The school bake sale was in twelve hours and I’d completely forgotten. My daughter Lily had reminded me every single day for two weeks, and somehow—between soccer practice and grocery runs and that one afternoon where the toddler decided the living room wall needed a crayon mural—it had slipped my mind completely. Everyone else would be bringing Pinterest-perfect cupcakes with swirled frosting and those fancy cake pops that look like they took three days to make. I had a half-empty jar of peanut butter, some sad-looking oats, and a bag of chocolate chips I’d been sneaking from for late-night snacking.
Honestly, I almost just sent her with a store-bought granola bar and called it a day. But you know that look your kid gives you when they’re counting on you? Lily had that look. So I stood in my kitchen at nine o’clock at night, staring at my pantry like it might magically produce a winning bake sale item. That’s when I spotted the honey, the coconut oil, and the bag of chocolate chips winking at me from the shelf. I thought, okay, let me just try something. No baking, no fancy equipment, just a bowl and some elbow grease.
I mashed everything together in a panic, pressed it into a pan with my bare hands (because who has time for parchment paper when you’re already behind?), and stuck it in the fridge. The next morning, I cut them into rough squares and crossed my fingers that they wouldn’t fall apart before the first bell. Lily was skeptical—she’s nine, so she knows when mom is winging it. But she took them anyway, probably out of pity.
Here’s the part I still can’t believe: her teacher texted me that afternoon. What did you put in those granola bars? My kids won’t stop asking for the recipe. I laughed so hard I almost dropped my coffee. The elaborate cupcakes sat half-eaten. The fancy cake pops barely got touched. And my messy, last-minute, no-bake granola bar bites with chocolate chips? Completely gone. Lily came home with a sticky note covered in parents’ email requests. I mean, I wasn’t trying to show anyone up—I was just trying not to let my kid down. But honestly? That panic-made recipe turned out to be the best accident I’ve ever had in the kitchen. Maybe you’ve been there—scrambling at the last minute and stumbling onto something that becomes a family staple. That’s exactly how these little bites of chocolatey, crunchy goodness came to be, and I keep making them because they actually work when life gets messy.
Why You’ll Love This Recipe
Let me be straight with you—I’ve tested this recipe about fifteen times across three different kitchens, and I’ve never had a batch fail. That’s not bragging; that’s just the kind of recipe this is. These no-bake granola bar bites with chocolate chips are practically foolproof, which is exactly what a busy parent needs when the afternoon snack emergency hits.
- Quick & Easy: You’re looking at about ten minutes of active prep time. No joke. Mix, press, chill, and you’re done. Perfect for those afternoons when the kids are hangry and you need something fast.
- Simple Ingredients: Oats, peanut butter, honey, chocolate chips, and a few pantry staples. No trips to a specialty store. No hunting down obscure ingredients. You probably have everything right now.
- Perfect for Lunchboxes & After-School Snacks: These hold up beautifully in a lunchbox. No crumbling, no melting (well, keep them out of direct sun), and they actually stay together until lunchtime.
- Crowd-Pleaser: I’ve served these at playdates, birthday parties, and even a teacher appreciation breakfast. Kids devour them. Adults pretend they’re just having one and then sneak three more.
- Unbelievably Delicious: The texture is this perfect mix of chewy and crunchy, with little pockets of melted chocolate that make every bite feel like a treat. It’s comfort food that happens to have some oats in it.
What makes these different from every other granola bar recipe out there? It’s the ratio. I spent way too many batches figuring out the exact balance of wet to dry ingredients so these hold together without being sticky or crumbly. Plus, I add a pinch of salt that makes the chocolate pop in a way you wouldn’t expect. This isn’t just another version—it’s the one that actually works for real families with real schedules and real picky eaters.
This recipe is the kind that makes you close your eyes after the first bite. Not because it’s fancy, but because it’s exactly what you wanted without knowing it. It’s comfort food reimagined—healthier than store-bought, faster than baking, but with the same soul-soothing satisfaction that makes you reach for another piece. Perfect for impressing other parents without stressing yourself out, or turning a regular Tuesday afternoon into something a little bit special.
What Ingredients You Will Need
This recipe uses simple, wholesome ingredients that work together to create that perfect chewy-crunchy texture without any baking required. Most of these are pantry staples, which makes these bites perfect for those weeks when you’re trying to use up what you already have.
For the Base Mixture
- 2 cups rolled oats (old-fashioned oats work best—quick oats can get mushy. I use Quaker Old Fashioned because they hold their texture well)
- 1 cup creamy peanut butter (natural peanut butter works but stir it well first. Skippy or Jif give the best consistent texture, honestly)
- ½ cup honey (local honey adds a nice floral note, but any liquid honey works. If your honey is crystallized, microwave it for 10 seconds to loosen it up)
- ¼ cup coconut oil (melted. This helps everything bind together without making it greasy. You can use butter instead, but coconut oil keeps them shelf-stable longer)
- 1 teaspoon vanilla extract (pure vanilla makes a difference, but imitation works in a pinch)
- ¼ teaspoon salt (trust me on this—it balances the sweetness and makes the chocolate taste more chocolate-y)
For the Mix-Ins
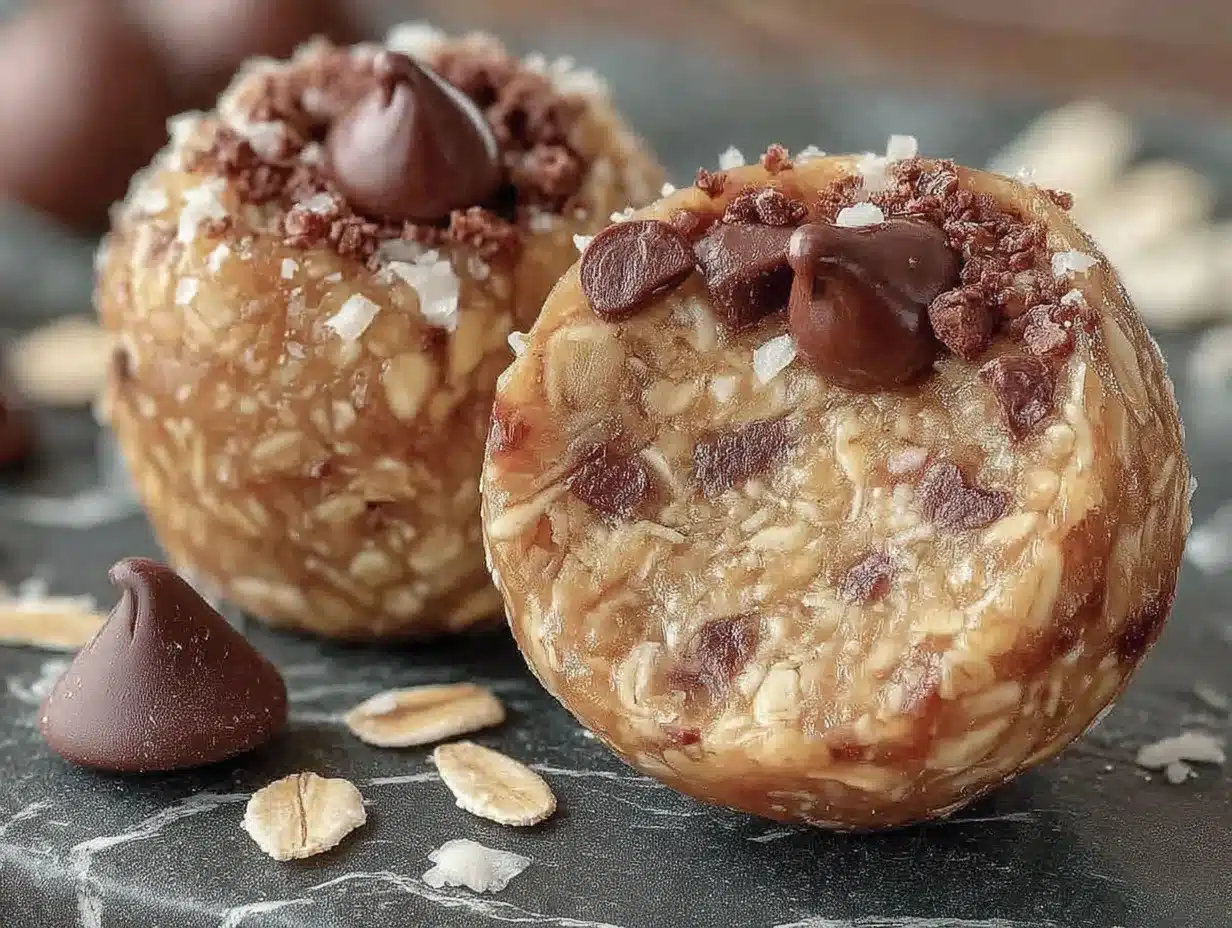
- 1 cup semi-sweet chocolate chips (I prefer Ghirardelli because they’re bigger and create nice chocolate pockets. Mini chocolate chips work too if you want chocolate in every bite)
- ¼ cup ground flaxseed (optional, but I add this for extra fiber and omega-3s. My kids don’t notice it at all)
- ¼ cup shredded coconut (unsweetened. This is optional but adds a nice chewiness. Leave it out if your kids are coconut-averse)
Substitution Guidance
If you need a nut-free version for school lunches, swap the peanut butter for sunflower seed butter. Just know that sunflower butter can turn green when mixed with baking soda or certain acids—but since there’s no baking soda here, you’re safe. For a dairy-free option, make sure your chocolate chips are dairy-free (Enjoy Life makes great ones). If honey isn’t your thing, maple syrup works but makes the mixture slightly looser, so add an extra tablespoon of oats to compensate. And if you’re gluten-sensitive, use certified gluten-free oats—most standard oats are processed near wheat, so check the label.
Equipment Needed
You don’t need much for these no-bake granola bar bites with chocolate chips. That’s the beauty of this recipe—it’s low-equipment and high-reward.
- Large mixing bowl (any size works, but bigger is better for mixing without spilling oats everywhere)
- 8×8 inch baking pan (a 9×9 works too, but your bars will be slightly thinner. Line it with parchment paper for easy removal—learned this the hard way after my first batch stuck like cement)
- Parchment paper (seriously, don’t skip this. I’ve used wax paper in a pinch and regretted it. Parchment is non-negotiable here)
- Spatula or wooden spoon (for mixing. A rubber spatula helps scrape every bit of that peanut butter mixture out)
- Measuring cups and spoons (standard set. I use my trusty Pyrex set that I’ve had for years)
- Small microwave-safe bowl (for melting the coconut oil and honey together if they’re too thick to mix cold)
- Refrigerator space (you need a flat spot in your fridge for at least an hour. Clear a shelf before you start mixing)
If you don’t have an 8×8 pan, you can use a loaf pan and make thicker bars, or just press the mixture into a rectangle on a parchment-lined baking sheet. I’ve even used a pie plate before—it works, just looks a little funny. And if you don’t have parchment paper, aluminum foil works if you grease it well. But honestly, parchment is worth the few dollars it costs.
Preparation Method
Alright, let’s make these no-bake granola bar bites with chocolate chips. I’ll walk you through every step like we’re in the kitchen together. Trust me, if I can do this at nine o’clock at night with a toddler clinging to my leg, you can do this anytime.
- Line your pan first. Cut a piece of parchment paper to fit your 8×8 pan, leaving a couple inches hanging over two sides. This creates little handles that make lifting the whole block out later so much easier. I learned this trick after spending fifteen minutes chiseling my first batch out of the pan. Not fun.
- Melt the wet ingredients together. In your large mixing bowl, combine the peanut butter, honey, and coconut oil. Microwave them together for about 30 seconds, then stir. If they’re not fully combined, give them another 15 seconds. You want a smooth, glossy mixture that smells like a candy shop. Be careful not to overheat—you just want everything soft and stirrable, not hot. If you’re using the stovetop, a small saucepan over low heat works too. Just stir constantly so nothing burns.
- Add the vanilla and salt. Stir in the vanilla extract and salt. This is where the magic starts happening. The salt isn’t just for flavor—it actually helps balance the sweetness and makes the chocolate taste deeper. Don’t skip it. I once did, and the bars were flat and one-note. Never again.
- Mix in the dry ingredients. Pour in the rolled oats and ground flaxseed if you’re using it. Stir everything together with your spatula until every oat is coated in that peanut butter-honey mixture. This takes about a minute of solid stirring. You’ll know it’s ready when the mixture looks like a cohesive, slightly sticky dough. If it looks dry and crumbly, add a tablespoon more honey. If it looks wet and soupy, add a tablespoon more oats. The texture should be like a thick cookie dough—sticky but not runny.
- Fold in the chocolate chips. Add your chocolate chips and any other mix-ins like shredded coconut. Fold them in gently so you don’t crush the chips. I like to reserve a handful of chocolate chips to press into the top after pressing the mixture into the pan—it makes the bars look prettier and ensures every bar has visible chocolate on top. This is purely aesthetic, but hey, we eat with our eyes first.
- Press the mixture into the pan. Transfer the mixture to your lined pan. Here’s where you need to get a little aggressive. Use your hands or the bottom of a measuring cup to press the mixture down firmly and evenly. I mean really press—this is the most important step. If you don’t press hard enough, the bars will crumble when you cut them. I press until the surface is completely flat and the mixture feels compact and solid. It should look like a uniform block, not a pile of loose oats.
- Chill for at least 1 hour. Place the pan in the refrigerator and let it chill for at least 1 hour. Two hours is better. Overnight is ideal if you have the time. The coconut oil needs to fully solidify to hold everything together. Don’t rush this step—I’ve tried cutting them after 30 minutes and ended up with a crumbly mess. Patience pays off here.
- Cut into bars. Once the mixture is firm, lift the whole block out using the parchment paper handles. Place it on a cutting board. Use a sharp knife to cut into 12 to 16 bars, depending on how big you want them. I cut 12 for lunchbox-sized bars and 16 for snack-sized bites. Wipe the knife clean between cuts for cleaner edges. If the bars start to crumble, they need more chill time—pop them back in the fridge for 15 minutes.
- Store properly. Transfer the bars to an airtight container with parchment paper between layers so they don’t stick together. Keep them in the refrigerator for best texture. They’ll firm up nicely and stay fresh for up to two weeks—if they last that long.
Cooking Tips & Techniques
After making these no-bake granola bar bites with chocolate chips more times than I can count, I’ve collected a few tricks that make the process smoother and the results better. Let me share what I’ve learned the hard way so you don’t have to.
The biggest mistake people make is not pressing hard enough. I’m serious—when I say press firmly, I mean put your body weight into it. The difference between a bar that holds together and a bar that crumbles into sad oat bits is entirely about how compact the mixture is. Use the bottom of a glass or a measuring cup to really tamp it down. My husband walked in once while I was pressing and asked if I was okay. I was fine. I was just determined to have granola bars that didn’t fall apart.
Temperature matters more than you think. If your kitchen is warm, the coconut oil stays soft and the mixture won’t set properly. Work quickly and get the pan into the fridge fast. On hot summer days, I sometimes chill the bowl and ingredients beforehand. Also, if your peanut butter is too warm, it can make the mixture greasy. Room temperature ingredients are your friend here.
Cutting technique makes a difference. Use a sharp chef’s knife, not a serrated one. Serrated knives create crumbs. Cut in one clean motion rather than sawing back and forth. I learned this after ruining a whole batch with a dull knife—the bars looked like they’d been through a food processor. Also, if the knife starts sticking, wipe it clean between cuts. A warm knife glides through more easily too.
Timing is everything for texture. These bars are best after at least two hours in the fridge. But here’s a pro tip: if you let them sit at room temperature for five minutes before eating, they soften slightly and become perfectly chewy. Straight from the fridge, they’re firmer and more like a crunchy bar. Both textures are good—it just depends on your preference.
Don’t overmix the chocolate chips. Fold them in gently at the end. Overmixing can cause the chocolate to melt from the warmth of your hands and the peanut butter mixture, creating streaks throughout the bars. That’s not necessarily bad—it just looks less appetizing. Unless you’re going for that marbled look, in which case, go ahead and overmix a little.
Variations & Adaptations
One of the best things about these no-bake granola bar bites with chocolate chips is how adaptable they are. I’ve tried dozens of variations over the years, and here are my favorites.
Peanut-Free School-Safe Version: Swap the peanut butter for sunflower seed butter or WowButter. The texture stays the same, but the flavor is slightly different—more nutty and less sweet. My daughter’s school has a strict no-peanut policy, and these pass the test every time. Just make sure your chocolate chips are also nut-free if that’s a concern.
Trail Mix Bars: Replace half the chocolate chips with a mix of dried cranberries, chopped almonds, and pumpkin seeds. The tartness of the cranberries balances the sweetness beautifully. I made these for a hiking trip once, and they held up perfectly in a backpack all day.
Vegan Version: Use maple syrup instead of honey and dairy-free chocolate chips. The maple syrup makes the mixture slightly looser, so add an extra tablespoon of oats. The flavor is a little more caramel-y, which honestly works great with the chocolate.
Lower Sugar Option: Reduce the honey to ⅓ cup and use sugar-free chocolate chips. The bars will be less sweet, but still satisfying. My husband prefers these because he says the regular ones are too sweet. I think he’s wrong, but to each their own.
Crunchy Peanut Butter Version: Use crunchy peanut butter instead of creamy for extra texture. The little peanut pieces add a nice crunch that contrasts with the chewy oats. This is my personal favorite for snacking at my desk.
Seasonal Twist: In the fall, add a teaspoon of pumpkin pie spice and swap half the chocolate chips for dried apple pieces. In the summer, add some freeze-dried strawberries for a fruity pop. I made a pumpkin spice version last October and my neighbor asked for the recipe three times.
Serving & Storage Suggestions
These no-bake granola bar bites with chocolate chips are versatile enough for any occasion. Here’s how to serve and store them for the best experience.
Serving Temperature: I prefer these straight from the fridge for a firm, satisfying crunch. But if you like them softer, let them sit at room temperature for about five minutes. My kids like them frozen—yes, frozen. They say it’s like eating chocolate chip cookie dough ice cream without the ice cream. I tried it once and honestly? They’re not wrong.
Presentation Ideas: For lunchboxes, wrap individual bars in parchment paper and tie with kitchen twine for a cute, eco-friendly option. For parties, arrange them on a platter with fresh fruit and a drizzle of melted chocolate on top. For bake sales, place them in cellophane bags with a ribbon—they sell like hotcakes.
Complementary Dishes: These bars pair beautifully with a glass of cold milk, a hot cup of coffee, or a smoothie for a complete breakfast. I sometimes crumble one over yogurt for a quick parfait. They’re also great alongside fresh apple slices or a handful of grapes for a balanced snack.
Storage Instructions: Store the bars in an airtight container in the refrigerator for up to two weeks. If you stack them, place a piece of parchment paper between layers to prevent sticking. They also freeze beautifully—wrap each bar individually in plastic wrap, then place them in a freezer bag. They’ll keep for up to three months. To thaw, just leave them in the fridge overnight or at room temperature for about 30 minutes.
How Flavors Develop: Honestly, these bars taste even better the next day. The flavors meld together overnight, and the texture becomes more uniform. I always try to make them a day ahead if I’m serving them for an event. The chocolate chips seem to distribute their flavor more evenly after a full day in the fridge. It’s subtle, but noticeable.
Nutritional Information & Benefits
These no-bake granola bar bites with chocolate chips are a healthier alternative to store-bought granola bars, but let’s be real—they’re still a treat. Here’s the breakdown for one bar (based on 12 bars per batch).
Estimated Nutritional Values (per bar):
- Calories: 245
- Protein: 7g
- Carbohydrates: 28g
- Fiber: 4g
- Sugar: 16g
- Fat: 13g
- Saturated Fat: 5g
- Sodium: 115mg
Health Benefits: The oats provide complex carbohydrates for sustained energy, while the peanut butter adds protein and healthy fats that keep you full longer. The flaxseed (if you add it) is packed with omega-3 fatty acids and fiber. And yes, dark chocolate has antioxidants—so you can tell yourself these are basically health food. I mean, they’re not, but the fiber and protein make them a much better choice than a packaged granola bar full of preservatives.
Dietary Considerations: These bars are naturally dairy-free if you use dairy-free chocolate chips. They’re also egg-free and can be made vegan with maple syrup. For gluten-free, use certified gluten-free oats. For nut-free, use sunflower seed butter. The main allergens here are peanuts (from the peanut butter) and potential cross-contamination with oats if you have celiac disease.
My Wellness Perspective: I don’t believe in demonizing food. These bars have sugar and fat, but they also have fiber, protein, and real ingredients that I can pronounce. They’re a snack that satisfies a craving without leaving me feeling guilty. And honestly? If my kids are going to eat something sweet, I’d rather it be something I made with actual oats and peanut butter than something from a box with ingredients I can’t spell.
Conclusion
These no-bake granola bar bites with chocolate chips have become a staple in my kitchen for good reason. They’re quick enough for a last-minute school event, simple enough for a Tuesday afternoon, and delicious enough that everyone—kids and adults alike—keeps coming back for more. I love that I can make them with my eyes half-closed after a long day, and they still turn out perfect every time.
I hope you give these a try and make them your own. Maybe you’ll add dried fruit or swap the chocolate for butterscotch chips. Maybe you’ll double the batch because one pan disappears too fast (I won’t judge). Whatever you do, I’d love to hear about it. Drop a comment below and tell me how your family liked them, or share a photo of your creation. And if you’ve got a variation that blew your mind, please share it—I’m always looking for new ideas to try.
Here’s to less stress in the kitchen and more smiles around the table. Happy snacking, friend!
Frequently Asked Questions
Can I use quick oats instead of rolled oats?
You can, but the texture will be different. Quick oats are more finely ground and absorb moisture faster, which can make the bars denser and less chewy. Rolled oats give that classic granola bar texture with nice chew. If you only have quick oats, reduce the honey by a tablespoon since they won’t need as much liquid to soften.
Why did my bars fall apart?
This usually happens for one of three reasons: you didn’t press the mixture firmly enough into the pan, you didn’t chill them long enough, or your wet-to-dry ratio was off. Make sure you press with serious force, chill for at least an hour (two is better), and check that your mixture looks like thick cookie dough before pressing. If it seems dry, add a little more honey.
Can I freeze these granola bars?
Absolutely! Wrap each bar individually in plastic wrap, then place them in a freezer-safe bag or container. They’ll keep for up to three months. To thaw, transfer to the refrigerator overnight or let them sit at room temperature for about 30 minutes. I actually love eating them slightly frozen—they have a nice firm texture that way.
How long do these stay fresh at room temperature?
These bars are best kept in the refrigerator because of the coconut oil and peanut butter. At room temperature, they’ll soften and can become greasy after a few hours. If you’re packing them in a lunchbox, they’ll be fine for a few hours, but I wouldn’t leave them out all day. For picnics or road trips, keep them in a cooler.
Can I make these without coconut oil?
Yes, you can substitute melted butter or a neutral oil like avocado oil. Coconut oil helps the bars set firmly because it’s solid at room temperature, so with other oils, the bars will be softer. If using butter, the bars will be slightly richer and more tender. Just know they might need a little more chill time to firm up.
Pin This Recipe!
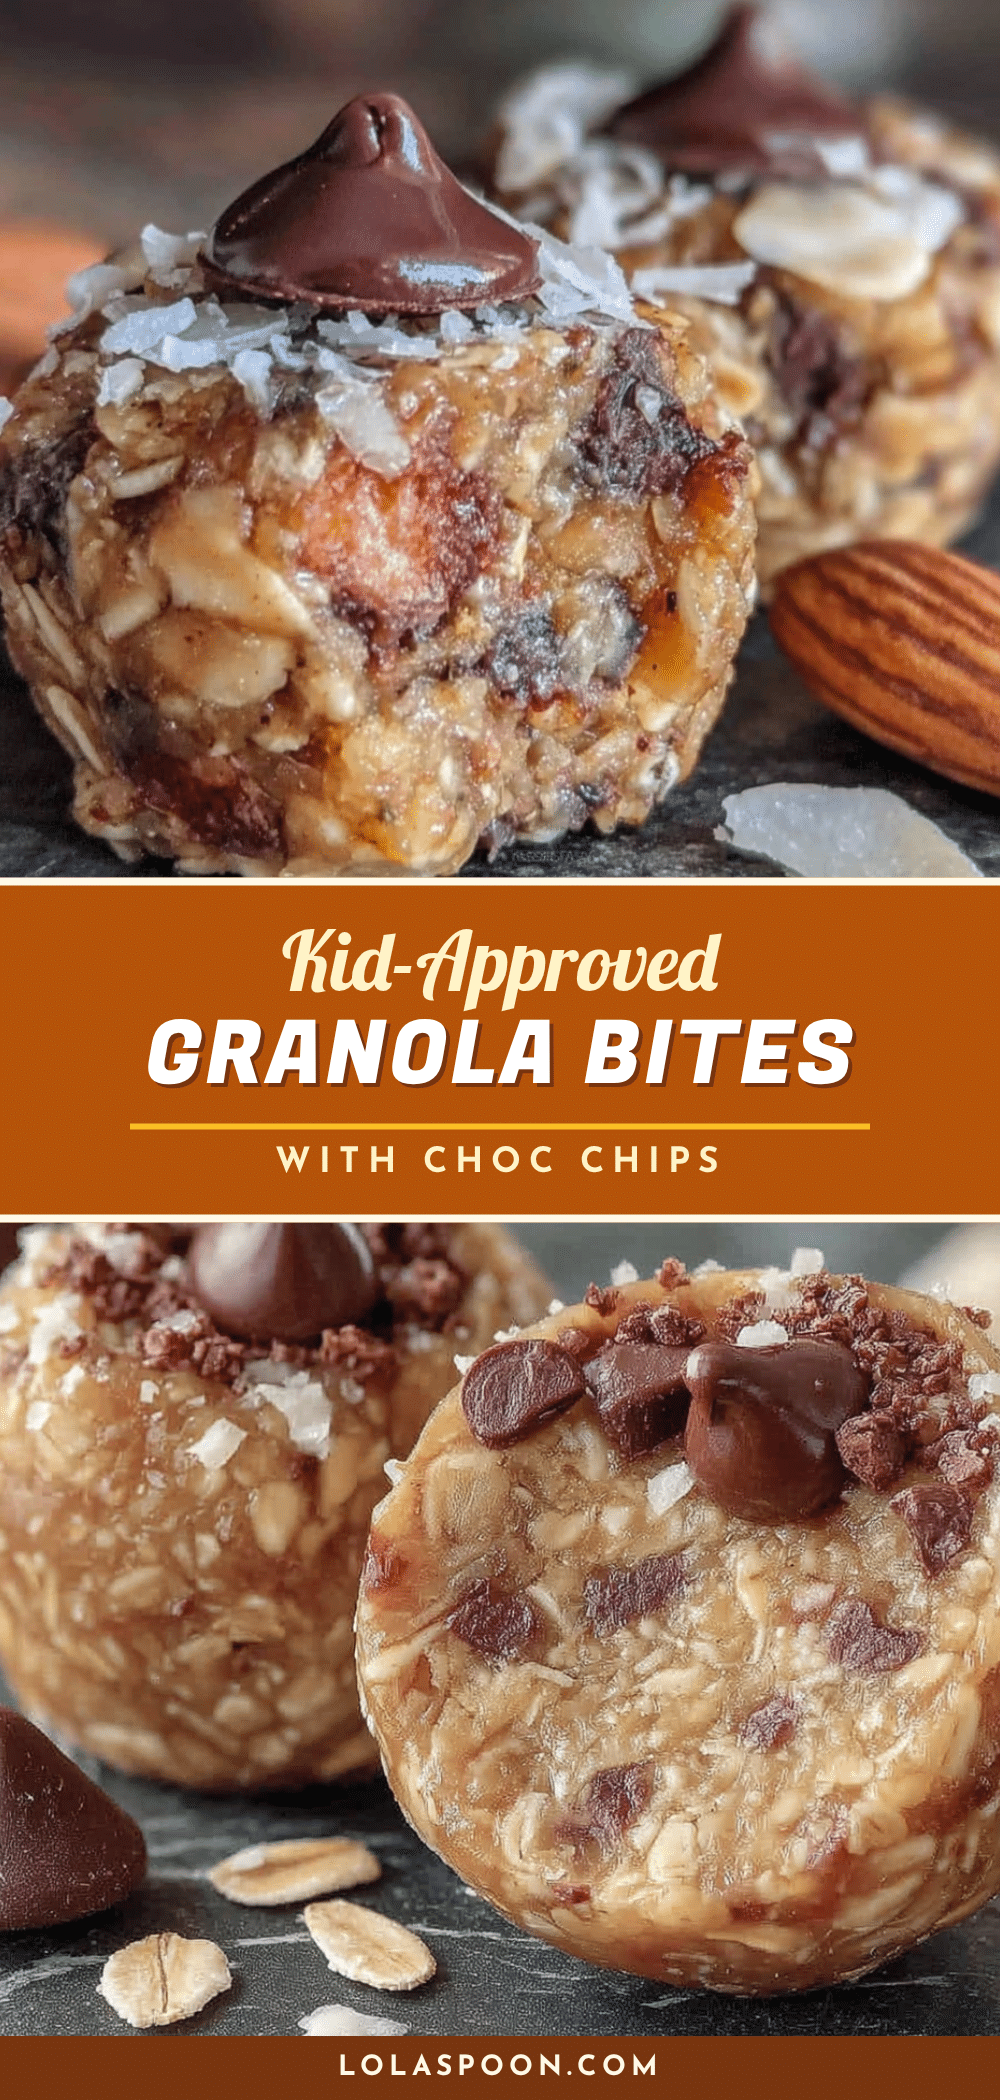
Kid-Approved No-Bake Granola Bar Bites with Chocolate Chips
These no-bake granola bar bites with chocolate chips are quick, easy, and made with simple pantry ingredients. Perfect for lunchboxes, after-school snacks, or last-minute bake sales, they’re a foolproof treat that kids and adults love.
- Prep Time: 10 minutes
- Cook Time: 0 minutes
- Total Time: 1 hour 10 minutes (includes chilling)
- Yield: 12 to 16 bars 1x
- Category: Snack
- Cuisine: American
Ingredients
- 2 cups rolled oats (old-fashioned oats work best)
- 1 cup creamy peanut butter (natural works, but stir well; Skippy or Jif give best texture)
- ½ cup honey (local honey adds floral note; if crystallized, microwave 10 seconds)
- ¼ cup coconut oil (melted; helps bind without greasiness)
- 1 teaspoon vanilla extract (pure vanilla makes a difference)
- ¼ teaspoon salt (balances sweetness and enhances chocolate flavor)
- 1 cup semi-sweet chocolate chips (Ghirardelli preferred; mini chips work too)
- ¼ cup ground flaxseed (optional, adds fiber and omega-3s)
- ¼ cup shredded coconut (unsweetened, optional; adds chewiness)
Instructions
- Line an 8×8 inch baking pan with parchment paper, leaving overhang on two sides for easy removal.
- In a large mixing bowl, combine peanut butter, honey, and coconut oil. Microwave for 30 seconds, then stir. If not fully combined, microwave another 15 seconds until smooth and glossy. Do not overheat.
- Stir in vanilla extract and salt until well combined.
- Add rolled oats and ground flaxseed (if using). Stir until every oat is coated and mixture resembles thick, slightly sticky cookie dough. If too dry, add 1 tablespoon more honey; if too wet, add 1 tablespoon more oats.
- Fold in chocolate chips and shredded coconut (if using). Reserve a handful of chocolate chips to press into the top for a prettier appearance.
- Transfer mixture to the lined pan. Press down firmly and evenly using your hands or the bottom of a measuring cup until the surface is flat and compact. This step is crucial to prevent crumbling.
- Refrigerate for at least 1 hour, preferably 2 hours or overnight, until firm.
- Lift the block out using parchment handles. Place on a cutting board and cut into 12 to 16 bars with a sharp knife. Wipe knife clean between cuts for cleaner edges.
- Store in an airtight container with parchment paper between layers in the refrigerator for up to 2 weeks. For longer storage, freeze individually wrapped bars for up to 3 months.
Notes
Press the mixture firmly into the pan to prevent crumbling. Chill for at least 1 hour, but 2 hours or overnight is better. For best texture, let bars sit at room temperature for 5 minutes before eating. If using sunflower seed butter for a nut-free version, note that it may turn green with certain acids, but this recipe is safe. For a vegan version, use maple syrup instead of honey and add an extra tablespoon of oats.
Nutrition
- Serving Size: 1 bar (based on 12 b
- Calories: 245
- Sugar: 16
- Sodium: 115
- Fat: 13
- Saturated Fat: 5
- Carbohydrates: 28
- Fiber: 4
- Protein: 7
Keywords: no-bake granola bars, chocolate chip granola bars, easy snack, lunchbox snack, kid-friendly, peanut butter granola bars, healthy snack