The plumber was the last person I expected cooking advice from. But there he was, crouched under my sink, wrench in hand, telling me exactly how to make ice cream without a machine. I was just standing there, holding a flashlight, trying to keep the light steady while he talked about condensed milk and heavy cream like he was reciting poetry. “You don’t need all that fancy equipment,” he said, peering up at me. “My grandmother made it this way for fifty years. Best ice cream you’ll ever have.” I honestly thought he was exaggerating. I mean, a plumber giving dessert advice? But something about the way he said it made me want to try.
That conversation happened two summers ago, and let me tell you, I’ve been making some version of no-churn ice cream ever since. This particular recipe—Creamy No-Churn Salted Caramel Ice Cream (Lightened Up)—came from a few tweaks I made after realizing I wanted something that felt indulgent but didn’t leave me feeling like I’d overdone it. Maybe you’ve been there too, standing in front of the freezer at 9 p.m., trying to decide if you really need that pint of premium ice cream. This recipe is my answer to that exact moment.
The first batch I made was a little too sweet. The second was too salty. The third? That was the one. I brought it to a backyard barbecue and watched people go back for seconds, completely unaware they were eating a lighter version. That’s the thing about this recipe—it doesn’t taste like a compromise. It tastes like the real deal, maybe even better. And it all started with a plumber, a leaky pipe, and a grandmother’s secret.
Why You’ll Love This Recipe
Let me tell you why this Creamy No-Churn Salted Caramel Ice Cream (Lightened Up) has become my go-to dessert for pretty much every occasion. I’ve tested this recipe more times than I can count, and every single time, it delivers that perfect balance of sweet and salty without the heavy feeling you get from traditional ice cream.
- No Ice Cream Maker Needed : You read that right. No churning, no freezing bowls overnight, no special equipment. Just a mixer and a loaf pan.
- Simple Ingredients : Everything you need is probably in your kitchen right now. No fancy extracts or hard-to-find items.
- Ready in Minutes : The active prep time is about 15 minutes. After that, the freezer does all the work.
- Lightened Up Without Sacrifice : I swapped some ingredients to cut calories and sugar, but I promise you won’t miss a thing. The texture is still incredibly creamy.
- Perfect for Any Occasion : Summer barbecues, holiday desserts, or just a Tuesday night treat. This ice cream fits everywhere.
- Crowd-Pleaser : Every time I serve this, people ask for the recipe. Even the ones who swear they don’t like “healthy” desserts.
What makes this recipe different from all the other no-churn versions out there? It’s the method. I found that whipping the cream to just the right consistency and folding in the caramel in stages creates a texture that’s almost identical to traditional churned ice cream. No icy crystals, no weird aftertaste. Just pure, creamy goodness with a salted caramel swirl that hits every single note.
This is the kind of dessert that makes you close your eyes after the first bite. It’s comfort food reimagined—healthier, faster, but with the same soul-soothing satisfaction. Perfect for impressing guests without stress, or turning a simple evening into something memorable.
What Ingredients You Will Need
This recipe uses simple, wholesome ingredients to deliver bold flavor and satisfying texture without the fuss. Most of these are pantry staples, which makes this Creamy No-Churn Salted Caramel Ice Cream (Lightened Up) perfect for spontaneous dessert cravings.
For the Ice Cream Base
- 2 cups heavy cream (cold) — This is the foundation. The higher the fat content, the creamier your ice cream. I prefer Organic Valley or Horizon for consistent results.
- 1 can (14 ounces) sweetened condensed milk (I use the low-fat version to lighten things up) — This replaces the traditional custard base and gives that rich, velvety texture.
- 1 teaspoon vanilla extract — Pure vanilla makes a difference here. Skip the imitation stuff if you can.
- 1/4 teaspoon salt — Just a pinch to balance the sweetness.
For the Salted Caramel Swirl

- 1/2 cup granulated sugar — Regular white sugar works best for caramel. Don’t use brown sugar here; it changes the flavor too much.
- 3 tablespoons unsalted butter (cut into small pieces) — I use salted butter sometimes and just reduce the added salt. Both work fine.
- 1/4 cup heavy cream (room temperature) — Cold cream will seize up your caramel. Let it sit out for 10 minutes first.
- 1/2 teaspoon flaky sea salt (like Maldon) — This is for the final sprinkle. Don’t skip it. The crunch makes all the difference.
Optional Add-Ins
- 1/2 cup chopped pecans or walnuts — Toasted adds a nice crunch. I add them about halfway through freezing.
- 1/4 cup dark chocolate chips — Because chocolate and caramel are best friends.
- 1 tablespoon bourbon or rum — A little splash keeps the ice cream softer and adds a grown-up twist.
Ingredient Selection Tips : For the best texture, make sure your heavy cream is very cold—straight from the fridge. If you’re using the low-fat condensed milk, don’t worry, the texture stays creamy because of the heavy cream. For a dairy-free version, use full-fat coconut cream instead of heavy cream and a dairy-free condensed milk alternative. The flavor will be slightly different, but still delicious.
Substitution Guidance : If you don’t have flaky sea salt, regular kosher salt works. Just use half the amount. And if you’re out of vanilla extract, a vanilla bean scraped into the cream adds beautiful specks and intense flavor.
Equipment Needed
You don’t need much for this recipe, which is honestly my favorite part. Here’s what you’ll need:
- Electric mixer (stand mixer or hand mixer) — You need to whip the cream to stiff peaks. Doing this by hand is possible but your arm will hate you.
- Large mixing bowl — Make sure it’s big enough to hold the whipped cream without splashing everywhere.
- Medium saucepan — For making the caramel. A light-colored pan helps you see the color change.
- Loaf pan or freezer-safe container — A standard 9×5 loaf pan works perfectly. I like using a metal pan because it freezes faster.
- Rubber spatula — For folding everything together gently.
- Parchment paper — Lining the pan makes removal so much easier. Trust me on this one.
- Whisk — For the caramel, in case you don’t want to dirty a spoon.
If you don’t have a stand mixer, a hand mixer works just as well. I’ve made this recipe in a tiny apartment kitchen with a $20 hand mixer and it turned out great. The only thing I wouldn’t recommend is trying to whip the cream with a whisk—unless you’re looking for an arm workout.
Budget-Friendly Tip : You don’t need expensive equipment for this. A metal loaf pan from the dollar store works fine. Just make sure it’s freezer-safe.
Preparation Method
Let me walk you through this step by step. I’ve made this Creamy No-Churn Salted Caramel Ice Cream (Lightened Up) at least twenty times, so I know exactly where things can go wrong—and how to fix them.
Step 1: Make the Salted Caramel (10 minutes)
Start by making your caramel. This is the part that scares people, but honestly, it’s easier than you think. Place 1/2 cup granulated sugar in a medium saucepan over medium heat. Don’t stir it yet. Just let it sit and melt. After about 3-4 minutes, you’ll see the edges start to turn golden. Now you can gently swirl the pan—don’t use a spoon yet—to help the unmelted sugar dissolve. Keep going until the sugar turns a deep amber color, like a penny. This takes about 6-8 minutes total.
Once it’s that beautiful amber color, remove the pan from heat and add the 3 tablespoons butter. Be careful here—it will bubble up aggressively. Whisk until the butter is completely melted and incorporated. Slowly pour in the 1/4 cup room-temperature heavy cream while whisking constantly. The mixture will bubble up again, so keep whisking until it smooths out. Stir in 1/4 teaspoon flaky sea salt. Let the caramel cool for about 15 minutes. It will thicken as it cools.
My Personal Tip : The first time I made caramel, I walked away to answer a text and came back to a burnt mess. Don’t leave the stove. Caramel goes from perfect to ruined in about 30 seconds.
Step 2: Whip the Cream (5 minutes)
Pour 2 cups cold heavy cream into your large mixing bowl. Using your electric mixer, start on low speed and gradually increase to medium-high. Whip until stiff peaks form—this means when you lift the beaters, the cream stands up in firm peaks without collapsing. This usually takes about 3-4 minutes with a stand mixer, a bit longer with a hand mixer.
Sensory Cue : You’ll hear the sound change from a sloshing liquid to a more solid, whooshing sound. That’s how you know you’re getting close. The cream should look thick and luscious, like whipped cream you’d pipe onto a cake.
Step 3: Combine the Base (3 minutes)
In a separate bowl, whisk together the 14 ounces sweetened condensed milk, 1 teaspoon vanilla extract, and 1/4 teaspoon salt until smooth. Now, gently fold this mixture into your whipped cream. Use a rubber spatula and fold from the bottom up, turning the bowl as you go. Be gentle—you don’t want to deflate all that air you just whipped in. Fold until just combined. A few streaks are okay.
Step 4: Layer and Swirl (5 minutes)
Spoon about one-third of the cream mixture into your prepared loaf pan (lined with parchment paper if you’re smart, which I sometimes forget to be). Drizzle about one-third of the cooled caramel over the top. Use a butter knife to gently swirl it through the cream—don’t overdo it, or you’ll lose the distinct ribbons. Repeat with another third of cream, more caramel, and swirl again. Finish with the remaining cream and caramel. Sprinkle the flaky sea salt evenly over the top.
Step 5: Freeze (6+ hours)
Cover the pan with plastic wrap or aluminum foil and place it in the freezer. Freeze for at least 6 hours, but overnight is better. The longer it freezes, the firmer it gets. If you’re adding nuts or chocolate chips, fold them in after about 2 hours of freezing, when the ice cream is partially set. This keeps them evenly distributed instead of sinking to the bottom.
Warning : Don’t skip the parchment paper. I did once, and spent 20 minutes trying to scoop out rock-hard ice cream from a metal pan. Learn from my mistakes.
Cooking Tips & Techniques
After making this recipe more times than I care to count, I’ve picked up a few tricks that make a real difference. Here’s what I wish someone had told me before my first attempt.
Temperature Matters : The biggest mistake people make with no-churn ice cream is not having their ingredients at the right temperature. Your heavy cream needs to be very cold—like, straight from the back of the fridge cold. If it’s even slightly warm, it won’t whip properly. On the flip side, your caramel needs to cool down before you add it to the cream mixture. If you pour hot caramel into whipped cream, you’ll end up with a soupy mess.
Don’t Over-Whip : I’ve done this more times than I’d like to admit. You whip the cream, get distracted, come back, and suddenly you’ve got butter. Stop when the peaks are stiff but still glossy. If they start looking grainy, you’ve gone too far. The good news? You can still use over-whipped cream—just mix it gently by hand and it will come back together.
The Perfect Swirl : When you’re adding the caramel, resist the urge to mix it in completely. You want distinct ribbons of caramel throughout the ice cream. I like to use a butter knife and make just three or four figure-eight motions through the pan. Less is more here.
Freezer Temperature : Your freezer should be at 0°F (-18°C) or colder. If your freezer is too warm, the ice cream will take forever to set and might develop ice crystals. If you’re not sure, use a freezer thermometer. They’re cheap and worth it.
Timing Strategy : I like to make the caramel first and let it cool while I whip the cream. This way, everything comes together at the right temperature. Multitasking is your friend here.
Variations & Adaptations
One of the best things about this Creamy No-Churn Salted Caramel Ice Cream (Lightened Up) is how easy it is to customize. Here are some variations I’ve tried and loved.
Chocolate Salted Caramel
Add 1/4 cup unsweetened cocoa powder to the cream mixture before folding in the caramel. The chocolate and salted caramel combo is absolutely divine. I made this for a friend’s birthday and people literally licked their bowls clean.
Vegan Version
Use full-fat coconut cream instead of heavy cream and a dairy-free sweetened condensed coconut milk. The caramel can be made with vegan butter and coconut cream. The texture is slightly different—a bit more icy—but the flavor is still fantastic. Let it sit at room temperature for 5 minutes before scooping for best results.
Keto-Friendly Option
Replace the sweetened condensed milk with a mixture of 1 cup heavy cream, 1/2 cup powdered erythritol, and 1 teaspoon vanilla. Use a sugar-free caramel sauce or make your own with allulose. It won’t be as creamy, but it satisfies that ice cream craving without the carbs.
Seasonal Twist
In the fall, I add 1 teaspoon pumpkin pie spice to the cream mixture and swirl in some pumpkin puree along with the caramel. In the summer, fresh berries folded in at the end are incredible. The tartness cuts through the sweetness beautifully.
Boozy Version
Add 2 tablespoons bourbon or dark rum to the cream mixture before freezing. The alcohol keeps the ice cream softer and adds a warm, complex flavor. Just don’t add too much, or it won’t freeze properly. I learned this the hard way with a very liquidy batch.
Serving & Storage Suggestions
This ice cream is best served slightly softened. Take it out of the freezer about 5-10 minutes before you plan to scoop it. This makes it easier to scoop and allows the flavors to really come through. I like to serve it in chilled bowls—just pop them in the freezer for 10 minutes before serving.
Presentation Ideas : A drizzle of extra caramel sauce and a sprinkle of flaky sea salt on top makes it look like it came from a fancy ice cream shop. Fresh mint leaves add a pop of color. For a sundae, layer it with fresh berries and a dollop of whipped cream. Or just eat it straight from the pan—no judgment here.
Storage Instructions : Keep the ice cream in an airtight container in the freezer. Press a piece of parchment paper directly onto the surface before sealing to prevent ice crystals from forming. It will keep for up to 2 weeks, but honestly, it never lasts that long in my house.
Reheating Tip : If your ice cream gets too hard, microwave the container for 10-15 seconds to soften it. Or let it sit at room temperature for 10 minutes. Don’t microwave it for too long, or you’ll end up with soup.
Flavor Development : The flavors actually get better after a day or two in the freezer. The caramel continues to infuse into the cream, and the saltiness mellows out. So if you can wait, make it a day ahead.
Nutritional Information & Benefits
Here’s the thing about this Creamy No-Churn Salted Caramel Ice Cream (Lightened Up)—it’s not health food, but it’s a much better choice than traditional ice cream. By using low-fat condensed milk and being mindful of portions, you’re saving calories without sacrificing flavor.
Estimated Nutritional Values (per 1/2 cup serving) :
- Calories: 280
- Fat: 18g
- Carbohydrates: 28g
- Protein: 4g
- Sugar: 24g
- Sodium: 180mg
Health Benefits : The heavy cream provides calcium and vitamin A, which are good for bone health and immune function. The caramel is made from scratch, so you’re avoiding the preservatives and artificial flavors found in store-bought versions. And because it’s homemade, you control the sugar content.
Dietary Considerations : This recipe contains dairy and gluten (in the caramel, if you’re sensitive). For a gluten-free version, make sure your vanilla extract is certified gluten-free. For a lower-sugar option, use a sugar substitute in the caramel, though the texture will be slightly different.
My Personal Perspective : I believe in balance. I eat this ice cream because it makes me happy, and I know exactly what went into it. That’s worth more than any number on a nutrition label.
Conclusion
So there you have it—a Creamy No-Churn Salted Caramel Ice Cream (Lightened Up) that started with a plumber under my sink and ended up being one of my most-requested recipes. It’s proof that you don’t need fancy equipment or complicated techniques to make something truly special. Just good ingredients, a little patience, and a willingness to try something new.
I hope you give this recipe a try. Maybe you’ll make it for a summer party, or maybe you’ll make it on a random Tuesday night when you need a little sweetness in your life. Either way, I’d love to hear how it turns out. Did you add chocolate? Try the vegan version? Eat the whole batch in one sitting? (No judgment, I’ve been there.)
Leave a comment below and let me know. And if you share it on social media, tag me—I want to see your beautiful creations. Until next time, happy cooking, and remember: sometimes the best recipes come from the most unexpected places.
Frequently Asked Questions
Can I make this without an electric mixer?
You can, but it’s a workout. Whipping cream to stiff peaks by hand takes about 10-15 minutes of continuous whisking. If you’re up for the challenge, go for it. Otherwise, a hand mixer is a worthwhile investment.
Why did my ice cream turn out icy?
Ice crystals usually form when the ice cream isn’t frozen quickly enough or when it’s been in the freezer too long. Make sure your freezer is at 0°F or colder, and press parchment paper onto the surface before sealing. Adding a tablespoon of alcohol (like bourbon or rum) can also help prevent iciness.
Can I use store-bought caramel sauce instead of making my own?
You can, but homemade is so much better. Store-bought caramel sauces often have preservatives and corn syrup that change the texture. If you’re short on time, look for a high-quality brand with simple ingredients.
How long does this ice cream last in the freezer?
Up to 2 weeks, but it’s best within the first week. After that, it might develop ice crystals or lose some of its creamy texture. Not that it ever lasts that long in my house.
Can I double this recipe?
Absolutely. Just make sure you have a large enough container. I’ve doubled it for parties and it works perfectly. You might need to whip the cream in batches if your mixer bowl isn’t big enough.
Pin This Recipe!
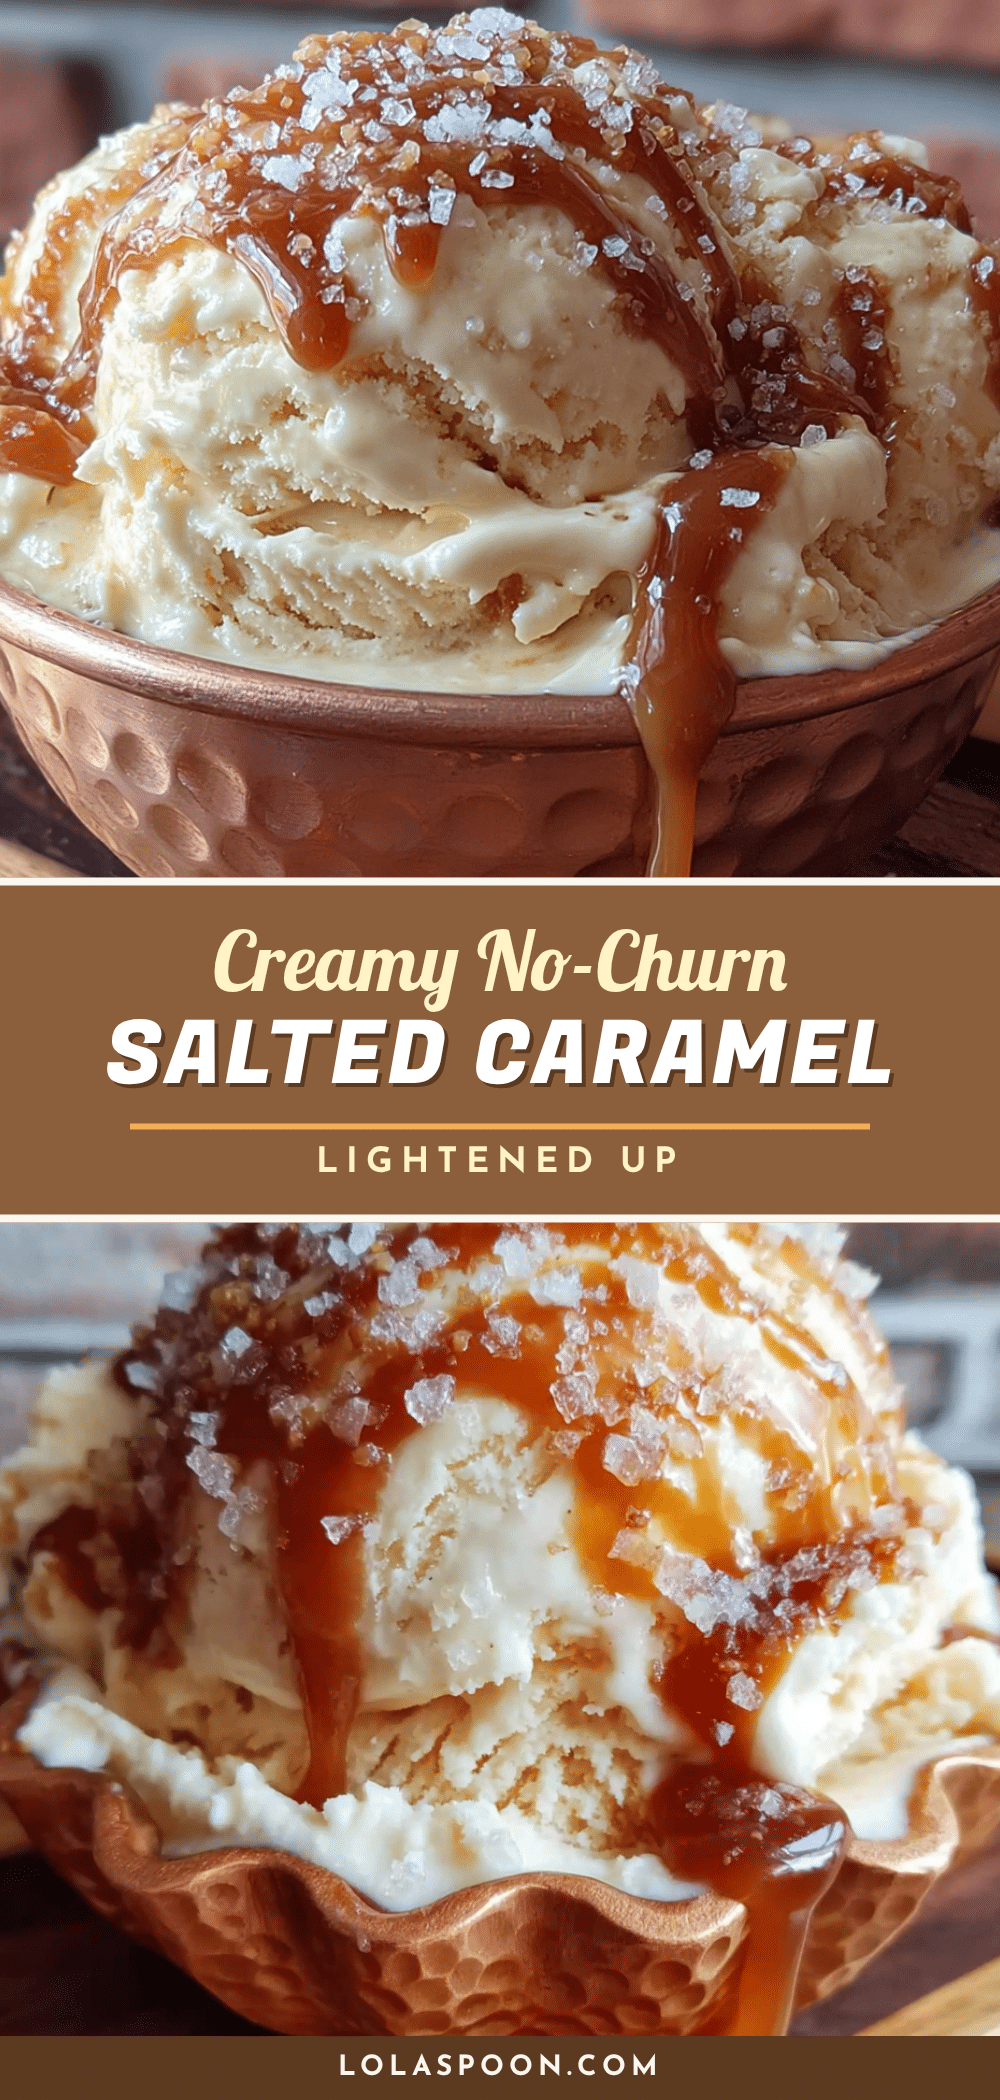
Creamy No-Churn Salted Caramel Ice Cream (Light & Easy)

A lightened-up, no-churn salted caramel ice cream that’s incredibly creamy and easy to make without an ice cream maker. This recipe delivers the perfect balance of sweet and salty without the heavy feeling of traditional ice cream.
- Prep Time: 15 minutes
- Cook Time: 10 minutes
- Total Time: 6 hours 25 minutes (including freezing time)
- Yield: 8 servings 1x
- Category: Dessert
- Cuisine: American
Ingredients
- 2 cups heavy cream (cold)
- 1 can (14 ounces) sweetened condensed milk (low-fat version recommended)
- 1 teaspoon vanilla extract
- 1/4 teaspoon salt
- 1/2 cup granulated sugar
- 3 tablespoons unsalted butter (cut into small pieces)
- 1/4 cup heavy cream (room temperature)
- 1/2 teaspoon flaky sea salt (like Maldon)
- 1/2 cup chopped pecans or walnuts (optional)
- 1/4 cup dark chocolate chips (optional)
- 1 tablespoon bourbon or rum (optional)
Instructions
- Make the salted caramel: Place 1/2 cup granulated sugar in a medium saucepan over medium heat. Let it melt without stirring for 3-4 minutes until edges turn golden. Gently swirl the pan until sugar turns a deep amber color (6-8 minutes total). Remove from heat and add 3 tablespoons butter; whisk until melted. Slowly pour in 1/4 cup room-temperature heavy cream while whisking constantly. Stir in 1/4 teaspoon flaky sea salt. Let cool for 15 minutes.
- Whip the cream: Pour 2 cups cold heavy cream into a large mixing bowl. Using an electric mixer, start on low speed and increase to medium-high. Whip until stiff peaks form (3-4 minutes with a stand mixer).
- Combine the base: In a separate bowl, whisk together 14 ounces sweetened condensed milk, 1 teaspoon vanilla extract, and 1/4 teaspoon salt until smooth. Gently fold this mixture into the whipped cream using a rubber spatula until just combined.
- Layer and swirl: Spoon one-third of the cream mixture into a parchment-lined loaf pan. Drizzle one-third of the cooled caramel over the top and gently swirl with a butter knife. Repeat with remaining cream and caramel. Sprinkle flaky sea salt evenly over the top.
- Freeze: Cover the pan with plastic wrap or foil and freeze for at least 6 hours, preferably overnight. If adding nuts or chocolate chips, fold them in after 2 hours of freezing when partially set.
Notes
Make sure heavy cream is very cold for best whipping. Let caramel cool before adding to cream mixture to avoid melting. For best texture, freeze overnight. Press parchment paper onto surface before sealing to prevent ice crystals. Ice cream keeps up to 2 weeks in freezer.
Nutrition
- Serving Size: 1/2 cup
- Calories: 280
- Sugar: 24
- Sodium: 180
- Fat: 18
- Saturated Fat: 11
- Carbohydrates: 28
- Protein: 4
Keywords: no-churn ice cream, salted caramel, light ice cream, easy ice cream, homemade ice cream, no machine ice cream