Introduction
Our neighborhood Halloween party was in four hours, and I’d completely forgotten. Everyone else would be bringing elaborate things—a cauldron of bubbling green punch with dry ice, a graveyard cake with handmade tombstone cookies, those little mummy hot dogs that actually look super cute. I had a bag of pretzel rods, a block of white chocolate I’d been hoarding for no reason, and a sudden, sweaty panic.
Honestly, I almost just grabbed a bag of chips and called it a day. But then I spotted the green food coloring in the back of the spice drawer, and a memory of a Pinterest fail from three years ago popped into my head. I remembered someone trying to make witch fingers and ending up with a melted mess. I figured, what did I have to lose? If they turned out ugly, I could just say they were “scary.”
Let me tell you, the panic was real. I was chopping chocolate while the timer for a load of laundry beeped, and I nearly knocked over the whole bowl. But thirty minutes later, I walked into that party with a platter of these creepy-cute witch finger pretzel rods, and they were gone before I even set them down. A neighbor actually asked me for the recipe while she was still chewing. That’s when I knew this was something special. It’s the kind of recipe that saves you in a pinch and makes you look like you planned it all along, even when you absolutely didn’t.
Why You’ll Love This Recipe
Let’s face it—when you’re busy on a weeknight, you don’t have time for fussy recipes that require a dozen specialty tools. These witch finger pretzel rods are the opposite of that. They come together in under 30 minutes, and the best part? You probably have most of the ingredients in your pantry right now.
- Quick & Easy: From start to finish, you’re looking at about 25 minutes of active time. The hardest part is waiting for the chocolate to set.
- Simple Ingredients: No fancy grocery trips needed. Pretzel rods, white chocolate, and a few pantry staples are all you need.
- Perfect for Halloween Parties: These are a guaranteed hit at any spooky gathering—school parties, office potlucks, or last-minute get-togethers.
- Crowd-Pleaser: Kids love them, adults love them, and everyone loves the creepy factor. They always get rave reviews.
- Unbelievably Delicious: The salty crunch of the pretzel against the sweet, creamy white chocolate is a combo that just works. It’s simple, but it’s perfect.
What makes this recipe different from the rest is the texture. I’ve tried versions where the chocolate is too thick or the pretzel gets soggy. My trick is to use a high-quality white chocolate and let it set completely on a parchment-lined tray. It creates a shell that snaps when you bite into it, while the pretzel stays perfectly crunchy. This isn’t just another Halloween treat—it’s the one you’ll make every year.
I mean, there’s something special about a recipe that feels like a secret weapon. You know that feeling when you bring something to a party and people keep circling back to the table for more? That’s this recipe. It’s comfort food with a spooky twist—fast, easy, and totally satisfying.
What Ingredients You Will Need
This recipe uses simple, everyday ingredients to create a fun Halloween treat that looks way more complicated than it is. Most of these are pantry staples, so you can whip these up on a whim without a special trip to the store.
- Pretzel rods (12-15 rods): Look for thick, sturdy pretzel rods that won’t break easily when you dip them. I prefer the Snyder’s of Hanover brand for their consistent crunch. Standard length works best—about 7 to 8 inches.
- White chocolate melting wafers (12 ounces): These are my go-to because they melt smoothly and don’t require tempering. Ghirardelli or Wilton brands both work great. If you’re using white chocolate chips, add a teaspoon of coconut oil to help them melt smoothly.
- Green gel food coloring (1/2 teaspoon): Gel coloring is key here—it gives you a vibrant, spooky green without thinning out the chocolate. Liquid food coloring can make the chocolate seize up, so stick with gel.
- Sliced almonds (about 30-36 slices): These become the fingernails. Look for whole sliced almonds, not slivered or chopped. You want a nice, flat surface to press into the chocolate.
- Butter knife or small offset spatula: For creating the knuckle lines on the fingers. A toothpick also works in a pinch.
Optional but fun additions:
- Black or red decorating gel: For adding “blood” or dirt effects around the fingernails.
- Edible glitter or sanding sugar: For a magical, sparkly finish that kids especially love.
- Pretzel crumbs: Sprinkle these on for a dirt-like texture that adds to the creepy vibe.
Substitution notes: If you’re dairy-free, use a high-quality dairy-free white chocolate. I’ve had good luck with the Enjoy Life brand. For a nut-free version, skip the almonds and use a sliver of dried apricot or a small piece of banana chip for the fingernail—though the texture is a bit different. And if you’re short on time, you can skip the knuckle lines entirely and just do the almond fingernail. They still look creepy!
Equipment Needed

You don’t need a fancy kitchen to make these. Here’s what you’ll need:
- Baking sheet: A standard half-sheet pan works perfectly. Line it with parchment paper or a silicone baking mat for easy cleanup.
- Microwave-safe bowl: For melting the white chocolate. Glass or ceramic works best—avoid plastic, which can hold onto odors.
- Small rubber spatula: For stirring the chocolate and food coloring. Silicone is ideal because it doesn’t scratch your bowls.
- Butter knife or toothpick: For creating the knuckle indentations on the chocolate. A toothpick gives you more control for fine lines.
- Tongs or a fork: For dipping the pretzel rods into the chocolate without getting your fingers messy. Tongs give you better control.
Budget-friendly tip: If you don’t have a microwave, you can melt the white chocolate in a heatproof bowl set over a saucepan of simmering water (double boiler method). Just make sure the bowl doesn’t touch the water. And if you don’t have a silicone baking mat, parchment paper works just fine—just make sure it’s weighed down so it doesn’t roll up.
I’ve made these in a tiny apartment kitchen with just a microwave and a butter knife, so don’t overthink the equipment. The only thing I’d recommend splurging on is good parchment paper—the cheap stuff can stick to the chocolate. Trust me on that one.
Preparation Method
Let’s get started. These are surprisingly easy, but a few small tricks make all the difference between a witch finger that looks creepy and one that looks like a sad, green blob.
- Prep your workspace: Line a baking sheet with parchment paper or a silicone mat. Make sure it’s flat and stable. Arrange your pretzel rods, sliced almonds, and a butter knife or toothpick nearby so you’re not scrambling once the chocolate is melted.
- Melt the white chocolate: Place the white chocolate melting wafers in a microwave-safe bowl. Microwave in 30-second intervals, stirring thoroughly after each interval. It usually takes about 90 seconds total. Stop heating when the chocolate is mostly melted with a few small lumps—the residual heat will finish the job as you stir. Don’t overheat, or the chocolate will seize up and turn grainy. I learned this the hard way my first time, and it was not pretty.
- Add the green color: Stir in the green gel food coloring until the chocolate is evenly tinted. Start with a small amount—about 1/4 teaspoon—and add more if you want a deeper, more vibrant green. You’re going for a witchy, slightly sickly shade. Think “monster” green, not “mint” green. If the color looks too light after dipping, you can always add a tiny drop more and stir again.
- Dip the pretzel rods: Hold a pretzel rod by one end and dip it into the melted green chocolate, rotating to coat about two-thirds of the rod. Let the excess chocolate drip back into the bowl for a few seconds. You want a nice, even coating—not too thick, not too thin. If the chocolate is getting too thick as it cools, pop the bowl back in the microwave for 10 seconds and stir again.
- Create the knuckle lines: Place the dipped pretzel rod on the prepared baking sheet. While the chocolate is still wet, use the back of a butter knife or a toothpick to gently press three or four horizontal lines across the chocolate-covered portion. These will look like knuckles on a finger. Don’t press too hard—you just want an indentation, not a cut through the chocolate.
- Add the fingernail: Immediately press a sliced almond onto the tip of the pretzel rod, pointed end facing outward. The almond should stick out slightly from the end, like a long, pointed fingernail. Gently press it into the chocolate so it stays put. Repeat for all the pretzel rods.
- Let them set: Allow the pretzel rods to set completely at room temperature. This takes about 20-30 minutes, depending on your kitchen temperature. Don’t rush this step—if you try to move them too soon, the chocolate will smudge. If you’re in a hurry, you can pop the baking sheet in the refrigerator for about 10 minutes, but keep an eye on them so they don’t develop condensation.
- Optional finishing touches: Once the chocolate is fully set, you can add a tiny dab of red decorating gel at the base of the almond fingernail to look like “blood.” Or brush a little black gel around the knuckles for a dirt effect. This is completely optional, but it really amps up the creepy factor.
Sensory cue: When you bite into one, you should hear a satisfying snap from the chocolate shell, followed by the crunchy pretzel. The almond adds a slightly nutty, buttery finish. The color should be a vibrant, unnatural green—perfect for Halloween.
Cooking Tips & Techniques
I’ve made these enough times to know where things can go wrong. Here are my best tips for getting it right every time.
Don’t overheat the chocolate. This is the number one mistake. White chocolate is delicate and can seize up into a grainy mess if it gets too hot. Always microwave in short bursts and stir between intervals. If it starts to look thick or lumpy, you’ve gone too far. You can try adding a teaspoon of coconut oil to smooth it out, but it’s better to just start over.
Work in small batches. Don’t try to dip all the pretzel rods at once. The chocolate will start to set as you work, and you’ll end up with messy knuckle lines. I usually work in batches of 4 or 5. Melt the chocolate, dip and decorate those, then melt a little more if needed for the next batch.
Use the right almond placement. The almond should be pressed into the chocolate at the very tip of the pretzel rod, with the pointed end facing outward. If you press it too far down, it looks like a weird toe instead of a finger. I made that mistake once and ended up with “witch toes” instead. Still creepy, but not quite right.
Keep the knuckle lines shallow. You want the indentations to be visible but not deep enough to cut through the chocolate. A toothpick gives you more control than a butter knife. If the chocolate starts to crack around the lines, you’re pressing too hard.
Let them set completely. This is the hardest part—waiting. But it’s crucial. If you try to pack them up or move them too soon, the chocolate will smudge and the almonds will fall off. Room temperature setting is best, but the fridge works in a pinch. Just make sure they’re fully dry before you touch them.
One time, I was rushing to get these done for a school party and I didn’t let them set long enough. The chocolate was still soft when I stacked them in a container, and they all stuck together in one giant, green, pretzel blob. It was a mess. So trust me on this—patience pays off.
Variations & Adaptations
Once you’ve mastered the basic recipe, there are so many ways to make these your own. Here are a few of my favorites.
- Monster Mummies: Instead of green chocolate, use white chocolate and drizzle a little more white chocolate over the top after it sets to look like bandages. Add tiny candy eyes for a mummy effect. These are perfect for kids who might find the witch fingers a little too creepy.
- Zombie Fingers: Use a mix of green and a tiny drop of purple food coloring to create a grayish, undead tone. Skip the almond fingernail and use a sliver of dried cranberry instead—it looks like a bloody, rotted nail. Gross but effective.
- Dairy-Free Version: Use dairy-free white chocolate, like the Enjoy Life brand. The texture is slightly different—a bit softer—but it still works. You may need to let them set in the fridge for a bit longer.
- Spider Web Effect: After the green chocolate sets, melt a small amount of dark or white chocolate and drizzle it in a thin, zigzag pattern over the top to look like spider webs. Use a toothpick to drag the lines into a web pattern.
- Gluten-Free Option: Look for gluten-free pretzel rods. They’re available at most grocery stores now, and they work exactly the same way. Just double-check the chocolate is also gluten-free if that’s a concern.
I once tried a version with dark chocolate instead of white, and it was surprisingly good—the bitterness of the dark chocolate balanced the saltiness of the pretzel beautifully. I called them “Dark Witch Fingers” and they were a hit with the adults at the party. So don’t be afraid to experiment!
Serving & Storage Suggestions
These are best served at room temperature, so don’t keep them in the fridge right before serving. The chocolate shell should be firm but not cold—it snaps nicely when you bite into it.
Presentation ideas: Arrange them upright in a small vase or jar for a creepy “hand” effect. Or lay them out on a platter lined with black or orange tissue paper. For extra drama, place a fake spider or two on the platter. Kids love it.
Storage: Store the finished pretzel rods in an airtight container at room temperature for up to 5 days. If you stack them, place a layer of parchment paper between each layer to prevent sticking. Do not refrigerate them for long-term storage unless absolutely necessary—the condensation can make the chocolate bloom (turn white and streaky). If you must refrigerate, let them come to room temperature in the container before opening to avoid condensation.
Freezing: You can freeze these for up to a month. Place them in a single layer on a baking sheet and freeze until solid, then transfer to a freezer-safe bag or container. Thaw at room temperature in the container to prevent condensation. They’re great to have on hand for last-minute Halloween parties.
Make-ahead tip: You can make these up to 3 days in advance. In fact, they actually get better after a day—the flavors meld together a bit. Just keep them in an airtight container at room temperature, and they’ll be perfect for your party.
Nutritional Information & Benefits
Let’s be real—these are a treat, not a health food. But here’s the breakdown if you’re curious. Per serving (1 pretzel rod): approximately 180 calories, 9g fat, 22g carbohydrates, 3g protein, 15g sugar, 1g fiber. The pretzel provides a small amount of iron and B vitamins, while the almonds offer healthy fats and vitamin E.
If you’re looking to make them a bit lighter, you can use a sugar-free white chocolate alternative. The texture won’t be quite as smooth, but it works in a pinch. For a lower-sugar option, look for pretzel rods that are unsalted or low-sodium to balance out the sweetness of the chocolate.
Dietary considerations: This recipe contains dairy (white chocolate), gluten (pretzels), and tree nuts (almonds). For a nut-free version, skip the almonds and use a small piece of dried fruit or a candy corn for the fingernail. For a gluten-free version, use gluten-free pretzel rods. Always check labels if you’re serving someone with allergies.
I personally love that these are a portion-controlled treat. One or two is usually enough to satisfy a sweet craving, and they’re fun to eat, which makes them feel more special than a regular candy bar. Plus, the salty-sweet combo is just so satisfying.
Conclusion
These witch finger pretzel rods are the perfect last-minute Halloween treat. They’re quick, easy, and look way more impressive than they have any right to. Honestly, they’ve saved me more times than I can count—from school parties to office potlucks to that one time I forgot about a neighborhood gathering until an hour before.
I love that you can customize them to fit your vibe—go full creepy with blood effects, or keep it cute with sparkly sprinkles. Either way, they’re guaranteed to be a hit. And the best part? You probably have everything you need in your pantry right now.
So go ahead—give them a try! I’d love to hear how they turn out. Did you add your own twist? Did the kids love them? Drop a comment below and let me know. And if you’re looking for more quick and easy Halloween treats, check out my spooky popcorn mix or these mummy pizza bites. Happy haunting!
Frequently Asked Questions
Can I use milk chocolate instead of white chocolate?
Absolutely! Milk chocolate works great, but the color won’t be as vibrant for the “witch” effect. You can still add a few drops of green food coloring to milk chocolate for a darker, more muted green. Dark chocolate is also an option for a less sweet version.
Why did my white chocolate seize up?
White chocolate is sensitive to heat and moisture. If it gets too hot or if even a drop of water gets into the bowl, it can seize up into a grainy, thick mess. Always use a dry bowl and utensils, and microwave in short bursts. If it does seize, you can try adding a teaspoon of vegetable oil or coconut oil and stirring vigorously—sometimes it helps, but no promises.
Can I make these ahead of time?
Yes! They actually keep well for up to 5 days in an airtight container at room temperature. Just make sure they’re fully set before you store them. I’ve also frozen them for up to a month with great results.
How do I get the green color to be vibrant?
Use gel food coloring instead of liquid. Liquid food coloring can change the consistency of the chocolate and make it seize. Start with a small amount and add more gradually until you reach the desired shade. A little goes a long way with gel colors.
My almond fingernails keep falling off. What am I doing wrong?
This usually happens when the chocolate has started to set before you press the almond in. Make sure you add the almond immediately after dipping and creating the knuckle lines. Also, press firmly but gently—you want the almond to be embedded in the chocolate, not just sitting on top. If the chocolate is too thick, reheat it briefly to thin it out.
Pin This Recipe!
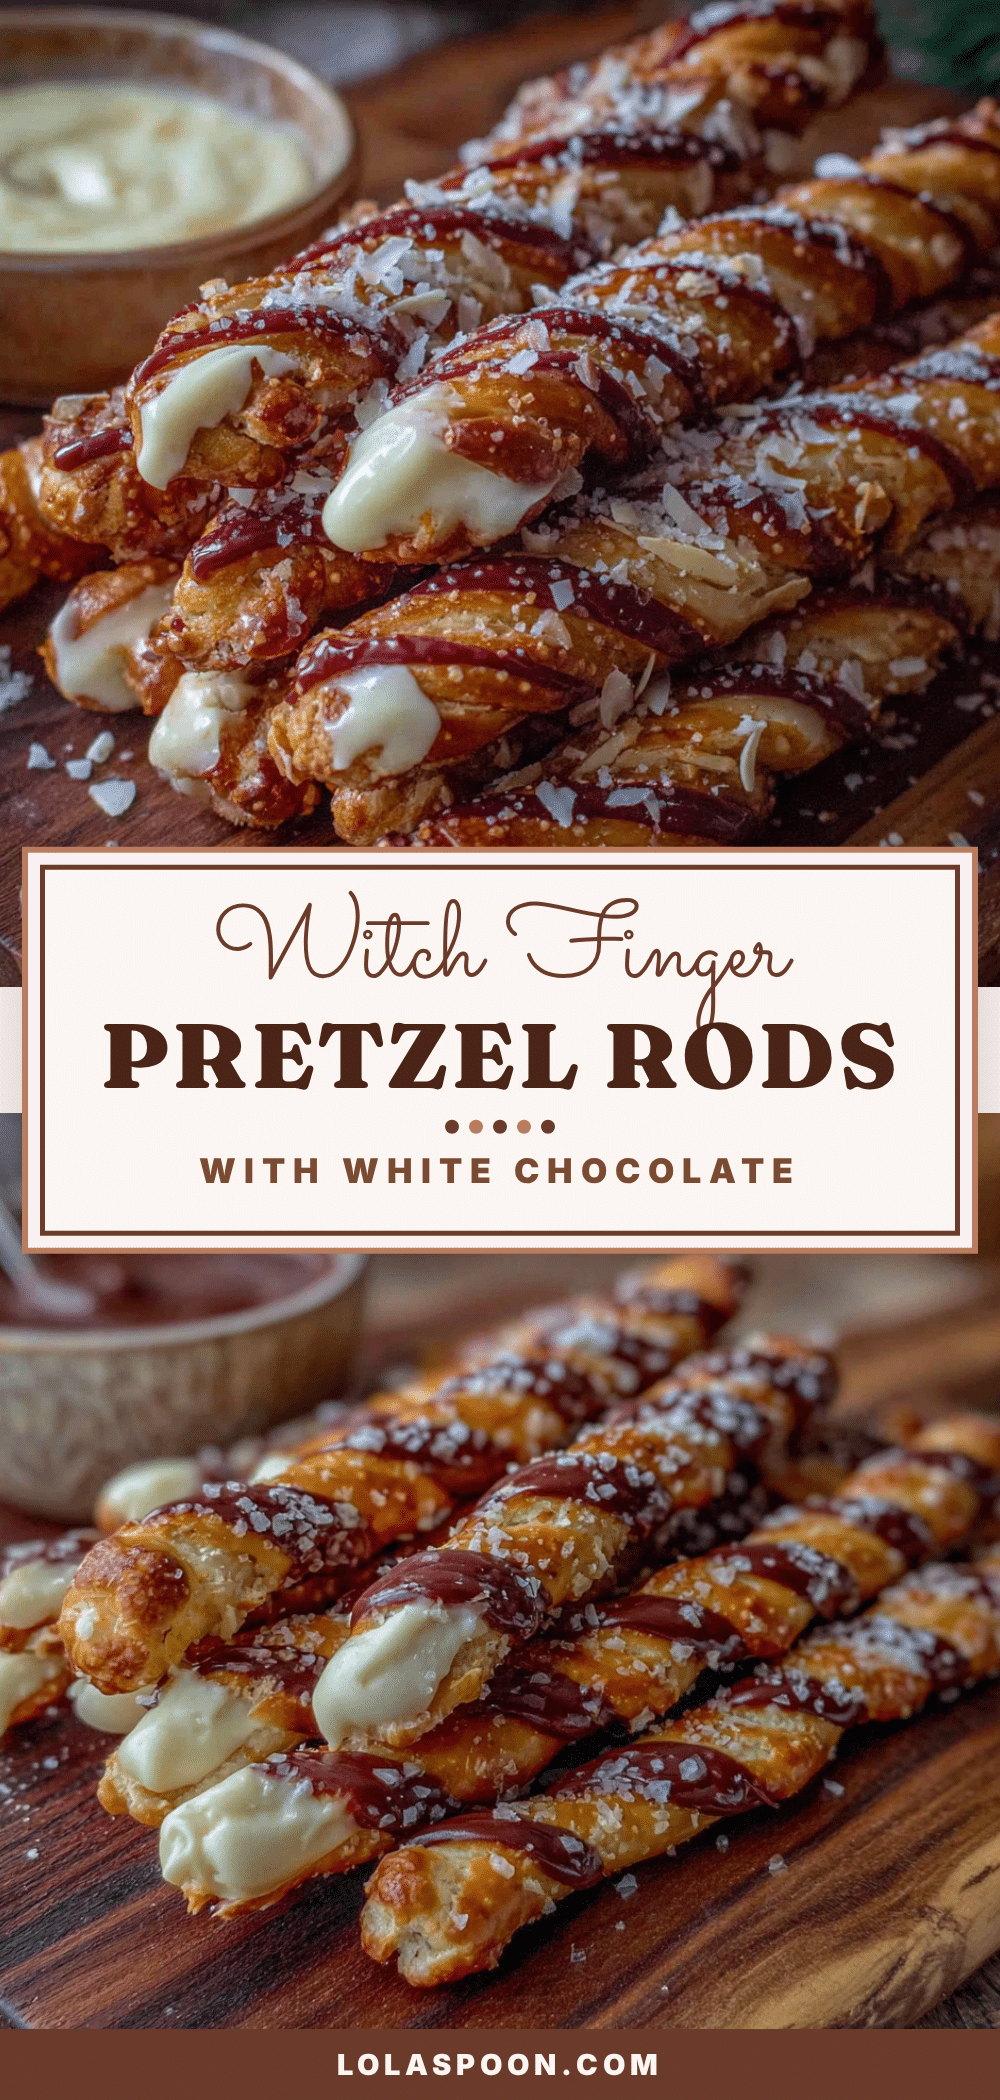
The Best Witch Finger Pretzel Rods: Easy White Chocolate Recipe

These creepy-cute witch finger pretzel rods are a quick and easy Halloween treat that comes together in under 30 minutes. Made with simple pantry ingredients, they’re perfect for last-minute parties and guaranteed to be a hit with kids and adults alike.
- Prep Time: 15 minutes
- Cook Time: 10 minutes
- Total Time: 25 minutes
- Yield: 12-15 servings 1x
- Category: Dessert
- Cuisine: American
Ingredients
- 12–15 pretzel rods (thick, sturdy, about 7–8 inches long)
- 12 ounces white chocolate melting wafers (e.g., Ghirardelli or Wilton)
- 1/2 teaspoon green gel food coloring
- 30–36 sliced almonds (whole slices, not slivered)
- Optional: black or red decorating gel for blood/dirt effects
- Optional: edible glitter or sanding sugar for sparkle
- Optional: pretzel crumbs for dirt texture
Instructions
- Line a baking sheet with parchment paper or a silicone mat. Arrange pretzel rods, sliced almonds, and a butter knife or toothpick nearby.
- Place white chocolate melting wafers in a microwave-safe bowl. Microwave in 30-second intervals, stirring thoroughly after each, until mostly melted (about 90 seconds total). Let residual heat finish melting; do not overheat.
- Stir in green gel food coloring until evenly tinted. Start with 1/4 teaspoon and add more for a deeper, vibrant green (monster green, not mint).
- Hold a pretzel rod by one end and dip into melted green chocolate, rotating to coat about two-thirds. Let excess drip back into the bowl for a few seconds.
- Place dipped pretzel rod on prepared baking sheet. While chocolate is still wet, use the back of a butter knife or toothpick to gently press 3-4 horizontal lines across the chocolate to create knuckle indentations. Do not press too hard.
- Immediately press a sliced almond onto the tip of the pretzel rod, pointed end facing outward, so it sticks out like a fingernail. Gently press into the chocolate.
- Repeat for all pretzel rods. Let set completely at room temperature for 20-30 minutes, or refrigerate for 10 minutes if in a hurry (watch for condensation).
- Optional: Once set, add a dab of red decorating gel at the base of the almond for ‘blood’ or black gel around knuckles for dirt effect.
Notes
Use gel food coloring, not liquid, to avoid seizing. Work in small batches of 4-5 pretzels to prevent chocolate from setting too quickly. For dairy-free, use Enjoy Life dairy-free white chocolate. For nut-free, skip almonds and use dried apricot or banana chip. Store in airtight container at room temperature for up to 5 days; freeze for up to 1 month. Let come to room temperature before serving to avoid condensation.
Nutrition
- Serving Size: 1 pretzel rod
- Calories: 180
- Sugar: 15
- Sodium: 200
- Fat: 9
- Saturated Fat: 5
- Carbohydrates: 22
- Fiber: 1
- Protein: 3
Keywords: Halloween treats, witch finger pretzels, white chocolate pretzels, easy Halloween recipe, spooky snacks, last-minute Halloween, pretzel rods, white chocolate