I was supposed to be making blondies. That was the plan, anyway. I had the butter melting on the stove, the mixer ready to go, and a very clear image in my head of what was coming out of that oven. But somewhere between browning the butter and reaching for the brown sugar, I grabbed the chocolate chips instead of chopping a bar of chocolate, dumped them in without thinking, and scooped the whole mess onto a baking sheet because I was already running late for a phone call with my mom. The blondies never happened. What came out of the oven was nothing like the plan — and honestly, so much better.
I pulled the tray out, stared at these lumpy, golden discs, and thought I’d ruined dinner dessert completely. They were flat in all the wrong places and puffy in others. But I was hungry, so I grabbed one while it was still warm, and that first bite stopped me mid-chew. The edges were impossibly crispy, the centers were soft in that way that makes you close your eyes, and the brown butter — oh, the brown butter — had turned the whole thing into something nutty and rich and almost caramel-like. I called my mom back just to tell her what happened. She laughed and said, “Sounds like a keeper.” She was right.
These perfect chewy brown butter chocolate chip cookies have been my go-to ever since. I’ve made them for neighbors, for holiday cookie swaps, and for those Tuesday nights when you just need something warm and sweet. Maybe you’ve been there — you set out to make one thing and end up with something completely different, something that somehow works better than what you planned. That’s this recipe. It’s the happy accident that became a staple, and I keep making it because it never lets me down.
Why You’ll Love This Recipe
Let me tell you why these cookies are different from every other chocolate chip cookie recipe you’ve tried. I’ve tested this one more times than I can count, and it’s the only one I reach for now.
- Quick & Easy: From start to finish, you’re looking at about 25 minutes. No complicated steps, no chilling the dough for hours — just brown the butter, mix, scoop, and bake.
- Simple Ingredients: You probably have everything in your kitchen right now. Butter, sugar, eggs, flour, chocolate chips — that’s it. No fancy extracts or specialty flours required.
- Perfect for Any Occasion: These cookies work for bake sales, last-minute guests, cozy movie nights, or just because it’s Wednesday. They’re versatile like that.
- Crowd-Pleaser: I’ve brought these to parties and watched people grab three before I could even say hello. Kids love them. Adults love them. Even my picky neighbor who “doesn’t do dessert” asked for the recipe.
- Unbelievably Delicious: The brown butter is the real star here. It adds this deep, nutty, almost toffee-like flavor that regular cookies just can’t match. The texture is spot-on — crispy edges with a soft, chewy center that stays that way for days.
What makes this recipe different is the technique. Browning the butter isn’t just a fancy trick — it changes the whole flavor profile. Plus, the ratio of brown sugar to white sugar is dialed in perfectly for maximum chewiness. I’ve tried dozens of versions, and this one is the best. It’s not just another cookie recipe; it’s the one you’ll come back to again and again.
These cookies are the kind that make you close your eyes after the first bite. They’re comfort food reimagined — faster, simpler, but with all the soul-soothing satisfaction you want from a homemade cookie.
What Ingredients You Will Need
This recipe uses simple, wholesome ingredients that come together to create something truly special. Most of these are pantry staples, so you can whip up a batch anytime the craving hits.
For the Cookies
- 1 cup (226g) unsalted butter — You’ll be browning this, so use good-quality butter. I prefer Kerrygold for its rich flavor, but any unsalted butter works. Salted butter can be used if you reduce the added salt by 1/4 teaspoon.
- 1 cup (200g) packed light brown sugar — This is key for the chewy texture. Brown sugar has more moisture than white sugar, which keeps the cookies soft. Dark brown sugar works too and adds even more depth.
- 1/2 cup (100g) granulated sugar — Adds a bit of crispness to the edges. Don’t skip it — the combination of both sugars is what gives you that perfect texture.
- 2 large eggs — Room temperature is best. If you forget to take them out ahead of time, place them in a bowl of warm water for 5 minutes.
- 2 teaspoons vanilla extract — Pure vanilla extract makes a difference here. I use Nielsen-Massey Madagascar vanilla, but any good brand works.
- 2 1/4 cups (280g) all-purpose flour — Spoon and level your flour for best results. Scooping directly from the bag can pack in too much flour and make the cookies dry.
- 1 teaspoon baking soda — Make sure it’s fresh. Test it by dropping a bit into vinegar — if it fizzes, it’s good to go.
- 1/2 teaspoon salt — Fine sea salt is my go-to. It balances the sweetness and enhances the brown butter flavor.
- 2 cups (340g) semi-sweet chocolate chips — I recommend Ghirardelli or Guittard for the best melt and flavor. You can also chop a good-quality chocolate bar for bigger puddles of chocolate. Milk chocolate chips work if you prefer a sweeter cookie.
Optional Add-Ins
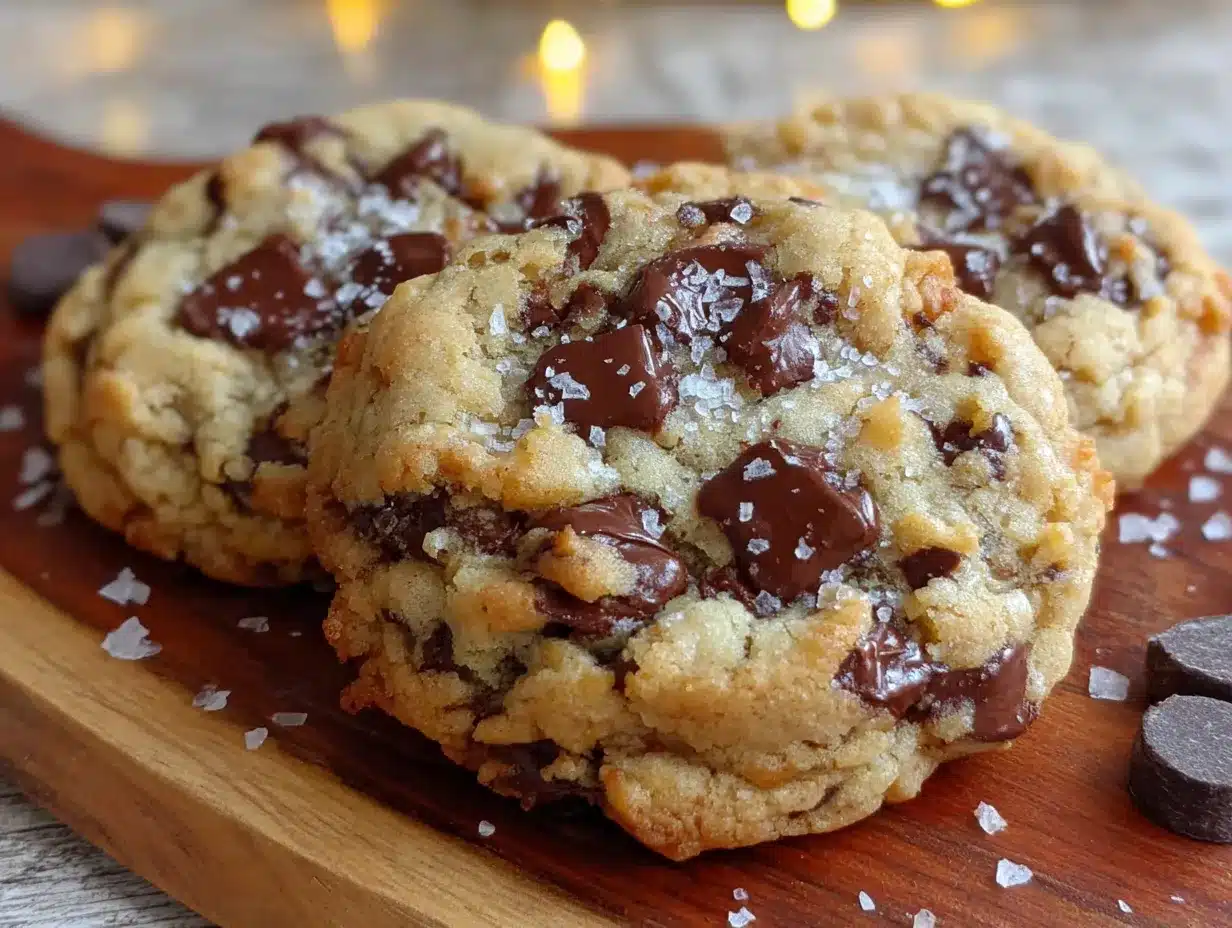
- Flaky sea salt — Sprinkle on top right after baking. It takes these cookies to another level.
- 1/2 cup chopped nuts — Walnuts or pecans add a nice crunch. Toast them first for extra flavor.
I always use semi-sweet chips because they balance the sweetness of the brown butter dough perfectly. If you’re using milk chocolate, consider reducing the sugar by a tablespoon or two. For a dairy-free version, use plant-based butter — just make sure it’s one that browns well, like Miyoko’s.
Equipment Needed
You don’t need much fancy equipment for these cookies. Here’s what I use:
- Large skillet or saucepan — For browning the butter. A light-colored pan helps you see the color change. I use a stainless steel skillet, but any heavy-bottomed pan works.
- Mixing bowls — One large bowl for the wet ingredients and one medium bowl for the dry ingredients. Glass or stainless steel is fine.
- Whisk — For mixing the dry ingredients and combining the wet ones. A sturdy whisk makes a difference.
- Wooden spoon or rubber spatula — For folding in the chocolate chips. I prefer a silicone spatula because it doesn’t scratch my bowls.
- Baking sheets — Two large sheets work best so you can bake multiple batches. I use Nordic Ware aluminum sheets — they conduct heat evenly and don’t warp.
- Parchment paper or silicone baking mats — Parchment paper is my favorite because it makes cleanup easy and prevents sticking. Silicone mats work too, but they can spread the cookies slightly more.
- Cookie scoop — A 1.5-tablespoon scoop gives you consistent cookies every time. If you don’t have one, use two spoons to portion the dough.
- Cooling rack — Lets air circulate around the cookies so they cool evenly. I use a simple wire rack from the grocery store.
If you don’t have a cookie scoop, no worries — just use a tablespoon and your hands to roll the dough into balls. Your cookies will still turn out great.
Preparation Method
Let’s make these cookies. I’ll walk you through each step so you get perfect results every time.
- Brown the butter. Place the butter in a large skillet or saucepan over medium heat. Stir constantly with a whisk or spatula. After about 5 minutes, the butter will start to foam and turn golden. Watch closely — once you see brown specks forming at the bottom and smell a nutty aroma, remove it from the heat immediately. Pour the browned butter into a large mixing bowl to stop the cooking process. Let it cool for 10 minutes. Don’t skip the cooling step, or your cookies will spread too much.
- Mix the sugars and butter. Add the brown sugar and granulated sugar to the cooled browned butter. Whisk vigorously for about 2 minutes until the mixture looks like wet sand and is well combined. The sugar helps incorporate air into the butter, which gives the cookies a better texture.
- Add the eggs and vanilla. Crack the eggs into the bowl one at a time, whisking well after each addition. Add the vanilla extract and whisk until the mixture is smooth and glossy. It should look a bit like caramel sauce at this point. If the mixture looks greasy or separated, you may have added the eggs while the butter was still too warm — let it cool a few more minutes next time.
- Combine the dry ingredients. In a separate medium bowl, whisk together the flour, baking soda, and salt. This ensures the leavening agent and salt are evenly distributed throughout the dough. I always give it a good 15-20 seconds of whisking.
- Mix the dry into the wet. Add the flour mixture to the wet ingredients in two additions, folding gently with a rubber spatula after each. Mix just until no streaks of flour remain. Overmixing at this stage develops gluten and makes the cookies tough. A few lumps are okay.
- Fold in the chocolate chips. Add the chocolate chips to the dough and fold them in gently. Make sure they’re evenly distributed. If you’re adding nuts or other mix-ins, fold them in now too. The dough will be thick and slightly sticky — that’s perfect.
- Preheat the oven and prepare baking sheets. Preheat your oven to 375°F (190°C). Line two baking sheets with parchment paper. Don’t use greased sheets — the cookies will spread too much.
- Scoop the dough. Use a 1.5-tablespoon cookie scoop to portion the dough into balls. Place them 2 inches apart on the prepared baking sheets. You should get about 24 cookies. If you want bigger cookies, use a 3-tablespoon scoop and bake for an extra 1-2 minutes.
- Bake the cookies. Bake one sheet at a time in the center of the oven for 9-11 minutes. The cookies should look golden around the edges but still soft and slightly puffy in the center. They will continue to set on the baking sheet as they cool. I usually pull them out at the 10-minute mark for the perfect chewy texture.
- Cool and enjoy. Let the cookies cool on the baking sheet for 5 minutes. This allows them to firm up without overbaking. Then transfer them to a cooling rack to cool completely. If you’re adding flaky sea salt, sprinkle it on right after you pull them from the oven while they’re still warm.
Your kitchen will smell incredible at this point. I usually can’t resist eating one warm — the chocolate is all melty and the brown butter flavor is at its peak. Go ahead, you deserve it.
Cooking Tips & Techniques
I’ve made these cookies more times than I can count, and I’ve learned a few things along the way. Here are my best tips for getting perfect results every time.
Don’t rush the brown butter. This is the most important step. If you take the butter off the heat too early, you won’t get that deep nutty flavor. If you leave it too long, it can burn and turn bitter. Watch for the brown specks and that unmistakable aroma — it smells like toasted nuts and caramel. I ruined my first batch by walking away to answer the door. Never again.
Let the butter cool properly. I know it’s tempting to add the eggs right away, but hot butter will scramble the eggs and ruin the texture. Give it at least 10 minutes. I usually set a timer so I don’t forget.
Use room temperature eggs. Cold eggs can seize the butter mixture and make it lumpy. If you forgot to take them out of the fridge, place them in a bowl of warm water for 5 minutes. Works like a charm.
Don’t overmix the dough. Once you add the flour, mix just until it disappears. Overmixing develops gluten, and more gluten means tougher cookies. I learned this the hard way after making a batch that could have doubled as hockey pucks.
Chill the dough if you have time. While this recipe works without chilling, letting the dough rest in the fridge for 30 minutes to an hour develops the flavor even more and prevents excessive spreading. I do this when I’m making cookies for company. The difference is subtle but noticeable.
Bake one sheet at a time. Putting two sheets in the oven at once messes with the heat distribution. Your cookies won’t bake evenly. I know it takes longer, but the results are worth it.
Use a cookie scoop for consistent size. This ensures all your cookies bake evenly. No more tiny burnt ones next to huge underdone ones. A 1.5-tablespoon scoop is my favorite size for these cookies.
Pull them out when they look slightly underdone. The centers should still look soft and puffy when you take them out. They’ll continue to set on the hot baking sheet. Overbaked cookies are dry and crumbly, and nobody wants that.
Variations & Adaptations
One of the best things about this recipe is how easy it is to customize. Here are some of my favorite variations.
Double Chocolate Chip Cookies: Replace 1/4 cup of the flour with 1/4 cup of unsweetened cocoa powder. Use dark chocolate chips for an extra-rich flavor. These are dangerously good — I made a batch for a friend’s birthday and they disappeared in 10 minutes.
Gluten-Free Version: Swap the all-purpose flour with a 1:1 gluten-free baking flour blend. I use Bob’s Red Mill 1:1 Baking Flour. No other changes needed. The texture is slightly different — a bit more tender — but still delicious.
Vegan Adaptation: Use plant-based butter (make sure it browns well) and replace the eggs with flax eggs (2 tablespoons ground flaxseed mixed with 6 tablespoons water, let sit for 5 minutes). The cookies will be a bit less chewy but still really good. I’ve made these for vegan friends and they always ask for more.
Nutty Brown Butter Cookies: Add 1/2 cup of toasted chopped pecans or walnuts along with the chocolate chips. Toast the nuts in a dry skillet over medium heat for 3-4 minutes until fragrant. Let them cool before adding to the dough.
Sea Salt Caramel Version: Press a soft caramel candy into the center of each dough ball before baking. Sprinkle with flaky sea salt right after they come out of the oven. The caramel gets all gooey and the salt balances the sweetness perfectly.
Peppermint Chocolate Chip: Add 1/2 teaspoon peppermint extract along with the vanilla. Use dark chocolate chips and crush a few candy canes to sprinkle on top after baking. These are amazing for the holidays.
I’ve tried all of these variations, and honestly, I can’t pick a favorite. The original is my go-to, but the double chocolate version calls my name on rainy days. Experiment and find your own favorite — that’s half the fun of baking.
Serving & Storage Suggestions
These cookies are best served warm, when the chocolate is still melty and the brown butter flavor is at its peak. Let them cool on the baking sheet for 5 minutes, then transfer to a plate and enjoy with a cold glass of milk or a hot cup of coffee. They’re also fantastic with a scoop of vanilla ice cream sandwiched between two cookies — instant ice cream sandwiches.
For storage, place the cooled cookies in an airtight container at room temperature. They’ll stay fresh for up to 5 days. I like to layer them with parchment paper so they don’t stick together. The texture actually improves after a day — the flavors meld and the cookies become even chewier.
To freeze the baked cookies, place them in a single layer on a baking sheet and freeze for 1 hour. Then transfer them to a freezer-safe bag or container. They’ll keep for up to 3 months. Thaw at room temperature for about 15 minutes, or pop them in the microwave for 10 seconds for that fresh-from-the-oven feel.
You can also freeze the raw dough. Scoop it into balls, place them on a baking sheet, and freeze until solid. Then transfer the frozen dough balls to a freezer bag. When you’re ready to bake, place them directly on a parchment-lined baking sheet and add 2-3 minutes to the baking time. No need to thaw first. This is my secret for having fresh cookies on demand.
If you’re making these for a cookie swap or holiday party, bake them a day ahead. The flavor actually gets better overnight. Just store them in an airtight container and they’ll be perfect.
Nutritional Information & Benefits
Here’s the estimated nutritional information for one cookie (based on 24 cookies):
- Calories: 185
- Total Fat: 10g
- Saturated Fat: 6g
- Cholesterol: 35mg
- Sodium: 95mg
- Total Carbohydrates: 23g
- Dietary Fiber: 1g
- Sugars: 15g
- Protein: 3g
These numbers are estimates and will vary based on the specific brands and ingredients you use. If you’re watching your sugar intake, you can reduce the sugar by a quarter cup without affecting the texture too much.
While these cookies are definitely a treat, they do have some redeeming qualities. The brown butter adds a depth of flavor that means you can use less sugar than many other recipes. The eggs provide protein, and the chocolate chips contain antioxidants. Plus, there’s something to be said for the mental health benefits of baking and enjoying a homemade cookie — it’s comfort food that brings joy.
For those with dietary restrictions, the gluten-free and vegan variations work well. Just be aware that the nutritional values will change with those substitutions.
Conclusion
These perfect chewy brown butter chocolate chip cookies are the recipe I keep coming back to, again and again. They started as a happy accident — a distracted moment that turned into something better than I planned — and now they’re a staple in my kitchen. The brown butter gives them a depth of flavor that regular cookies just can’t match, and the texture is exactly what I want: crispy edges, soft centers, and that perfect chewiness that makes you reach for another one.
I love how simple this recipe is. No fancy techniques, no obscure ingredients, no hours of chilling. Just good butter, good chocolate, and a little bit of patience while the butter browns. It’s the kind of recipe that feels special enough for company but easy enough for a random Tuesday night.
I’d love to hear how these turn out for you. Did you try any of the variations? Did you add your own twist? Drop a comment below and let me know. And if you share them on social media, tag me — I want to see your beautiful cookies. Happy baking, friend!
Frequently Asked Questions
Can I use salted butter instead of unsalted?
Yes, you can. Just reduce the added salt in the recipe by 1/4 teaspoon. The salted butter will add a bit more saltiness, which actually works well with the brown butter flavor.
Why did my cookies spread too much?
This usually happens if the butter was too warm when you added the eggs, or if you didn’t let the browned butter cool enough. Make sure to cool the butter for at least 10 minutes before adding the eggs. Chilling the dough for 30 minutes before baking also helps prevent spreading.
Can I make these cookies without browning the butter?
You can, but they won’t have that same nutty, caramel-like flavor. If you skip the browning, just melt the butter and let it cool slightly before using. The cookies will still be good, just not as special.
How do I know when the cookies are done baking?
Look for golden brown edges with centers that still look soft and slightly puffy. The cookies will continue to set on the baking sheet as they cool. If the centers look fully set in the oven, they’ll be overbaked and dry once cooled.
Can I double this recipe?
Absolutely. This recipe doubles beautifully. Just make sure you brown the butter in batches — a single pan can’t handle 2 cups of butter without burning. Use two pans or brown one batch at a time.
Pin This Recipe!
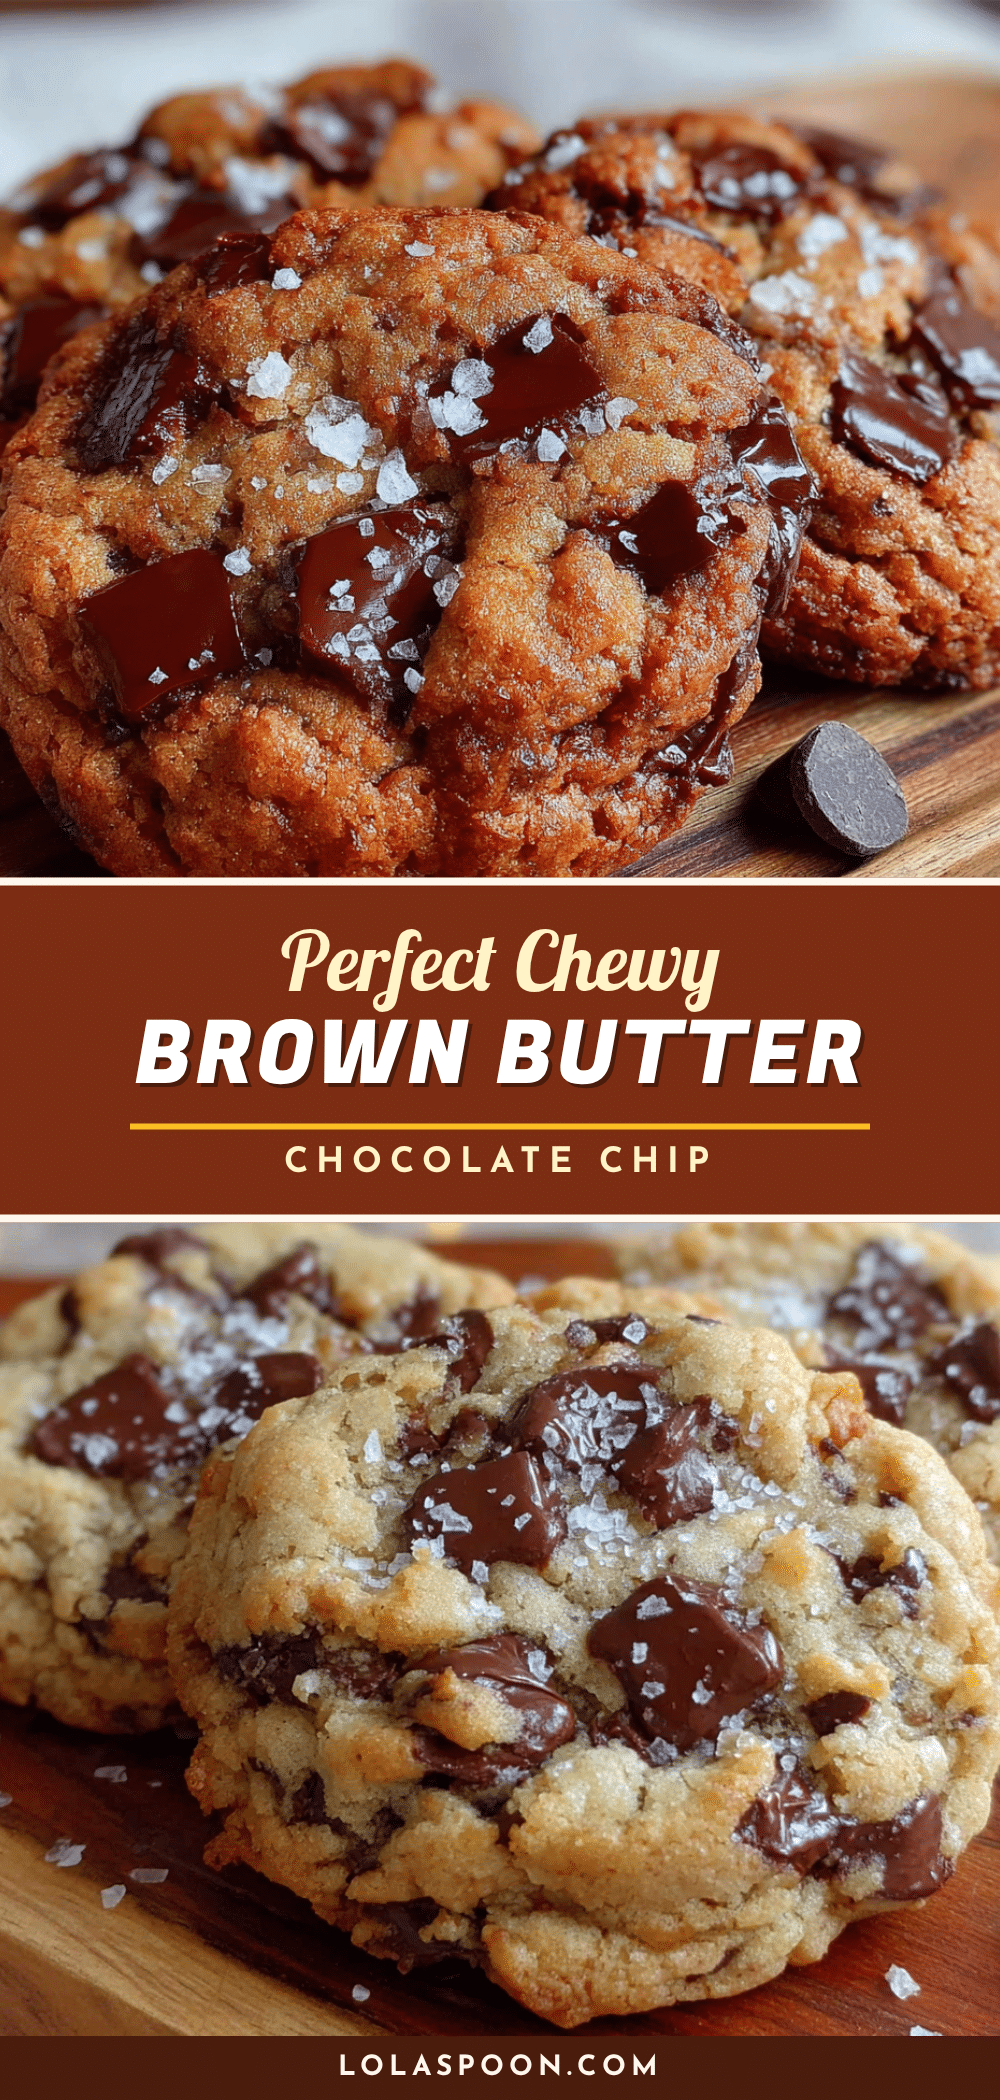
Perfect Chewy Brown Butter Chocolate Chip Cookie Recipe
These perfect chewy brown butter chocolate chip cookies have crispy edges, soft centers, and a deep nutty flavor from browned butter. A happy accident turned staple, they’re quick, easy, and made with simple ingredients.
- Prep Time: 15 minutes
- Cook Time: 10 minutes
- Total Time: 25 minutes
- Yield: 24 cookies 1x
- Category: Dessert
- Cuisine: American
Ingredients
- 1 cup (226g) unsalted butter
- 1 cup (200g) packed light brown sugar
- 1/2 cup (100g) granulated sugar
- 2 large eggs, room temperature
- 2 teaspoons vanilla extract
- 2 1/4 cups (280g) all-purpose flour
- 1 teaspoon baking soda
- 1/2 teaspoon fine sea salt
- 2 cups (340g) semi-sweet chocolate chips
- Flaky sea salt (optional, for topping)
- 1/2 cup chopped walnuts or pecans (optional)
Instructions
- Brown the butter: Place butter in a large skillet or saucepan over medium heat. Stir constantly until it foams, turns golden, and brown specks form at the bottom (about 5 minutes). Remove from heat immediately and pour into a large mixing bowl. Let cool for 10 minutes.
- Mix the sugars and butter: Add brown sugar and granulated sugar to the cooled browned butter. Whisk vigorously for about 2 minutes until the mixture looks like wet sand and is well combined.
- Add the eggs and vanilla: Crack eggs into the bowl one at a time, whisking well after each addition. Add vanilla extract and whisk until smooth and glossy.
- Combine the dry ingredients: In a separate medium bowl, whisk together flour, baking soda, and salt for 15-20 seconds.
- Mix the dry into the wet: Add flour mixture to wet ingredients in two additions, folding gently with a rubber spatula after each. Mix just until no streaks of flour remain.
- Fold in the chocolate chips: Add chocolate chips (and nuts if using) and fold gently until evenly distributed. Dough will be thick and slightly sticky.
- Preheat oven and prepare baking sheets: Preheat oven to 375°F (190°C). Line two baking sheets with parchment paper.
- Scoop the dough: Use a 1.5-tablespoon cookie scoop to portion dough into balls. Place 2 inches apart on prepared baking sheets. Makes about 24 cookies.
- Bake the cookies: Bake one sheet at a time in the center of the oven for 9-11 minutes. Cookies should look golden around edges but still soft and slightly puffy in the center.
- Cool and enjoy: Let cookies cool on baking sheet for 5 minutes, then transfer to a cooling rack. Sprinkle with flaky sea salt if desired while still warm.
Notes
Don’t rush the brown butter; watch for brown specks and nutty aroma. Let butter cool properly before adding eggs. Use room temperature eggs. Don’t overmix dough. Chill dough for 30 minutes to an hour for better flavor and less spreading. Bake one sheet at a time. Pull cookies out when centers look slightly underdone.
Nutrition
- Serving Size: 1 cookie
- Calories: 185
- Sugar: 15
- Sodium: 95
- Fat: 10
- Saturated Fat: 6
- Carbohydrates: 23
- Fiber: 1
- Protein: 3
Keywords: brown butter chocolate chip cookies, chewy cookies, easy cookie recipe, homemade cookies, chocolate chip cookies


