My seven-year-old nephew asked me why I couldn’t just pipe the spider web right onto the cookie dough before baking. I started to explain why that wouldn’t work—then stopped. Honestly, I had no good reason. I just assumed it was something you did after baking, because that’s how every recipe I’d ever seen did it.
So, I let him try it on one cookie. I figured I’d scrape it off and start over. But you know what? It worked. The icing settled into the cracks as the cookie spread, creating this incredible, organic web pattern that looked way more authentic than anything I’d ever piped onto a cooled cookie. I mean, I was genuinely annoyed at how good it looked. There I was, the “experienced” baker, getting schooled by a kid who just thought the web should bake into the cookie. That single experiment turned into these Fudgy Spider Web Chocolate Crinkle Cookies, and I haven’t looked back since.
The cookies themselves are the real star—deep, dark, and intensely fudgy, with that signature crinkled top that looks like cracked earth. The powdered sugar coating gives them a snowy finish, making the dark chocolate web pop. It’s the kind of cookie that disappears fast at Halloween parties, and honestly, I’m okay with that. Maybe you’ve been there—overcomplicating something that a kid could solve in two seconds. This recipe is my little reminder that sometimes the best ideas come from the people we’re trying to teach.
Why You’ll Love This Recipe
Let’s be real—most Halloween cookies are either too dry, too sweet, or too much work. These Fudgy Spider Web Chocolate Crinkle Cookies hit that sweet spot where indulgence meets ease. I’ve tested this recipe six times to get the fudgy factor just right, and the spider web technique came from a genuine kitchen accident (thanks, nephew).
- Quick & Easy: From start to finish, these come together in about 45 minutes. The dough needs just 30 minutes of chilling, so you’re not waiting around all day.
- Simple Ingredients: No weird extracts or hard-to-find decorations. You probably have everything in your pantry right now—cocoa powder, sugar, eggs, and butter.
- Perfect for Halloween: These are the showstoppers of any Halloween party, spooky movie night, or classroom treat. They look way more impressive than they actually are.
- Crowd-Pleaser: I brought these to a neighborhood gathering, and they got devoured before the cupcakes. Kids love the web pattern, adults love the rich chocolate flavor.
- Unbelievably Fudgy: The texture is what sets these apart. They’re soft, chewy, and almost brownie-like in the center. The crinkle top adds that satisfying crackle with every bite.
What makes this recipe different? It’s the combination of melted chocolate and cocoa powder that gives these cookies their deep, fudgy richness without being cakey. Plus, the pre-baked spider web technique means you don’t have to wait for the cookies to cool before decorating. It’s a total game-changer for anyone who’s ever spent an hour piping webs onto individual cookies.
What Ingredients You Will Need
This recipe uses simple, wholesome ingredients to deliver that intense chocolate flavor and fudgy texture. Most of these are pantry staples, so you might not even need a grocery run.
- Unsalted butter, 1/2 cup (1 stick), softened (I prefer Kerrygold for its rich flavor)
- Granulated sugar, 1 cup (200g) (adds sweetness and helps create the crinkle top)
- Large eggs, 2, room temperature (room temp eggs incorporate better into the batter)
- Vanilla extract, 1 teaspoon (pure extract makes a difference here)
- All-purpose flour, 1 1/2 cups (180g) (spoon and level for accuracy)
- Unsweetened cocoa powder, 1/2 cup (50g) (I recommend Ghirardelli or Hershey’s Special Dark for deep color)
- Baking powder, 1 teaspoon
- Salt, 1/2 teaspoon
- Semi-sweet chocolate chips, 1 cup (175g), melted and slightly cooled (use good quality chips for best melt)
- Powdered sugar, 1/4 cup (30g), for coating (plus extra for dusting)
- For the spider web icing: 1/2 cup (60g) powdered sugar, 2-3 teaspoons milk, and 1/4 teaspoon vanilla extract
For the cocoa powder, I’ve tested this with both Dutch-process and natural, and both work fine. Dutch-process gives a darker, more Oreo-like color, while natural cocoa yields a slightly more traditional chocolate crinkle look. If you’re using natural cocoa, make sure your baking powder is fresh to get that proper rise.
For a dairy-free version, swap the butter with a plant-based stick butter (I like Earth Balance) and use dairy-free chocolate chips. The texture stays remarkably similar.
Equipment Needed
You don’t need any fancy tools for these cookies. Here’s what I use:
- Stand mixer or hand mixer: A stand mixer makes creaming the butter and sugar effortless, but a hand mixer works just as well. If you’re mixing by hand, be prepared for a good arm workout.
- Large mixing bowls: You’ll need at least two—one for wet ingredients, one for dry.
- Baking sheets: Two standard half-sheet pans work perfectly. Line them with parchment paper or silicone baking mats.
- Cooling rack: A wire rack helps the cookies cool evenly without getting soggy bottoms.
- Piping bag or zip-top bag: For the spider web icing. A small zip-top bag with the corner snipped off works perfectly and costs nothing.
- Small cookie scoop: A 1.5-tablespoon scoop ensures uniform cookies that bake evenly. If you don’t have one, use two spoons.
Preparation Method

- Melt the chocolate: Place the chocolate chips in a microwave-safe bowl. Microwave in 30-second intervals, stirring after each, until smooth. Let it cool slightly while you prep the other ingredients. Don’t skip the cooling—hot chocolate will melt your butter and ruin the texture.
- Cream the butter and sugar: In a large bowl, beat the softened butter and granulated sugar together until light and fluffy, about 3-4 minutes. You’re looking for a pale, airy mixture. Scrape down the sides halfway through.
- Add the eggs and vanilla: Beat in the eggs one at a time, mixing well after each. Add the vanilla extract and mix until combined. The mixture might look slightly curdled—that’s okay, it’ll come together when you add the chocolate.
- Mix in the melted chocolate: Pour the slightly cooled melted chocolate into the bowl and mix on low speed until fully incorporated. The batter will darken and become glossy. This is where the fudgy magic starts.
- Combine the dry ingredients: In a separate bowl, whisk together the flour, cocoa powder, baking powder, and salt. Make sure there are no lumps—cocoa powder loves to clump.
- Add dry ingredients to wet: Gradually add the dry ingredients to the wet mixture, mixing on low speed until just combined. Don’t overmix! Stop as soon as you don’t see any more flour streaks. Overworking the dough will make the cookies tough.
- Chill the dough: Cover the bowl with plastic wrap and refrigerate for at least 30 minutes. This step is non-negotiable—chilled dough is easier to handle and bakes up thicker and fudgier. If you skip this, the cookies will spread into flat puddles.
- Preheat and prep: While the dough chills, preheat your oven to 350°F (175°C). Line two baking sheets with parchment paper.
- Shape the cookies: Place the powdered sugar in a shallow bowl. Using a cookie scoop, portion out rounded tablespoons of dough. Roll each portion into a ball between your palms, then drop it into the powdered sugar. Roll it around to coat generously—the sugar is what creates the crinkle effect. Place the coated balls 2 inches apart on the prepared baking sheets.
- Pipe the spider webs: This is the fun part. Mix the icing ingredients in a small bowl until smooth. Transfer to a piping bag or zip-top bag and snip a tiny corner off. Pipe a small spiral or concentric circles onto each cookie dough ball. Don’t worry about perfection—the dough will spread in the oven, and the icing will crack and stretch into organic web patterns. I personally like to start with a small dot in the center and spiral outward.
- Bake: Bake for 10-12 minutes. The cookies should look puffed and cracked, with the edges set but the centers still slightly soft. They’ll continue to set as they cool. Don’t overbake if you want that fudgy center.
- Cool: Let the cookies cool on the baking sheet for 5 minutes, then transfer to a wire rack to cool completely. The spider webs will become more defined as they cool.
Cooking Tips & Techniques
I’ve made these cookies at least a dozen times, and I’ve learned a few things the hard way. Here’s what I wish someone had told me:
Don’t skip the chill time. I know it’s tempting to rush, but cold dough is the secret to thick, fudgy cookies. I once tried to skip the chilling step because I was in a hurry, and the cookies spread into thin, crispy discs. They still tasted good, but they lost that signature crinkle.
Coat generously in powdered sugar. You want a thick, snowy coating. If you can still see the dark dough through the sugar, add more. The sugar creates the cracks as the cookie expands in the oven, so a light coating won’t give you that dramatic crinkle effect.
Pipe the web right before baking. If you pipe the icing too early, it might soak into the dough. I like to pipe the webs on one sheet, pop it in the oven, then pipe the second sheet while the first bakes. This keeps the icing fresh and defined.
Use a light hand with the icing. The icing should be thin enough to pipe easily but thick enough to hold its shape. If it’s too runny, it will disappear into the dough. Add milk one drop at a time until you reach a toothpaste-like consistency.
Rotate your pans halfway through. Ovens have hot spots, so rotating the pans at the 6-minute mark ensures even baking. I forgot to do this once, and the cookies on the back of the pan came out darker than the front.
Variations & Adaptations
These cookies are endlessly adaptable. Here are some variations I’ve tried and loved:
- White Chocolate Spider Webs: Swap the dark icing for white chocolate icing. Melt 1/4 cup white chocolate chips with 1 teaspoon coconut oil, then pipe as directed. The white webs against the dark cookies are stunning.
- Gluten-Free Version: Substitute the all-purpose flour with a 1:1 gluten-free baking flour (I like King Arthur’s Measure for Measure). The texture is slightly more tender, but the cookies are still deliciously fudgy.
- Peppermint Crunch: Add 1/2 teaspoon peppermint extract to the dough along with the vanilla. Crush a few candy canes and sprinkle them on top of the cookies right after baking. It’s a holiday-friendly twist on the Halloween classic.
- Spicy Mexican Chocolate: Add 1/2 teaspoon cinnamon and a pinch of cayenne pepper to the dry ingredients. The warmth of the spices pairs beautifully with the dark chocolate.
- Vegan Adaptation: Use flax eggs (2 tablespoons ground flaxseed mixed with 6 tablespoons water) instead of regular eggs, and swap the butter with coconut oil or vegan butter. The cookies won’t be quite as fudgy, but they’re still incredibly good.
Serving & Storage Suggestions
These cookies are best served at room temperature, but I won’t judge you if you eat one warm from the oven. The spider web icing sets as the cookies cool, so they’re ready to serve within 15 minutes of baking.
For a Halloween party, arrange them on a platter with a few fake spiders scattered around. They also look fantastic on a tiered stand with other spooky treats. I like to serve them with a cold glass of milk or a warm cup of coffee—the bitterness of the coffee balances the sweetness of the cookies perfectly.
Storage: Keep the cookies in an airtight container at room temperature for up to 5 days. Place a piece of bread in the container to absorb excess moisture and keep the cookies soft. The spider webs will stay intact for at least 2-3 days.
Freezing: You can freeze the unbaked dough balls (without the powdered sugar and icing) for up to 3 months. When you’re ready to bake, let them thaw in the fridge overnight, then roll in powdered sugar, pipe the webs, and bake as directed. The baked cookies also freeze well for up to 2 months.
One thing I’ve noticed—the cookies actually taste better the next day. The flavors meld together, and the texture becomes even more fudgy. So if you can resist eating them all on day one, you’re in for a treat.
Nutritional Information & Benefits
These cookies are a treat, but they’re not total nutritional wastelands. Here’s the approximate breakdown per cookie (based on 24 cookies):
- Calories: 145
- Fat: 7g
- Carbohydrates: 20g
- Protein: 2g
- Fiber: 1g
- Sugar: 13g
The cocoa powder is rich in antioxidants called flavonoids, which can help reduce inflammation and improve heart health. Dark chocolate (at least 70% cocoa) has been linked to better brain function and lower blood pressure. Of course, these benefits come with sugar and butter, so moderation is key.
These cookies are vegetarian and can be made gluten-free, dairy-free, or vegan with the substitutions listed above. They do contain eggs, dairy, and gluten in their standard form, so keep that in mind if you’re baking for someone with allergies.
Conclusion
These Fudgy Spider Web Chocolate Crinkle Cookies have become my go-to Halloween treat, and I don’t see that changing anytime soon. They’re the perfect blend of rich, fudgy chocolate and that satisfying crinkle texture, all topped with a spider web design that looks way more impressive than it actually is. Honestly, the hardest part is not eating all the dough before it hits the oven.
I’d love to hear how these turn out for you. Did you try any of the variations? Did your kids or friends have a better idea for the web pattern? Drop a comment below and let me know—I’m always up for learning something new from someone who just decided to try something different.
Happy Halloween, and happy baking! Remember, the best cookies are the ones you make with a little bit of fun and a whole lot of chocolate.
Frequently Asked Questions
Can I use cocoa powder instead of melted chocolate?
You can, but the cookies won’t be as fudgy. The melted chocolate adds richness and moisture that cocoa powder alone can’t replicate. If you’re in a pinch, use 1/2 cup extra cocoa powder and increase the butter by 2 tablespoons.
Why didn’t my cookies crinkle?
Most likely, you didn’t coat them in enough powdered sugar, or the dough wasn’t chilled long enough. The crinkle effect happens when the dough expands and cracks the sugar coating. Make sure each dough ball is heavily coated, and don’t skip the 30-minute chill time.
Can I make the dough ahead of time?
Absolutely! The dough keeps in the fridge for up to 3 days. Just wrap it tightly in plastic wrap. When you’re ready to bake, let it sit at room temperature for 10 minutes to soften slightly, then shape and coat as directed.
How do I get the spider web to look perfect?
Don’t stress about perfection—the oven does most of the work. Pipe a simple spiral or concentric circles, and the spreading dough will stretch the icing into organic web patterns. If you want more defined lines, pipe a thicker icing and use a toothpick to drag lines from the center outward.
Can I use this recipe for other holidays?
Yes! Skip the spider web icing and you’ve got classic chocolate crinkle cookies perfect for Christmas, Valentine’s Day, or any occasion. You can also tint the icing with food coloring for different holidays—green for Christmas, pink for Valentine’s, etc.
Pin This Recipe!
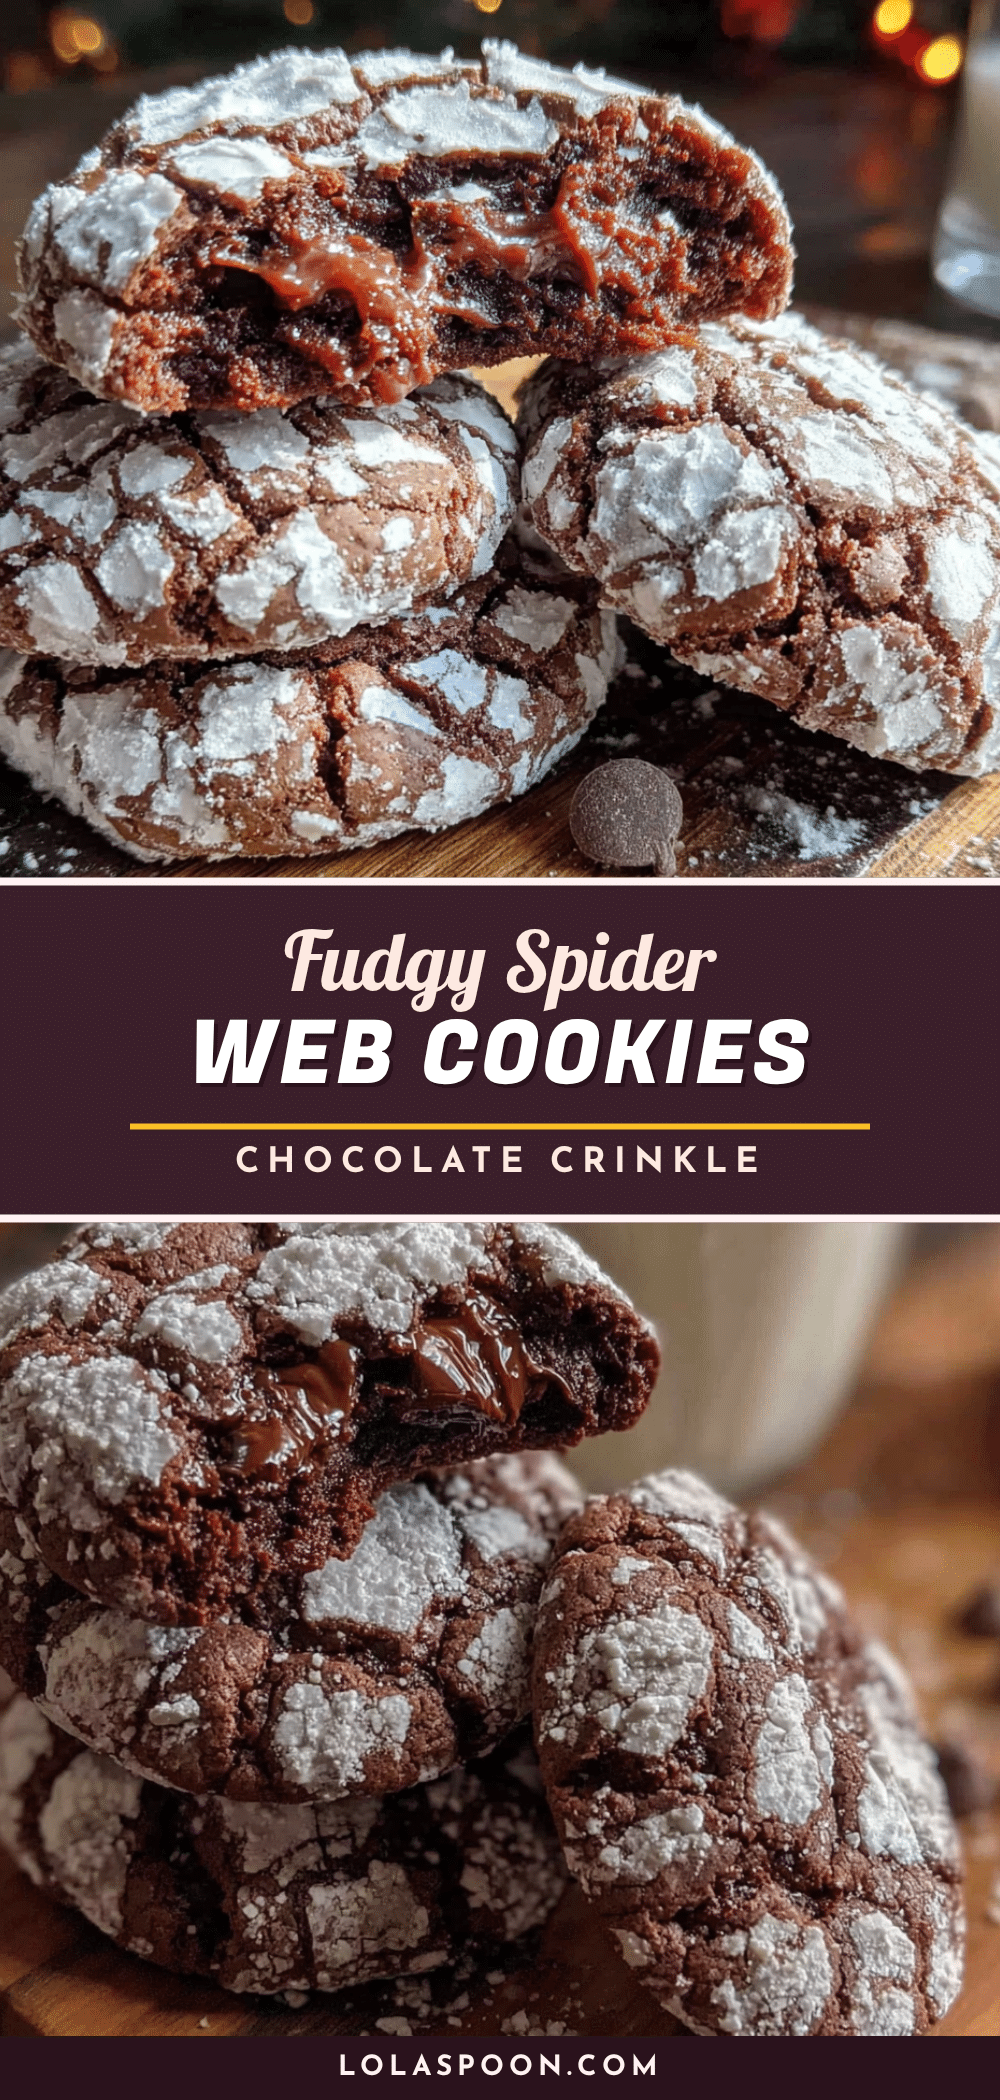
Fudgy Spider Web Chocolate Crinkle Cookies (Easy Halloween Recipe)

Deep, dark, and intensely fudgy chocolate crinkle cookies topped with a baked-on spider web icing that creates an organic, authentic web pattern. A quick and easy Halloween treat that looks way more impressive than it actually is.
- Prep Time: 15 minutes
- Cook Time: 12 minutes
- Total Time: 45 minutes
- Yield: 24 cookies 1x
- Category: Dessert
- Cuisine: American
Ingredients
- 1/2 cup (1 stick) unsalted butter, softened
- 1 cup (200g) granulated sugar
- 2 large eggs, room temperature
- 1 teaspoon vanilla extract
- 1 1/2 cups (180g) all-purpose flour
- 1/2 cup (50g) unsweetened cocoa powder
- 1 teaspoon baking powder
- 1/2 teaspoon salt
- 1 cup (175g) semi-sweet chocolate chips, melted and slightly cooled
- 1/4 cup (30g) powdered sugar, for coating
- For the spider web icing: 1/2 cup (60g) powdered sugar, 2-3 teaspoons milk, 1/4 teaspoon vanilla extract
Instructions
- Melt the chocolate chips in a microwave-safe bowl in 30-second intervals, stirring after each, until smooth. Let cool slightly.
- In a large bowl, beat the softened butter and granulated sugar together until light and fluffy, about 3-4 minutes.
- Beat in the eggs one at a time, mixing well after each. Add the vanilla extract and mix until combined.
- Mix in the slightly cooled melted chocolate on low speed until fully incorporated.
- In a separate bowl, whisk together the flour, cocoa powder, baking powder, and salt.
- Gradually add the dry ingredients to the wet mixture, mixing on low speed until just combined. Do not overmix.
- Cover the bowl with plastic wrap and refrigerate for at least 30 minutes.
- Preheat oven to 350°F (175°C). Line two baking sheets with parchment paper.
- Place the powdered sugar in a shallow bowl. Using a cookie scoop, portion out rounded tablespoons of dough. Roll each into a ball, then coat generously in powdered sugar. Place 2 inches apart on prepared baking sheets.
- Mix the spider web icing ingredients in a small bowl until smooth. Transfer to a piping bag or zip-top bag and snip a tiny corner off. Pipe a small spiral or concentric circles onto each cookie dough ball.
- Bake for 10-12 minutes. The cookies should look puffed and cracked, with edges set but centers still soft.
- Let cookies cool on the baking sheet for 5 minutes, then transfer to a wire rack to cool completely.
Notes
Don’t skip the chill time—cold dough is key to thick, fudgy cookies. Coat generously in powdered sugar for the best crinkle effect. Pipe the web right before baking. Rotate pans halfway through for even baking.
Nutrition
- Serving Size: 1 cookie
- Calories: 145
- Sugar: 13
- Sodium: 85
- Fat: 7
- Saturated Fat: 4
- Carbohydrates: 20
- Fiber: 1
- Protein: 2
Keywords: Halloween cookies, chocolate crinkle cookies, spider web cookies, fudgy chocolate cookies, easy Halloween recipe