This was supposed to be a batch of my grandmother’s famous lemon sugar cookies. I had the butter softening, the lemon zest ready to go, and I was feeling pretty good about myself. Then the power flickered. Just once, but it was enough to reset my stand mixer mid-cream, and suddenly I was staring at a grainy, butter-sugar mess that looked nothing like the light, fluffy base I needed. I was already running late for a work call, the kitchen was a disaster, and honestly, I almost just threw the whole bowl in the trash.
But I didn’t. I grabbed a different bag of flour—the one I use for cut-out cookies—and just started adding things. A splash of vanilla where the lemon should have gone. A little more flour than the recipe called for. The dough felt stiff, almost wrong, but I rolled it out anyway. It was then I noticed the jar of black gel food coloring sitting on the counter from a failed attempt at making monster cupcakes for my nephew’s birthday party. On a whim, I divided the dough, colored half of it black, and started layering them together. I had no plan. I was just trying to save a lost cause.
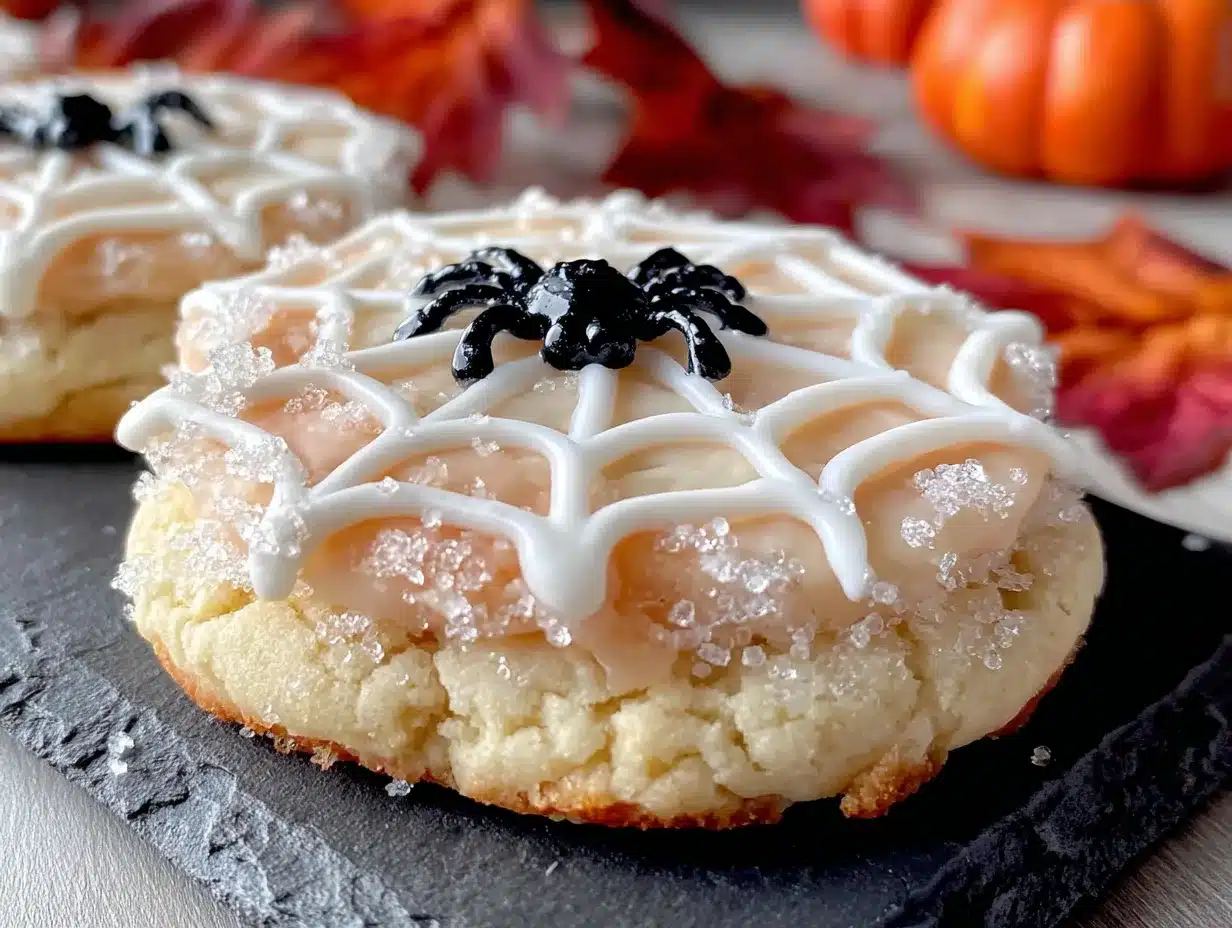
When I pulled those cookies out of the oven, I actually laughed out loud. The black and white layers had swirled together into perfect, natural spider webs. I mean, it looked like something from a fancy bakery, not from my chaotic Tuesday afternoon. The best part? They tasted incredible. Crisp on the edges, soft in the middle, with a buttery vanilla flavor that was way better than what I had originally been trying to make. I ended up bringing them to the office Halloween party, and people kept asking where I bought them. I just smiled and said, “Oh, you know, it was an accident.”
These Easy Halloween Spider Web Sugar Cookies are my favorite kind of recipe—the one that proves you don’t need to be perfect to make something amazing. Maybe you’ve been there, staring at a kitchen fail and wondering if it’s worth saving. Trust me, sometimes the best things happen when you stop trying so hard and just let the dough do its thing. These cookies are proof.
Why You’ll Love This Recipe
Let me tell you why these cookies have become my go-to for Halloween, and why they will probably become yours too. I have made more versions of sugar cookies than I care to count, and this one is different. It is not fussy, it does not require a steady hand, and it actually gets better the less you try to control it.
- Quick & Easy: From start to finish, these cookies come together in under 45 minutes. No chilling time needed, which is a game-changer for those “I need a Halloween treat right now” moments.
- Simple Ingredients: You probably have everything in your pantry already. Butter, sugar, flour, eggs, vanilla—no special Halloween-themed ingredients required besides some black food coloring.
- Perfect for Halloween Parties: These are the cookies that disappear first. Kids love the spooky web pattern, and adults love that they taste like real butter cookies, not overly sweet frosting bombs.
- Crowd-Pleaser: I have brought these to three different Halloween gatherings now, and every single time, someone asks for the recipe. They are universally loved, even by people who “don’t like” decorated cookies.
- Unbelievably Delicious: The texture is what gets me every time. The edges are slightly crisp, but the center stays soft and tender. The vanilla flavor is pure comfort, and the slight crunch from the sugar creates this perfect mouthfeel.
What makes this recipe different from all the other spider web cookies out there? It is the technique. Most recipes have you pipe royal icing onto baked cookies, which takes forever and always looks messy. My method uses a simple two-color dough that creates the web pattern naturally as it bakes. It is the kind of clever shortcut that makes you feel like a baking genius with almost zero effort. Honestly, this is the recipe I wish I had when I was a busy mom trying to make something special for my kids without spending three hours in the kitchen. It is comfort food reimagined—faster, easier, but with the same soul-soothing satisfaction.
What Ingredients You Will Need
This recipe uses simple, wholesome ingredients to deliver bold flavor and satisfying texture without the fuss. Most of these are pantry staples, which means you can whip up a batch of these spooky cookies any time the Halloween mood strikes.
For the Cookie Dough Base
- 2 ½ cups all-purpose flour (315 grams) – Spoon and level your flour for the best results. I prefer Gold Medal for its consistent protein content.
- 1 cup unsalted butter (226 grams), softened to room temperature – Kerrygold is my go-to for its rich flavor, but any good quality butter works.
- 1 cup granulated sugar (200 grams) – Regular white sugar gives these cookies their signature crisp edges.
- 1 large egg, room temperature – Cold egg can seize the butter, so let it sit out for 30 minutes first.
- 1 teaspoon vanilla extract – Pure vanilla makes a difference here. I use Nielsen-Massey Madagascar vanilla.
- ½ teaspoon salt – Fine sea salt is best for even distribution.
- ½ teaspoon baking powder – Helps the cookies spread just the right amount.
For the Spider Web Pattern
- Black gel food coloring – This is crucial. Do not use liquid food coloring, as it will make the dough too wet. I recommend Americolor Super Black or Wilton Color Right.
- ¼ cup all-purpose flour (30 grams), for dusting – You will need this for rolling out the dough and for the layering process.
Ingredient Selection Tips
When choosing your butter, look for blocks that are firm but give slightly when pressed. Overly soft butter will make the dough greasy and hard to work with. For the food coloring, I cannot stress this enough—use gel. I learned this the hard way when I tried liquid coloring and ended up with sticky, unworkable dough that spread into blobs instead of webs. Gel coloring gives you that deep, dramatic black without adding extra moisture.
If you want to make these cookies gluten-free, swap the all-purpose flour for a 1:1 gluten-free baking blend. I have had good results with Bob’s Red Mill. The texture will be slightly more tender, but the web pattern still works beautifully. For a dairy-free version, use plant-based butter sticks (not the spreadable kind in a tub). Miyoko’s European Style Cultured Vegan Butter works wonderfully here.
Equipment Needed
You do not need a lot of fancy equipment for these cookies, which is part of what makes them so great for busy weeknights. Here is what you will need:
- Stand mixer or hand mixer – Either works. I use my KitchenAid stand mixer because it frees up my hands, but a hand mixer and a large bowl get the job done just fine.
- Rolling pin – A standard rolling pin works. If you have adjustable rings, they help keep the dough even, but they are not necessary.
- Parchment paper – Non-negotiable. It prevents sticking and makes cleanup a breeze. I buy the pre-cut sheets for convenience.
- Baking sheets – Light-colored aluminum sheets give the most even browning. Dark sheets can burn the bottoms.
- Sharp knife or pizza cutter – You will be cutting the layered dough into strips, so a sharp tool is important for clean edges.
- Cooling rack – Lets air circulate so your cookies stay crisp, not soggy.
If you do not have a stand mixer, do not worry. I actually made my first batch of these using nothing but a wooden spoon and a lot of elbow grease. It took a little longer, but the cookies came out just as good. A bench scraper is also helpful for cleaning up flour messes, but again, not essential. The beauty of this recipe is that it is forgiving—even if your equipment is not perfect, these cookies will still turn out amazing.
Preparation Method
Follow these steps carefully, and you will have a batch of stunning spider web cookies in under an hour. I have included all my little tricks and warnings so you can avoid the mistakes I made.
- Cream the butter and sugar. In a large mixing bowl, beat the softened butter and granulated sugar together on medium speed for 3-4 minutes, until light and fluffy. Scrape down the sides of the bowl halfway through. You want the mixture to look pale and almost doubled in volume. If it looks greasy or separated, your butter was too soft—pop the bowl in the fridge for 5 minutes and try again.
- Add the egg and vanilla. Crack the egg into a small bowl first (just in case you get shell pieces), then add it to the butter mixture along with the vanilla extract. Beat on low speed until just combined. Do not overmix here, or your cookies will be tough. The mixture might look a little curdled at this point—that is totally normal, do not panic.
- Mix the dry ingredients. In a separate bowl, whisk together the flour, salt, and baking powder. Add this to the wet mixture in two additions, mixing on low speed after each. Stop as soon as the flour disappears. The dough should be soft but not sticky. If it feels too wet, add a tablespoon more flour.
- Divide and color the dough. Split the dough into two equal halves. Leave one half plain (this will be your white web). To the other half, add about 1 teaspoon of black gel food coloring. Knead the color in with your hands—wear gloves if you do not want stained fingers. Add more coloring a little at a time until you get a deep, dark black. This usually takes 1-2 teaspoons total.
- Layer the dough. On a lightly floured surface, roll out the white dough into a rectangle about ¼-inch thick. It does not have to be perfect—rough edges are fine. Roll the black dough into a rectangle of the same size. Carefully lift the black dough and place it directly on top of the white dough. Press gently to make them stick together.
- Cut into strips. Using a sharp knife or pizza cutter, cut the layered dough into strips about ½-inch wide. You will have about 12-14 strips depending on the size of your rectangle. This is the messy part, but do not worry about perfection. Imperfect strips make more interesting webs.
- Twist and roll. Take two strips and lay them side by side. Gently twist them together like you are making a two-color rope. Then, roll the twisted rope into a spiral, starting from one end and working your way around. Pinch the end to seal it. Repeat with the remaining strips. You should get about 6-8 cookie spirals.
- Flatten and bake. Place each spiral on a parchment-lined baking sheet, leaving 2 inches between them. Gently press down on each spiral with the palm of your hand to flatten it into a cookie shape. Bake at 350°F (175°C) for 10-12 minutes, until the edges are just barely golden. The centers will look slightly underdone—that is good. Let them cool on the baking sheet for 5 minutes, then transfer to a cooling rack.
Here is the moment of truth: as the cookies bake, the black and white dough will spread and swirl together, creating those beautiful spider web patterns. If your cookies look a little messy when they go in, trust the process. The oven does the magic. I have made these at least ten times now, and every single batch looks different—some have tight, intricate webs, others have loose, organic patterns. They are all beautiful in their own way.
Cooking Tips & Techniques
I have learned a few things the hard way so you do not have to. Here are my best tips for getting perfect spider web cookies every time.
Do not skip the flour dusting. When you are rolling out the layered dough and cutting it into strips, keep your work surface and your hands lightly floured. The dough will be soft and sticky, and if you do not use enough flour, the strips will stick together and lose their definition. I keep a small bowl of flour nearby and dust as I go.
Work quickly but calmly. The longer you handle the dough, the warmer it gets, and the harder it is to work with. If at any point the dough feels too soft to cut, pop it in the fridge for 10 minutes. I cannot tell you how many times I have rushed through this step and ended up with a sticky mess. Patience is your friend here.
Watch the baking time closely. These cookies go from perfectly baked to overdone very quickly. I start checking at the 9-minute mark. The edges should be just barely golden, and the centers should still look slightly soft. They will continue to set as they cool on the baking sheet. Overbaked cookies will be dry and lose that beautiful soft center.
Let them cool completely. I know it is tempting to eat one right out of the oven, but these cookies need time to set. The web pattern becomes more defined as they cool, and the texture firms up to that perfect crisp-on-the-outside, soft-on-the-inside consistency. Give them at least 15 minutes on the cooling rack before serving.
One mistake I made early on was trying to make the webs too perfect. I spent forever carefully arranging the strips into precise spirals, only to have them spread into unrecognizable blobs in the oven. The truth is, the less you fuss with them, the better they turn out. A little imperfection is what makes these cookies look so authentically spooky.
Variations & Adaptations
Over the years, I have experimented with different versions of these cookies, and here are some of my favorites. Feel free to get creative and make them your own.
Chocolate Spider Webs: Replace ¼ cup of the all-purpose flour with unsweetened cocoa powder. This gives you a chocolate base with black webs, or you can do a white dough with chocolate webs. The chocolate version is richer and pairs beautifully with a glass of cold milk.
Orange Vanilla Twist: Add 1 tablespoon of orange zest to the dough along with the vanilla. The citrus flavor cuts through the sweetness and gives these cookies a bright, festive taste. I made these for a Halloween brunch once, and they were a huge hit.
Gluten-Free Version: As I mentioned earlier, a 1:1 gluten-free flour blend works perfectly here. I have also tried using almond flour, but the cookies were too delicate and crumbly. Stick with the blend for the best texture.
Spicy Pumpkin Webs: Add ½ teaspoon of pumpkin pie spice and ¼ cup of pumpkin puree to the dough. Reduce the butter by 2 tablespoons to compensate for the extra moisture. These have a lovely autumn flavor and are perfect for Thanksgiving leftovers.
Mini Cookie Bites: Instead of making full-sized cookies, roll the twisted strips into smaller spirals about 1 inch wide. Bake for 8-9 minutes instead of 10-12. These are perfect for Halloween party platters or lunchbox surprises.
My personal favorite variation is the chocolate version. I made it for a Halloween movie night with friends, and one person actually asked if I had bought them from a bakery. That is the kind of compliment that makes all the kitchen mess worth it.
Serving & Storage Suggestions
These cookies are best served at room temperature, straight from the cooling rack. The contrast between the crisp edges and soft centers is most pronounced when they have had time to fully set. If you are serving them at a party, arrange them on a black platter or a dark-colored cake stand to make the white webs pop.
For a fun presentation, I like to dust the cookies with a light sprinkle of powdered sugar right before serving. It looks like a dusting of snow or spider silk, depending on your mood. You can also drizzle a little white chocolate over the top for extra sweetness.
These cookies pair beautifully with hot apple cider, pumpkin spice lattes, or a simple glass of cold milk. If you are feeling fancy, serve them alongside a warm caramel dipping sauce. The combination of buttery cookie and rich caramel is absolutely divine.
Storage Instructions: Store the cookies in an airtight container at room temperature for up to 5 days. I like to layer them between sheets of parchment paper to prevent sticking. Do not refrigerate them, as the cold will make them dry out faster.
Freezer Instructions: These cookies freeze beautifully. Place them in a single layer on a baking sheet and freeze for 1 hour, then transfer to a freezer-safe bag or container. They will keep for up to 3 months. To thaw, leave them at room temperature for about 30 minutes. The texture stays remarkably close to fresh-baked.
One thing I have noticed is that these cookies actually taste better the day after baking. The flavors meld together, and the texture becomes even more perfectly balanced. So if you can resist eating them all on day one, you are in for a treat on day two.
Nutritional Information & Benefits
I am not going to pretend these are health food, but I do believe in enjoying treats in moderation. Here is the approximate nutritional breakdown for one cookie (based on a batch of 12):
- Calories: 285
- Total Fat: 16g
- Saturated Fat: 10g
- Cholesterol: 55mg
- Sodium: 145mg
- Total Carbohydrates: 33g
- Sugars: 17g
- Protein: 3g
On the plus side, these cookies do contain butter, which is a good source of fat-soluble vitamins like A, D, and E. The eggs provide high-quality protein and choline, which is important for brain health. And honestly, there is something to be said for the mental health benefits of taking time to bake something beautiful. I have had some of my best thinking moments while rolling out dough and twisting strips.
If you are watching your sugar intake, you can reduce the sugar to ¾ cup without significantly affecting the texture. I have tried it, and the cookies are still sweet enough to satisfy a craving. For a lower-fat version, you can substitute half the butter with unsweetened applesauce, but the cookies will be more cake-like and less crisp.
These cookies contain gluten, dairy, and eggs, so they are not suitable for those with allergies to those ingredients. However, the gluten-free and dairy-free variations I mentioned earlier work wonderfully for those with dietary restrictions.
Conclusion
These Easy Halloween Spider Web Sugar Cookies are proof that the best recipes often come from the most unexpected places. What started as a kitchen disaster turned into my most requested Halloween treat, and I love that they are so forgiving and fun to make. You do not need to be a pastry chef or have a steady hand—just a little patience and a willingness to embrace imperfection.
I hope you give these cookies a try and make them your own. Maybe you will add a sprinkle of cinnamon, or swap the vanilla for almond extract, or create a rainbow of colored webs for a different holiday. That is the beauty of baking—it is a canvas for your creativity. And if your first batch does not turn out exactly like the pictures? That is okay. Some of the best-looking webs I have ever made were the ones that looked like a total mess going into the oven.
If you do make these, I would love to hear about it. Drop a comment below and tell me how your spider webs turned out, or share a photo of your creations. And if you have your own variation that you love, please share it! That is how recipes evolve and become something even better. Happy Halloween, and happy baking!
Frequently Asked Questions
Can I make the dough ahead of time?
Yes! You can prepare the dough up to the point of coloring and layering, then wrap it tightly in plastic wrap and refrigerate for up to 3 days. When you are ready to bake, let it sit at room temperature for 15 minutes to soften slightly before cutting and twisting.
Why did my spider webs disappear during baking?
This usually happens if the dough was too warm when it went into the oven, or if the strips were twisted too loosely. Make sure your dough is chilled and your twists are tight. Also, check that your oven is at the correct temperature—an oven that is too hot will cause the cookies to spread too quickly.
Can I use liquid food coloring instead of gel?
I strongly recommend against it. Liquid food coloring adds too much moisture to the dough, which makes it sticky and hard to work with. It also produces a less intense color. Gel food coloring gives you that deep, dramatic black without altering the dough’s consistency.
How do I get the cookies to stay crisp?
The key is proper storage. Keep them in an airtight container at room temperature, and do not stack them too high. If they do soften, you can crisp them up by placing them on a baking sheet in a 300°F (150°C) oven for 3-4 minutes.
Can I freeze the unbaked cookie spirals?
Absolutely! Arrange the unbaked spirals on a parchment-lined baking sheet and freeze until solid, then transfer to a freezer bag. When you are ready to bake, place them frozen on a baking sheet and add 2-3 minutes to the baking time. No need to thaw first.
Pin This Recipe!
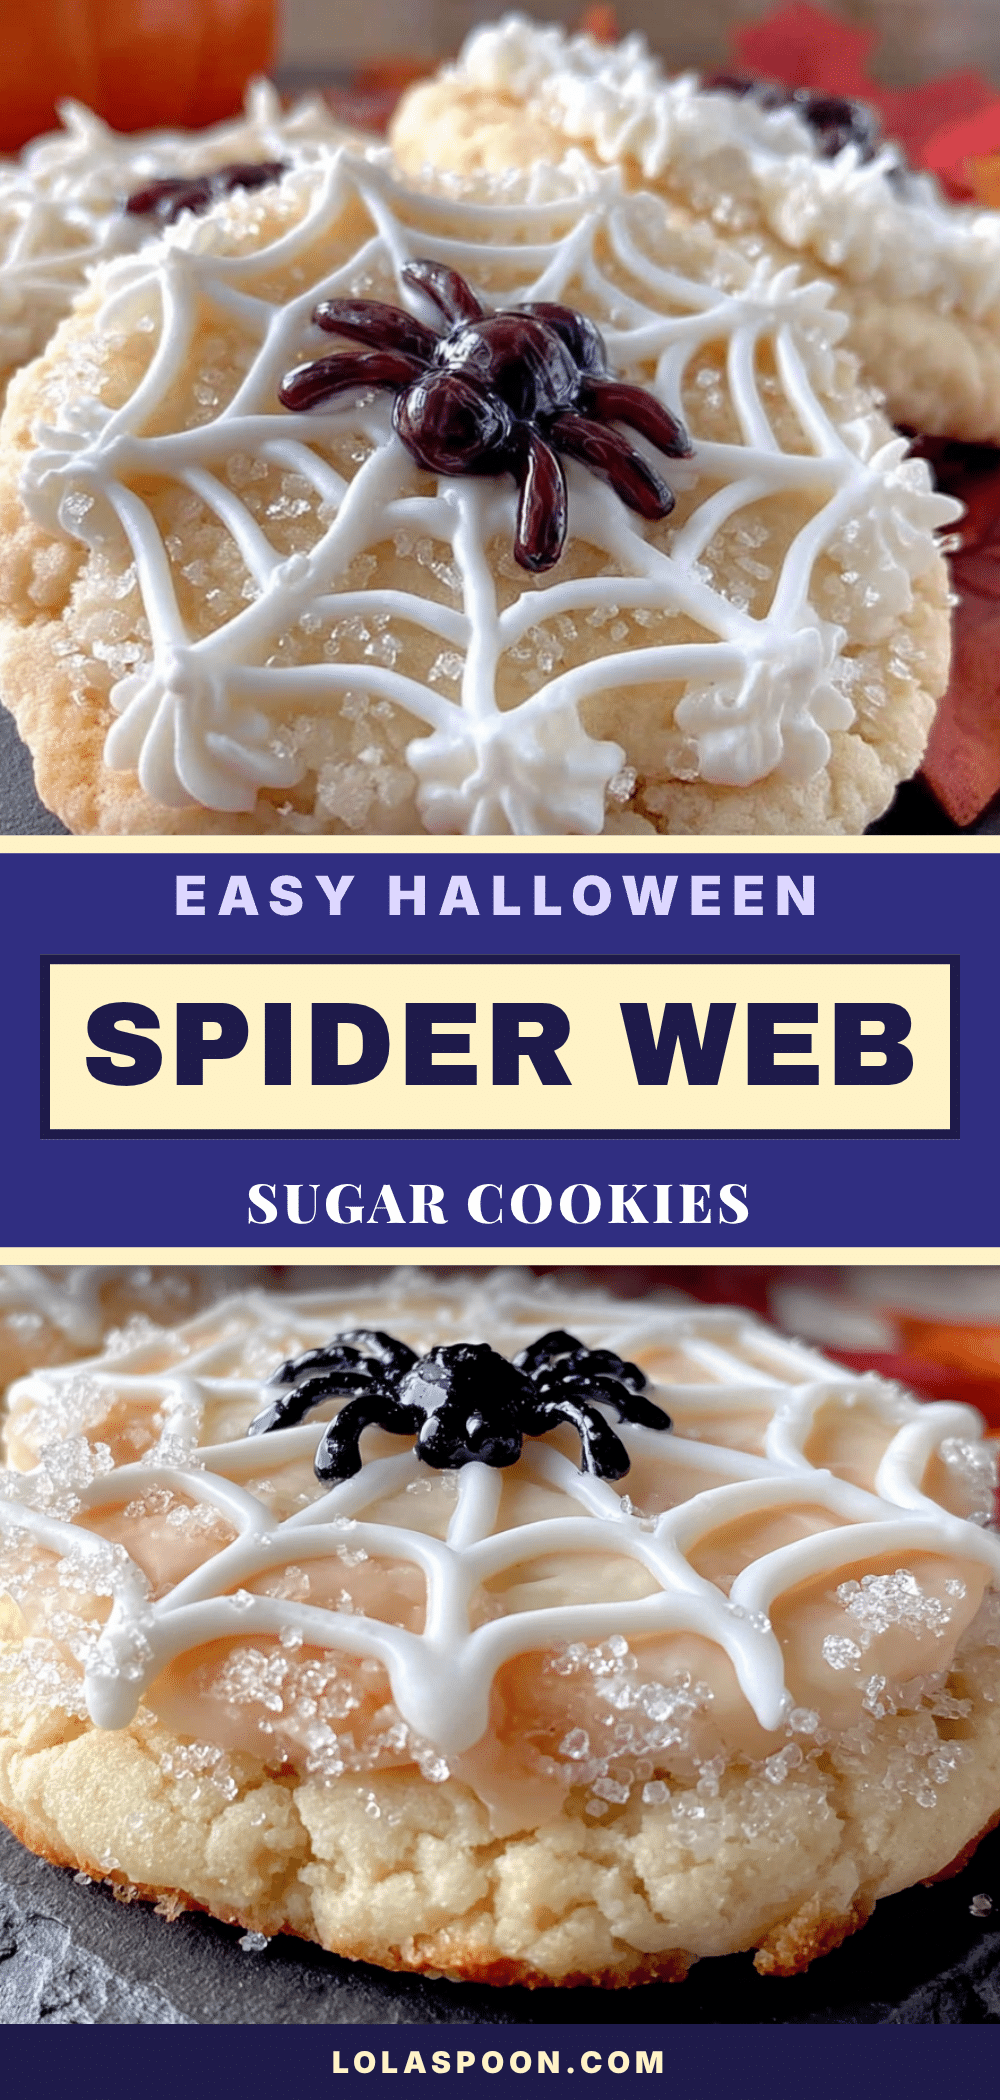
Easy Halloween Spider Web Sugar Cookies
These Easy Halloween Spider Web Sugar Cookies are the perfect spooky treat that comes together in under 45 minutes with no chilling time. A simple two-color dough creates natural spider web patterns as they bake, resulting in crisp-edged, soft-centered cookies that are a crowd-pleaser at any Halloween party.
- Prep Time: 30 minutes
- Cook Time: 12 minutes
- Total Time: 42 minutes
- Yield: 12 servings 1x
- Category: Dessert
- Cuisine: American
Ingredients
- 2 ½ cups all-purpose flour (315 grams)
- 1 cup unsalted butter (226 grams), softened to room temperature
- 1 cup granulated sugar (200 grams)
- 1 large egg, room temperature
- 1 teaspoon vanilla extract
- ½ teaspoon salt
- ½ teaspoon baking powder
- Black gel food coloring (about 1-2 teaspoons)
- ¼ cup all-purpose flour (30 grams), for dusting
Instructions
- Cream the butter and sugar. In a large mixing bowl, beat the softened butter and granulated sugar together on medium speed for 3-4 minutes, until light and fluffy. Scrape down the sides of the bowl halfway through. You want the mixture to look pale and almost doubled in volume. If it looks greasy or separated, your butter was too soft—pop the bowl in the fridge for 5 minutes and try again.
- Add the egg and vanilla. Crack the egg into a small bowl first (just in case you get shell pieces), then add it to the butter mixture along with the vanilla extract. Beat on low speed until just combined. Do not overmix here, or your cookies will be tough. The mixture might look a little curdled at this point—that is totally normal, do not panic.
- Mix the dry ingredients. In a separate bowl, whisk together the flour, salt, and baking powder. Add this to the wet mixture in two additions, mixing on low speed after each. Stop as soon as the flour disappears. The dough should be soft but not sticky. If it feels too wet, add a tablespoon more flour.
- Divide and color the dough. Split the dough into two equal halves. Leave one half plain (this will be your white web). To the other half, add about 1 teaspoon of black gel food coloring. Knead the color in with your hands—wear gloves if you do not want stained fingers. Add more coloring a little at a time until you get a deep, dark black. This usually takes 1-2 teaspoons total.
- Layer the dough. On a lightly floured surface, roll out the white dough into a rectangle about ¼-inch thick. It does not have to be perfect—rough edges are fine. Roll the black dough into a rectangle of the same size. Carefully lift the black dough and place it directly on top of the white dough. Press gently to make them stick together.
- Cut into strips. Using a sharp knife or pizza cutter, cut the layered dough into strips about ½-inch wide. You will have about 12-14 strips depending on the size of your rectangle. This is the messy part, but do not worry about perfection. Imperfect strips make more interesting webs.
- Twist and roll. Take two strips and lay them side by side. Gently twist them together like you are making a two-color rope. Then, roll the twisted rope into a spiral, starting from one end and working your way around. Pinch the end to seal it. Repeat with the remaining strips. You should get about 6-8 cookie spirals.
- Flatten and bake. Place each spiral on a parchment-lined baking sheet, leaving 2 inches between them. Gently press down on each spiral with the palm of your hand to flatten it into a cookie shape. Bake at 350°F (175°C) for 10-12 minutes, until the edges are just barely golden. The centers will look slightly underdone—that is good. Let them cool on the baking sheet for 5 minutes, then transfer to a cooling rack.
Notes
Do not skip the flour dusting when rolling and cutting the dough. Work quickly but calmly to keep the dough from getting too warm. Watch the baking time closely; start checking at 9 minutes. Let the cookies cool completely on the cooling rack before serving. The web pattern becomes more defined as they cool. For best results, use gel food coloring, not liquid. The cookies taste even better the day after baking.
Nutrition
- Serving Size: 1 cookie
- Calories: 285
- Sugar: 17
- Sodium: 145
- Fat: 16
- Saturated Fat: 10
- Carbohydrates: 33
- Protein: 3
Keywords: Halloween cookies, spider web cookies, sugar cookies, easy Halloween treats, no-chill cookies, two-color dough cookies