There used to be a little diner on Route 9 called The Skillet that made the most perfect deviled eggs. They weren’t fancy—just creamy, tangy, and topped with a tiny sprinkle of paprika that looked like confetti. When they closed in 2019 (the landlord sold the building, if you can believe it), I honestly went through a weird mourning period. I mean, who gets sad over a diner’s deviled eggs? Me, apparently. After maybe seven tries—some too runny, one that tasted like straight mustard—I finally cracked the code. This version is my tribute to those lost eggs, but with a spooky Halloween twist that my kids beg for every October.
I remember the Tuesday I finally got it right. My three-year-old was “helping” by dumping sprinkles on the counter, and I almost gave up. But that first bite? The filling was silky, the egg whites were firm, and I knew I had something special. Maybe you’ve been there—chasing a flavor from your past, determined to bring it back. These Easy Halloween Deviled Eggs are that victory. They’re the snack that makes your kitchen feel like a cozy diner and a haunted house all at once. Let me tell you, once you see those little “monster” faces staring up from the platter, you’ll never go back to plain deviled eggs again.
Why You’ll Love This Recipe
These aren’t just any deviled eggs—they’re a Halloween party miracle. I’ve tested this recipe with my own picky eaters and a classroom full of sugar-crazed kids, and every single one disappeared. Here’s why they work:
- Quick & Easy: Comes together in under 30 minutes, perfect for last-minute classroom treats or after-school spooky fun.
- Simple Ingredients: No fancy grocery trips needed; you likely already have eggs, mayo, and mustard in your kitchen.
- Perfect for Halloween Parties: Great for potlucks, school events, or a silly snack before trick-or-treating.
- Crowd-Pleaser: Always gets rave reviews from kids and adults alike—even the ones who “don’t like eggs.”
- Unbelievably Delicious: The creamy, tangy filling paired with a crunchy “monster” topping is next-level comfort food.
What makes this recipe different from the rest? It’s the little tricks I picked up from my diner obsession days—like using a potato ricer for the filling (trust me, it makes it impossibly smooth) and adding a splash of pickle juice for that nostalgic tang. Plus, the spooky decorations are so easy that even a toddler can help. Honestly, this recipe isn’t just good—it’s the kind that makes you close your eyes after the first bite. It’s comfort food reimagined: spooky, silly, and with the same soul-soothing satisfaction as those diner eggs I still dream about.
What Ingredients You Will Need
This recipe uses simple, pantry-friendly ingredients to deliver that creamy, tangy deviled egg filling we all love—plus a few fun extras for the spooky decorations. You probably have most of these already.
For the Deviled Eggs:
- 12 large eggs (room temperature works best for peeling)
- 1/3 cup mayonnaise (I prefer Hellmann’s for its creamy texture)
- 1 tablespoon yellow mustard (adds that classic tang)
- 1 teaspoon white vinegar or pickle juice (trust me on the pickle juice)
- 1/4 teaspoon salt
- 1/8 teaspoon black pepper
- Paprika for garnish (smoked or sweet, your call)
For the Spooky Decorations:
- Black olives (sliced, for “spider” bodies or “monster” eyes)
- Red bell pepper (cut into tiny triangles for “devil horns” or “tongues”)
- Chives or green onion slices (for “whiskers” or “spider legs”)
- Optional: Sriracha or hot sauce (for a bloody “monster” look)
Ingredient Tips from My Kitchen: Look for eggs that are at least a week old—fresh eggs are a nightmare to peel, I’ve learned the hard way. For the mayonnaise, don’t use the low-fat kind; it makes the filling watery. If you’re out of yellow mustard, Dijon works but gives a slightly sharper flavor. And that pickle juice? It’s my secret weapon for that diner-style tang. I use the juice from bread-and-butter pickles, but dill works too.
Equipment Needed
You don’t need fancy tools for these Easy Halloween Deviled Eggs, but a few key items make the process smoother. Here’s what I use:
- Large pot for boiling the eggs (a 4-quart pot works perfectly)
- Slotted spoon for gently lowering eggs into the water
- Bowl of ice water for shocking the eggs after boiling
- Sharp knife for cleanly slicing the eggs in half
- Small spoon for scooping out the yolks
- Potato ricer or fork for mashing the yolks (the ricer gives the smoothest texture, I swear by it)
- Piping bag or zip-top bag for filling the eggs neatly
- Serving platter with a little grip (so the eggs don’t slide around)
If you don’t have a potato ricer, don’t stress—a fork works fine, just mash thoroughly. For the piping bag, a zip-top bag with the corner snipped off is my go-to budget hack. I’ve been using the same one for years, and it’s never let me down.
Preparation Method
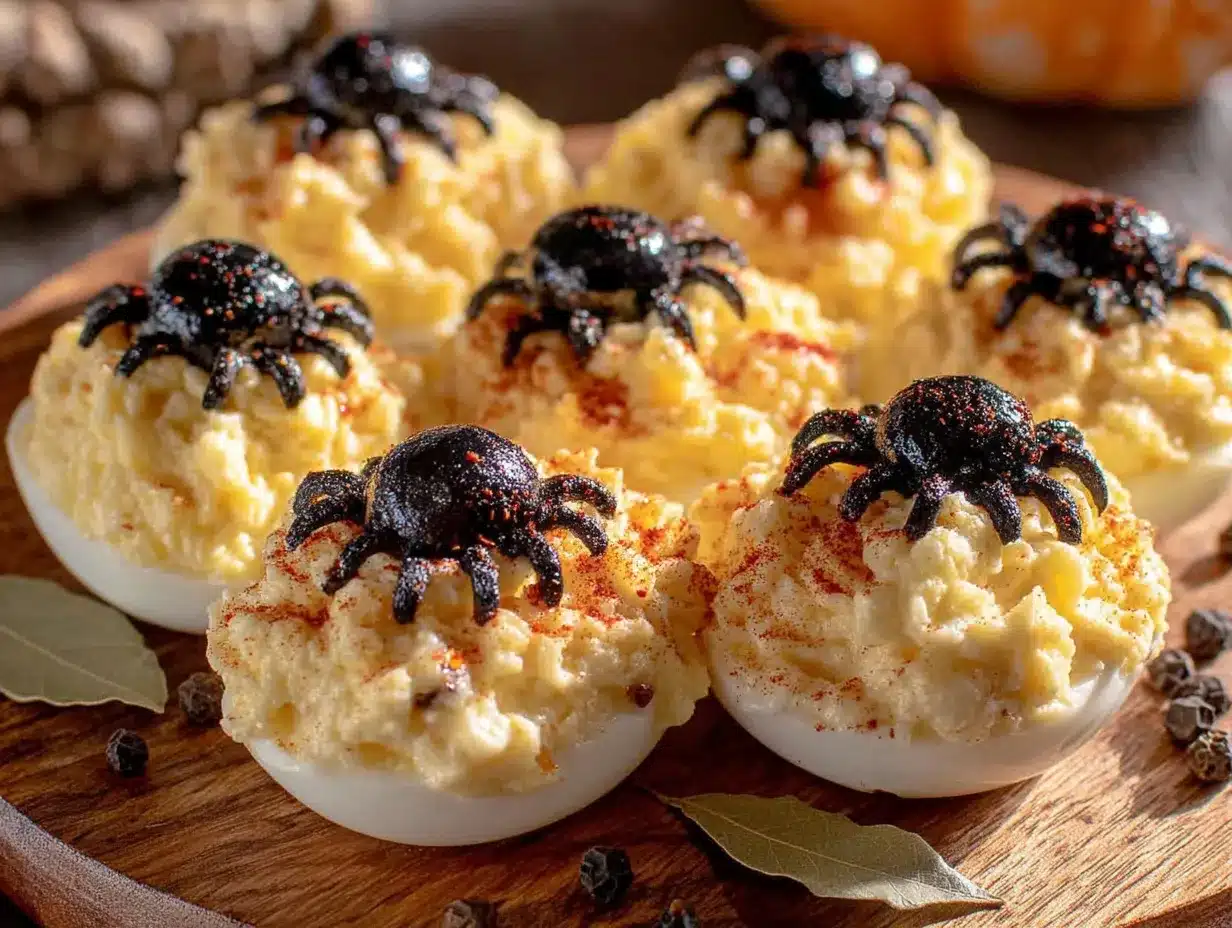
Let’s make some spooky magic. Take your time with the eggs—rushing leads to cracked shells and sad filling.
- Boil the eggs: Place your 12 eggs in a single layer in a large pot. Cover them with cold water by about an inch. Bring to a rolling boil over high heat—this takes about 8-10 minutes. Once boiling, cover the pot, remove from heat, and let sit for exactly 12 minutes. I set a timer because I’ve definitely forgotten and ended up with green-ringed yolks. Not cute.
- Shock the eggs: While the eggs are sitting, fill a large bowl with ice and water. After the 12 minutes are up, use your slotted spoon to transfer the eggs to the ice bath. Let them chill for at least 10 minutes. This stops the cooking and makes peeling a breeze. Pro tip: Gently crack the eggs against the counter before putting them in the ice bath—the water seeps under the shell and helps it slide right off.
- Peel and slice: Once the eggs are cool, tap them gently on the counter to crack the shell all over. Roll them between your palms to loosen the shell, then peel under running cold water. Pat dry with a paper towel. Using a sharp knife, slice each egg in half lengthwise. Carefully pop out the yolks into a medium bowl. Arrange the egg white halves on your serving platter, cut-side up.
- Make the filling: Mash the yolks with a fork or push them through a potato ricer (my preferred method—it makes the filling impossibly smooth). Add the mayonnaise, mustard, vinegar or pickle juice, salt, and pepper. Stir until completely smooth and creamy. Taste it—does it need more salt? A little more mustard? This is your moment to adjust. I usually end up adding an extra splash of pickle juice because I love that tang.
- Fill the eggs: Spoon the filling into a piping bag or a zip-top bag. Snip off a small corner (about 1/2 inch wide). Pipe the filling into each egg white half, mounding it slightly. Don’t overfill—you want a nice dome, not a volcano. If you don’t have a bag, use a small spoon and a gentle hand.
- Decorate for Halloween: Now the fun part. For “spider” eggs, place a sliced black olive on top of the filling and add chive “legs” on either side. For “monster” eggs, use red bell pepper triangles for horns and olive slices for eyes. For “bloodshot” eggs, drizzle a tiny bit of Sriracha over the top. Let the kids help with this part—it’s messy and wonderful. I once let my nephew go wild, and we ended up with a “franken-egg” that had three eyes and no mouth. He was so proud.
- Chill and serve: Once decorated, cover the platter loosely with plastic wrap and refrigerate for at least 30 minutes before serving. This lets the flavors meld and the filling firm up slightly. They’re best served cold or at room temperature.
Cooking Tips & Techniques
After making these Easy Halloween Deviled Eggs about a hundred times (okay, maybe fifty), I’ve learned a few things the hard way. Here’s what I wish someone had told me:
The perfect hard-boiled egg is all about timing. Overcook them, and you get that green ring around the yolk—it’s harmless but looks sad. Undercook them, and the yolk is too soft to mash. My 12-minute rest method has never failed me. If you’re at high altitude, add an extra minute or two.
Peeling is the worst part, but it doesn’t have to be. The ice bath trick is non-negotiable. Also, start peeling from the wider end of the egg—there’s an air pocket there that makes it easier to get under the shell. If you’re still struggling, try peeling under running water. The water helps separate the shell from the egg white.
Don’t overmix the filling. I know it’s tempting to keep stirring, but overmixing can make the mayonnaise separate and the filling turn greasy. Mix just until smooth, then stop. If your filling seems too thick, add a tiny splash of milk or extra pickle juice. Too thin? Add another mashed yolk if you have one.
Make ahead for stress-free parties. You can boil and peel the eggs up to two days in advance. Store them in the fridge in a covered container with a damp paper towel to keep them from drying out. Make the filling a day ahead, but pipe it into the eggs no more than a few hours before serving. The decorations can be prepped ahead too—slice your olives and bell peppers and store them in the fridge.
One mistake I’ll never make again: I once tried to pipe the filling while the eggs were still warm. The filling slid right off the egg whites and made a huge mess. Let everything cool completely before assembling. Patience, my friend.
Variations & Adaptations
These Easy Halloween Deviled Eggs are super flexible. Here are some ways to switch them up:
Dietary Adaptations: For a dairy-free version, use vegan mayonnaise (I like Follow Your Heart’s Vegenaise). The rest of the recipe is naturally gluten-free, so celiac friends can enjoy them without worry. For a lower-fat option, swap half the mayo with plain Greek yogurt—it adds a nice tang too.
Spooky Variations: Try “mummy” eggs by drizzling thin strips of cream cheese over the filling for a bandaged look. Use sliced cherry tomatoes for “pumpkin” faces. For “bat” eggs, cut black olive slices into tiny wings and attach them to the filling. My kids once made “zombie” eggs by adding a drop of green food coloring to the filling—they looked hilariously gross.
Flavor Twists: Add 1/2 teaspoon of curry powder to the filling for a warm, savory kick. Or mix in 2 tablespoons of finely chopped dill pickles for extra crunch and tang. For a smoky version, use smoked paprika and add a pinch of chipotle powder. I tried a wasabi version once—way too spicy for the kids, but the adults loved it.
Different Cooking Methods: If you have an Instant Pot, you can steam the eggs on a trivet with 1 cup of water at high pressure for 5 minutes, then quick release and ice bath. The shells practically fall off. I’ve also baked eggs in a muffin tin at 325°F for 25 minutes—they come out perfectly hard-boiled and are even easier to peel.
Serving & Storage Suggestions
These Easy Halloween Deviled Eggs are best served cold or at room temperature, straight from the fridge. Arrange them on a platter with a little space between each egg so the decorations don’t get smushed. I like to line my platter with lettuce leaves or black paper for a spooky backdrop.
What to serve with them: These eggs are the star of any Halloween spread, but they pair beautifully with other finger foods. Try them alongside spooky sausage rolls mummies for a savory combo, or serve with a bowl of roasted pumpkin soup for a cozy meal. For drinks, apple cider or a simple punch works great for kids, while adults might enjoy a crisp white wine or a dark beer.
Storage: Leftover deviled eggs (if there are any!) can be stored in an airtight container in the refrigerator for up to 2 days. The filling may weep a little, so pat them dry with a paper towel before serving again. Do not freeze deviled eggs—the texture will be ruined. The egg whites get watery and the filling separates.
Reheating: Don’t. Seriously, deviled eggs are meant to be served cold. If you’ve stored them, just let them sit at room temperature for 10 minutes before serving to take the chill off.
How flavors develop: These eggs actually taste better after a few hours in the fridge. The flavors meld together, and the filling gets even creamier. That’s why making them a few hours ahead is perfect for parties. Just add the decorations right before serving so they stay fresh and crisp.
Nutritional Information & Benefits
Here’s the approximate nutritional breakdown for one deviled egg half (based on 24 servings from 12 eggs):
- Calories: 65
- Protein: 5g
- Fat: 5g
- Carbohydrates: 1g
- Fiber: 0g
- Sugar: 0g
- Sodium: 95mg
Health Benefits: Eggs are a fantastic source of high-quality protein and contain all nine essential amino acids. They’re rich in choline, which supports brain health—great for growing kids. The yolks provide vitamin D, B12, and selenium. Using mayonnaise in moderation adds healthy fats that help your body absorb fat-soluble vitamins. The olives and bell peppers in the decorations add a tiny boost of antioxidants and vitamin C.
Dietary Considerations: This recipe is naturally gluten-free, low-carb, and keto-friendly. For a paleo version, use avocado oil mayonnaise. The main allergen is eggs, so this isn’t suitable for those with egg allergies. If you’re watching sodium, use low-sodium mayonnaise and skip the added salt—the pickle juice adds enough tang on its own.
My Personal Take: I love that these deviled eggs are a treat that doesn’t feel heavy. They’re satisfying without being indulgent, and the protein keeps kids full longer than candy ever will. Plus, the healthy fats from the yolks and mayo make them a smart snack for growing bodies. I feel good serving these at a Halloween party—they’re fun but also genuinely nourishing.
Conclusion
These Easy Halloween Deviled Eggs are more than just a spooky snack—they’re a little piece of my diner-loving heart, reimagined for the Halloween season. The creamy, tangy filling, the silly monster faces, and the joy on my kids’ faces when they see the platter make every batch worth it. I hope you’ll make them your own, whether that means adding extra pickle juice like I do or inventing a new monster design with whatever you have in the fridge.
Honestly, the best part of this recipe is watching people’s faces light up when they see those little olive spiders or bell pepper horns. It’s silly and fun and reminds us that cooking doesn’t have to be serious. So go ahead—boil those eggs, let the kids get messy with the decorations, and enjoy every bite. When you make them, come back and tell me how they turned out. Did your kids invent a new monster? Did you discover a secret ingredient? I want to hear it all. Drop a comment below or tag me in your photos—I’ll be the one cheering from my kitchen.
Frequently Asked Questions
Can I make these deviled eggs a day ahead?
Absolutely! You can boil and peel the eggs up to two days in advance. Make the filling a day ahead and store it in the fridge. Pipe the filling into the eggs no more than a few hours before serving, and add the decorations right before you set them out. This keeps everything fresh and the toppings crisp.
Why are my deviled eggs watery?
Watery filling usually means the eggs were slightly undercooked, or the mayonnaise is too thin. Make sure your eggs are fully hard-boiled (the 12-minute rest method works perfectly). If your filling is already watery, try adding an extra mashed yolk to thicken it, or drain off any excess liquid before piping.
How do I get the egg shells off easily?
The ice bath is your best friend—it shocks the eggs and shrinks the whites away from the shell. Also, use eggs that are at least a week old. Fresh eggs are a nightmare to peel. Start peeling from the wider end where the air pocket is, and try peeling under running water. It makes a huge difference.
Can I use a different type of mustard?
Yes! Yellow mustard gives the classic tang, but Dijon adds a sharper, more sophisticated flavor. Spicy brown mustard works too, and honey mustard will make the filling slightly sweeter. Just adjust the amount to your taste—start with 1 tablespoon and add more if needed.
What if I don’t have a piping bag?
No problem at all. Use a zip-top bag with a small corner snipped off—it works just as well. Or simply use a small spoon to fill the eggs. A piping bag gives a neater look, but spoon-filling is perfectly fine and has a charming homemade feel. I’ve done both, and honestly, the spoon method is faster for big batches.
Pin This Recipe!
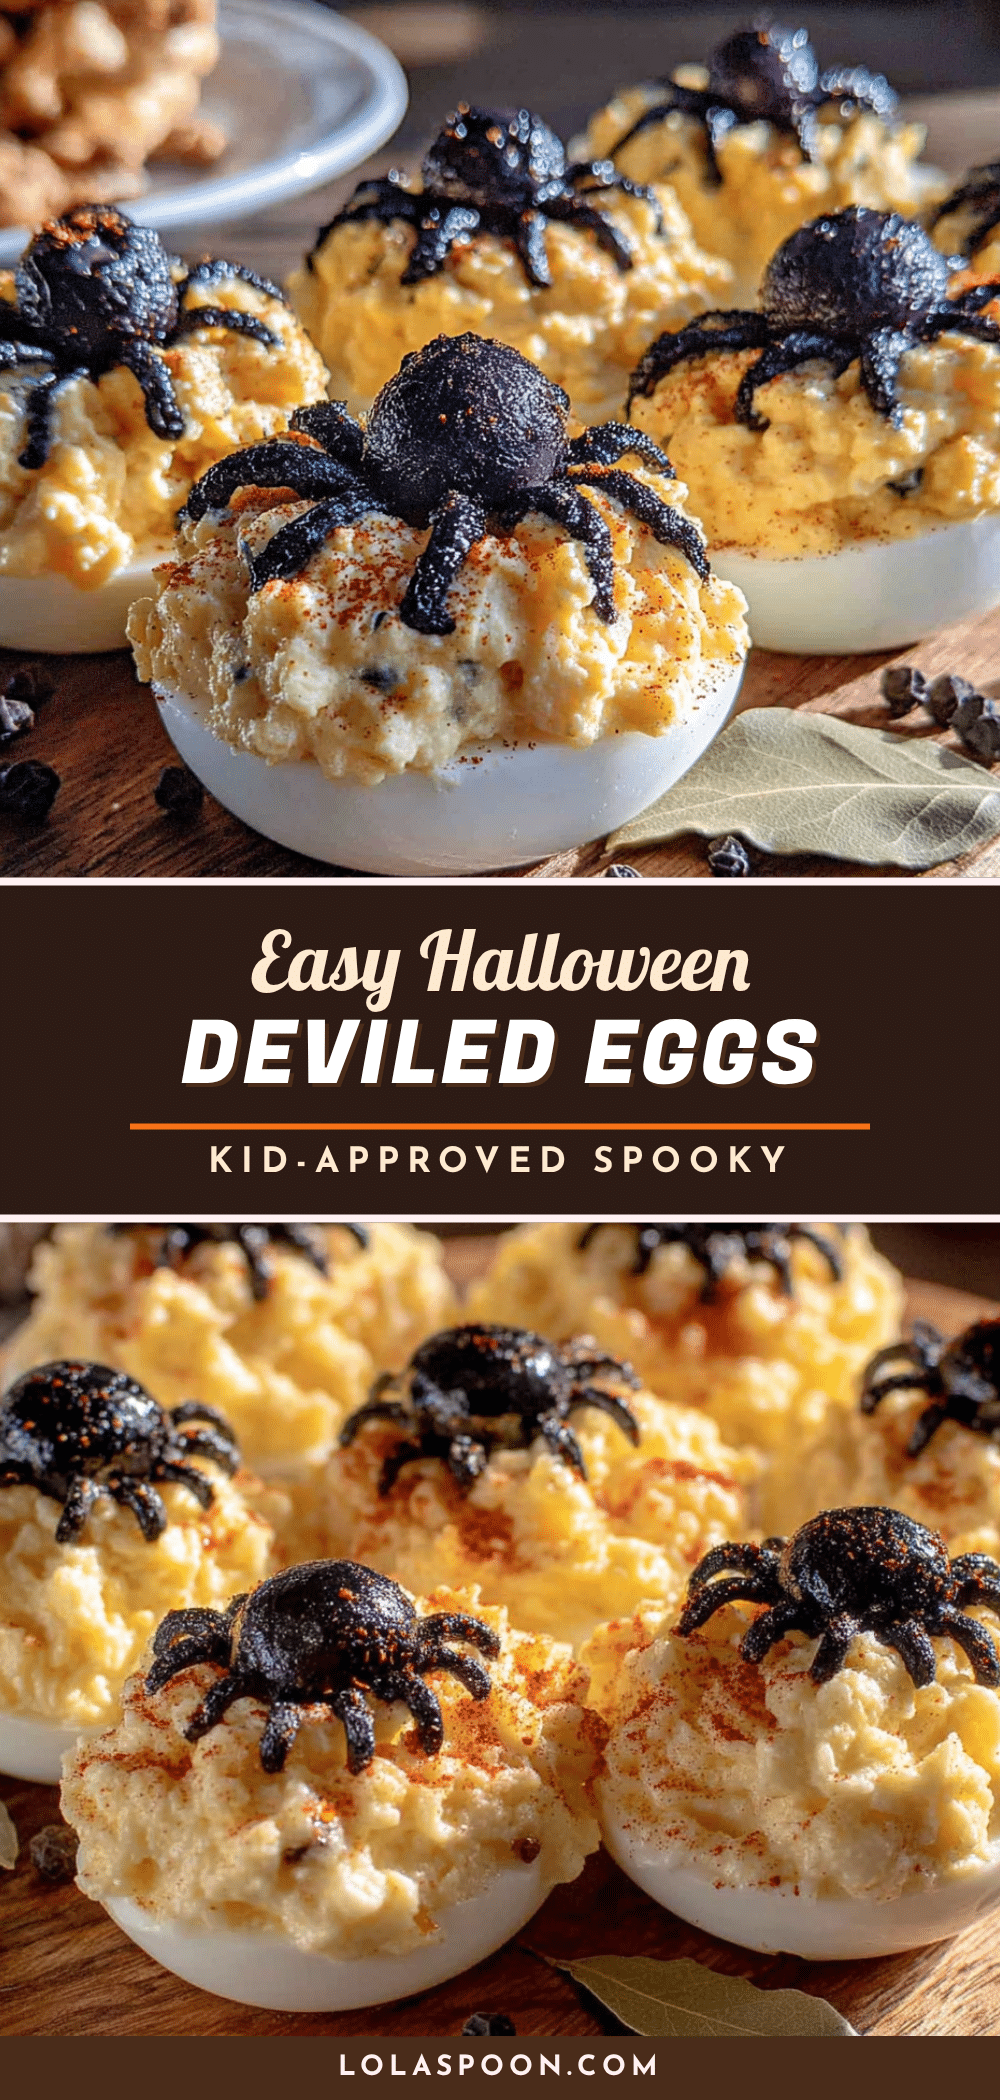
Easy Halloween Deviled Eggs: Spooky Snack Kids Love
These Easy Halloween Deviled Eggs are a spooky twist on classic deviled eggs, featuring a creamy, tangy filling and fun monster decorations. Perfect for Halloween parties, they’re quick to make and always a crowd-pleaser.
- Prep Time: 15 minutes
- Cook Time: 12 minutes
- Total Time: 27 minutes
- Yield: 24 servings 1x
- Category: Appetizer
- Cuisine: American
Ingredients
- 12 large eggs (room temperature)
- 1/3 cup mayonnaise (preferably Hellmann’s)
- 1 tablespoon yellow mustard
- 1 teaspoon white vinegar or pickle juice
- 1/4 teaspoon salt
- 1/8 teaspoon black pepper
- Paprika for garnish (smoked or sweet)
- Black olives (sliced, for decorations)
- Red bell pepper (cut into tiny triangles)
- Chives or green onion slices (for decorations)
- Optional: Sriracha or hot sauce (for a bloody look)
Instructions
- Boil the eggs: Place 12 eggs in a single layer in a large pot. Cover with cold water by about an inch. Bring to a rolling boil over high heat (8-10 minutes). Once boiling, cover the pot, remove from heat, and let sit for exactly 12 minutes.
- Shock the eggs: While eggs sit, fill a large bowl with ice and water. After 12 minutes, transfer eggs to the ice bath using a slotted spoon. Let chill for at least 10 minutes. Gently crack eggs against the counter before placing in ice bath to help peeling.
- Peel and slice: Tap eggs gently to crack shells all over, roll between palms, and peel under running cold water. Pat dry. Slice each egg in half lengthwise with a sharp knife. Pop out yolks into a medium bowl. Arrange egg white halves on a serving platter, cut-side up.
- Make the filling: Mash yolks with a fork or push through a potato ricer. Add mayonnaise, mustard, vinegar or pickle juice, salt, and pepper. Stir until smooth and creamy. Adjust seasoning to taste.
- Fill the eggs: Spoon filling into a piping bag or zip-top bag. Snip off a small corner (about 1/2 inch wide). Pipe filling into each egg white half, mounding slightly. Do not overfill.
- Decorate for Halloween: For ‘spider’ eggs, place a sliced black olive on top and add chive ‘legs’. For ‘monster’ eggs, use red bell pepper triangles for horns and olive slices for eyes. For ‘bloodshot’ eggs, drizzle a tiny bit of Sriracha.
- Chill and serve: Cover platter loosely with plastic wrap and refrigerate for at least 30 minutes before serving. Serve cold or at room temperature.
Notes
Use eggs at least a week old for easier peeling. The ice bath is essential for easy peeling. Do not overmix the filling to avoid greasiness. Make ahead: boil and peel eggs up to 2 days in advance; pipe filling a few hours before serving. Store leftovers in an airtight container in the fridge for up to 2 days. Do not freeze.
Nutrition
- Serving Size: 1 deviled egg half
- Calories: 65
- Sodium: 95
- Fat: 5
- Saturated Fat: 1.5
- Carbohydrates: 1
- Protein: 5
Keywords: Halloween deviled eggs, spooky deviled eggs, easy deviled eggs, monster deviled eggs, Halloween appetizer