My neighbor Maria watched me fumbling with a piping bag of frosting one October afternoon, sweat beading on my forehead as I tried to make spiderweb cupcakes look professional. She didn’t say anything at first. She just leaned against my kitchen doorway, arms crossed, with this knowing little smile. Then she walked over to my pantry, grabbed a package of Oreos, some pudding mix, and a bag of gummy worms, and set them on the counter. “You’re overthinking it,” she said. “Halloween treats are supposed to be fun, not stressful.”
That was three years ago, and I haven’t touched a piping bag for Halloween since. Maria grew up making these dirt cups with her kids every year, and she passed the whole concept to me in about thirty seconds flat. No fancy techniques, no special equipment — just good old-fashioned kitchen shortcuts that actually work. Honestly, I was a little embarrassed I hadn’t thought of it myself. I mean, who doesn’t love chocolate pudding and crushed cookies? But the real genius is how she layers everything so it looks like actual dirt, with those gummy worms wiggling out like they’re escaping their grave.
The first time I made these for my own kids, my youngest shrieked with delight and immediately pretended to eat a worm, complete with dramatic chewing sounds. My older one, who usually rolls his eyes at my “homemade stuff,” ate three cups without saying a word. That’s when I knew this recipe had staying power. Maybe you’ve been there — trying to pull off a Pinterest-perfect Halloween spread while your kids just want candy and chaos. These dirt cups are the answer to that exact struggle. They look spooky, taste amazing, and take less time than it takes to convince your kid to put on their costume.
What I love most about this recipe, and what keeps me making it year after year, is how it lets me be a fun mom without losing my mind. There’s no baking, no melting chocolate, no worrying about frosting consistency. It’s just assembly — the kind of cooking where you can chat with your kids, let them help, and still have everything ready before the doorbell rings. Maria moved away last year, but every Halloween, when I crush those Oreos and watch the gummy worms poke through the “dirt,” I think of her standing in my kitchen, saving me from myself.
Why You’ll Love This Recipe
Let me tell you why these Halloween dirt cups have become my go-to for every spooky season gathering. After testing this recipe at three different Halloween parties, two classroom celebrations, and one very chaotic family dinner, I can confidently say they deliver every single time.
- Quick & Easy: These come together in under 15 minutes. No kidding. If you can stir pudding and crush cookies, you’ve got this handled. Perfect for those evenings when you realize school has a Halloween party tomorrow and you have nothing to bring.
- Simple Ingredients: You probably already have most of this stuff in your kitchen right now. Oreos, instant pudding, milk, and gummy worms. That’s it. No weird specialty items that cost twelve dollars and never get used again.
- Perfect for Halloween Parties: Whether it’s a classroom celebration, a neighborhood potluck, or just a fun treat for your own little monsters, these cups fit right in. They’re portion-controlled, easy to transport, and kids absolutely lose their minds over them.
- Crowd-Pleaser: I’ve served these to picky eaters, sugar-obsessed teenagers, and even adults who claim they don’t do sweets. Every single person has gone back for seconds. The texture combo of creamy pudding and crunchy cookie crumbles is just irresistible.
- Unbelievably Delicious: This isn’t just a gimmick. The chocolate pudding gets extra rich when it sits overnight, the crushed Oreos taste like actual chocolate dirt, and the gummy worms add that chewy, fruity pop that makes every bite interesting.
What makes this recipe different from every other dirt cup you’ve seen? It’s the little tricks I’ve picked up from making these dozens of times. I use whole milk for the pudding instead of skim — it makes the texture creamier and more indulgent. I crush the Oreos in a ziplock bag with a rolling pin instead of using a food processor, because the uneven chunks look more like real dirt. And I always, always let the pudding set for at least an hour before serving, because patience here pays off big time.
This recipe isn’t just good — it’s the kind that makes you feel like a Halloween hero without breaking a sweat. It’s comfort food with a spooky twist, faster than ordering takeout, and way more memorable than handing out candy from a bowl. Perfect for impressing your kids’ friends without stress, or turning a regular Tuesday into something magical.
What Ingredients You Will Need
This recipe uses simple, everyday ingredients to deliver that perfect combination of creamy, crunchy, and chewy without any fuss. Most of these are pantry staples, which means you can literally decide to make these on a whim and probably already have everything on hand.
For the Pudding Base
- 1 (3.9 ounce) box instant chocolate pudding mix (I prefer Jell-O brand for the smoothest texture, but store brands work fine too)
- 2 cups whole milk (cold — this is important for the pudding to set properly. You can use 2% or skim, but whole milk gives a much richer, creamier result)
- 1/2 cup cold water (this helps the pudding reach the perfect consistency without being too thick)
For the Dirt Layer
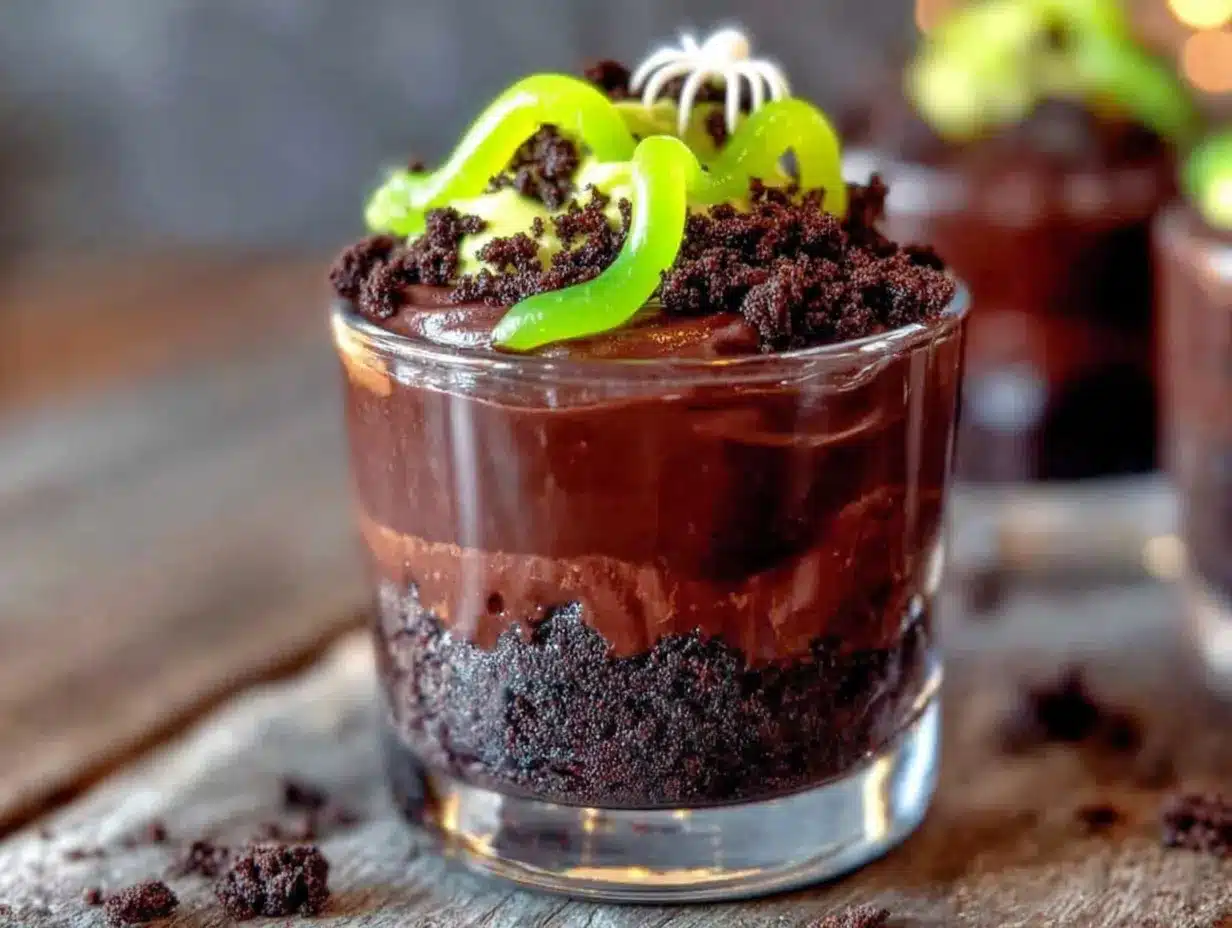
- 1 (14.3 ounce) package Oreo cookies (about 36 cookies — you’ll need the whole package, including the cream filling. Don’t separate them, the cream helps the crumbs stick together like real dirt)
- 2 tablespoons unsalted butter, melted (optional, but it makes the “dirt” feel more authentic and helps it clump slightly)
For Decoration
- 1 (4.5 ounce) bag gummy worms (I use Trolli or Black Forest brand — the bright colors really pop against the dark “dirt”. Look for gummy worms that have multiple colors for the best visual effect)
- Optional: 8-10 small Halloween-themed decorations (like plastic spiders, candy pumpkins, or tombstone cookies for extra spooky flair)
Ingredient Selection Tips
When choosing your pudding mix, look for the instant variety, not cook-and-serve. Instant pudding sets up in the fridge without any stovetop work, which is exactly what we want for a quick recipe. For the Oreos, go with the original flavor — Double Stuf creates too much cream filling and the “dirt” ends up too sticky. I learned this the hard way when I tried to get fancy and ended up with gray, pasty crumbs instead of dark, realistic dirt.
For the gummy worms, I recommend buying the big “mega” worms if you can find them. They’re thicker and more dramatic when they poke out of the pudding. Regular gummy worms work perfectly fine, but the larger ones really sell the “worms crawling out of dirt” look. If you’re making these for a classroom or party where some kids might have dietary restrictions, look for gluten-free Oreo alternatives and dairy-free pudding options. The recipe adapts beautifully with those substitutions.
Equipment Needed
You don’t need any fancy kitchen gadgets for these dirt cups, which is honestly my favorite part about this recipe. Here’s what you’ll need:
- 8 small clear cups or glasses (plastic or glass, doesn’t matter — but clear cups are essential for showing off the layers. I use 8-ounce plastic cups from the dollar store and they work perfectly)
- One large mixing bowl (for the pudding — any medium-to-large bowl will do)
- One medium mixing bowl (for crushing the Oreos)
- A whisk (for mixing the pudding — a fork works in a pinch, but a whisk prevents lumps)
- A rolling pin or heavy-bottomed glass (for crushing the Oreos inside a ziplock bag)
- One gallon-sized ziplock bag (for containing the Oreo mess while crushing)
- A measuring cup and measuring spoons (for accurate liquid measurements)
- A spoon or small scoop (for layering the pudding and crumbs into the cups)
If you don’t have a rolling pin, honestly, a wine bottle works just as well. I’ve used a cast iron skillet in a pinch too — just be careful not to smash your fingers. For the cups, any small clear container works. I’ve used mason jars, plastic shot glasses for mini versions, and even small paper cups in a desperate situation. The clear cups just make the presentation more fun because you can see the layers.
Preparation Method
Alright, let’s make these Halloween dirt cups. I’ve broken this down step by step so even if you’ve never made anything like this before, you’ll feel like a pro. Total active time is about 10-15 minutes, plus chilling time.
Step 1: Make the Pudding (5 minutes)
In your large mixing bowl, combine the instant chocolate pudding mix with 2 cups of cold whole milk and 1/2 cup of cold water. Whisk vigorously for about 2 minutes until the mixture starts to thicken. You’ll notice it going from thin and watery to slightly thicker and more opaque — that’s your cue that it’s working. Don’t over-whisk or you’ll incorporate too many air bubbles. Just go until it’s smooth and starting to set.
Here’s a tip I learned from my third batch: make sure your milk is really cold. If it’s even slightly warm, the pudding won’t set properly and you’ll end up with soup. I keep my milk in the coldest part of the fridge and pull it out right when I’m ready to use it. If you’re in a rush, you can pop the bowl of mixed pudding in the freezer for 5 minutes while you crush the Oreos — that helps it set faster.
Step 2: Crush the Oreos (5 minutes)
Place the entire package of Oreos (cream filling included) into your gallon-sized ziplock bag. Seal it up, making sure to squeeze out as much air as possible — this prevents the bag from bursting open while you’re crushing. Now, take your rolling pin (or wine bottle, or cast iron skillet) and start smashing. Go for a mix of fine crumbs and small chunks — you don’t want powder, you want texture that looks like real soil.
I usually crush for about 2-3 minutes, turning the bag over halfway through to make sure everything gets evenly broken. If you have kids helping you, this is the step they’ll fight over. Let them go to town on the bag — it’s great stress relief and they’ll feel like they contributed. Just make sure the bag is sealed tight. I learned that lesson when my son got overexcited and Oreo dust exploded all over my kitchen.
Optional: If you’re using the melted butter, drizzle it into the bag after crushing, seal it back up, and massage it through the crumbs. This gives the “dirt” a slightly clumpy, moist texture that looks incredibly realistic. I skip this step if I’m short on time, but it does make a difference visually.
Step 3: Layer the Cups (5 minutes)
Now comes the fun part. Take your clear cups and start layering. Begin with a spoonful of crushed Oreos at the bottom of each cup — about 2 tablespoons per cup. This creates the “underground” layer. Then add a generous scoop of pudding — about 1/4 cup per cup. Smooth it out gently with the back of your spoon.
Here’s where the magic happens: take your gummy worms and press a few into the pudding layer, letting the ends stick out over the edge of the cup. I usually use 2-3 worms per cup, positioning them at different angles so it looks like they’re crawling out. Some I push all the way in except for the head, others I just barely tuck in so it looks like they’re emerging.
Finally, top each cup with another generous layer of crushed Oreos — about 3 tablespoons — covering the pudding and the base of the gummy worms completely. The worms should be poking out of the “dirt” like they’re trying to escape. If you want to get extra fancy, you can leave a few Oreo chunks on top for texture, or sprinkle a tiny bit of cocoa powder over everything for an even darker, earthier look.
Step 4: Chill and Set (at least 1 hour)
Place all the assembled cups in the refrigerator for at least 1 hour. This is crucial — the pudding needs time to fully set and the Oreo crumbs need to soften slightly against the pudding, which creates that authentic “dirt” texture. I’ve tried rushing this step and ended up with crunchy pudding that didn’t hold together. Trust me, the wait is worth it.
If you’re making these the night before, they actually get better. The flavors meld together, the Oreo crumbs absorb some moisture from the pudding and become more soil-like, and the gummy worms soften just a tiny bit so they’re easier to bite through. I’ve kept them in the fridge for up to 3 days and they were still fantastic.
Cooking Tips & Techniques
After making these dirt cups at least twenty times over the past few years, I’ve collected a few tricks that make the process smoother and the results more impressive. Let me share what I’ve learned through trial and error.
Don’t skip the chilling time. I know, I know — when you’re making a last-minute Halloween treat, waiting feels impossible. But here’s the thing: the pudding needs that time to set into a proper custard-like consistency. If you serve these immediately, you’ll have runny pudding that soaks through the Oreo layer and turns everything into a brown mess. I once served these after only 20 minutes in the fridge and ended up with what looked like chocolate soup with worms floating in it. Not cute.
Crush the Oreos unevenly on purpose. This is the biggest mistake I see in other recipes. Everyone tries to make their Oreo crumbs uniform, but real dirt isn’t uniform. You want some fine powder, some small pebbles, and a few larger chunks. That variety is what makes the “dirt” look authentic. When I use a food processor, I pulse it just 3-4 times and then finish by hand in the bag. The hand-crushed texture is always better.
Use room temperature gummy worms. If your gummy worms are fresh out of the fridge, they’ll be stiff and hard to position. Let them sit at room temperature for 10 minutes before you start assembling. They’ll be more pliable and you can bend them into more dramatic “crawling” positions. I like to curl a few of them so it looks like they’re writhing in the dirt.
Plan your assembly line. Before you start, have all your components ready: crushed Oreos in a bowl, pudding mixed and slightly set, gummy worms laid out, and cups arranged on a tray. This way you can move through the layering process without stopping to search for ingredients. I once had to pause mid-assembly to find more gummy worms, and by the time I got back, the pudding had set too much to layer smoothly.
Make extra for yourself. Seriously. The first time I made these, I portioned everything perfectly for 8 cups and then my husband ate one before the party started. Now I always make 9 or 10 cups worth of filling, just to account for taste-testers and greedy parents. You’ll thank me later.
Variations & Adaptations
One of the best things about this recipe is how easily it adapts to different tastes, dietary needs, and occasions. Here are some variations I’ve tried and loved:
Dietary Adaptations
Gluten-Free Version: Swap the Oreos for gluten-free chocolate sandwich cookies. There are several brands available now that taste nearly identical to the original. Use gluten-free certified pudding mix and you’re all set. I’ve made this version for my gluten-sensitive niece and she couldn’t tell the difference.
Dairy-Free Version: Use almond milk, oat milk, or coconut milk in place of whole milk for the pudding. Just make sure you use a dairy-free milk that’s unsweetened — flavored milks can throw off the chocolate taste. For the Oreo layer, original Oreos are actually dairy-free, which surprised me when I first found out.
Lower Sugar Version: Use sugar-free instant pudding mix and sugar-free chocolate sandwich cookies. The taste is slightly less indulgent, but still satisfies that chocolate craving. I’ve also tried using homemade chocolate pudding with less sugar, but honestly, the instant mix is so much easier and the texture is better for this application.
Flavor Twists
Peanut Butter Dirt Cups: Add a spoonful of creamy peanut butter to the pudding mixture before whisking. It gives the pudding a Reese’s-like flavor that pairs incredibly well with the chocolate Oreos. My kids beg for this version now.
Mint Chocolate Version: Use mint chocolate pudding mix instead of regular chocolate. The minty flavor combined with the chocolate Oreos tastes like a Thin Mint cookie in cup form. Add a few crushed candy canes on top for a Christmas variation.
Cookies and Cream Version: Instead of crushing all the Oreos, reserve a few cookies and break them into larger chunks. Layer these chunks in the middle of the pudding for extra cookie crunch in every bite.
Seasonal Adaptations
This recipe isn’t just for Halloween! For Easter, use green-tinted coconut flakes instead of Oreos for “grass” and add jelly beans. For Thanksgiving, use crushed graham crackers and chocolate pudding with candy corn “harvest worms.” For Christmas, use white chocolate pudding with crushed peppermint and gummy Christmas trees. The basic technique stays the same — just swap the colors and themes.
Serving & Storage Suggestions
These dirt cups are best served cold, straight from the refrigerator. The contrast between the cold, creamy pudding and the slightly softened Oreo crumbs is what makes every spoonful satisfying. I like to serve them on a tray with a few extra gummy worms scattered around for visual effect, and maybe a plastic spider or two for extra spookiness.
For presentation, arrange the cups on a black or orange platter to really make the layers pop. If you’re bringing these to a party, transport them on a flat tray in the fridge until you leave, then keep them cool in a cooler bag. They’ll hold up for about 2 hours at room temperature, but any longer and the pudding can start to separate.
Storage: These keep beautifully in the refrigerator for up to 3 days. Just cover each cup with plastic wrap or a lid to prevent the pudding from absorbing any fridge odors. I’ve found that day 2 is actually the sweet spot — the flavors have melded together and the texture is perfectly balanced.
Freezing: I don’t recommend freezing these. The pudding texture changes dramatically when frozen and thawed, becoming grainy and watery. The gummy worms also become rock-hard and lose their chewy texture. These are strictly a refrigerator treat.
Reheating: Don’t. These are meant to be served cold. If you want to soften the pudding slightly, let the cups sit at room temperature for 5-10 minutes before serving. That’s all the “reheating” they need.
One thing I love about these cups is how the flavors develop overnight. The Oreo crumbs absorb just enough moisture from the pudding to become soft and cake-like, while the gummy worms stay chewy and bright. If you’re making these for a party, I highly recommend making them the day before. Your future self will thank you.
Nutritional Information & Benefits
Let’s be real — these are a treat, not a health food. But here’s what you’re looking at per serving (one cup, made with whole milk and full-fat ingredients):
- Calories: Approximately 320-350 per cup
- Total Fat: 12-15g
- Saturated Fat: 6-8g
- Carbohydrates: 48-52g
- Sugar: 35-38g
- Protein: 5-7g
- Calcium: 150-200mg (from the milk)
Now, on the positive side, the milk in the pudding provides a decent amount of calcium and vitamin D. The Oreos, while not exactly nutritious, do contain a small amount of iron from the enriched flour. And gummy worms are made from gelatin, which contains protein — though not enough to make a meaningful difference in your daily intake.
For those with dietary concerns, this recipe contains dairy (from the milk) and gluten (from the Oreos). It also contains soy (present in Oreos) and corn syrup (in the gummy worms). If you’re serving these at a party, it’s worth asking about allergies beforehand, or offering a gluten-free and dairy-free version on the side.
My personal perspective? These are a celebration treat. They’re meant for Halloween parties, classroom celebrations, and special occasions. I don’t stress about the sugar content because my kids eat these once a year, not every day. The joy on their faces when they see those gummy worms poking through the dirt is worth every calorie. Balance is key — enjoy the treat, and get back to your regular eating habits tomorrow.
Conclusion
These Quick Halloween Dirt Cups with Gummy Worms have become my secret weapon for every spooky season gathering. They’re ridiculously easy to make, use ingredients you probably already have, and deliver that perfect combination of creamy, crunchy, and chewy that kids and adults both go crazy for. The best part? You don’t need any baking skills, special equipment, or hours of prep time. It’s basically assembly work disguised as magic.
I love that this recipe lets me be a fun, creative parent without losing my mind in the kitchen. When my kids help me crush the Oreos and position the gummy worms, we’re making memories as much as we’re making dessert. And when I walk into a Halloween party carrying a tray of these cups, I know I’m bringing something that will make people smile — and probably disappear within the first hour.
Don’t be afraid to make this recipe your own. Add extra gummy worms if your kids love them. Use different pudding flavors. Experiment with the toppings. The basic formula is foolproof, so have fun with it. And if you make these, I’d love to hear how they turned out! Drop a comment below and let me know if your little monsters approved. Happy Halloween, and happy snacking!
Frequently Asked Questions
Can I make these dirt cups ahead of time?
Absolutely! In fact, they’re better when made the day before. The flavors meld together overnight and the texture becomes perfectly balanced. Just keep them covered in the refrigerator and they’ll stay fresh for up to 3 days.
Can I use homemade chocolate pudding instead of instant?
You can, but I don’t recommend it for this recipe. Homemade pudding tends to be thinner and doesn’t set as firmly, which means it won’t hold up the Oreo layer as well. Instant pudding gives you that thick, custard-like texture that makes these cups work.
How many cups does this recipe make?
This recipe makes 8 standard-sized cups (about 8 ounces each). If you’re using smaller cups for a kids’ party, you can stretch it to 10-12 servings. Just adjust the layering proportions accordingly.
Can I use different types of cookies for the dirt layer?
Yes! Chocolate wafer cookies, gluten-free chocolate cookies, or even crushed chocolate graham crackers all work beautifully. Just avoid cookies with cream filling that’s too soft, as they can make the “dirt” layer greasy instead of crumbly.
How do I keep the gummy worms from sinking into the pudding?
Press the worms into the pudding layer gently, making sure the ends are tucked under the top Oreo layer. The Oreo crumbs act as anchors that hold the worms in place. If your worms are still sinking, your pudding might be too thin — let it set for 10 more minutes before assembling.
Pin This Recipe!
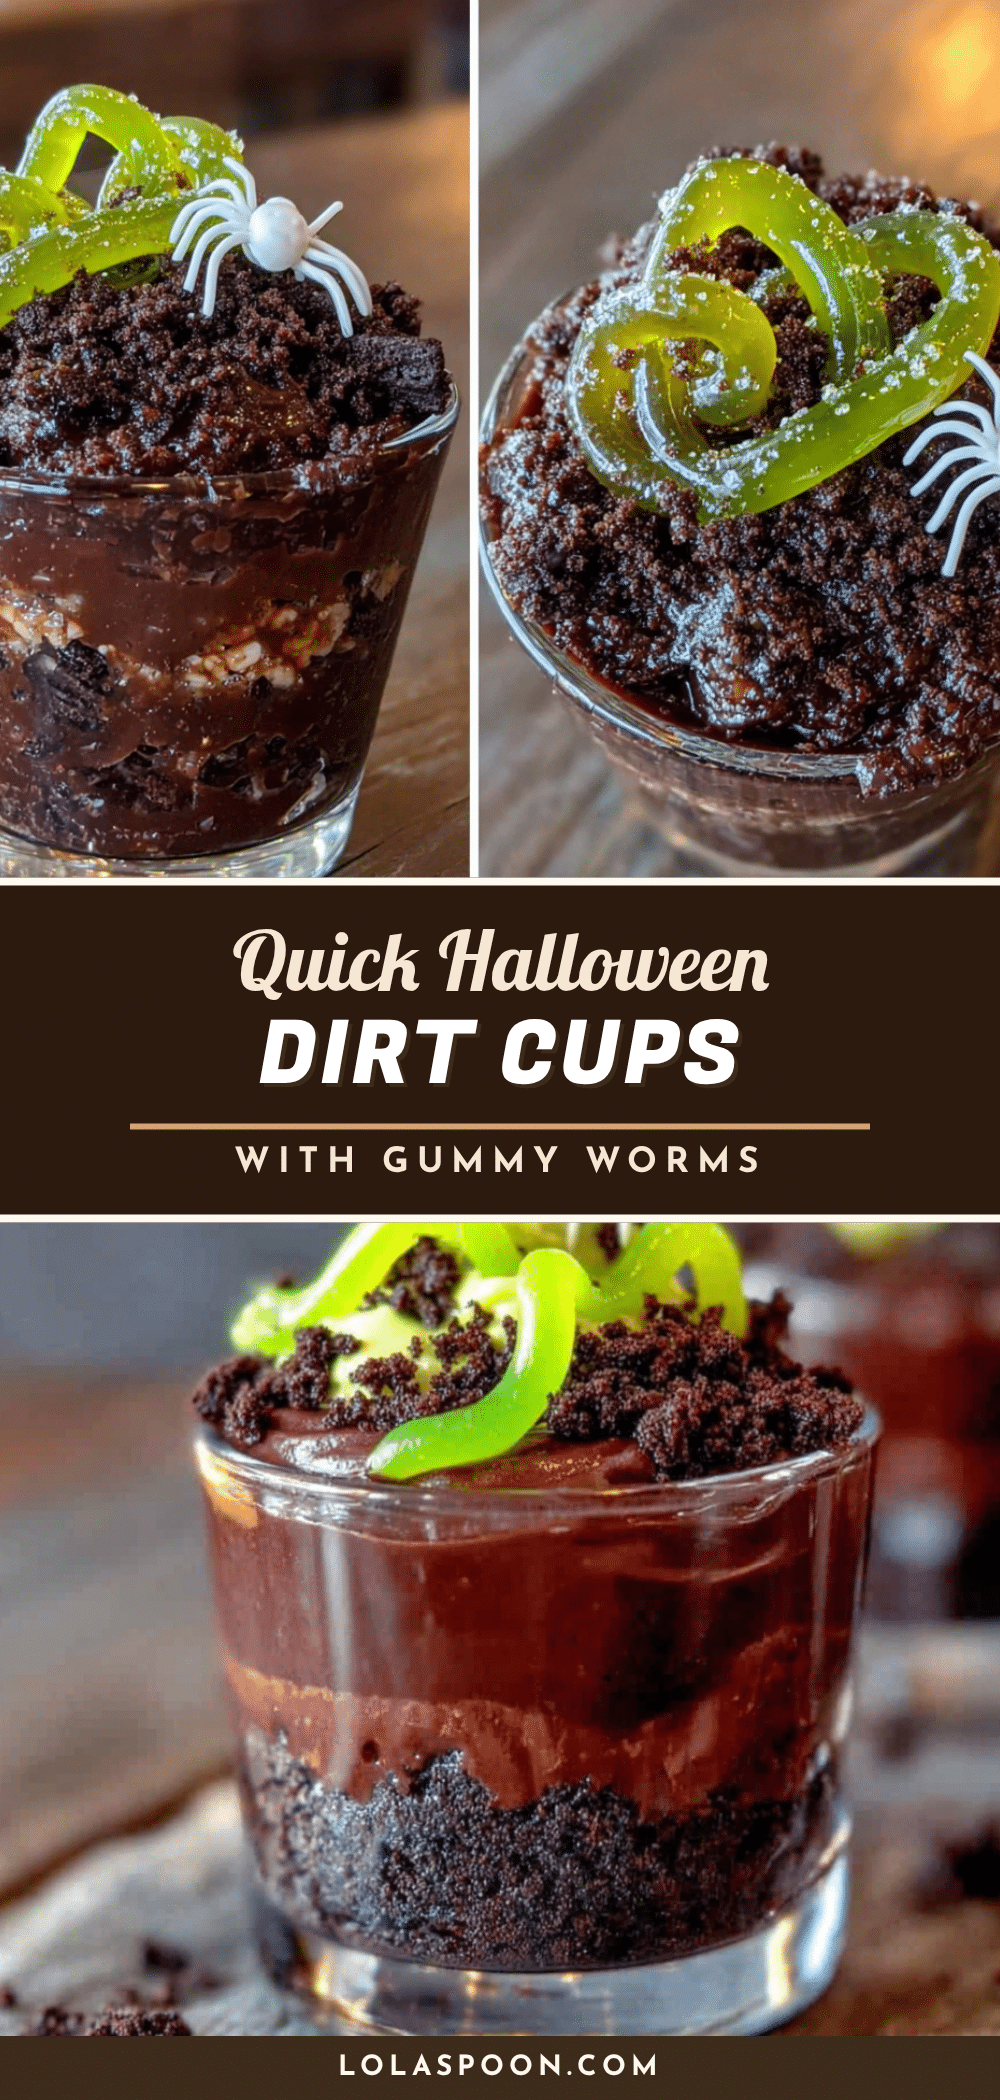
Quick & Easy Halloween Dirt Cups with Gummy Worms
No-bake Halloween dirt cups with creamy chocolate pudding, crushed Oreo ‘dirt,’ and gummy worms crawling out. A fun, kid-friendly treat that comes together in under 15 minutes.
- Prep Time: 15 minutes
- Cook Time: 0 minutes
- Total Time: 1 hour 15 minutes (includes chilling)
- Yield: 8 servings 1x
- Category: Dessert
- Cuisine: American
Ingredients
- 1 (3.9 ounce) box instant chocolate pudding mix
- 2 cups whole milk, cold
- 1/2 cup cold water
- 1 (14.3 ounce) package Oreo cookies (about 36 cookies)
- 2 tablespoons unsalted butter, melted (optional)
- 1 (4.5 ounce) bag gummy worms
- Optional: 8-10 small Halloween-themed decorations (plastic spiders, candy pumpkins, or tombstone cookies)
Instructions
- In a large mixing bowl, combine the instant chocolate pudding mix with 2 cups of cold whole milk and 1/2 cup of cold water. Whisk vigorously for about 2 minutes until the mixture starts to thicken. Do not over-whisk.
- Place the entire package of Oreos (cream filling included) into a gallon-sized ziplock bag. Seal, squeezing out as much air as possible. Use a rolling pin or heavy-bottomed glass to crush the cookies into a mix of fine crumbs and small chunks (about 2-3 minutes). If using melted butter, drizzle it into the bag after crushing, seal, and massage through the crumbs.
- Take 8 small clear cups or glasses. Begin with a spoonful of crushed Oreos at the bottom of each cup (about 2 tablespoons per cup). Add a generous scoop of pudding (about 1/4 cup per cup) and smooth gently.
- Press 2-3 gummy worms into the pudding layer, letting the ends stick out over the edge of the cup at different angles.
- Top each cup with another generous layer of crushed Oreos (about 3 tablespoons), covering the pudding and the base of the gummy worms completely. The worms should be poking out of the ‘dirt.’
- Refrigerate the assembled cups for at least 1 hour before serving. For best results, make the day before to allow flavors to meld.
Notes
Use whole milk for creamier pudding. Crush Oreos unevenly for realistic dirt texture. Let gummy worms come to room temperature for easier positioning. Make extra filling for taste-testers. These keep in the refrigerator for up to 3 days; do not freeze.
Nutrition
- Serving Size: 1 cup
- Calories: 335
- Sugar: 37
- Sodium: 380
- Fat: 14
- Saturated Fat: 7
- Carbohydrates: 50
- Fiber: 1
- Protein: 6
Keywords: Halloween dirt cups, gummy worms, no-bake dessert, chocolate pudding, Oreo dirt, kid-friendly Halloween treat, easy Halloween recipe