The school potluck was in six hours and I’d completely forgotten. Not just forgotten—I’d signed up to bring the main dish for the third-grade teacher appreciation luncheon, and my calendar had betrayed me. Every other parent would be showing up with their signature slow-cooker masterpieces or those Pinterest-perfect casseroles that take three days to assemble. I had a bag of chicken thighs thawing in the sink and a pantry that was looking pretty sad.
Honestly, I stood there staring into the fridge like it owed me money. A block of Parmesan, some garlic cloves that were starting to sprout, and a bottle of ranch dressing that had seen better days. Not exactly the stuff of culinary legend. But here’s the thing about being a mom on a budget—you learn to make magic out of nothing. I grabbed the air fryer, crossed my fingers, and just started throwing things together.
The kitchen smelled incredible within minutes, which should have been my first clue. By the time I pulled those golden-brown thighs out of the air fryer, even my pickiest eater had wandered in asking what was for dinner. I packed them up still warm, feeling like I was bringing a half-baked experiment to a room full of serious cooks.
Let me tell you, the potluck was a disaster—for everyone else’s leftovers. Those crispy air fryer chicken thighs vanished in under fifteen minutes. Three different moms asked for the recipe, and Mrs. Patterson from the PTA actually said she’d pay me to cater her daughter’s birthday party. I just laughed and told her the truth: it was a happy accident born from a mom who forgot her own schedule. Maybe you’ve been there, staring at a clock and wondering how dinner is going to happen. This recipe is for those days, and honestly, it’s the kind of win that makes you feel like a kitchen genius even when you’re just flying by the seat of your pants.
Why You’ll Love This Recipe
These crispy air fryer chicken thighs have saved my sanity more times than I can count, and I’m not exaggerating when I say they’ve become a weekly staple in our house. Here’s why you’re going to want this one in your back pocket:
- Quick & Easy: From fridge to table in under 30 minutes. No marinating, no complicated steps, and hardly any cleanup. This is the kind of dinner that makes you wonder why you ever stressed about weeknight meals.
- Simple Ingredients: Chicken thighs, garlic powder, Parmesan cheese, salt, pepper, and a little oil. That’s it. No fancy grocery store runs or specialty items that cost a fortune and sit in your pantry for years.
- Perfect for Busy Weeknights: When the kids are hungry, the homework is piling up, and you just need something that works. These thighs deliver every single time without demanding much from you.
- Crowd-Pleaser: My kids used to turn their noses up at chicken thighs—too dark, too fatty, they said. Now they ask for these specifically. The crispy exterior wins over even the pickiest eaters.
- Unbelievably Delicious: The garlic Parmesan coating creates this incredible crunchy crust while the meat stays juicy and tender on the inside. It’s comfort food that feels indulgent but comes together with almost no effort.
What makes these different from every other air fryer chicken recipe out there? It’s the ratio. Most recipes either overdry the chicken or end up with a soggy coating. I’ve tested this exact technique more times than I care to admit—burned a few batches, learned from every mistake—and landed on a method that gives you that deep golden crust every single time. The secret is in how you prep the skin and the order you add the seasoning. Trust me on this one.
This is the kind of recipe that makes you close your eyes after the first bite. It’s weeknight cooking that feels like a treat, budget-friendly ingredients that taste expensive, and a guaranteed win for anyone sitting at your table.
What Ingredients You Will Need
This recipe uses simple, honest ingredients that you probably already have in your kitchen. No hunting down obscure spices or spending money on things you’ll only use once. Here’s what you need:
For the Chicken
- 4 bone-in, skin-on chicken thighs (about 1.5 pounds total) — The skin is crucial for that crispy texture, and bone-in thighs stay juicier during cooking. I usually grab a family pack when they’re on sale and freeze what I don’t use.
- 1 tablespoon olive oil — Helps the seasoning stick and encourages browning. Avocado oil works great too if you have it on hand.
- 1 teaspoon salt — I use kosher salt for better flavor distribution, but regular table salt works fine. Just use a little less if you’re using fine salt.
- 1/2 teaspoon black pepper — Freshly ground makes a difference here, honestly. The pre-ground stuff works, but fresh adds more depth.
- 1 teaspoon garlic powder — Not garlic salt! Garlic powder gives you that pure garlic flavor without extra sodium. I prefer McCormick for consistency, but any brand works.
- 1/2 teaspoon onion powder — Adds a subtle sweetness that rounds out the savory flavors. Totally optional but worth it.
For the Garlic Parmesan Coating
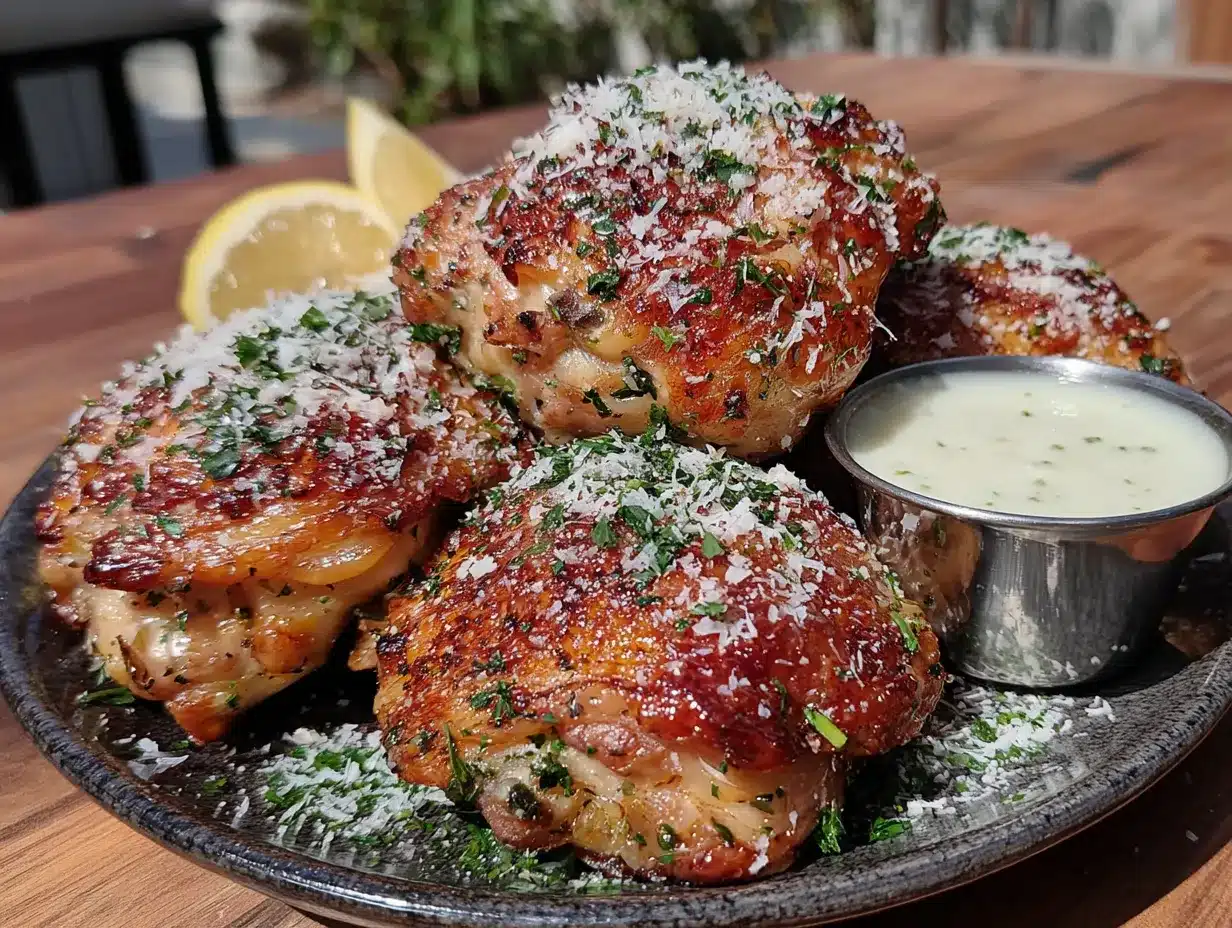
- 1/3 cup grated Parmesan cheese — The kind in the green can works perfectly here, honestly. Freshly grated Parmesan is lovely if you have it, but the shelf-stable stuff melts differently and creates a better crust in the air fryer. Look for the BelGioioso or Sargento brands for best results.
- 1 teaspoon garlic powder — Yes, more garlic. This is garlic Parmesan chicken, after all.
- 1/2 teaspoon dried parsley — Mostly for color, but it adds a tiny bit of freshness too.
- 1/4 teaspoon paprika — Smoked paprika is amazing here if you have it. Regular works fine too.
- Pinch of red pepper flakes (optional) — My kids don’t love heat, so I usually skip this. But if your family likes a little kick, go for it.
For Serving (Optional but Recommended)
- Fresh lemon wedges — A squeeze of lemon right before eating brightens everything up.
- Chopped fresh parsley — Makes it look fancy with almost zero effort.
- Extra grated Parmesan — Because more cheese is always a good idea.
One thing I’ve learned the hard way—pat the chicken thighs dry with paper towels before you start. Wet skin won’t crisp up, and you’ll end up with sad, soggy chicken. I know it’s tempting to skip this step when you’re in a hurry, but it honestly makes all the difference.
If you need a dairy-free option, you can use nutritional yeast instead of Parmesan. It won’t be exactly the same, but it gives you that savory, cheesy flavor without the dairy. My sister-in-law swears by it.
Equipment Needed
You don’t need a fancy kitchen to make these crispy air fryer chicken thighs. Here’s what you’ll actually use:
- Air fryer — Any size works, but a 5.8-quart or larger basket-style air fryer gives you enough room to cook four thighs without crowding. I use a Cosori Pro II and love it, but my friend makes these in her little Ninja and they come out perfect every time.
- Paper towels — For drying the chicken. This is non-negotiable if you want crispy skin.
- Mixing bowl — Medium-sized, for tossing the chicken with oil and seasonings.
- Tongs — For flipping the chicken halfway through. Silicone-tipped ones won’t scratch your air fryer basket.
- Meat thermometer — This is your best friend for perfect chicken. The ThermoPro digital instant-read thermometer costs about twelve bucks and has saved me from both undercooked and overcooked chicken more times than I can count.
- Small bowl — For mixing the Parmesan coating.
- Cutting board and knife — For serving and any garnishes.
If you don’t have an air fryer yet, honestly, you can make these in the oven. Bake at 425°F on a wire rack set over a baking sheet for about 35-40 minutes. The texture won’t be quite as crispy, but the flavor will still be there. I’ve done it during power outages and it works in a pinch.
One quick tip—clean your air fryer basket between batches if you’re cooking more than four thighs. Built-up residue can cause uneven cooking and weird flavors. A quick wash with warm soapy water takes two minutes and keeps everything tasting fresh.
Preparation Method
Alright, let’s get cooking. This is where the magic happens, and I promise it’s simpler than you think.
- Preheat your air fryer to 400°F (200°C). Give it a full 5 minutes to heat up. I know it’s tempting to skip preheating, but it makes a real difference in getting that initial sear on the chicken skin. Most air fryers beep when they’re ready, but if yours doesn’t, just set a timer.
- Pat the chicken thighs completely dry with paper towels. This is the most important step, I’m not kidding. Take your time here and really get every bit of moisture off the skin. Wet skin steams instead of crisps, and nobody wants steamed chicken skin. I usually use three or four paper towels per batch.
- Season the chicken with salt and pepper. Sprinkle both sides generously—don’t be shy. The salt helps draw out moisture and seasons the meat all the way through. Let the seasoned chicken sit for about 5 minutes while you prep the coating. This gives the salt time to start working.
- In a small bowl, mix together the Parmesan coating ingredients: 1/3 cup grated Parmesan, 1 teaspoon garlic powder, 1/2 teaspoon dried parsley, 1/4 teaspoon paprika, and the optional red pepper flakes. Stir it all together with a fork so everything is evenly distributed.
- Drizzle the olive oil over the chicken thighs. Use your hands to rub it all over each piece—both sides, under the skin if you can get in there. The oil helps the seasoning stick and promotes browning. Don’t use too much or the coating will slide off. One tablespoon for four thighs is the sweet spot.
- Sprinkle the Parmesan mixture over the chicken. Press it gently into the skin with your fingers so it adheres. Don’t just shake it on and hope for the best—really pat it down. I do this over the mixing bowl to catch any extra that falls off.
- Place the chicken thighs in the air fryer basket, skin side up. Make sure they’re in a single layer with space between each piece. If they’re touching, they won’t crisp evenly. If your air fryer is small, cook in batches. I know it takes longer, but overcrowding is the enemy of crispy chicken.
- Cook at 400°F for 18-20 minutes. Don’t open the air fryer for the first 12 minutes—let that crust develop. After 12 minutes, use tongs to carefully flip each thigh. The skin should be starting to turn golden. Cook for another 6-8 minutes on the other side.
- Check the internal temperature. Insert your meat thermometer into the thickest part of the thigh, avoiding the bone. You’re looking for 165°F (74°C). If it’s not there yet, cook in 2-minute increments until it hits the mark. I’ve found that 185°F actually gives you better texture for thighs—the extra heat breaks down connective tissue and makes the meat more tender. Don’t be afraid to take them a little higher.
- Let the chicken rest for 5 minutes before serving. This is crucial. The juices need time to redistribute, and the crust sets up during this rest. If you cut into them right away, all those delicious juices run out onto the plate instead of staying in the meat.
One thing I learned the hard way—don’t walk away during the last 5 minutes of cooking. Air fryers can vary wildly in temperature, and those last few minutes are where things can go from perfect to burnt. I ruined a batch while I was folding laundry, and let me tell you, that was a sad dinner.
The chicken should look deep golden brown with a visible crust. You’ll hear a slight crunch when you tap it with a fork. The smell at this point is absolutely ridiculous—garlicky, cheesy, and just pure comfort.
Cooking Tips & Techniques
After making these crispy air fryer chicken thighs probably fifty times now, I’ve picked up a few tricks that make a real difference. Let me share what I’ve learned so you don’t have to make the same mistakes I did.
Don’t skip the drying step. I know I said it already, but it bears repeating. The number one reason air fryer chicken turns out soggy is moisture on the skin. Take those extra 30 seconds to really pat everything dry. I actually leave the chicken uncovered in the fridge for 15 minutes if I have time—it dries out the skin even more and gives you an incredible crust.
Spray the air fryer basket with cooking spray. Even if your basket is non-stick, a light spray helps prevent the Parmesan from sticking and burning. I use avocado oil spray because it has a high smoke point, but any neutral oil works. Don’t use aerosol cooking sprays with propellants—they can damage the non-stick coating over time. Get a pump spray bottle instead.
Flip carefully. The Parmesan coating is delicate when it’s hot. Use tongs and be gentle when you flip the chicken halfway through. If you’re aggressive, you’ll knock off half the coating. I’ve definitely done this and ended up with bare spots on my chicken. Learn from my mistakes.
Let the air fryer recover between batches. If you’re cooking more than four thighs, give the air fryer a minute or two to come back up to temperature before adding the next batch. Dropping cold chicken into a partially cooled basket leads to uneven cooking. I usually start the second batch right after I take the first one out to rest.
Use a meat thermometer every single time. I don’t care how experienced you are—chicken is one of those things you don’t guess on. The difference between perfectly cooked and dry is about 5 degrees. A good thermometer takes the guesswork out completely.
One failure I’ll never forget—I tried to skip the oil once, thinking the chicken skin had enough fat on its own. Big mistake. The Parmesan just burned into a black crust while the skin stayed pale and rubbery. That little bit of oil is the bridge between the seasoning and the chicken. Don’t skip it.
Variations & Adaptations
One of the best things about this recipe is how easy it is to switch things up. Here are some ways I’ve adapted it for different moods and dietary needs:
Spicy Buffalo Version: Toss the cooked chicken thighs in your favorite buffalo sauce before serving. My husband loves this version—he adds extra hot sauce and blue cheese crumbles on top. The crispy coating holds up really well to the sauce, so it doesn’t get soggy. I serve these with celery sticks and ranch dressing for dipping.
Lemon Herb Twist: Add the zest of one lemon to the Parmesan coating mixture and replace the dried parsley with dried oregano or thyme. Squeeze fresh lemon juice over the chicken right before serving. This version feels brighter and lighter, perfect for spring or summer dinners. My neighbor brought this to a cookout and everyone went crazy for it.
Gluten-Free Option: The recipe is naturally gluten-free as written, since we’re using Parmesan instead of breadcrumbs. But if you want extra crunch, you can add 2 tablespoons of almond flour or crushed pork rinds to the coating mixture. Both add texture without any gluten. My cousin with celiac disease makes these all the time and says they’re better than any breaded chicken she’s had.
Cajun Style: Swap the garlic powder and parsley for 1 tablespoon of Cajun seasoning. Reduce the salt slightly since most Cajun blends already have salt in them. This version has a nice kick and pairs perfectly with rice and beans. I made this for Mardi Gras one year and it was a hit with everyone except my youngest, who thought it was too spicy.
Air Fryer vs. Oven: If you don’t have an air fryer, bake these at 425°F on a wire rack set over a baking sheet. The wire rack is important—it lets air circulate underneath so the bottom stays crispy. Bake for 30-35 minutes, flipping halfway through. The texture won’t be quite as crunchy, but the flavor is still amazing.
Serving & Storage Suggestions
These crispy air fryer chicken thighs are pretty versatile when it comes to serving. Here’s how I like to do it:
Serving Temperature: Serve them hot, right after the 5-minute rest. The crust is at its crispiest right out of the air fryer. If they sit too long, the steam from the meat softens the coating. I’ve made the mistake of letting them sit while I finished side dishes, and they were noticeably less crunchy.
What to Serve With: These go with pretty much anything. Our family favorites include mashed potatoes, roasted vegetables, a simple green salad, or rice pilaf. The garlic Parmesan flavor works well with both Italian and American-style sides. For a complete meal that comes together fast, I toss some broccoli with olive oil and salt and throw it in the air fryer during the last 10 minutes of chicken cooking time.
Presentation Ideas: Arrange the chicken on a platter with lemon wedges and fresh parsley. If you’re serving for company, a sprinkle of extra Parmesan and a drizzle of balsamic glaze makes it look restaurant-quality. For casual family dinners, I just pile them on a plate and let everyone grab what they want.
Storage: Leftover chicken thighs keep in an airtight container in the refrigerator for up to 4 days. The coating will soften over time, but the flavor stays great. I actually like them cold, chopped up on top of a salad for lunch the next day.
Reheating: The air fryer is your best friend for leftovers. Reheat at 375°F for 3-4 minutes, and the crust comes back to life. The microwave works in a pinch but makes the coating soggy. If you’re meal prepping, I recommend cooking the chicken and storing it without the coating, then adding the Parmesan mixture right before reheating in the air fryer. That way you get fresh crispy chicken every time.
Freezing: Cooked chicken thighs freeze well for up to 3 months. Wrap each piece individually in plastic wrap, then place in a freezer bag. Thaw overnight in the fridge and reheat in the air fryer. I’ve done this for busy weeks and it works beautifully—just add an extra minute or two to the reheating time.
The flavors actually deepen after a day in the fridge. The garlic and Parmesan meld together even more, so leftovers might taste even better than the first meal. Not that they usually last that long in my house.
Nutritional Information & Benefits
Here’s the breakdown for one serving (one chicken thigh with coating):
- Calories: Approximately 320-350
- Protein: 28-30g
- Fat: 22-24g
- Carbohydrates: 2-3g
- Fiber: 0g
- Sugar: 0g
- Sodium: 550-600mg
These values are estimates and will vary based on the exact ingredients and portion sizes you use.
Chicken thighs are actually a fantastic source of protein, iron, and B vitamins. They have more fat than chicken breasts, but that fat is what keeps them juicy and flavorful without needing a lot of added oil. The Parmesan adds calcium and a little extra protein, plus a ton of flavor with very few calories.
This recipe is naturally low-carb and keto-friendly, with only 2-3 grams of carbs per serving. It’s also gluten-free as written, which makes it a great option for anyone avoiding gluten. If you’re watching your sodium, you can reduce the salt and use a low-sodium Parmesan cheese.
I’m not a nutritionist, but I’ve learned that cooking with ingredients like chicken thighs and real cheese—things that actually satisfy you—means you’re less likely to overeat later. This recipe fills you up with real food, not empty calories. That’s the kind of eating that works for my family.
Conclusion
These crispy air fryer chicken thighs with garlic Parmesan have become one of those recipes I can make with my eyes closed. They’ve saved me on busy weeknights, impressed people at potlucks, and turned my kids into chicken thigh fans. All from a happy accident born out of a forgotten calendar date and a fridge full of basic ingredients.
What I love most about this recipe is how forgiving it is. You don’t need to be a trained chef or own fancy equipment. You just need an air fryer, some chicken, and a willingness to trust the process. The first time I made these, I was sure I’d messed something up. Now I know that this recipe works because it’s simple, honest cooking that lets good ingredients shine.
I’d love to hear how these turn out for you. Did your kids love them? Did you try a variation that blew your mind? Drop a comment below and let me know—I read every single one, and your stories are what keep me cooking and sharing. And if you’re feeling generous, share this recipe with a friend who needs an easy dinner win. Trust me, they’ll thank you.
Until next time, keep it simple and keep it crispy.
Frequently Asked Questions
Can I use boneless, skinless chicken thighs for this recipe?
You can, but the results won’t be as crispy. Boneless, skinless thighs cook faster—about 12-15 minutes at 400°F—and won’t develop the same crunchy exterior. If you use them, reduce the cooking time and check for doneness early. The flavor will still be great, just don’t expect that signature crispy skin.
How do I prevent the Parmesan from burning in the air fryer?
This is a common concern, and the answer is simple: don’t use super high heat. 400°F is the sweet spot for this recipe. Anything higher and the Parmesan can scorch before the chicken is cooked through. Also, make sure your chicken is fully dry before adding the coating—moisture on the skin can cause the cheese to steam and burn unevenly.
Can I make these ahead of time for a party?
Absolutely! Cook the chicken thighs completely, then let them cool. Store them in the fridge for up to 24 hours. When you’re ready to serve, reheat them in the air fryer at 375°F for 3-4 minutes. The crust crisps right back up. I’ve done this for several gatherings and nobody ever guesses they weren’t freshly made.
What’s the best way to get the coating to stick?
The secret is oil and pressure. Rub a thin layer of oil over the chicken first—this gives the Parmesan mixture something to cling to. Then press the coating firmly into the skin with your hands. Don’t just sprinkle it on and hope for the best. Really pat it down so it adheres. A light spray of cooking oil on top of the coating helps too.
Can I use chicken breasts instead of thighs?
Yes, but you’ll need to adjust the cooking time and technique. Chicken breasts are leaner and dry out faster. Pound them to an even thickness first, then cook at 400°F for about 15-18 minutes, flipping halfway through. The coating might not get as crispy since there’s less fat underneath, but it still tastes delicious. Just watch the internal temperature closely—170°F is your target for breasts.
Pin This Recipe!
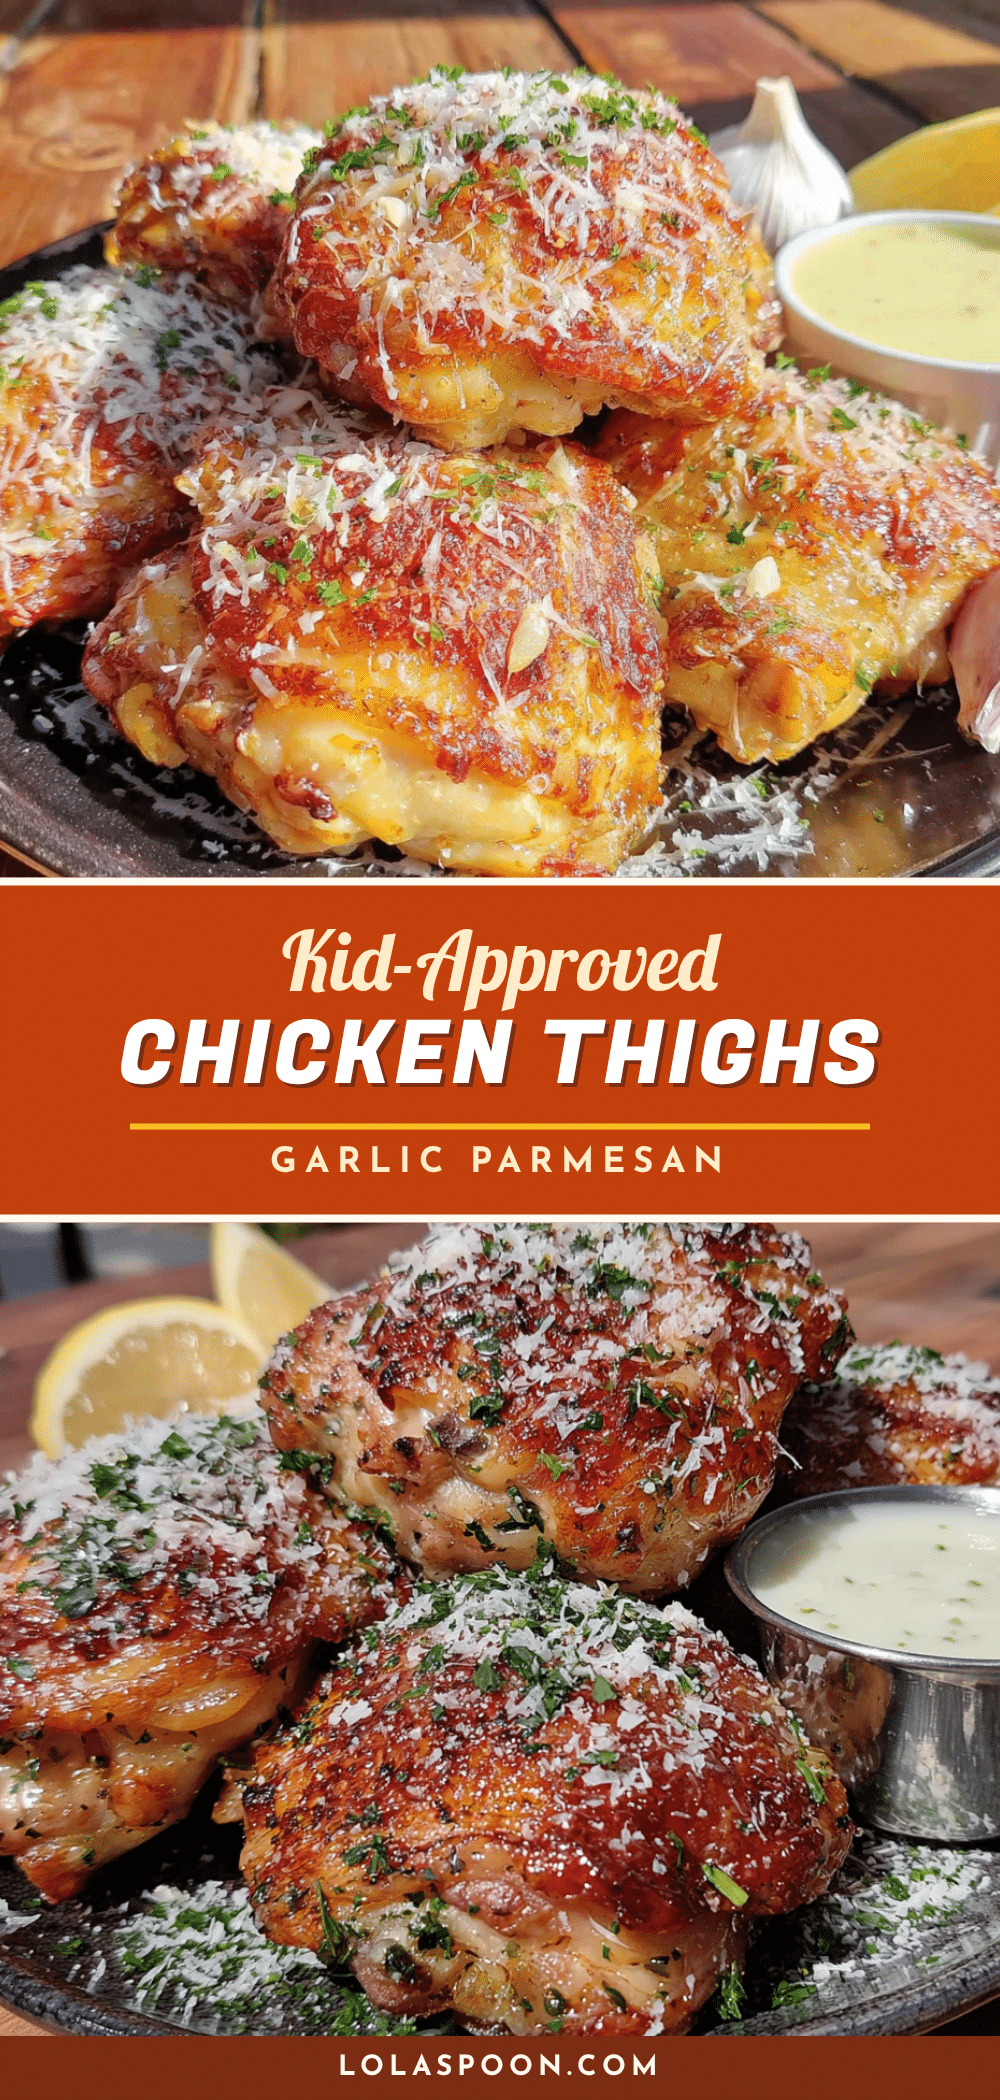
Crispy Air Fryer Chicken Thighs: Easy Garlic Parmesan

These crispy air fryer chicken thighs are a quick and easy weeknight dinner with a crunchy garlic Parmesan coating. Perfect for busy families, this budget-friendly recipe delivers juicy, flavorful chicken in under 30 minutes.
- Prep Time: 10 minutes
- Cook Time: 20 minutes
- Total Time: 30 minutes
- Yield: 4 servings 1x
- Category: Main Course
- Cuisine: American
Ingredients
- 4 bone-in, skin-on chicken thighs (about 1.5 pounds total)
- 1 tablespoon olive oil
- 1 teaspoon salt
- 1/2 teaspoon black pepper
- 1 teaspoon garlic powder
- 1/2 teaspoon onion powder
- 1/3 cup grated Parmesan cheese
- 1 teaspoon garlic powder (for coating)
- 1/2 teaspoon dried parsley
- 1/4 teaspoon paprika
- Pinch of red pepper flakes (optional)
- Fresh lemon wedges (for serving, optional)
- Chopped fresh parsley (for serving, optional)
- Extra grated Parmesan (for serving, optional)
Instructions
- Preheat your air fryer to 400°F (200°C) for 5 minutes.
- Pat the chicken thighs completely dry with paper towels.
- Season the chicken with salt and pepper on both sides. Let sit for 5 minutes.
- In a small bowl, mix together the Parmesan coating: 1/3 cup grated Parmesan, 1 teaspoon garlic powder, 1/2 teaspoon dried parsley, 1/4 teaspoon paprika, and optional red pepper flakes.
- Drizzle olive oil over the chicken thighs and rub it all over each piece.
- Sprinkle the Parmesan mixture over the chicken, pressing it gently into the skin.
- Place the chicken thighs in the air fryer basket, skin side up, in a single layer with space between each piece.
- Cook at 400°F for 18-20 minutes. After 12 minutes, flip each thigh carefully and cook for another 6-8 minutes.
- Check the internal temperature with a meat thermometer; it should reach 165°F (74°C) in the thickest part. For better texture, cook to 185°F.
- Let the chicken rest for 5 minutes before serving.
Notes
Pat the chicken thighs completely dry for the crispiest skin. Don’t skip the oil—it helps the coating stick and promotes browning. Use a meat thermometer for perfect doneness. Let the chicken rest for 5 minutes before serving to keep juices inside. For best results, don’t overcrowd the air fryer basket; cook in batches if needed.
Nutrition
- Serving Size: 1 chicken thigh
- Calories: 335
- Sodium: 575
- Fat: 23
- Saturated Fat: 6
- Carbohydrates: 2.5
- Protein: 29
Keywords: air fryer chicken thighs, crispy chicken thighs, garlic parmesan chicken, easy weeknight dinner, budget-friendly chicken recipe


