It was 11:47 PM on a random Wednesday, and I had this undeniable, almost aggressive hankering for a chocolate chip cookie. Not just any cookie—the kind with crispy, lacy edges and a soft, gooey center that practically sighs when you bite into it. I didn’t have any regular unsalted butter in the fridge, you know, the kind you’d normally use. But I had a block of salted butter and a crazy idea that had been rattling around in my head for weeks: brown butter. I figured, why not? It was late, no one was watching, and the worst that could happen was I’d have a pan of weird, burnt-smelling butter. Honestly, I was already in my pajamas and the kitchen was dim, lit only by the hood light over the stove.
I tossed that butter into a saucepan and watched it melt, foam, and then—like magic—turn into this liquid gold that smelled like toasted hazelnuts and pure heaven. I was so tired I almost forgot to take it off the heat, but that little bit of chaos, that late-night impulsiveness, changed everything. The dough came together in a weird, quiet ritual, and I baked just one cookie to test it. I mean, it was midnight, I had to be sure. That first bite, with the flaky sea salt I found in the back of the cabinet, was so good I actually laughed out loud. Maybe you’ve been there—when a mistake turns into your new favorite thing. This recipe stayed with me because it’s proof that the best baking happens when you stop following the rules so closely.
Why You’ll Love This Recipe
If you’ve been on the hunt for the perfect chocolate chip cookie, let me just say—this is it. I’ve tested this recipe about a dozen times (my neighbors have been very happy guinea pigs), and it consistently delivers that bakery-quality result without any of the fuss. This isn’t just another cookie recipe; it’s the one you’ll come back to again and again, especially when you’re trying to impress a crowd at a dinner party or a casual get-together. The nutty depth of the brown butter is a total game-changer, and it makes you look like a total pro with very little extra effort.
- Quick & Easy: The dough comes together in about 20 minutes, and the brown butter step adds only 5 minutes to your prep time. It’s totally doable on a weeknight or when you get a last-minute craving.
- Simple Ingredients: You probably have everything in your pantry right now—flour, sugar, eggs, chocolate chips. The only “special” ingredient is a stick of butter, and I promise you have that.
- Perfect for Hosting: These cookies are a showstopper at any gathering. They look gorgeous on a platter with that sprinkle of sea salt, and they always get devoured before the main course even comes out. I love making a double batch when I have friends over for a potluck.
- Crowd-Pleaser: I have yet to meet someone who doesn’t love these. Kids go crazy for the chocolate, and adults appreciate that sophisticated, salty-sweet thing going on. It’s a universal win.
- Unbelievably Delicious: The texture is next-level—crispy on the outside, chewy on the inside, with pockets of melted chocolate and that irresistible toasted flavor from the butter. It’s the kind of cookie that makes you close your eyes after the first bite.
What makes this recipe different from the rest is that browned butter. It’s a simple technique, but it adds a layer of flavor you just can’t get from regular melted butter. It’s comfort food reimagined—familiar, but with a soul-soothing, nutty richness that feels special. Perfect for impressing guests without the stress, or turning a simple Tuesday into something memorable.
What Ingredients You Will Need
This recipe uses simple, pantry-friendly ingredients to create a cookie that tastes anything but basic. The magic really happens with the butter, so let’s talk about what you’ll need and why each ingredient matters.
- Unsalted Butter (1 cup / 2 sticks): This is the star of the show. I prefer using unsalted so I can control the salt level. You’ll be browning this, so avoid margarine or spreads—real butter is non-negotiable for that nutty flavor. I always use Kerrygold for its higher fat content, which browns beautifully.
- Dark Brown Sugar (1 cup, packed / 200g): This gives the cookies their deep, molasses-like flavor and that perfect chewy texture. The extra moisture in brown sugar is what keeps the centers soft. You can use light brown sugar in a pinch, but dark brown is where the magic is.
- Granulated Sugar (½ cup / 100g): This adds sweetness and helps create those crispy, lacy edges. The combination of both sugars is key for that perfect texture contrast.
- Large Egg (1, room temperature): The egg binds everything together and adds richness. Make sure it’s at room temperature so it emulsifies properly with the brown butter. If you forget to take it out, just place it in a bowl of warm water for 5 minutes.
- Egg Yolk (1, room temperature): This is my little secret. The extra yolk adds even more chewiness and richness without making the dough too wet. It’s a trick I learned from a pastry chef friend.
- Vanilla Extract (2 teaspoons): Good vanilla enhances the flavor of the brown butter and chocolate. I recommend using pure vanilla extract, not imitation, for the best taste. Nielsen-Massey is my go-to brand.
- All-Purpose Flour (2 cups + 2 tablespoons / 280g): Spoon and level your flour—don’t scoop it directly from the bag! Too much flour will make your cookies cakey instead of chewy. I use King Arthur Flour for consistent results.
- Baking Soda (1 teaspoon): This helps the cookies spread just the right amount and gives them a little lift. Make sure it’s fresh—old baking soda won’t give you the same results.
- Salt (1 teaspoon): I use fine sea salt in the dough to balance the sweetness. Don’t skip it—it makes the chocolate flavor pop.
- Semi-Sweet Chocolate Chips (1 ½ cups / 270g): You can use dark or milk chocolate, but I love semi-sweet for its balanced flavor. For a fancier touch, chop up a good-quality chocolate bar instead of using chips—it creates those beautiful pools of chocolate. Guittard or Ghirardelli are my favorites.
- Flaky Sea Salt (for topping): This is non-negotiable for me. A sprinkle of Maldon sea salt right when the cookies come out of the oven takes them from “great” to “absolutely unforgettable.” It cuts the sweetness and adds that perfect crunchy, salty finish.
Equipment Needed
You don’t need a fancy bakery setup for these cookies, but a few key tools will make the process smoother. I’ve learned the hard way that using the wrong pan can ruin a batch, so let me share what works.
- Light-Colored Saucepan: A light-colored pan (like stainless steel) is crucial for browning butter because you can actually see the color change. A dark non-stick pan makes it hard to tell when the butter is done, and you’ll end up with burnt butter. Trust me on this one.
- Stand Mixer or Hand Mixer: You need to cream the brown butter and sugars together until they’re light and fluffy. A stand mixer with the paddle attachment is easiest, but a hand mixer works just fine. You can also do it by hand with a whisk, but your arm will get a workout.
- Baking Sheets: Use heavy-duty, light-colored baking sheets. Dark sheets can cause the bottoms of your cookies to burn before the centers are done. I love my Nordic Ware sheets—they’re sturdy and bake evenly.
- Parchment Paper or Silicone Baking Mat: This prevents sticking and makes cleanup a breeze. Silicone mats are great for even browning, but parchment paper works perfectly too.
- Cooling Rack: Letting the cookies cool on a rack prevents the bottoms from getting soggy. It’s a small step that makes a big difference.
- Cookie Scoop (2-tablespoon size): This ensures all your cookies are the same size, so they bake evenly. It’s a cheap tool that’s totally worth it. If you don’t have one, just use two spoons.
Preparation Method
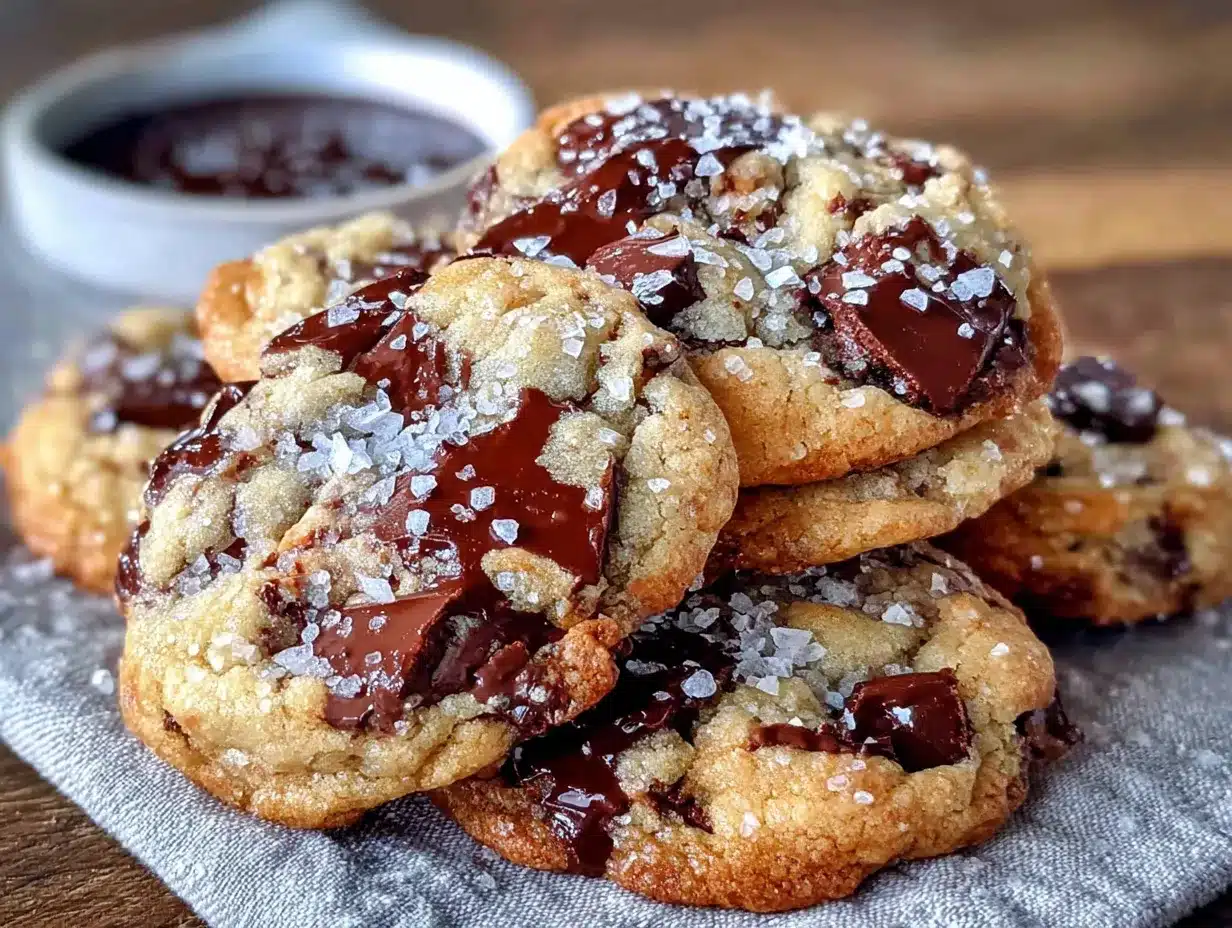
Alright, let’s get to the good part. This method might look a little different from your usual cookie recipe, but I promise every step is worth it. Take your time, and don’t rush the brown butter—it’s the heart of this cookie.
- Brown the Butter: Place the 1 cup (2 sticks) of unsalted butter in a light-colored saucepan over medium heat. Let it melt completely, then continue cooking, swirling the pan occasionally. The butter will start to foam and crackle. After about 4-5 minutes, the foam will subside, and you’ll see golden-brown specks forming at the bottom. The butter will smell nutty and amazing. As soon as it turns a deep amber color (think the color of a penny), remove it from the heat immediately. Don’t walk away—it can go from perfect to burnt in seconds. Pour the browned butter into a heatproof bowl, including all those delicious brown bits. Let it cool for about 10-15 minutes until it’s warm but not hot.
- Mix the Wet Ingredients: In the bowl of your stand mixer (or a large bowl if using a hand mixer), combine the cooled brown butter, 1 cup packed dark brown sugar, and ½ cup granulated sugar. Beat on medium speed for about 2 minutes until the mixture looks like wet sand and is slightly lighter in color. Add the 1 large egg and 1 egg yolk, one at a time, beating well after each. Then add the 2 teaspoons of vanilla extract and mix until combined. The mixture should look glossy and smooth.
- Combine the Dry Ingredients: In a separate medium bowl, whisk together the 2 cups + 2 tablespoons all-purpose flour, 1 teaspoon baking soda, and 1 teaspoon fine sea salt. Whisking aerates the flour and ensures the leavening agents are evenly distributed. Don’t skip this step—it prevents pockets of baking soda in your cookies.
- Bring It Together: With the mixer on low speed, gradually add the dry ingredients to the wet ingredients. Mix just until you see the last streaks of flour disappear. Overmixing at this stage will develop too much gluten and make your cookies tough. Stop the mixer and scrape down the sides and bottom of the bowl with a spatula.
- Add the Chocolate: Fold in the 1 ½ cups of semi-sweet chocolate chips using a rubber spatula. Make sure they’re evenly distributed throughout the dough. The dough will be thick, shiny, and absolutely irresistible. I always sneak a little taste here—it’s safe since there’s no raw flour risk with the hot butter.
- Chill the Dough (Crucial Step!): Cover the bowl with plastic wrap and refrigerate for at least 30 minutes, but 1-2 hours is even better. Chilling solidifies the brown butter, which prevents the cookies from spreading too much in the oven. It also allows the flavors to meld together. You can even chill it overnight for the best results. Don’t skip this—I’ve tried baking them right away, and they turn into flat, greasy puddles.
- Preheat and Prep: When you’re ready to bake, preheat your oven to 375°F (190°C). Line two baking sheets with parchment paper or silicone mats.
- Scoop and Bake: Using a 2-tablespoon cookie scoop, portion the dough into balls (about 1.5 ounces each). Place them about 3 inches apart on the prepared baking sheets. Bake one sheet at a time for 10-12 minutes, or until the edges are golden brown and the centers still look slightly soft and puffy. The cookies will continue to set as they cool. For softer cookies, bake for 10 minutes; for crispier edges, go for 12 minutes.
- The Finishing Touch: As soon as the cookies come out of the oven, sprinkle them immediately with a pinch of flaky sea salt. This is the moment it all comes together. Let them cool on the baking sheet for 5 minutes—this allows them to set up properly—then transfer them to a wire rack to cool completely. Or, you know, eat one warm. I won’t judge.
Cooking Tips & Techniques
I’ve made my fair share of cookie mistakes, and I want you to avoid them. Here are the tips I wish someone had told me when I first started working with brown butter.
Don’t Rush the Brown Butter: This is the most important part. Keep your heat at medium—high heat will burn the butter before it browns. Swirl the pan constantly. The butter will go through stages: melt, foam, then crackle. When the crackling stops and you see brown specks, it’s done. I once got distracted by a phone call and ended up with black, acrid butter. It was a sad day.
The Chill Factor: I cannot stress this enough—chill your dough. The brown butter is soft, and if you bake it right away, your cookies will spread into thin, crispy disks. Chilling for at least 30 minutes solidifies the fat and gives you those thick, chewy centers. For the best results, I chill mine for 2 hours. You can even scoop the dough into balls and freeze them for later baking (just add 2 minutes to the bake time).
Room Temperature Eggs: Cold eggs can seize the brown butter and make the dough lumpy. Let your eggs sit out for 30 minutes before you start. If you’re in a hurry, place them in a bowl of warm (not hot) water for 5 minutes. It makes a real difference in the emulsion.
Weigh Your Flour: I know it’s an extra step, but using a kitchen scale is the most accurate way to measure flour. Scooping directly from the bag can add up to 25% more flour, which makes dry, cakey cookies. If you don’t have a scale, spoon the flour into your measuring cup and level it off with a knife.
Batch Baking: Only bake one sheet at a time in the center of the oven. If you try to bake two sheets at once, the heat won’t circulate properly, and your cookies will bake unevenly. It takes a little longer, but the results are worth it.
Variations & Adaptations
One of the best things about this recipe is how adaptable it is. I’ve played around with it quite a bit, and here are some of my favorite variations that still keep that amazing brown butter flavor front and center.
Dark Chocolate & Toffee: Swap the semi-sweet chips for dark chocolate chunks (60-70% cacao) and fold in ½ cup of chopped toffee bits. The bitterness of the dark chocolate pairs beautifully with the sweet, buttery toffee and the nutty brown butter. This is my go-to version when I’m feeling fancy.
Gluten-Free Option: Use a 1:1 gluten-free baking flour blend (like Bob’s Red Mill or King Arthur Measure for Measure). The cookies will spread a tiny bit more, so chill the dough for a full hour. They won’t be quite as chewy, but they’re still absolutely delicious and perfect for guests with dietary restrictions.
Nutty Crunch: Toast ½ cup of chopped pecans or walnuts in a dry skillet until fragrant, then let them cool before folding them into the dough along with the chocolate. The crunch adds a lovely texture, and the toasted nuts complement the brown butter flavor perfectly. I love this version for fall gatherings.
Mint Chocolate Chip: Add ½ teaspoon of peppermint extract along with the vanilla extract. Use dark chocolate chips or chunks. The cool mint against the warm, nutty brown butter is a surprisingly amazing combination. It’s like a thin mint cookie in chewy form.
Double Brown Butter: For the truly obsessed (like me), you can brown an extra 2 tablespoons of butter and drizzle it over the baked cookies right after you sprinkle the salt. It sounds extra, but it’s incredible. The warm butter soaks into the cookie and intensifies that nutty flavor even more.
Serving & Storage Suggestions
These cookies are best served warm, when the chocolate is still melty and the sea salt is just starting to dissolve. If you’re hosting a dinner party, I recommend baking them right before your guests arrive so the kitchen smells amazing and the cookies are fresh out of the oven. Arrange them on a beautiful wooden board or a simple white platter—the golden-brown cookies with the sparkly salt crystals look stunning.
They pair wonderfully with a cold glass of milk, a strong cup of coffee, or even a scoop of vanilla bean ice cream for a decadent dessert. For a holiday gathering, I like to serve them alongside a warm mug of spiced apple cider or a rich hot chocolate. They’re also fantastic crumbled over a bowl of vanilla ice cream with some caramel sauce—trust me on that one.
Storage: Store the baked cookies in an airtight container at room temperature for up to 5 days. They’ll stay soft and chewy. If you want to keep them longer, you can freeze the baked cookies for up to 3 months. Just layer them between sheets of parchment paper in a freezer-safe container. Thaw at room temperature for about 15 minutes before serving.
Freezing the Dough: This is my favorite hosting hack. Scoop the dough into balls, place them on a baking sheet, and freeze until solid (about 1 hour). Then transfer the frozen dough balls to a zip-top bag. You can bake them straight from frozen—just add 2-3 minutes to the bake time. This way, you always have fresh cookies ready to go when unexpected guests show up.
The flavors actually develop and deepen after a day or two in the fridge, so don’t be afraid to make the dough ahead. I’ve found that cookies baked from dough that’s been chilled for 24 hours are even more flavorful and have a better texture.
Nutritional Information & Benefits
Let’s be real—these are indulgent cookies, not health food. But knowing what’s in them can help you enjoy them mindfully. Here’s the approximate nutritional breakdown per cookie (based on 24 cookies):
| Nutrient | Amount per Cookie |
|---|---|
| Calories | 185 |
| Total Fat | 10g |
| Saturated Fat | 6g |
| Cholesterol | 30mg |
| Sodium | 125mg |
| Total Carbohydrates | 24g |
| Dietary Fiber | 1g |
| Sugars | 16g |
| Protein | 2g |
The dark chocolate contains antioxidants called flavonoids, which can support heart health. The brown butter, while high in saturated fat, adds a richness that means you’ll feel satisfied with just one or two cookies (in theory, at least!). I personally love that these cookies use simple, real ingredients—no preservatives, no weird additives, just butter, sugar, flour, and chocolate.
If you’re watching your sugar intake, you can reduce the granulated sugar to ¼ cup, but the texture will be slightly less crispy. For a dairy-free version, use a high-quality vegan butter stick (like Miyoko’s) and dairy-free chocolate chips. The brown butter effect won’t be quite the same, but it’s still a very good cookie.
Conclusion
If you take nothing else from this post, let it be this: brown butter changes everything. It turns a simple chocolate chip cookie into something that feels special, thoughtful, and absolutely irresistible. This recipe is the one I bring to every potluck, every family dinner, every “I need to impress someone” moment. It’s never let me down.
I really hope you give these a try. Don’t be intimidated by the brown butter step—it’s easier than you think, and the payoff is huge. Make them for your next get-together, or just make them for yourself on a quiet Tuesday night. You deserve a cookie that good.
I’d love to hear how they turn out! Leave a comment below and let me know if you tried any of the variations, or if you came up with your own twist. Don’t forget to share this post with a friend who loves baking (or eating) amazing cookies. Happy baking!
Frequently Asked Questions
Can I use salted butter instead of unsalted for browning?
Yes, you can. Just reduce the added salt in the dough to ½ teaspoon. The salt in the butter will concentrate as it browns, so be careful not to over-salt. I’ve done it before in a pinch, and it works fine.
Why did my cookies turn out flat?
This usually happens for one of two reasons: the butter was too warm when you mixed it, or you didn’t chill the dough long enough. Make sure your brown butter is cooled to room temperature (warm, not hot), and chill the dough for at least 30 minutes. Also, check that your baking soda is fresh.
Can I use milk chocolate chips instead of semi-sweet?
Absolutely. Milk chocolate will make the cookies sweeter and creamier. I’d recommend reducing the granulated sugar to ⅓ cup to balance the sweetness. The cookies will also be a little softer because milk chocolate has more milk fat.
How do I know when the brown butter is done?
Watch for the color. The butter will go from yellow to golden to a deep amber. You’ll see brown specks forming at the bottom of the pan, and it will smell intensely nutty and toasty. As soon as it reaches that amber color, take it off the heat. It will continue to cook slightly from the residual heat.
Can I make these cookies without a stand mixer?
Yes, definitely. You can mix everything by hand with a whisk and a rubber spatula. Just make sure your brown butter is cooled, and whisk the sugars and butter vigorously for about 2 minutes until it looks like wet sand. Then switch to the spatula when you add the flour. It’s a great arm workout!
Pin This Recipe!
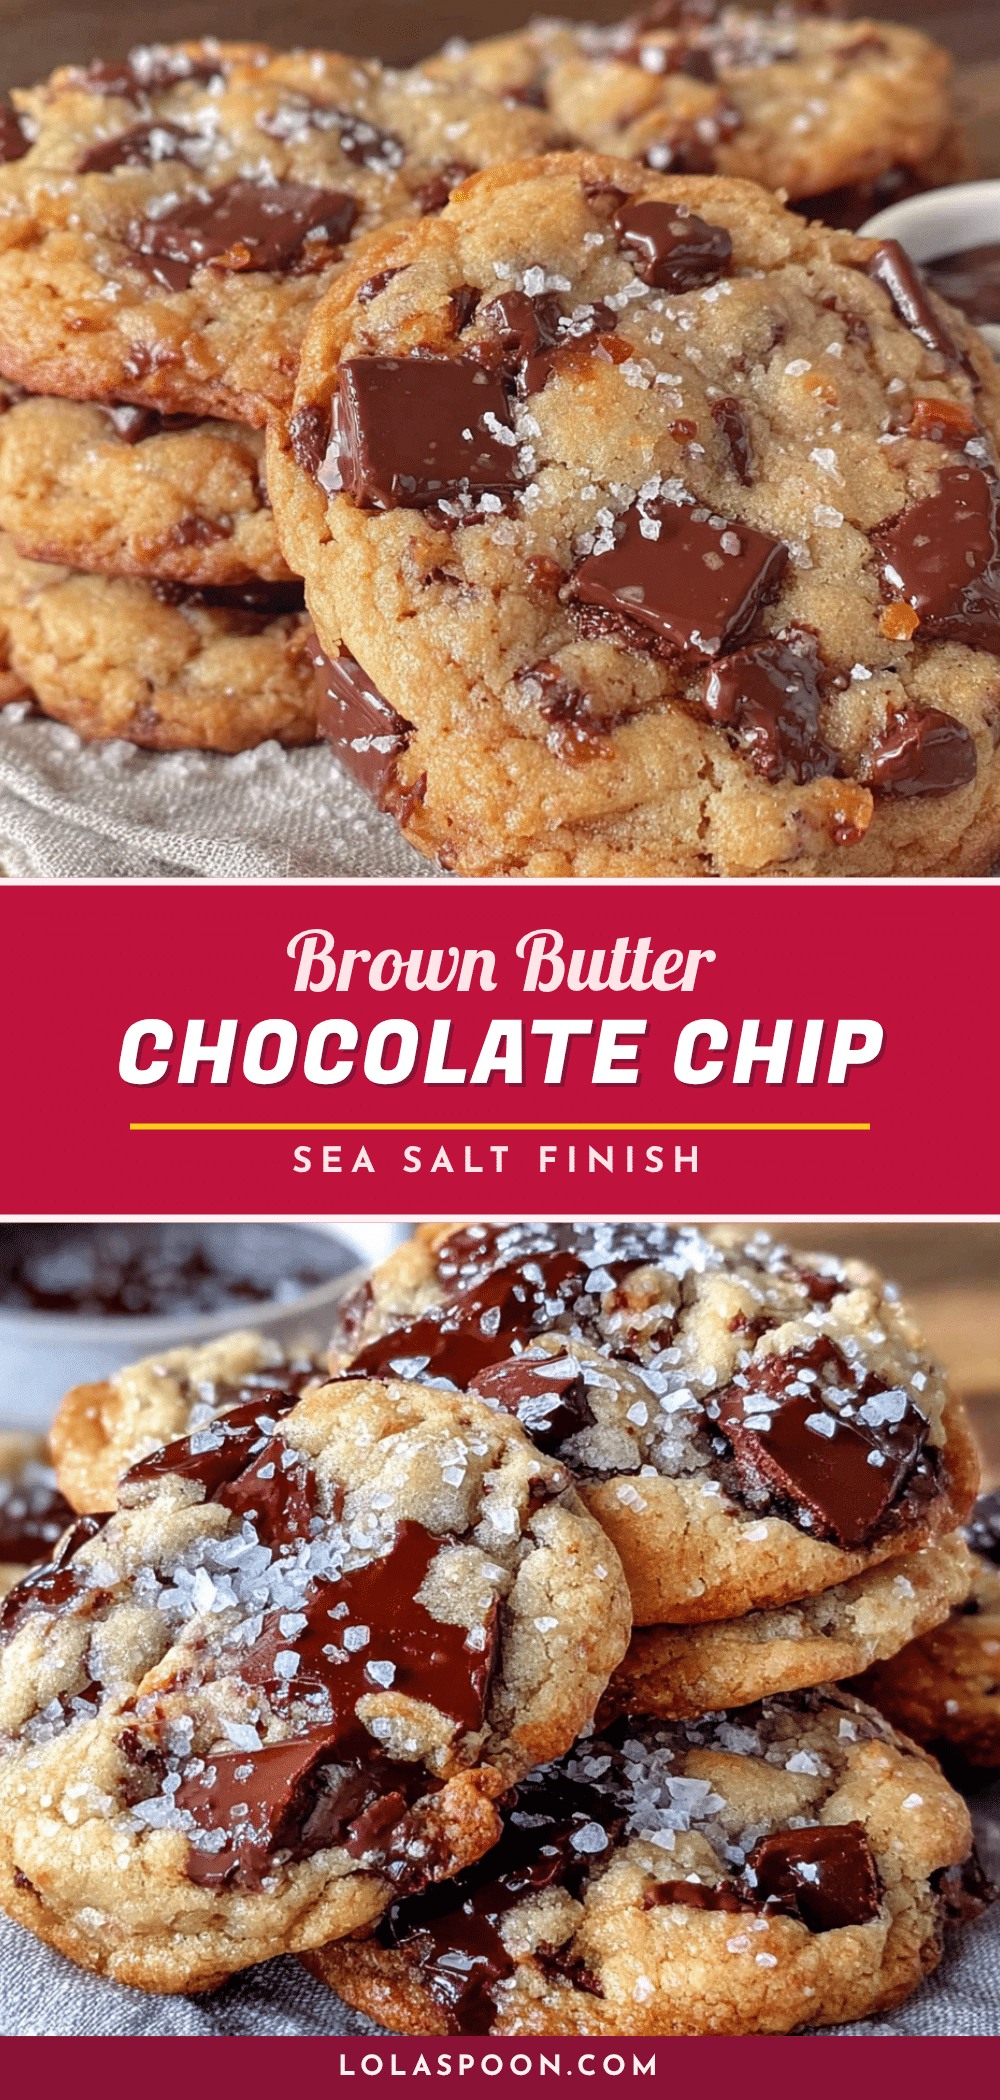
Best Brown Butter Chocolate Chip Cookies – Easy Sea Salt Recipe

These brown butter chocolate chip cookies have crispy, lacy edges and a soft, gooey center, topped with flaky sea salt for an unforgettable salty-sweet treat.
- Prep Time: 20 minutes
- Cook Time: 12 minutes
- Total Time: 1 hour 2 minutes (including 30 minutes chilling)
- Yield: 24 cookies 1x
- Category: Dessert
- Cuisine: American
Ingredients
- 1 cup (2 sticks) unsalted butter
- 1 cup (200g) packed dark brown sugar
- ½ cup (100g) granulated sugar
- 1 large egg, room temperature
- 1 egg yolk, room temperature
- 2 teaspoons vanilla extract
- 2 cups + 2 tablespoons (280g) all-purpose flour
- 1 teaspoon baking soda
- 1 teaspoon fine sea salt
- 1 ½ cups (270g) semi-sweet chocolate chips
- Flaky sea salt (for topping)
Instructions
- Brown the butter: Place 1 cup (2 sticks) unsalted butter in a light-colored saucepan over medium heat. Melt completely, then cook, swirling occasionally, until it foams, crackles, and turns deep amber with brown specks (about 4-5 minutes). Remove from heat immediately and pour into a heatproof bowl. Let cool 10-15 minutes until warm but not hot.
- Mix the wet ingredients: In a stand mixer bowl (or large bowl with hand mixer), combine cooled brown butter, 1 cup packed dark brown sugar, and ½ cup granulated sugar. Beat on medium speed for 2 minutes until like wet sand. Add 1 large egg and 1 egg yolk, one at a time, beating well after each. Add 2 teaspoons vanilla extract and mix until glossy and smooth.
- Combine dry ingredients: In a separate bowl, whisk together 2 cups + 2 tablespoons all-purpose flour, 1 teaspoon baking soda, and 1 teaspoon fine sea salt.
- Bring together: With mixer on low, gradually add dry ingredients to wet, mixing just until last streaks of flour disappear. Scrape down bowl.
- Add chocolate: Fold in 1 ½ cups semi-sweet chocolate chips with a rubber spatula until evenly distributed.
- Chill dough: Cover bowl with plastic wrap and refrigerate at least 30 minutes (1-2 hours preferred, or overnight).
- Preheat and prep: Preheat oven to 375°F (190°C). Line two baking sheets with parchment paper or silicone mats.
- Scoop and bake: Using a 2-tablespoon cookie scoop, portion dough into balls (about 1.5 ounces each), placing 3 inches apart on prepared sheets. Bake one sheet at a time for 10-12 minutes, until edges are golden and centers are soft and puffy.
- Finishing touch: Immediately sprinkle baked cookies with flaky sea salt. Cool on baking sheet for 5 minutes, then transfer to wire rack to cool completely.
Notes
Chilling the dough is crucial to prevent spreading. For best results, chill for 2 hours or overnight. Brown butter can burn quickly, so watch carefully. Use room temperature eggs for proper emulsion.
Nutrition
- Serving Size: 1 cookie
- Calories: 185
- Sugar: 16
- Sodium: 125
- Fat: 10
- Saturated Fat: 6
- Carbohydrates: 24
- Fiber: 1
- Protein: 2
Keywords: brown butter chocolate chip cookies, sea salt cookies, easy cookie recipe, chewy chocolate chip cookies, bakery-style cookies


