I used to think Halloween party food had to be complicated. You know the type—those elaborate desserts that look like eyeballs or sculpted cakes that take three days to assemble. I’d scroll Pinterest feeling equal parts inspired and exhausted. But then last October, I stopped by my neighbor Carla’s house on a Tuesday afternoon to borrow a ladder. She wasn’t trying to impress anyone. She had music playing in the background, flour on her cheek, and she was wrapping strips of crescent dough around hot dogs like it was no big deal.
The smell hit me before I even got through her screen door. Buttery, warm, with this toasty golden thing happening that made my stomach growl immediately. “What are you making?” I asked, already peeking over her shoulder. She shrugged and said, “Oh, just something quick for the kids’ Halloween party tomorrow.” Just something quick. She said it like she was making toast. But let me tell you, those little mummy hot dogs were the cutest things I’d ever seen. Tiny dough strips wrapped like bandages, little mustard eyes peeking through. Honestly, I stood there watching her work and felt a little jealous of how effortless she made it look.
Carla let me taste one fresh out of the oven, and I swear I ate three before I left. The crescent dough was flaky and golden, the hot dog was juicy inside, and the whole thing felt like a party in my mouth. She didn’t use any fancy ingredients. She didn’t have a special technique. She just had a package of crescent rolls, some hot dogs, and this casual confidence that I wanted to bottle up and take home. I asked her for the recipe, and she laughed. “It’s not really a recipe. It’s just… wrapping.” But I knew right then I’d be making these for every Halloween gathering from that day forward. And honestly? Maybe you’ve been there—staring down a holiday party and wondering what you can bring that looks impressive without requiring a culinary degree. These mummy dogs are your answer.
Why You’ll Love This Recipe
Let me tell you why these crescent mummy hot dogs have become my secret weapon for Halloween parties. I’ve tested them at four different gatherings now, and they disappear every single time. The best part? They take almost no effort, which means you can actually enjoy your own party instead of hiding in the kitchen.
- Quick & Easy: These come together in under 25 minutes from start to finish. Seriously. You can make a whole tray while the kids are still arguing about costumes.
- Simple Ingredients: You need exactly four ingredients. Crescent rolls, hot dogs, mustard, and maybe some cream cheese if you want to get fancy. No weird grocery store trips.
- Perfect for Halloween Parties: These little mummies steal the show every time. Kids love them, adults sneak them when nobody’s looking, and they fit any spooky theme.
- Crowd-Pleaser: I’ve brought these to potlucks, classroom parties, and even a grown-up Halloween dinner. They get rave reviews from everyone—picky eaters, foodies, the whole range.
- Unbelievably Delicious: The combo of flaky, buttery crescent dough wrapped around a warm hot dog is pure comfort food. Add those tiny mustard eyes, and you’ve got something that tastes as good as it looks.
What makes this recipe different from every other version out there? It’s the technique. Most recipes tell you to cut the dough into strips, but I’ve learned the hard way that the width of those strips matters. Too thick, and they don’t look like bandages. Too thin, and they tear. I’ll show you exactly how to get that perfect mummy look without the frustration. Plus, I’ve discovered a trick for keeping the dough from unraveling as they bake—because nothing ruins the spooky effect like a mummy that’s lost its bandages.
This is the kind of recipe that makes you close your eyes after the first bite. It’s Halloween comfort food at its finest—fun, festive, and deeply satisfying. Perfect for impressing guests without any stress, or turning a simple snack into something memorable.
What Ingredients You Will Need
This recipe uses simple, everyday ingredients to create something that looks way more impressive than it actually is. You probably already have most of these in your kitchen right now.
- 1 can (8 oz) refrigerated crescent roll dough (I prefer Pillsbury for consistent results, but any brand works fine. The key is getting the seamless kind if you can find it—less tearing.)
- 8 hot dogs (Use your favorite brand. I like Hebrew National or Oscar Mayer for that classic flavor. Cocktail sausages work great too if you want mini mummies for appetizers.)
- Yellow mustard (For the eyes. You can also use ketchup or sriracha for different colored eyes, but yellow mustard gives that classic mummy look.)
- 1 tablespoon melted butter (Optional but highly recommended. Brushing this on before baking gives the dough that gorgeous golden color.)
- Sesame seeds or poppy seeds (Optional. Adds a little texture and makes the mummies look even more authentic.)
Ingredient Tips from My Kitchen
I’ve made these more times than I can count, and I’ve learned a few things. First, the crescent dough needs to be cold when you’re working with it. If it gets too warm, the strips become sticky and hard to handle. Pop it in the fridge for 10 minutes if your kitchen is warm.
For the hot dogs, I recommend using regular-sized ones rather than jumbo. The jumbo ones take too long to cook through, and the dough gets overdone before the hot dog is warm. If you’re feeling adventurous, try using cheese-filled hot dogs for a gooey surprise inside.
One substitution I love: swap the hot dogs for turkey dogs or plant-based sausages. They work exactly the same way, and nobody will notice the difference once they’re wrapped up in that flaky dough. For a gluten-free version, use gluten-free crescent dough (it exists!) or puff pastry sheets cut into strips.
Equipment Needed
You don’t need a fancy kitchen to pull these off. Here’s what you’ll actually use:
- Baking sheet (A standard half-sheet pan works great. Line it with parchment paper for easy cleanup.)
- Sharp knife or pizza cutter (For cutting the crescent dough into strips. A pizza cutter makes this so much faster.)
- Pastry brush (For brushing on melted butter. If you don’t have one, just use a spoon and spread it gently.)
- Small bowl (For the melted butter.)
- Toothpicks (Optional. If your dough keeps unraveling, a toothpick can hold everything in place while baking.)
I’ve made these with a butter knife and a cookie sheet that was older than me, and they turned out fine. Don’t overthink the equipment. The only thing I’d recommend is parchment paper—it saves you from scrubbing baked-on dough later. Trust me on this one.
Preparation Method
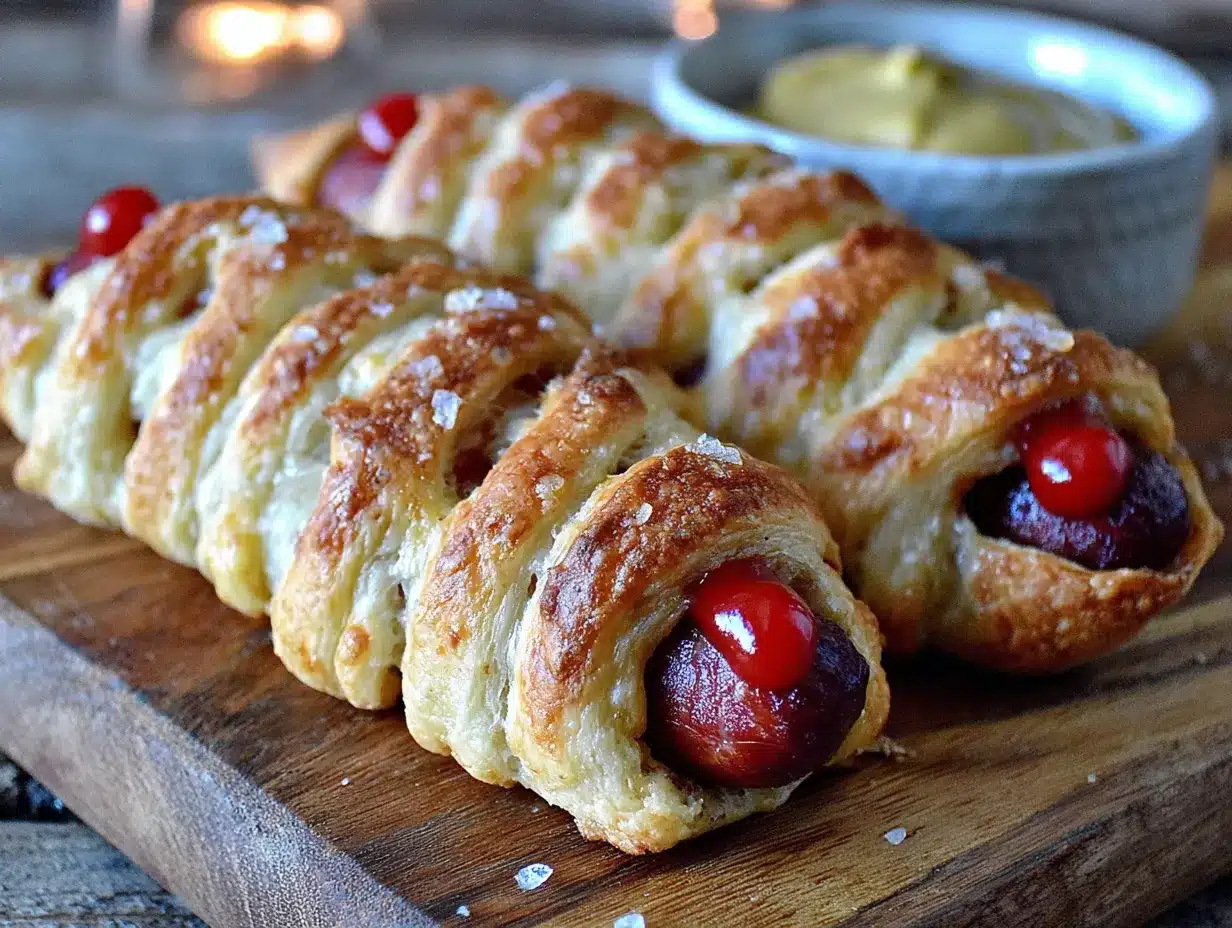
Alright, let’s get into the actual making of these little guys. I’ll walk you through every step so you don’t have to guess.
- Preheat your oven to 375°F (190°C). Line a baking sheet with parchment paper. This is non-negotiable unless you enjoy scrubbing pans.
- Unroll the crescent dough. Lay it flat on a cutting board. If you bought the perforated kind (the one that’s already cut into triangles), press the seams together gently with your fingers to create one solid sheet. Don’t worry if it’s not perfect—the strips will hide any imperfections.
- Cut the dough into strips. Using a sharp knife or pizza cutter, slice the dough lengthwise into thin strips about 1/4 to 1/2 inch wide. You want them thin enough to look like bandages but thick enough that they won’t tear when you wrap them. Aim for about 8 to 10 strips per sheet. (I learned this the hard way after my first batch looked like angry mummies with too many bandages.)
- Wrap the hot dogs. Take one hot dog and start wrapping a strip of dough around it, leaving a small gap near the top for the face. Overlap the dough slightly as you go, like you’re wrapping a real bandage. Don’t wrap too tightly—the dough needs room to expand as it bakes. Leave about 1/2 inch of hot dog exposed at the top for the eyes.
- Place on baking sheet. Set each wrapped mummy on the prepared baking sheet, leaving about an inch between them. They’ll puff up a bit, so give them room to breathe.
- Brush with melted butter. Using your pastry brush, lightly coat each mummy with melted butter. This gives them that gorgeous golden color. If you’re using sesame seeds, sprinkle them on now while the butter is still wet.
- Bake for 10-12 minutes. Keep an eye on them. You want the dough to be golden brown and flaky. The hot dogs should be heated through. Every oven is different, so start checking at 10 minutes.
- Add the eyes. Remove from the oven and let cool for 2-3 minutes. Using a toothpick or the tip of a knife, dab two small dots of mustard onto the exposed hot dog area to create the eyes. Don’t do this before baking—the mustard will dry out and look weird.
- Serve warm. These are best fresh out of the oven. The dough is flaky, the hot dog is warm, and the mustard eyes are still bright. Watch them disappear.
Troubleshooting Tip: If your dough keeps unraveling as you wrap, use a toothpick to secure the end of the strip against the hot dog. Remove the toothpick before serving. I’ve also found that slightly dampening the end of the dough strip helps it stick better.
Cooking Tips & Techniques
After making these about a dozen times, I’ve collected some wisdom I wish I’d had from the start. Let me save you from my mistakes.
The Dough Temperature Trick: Cold dough is easier to work with. If your crescent roll dough gets too warm while you’re cutting strips, pop it back in the fridge for 5 minutes. Warm dough gets sticky and tears easily. I learned this after a particularly frustrating batch where my strips kept breaking apart like wet paper.
Strip Width Matters: I mentioned this earlier, but it’s worth repeating. Strips that are too thick look like a kid’s art project gone wrong. Too thin, and they tear. The sweet spot is about 1/3 inch wide. Think of it like fettuccine noodles—thin enough to wrap multiple times, but sturdy enough to hold together.
Don’t Overlap Too Much: You want the dough strips to overlap just slightly, like real bandages. If you overlap too much, the dough gets thick and doughy in spots, and nobody wants a raw dough center. Leave tiny gaps between the strips—the dough will expand as it bakes and fill those gaps naturally.
The Mustard Eye Dilemma: I tried using ketchup for eyes once. Big mistake. It spread and looked like the mummies were crying blood. Stick with yellow mustard. It holds its shape, the color pops, and it tastes good with the hot dog. If you want different colors, use sriracha for red eyes or Dijon for a more subtle look.
Multitasking Strategy: While the first batch is baking, prep the second batch on a separate sheet. This way you can serve them fresh and hot. Cold mummy dogs are still good, but they lose that magical flaky texture. Trust me, your guests will notice the difference.
My Biggest Failure: The first time I made these, I used jumbo hot dogs and didn’t adjust the baking time. The dough was golden and beautiful, but the hot dogs were cold in the center. It was a texture nightmare. Now I always use regular hot dogs, and I let them sit at room temperature for 5 minutes before wrapping if they’re straight from the fridge.
Variations & Adaptations
One of the best things about this recipe is how easy it is to change up. Here are some variations I’ve tried and loved.
Cheesy Mummy Dogs: Before wrapping, slit the hot dog lengthwise (not all the way through) and stuff a thin strip of cheddar or mozzarella cheese inside. The cheese melts as the dough bakes, and you get this gooey surprise when you bite in. I did this for a Halloween party last year, and people lost their minds.
Spicy Mummy Dogs: Use spicy Italian sausages instead of regular hot dogs. Brush the dough with a mixture of melted butter and hot sauce before baking. Add a tiny dot of sriracha for the eyes instead of mustard. These are perfect for grown-up parties where you want a little heat.
Veggie Mummy Dogs: Swap the hot dogs for plant-based sausages or even carrot dogs (roasted carrots marinated in soy sauce and liquid smoke). The wrapping technique works exactly the same. I’ve made these for a vegetarian friend’s Halloween party, and they were a hit with everyone, not just the vegetarians.
Breakfast Mummy Dogs: Use breakfast sausages instead of hot dogs, and wrap with crescent dough. Brush with melted butter and sprinkle with cinnamon sugar. Serve with maple syrup for dipping. This is my go-to for Halloween morning breakfast before school parties.
Pizza Mummy Dogs: Before wrapping, brush the hot dog with pizza sauce and sprinkle with shredded mozzarella. Wrap with dough, bake as directed, and serve with extra pizza sauce for dipping. Kids absolutely love these ones.
My Personal Favorite: I once made these with bacon-wrapped hot dogs inside the crescent dough. I cooked the bacon halfway first, wrapped it around the hot dog, then wrapped the crescent dough over everything. It was absurdly good. My cardiologist probably wouldn’t approve, but for one Halloween party? Totally worth it.
Serving & Storage Suggestions
These mummy dogs are best served warm, right after the mustard eyes go on. The contrast between the hot, flaky dough and the cool mustard is part of the magic. I like to arrange them on a platter with a bowl of ketchup or ranch dressing in the center for dipping. Sometimes I add a few pretzel sticks around the edges to look like bones.
What to Serve Alongside: These pair beautifully with other Halloween finger foods. Think pumpkin-shaped cheese crackers, veggie platters with creepy names (like “zombie fingers” for carrot sticks), or a big bowl of popcorn tossed with orange and black sprinkles. For drinks, apple cider or a dark punch adds to the spooky vibe.
Storage: If you have leftovers (unlikely, but possible), let them cool completely, then store in an airtight container in the refrigerator for up to 3 days. The dough will lose its crispness, but they’re still tasty cold or reheated.
Reheating: The best way to reheat these is in the oven or air fryer. Pop them in a 350°F (175°C) oven for 5-7 minutes until the dough crisps up again. The microwave works in a pinch, but the dough gets soft and chewy. I’ve also reheated them in a toaster oven with great results. Just watch them closely so the dough doesn’t burn.
Freezer-Friendly: You can freeze these before baking. Wrap the uncooked mummy dogs on a baking sheet, freeze until solid, then transfer to a freezer bag. When you’re ready to bake, add 2-3 minutes to the baking time. Don’t thaw them first—bake straight from frozen. This is a lifesaver for busy Halloween weeks.
Flavor Development: Honestly, these are best fresh. The magic is in that first bite when the flaky dough shatters and the warm hot dog meets the tangy mustard. They don’t get better with age. But if you’re planning a party, you can prep everything the night before and bake them fresh just before guests arrive.
Nutritional Information & Benefits
Let’s be real—this is a treat, not a health food. But here’s what you’re looking at per mummy dog (based on one serving):
- Calories: Approximately 220-250
- Protein: 7-9 grams
- Fat: 14-16 grams
- Carbohydrates: 18-20 grams
- Sodium: 600-700 mg
Health Highlights: On the plus side, hot dogs do provide some protein, and crescent dough gives you quick energy. If you use turkey dogs or plant-based sausages, you can cut the fat and calories significantly. The mustard adds negligible calories but brings a nice dose of turmeric (which has anti-inflammatory properties).
Dietary Considerations: This recipe is not gluten-free unless you use gluten-free crescent dough. It contains dairy from the butter (though you can skip the butter wash or use a dairy-free alternative). For a lower-sodium version, look for low-sodium hot dogs and skip the extra salt in the butter wash.
My Wellness Perspective: I’m a firm believer that food should be enjoyed, especially on holidays. These mummy dogs are a once-a-year treat for most people, and I think that’s perfectly fine. Balance is about the whole picture, not one snack. So go ahead, enjoy three of them. Halloween only comes once a year.
Conclusion
These crescent mummy hot dogs have become my go-to Halloween party contribution for a reason. They’re simple enough to make while juggling a million other things, impressive enough to get compliments, and delicious enough that people actually eat them instead of just looking at them. I’ve brought them to four different parties now, and every single time, someone asks for the recipe.
What I love most is how customizable they are. You can make them spicy, cheesy, breakfast-style, or keep them classic. They work for kids’ parties, adult gatherings, classroom celebrations, or even a fun family dinner before trick-or-treating. The dough wrapping is almost meditative once you get the hang of it, and watching them come out of the oven all golden and cute never gets old.
I’d love to hear how yours turn out. Did you try a fun variation? Did your kids help wrap them? Did they disappear as fast as mine always do? Drop a comment below and let me know. And if you’re looking for more Halloween party ideas, check out my other spooky recipes—they’re all designed to be fun without being fussy.
Go make some mummy dogs. Your Halloween party needs them. And honestly? You deserve to be the person who shows up with the dish everyone talks about.
Frequently Asked Questions
Can I make these ahead of time for a party?
Absolutely! You can assemble the mummy dogs up to 24 hours in advance and keep them covered in the refrigerator. Just add the mustard eyes after baking. You can also freeze them unbaked for up to 3 months and bake straight from frozen—just add 2-3 minutes to the baking time.
What if I don’t have crescent roll dough?
No problem! You can use puff pastry sheets cut into strips, or even refrigerated biscuit dough rolled out thin and cut into strips. Puff pastry gives a flakier result, while biscuit dough makes them a little denser. Both work great.
How do I keep the dough from unraveling while baking?
Make sure the end of the dough strip is tucked underneath the hot dog when you place it on the baking sheet. The weight of the hot dog holds it in place. You can also use a toothpick to secure the end—just remember to remove it before serving.
Can I use cocktail sausages instead of hot dogs?
Yes! Cocktail sausages or little smokies work perfectly. Cut the crescent dough into narrower strips (about 1/4 inch wide) and reduce the baking time to 8-10 minutes. These mini mummies are perfect for appetizer platters.
What can I use instead of mustard for the eyes?
You have options! Ketchup works but tends to spread a bit. Sriracha gives red eyes with a kick. Cream cheese piped through a small piping tip creates white eyes that you can add a tiny dot of food coloring to. Even small dots of ranch dressing work in a pinch.
Pin This Recipe!
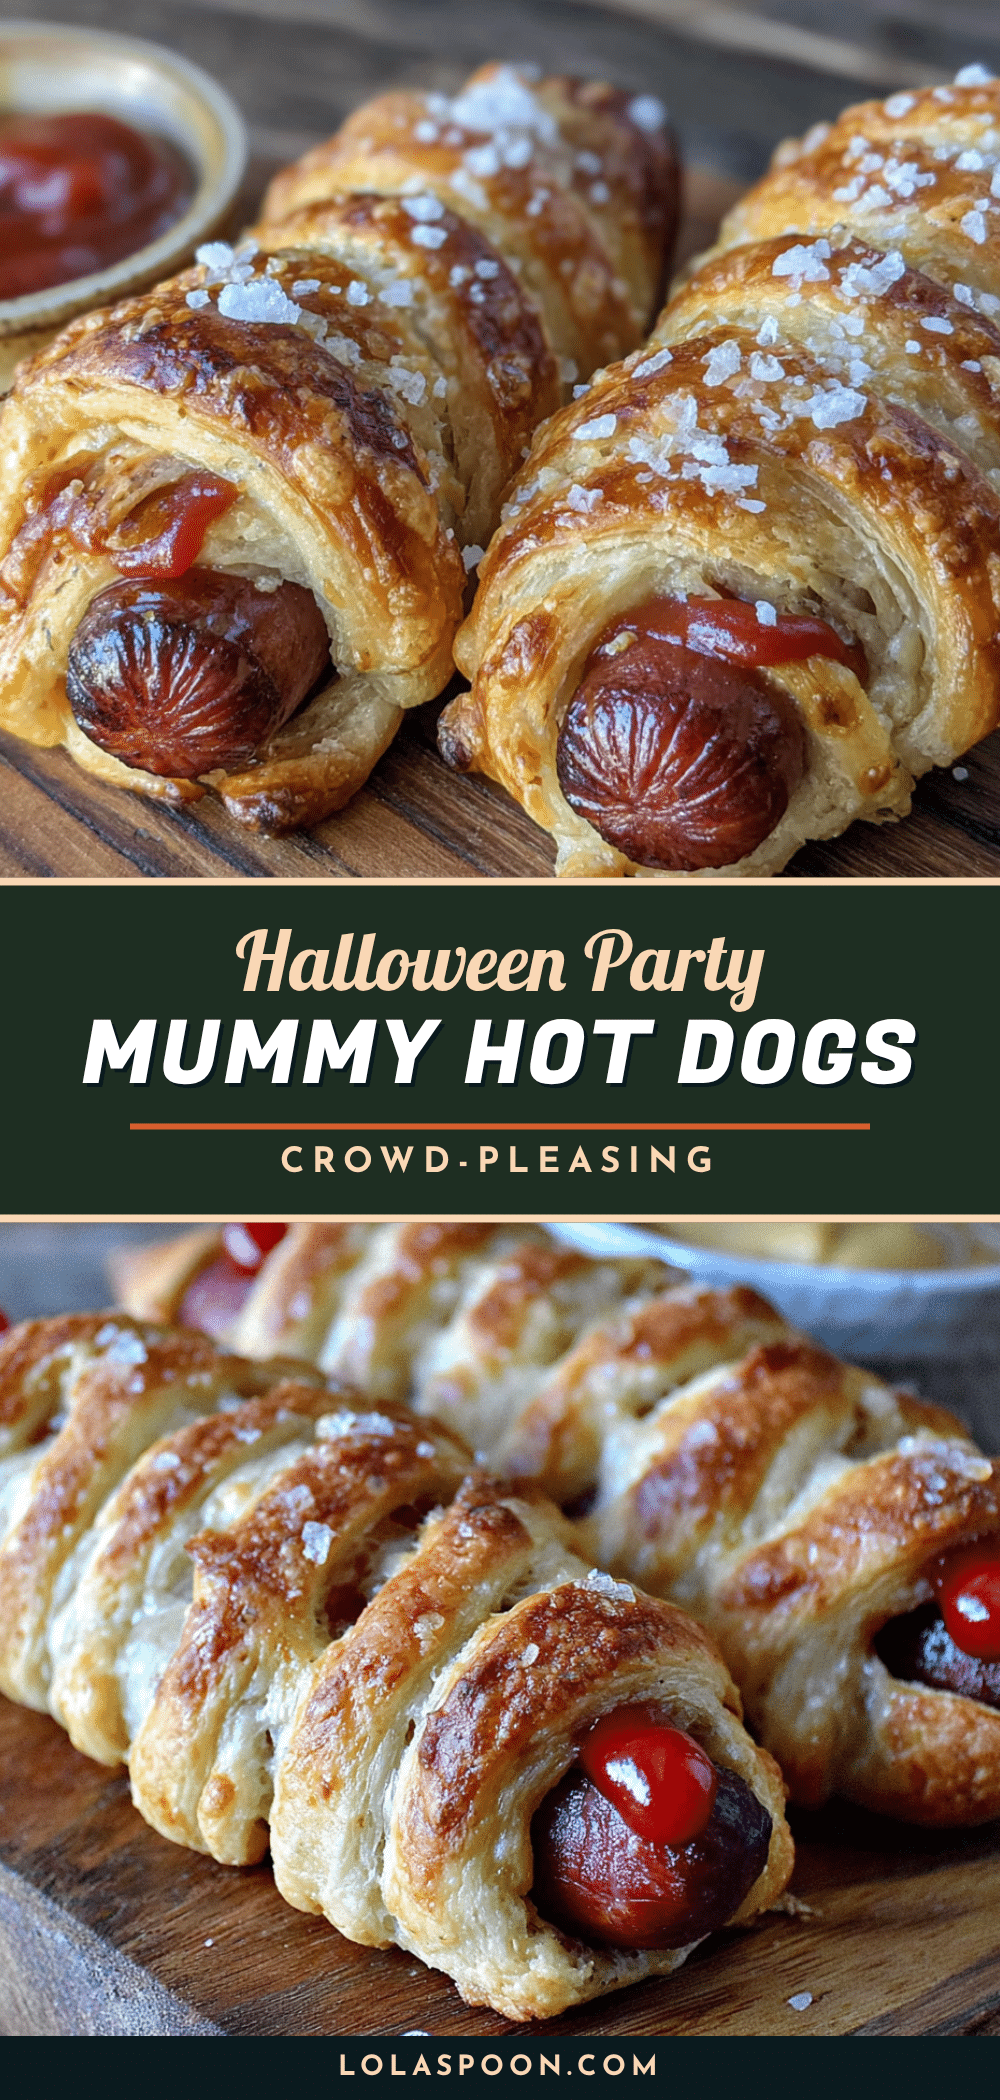
Best Easy Crescent Mummy Hot Dogs for Halloween Parties

These crescent mummy hot dogs are the perfect Halloween party food—quick, easy, and adorable. Made with just a few simple ingredients, they come together in under 25 minutes and are always a crowd-pleaser.
- Prep Time: 10 minutes
- Cook Time: 12 minutes
- Total Time: 22 minutes
- Yield: 8 servings 1x
- Category: Appetizer
- Cuisine: American
Ingredients
- 1 can (8 oz) refrigerated crescent roll dough
- 8 hot dogs
- Yellow mustard (for eyes)
- 1 tablespoon melted butter (optional)
- Sesame seeds or poppy seeds (optional)
Instructions
- Preheat your oven to 375°F (190°C). Line a baking sheet with parchment paper.
- Unroll the crescent dough. If using perforated dough, press the seams together to create one solid sheet.
- Using a sharp knife or pizza cutter, slice the dough lengthwise into thin strips about 1/4 to 1/2 inch wide. Aim for 8 to 10 strips per sheet.
- Take one hot dog and start wrapping a strip of dough around it, leaving a small gap near the top for the face. Overlap the dough slightly as you go. Leave about 1/2 inch of hot dog exposed at the top for the eyes.
- Place each wrapped mummy on the prepared baking sheet, leaving about an inch between them.
- Brush each mummy with melted butter. If using, sprinkle sesame seeds on while the butter is still wet.
- Bake for 10-12 minutes, until the dough is golden brown and flaky.
- Remove from the oven and let cool for 2-3 minutes. Using a toothpick or knife tip, dab two small dots of mustard onto the exposed hot dog area to create the eyes.
- Serve warm.
Notes
Cold dough is easier to work with. If dough gets too warm, refrigerate for 5 minutes. For best results, use regular-sized hot dogs. Add mustard eyes after baking to prevent drying out. Can be assembled up to 24 hours in advance and refrigerated, or frozen unbaked for up to 3 months.
Nutrition
- Serving Size: 1 mummy dog
- Calories: 235
- Sugar: 3
- Sodium: 650
- Fat: 15
- Saturated Fat: 5
- Carbohydrates: 19
- Protein: 8
Keywords: Halloween, mummy hot dogs, crescent rolls, party food, easy appetizer, spooky snacks


