I was standing in the grocery store aisle last October, staring at a bag of baby carrots like they held the secrets to the universe, when the smell hit me — that weird, waxy scent of a brand-new plastic tablecloth. And suddenly I was seven years old at my Aunt Carla’s house, her kitchen smelling like cinnamon and something burning slightly, her fingers stained purple from the punch she was mixing. She wasn’t really my aunt — she was my mom’s best friend from high school — but she was the one who threw the Halloween party every single year without fail. The one where the adults sat around laughing too loud and us kids ran wild until someone inevitably cried. But the thing I remember most? The veggie tray. Not the candy, not the costumes. The veggie tray. She’d arrange it every year like a giant spider web, and I thought it was the coolest thing I’d ever seen. I mean, vegetables that looked like art? It was magic to a kid who usually hid broccoli in her napkin.
She passed away a few years ago, and honestly, I hadn’t thought about those parties in forever. But standing there in that fluorescent-lit aisle, I could see her hands so clearly — those short nails with chipped red polish — carefully placing each broccoli floret like she was building something important. She never made a big deal about it. She’d just set it down on the coffee table and say, “Don’t touch it until I say so,” like she was guarding the crown jewels. And we’d all stand around staring at this beautiful web of vegetables, waiting for permission to destroy it. Maybe you’ve been there — that moment when a random smell or sight pulls you right back to a person you haven’t thought about in years. That’s what happened to me. So I bought the carrots, the broccoli, the cauliflower. I grabbed everything I needed to make my own version of her Perfect Spider Web Veggie Tray for Halloween. And let me tell you, it’s become my favorite tradition, too.
This isn’t just a veggie tray. It’s the one that makes people stop mid-conversation and say, “Wait, did you make that?” It’s the one that gets devoured before the chips even hit the table. And it’s the one I keep making because every time I do, I feel like I’m carrying a little piece of Aunt Carla’s party into my own home. So grab your cutting board and let me show you how to build this thing.
Why You’ll Love This Recipe
Let me be honest with you — I’ve made a lot of veggie trays in my time. Some were sad little store-bought platters that looked like they’d been sitting out for days. Others were ambitious Pinterest fails that collapsed before anyone even saw them. But this Perfect Spider Web Veggie Tray for Halloween? This one’s different. It’s the Goldilocks of appetizers — not too complicated, not too boring, just right. Here’s why you’re going to love it:
- Quick & Easy: You can put this together in about 20 minutes, maybe 30 if you’re particular about your cuts. Perfect for those last-minute Halloween parties where you forgot you volunteered to bring something. (Not that I’ve ever done that. Okay, I’ve absolutely done that.)
- Simple Ingredients: No fancy grocery trips needed here. You’re looking at basic veggies you can find at any store — carrots, broccoli, cauliflower, cherry tomatoes, bell peppers, and some dip. That’s it. You might even have most of them in your fridge right now.
- Perfect for Halloween Parties: This thing is a showstopper at any spooky gathering. It’s thematic without being cheesy, and it fits right in alongside the candy bowls and pumpkin decorations. Kids love it, adults love it, even that one friend who claims they don’t like vegetables will hover around it.
- Crowd-Pleaser: I’ve brought this to potlucks, office parties, and family gatherings, and it always gets rave reviews. There’s something about the spider web design that makes people feel like they’re eating art. Plus, it’s one of those rare dishes that satisfies both the health-conscious crowd and the “I just want something to snack on” crowd.
- Unbelievably Delicious: Okay, I know it’s just vegetables and dip. But there’s something about the way the ranch dip sits in the center like a spider’s body, and the way the veggies radiate outward like webs — it makes everything taste better. I swear. The presentation affects the flavor. That’s science. Or at least it should be.
What makes this recipe different from every other veggie tray out there? It’s the technique. Instead of just throwing veggies on a plate, you’re building a web. You’re creating something that looks intentional and impressive without requiring any actual culinary skills. It’s the perfect trick for people who want to look like they spent hours in the kitchen when really, you just arranged things in a circle. And honestly? That’s my favorite kind of recipe.
What Ingredients You Will Need
This Perfect Spider Web Veggie Tray for Halloween uses simple, wholesome ingredients to deliver that satisfying crunch and festive vibe without any fuss. The beauty of this recipe is that you can customize it based on what’s in season or what your family loves. Here’s what you’ll need:
- 1 large head of broccoli — Look for crowns with tight, dark green florets. You’ll be cutting these into small, bite-sized trees. (I like to grab an extra one because someone always eats the florets while I’m arranging.)
- 1 large head of cauliflower — White or orange cauliflower works great. The orange variety actually adds a nice Halloween color pop. Cut into similar-sized florets as the broccoli for consistency.
- 1 bag of baby carrots — About 16 ounces. No need to peel or cut these — they’re ready to go. I recommend the shorter, stubbier ones because they’re easier to arrange in the web pattern.
- 1 pint of cherry tomatoes — Red or orange work best for the Halloween color scheme. You want them firm and bright. Leave them whole — they’ll act like little jewels in your web.
- 2 bell peppers — One orange and one yellow for that autumn vibe. Cut these into thin strips, about 2 inches long. The strips will form the actual “web” lines radiating from the center.
- 1 cucumber — English cucumbers work best because they have fewer seeds. Slice into rounds or half-moons, about a quarter-inch thick. They add a nice refreshing crunch.
- 1 cup of ranch dip or hummus — This will be the spider’s body in the center. I personally love using a thick, creamy ranch (Hidden Valley is my go-to, don’t judge me), but hummus works beautifully for a healthier option. You can even make your own if you’re feeling fancy.
- Black olives — About 8-10 whole black olives. These will become the spider’s legs and eyes. Look for large, pitted olives so they’re easier to work with.
- Fresh parsley or chives — For garnish. A few sprigs around the edges add a nice pop of green and make the whole thing look more intentional.
If you want to get creative, you can add other veggies like snap peas, radishes, or even small pickles. The key is to use a variety of colors and shapes so the web looks full and inviting. For a gluten-free option, just make sure your dip is certified gluten-free. And if you’re dairy-free, swap the ranch for a dairy-free version or go with hummus — it’s just as delicious.
Equipment Needed
You don’t need much to pull off this Perfect Spider Web Veggie Tray for Halloween, which is part of why I love it so much. Here’s what you’ll want to have on hand:
- Large round platter or serving board — A round platter works best for the web design. I use a 16-inch wooden board I picked up at a thrift store for three bucks. If you don’t have round, a large rectangular cutting board or even a pizza pan works in a pinch.
- Sharp chef’s knife — You’ll be cutting through broccoli stems and bell peppers, so a good sharp knife makes all the difference. I learned that lesson the hard way after nearly losing a finger to a dull blade.
- Cutting board — Preferably a large one so you have room to work. I like using a plastic one for veggies because it’s easier to clean, but wood works too.
- Small bowl or ramekin — For holding the dip in the center. You want something that fits nicely in the middle of your platter without taking up too much space. A 4-ounce ramekin is perfect.
- Paper towels — For drying the veggies after washing. Wet veggies slide around and make the web look messy. Trust me on this one.
- Tweezers or small tongs — Optional, but they help with placing the olive legs precisely. I used my fingers for years, but tweezers make it look so much cleaner.
If you don’t have a round platter, don’t stress. A square or rectangular board just means your web will be a little more abstract. Think of it as modern art. And if you don’t have a small ramekin, a custard cup or even a small glass jar works fine. The key is making do with what you’ve got — that’s what real cooking is all about.
Preparation Method
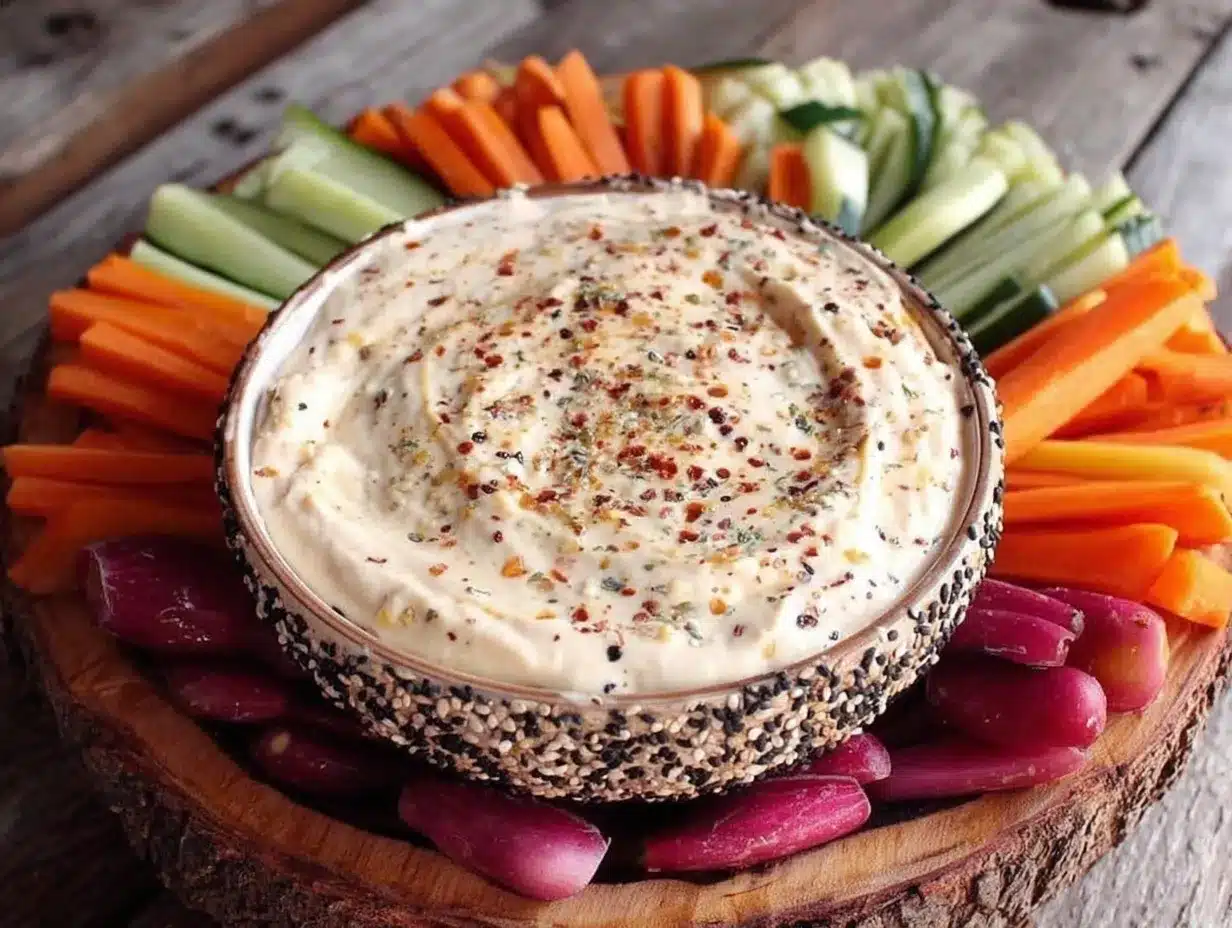
Alright, let’s build this spider web. I’ve made this Perfect Spider Web Veggie Tray for Halloween about a dozen times now, so I’ve got the process down to a science. Take your time with the first few steps — the prep work is where the magic happens.
- Wash and dry all your vegetables thoroughly. This is non-negotiable. Wet veggies make for a slippery, sad-looking web. Spread them out on paper towels and pat them dry. Give them a good 5-10 minutes to air dry while you prep your work station. (I once rushed this step and ended up with a web that looked more like a mudslide. Learn from my mistakes.)
- Cut the broccoli and cauliflower into small florets. You want them bite-sized — about 1 to 1.5 inches across. Cut the stems flush with the florets so they sit flat on the platter. For the broccoli, I like to leave a little stem attached because it gives them a nice tree-like shape. For the cauliflower, just break them apart gently with your hands after cutting the stem. Set them aside in separate bowls.
- Slice the bell peppers into thin strips. Cut off the tops and bottoms, remove the seeds and white pith, then slice them lengthwise into strips about 2 inches long and a quarter-inch wide. These strips will form the actual web lines, so try to keep them uniform. Orange and yellow peppers give that perfect autumn color palette. Set them aside.
- Slice the cucumber into rounds or half-moons. If you’re using an English cucumber, you can leave the skin on for color. Slice into rounds about a quarter-inch thick. If the rounds are too big, cut them in half to make half-moons. These will fill in the gaps in your web.
- Prepare your dip center. Spoon your ranch or hummus into the small ramekin, filling it about three-quarters full. Smooth the top with the back of a spoon so it looks neat. This will be the spider’s body, so make it look intentional. Place the ramekin in the very center of your platter.
- Start building the web lines. Take your pepper strips and lay them out from the center ramekin to the edge of the platter, like spokes on a wheel. Space them evenly — I usually do 8 spokes, like a classic spider web. Press the ends gently against the ramekin so they stay in place. This is the foundation of your design.
- Create the concentric web circles. Using your cucumber slices and cherry tomatoes, start building rings around the center. Place them between the pepper spokes, creating a spiral effect. Start about 2 inches from the center and work your way outward. Alternate colors — tomato, cucumber, tomato, cucumber — to create visual interest. Don’t worry if they’re not perfectly aligned; a little imperfection looks more organic.
- Fill in the wedges with broccoli and cauliflower. Now you’ve got these triangular spaces between your spokes. Fill them with alternating florets of broccoli and cauliflower. Start near the center and work outward, packing them in snugly but not too tight. You want it to look full and abundant, not crammed. The green and white contrast against the orange and yellow peppers is gorgeous.
- Add the baby carrots. These are your accent pieces. Tuck them in around the edges, pointing outward like rays of the sun. They add a nice pop of orange and give the whole tray a finished look. Plus, they’re the easiest thing to grab for dipping.
- Create the spider. This is the fun part. Take your black olives and arrange them on top of the dip to form a spider. Use one olive for the body (cut in half lengthwise if it’s too big) and slice the others into thin strips for legs. You want 8 legs radiating outward from the body. Use the tweezers for precision if you have them. Add two tiny dots of dip for eyes, or use small pieces of chive. It sounds fiddly, but it takes about 2 minutes and everyone loses their minds over it.
- Garnish and serve. Sprinkle fresh parsley or chives around the edges of the platter for a pop of green. Step back and admire your work. Then watch it disappear in about 15 minutes flat.
A few notes from my many attempts: If your pepper spokes keep sliding around, try cutting a tiny slit in the end and hooking it over the edge of the ramekin. And if you run out of room on the platter, just keep a bowl of extra veggies nearby for refills. This tray is meant to be eaten, after all.
Cooking Tips & Techniques
After making this Perfect Spider Web Veggie Tray for Halloween more times than I care to count, I’ve picked up a few tricks that make the process smoother and the final product more impressive. Let me share what I’ve learned the hard way so you don’t have to.
Keep your veggies cold but dry. The biggest mistake I made my first time was washing the veggies and then putting them straight on the platter while they were still wet. The pepper strips slid around, the cucumbers left puddles, and the whole thing looked like a sad, soggy mess. Now I wash everything, lay it out on paper towels, and let it sit in the fridge for about 15 minutes. The cold makes the veggies crisp, and the dryness helps everything stay in place. It’s a game-changer.
Cut your veggies the night before. If you’re hosting a party, do yourself a favor and prep everything the night before. Store the cut veggies in separate zip-top bags with a paper towel to absorb moisture. Then all you have to do on party day is arrange them on the platter. It takes the stress out of last-minute prep and means you can actually enjoy the party instead of hiding in the kitchen.
Use a template if you’re nervous. I know, it sounds silly for a veggie tray, but hear me out. If you’re worried about getting the spokes even, use a piece of string or a toothpick to mark where your pepper strips should go. Or just eyeball it — honestly, even if they’re not perfectly spaced, it still looks great. The web pattern is forgiving because it’s supposed to look organic.
Don’t overcrowd the center. I made this mistake once and ended up with a veggie mountain instead of a web. Leave some negative space around the ramekin so the spider has room to breathe. The web pattern works best when you can see the individual spokes and rings. Think of it as a mandala — the beauty is in the pattern, not the density.
Make extra dip. This is the pro tip you didn’t know you needed. People will eat the dip faster than the veggies, and there’s nothing sadder than a half-eaten veggie tray with an empty dip bowl. Make a little extra and keep it in the fridge so you can refill when needed. Your guests will thank you.
Practice the spider ahead of time. The first time I tried to make the olive spider, I ended up with a blob that looked more like a confused beetle. Now I practice on a small plate before committing to the dip. It takes the pressure off and ensures your spider looks like an actual spider. Your guests don’t need to know about the failed attempts in the trash.
Variations & Adaptations
One of the best things about this Perfect Spider Web Veggie Tray for Halloween is how adaptable it is. I’ve tried several variations over the years, and each one has its own charm. Here are some of my favorites:
- Dietary Variations: For a vegan version, swap the ranch for a cashew-based dip or your favorite hummus. For a low-carb option, skip the carrots and add more cucumber and bell pepper. You can also add celery sticks for extra crunch without the carbs. If you’re avoiding nightshades, replace the tomatoes and peppers with radishes, jicama, and zucchini strips.
- Seasonal Twists: In the fall, I love adding roasted pumpkin seeds or pomegranate seeds as a garnish. They add a nice pop of color and a little crunch. In summer, swap in fresh cherry tomatoes from the garden and add some grilled corn kernels for sweetness. In winter, roasted root vegetable cubes (like parsnips or sweet potatoes) add warmth and heartiness.
- Flavor Variations: Change up the dip to match the theme. A spinach-artichoke dip gives it a green, swampy vibe that’s perfect for Halloween. A spicy sriracha mayo adds a kick that contrasts nicely with the cool veggies. Or go with a classic French onion dip for a retro feel. I once made a beet hummus that turned the center pink, and it was a huge hit — though it looked more like a Valentine’s Day spider than a Halloween one.
- Different Cooking Methods: While this is a no-cook recipe, you can roast some of the veggies for a different texture. Roasted broccoli and cauliflower with a little olive oil and salt bring out their natural sweetness and add a smoky flavor. Just let them cool completely before arranging. I tried this once for a fall party, and the warm, caramelized veggies were a surprising hit.
- Personal Variation: My favorite twist is adding a ring of baby corn around the outside edge. It looks like little fingers reaching out from the web, and it’s a fun conversation starter. I also like to use purple cauliflower when I can find it — the deep purple adds such a dramatic, spooky vibe. Plus, it’s a fun way to trick kids into eating more vegetables. “It’s purple cauliflower!” always gets a “Whoa, cool!” before they scarf it down.
The beauty of this recipe is that it’s a template, not a strict set of rules. Use what you have, swap what you don’t, and make it your own. The spider web pattern is forgiving, and the veggies are forgiving. That’s the kind of recipe I can get behind.
Serving & Storage Suggestions
This Perfect Spider Web Veggie Tray for Halloween is best served cold, right after you’ve arranged it. The crispness of the veggies and the chill of the dip make for a refreshing contrast to all the sugary treats at a Halloween party. Here’s how to make the most of it:
Serving Temperature and Presentation: Serve the tray chilled, straight from the fridge. If you’re setting it out for a party, try to keep it in a cool spot or set the platter on a bed of ice. Veggies start to wilt after about 30 minutes at room temperature, especially the cucumber and bell pepper. I like to bring it out right as guests arrive and refresh it halfway through the party. Place it on a table with other appetizers, and watch it become the center of attention. It’s also great for potlucks — just cover it with plastic wrap and transport it carefully.
Complementary Dishes: This tray pairs beautifully with other Halloween-themed snacks. Try serving it alongside a bowl of popcorn tossed with nutritional yeast for a cheesy flavor, or a platter of deviled eggs with olive spiders on top. For drinks, a pitcher of apple cider or a spooky punch with floating eyeballs (lychee fruits with blueberry pupils) ties the whole theme together. If you’re doing a full meal, it works as a starter before a hearty pumpkin soup or chili.
Storage Instructions: Leftovers can be stored in an airtight container in the refrigerator for up to 2 days. The key is to separate the veggies from the dip — the dip will make everything soggy if left together. Store the veggies in one container with a paper towel to absorb moisture, and keep the dip in a separate small container. The olive spider can be stored in a tiny baggie and reused for another tray if you’re feeling thrifty.
Reheating Methods: This is a cold dish, so no reheating needed. If you want to refresh the veggies after storage, give them a quick rinse in cold water and pat them dry. The crispness won’t be quite as good as fresh, but they’ll still be tasty. For the dip, just give it a stir and it’s good to go.
How Flavors Develop: Honestly, this is best eaten the day you make it. The veggies are at their peak crispness, and the dip is fresh and flavorful. That said, the flavors do meld a bit after a day in the fridge — the ranch dip gets a little more garlicky, and the veggies absorb some of the seasoning. It’s not bad, just different. I wouldn’t make it more than a day ahead, though.
Nutritional Information & Benefits
Let’s talk about what’s actually in this Perfect Spider Web Veggie Tray for Halloween. While I’m not a nutritionist, I can tell you that this is one of the healthier options at any Halloween party. Here’s a rough breakdown per serving (about 1 cup of veggies with 2 tablespoons of dip):
- Calories: Approximately 120-150 calories per serving, depending on the dip you choose. Ranch adds more calories than hummus, but both are reasonable for a party snack.
- Fiber: About 4-5 grams per serving, thanks to all those crunchy veggies. Broccoli and cauliflower are especially high in fiber, which helps with digestion and keeps you feeling full.
- Vitamins and Minerals: This tray is packed with vitamin C from the bell peppers and broccoli, vitamin A from the carrots, and potassium from the cucumbers. The cauliflower adds a good dose of vitamin K and folate. It’s basically a multivitamin in snack form.
- Antioxidants: The colorful veggies — especially the bell peppers and tomatoes — are rich in antioxidants like beta-carotene and lycopene, which help fight inflammation and support immune health. Perfect for cold and flu season.
- Dietary Considerations: This recipe is naturally gluten-free, dairy-free (if you choose a dairy-free dip), and can be made vegan with the right dip choice. It’s also low in sodium and contains no added sugars. The only potential allergen is the dairy in the ranch dip, but that’s easily swapped.
I love that I can bring this to a party and feel good about what I’m eating. Sure, I’ll probably have a piece of candy later, but at least I’ve got a solid foundation of veggies in my system. It’s all about balance, right?
Conclusion
This Perfect Spider Web Veggie Tray for Halloween has become one of my most-requested recipes, and I honestly never get tired of making it. It’s the kind of dish that makes people smile, that sparks conversations, that brings a little bit of whimsy to a party without requiring any actual culinary skill. And every time I arrange those pepper spokes and place that little olive spider in the center, I think of Aunt Carla and her chipped red nail polish and her slightly burned punch. I think of how she made vegetables feel like a treat, not a chore. And I hope that somewhere, she’s smiling down at me and my imperfect, beautiful spider web.
I’d love to hear how yours turns out. Did you add your own twist? Did the kids help you arrange it? Did anyone actually eat the olive spider? Drop a comment below and let me know — I read every single one, and your stories make my day. And if you loved this recipe, share it with a friend who loves Halloween as much as you do. Together, we can make vegetables the star of the party. Happy Halloween, friend. Go make something beautiful.
Frequently Asked Questions
Can I make this spider web veggie tray the day before?
You can prep the veggies the day before, but I recommend arranging the tray on the day you plan to serve it. The veggies stay crisper, and the presentation looks fresher. If you must assemble it ahead, cover it tightly with plastic wrap and keep it in the fridge for no more than 4-6 hours.
What’s the best dip for a Halloween spider web veggie tray?
Ranch dressing is the classic choice because it’s thick and stays in place, plus it’s a crowd-pleaser. But hummus works beautifully too, especially if you want a healthier option. For a spooky twist, try a green spinach dip or a black bean dip for a darker, more dramatic center.
How do I keep the veggies from sliding around on the platter?
Make sure your veggies are completely dry before arranging them. You can also put a thin layer of dip on the bottom of the ramekin to help it stick to the platter. If your pepper strips still slide, cut a tiny slit in the end and hook it over the edge of the ramekin — that usually does the trick.
Can I use frozen vegetables for this recipe?
I wouldn’t recommend it. Frozen vegetables release a lot of water when they thaw, which will make your web soggy and sad. Stick with fresh veggies for the best texture and presentation. If you’re in a pinch, you can use thawed and well-drained frozen broccoli, but fresh is always better.
How long will this veggie tray last at a party?
It’s best within the first hour of being set out. After that, the veggies start to wilt and the dip can get warm. If you’re hosting a longer party, keep a backup batch of prepped veggies in the fridge and refresh the tray halfway through. Your guests will appreciate the fresh crunch.
Pin This Recipe!
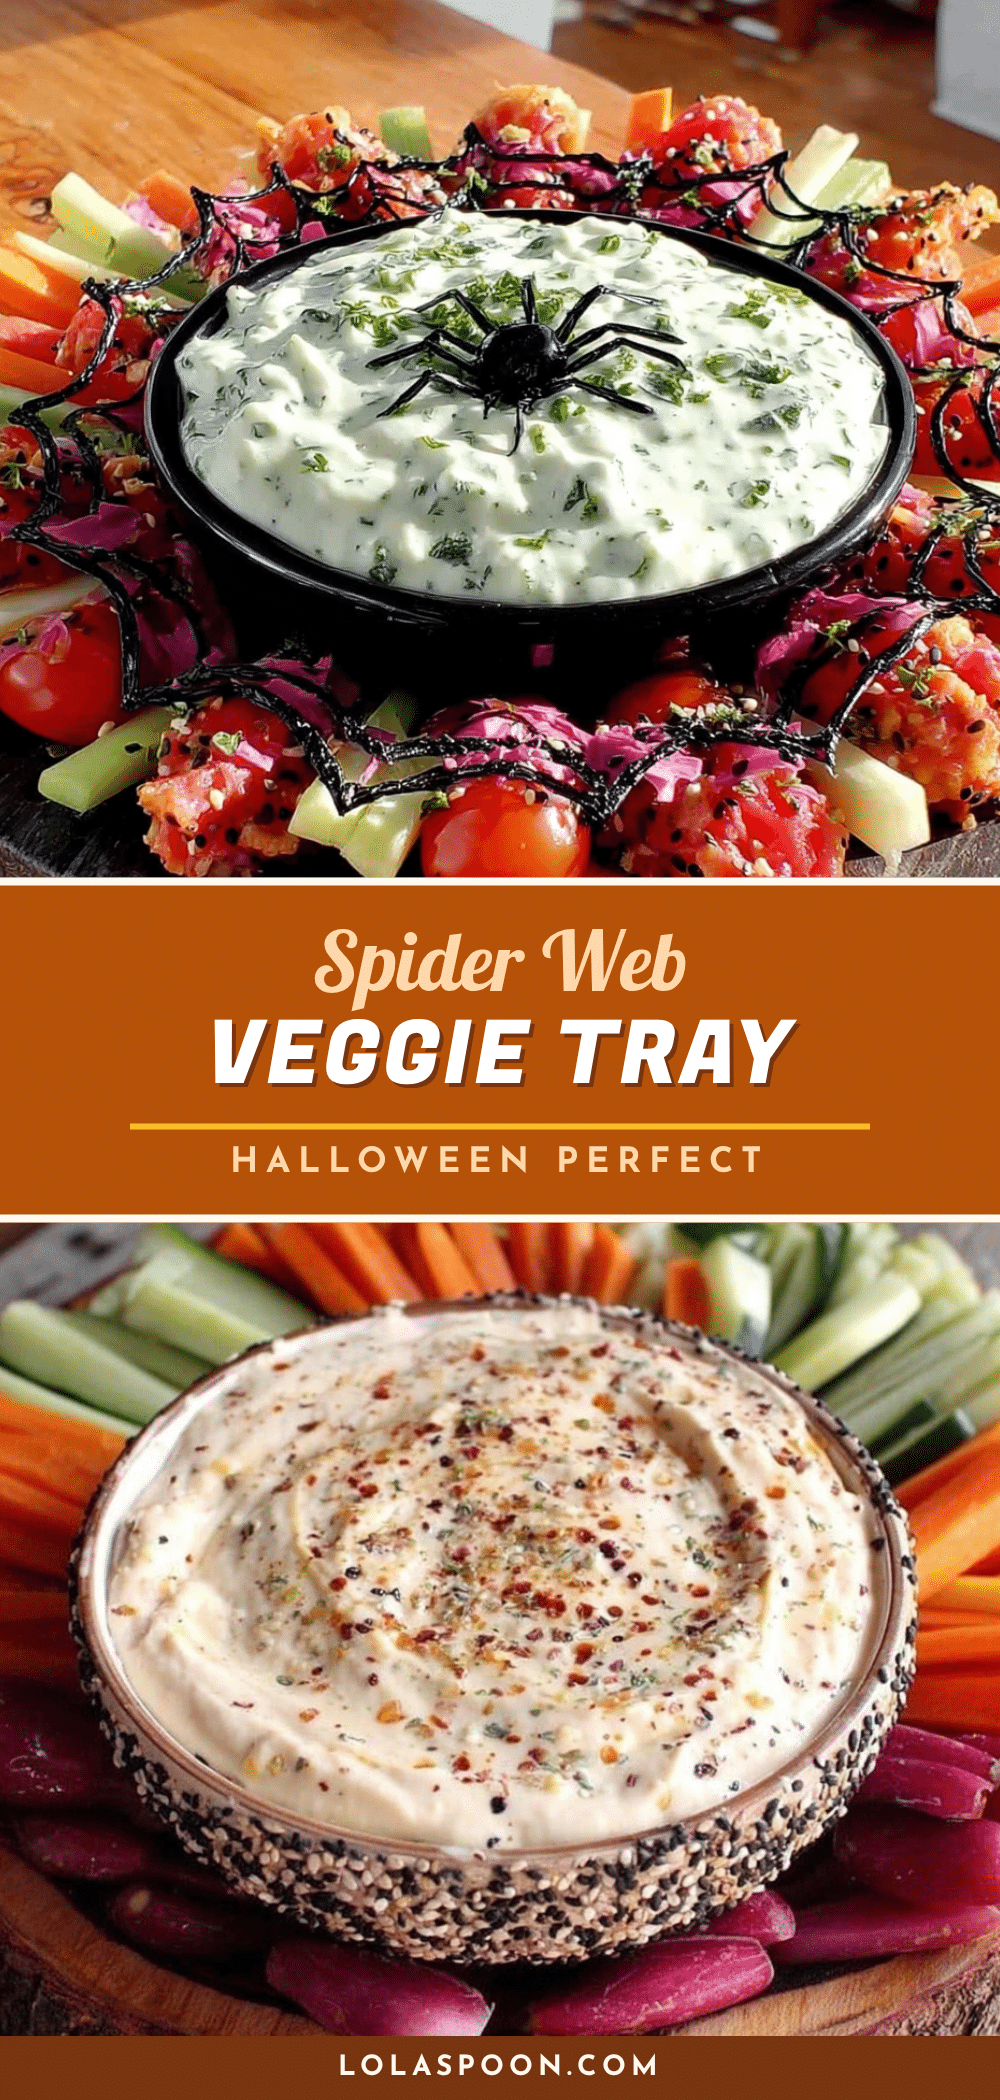
Perfect Spider Web Veggie Tray: Easy Halloween Appetizer
A stunning and easy Halloween appetizer that transforms fresh vegetables into a spider web design, perfect for parties and guaranteed to be a crowd-pleaser.
- Prep Time: 20 minutes
- Cook Time: 0 minutes
- Total Time: 20 minutes
- Yield: 8 servings 1x
- Category: Appetizer
- Cuisine: American
Ingredients
- 1 large head of broccoli
- 1 large head of cauliflower
- 1 bag (16 oz) baby carrots
- 1 pint cherry tomatoes
- 2 bell peppers (1 orange, 1 yellow)
- 1 English cucumber
- 1 cup ranch dip or hummus
- 8–10 whole black olives
- Fresh parsley or chives for garnish
Instructions
- Wash and dry all vegetables thoroughly. Spread them on paper towels and let air dry for 5-10 minutes.
- Cut broccoli and cauliflower into small, bite-sized florets (about 1 to 1.5 inches). Cut stems flush so they sit flat.
- Slice bell peppers into thin strips, about 2 inches long and 1/4 inch wide.
- Slice cucumber into rounds or half-moons, about 1/4 inch thick.
- Spoon ranch dip or hummus into a small ramekin, filling about three-quarters full. Smooth the top and place the ramekin in the center of a large round platter.
- Lay pepper strips from the center ramekin to the edge of the platter like spokes on a wheel (about 8 spokes). Press ends gently against the ramekin.
- Create concentric circles around the center using cucumber slices and cherry tomatoes, alternating colors. Start about 2 inches from the center and work outward.
- Fill the triangular spaces between spokes with alternating florets of broccoli and cauliflower, starting near the center and working outward.
- Tuck baby carrots around the edges, pointing outward like rays.
- Arrange black olives on top of the dip to form a spider: one olive for the body (cut in half if needed), and the others sliced into thin strips for 8 legs. Add two tiny dots of dip or chive pieces for eyes.
- Garnish with fresh parsley or chives around the edges. Serve immediately.
Notes
Keep veggies cold but dry for best results. Cut veggies the night before to save time. Use a template if nervous about spacing. Don’t overcrowd the center. Make extra dip for refills. Practice the olive spider ahead of time.
Nutrition
- Serving Size: 1 cup of veggies wit
- Calories: 135
- Sugar: 6
- Sodium: 280
- Fat: 8
- Saturated Fat: 1.5
- Carbohydrates: 14
- Fiber: 4
- Protein: 3
Keywords: Halloween, veggie tray, spider web, appetizer, party, vegetables, healthy snack


