The Halloween bake sale was in six hours and I’d completely forgotten. I mean, I’d remembered the costume for my daughter’s school parade, the face paint, the spooky stickers for her classmates—everything except my assigned table for the bake sale. Everyone else would be bringing elaborate themed creations: witch-hat cupcakes with piped green frosting, mummy hot dogs wrapped in puff pastry, those creepy-crawly dirt cups with gummy worms. I had a package of chocolate chips, some butter, and frankly, a growing sense of panic.
I stood in my kitchen at 7 AM, still in my pajamas, staring at the pantry like it might magically produce something impressive. The coffee hadn’t even finished brewing. My daughter kept asking if we could make a spider web cake, and I laughed—until the idea stuck. A spider web pattern on a cookie bar, maybe? Something that looked like I’d spent hours on it, but could actually come together before I had to get dressed. That’s when these Easy Spider Web Chocolate Chip Cookie Bars were born, and honestly, they saved my reputation.
The best part? I didn’t even win the bake sale for the right reasons. I won because the other moms kept coming back for “just one more bite” of something that took me less than thirty minutes to throw together. One mom actually asked for the recipe before the event was over, looking slightly annoyed that my “simple” bars were outshining her three-layer monster cake. Maybe you’ve been there—the accidental overachiever who stumbles into a win when you least expect it. That’s exactly what these cookie bars are: a happy accident that became my most-requested recipe.
Why You’ll Love This Recipe
Let me tell you why these Easy Spider Web Chocolate Chip Cookie Bars have become my secret weapon for every fall gathering, last-minute school event, and Halloween party I’ve ever attended. I’ve tested this recipe at least a dozen times across different ovens, different butter temperatures, and different chocolate chip brands—and it never fails.
- Quick & Easy : From start to finish, you’re looking at about 30 minutes. No chilling dough, no rolling individual cookies, no complicated piping bags. Just press, bake, and decorate.
- Simple Ingredients : You probably have everything in your pantry right now. Butter, sugar, eggs, flour, chocolate chips—the usual suspects. The spider web effect uses a little powdered sugar and melted chocolate, nothing fancy.
- Perfect for Halloween Parties : These bars look festive and spooky without being overly complicated. Kids love the web design, and adults love that they taste like a classic chocolate chip cookie in bar form.
- Crowd-Pleaser : I’ve brought these to three different Halloween events now, and they disappear faster than anything else on the table. There’s something about the combination of soft cookie bar and melty chocolate that people can’t resist.
- Unbelievably Delicious : The texture is what gets me every time—crispy edges, soft and chewy center, with pockets of melted chocolate in every bite. It’s comfort food at its finest, and it takes almost no effort.
What makes this recipe different from the hundreds of other cookie bar recipes out there? It’s the method. Instead of creaming the butter and sugar separately (which takes time and a mixer), I use melted butter. This gives you a denser, chewier texture that holds up beautifully for bar cutting and decorating. Plus, the melted butter method means you can mix everything by hand in one bowl. Less cleanup, more time for the fun part—making that spider web.
This recipe isn’t just good—it’s the kind that makes you close your eyes after the first bite. It’s the cookie bar equivalent of a warm hug on a chilly October evening. Perfect for impressing guests without stress, or turning a simple Tuesday night into something a little more magical.
What Ingredients You Will Need
This recipe uses simple, wholesome ingredients to deliver bold flavor and satisfying texture without the fuss. Most of these are pantry staples, which is exactly what you want when you’re scrambling to make something for a last-minute event. Here’s everything you’ll need:
For the Cookie Bars
- 1/2 cup (1 stick) unsalted butter, melted (adds richness and creates that chewy texture)
- 3/4 cup granulated sugar (for sweetness and structure)
- 1/4 cup packed light brown sugar (adds moisture and a hint of caramel flavor)
- 1 large egg, room temperature (binds everything together)
- 1 teaspoon vanilla extract (pure, not imitation, for best flavor)
- 1 and 1/2 cups all-purpose flour (spooned and leveled—don’t scoop directly)
- 1/2 teaspoon baking soda (helps the bars rise slightly)
- 1/4 teaspoon salt (balances the sweetness)
- 1 cup semi-sweet chocolate chips (I prefer Ghirardelli or Toll House for consistent melting)
For the Spider Web Decoration
- 1/4 cup powdered sugar (for dusting—creates the web effect)
- 2 tablespoons melted chocolate chips or chocolate melting wafers (for the spider lines)
- Optional: Candy spiders or gummy spiders (for a fun garnish—my daughter insists on these)
A few ingredient notes from my trials: If you only have salted butter, reduce the added salt to just a pinch. I’ve made these with both light and dark brown sugar, and light brown gives a more neutral flavor that lets the chocolate shine. For a dairy-free version, use vegan butter and dairy-free chocolate chips—I’ve had good results with Earth Balance and Enjoy Life brand chips. And if you’re out of vanilla extract, you can skip it, but the flavor won’t be quite as rich.
For the chocolate chips in the decoration, I recommend using melting wafers if you have them—they stay smooth and don’t seize up. But honestly, regular chocolate chips melted in the microwave work fine too. Just be careful not to overheat them, or they’ll turn into a grainy mess (speaking from experience here).
Equipment Needed
You don’t need a fancy kitchen to make these Easy Spider Web Chocolate Chip Cookie Bars. Here’s what you’ll need:
- 8×8-inch baking pan (a 9×9 works too, but bars will be slightly thinner and may need less baking time)
- Parchment paper (non-negotiable for easy removal—I learned this the hard way after a sticky disaster)
- Large mixing bowl (any bowl works, but glass or stainless steel is easiest to clean)
- Whisk or wooden spoon (no electric mixer required)
- Rubber spatula (for scraping every last bit of dough into the pan)
- Small microwave-safe bowl (for melting chocolate for the web)
- Toothpick or skewer (for dragging the spider web design)
- Fine-mesh strainer (for dusting powdered sugar evenly—a regular sieve works too)
- Cooling rack (helps bars cool evenly and prevents soggy bottoms)
If you don’t have an 8×8 pan, you can use a 9×9—just reduce the baking time by 2-3 minutes and check early. For the parchment paper, I buy the pre-cut sheets from Costco because they’re perfectly sized, but regular parchment from a roll works fine. Just leave an overhang on two sides so you can lift the bars out easily.
Preparation Method
Let’s get into the actual process. I’ve broken this down into clear steps with all the little details that make the difference between good cookie bars and great ones.
- Preheat your oven to 350°F (175°C). Line your 8×8-inch baking pan with parchment paper, leaving an overhang on two opposite sides. This will be your lifeline later when you’re trying to lift the bars out cleanly. Trust me on this—I once forgot the parchment and spent 20 minutes chipping cookie bar out of a pan with a butter knife.
- Melt the butter. Place the 1/2 cup unsalted butter in a microwave-safe bowl and heat in 20-second intervals until just melted. You want it melted but not hot—warm to the touch is perfect. If it’s too hot, let it cool for a minute before adding the sugars. Hot butter can cook the egg when you add it, and nobody wants scrambled eggs in their cookie bars.
- Mix the wet ingredients. In your large mixing bowl, combine the melted butter with 3/4 cup granulated sugar and 1/4 cup packed light brown sugar. Whisk until well combined—it should look like wet sand. Add 1 large egg and 1 teaspoon vanilla extract, and whisk until smooth and glossy. The mixture should be thick and slightly shiny.
- Add the dry ingredients. Sprinkle 1 and 1/2 cups all-purpose flour, 1/2 teaspoon baking soda, and 1/4 teaspoon salt over the wet mixture. Stir with your whisk or wooden spoon until just combined. Do not overmix! Stop as soon as you no longer see streaks of flour. Overmixing develops gluten and makes the bars tough instead of tender.
- Fold in the chocolate chips. Add 1 cup semi-sweet chocolate chips and fold them in gently with your rubber spatula. Make sure they’re evenly distributed throughout the dough. The dough will be thick and slightly sticky—that’s exactly what you want.
- Press into the pan. Transfer the dough to your prepared baking pan. Using your hands or the back of a spoon, press the dough into an even layer. Wet your fingers slightly if the dough sticks to you. Make sure the dough reaches all four corners and is level across the top. This ensures even baking.
- Bake. Place the pan on the middle rack of your preheated oven and bake for 18-22 minutes. The edges should be golden brown and the center should look set but still soft. A toothpick inserted into the center should come out with a few moist crumbs—not wet batter. My oven runs hot, so I always check at 18 minutes. If the center jiggles, give it another 2 minutes.
- Cool completely. This is the hardest part. Let the bars cool in the pan on a cooling rack for at least 30 minutes. Then lift them out using the parchment overhang and let them cool completely on the rack before decorating. If you try to decorate while they’re warm, the powdered sugar will melt and the chocolate will smear. I’ve made this mistake twice, and both times I ended up with a sticky mess that looked nothing like a spider web.
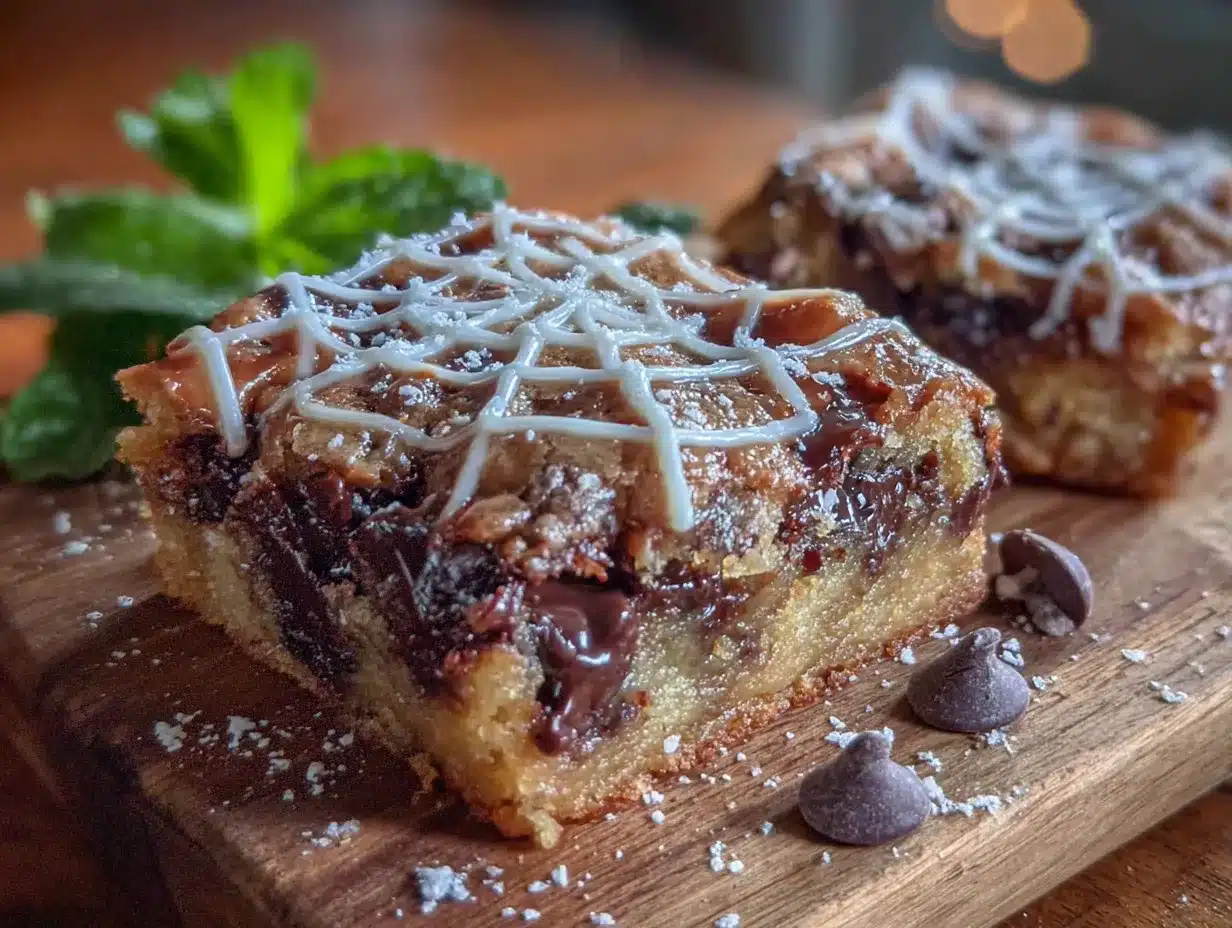
- Create the spider web. Once the bars are completely cool, place a fine-mesh strainer over the bars and add about 1/4 cup powdered sugar. Gently tap the strainer to dust an even layer of sugar over the entire surface. Then, melt 2 tablespoons of chocolate chips in a small microwave-safe bowl (20-second intervals, stirring between each). Transfer the melted chocolate to a small piping bag or a zip-top bag with a tiny corner snipped off. Pipe a spiral pattern on top of the powdered sugar—start in the center and work your way out. Then, use a toothpick or skewer to drag lines from the center outward, creating the web effect. Space the lines evenly around the circle for the best look.
- Let the decoration set. Allow the chocolate to set completely before cutting into bars. This takes about 15-20 minutes at room temperature, or you can pop the pan in the fridge for 10 minutes if you’re in a hurry.
Cooking Tips & Techniques
After making these Easy Spider Web Chocolate Chip Cookie Bars more times than I care to admit, I’ve collected a few tricks that make the process smoother and the results more consistent.
Don’t overbake. This is the number one mistake I see people make with cookie bars. They look underdone in the center when you pull them out, but they continue to cook from the residual heat of the pan. If you wait until the center looks fully set, you’ll end up with dry, crumbly bars. Pull them when the edges are golden and the center is just barely set—it should still look slightly soft.
Use room temperature egg. If you forget to take your egg out of the fridge ahead of time, place it in a bowl of warm water for 5 minutes. A cold egg will seize the melted butter and make the dough harder to mix. I learned this the hard way when I ended up with lumpy dough and had to start over.
Measure flour correctly. Spoon the flour into your measuring cup and level it off with a knife. Scooping directly from the bag packs the flour down and can add up to 25% more flour than the recipe calls for. This leads to dry, cakey bars instead of chewy ones.
Chill the pan for cleaner cuts. After the bars have cooled and the decoration is set, pop the whole pan in the fridge for 15 minutes before cutting. This firms up the chocolate and makes for cleaner, sharper edges. Use a sharp chef’s knife and wipe it clean between cuts for the best presentation.
Make ahead tip. You can bake the cookie bars a day ahead and store them at room temperature, then add the spider web decoration right before serving. The powdered sugar can absorb moisture over time and lose its snowy effect, so wait until the last minute to dust and pipe.
Variations & Adaptations
One of the things I love about this recipe is how adaptable it is. Here are a few variations I’ve tried and loved:
Gluten-Free Version: Substitute the all-purpose flour with a 1:1 gluten-free baking flour blend. I’ve used Bob’s Red Mill and King Arthur brands with great success. The texture will be slightly more tender, but the flavor is still fantastic. No other adjustments needed.
White Chocolate Spider Web: For a spookier look, use white chocolate chips in the dough and dark chocolate for the web design. The contrast is stunning—white bars with dark web lines look incredibly dramatic on a serving platter. My daughter calls these “ghost webs.”
Peanut Butter Twist: Replace 1/4 cup of the melted butter with 1/4 cup creamy peanut butter. This adds a nutty flavor that pairs beautifully with the chocolate. Just be aware that peanut butter makes the dough slightly denser, so you might need to add 1-2 minutes to the baking time.
Double Chocolate Version: Replace 1/4 cup of the flour with 1/4 cup unsweetened cocoa powder. This gives you a dark chocolate base that makes the white powdered sugar spider web really pop. Use white chocolate chips for the dough and dark chocolate for the web lines for maximum contrast.
Spooky Add-Ins: Fold in 1/2 cup of candy corn or 1/2 cup of chopped Reese’s Pieces along with the chocolate chips. The candy adds pops of color and extra sweetness. Just be careful not to overmix, or the candy colors will bleed into the dough.
Serving & Storage Suggestions
These Easy Spider Web Chocolate Chip Cookie Bars are best served at room temperature, which allows the chocolate to be soft and the cookie to be perfectly chewy. I like to arrange them on a black or orange platter for Halloween parties—the contrast really makes the spider web design pop.
For beverages, these bars pair wonderfully with a cold glass of milk, a warm cup of coffee, or even a pumpkin spice latte if you’re feeling festive. If you’re serving them at a party, set them out alongside some apple cider for a cozy fall vibe.
Storage: Store leftover bars in an airtight container at room temperature for up to 5 days. Place a piece of parchment paper between layers to prevent sticking. Do not refrigerate—the cold air will dry out the cookie bars and make the powdered sugar decoration look sad and clumpy.
Freezing: You can freeze the undecorated cookie bars for up to 3 months. Wrap them tightly in plastic wrap, then in aluminum foil, and place in a freezer-safe bag. When ready to serve, thaw at room temperature for about 2 hours, then add the spider web decoration. The bars taste just as fresh as the day you baked them.
Reheating: If you want that fresh-from-the-oven experience, microwave individual bars for 10-15 seconds. The chocolate will get melty and the cookie will soften. Just be aware that the powdered sugar decoration will disappear with reheating, so only do this if you’re eating them yourself and don’t care about presentation.
Nutritional Information & Benefits
Here’s the estimated nutritional information for one cookie bar (based on 16 bars per recipe):
- Calories: Approximately 185
- Total Fat: 10g
- Saturated Fat: 6g
- Cholesterol: 30mg
- Sodium: 85mg
- Total Carbohydrates: 24g
- Dietary Fiber: 1g
- Sugars: 16g
- Protein: 2g
While these are definitely a treat, there are a few small nutritional bright spots. The dark chocolate chips contain antioxidants called flavonoids, which can support heart health in moderate amounts. The butter provides vitamin A, and the egg adds a small amount of protein. For a healthier twist, you can reduce the sugar to 1/2 cup granulated and 1/4 cup brown sugar—the bars will still be sweet enough for most palates.
This recipe is vegetarian-friendly and can be made gluten-free and dairy-free with the substitutions mentioned earlier. It contains wheat, dairy, and eggs, so it’s not suitable for those with allergies to those ingredients. If you’re serving at a school event, check for any allergy policies first.
Conclusion
These Easy Spider Web Chocolate Chip Cookie Bars have saved me more times than I can count. From last-minute bake sales to impromptu Halloween parties, they’ve never let me down. They’re the recipe that makes you look like you planned ahead, even when you’re scrambling at the last minute. And honestly? That’s a superpower worth having in your back pocket.
I encourage you to make these your own. Add your favorite candy, experiment with different chocolate types, or let your kids help with the spider web design—it’s a great activity for little hands. The beauty of this recipe is that it’s forgiving. It doesn’t demand perfection. It just asks you to show up and have fun with it.
If you try these Easy Spider Web Chocolate Chip Cookie Bars, I’d love to hear about it. Drop a comment below and let me know how they turned out, what variations you tried, or if your kids helped with the decorating. And if you have a last-minute event coming up? Make these. You’ll thank me later.
Happy baking, and happy Halloween!
Frequently Asked Questions
Can I use a 9×13 pan instead of an 8×8?
Yes, but the bars will be much thinner. Double the recipe for a 9×13 pan, and reduce the baking time to about 15-18 minutes. Keep a close eye on them—thinner bars bake faster and can dry out quickly.
Why did my powdered sugar melt into the bars?
This happens when the bars are still warm when you dust them. Make sure the bars are completely cool before adding the powdered sugar. If they’re even slightly warm, the sugar will absorb moisture and dissolve. Patience is key here—let them cool fully on a rack.
Can I make the spider web with white chocolate instead?
Absolutely! White chocolate makes a beautiful contrast against the golden cookie bars. Just melt it the same way you would dark chocolate, and pipe it carefully. White chocolate can be more temperamental, so melt it in 15-second intervals and stir gently.
How do I get clean cuts on the cookie bars?
Chill the pan in the fridge for 15-20 minutes before cutting. Use a sharp chef’s knife and wipe it clean with a damp paper towel between each cut. This prevents the chocolate decoration from smearing and gives you picture-perfect bars every time.
Can I freeze the decorated bars?
I don’t recommend freezing bars after they’ve been decorated with the spider web. The powdered sugar will absorb moisture during thawing and lose its snowy effect. Freeze the undecorated bars instead, then add the spider web design after they’ve thawed at room temperature.
Pin This Recipe!
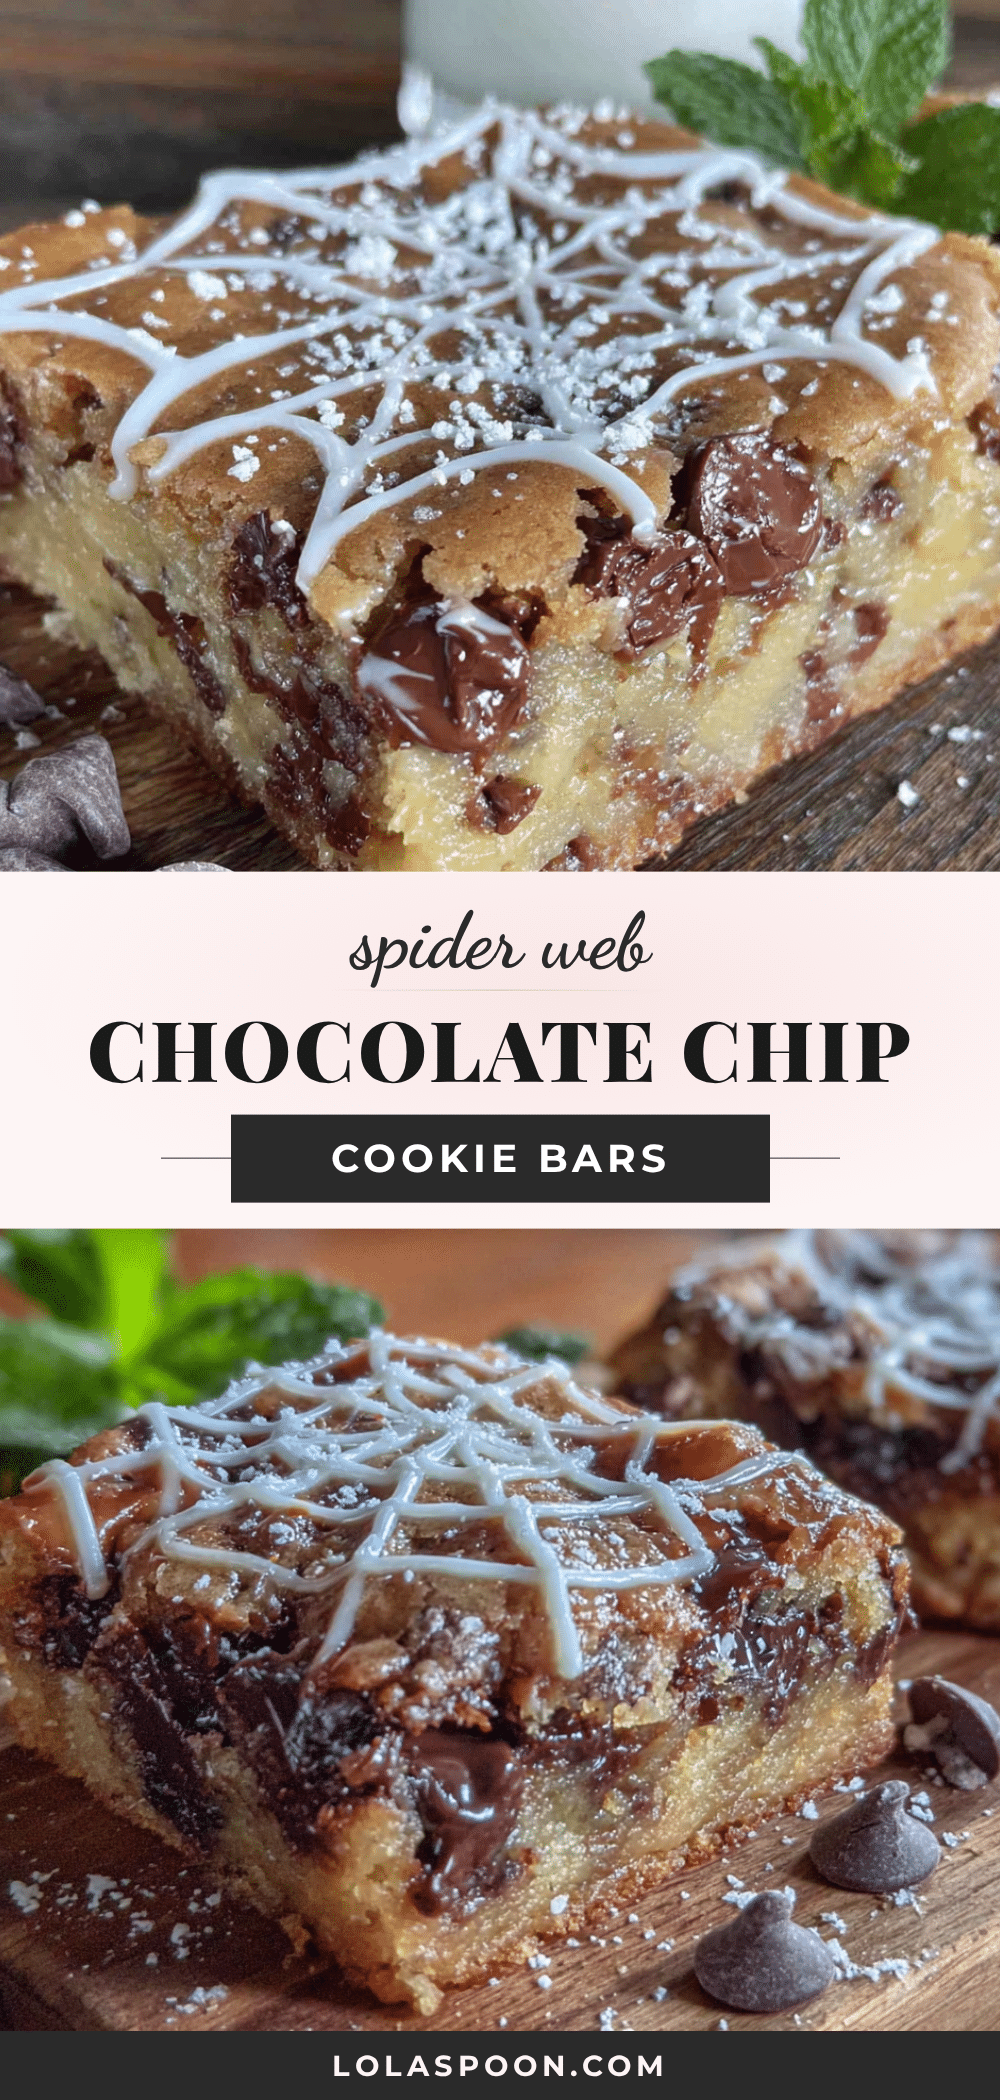
Easy Spider Web Chocolate Chip Cookie Bars (30-Minute Recipe)
These Easy Spider Web Chocolate Chip Cookie Bars are a quick and festive Halloween treat that comes together in just 30 minutes. With a chewy texture, melty chocolate chips, and a stunning spider web decoration, they’re perfect for last-minute bake sales, parties, or any fall gathering.
- Prep Time: 10 minutes
- Cook Time: 20 minutes
- Total Time: 30 minutes
- Yield: 16 servings 1x
- Category: Dessert
- Cuisine: American
Ingredients
- 1/2 cup (1 stick) unsalted butter, melted
- 3/4 cup granulated sugar
- 1/4 cup packed light brown sugar
- 1 large egg, room temperature
- 1 teaspoon vanilla extract
- 1 and 1/2 cups all-purpose flour, spooned and leveled
- 1/2 teaspoon baking soda
- 1/4 teaspoon salt
- 1 cup semi-sweet chocolate chips
- 1/4 cup powdered sugar (for decoration)
- 2 tablespoons melted chocolate chips or chocolate melting wafers (for decoration)
- Optional: Candy spiders or gummy spiders (for garnish)
Instructions
- Preheat your oven to 350°F (175°C). Line an 8×8-inch baking pan with parchment paper, leaving an overhang on two opposite sides.
- Melt the butter in a microwave-safe bowl in 20-second intervals until just melted. Let cool slightly if too hot.
- In a large mixing bowl, combine the melted butter with granulated sugar and packed light brown sugar. Whisk until well combined.
- Add the egg and vanilla extract, and whisk until smooth and glossy.
- Sprinkle the flour, baking soda, and salt over the wet mixture. Stir until just combined; do not overmix.
- Fold in the chocolate chips gently with a rubber spatula until evenly distributed.
- Transfer the dough to the prepared pan. Press into an even layer using your hands or the back of a spoon.
- Bake on the middle rack for 18-22 minutes, until edges are golden brown and center is set but still soft. A toothpick inserted should come out with moist crumbs.
- Cool the bars in the pan on a cooling rack for at least 30 minutes. Then lift out using the parchment and cool completely.
- Once completely cool, dust the top evenly with powdered sugar using a fine-mesh strainer.
- Melt 2 tablespoons of chocolate chips in a small microwave-safe bowl (20-second intervals, stirring between each). Transfer to a small piping bag or zip-top bag with a tiny corner snipped off.
- Pipe a spiral pattern on top of the powdered sugar, starting in the center and working outward.
- Use a toothpick or skewer to drag lines from the center outward, creating a web effect. Space the lines evenly.
- Let the chocolate set completely (15-20 minutes at room temperature or 10 minutes in the fridge) before cutting into bars.
Notes
Don’t overbake; pull bars when edges are golden and center is just barely set. Use room temperature egg to avoid seizing the butter. Measure flour correctly by spooning and leveling. Chill the pan for 15 minutes before cutting for cleaner cuts. Make ahead: bake bars a day ahead, store at room temperature, and decorate just before serving.
Nutrition
- Serving Size: 1 bar
- Calories: 185
- Sugar: 16
- Sodium: 85
- Fat: 10
- Saturated Fat: 6
- Carbohydrates: 24
- Fiber: 1
- Protein: 2
Keywords: spider web cookie bars, chocolate chip cookie bars, Halloween dessert, easy cookie bars, 30-minute recipe, fall baking, last-minute dessert


