The last place I expected to find a pie recipe was wedged between a tax manual and a dog-eared romance novel at a library book sale. It was a gray Saturday in October, the kind where the light gets all soft and golden by three in the afternoon, and I was hunting for old cookbooks, not life-changing pastry tips. But there it was—a spiral-bound community cookbook from some church in Iowa, held together with a rubber band and smelling faintly of vanilla and old paper. I almost put it back, honestly. The cover had a cartoon pilgrim on it that looked more confused than thankful. But I flipped it open anyway, and that’s when I met the pumpkin pie recipe that changed my entire approach to Thanksgiving dessert.
The woman who submitted it was named Gertrude, and her note at the bottom said, “This is the one my husband asks for every November. Don’t skip the butter.” I laughed out loud in the quiet library aisle, which earned me a stern look from the librarian. But you know that feeling when you just know a recipe is going to be good? That was it. I paid seventy-five cents for the book, took it home, and made Gertrude’s pie that very afternoon. Let me tell you—my kitchen smelled like a hug for three days straight. The crust was flaky and golden, and the filling had this velvety texture that felt like it was made from actual pumpkin, not just spice-flavored goo. I’ve tweaked it a little over the years (Gertrude, I hope you don’t mind), but the soul of it is still hers. And now I’m passing it along to you. Because honestly, everyone deserves a cozy homemade pumpkin pie with buttery crust that makes them close their eyes on the first bite.
Why You’ll Love This Recipe
I’ve tested this cozy homemade pumpkin pie with buttery crust more times than I can count, and let me tell you—it’s the one I bring to every Friendsgiving, every family dinner, and every random Tuesday when I just need a slice of comfort. Here’s why I think you’ll love it too:
- Quick & Easy: The filling comes together in about 10 minutes, and the whole pie is ready in under an hour. No complicated techniques here—just honest, delicious results.
- Simple Ingredients: You probably already have most of this stuff in your pantry. No weird extracts or obscure spices. Just real, wholesome ingredients that work together beautifully.
- Perfect for Cozy Evenings: This pie was made for cold nights, snowy afternoons, and those days when you just need something warm and familiar. It’s comfort food in its purest form.
- Crowd-Pleaser: I’ve served this to everyone from my picky five-year-old nephew to my food-snob chef friend, and it gets rave reviews every single time. Kids and adults both go back for seconds.
- Unbelievably Delicious: The texture is what gets me every time. The filling is silky and rich without being heavy, and the crust is so buttery and flaky it practically melts in your mouth. It’s next-level comfort food, I swear.
What makes this recipe different from all the other pumpkin pie recipes out there? It’s the little things. I use a combination of heavy cream and whole milk for the filling instead of evaporated milk, which gives it a much creamier texture. And the crust? I grate frozen butter into the flour using a box grater—it’s a trick I learned from a pastry chef, and it makes the flakiest crust you’ve ever had. No cutting in butter, no food processor, just a box grater and a little patience. It’s a game-changer, honestly.
This isn’t just a pie—it’s the kind that makes you slow down and actually taste every single bite. The kind that reminds you why homemade is always better than store-bought. And the best part? It’s forgiving. If your crust cracks a little or your filling gets a tiny wrinkle on top, it’s still going to be delicious. Trust me on that.
What Ingredients You Will Need
This cozy homemade pumpkin pie with buttery crust uses simple, honest ingredients to deliver that classic, soul-warming flavor. Most of these are pantry staples, and the few that aren’t are easy to find at any grocery store. Let me walk you through what you’ll need and why each one matters.
For the Buttery Crust
- All-purpose flour, 1 ¼ cups (156g) – I use King Arthur Flour for consistent results, but any brand works. Just don’t use bread flour—it’ll make the crust tough.
- Granulated sugar, 1 tablespoon (12g) – Just a touch of sweetness to balance the savory butter.
- Salt, ½ teaspoon (3g) – Don’t skip this! Salt makes the butter flavor pop.
- Unsalted butter, ½ cup (113g), very cold and frozen for 15 minutes – This is the star of the show. I recommend Kerrygold or any European-style butter for extra richness. The higher fat content makes the crust flakier.
- Ice water, 4 to 6 tablespoons (60-90ml) – You’ll need just enough to bring the dough together. Start with 4 and add more if needed.
- Apple cider vinegar, 1 teaspoon (5ml) – This sounds weird, I know, but it helps prevent gluten formation and makes the crust tender. You won’t taste it at all.
For the Pumpkin Filling
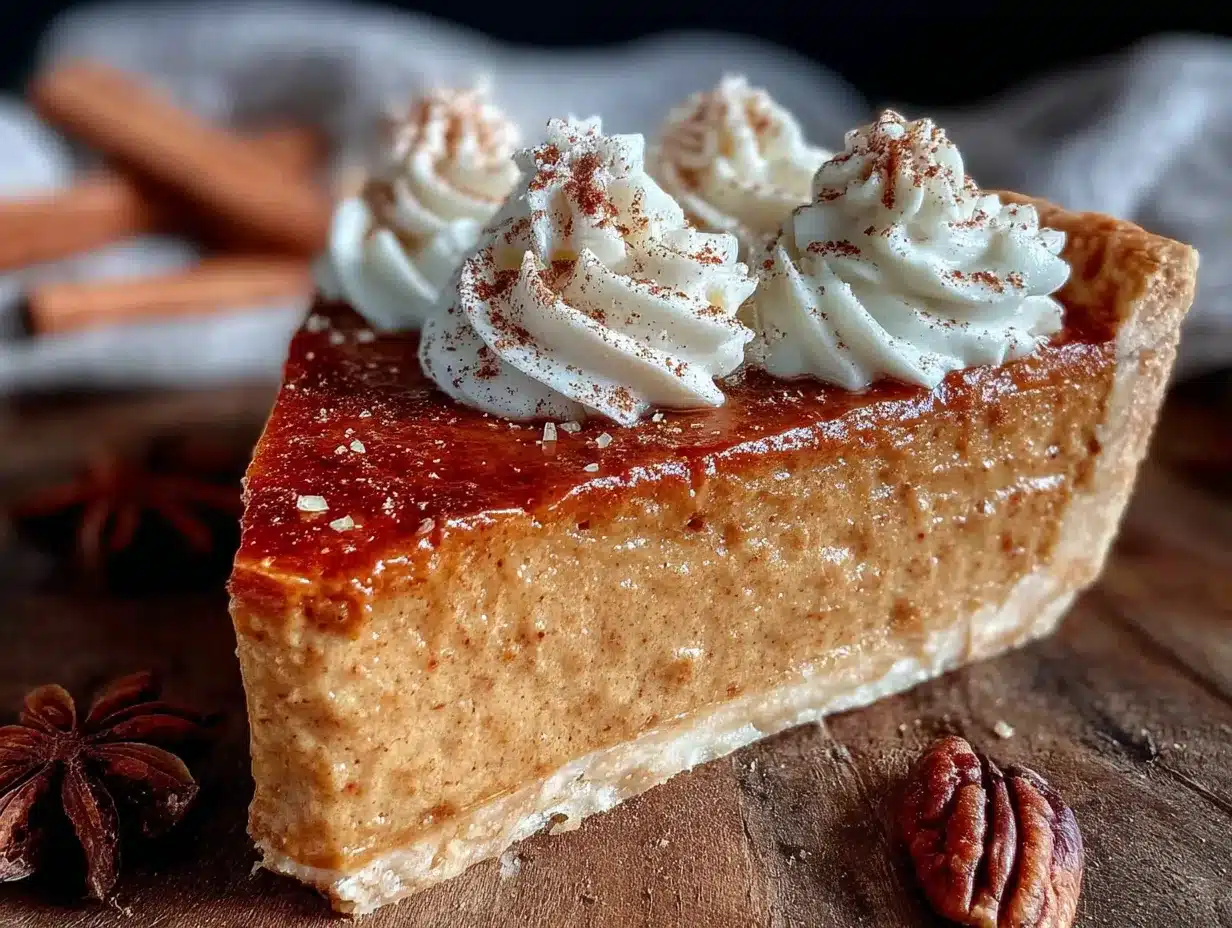
- Pumpkin puree, 1 can (15 ounces or 425g) – Make sure you’re buying pure pumpkin puree, not pumpkin pie filling. Libby’s is my go-to because it’s consistently thick and not watery.
- Heavy cream, ¾ cup (180ml) – This is what makes the filling extra luxurious. You can substitute with half-and-half if you want something lighter, but the texture won’t be quite as rich.
- Whole milk, ¼ cup (60ml) – Combined with the cream, this gives the perfect balance of richness and lightness.
- Light brown sugar, ¾ cup (150g), packed – Brown sugar adds a deeper, more caramel-like sweetness than white sugar alone. Dark brown sugar works too if you want an even more intense flavor.
- Granulated sugar, ¼ cup (50g) – Just enough to balance the brown sugar without overpowering it.
- Large eggs, 2 – Room temperature is best. They incorporate more smoothly into the filling.
- Vanilla extract, 1 teaspoon (5ml) – Pure vanilla, not imitation. It makes a difference.
- Pumpkin pie spice, 2 teaspoons (4g) – I use McCormick or make my own with cinnamon, nutmeg, ginger, and cloves. If you’re making your own, use 1 teaspoon cinnamon, ½ teaspoon ginger, ¼ teaspoon nutmeg, and ¼ teaspoon cloves.
- Cinnamon, ½ teaspoon (1g) – Extra cinnamon because you can never have too much.
- Salt, ¼ teaspoon (1.5g) – Balances the sweetness and brings out the pumpkin flavor.
Equipment Needed
You don’t need a ton of fancy equipment to make this cozy homemade pumpkin pie with buttery crust, but a few key tools will make your life a lot easier. Here’s what I use:
- 9-inch pie dish – Glass or ceramic works best. I use a Pyrex glass pie dish because I can see how the bottom crust is browning. Metal works too, but it conducts heat differently, so keep an eye on it.
- Box grater – This is my secret weapon for the crust. Grating frozen butter is way easier than cutting it in with a pastry blender. Just be careful—your fingers will get cold!
- Large mixing bowls – One for the crust, one for the filling. Stainless steel or glass is fine.
- Whisk – For mixing the filling until smooth. A balloon whisk works great.
- Rolling pin – A standard wooden one works perfectly. If you don’t have one, a wine bottle works in a pinch—I’ve done it more times than I’d like to admit.
- Parchment paper – Lining the crust with parchment and filling it with pie weights or dried beans prevents it from puffing up during blind baking.
- Pie weights or dried beans – I use dried chickpeas that I keep in a jar specifically for this purpose. They’re reusable and cheap.
- Cooling rack – Lets the pie cool evenly so the filling sets properly.
- Sharp knife or pastry wheel – For trimming the excess dough from the edges.
If you don’t have a rolling pin, don’t stress. A clean, smooth-sided water bottle works just fine. I’ve also used my hands to press the dough into the dish in a pinch—it’s not as pretty, but it tastes the same. And if you don’t have pie weights, dried beans or even uncooked rice work perfectly. Just don’t eat them afterward—they’ll be too dry and weird.
Preparation Method
Alright, let’s make this cozy homemade pumpkin pie with buttery crust. I’ll walk you through every step, including what to look for and how to fix common hiccups. Take your time—good things come to those who wait, especially when butter is involved.
Step 1: Make the Crust Dough
Start by grating your frozen butter using the large holes of a box grater. I know it sounds a little crazy, but this is the easiest way to get those tiny, even pieces of butter that make the crust flaky. Toss the grated butter in the freezer while you measure your dry ingredients.
In a large bowl, whisk together the flour, sugar, and salt. Add the grated frozen butter and toss gently with a fork to coat each piece in flour. You want the butter to stay cold and separate, not clump together. Drizzle the apple cider vinegar and 4 tablespoons of ice water over the mixture, then stir with a fork until the dough just starts to come together. It should look shaggy and uneven—that’s perfect. If it seems dry, add another tablespoon of water, one at a time, until it holds together when you squeeze a handful.
Turn the dough out onto a lightly floured surface and bring it together with your hands. Don’t knead it—just press it into a disc about 1 inch thick. Wrap it in plastic wrap and refrigerate for at least 1 hour. I usually let it chill for 2 hours if I have the time. This rest is crucial—it lets the gluten relax and the butter firm up again, which means a tender, flaky crust.
Step 2: Roll Out the Crust
After the dough has chilled, take it out of the fridge and let it sit for 5 minutes at room temperature. This makes it easier to roll without cracking. On a lightly floured surface, roll the dough into a 12-inch circle, about ⅛ inch thick. Rotate the dough a quarter turn after every few rolls to keep it even. If the edges start cracking, let it rest for another minute—it’s just the butter warming up too fast.
Carefully transfer the dough to your 9-inch pie dish. I do this by rolling the dough loosely around my rolling pin, then unrolling it over the dish. Gently press the dough into the bottom and up the sides, being careful not to stretch it. Trim the excess dough, leaving about a ½-inch overhang. Fold the overhang under itself and crimp the edges however you like—I use my thumb and forefinger to make a simple scalloped edge. Pop the crust in the fridge for at least 30 minutes while you preheat the oven to 375°F (190°C).
Step 3: Blind Bake the Crust
Line the chilled crust with a piece of parchment paper, making sure it goes all the way up the sides. Fill it with pie weights or dried beans, spreading them evenly. Bake for 15 minutes, then carefully remove the parchment and weights. Prick the bottom of the crust all over with a fork (this is called docking) and bake for another 8-10 minutes, until the bottom looks dry and just barely golden. Set the crust aside to cool slightly while you make the filling.
Don’t skip the blind baking! It prevents the dreaded soggy bottom and ensures your crust stays flaky even after the filling goes in. Trust me on this one—I learned the hard way after making a pie that was basically soup on a cracker.
Step 4: Make the Filling
In a large bowl, whisk together the pumpkin puree, heavy cream, whole milk, brown sugar, granulated sugar, eggs, vanilla, pumpkin pie spice, cinnamon, and salt. Whisk until everything is completely smooth and silky—about 30 seconds. Don’t overmix or you’ll incorporate too much air, which can cause the filling to puff up and crack. You want it smooth, not frothy.
Pour the filling into the pre-baked crust. It should fill the crust almost to the very top—that’s okay, it won’t overflow as long as you didn’t overmix. Carefully transfer the pie to the oven. I like to put it on a baking sheet just in case of any drips.
Step 5: Bake the Pie
Bake at 375°F (190°C) for 15 minutes, then reduce the oven temperature to 350°F (175°C) and bake for another 35-45 minutes. The pie is done when the edges are set and slightly puffed, but the center still jiggles just a tiny bit when you gently shake the pan. That little jiggle is what you want—it’ll set perfectly as the pie cools. If the crust edges start browning too quickly, cover them with a pie shield or strips of foil.
Let the pie cool completely on a wire rack—this takes about 2 hours. Don’t rush it! Cutting into a warm pie will give you a runny mess. I know it’s hard to wait, but it’s worth it. After it’s completely cool, you can refrigerate it for even cleaner slices.
Cooking Tips & Techniques
I’ve made this cozy homemade pumpkin pie with buttery crust at least thirty times, and I’ve messed it up in almost every way possible. Here’s what I’ve learned so you don’t have to make the same mistakes.
Keep everything cold for the crust. Cold butter is non-negotiable. If the butter melts before the pie goes in the oven, you’ll end up with a tough, greasy crust. I freeze my butter for 15 minutes before grating, and I chill the flour bowl in the fridge too. On a hot day, I even chill my rolling pin.
Don’t overwork the dough. The more you handle pie dough, the tougher it gets. Mix it just until it comes together, and if you see little streaks of butter in the dough, that’s a good thing. Those streaks will steam in the oven and create flaky layers.
Watch for the jiggle. The biggest mistake people make with pumpkin pie is overbaking it. The filling continues to cook as it cools, so you want to pull it out when the center still has a slight wobble. If it’s completely firm in the oven, it’ll be dry and cracked when it cools.
Strain your pumpkin puree. This is a pro tip I picked up from a pastry chef. Sometimes canned pumpkin can be a little watery, which makes the filling loose. If you have time, line a strainer with paper towels, add the pumpkin puree, and let it drain for 30 minutes. You’ll be amazed at how much liquid comes out, and your filling will be extra thick and creamy.
Let it rest overnight. I know, I know—you want to eat it right away. But pumpkin pie truly tastes better the next day. The spices meld together, the texture firms up perfectly, and the flavor gets deeper. Make it the day before you plan to serve it, and thank me later.
Variations & Adaptations
This cozy homemade pumpkin pie with buttery crust is pretty perfect as-is, but I love playing around with it depending on the season or who I’m feeding. Here are some of my favorite variations:
- Gluten-Free Version: Swap the all-purpose flour with a 1:1 gluten-free baking flour blend. I use Bob’s Red Mill. The crust will be a little more delicate, so handle it gently. The filling is naturally gluten-free, so no changes needed there.
- Dairy-Free Version: Use a high-quality vegan butter for the crust (I like Miyoko’s) and replace the heavy cream and whole milk with full-fat coconut cream. The filling will have a subtle coconut flavor that actually pairs beautifully with pumpkin and spices.
- Spiced-Up Variation: Add ¼ teaspoon of cardamom and a pinch of black pepper to the filling for a more complex, warming spice profile. It sounds strange, but black pepper actually enhances the pumpkin flavor—trust me.
- Maple Pumpkin Pie: Replace the granulated sugar with ½ cup of pure maple syrup and reduce the heavy cream to ½ cup. This gives the pie a deeper, more autumnal sweetness. Just know that the filling will be slightly softer because maple syrup adds more liquid.
- Mini Pie Version: Use a muffin tin to make individual pies. Roll the crust out and cut circles to fit into the muffin cups, then fill and bake for about 20-25 minutes. These are perfect for parties or when you don’t want to share a whole pie.
I once made a chocolate-swirl pumpkin pie by accident when I was trying to make a marbled effect. I melted some dark chocolate and drizzled it into the filling before baking, then gently swirled it with a knife. Let me tell you—that “accident” turned into a new family favorite. Don’t be afraid to experiment!
Serving & Storage Suggestions
This cozy homemade pumpkin pie with buttery crust is best served at room temperature or slightly warm. If you’ve refrigerated it, let it sit on the counter for about 30 minutes before serving to take the chill off—it really lets the flavors come alive.
For the ultimate serving experience, top each slice with a generous dollop of lightly sweetened whipped cream. I like to add a tiny pinch of cinnamon to the whipped cream for extra coziness. If you’re feeling fancy, a drizzle of caramel sauce and a sprinkle of toasted pecans takes it over the top. But honestly, it’s perfect on its own too.
Storage: Cover the pie loosely with plastic wrap or foil and store it in the refrigerator for up to 4 days. The crust will stay flaky for about 2 days, then it’ll start to soften a bit—but it’s still delicious.
Freezing: Pumpkin pie freezes beautifully! Cool the pie completely, then wrap it tightly in plastic wrap, followed by a layer of foil. Freeze for up to 3 months. To thaw, place it in the refrigerator overnight and then let it come to room temperature before serving. Don’t freeze a pie that’s already been sliced—the exposed filling will get icy and weird.
Reheating: If you want to serve it warm, pop individual slices in a 300°F (150°C) oven for 10 minutes. Microwaving works in a pinch, but it’ll make the crust soggy. The flavor actually deepens after a day or two in the fridge, so leftovers are always a treat.
Nutritional Information & Benefits
While this cozy homemade pumpkin pie with buttery crust is definitely a treat, it does have some redeeming qualities. Here’s a rough estimate per slice (based on 8 slices):
- Calories: Approximately 380-420
- Fat: 22g
- Carbohydrates: 45g
- Protein: 6g
- Fiber: 3g
- Sugar: 28g
Pumpkin itself is a nutritional powerhouse—it’s packed with vitamin A (great for your eyes and immune system), fiber, and antioxidants. The eggs add protein and healthy fats, and the spices like cinnamon and ginger have anti-inflammatory properties. Sure, it’s not a health food, but it’s a whole lot better than anything you’d get from a box or a bakery. Plus, when you make it yourself, you know exactly what’s going into it—no preservatives, no weird additives, just real, wholesome ingredients.
Dietary Considerations: This recipe contains gluten, dairy, and eggs. For gluten-free and dairy-free adaptations, see the Variations section above. It’s naturally nut-free, but check your pumpkin pie spice blend if you have allergies—some blends are processed in facilities that handle nuts.
Conclusion
This cozy homemade pumpkin pie with buttery crust is more than just a dessert—it’s a little piece of comfort that you can create in your own kitchen. It’s the pie that makes your house smell like fall, that brings people together around the table, and that reminds you why homemade is always worth the effort. Gertrude from that Iowa cookbook knew what she was doing, and I’m so glad I found her recipe tucked away between those dusty pages.
I hope you give this pie a try, whether it’s for Thanksgiving, a cozy Sunday dinner, or just because you need a little warmth in your life. Don’t be afraid to make it your own—add a little extra cinnamon, try the maple version, or top it with way too much whipped cream. That’s the beauty of cooking from scratch. You get to make it exactly the way you love it.
If you do make it, I’d love to hear how it turned out! Leave a comment below and tell me about your pie-making adventure. Did you try a variation? Did your family fight over the last slice? Share your stories—I read every single one. And if you took a photo, tag me on Pinterest—I’m always looking for inspiration from fellow home bakers.
Now go preheat that oven. Your cozy pumpkin pie is waiting.
Frequently Asked Questions
Can I use fresh pumpkin instead of canned?
Absolutely! But you’ll need to roast and puree it first. Cut a sugar pumpkin (not a carving pumpkin) in half, remove the seeds, and roast cut-side down at 400°F (200°C) for about 45 minutes until tender. Scoop out the flesh and puree it in a food processor until smooth. The main difference is that fresh pumpkin puree can be more watery, so you’ll want to strain it through a cheesecloth or paper towel-lined sieve for at least an hour before using.
Why did my crust shrink during baking?
This usually happens when the dough is stretched too much while fitting it into the pie dish. When you stretch the dough, it snaps back in the oven. Next time, let the dough relax in the dish for a few minutes before trimming the edges, and avoid pulling or stretching it. Also, make sure you’ve chilled the crust thoroughly before baking—at least 30 minutes in the fridge.
Can I make this pie ahead of time?
Yes, and I actually recommend it! Pumpkin pie tastes even better the next day because the spices have time to meld together. You can bake it a day in advance, let it cool completely, and store it in the refrigerator. Just don’t add the whipped cream until right before serving, or it’ll get watery.
How do I prevent cracks in the filling?
Cracks happen when the filling is overbaked or when too much air is incorporated during mixing. To avoid this, whisk the filling gently—just until smooth, not frothy—and pull the pie out of the oven when the center still has a slight jiggle. If you do end up with a crack, don’t worry! A generous layer of whipped cream covers it beautifully.
Can I use a store-bought crust instead?
You can, but honestly, the buttery crust is what makes this pie so special. The homemade crust takes about 20 minutes of active time and makes a world of difference. That said, if you’re short on time, a good-quality refrigerated pie crust will work in a pinch. Just blind bake it before adding the filling, just like you would with a homemade crust.
Pin This Recipe!
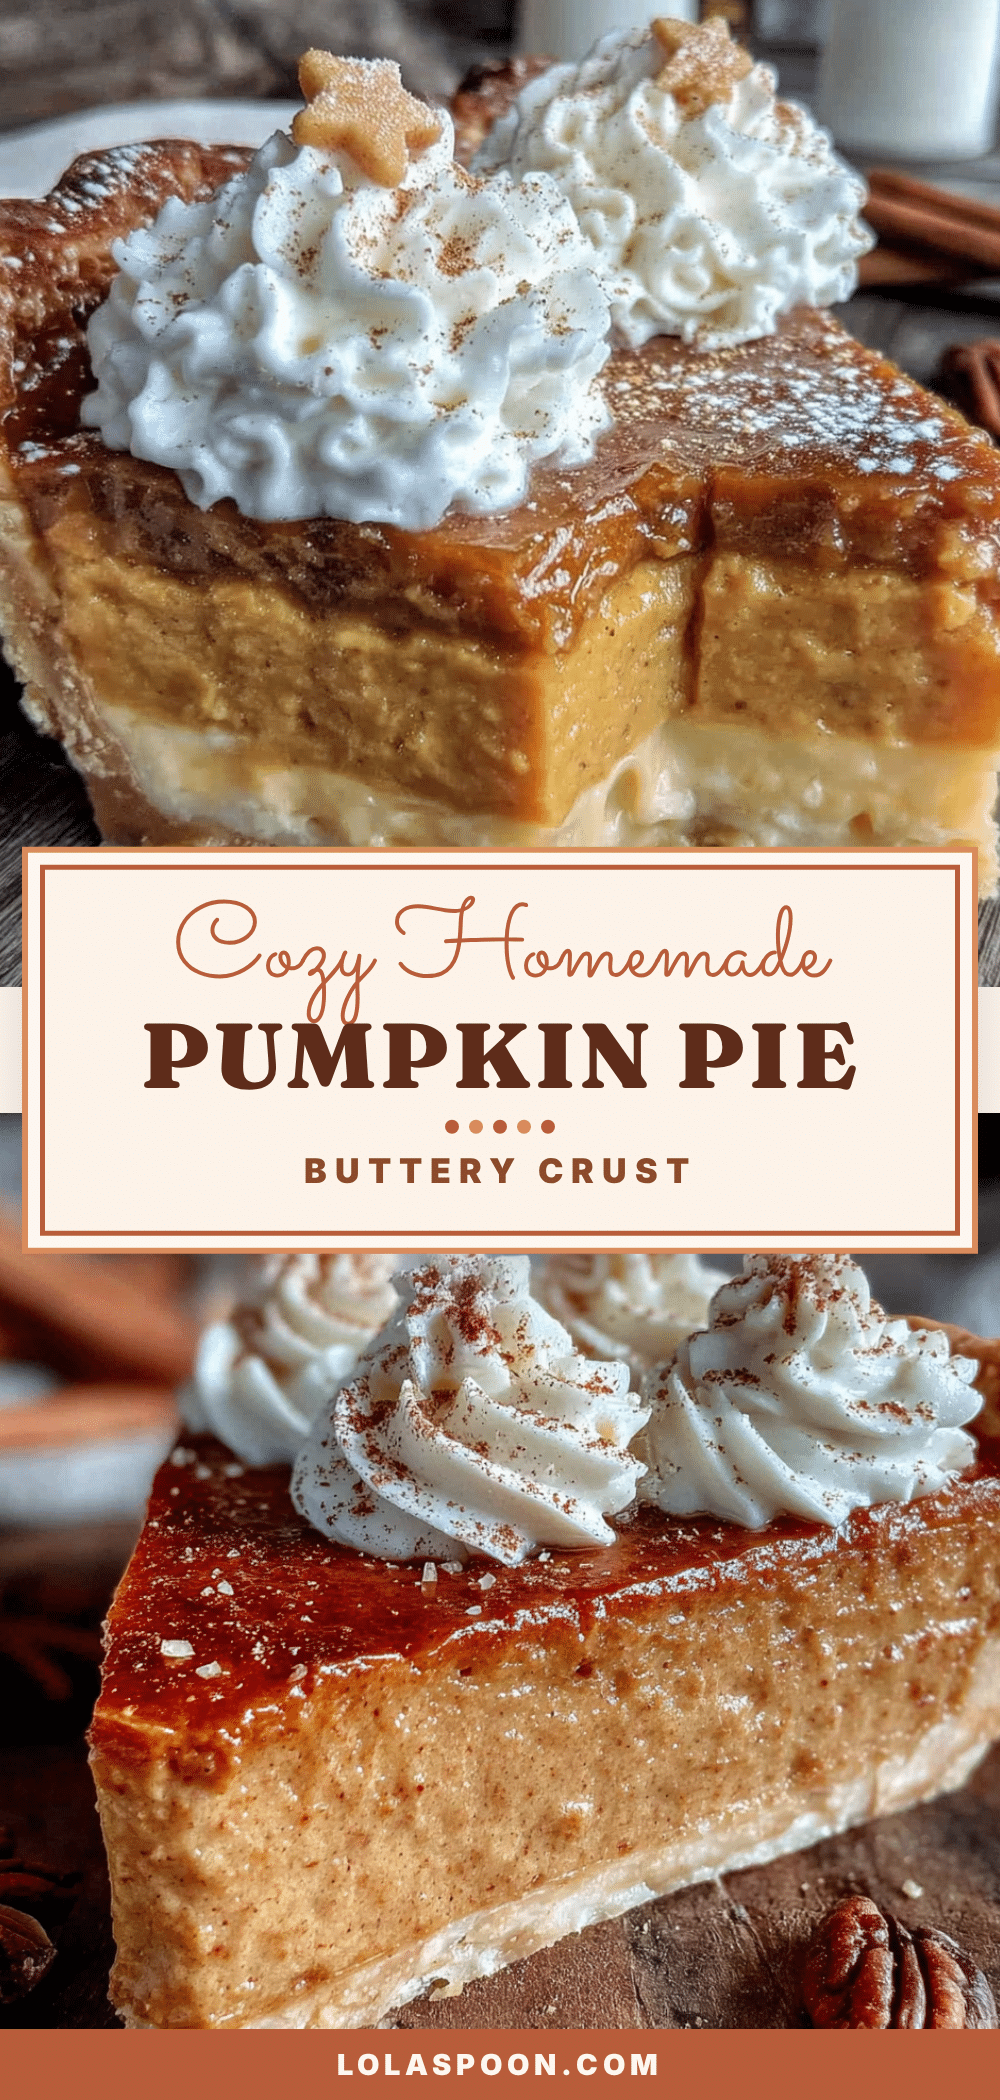
Cozy Homemade Pumpkin Pie with Buttery Crust
A velvety pumpkin pie with a flaky, buttery crust that tastes like comfort in every bite. Perfect for Thanksgiving, cozy evenings, or any time you need a slice of homemade warmth.
- Prep Time: 20 minutes
- Cook Time: 50 minutes
- Total Time: 1 hour 10 minutes (plus chilling and cooling time)
- Yield: 8 servings
- Category: Dessert
- Cuisine: American
Ingredients
- All-purpose flour, 1 ¼ cups (156g)
- Granulated sugar, 1 tablespoon (12g)
- Salt, ½ teaspoon (3g)
- Unsalted butter, ½ cup (113g), very cold and frozen for 15 minutes
- Ice water, 4 to 6 tablespoons (60-90ml)
- Apple cider vinegar, 1 teaspoon (5ml)
- Pumpkin puree, 1 can (15 ounces or 425g)
- Heavy cream, ¾ cup (180ml)
- Whole milk, ¼ cup (60ml)
- Light brown sugar, ¾ cup (150g), packed
- Granulated sugar, ¼ cup (50g)
- Large eggs, 2
- Vanilla extract, 1 teaspoon (5ml)
- Pumpkin pie spice, 2 teaspoons (4g)
- Cinnamon, ½ teaspoon (1g)
- Salt, ¼ teaspoon (1.5g)
Instructions
- Make the Crust Dough: Grate frozen butter using the large holes of a box grater. In a large bowl, whisk together flour, sugar, and salt. Add grated butter and toss with a fork to coat. Drizzle apple cider vinegar and 4 tablespoons ice water over mixture, stir with a fork until dough just comes together. Turn out onto a floured surface, press into a 1-inch disc, wrap in plastic, and refrigerate for at least 1 hour.
- Roll Out the Crust: Let dough sit at room temperature for 5 minutes. On a floured surface, roll into a 12-inch circle, about ⅛ inch thick. Transfer to a 9-inch pie dish, press gently into bottom and sides, trim excess, fold overhang under, and crimp edges. Refrigerate for at least 30 minutes. Preheat oven to 375°F (190°C).
- Blind Bake the Crust: Line chilled crust with parchment paper and fill with pie weights or dried beans. Bake for 15 minutes. Remove parchment and weights, prick bottom with a fork, and bake for another 8-10 minutes until dry and lightly golden. Set aside to cool slightly.
- Make the Filling: In a large bowl, whisk together pumpkin puree, heavy cream, whole milk, brown sugar, granulated sugar, eggs, vanilla, pumpkin pie spice, cinnamon, and salt until smooth (about 30 seconds). Do not overmix.
- Bake the Pie: Pour filling into pre-baked crust. Bake at 375°F (190°C) for 15 minutes, then reduce temperature to 350°F (175°C) and bake for 35-45 minutes, until edges are set and center jiggles slightly. Cover crust edges with foil if browning too quickly. Cool completely on a wire rack (about 2 hours).
Notes
Keep all crust ingredients cold. Do not overwork the dough. Watch for the jiggle—do not overbake. For best flavor, make the pie a day ahead and refrigerate overnight. Strain pumpkin puree if watery for a thicker filling.
Nutrition
- Serving Size: 1 slice
- Calories: 400
- Sugar: 28
- Sodium: 350
- Fat: 22
- Saturated Fat: 13
- Carbohydrates: 45
- Fiber: 3
- Protein: 6
Keywords: pumpkin pie, homemade pumpkin pie, buttery crust, Thanksgiving dessert, fall dessert, easy pumpkin pie


