My sister-in-law, Jen, wasn’t making a big deal of it. I’d stopped by to borrow a hand mixer, and the smell of butter and vanilla hit me before I even got through the front door. She was standing at the counter, rolling out dough, with a toddler on her hip and a smear of flour on her cheek. On the table sat a tray of these funny little cut-out shapes that I couldn’t quite figure out. “Oh, those,” she said when I asked. “Just the turkey cookies for the school party.” Just. She said just.
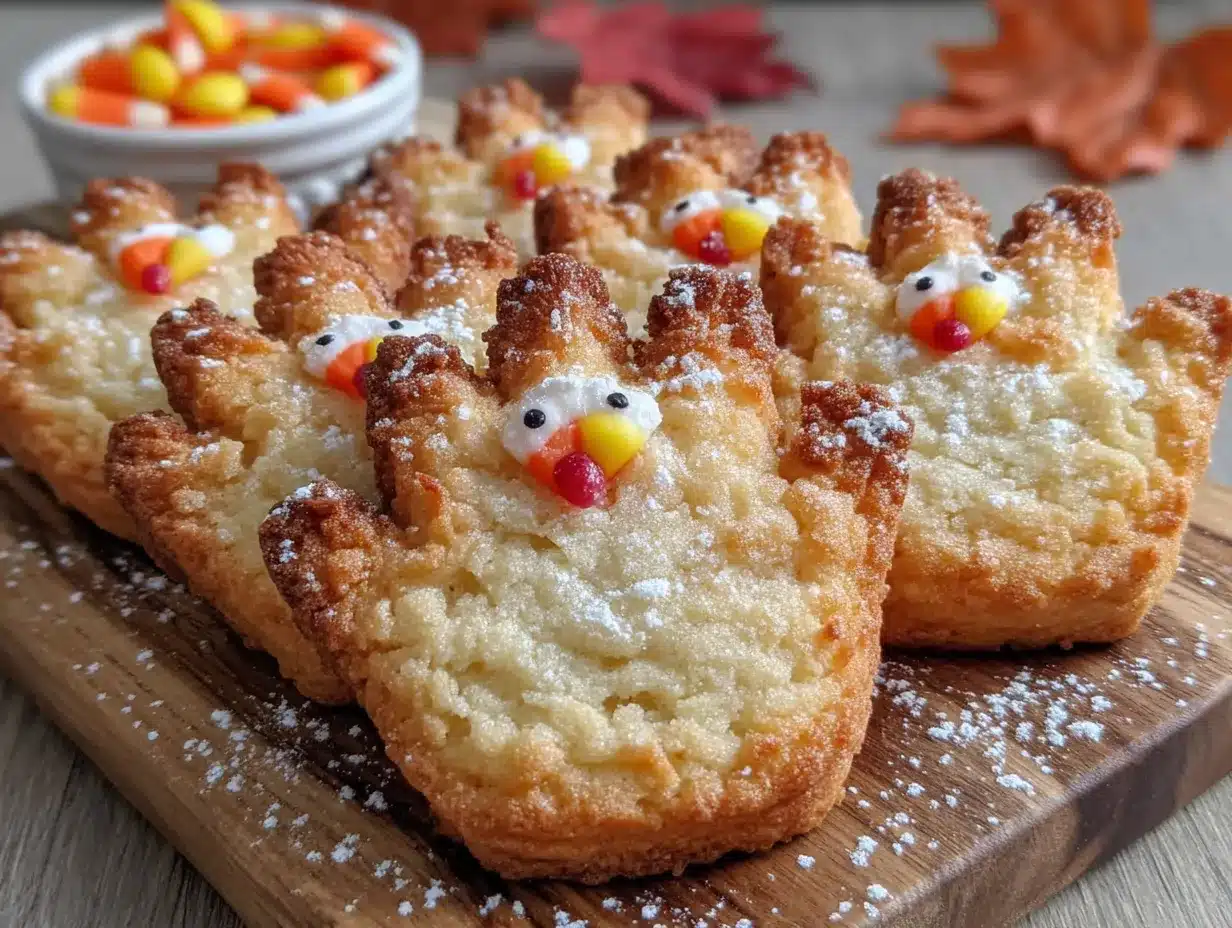
Honestly, let me tell you, I was floored. They weren’t just cookies. They were little edible turkeys made from a traced handprint — each one completely unique, with candy corn feathers and a little candy corn beak. I mean, the cuteness factor was off the charts. I stood there, holding my borrowed mixer, watching her work, and I knew right then I had to learn this. It wasn’t a showy, complicated recipe. It was pure, simple genius that looked like it took hours.
Maybe you’ve been there — scrolling through Pinterest, seeing those perfect, impossibly cute holiday treats and thinking, “I could never do that.” That’s exactly what I was thinking that day in Jen’s kitchen. But then she showed me the trick. It’s all about the handprint. You trace your kid’s hand, you cut it out of sugar cookie dough, and you decorate. That’s it. No fancy piping skills. No expensive cookie cutters. Just a pencil, some parchment paper, and a little bit of patience.
I’ve been making these Easy Turkey Hand Sugar Cookies for every gathering since that day. They’re the kind of thing that makes people stop and smile. They’re the star of the dessert table, the thing the kids beg to help with, and the recipe that makes you look like a holiday hero with almost no effort. And honestly, that’s the best kind of recipe to have in your back pocket.
Why You’ll Love This Recipe
Let’s be real for a second. When you’re hosting a party or heading to a potluck, you want something that wows people without making you want to pull your hair out. These cookies are that unicorn recipe. They’re ridiculously easy, but they look like you spent all day on them. Here’s why they always end up being the favorite:
- So Simple, Anyone Can Make Them: No baking experience needed. If you can trace a hand and press a candy corn, you’ve got this. Honestly, the hardest part is waiting for the dough to chill.
- Uses Basic Ingredients: You probably have everything in your pantry right now. Butter, sugar, flour, eggs, vanilla — the usual suspects. No weird specialty items that you’ll use once and forget about.
- Perfect for Parties and Gatherings: Thanksgiving, Friendsgiving, classroom parties, or just a fun weekend activity — these cookies fit every occasion. They’re a guaranteed conversation starter.
- Kid-Approved and Adult-Adored: The kids love making them (and eating the candy corn), and adults can’t resist grabbing one off the platter. They’re nostalgia on a plate.
- Completely Customizable: You can switch up the candies, change the frosting colors, or even make them gluten-free. They’re forgiving and flexible, which is my favorite kind of recipe.
What makes these different from every other sugar cookie recipe out there? It’s the handprint shape. There’s something about seeing your own hand (or your kid’s hand) turned into a turkey that just makes everyone smile. It’s personal. It’s funny. And it tastes amazing. I’ve tested this dough a dozen times to make sure it holds its shape, doesn’t spread too much, and stays soft in the middle with just a hint of crisp on the edges. This isn’t just another version — it’s the best version.
What Ingredients You Will Need
This recipe uses simple, wholesome ingredients to create a sugar cookie that’s sturdy enough to hold its shape but tender enough to be absolutely delicious. You don’t need a trip to a specialty store — just your regular grocery run will do.
For the Sugar Cookie Dough
- Unsalted butter, softened — 1 cup (2 sticks, 226g). Make sure it’s truly softened to room temperature, not melted. This gives you the perfect spread and texture.
- Granulated sugar — 1 cup (200g). Regular white sugar works best for that classic sugar cookie taste and texture.
- Large eggs — 2, at room temperature. Cold eggs can seize up the butter mixture, so let them sit out for 30 minutes first.
- Vanilla extract — 2 teaspoons. I prefer pure vanilla extract, but imitation works fine in a pinch.
- All-purpose flour — 3 cups (360g). Spoon and level your flour — don’t scoop directly from the bag or you’ll end up with dry cookies.
- Baking powder — 1 teaspoon. This gives the cookies just a little lift without making them puff up too much.
- Salt — ½ teaspoon. Balances the sweetness and enhances the vanilla flavor.
For the Royal Icing (or Simple Glaze)
- Powdered sugar — 2 cups (240g). Sift it first to avoid lumps in your icing.
- Meringue powder — 2 tablespoons (optional, but recommended for royal icing that hardens nicely). You can find this in the baking aisle.
- Water or milk — 3-4 tablespoons, added slowly until you reach the right consistency. For piping, you want it thick like toothpaste.
- Vanilla extract — ½ teaspoon, for flavor.
For Decorating
- Candy corn — 1 bag. You’ll need 5-6 pieces per cookie for the feathers. Get the classic harvest mix.
- Candy corn beak — Use a single candy corn cut in half, or buy small candy corn pieces. I just use a whole candy corn and it works fine.
- Candy eyes — Small round candy eyes (you can find these in the baking aisle). They make the turkeys look so cute and expressive.
- Red or orange frosting — For the wattle (that little red dangly bit under the beak). A tube of decorating gel works perfectly.
- Brown food coloring — To tint your icing, or you can leave it white for a different look.
Ingredient Tips and Substitutions
- Butter: If you only have salted butter, just reduce the added salt to ¼ teaspoon. I recommend Land O’Lakes or Kerrygold for the best flavor.
- Flour: For a gluten-free version, use a 1:1 gluten-free baking flour blend. I’ve had good luck with King Arthur Measure for Measure.
- Candy corn: If you’re not a fan, you can use candy corn pumpkins (mellowcremes) or even small colored candies like M&Ms. The look will be different, but still cute.
- Icing: If you don’t want to make royal icing, a simple glaze of powdered sugar and milk works. Just know it won’t harden completely, so stack cookies carefully.
Equipment Needed
You don’t need a lot of fancy tools for this recipe, which is part of the beauty. Here’s what you’ll want to have on hand:
- Mixing bowls: A large one for the dough and a medium one for the icing.
- Electric mixer: A stand mixer or hand mixer works. I’ve made these with a hand mixer for years — it’s totally fine.
- Parchment paper: Essential for tracing handprints and for lining baking sheets. Don’t skip this.
- Sharp knife or pizza cutter: For cutting out the handprint shapes. A pizza cutter makes the job much faster.
- Baking sheets: At least two, so you can rotate them in and out of the oven.
- Cooling rack: Helps the cookies cool evenly and keeps them from getting soggy on the bottom.
- Piping bags or zip-top bags: For the icing. A small zip-top bag with a tiny corner snipped off works perfectly if you don’t have piping bags.
- Small offset spatula or butter knife: For spreading icing if you choose to flood the cookies.
- Ruler (optional): Helps keep your handprint tracings a consistent size if you’re making multiple cookies.
If you don’t have a pizza cutter, a paring knife works fine — just take your time and cut smoothly. And honestly, I’ve used a butter knife in a pinch. It’s not pretty, but it gets the job done.
Preparation Method
Alright, let’s get to the fun part. This method breaks everything down so you can make these with confidence — even if it’s your first time.
Step 1: Make the Sugar Cookie Dough
In a large mixing bowl, cream together the softened butter and granulated sugar until it’s light and fluffy — about 3-4 minutes with an electric mixer. You want it to look pale and almost doubled in volume. Scrape down the sides of the bowl once or twice. Add the eggs one at a time, beating well after each addition, then stir in the vanilla extract.
In a separate bowl, whisk together the flour, baking powder, and salt. Gradually add the dry ingredients to the wet mixture, mixing on low speed until just combined. Don’t overmix — that’s the secret to tender cookies. The dough will be soft and a little sticky, which is exactly right.
Step 2: Chill the Dough
Divide the dough into two discs, wrap each tightly in plastic wrap, and refrigerate for at least 2 hours. I know, waiting is the worst part, but trust me — this is crucial. Chilled dough is much easier to roll out and cut, and it helps the cookies keep their shape while baking. You can even chill it overnight if you’re planning ahead.
Step 3: Trace the Handprints
While the dough chills, grab some parchment paper and a pencil. Have someone (or yourself) trace their hand with fingers spread slightly apart. Cut out the handprint tracing — this is your template. If you’re making multiple cookies, you can trace one hand and use it as a stencil for all of them. I like to make a few different sizes from different family members for variety.
Step 4: Roll and Cut
Preheat your oven to 350°F (175°C). Lightly flour your work surface and rolling pin. Take one disc of dough out of the fridge and roll it to about ¼-inch thickness. Place your handprint template on the dough and carefully cut around it with a sharp knife or pizza cutter. You can get about 3-4 handprints per rolling, depending on the size of the hand. Gather the scraps, re-roll, and cut again. Place the cut-out handprints on parchment-lined baking sheets, spacing them about 2 inches apart.
Step 5: Bake to Perfection
Bake for 8-10 minutes, or until the edges are just barely golden. The centers should look set but not browned. Let the cookies cool on the baking sheet for 5 minutes, then transfer them to a cooling rack to cool completely. Don’t skip this resting time — the cookies are fragile when hot and need to firm up.
Step 6: Make the Icing
In a medium bowl, whisk together the powdered sugar, meringue powder (if using), and 3 tablespoons of water. Add more water, a teaspoon at a time, until the icing is thick but pipeable — think toothpaste consistency. Stir in the vanilla extract. If you want brown icing for the turkey body, add a few drops of brown food coloring and mix well. Transfer the icing to a piping bag or a zip-top bag with a tiny corner snipped off.
Step 7: Decorate the Turkeys
This is where the magic happens. Start by piping a line of icing along the top edge of the handprint (the fingertips area). Press 5-6 candy corn pieces into the icing, pointed ends facing outward, to create the turkey’s tail feathers. Let that set for a few minutes.
Next, pipe a small oval of icing in the center of the palm area — this is the turkey’s body. Use a toothpick or small spatula to spread it smooth if needed. Place two candy eyes on the body. Add a candy corn beak (pointy end facing out) in the middle of the face. Use a small dot of red frosting or gel for the wattle underneath the beak.
Let the decorated cookies sit at room temperature for about an hour to allow the icing to set completely. This makes them easier to transport and stack.
Cooking Tips & Techniques
I’ve made these cookies more times than I can count, and I’ve learned a few things the hard way. Here are my best tips to make your turkey cookies perfect every time.
Don’t skip the chill time. I know it’s tempting to rush, but warm dough is a nightmare to work with. It sticks to everything, loses its shape, and spreads into unrecognizable blobs in the oven. If your dough gets too soft while you’re cutting, just pop the baking sheet in the fridge for 10 minutes before baking.
Use a light touch with flour. When rolling out the dough, dust your surface and rolling pin lightly. Too much flour will dry out the cookies and make them tough. I like to use a pastry cloth — it helps prevent sticking without adding extra flour.
Rotate your baking sheets halfway through. Every oven has hot spots. Halfway through the baking time, swap the top and bottom racks and rotate the sheets front to back. This gives you evenly baked cookies with consistent color.
Let the cookies cool completely before decorating. I cannot stress this enough. Warm cookies will melt your icing into a puddle. If you’re in a hurry, you can pop them in the fridge for 15 minutes to speed up the cooling process.
Practice your piping on a piece of parchment first. If you’re nervous about the icing, do a few test lines on parchment paper. It helps you get a feel for the pressure and flow before you touch the cookies.
One thing I learned the messy way: Don’t overcrowd the baking sheets. Give those handprints room to breathe. If they’re too close together, they’ll bake into one giant cookie blob. And nobody wants that.
Variations & Adaptations
One of the best things about this recipe is how flexible it is. You can change it up to fit your taste, your dietary needs, or just what you have in the pantry.
Gluten-Free Version: Swap the all-purpose flour for a 1:1 gluten-free baking blend. I’ve used Bob’s Red Mill and King Arthur with great results. Just make sure the blend contains xanthan gum for structure. The dough might be a little more delicate, so handle it gently.
Vegan Option: Use vegan butter (like Earth Balance) and a flax egg (1 tablespoon ground flaxseed mixed with 3 tablespoons water, let sit for 5 minutes). For the icing, use powdered sugar and plant-based milk. The candy corn is typically vegan, but double-check the label.
Different Candy Feathers: Not a candy corn fan? No problem. Use colored M&Ms, Skittles, or even small pretzel sticks for a different look. You can also use fruit leather cut into feather shapes for a chewier texture.
Chocolate Turkey Cookies: Replace ½ cup of the flour with ½ cup of unsweetened cocoa powder. Everything else stays the same. The chocolate dough makes for a delicious twist, and the candy corn really pops against the dark background.
Spiced Version: Add 1 teaspoon of cinnamon, ½ teaspoon of nutmeg, and ¼ teaspoon of cloves to the dry ingredients. It gives the cookies a warm, cozy fall flavor that’s perfect for Thanksgiving.
Mini Turkeys: Use a child’s handprint or trace a smaller hand for bite-sized cookies. These are adorable for classroom parties or as favors. Just reduce the baking time by 1-2 minutes.
I once made a batch with orange zest in the dough and used candy pumpkins instead of candy corn for the feathers. They looked like little fall harvest turkeys, and they were gone in ten minutes at the potluck. Don’t be afraid to get creative!
Serving & Storage Suggestions
These cookies are best served at room temperature, and they’re a showstopper on any dessert table. Here’s how to make them look their best and keep them fresh.
Presentation Tips: Arrange the turkeys on a large platter with the feathers pointing outward in a circular pattern — it looks like a flock of turkeys walking in a circle. You can also place them on a bed of green tissue paper or fake fall leaves for a festive touch. For individual servings, wrap each cookie in a clear cellophane bag tied with a ribbon. They make great party favors!
What to Serve Alongside: These cookies pair beautifully with a hot cup of apple cider, pumpkin spice latte, or a warm mug of chai tea. For a dessert spread, serve them alongside pumpkin pie, pecan bars, and apple crisp. They’re also perfect on a cookie tray with classic sugar cookies, gingerbread men, and snickerdoodles.
Storage Instructions: Store the undecorated cookies in an airtight container at room temperature for up to a week. Decorated cookies should be stored in a single layer (or between layers of parchment paper) in an airtight container. They’ll stay fresh for about 5 days. Do not refrigerate them — the fridge can make the cookies dry and the icing can get sticky.
Freezer Tips: You can freeze the baked, undecorated cookies for up to 3 months. Layer them between parchment paper in a freezer-safe container. When you’re ready to decorate, just thaw them at room temperature for an hour. The dough itself also freezes beautifully — wrap it tightly and freeze for up to 3 months. Thaw overnight in the fridge before rolling and cutting.
Flavor Development: Here’s a little secret — these cookies actually taste better the next day. The flavors meld together and the texture softens just slightly. So don’t stress about making them fresh the day of your party. Bake them a day or two ahead and decorate when you’re ready.
Nutritional Information & Benefits
Let’s be honest — these are a treat, not a health food. But here’s the estimated nutritional breakdown for one cookie (based on the recipe making about 18 cookies):
- Calories: Approximately 220-250 per cookie
- Total Fat: 10g
- Saturated Fat: 6g
- Carbohydrates: 32g
- Sugar: 20g
- Protein: 3g
- Sodium: 95mg
While these aren’t exactly a health food, there are a few bright spots. The butter provides a small amount of vitamin A, and the eggs contribute protein. If you’re looking to lighten them up, you can reduce the sugar in the dough by ¼ cup without affecting the texture too much. Using a lighter hand with the icing also cuts down on the sugar content.
For those with dietary restrictions, the gluten-free and vegan variations above are great options. The candy corn is typically free of common allergens like nuts and dairy, but always check the label if you’re serving someone with allergies. These cookies are also naturally nut-free (as long as your flour and butter are nut-free), making them a safe choice for school parties.
My personal philosophy? Life is short. Enjoy the cookie. Balance it out with a salad for lunch and a walk around the block. These are meant to be a celebration, and every celebration deserves a little indulgence.
Conclusion
These Easy Turkey Hand Sugar Cookies have become a non-negotiable part of my fall baking rotation. They’re the recipe that makes me look like a holiday hero without actually being one. They’re fun to make, adorable to look at, and absolutely delicious to eat. And honestly, there’s something so special about seeing your own handprint turned into a little turkey — it never gets old.
I hope you give these a try for your next gathering. Whether it’s a Thanksgiving feast, a classroom party, or just a cozy fall afternoon, these cookies are guaranteed to bring smiles. Don’t be afraid to make them your own — swap in your favorite candies, try different icing colors, or make them with your kids’ handprints for a personal touch. That’s the beauty of this recipe — it’s yours to play with.
I’d love to hear how yours turn out! Drop a comment below and let me know if your turkeys had a personality of their own. Did you use a toddler’s tiny hand or an adult’s big paw? Did you add any fun twists? Share your photos and tag me — I can’t wait to see your flock!
Happy baking, friends. And remember — the messier the kitchen, the better the memories.
Frequently Asked Questions
Can I use store-bought sugar cookie dough instead of making it from scratch?
Absolutely! If you’re short on time, a refrigerated sugar cookie dough from the store works perfectly. Just roll it out and follow the same cutting and baking instructions. The taste won’t be quite as good as homemade, but it’s a great shortcut when you need one.
How do I keep the cookies from spreading too much?
The key is a properly chilled dough. Make sure your dough is refrigerated for at least 2 hours before rolling. If your kitchen is warm, pop the cut-out cookies on the baking sheet into the fridge for 10-15 minutes before baking. Also, make sure your butter isn’t too soft when you start.
Can I make these cookies ahead of time for a party?
Yes! You have a few options. You can bake the undecorated cookies up to a week ahead and store them in an airtight container. Or you can make the dough and freeze it for up to 3 months. I usually bake them 2-3 days before and decorate the day before the party — it’s the perfect timeline.
What if I don’t have candy eyes?
No problem! You can use small chocolate chips, mini M&Ms, or even a dot of black frosting. I’ve also used black gel icing to draw tiny eyes. The turkeys will still look adorable — they just might have a slightly different expression.
My icing turned out too runny. How do I fix it?
Just add more powdered sugar, a tablespoon at a time, until it thickens up. If it’s too thick, add a drop of water. The perfect consistency for piping is like thick toothpaste — it should hold its shape but still be smooth enough to pipe easily. Don’t worry, it’s very forgiving!
Pin This Recipe!
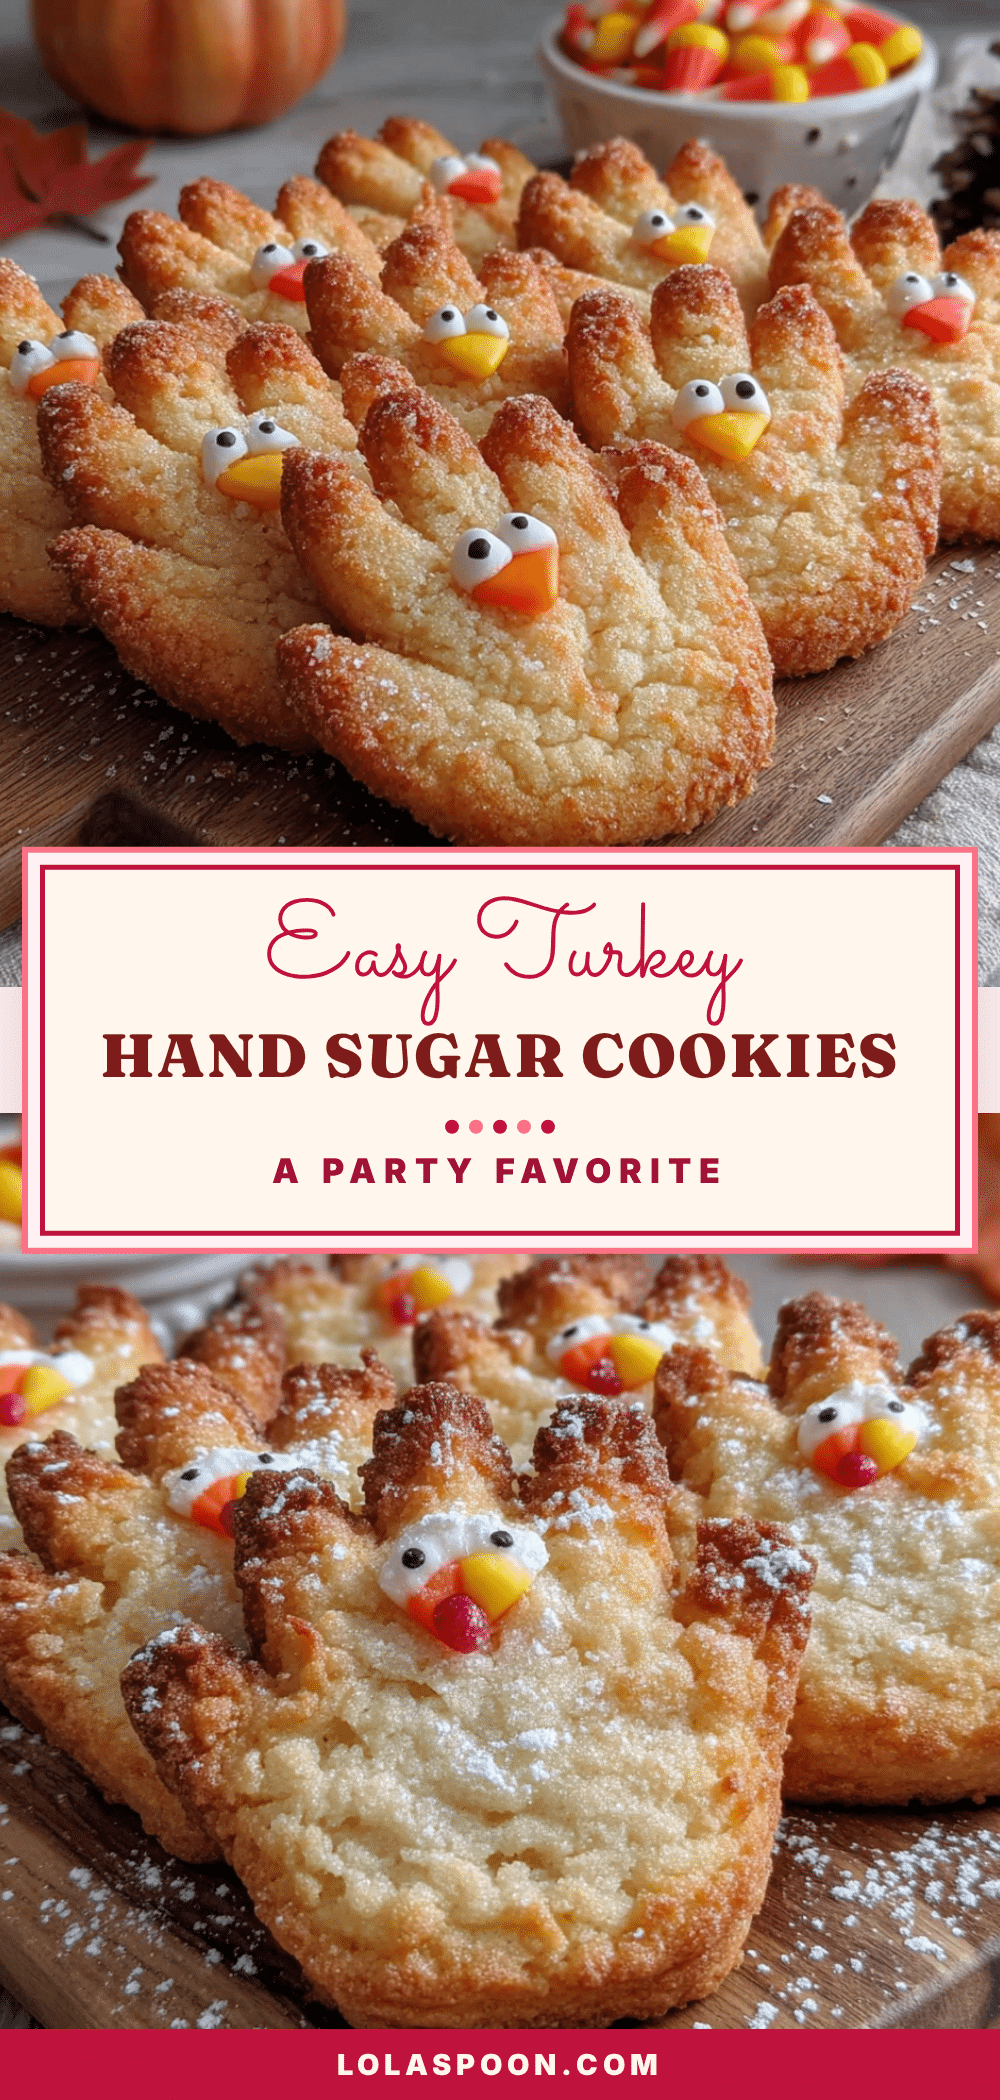
50+ Easy Turkey Sugar Cookies – Best Party Favorite Recipe

These adorable handprint turkey sugar cookies are a fun and easy Thanksgiving treat. Made with a simple sugar cookie dough and decorated with candy corn feathers, they’re perfect for parties and guaranteed to bring smiles.
- Prep Time: 30 minutes
- Cook Time: 10 minutes
- Total Time: 2 hours 40 minutes (includes 2 hours chilling)
- Yield: 18 cookies 1x
- Category: Dessert
- Cuisine: American
Ingredients
- 1 cup (2 sticks, 226g) unsalted butter, softened
- 1 cup (200g) granulated sugar
- 2 large eggs, at room temperature
- 2 teaspoons vanilla extract
- 3 cups (360g) all-purpose flour
- 1 teaspoon baking powder
- ½ teaspoon salt
- 2 cups (240g) powdered sugar
- 2 tablespoons meringue powder (optional)
- 3–4 tablespoons water or milk
- ½ teaspoon vanilla extract
- 1 bag candy corn
- Candy eyes
- Red or orange frosting (for wattle)
- Brown food coloring
Instructions
- In a large mixing bowl, cream together the softened butter and granulated sugar until light and fluffy, about 3-4 minutes. Add eggs one at a time, beating well after each, then stir in vanilla extract.
- In a separate bowl, whisk together flour, baking powder, and salt. Gradually add to wet mixture, mixing on low until just combined. Do not overmix.
- Divide dough into two discs, wrap in plastic wrap, and refrigerate for at least 2 hours (or overnight).
- While dough chills, trace a hand on parchment paper and cut out the tracing to use as a template.
- Preheat oven to 350°F (175°C). Lightly flour a work surface and roll one disc of dough to ¼-inch thickness.
- Place handprint template on dough and cut around it with a sharp knife or pizza cutter. Gather scraps, re-roll, and cut again. Place cut-outs on parchment-lined baking sheets, spacing 2 inches apart.
- Bake for 8-10 minutes, until edges are just barely golden. Let cool on baking sheet for 5 minutes, then transfer to a cooling rack to cool completely.
- In a medium bowl, whisk together powdered sugar, meringue powder (if using), and 3 tablespoons water. Add more water a teaspoon at a time until thick but pipeable (toothpaste consistency). Stir in vanilla extract and brown food coloring if desired.
- Pipe a line of icing along the top edge (fingertips) of each cookie. Press 5-6 candy corn pieces into the icing, pointed ends outward, for feathers. Let set a few minutes.
- Pipe a small oval of icing in the center of the palm for the turkey body. Place two candy eyes on the body. Add a candy corn beak (pointy end out) and a dot of red/orange frosting for the wattle.
- Let decorated cookies sit at room temperature for about 1 hour to allow icing to set completely.
Notes
Chill dough thoroughly to prevent spreading. Use a light touch with flour when rolling. Rotate baking sheets halfway through baking. Let cookies cool completely before decorating. Practice piping on parchment first. Store undecorated cookies in an airtight container at room temperature for up to a week; decorated cookies for about 5 days. Freeze undecorated cookies for up to 3 months.
Nutrition
- Serving Size: 1 cookie
- Calories: 235
- Sugar: 20
- Sodium: 95
- Fat: 10
- Saturated Fat: 6
- Carbohydrates: 32
- Protein: 3
Keywords: turkey cookies, sugar cookies, handprint cookies, Thanksgiving cookies, easy cookies, party cookies, kid-friendly


