There used to be a tiny bakery on the corner of 5th and Elm in my old neighborhood called “The Little Hen.” They made these incredible turkey cupcakes every November that were almost too cute to eat — almost. When they closed three years ago after the owner retired, I felt a genuine pang of loss. Not for the building, but for that specific memory of walking in on a crisp fall morning and seeing those chocolate-frosted turkey faces staring up at me from the display case.
After about six tries — and honestly, some pretty sad-looking attempts involving melted candy eyes sliding off frosting — I finally cracked the code. The secret? You don’t even need to bake. These no-bake turkey cupcakes come together in under 20 minutes, and they look like you spent hours on them. I brought a batch to my sister’s place last Thanksgiving, and her kids thought I’d ordered them from a bakery. I didn’t correct them. Let me tell you, that kind of kitchen victory feels pretty great.
Maybe you’ve been there — scrolling through Pinterest at 10 PM the night before the school party, realizing you need to bring something festive. These little guys have saved me more times than I can count. They’re the kind of recipe that makes you look like a superstar with almost zero effort. And honestly? That’s exactly the kind of recipe we all need in our back pocket.
Why You’ll Love This Recipe
These no-bake turkey cupcakes aren’t just another holiday treat. They’re the result of trial and error in my own kitchen, tested on picky eaters and dessert snobs alike. Here’s why they work so well:
- Quick & Easy: You can have these assembled in under 20 minutes. No oven required, no complicated piping skills needed.
- Simple Ingredients: You probably already have most of what you need in your pantry. No special trips to fancy baking stores.
- Perfect for School Parties & Potlucks: These are the star of any Thanksgiving-themed gathering. Kids go wild for them, and adults can’t resist snapping photos.
- Crowd-Pleaser: I’ve brought these to three different events now, and every single time, people ask for the recipe. They disappear faster than the pumpkin pie.
- Unbelievably Cute: Let’s be real — the visual payoff here is huge. They look like little works of art, but they’re actually foolproof.
What sets these apart from other turkey-themed treats? It’s the no-bake factor. Most recipes require you to bake cupcakes from scratch, then cool them, then decorate. By the time you’re done, you’ve spent two hours. This version uses store-bought cupcakes as your canvas, so you skip straight to the fun part: decorating. The chocolate frosting is the perfect backdrop for those bright candy corn feathers and googly eyes. It’s comfort food reimagined — faster, simpler, but with the same soul-soothing satisfaction.
What Ingredients You Will Need
This recipe uses simple, store-bought ingredients to deliver maximum cuteness with minimum fuss. Most of these are pantry staples or easy to find in any grocery store’s baking aisle.
- Chocolate Cupcakes (store-bought or homemade, 12 count) — I recommend Hostess or Little Debbie for consistent texture. The key is using cupcakes that are sturdy enough to hold the decorations without crumbling.
- Chocolate Frosting (1 can, 16 oz) — Duncan Hines or Betty Crocker work great. You’ll use this as the “glue” for your decorations.
- Candy Corn (1 bag, about 40 pieces) — These become the turkey’s tail feathers. Look for fresh candy corn that isn’t stale or hard.
- Candy Eyes (1 small package) — You can find these in the baking aisle near the sprinkles. They come in different sizes; go with the medium ones for best proportion.
- Orange Candy Melts or Orange Icing (for the beak) — Wilton orange candy melts work perfectly. Alternatively, you can use orange decorating icing in a tube.
- Red Candy Melts or Red Icing (for the wattle — that’s the red dangly bit under the beak) — Again, Wilton brand or any decorating icing will do.
- Chocolate Wafer Cookies or Oreos (12 cookies) — These form the base of the turkey’s face. The dark color creates a nice contrast with the candy corn.
- Pretzel Sticks (12 sticks, broken in half) — These become the turkey’s legs. Regular pretzel sticks work better than the thin ones.
Substitution Tips: If you can’t find candy eyes, you can use white chocolate chips with a tiny dot of chocolate frosting for the pupil. For the beak, you can also use a small triangle cut from an orange fruit roll-up. I’ve tried both options when I was in a pinch, and they work surprisingly well. For a gluten-free version, use gluten-free chocolate cupcakes and check that your candy corn is certified gluten-free (most brands are).
Equipment Needed
You don’t need much fancy equipment for this project, which is part of the beauty. Here’s what you’ll want on hand:
- Serving Platter or Baking Sheet — A large flat surface to arrange your finished turkeys. A cookie sheet lined with parchment paper works perfectly.
- Butter Knife or Offset Spatula — For spreading a thin layer of frosting on the wafer cookies. Nothing fancy needed.
- Small Microwave-Safe Bowls — For melting your candy melts if you’re using them. You’ll need two separate bowls for orange and red.
- Toothpicks — These are your best friend for placing tiny candy eyes and applying small dots of frosting. I keep a stash specifically for decorating projects.
- Piping Bag or Small Zip-Top Bag — If you’re using melted candy melts, a small piping bag or even a sandwich bag with the corner snipped off works great for precision.
- Paper Towels — For cleaning up stray frosting and candy corn dust. Trust me, you’ll need them.
Budget-Friendly Tip: Don’t have candy melts? Skip them entirely and use store-bought decorating icing tubes. They cost about $2 each and come with their own tips. I’ve done it both ways, and honestly, the icing tubes are easier for beginners.
Preparation Method
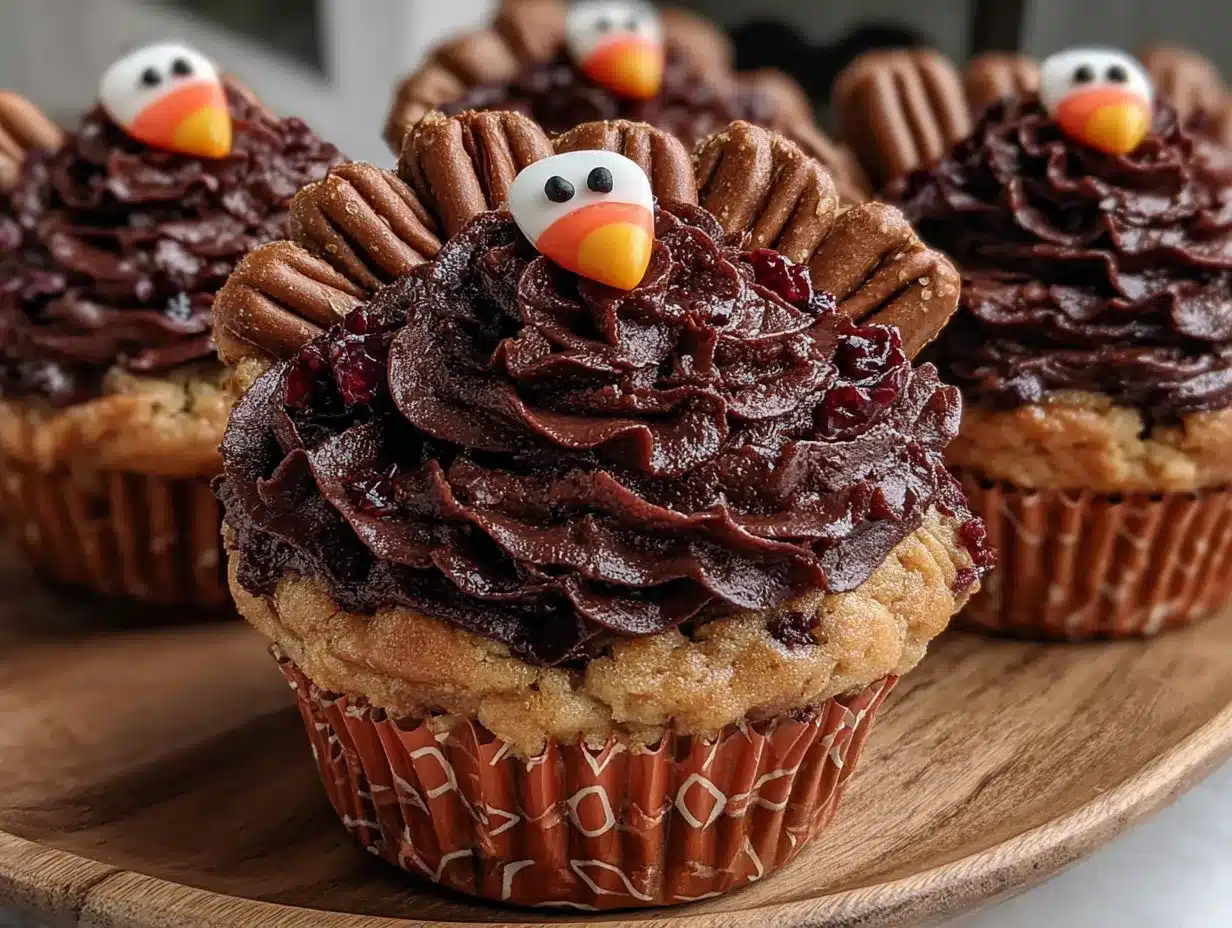
Let’s get these little guys assembled. Work in an assembly-line fashion, and you’ll have a whole flock of turkey cupcakes in no time.
- Prepare your workstation (2 minutes): Unwrap all 12 chocolate cupcakes and arrange them on your serving platter. Open your can of chocolate frosting and have your butter knife ready. Lay out all your decorations — candy corn, candy eyes, wafer cookies, pretzel sticks — so they’re within easy reach.
- Make the turkey bodies (3 minutes): Take each chocolate wafer cookie or Oreo and spread a thin layer of chocolate frosting on one side. Press the frosted side onto the center of each cupcake. This creates the turkey’s face. Don’t worry if it’s not perfectly centered — a little character is good.
- Add the feathers (5 minutes): This is where the magic happens. Take 5-6 pieces of candy corn and arrange them in a fan pattern behind the wafer cookie. Press the wide end of each candy corn into the frosting on the cupcake. The points should face outward, creating a tail-feather effect. Work quickly so the frosting doesn’t set before the candy corn sticks.
- Attach the eyes (2 minutes): Using a toothpick, dab a tiny bit of chocolate frosting onto the back of each candy eye. Press them gently onto the wafer cookie face. Position them slightly above the center so you have room for the beak below. If you don’t have candy eyes, use white chocolate chips with a tiny dot of chocolate frosting in the center.
- Create the beak (3 minutes): If using orange candy melts, melt them in the microwave in 15-second intervals, stirring between each, until smooth. Transfer to a small piping bag or zip-top bag with the corner snipped. Pipe a small triangle shape directly below the eyes on the wafer cookie. If using orange decorating icing, simply pipe the triangle shape directly from the tube.
- Add the wattle (2 minutes): Using your red candy melts or red decorating icing, pipe a small teardrop shape hanging down from the bottom of the beak. This is the wattle — the red dangly bit that makes a turkey look like a turkey. Don’t overthink it; a simple squiggle works fine.
- Attach the legs (2 minutes): Break each pretzel stick in half. Insert two half-sticks into the bottom of each cupcake, angling them slightly outward so it looks like the turkey is standing. Press them in until they feel secure.
- Final touches (1 minute): Step back and admire your work. If any candy corn pieces look loose, press them in gently. If any eyes look crooked, adjust them with your toothpick. Let the assembled turkeys sit for 5 minutes so everything sets.
Sensory Cue: When you press the wafer cookie onto the cupcake, you should feel it sink slightly into the frosting. That’s how you know you’ve used enough. If it feels dry, add a bit more frosting to the back of the cookie.
Time-Saving Tip: You can prep all your candy corn feathers in a little pile before you start assembling. Having everything ready to go makes the process feel much faster.
Cooking Tips & Techniques
I’ve made these turkey cupcakes about a dozen times now, and I’ve learned a few things the hard way. Here’s what I wish someone had told me before my first attempt:
Don’t over-melt your candy melts. I learned this one the hard way. If you microwave them for too long, they seize up into a grainy mess. Always go in 15-second bursts and stir thoroughly between each. If they do seize, you can try adding a teaspoon of vegetable oil to smooth them out, but honestly, it’s easier to just use decorating icing instead.
Work in small batches. Don’t try to assemble all 12 turkeys at once if you’re new to this. Do 4 at a time, then take a breath. Your candy corn will stay fresher, your frosting won’t dry out, and you’ll make fewer mistakes. I tried doing all 12 at once my second time, and by turkey number 8, my eyes were starting to look like they’d had too much coffee.
Use fresh candy corn. Stale candy corn gets hard and brittle. When you try to press it into the frosting, it’ll snap instead of sticking. If your candy corn feels hard, try microwaving it for 5 seconds to soften it slightly. This trick saved me during a last-minute school party panic.
Keep the cupcakes chilled until you’re ready to decorate. Cold frosting holds decorations better than room-temperature frosting. Pop your cupcakes in the fridge for 15 minutes before you start. It makes a noticeable difference in how well the candy corn and wafer cookies stay put.
Multitasking strategy: While your candy melts are cooling slightly after microwaving, use that time to unwrap your cupcakes and arrange your candy corn. Every minute counts when you’re working against the clock.
Variations & Adaptations
One of the best things about this recipe is how flexible it is. Here are some variations I’ve tried and loved:
Gluten-Free Version: Swap the regular chocolate cupcakes for gluten-free ones. Most candy corn is naturally gluten-free, but double-check the label. Use gluten-free chocolate wafer cookies — Kinnikinnick makes a good one. The rest of the ingredients are naturally gluten-free.
Dairy-Free Option: Use dairy-free chocolate cupcakes and a dairy-free chocolate frosting. Enjoy Life makes a great dairy-free chocolate wafer cookie. Check your candy corn — some brands use confectioner’s glaze that may contain dairy derivatives. Brach’s candy corn is dairy-free.
Mini Turkey Cupcakes: For a party appetizer version, use mini cupcakes instead of regular ones. Use mini wafer cookies and smaller candy eyes. Cut your candy corn in half lengthwise for smaller feathers. These are perfect for kids’ lunchboxes or holiday cocktail parties.
Fall Harvest Variation: Swap the candy corn for candy pumpkins or autumn-colored M&Ms. Use orange and yellow sprinkles on the frosting before adding the wafer cookie. This version works great for Halloween parties or general fall celebrations, not just Thanksgiving.
Chocolate Lover’s Twist: Instead of a plain chocolate wafer cookie, use a chocolate sandwich cookie with white filling. Pipe a small chocolate kiss on top of the wafer cookie as a little hat. My nephew requested this version, and honestly, it might be better than the original.
Serving & Storage Suggestions
These turkey cupcakes are best served at room temperature. The frosting softens slightly, making every bite perfectly creamy. Arrange them on a large platter with the turkey faces all facing the same direction for maximum visual impact. I like to scatter a few extra candy corn pieces around the platter for color.
What to serve with them: These pair beautifully with a hot cup of apple cider or pumpkin spice coffee. For a full Thanksgiving dessert spread, set them out alongside pumpkin pie bars and pecan tassies. They also work great as a school party treat — just pack them in a single layer in a disposable foil pan.
Storage Instructions: Store assembled turkey cupcakes in an airtight container at room temperature for up to 2 days. Do not refrigerate them — the candy corn can get sticky and the wafer cookies can soften. If you need to make them ahead, assemble all the components separately and put them together the day you plan to serve them. The chocolate cupcakes can be baked or purchased up to 3 days in advance and stored in an airtight container.
Reheating: These don’t need reheating, but if the frosting has firmed up, let them sit at room temperature for 20 minutes before serving. The flavors actually develop a bit overnight — the chocolate frosting melds with the candy corn in a way that’s surprisingly delicious.
Nutritional Information & Benefits
Let’s be honest — these are a treat, not a health food. But here’s what you’re looking at per turkey cupcake (based on standard store-bought ingredients):
- Calories: Approximately 320-380 per cupcake
- Fat: 14-18g
- Carbohydrates: 48-55g
- Protein: 3-4g
- Sugar: 32-38g
Dietary Considerations: This recipe contains dairy, gluten, and soy (from the chocolate cupcakes and frosting). It also contains corn syrup (from the candy corn). Not suitable for vegan diets unless you use vegan alternatives for all components. Contains potential allergens including wheat, milk, and soy lecithin.
Health Perspective: While these aren’t going to win any nutrition awards, they’re made with real ingredients — no artificial colors beyond what’s in the candy corn. The chocolate provides a small amount of antioxidants, and hey, sometimes a little joy in the form of a cute turkey cupcake is exactly what the soul needs. Everything in moderation, right?
Conclusion
These no-bake turkey cupcakes have become my secret weapon for every Thanksgiving-related event. They’re the recipe I turn to when I want to look like I put in way more effort than I actually did. The best part? They actually taste good — not just cute, but genuinely delicious. The combination of chocolate cupcake, creamy frosting, and crunchy candy corn is surprisingly addictive.
I’d love to hear how your turkey cupcakes turn out. Did you try a fun variation? Did your kids help with the decorating? Drop a comment below and share your creation. And if you’re looking for more no-bake holiday treats, check out my no-bake pumpkin cheesecake bites — they’re another lifesaver for busy holiday seasons. Happy decorating, and remember: even if your turkey’s eyes are a little crooked, that just gives it character!
Frequently Asked Questions
Can I use homemade cupcakes instead of store-bought?
Absolutely! Homemade chocolate cupcakes work perfectly. Just make sure they’re completely cooled before you start decorating. Warm cupcakes will melt the frosting and make a mess. I’ve used both, and honestly, homemade cupcakes taste even better because the cake is fresher.
How far in advance can I make these?
You can assemble them up to 24 hours in advance. Store them in an airtight container at room temperature. After 24 hours, the candy corn can start to soften and the wafer cookies can lose their crunch. For best results, assemble them the morning of your event.
Can I freeze these turkey cupcakes?
I don’t recommend freezing them once assembled. The candy corn and wafer cookies don’t thaw well. However, you can freeze the undecorated chocolate cupcakes for up to 3 months. Thaw them at room temperature, then decorate fresh.
What if I can’t find candy eyes?
No problem! You can make your own using white chocolate chips and a tiny dot of chocolate frosting for the pupil. Or use black decorating gel to pipe simple dots on the wafer cookie. I’ve even used mini chocolate chips placed upside down — they look like tiny black eyes.
My candy corn won’t stick to the frosting. What should I do?
This usually happens when the frosting is too cold or too thin. Try warming the cupcakes to room temperature first. If that doesn’t work, dab a tiny bit of extra frosting on the back of each candy corn piece before pressing it into place. You can also use a toothpick to apply a small dot of frosting directly to the cupcake where you want the candy corn to go.
Pin This Recipe!
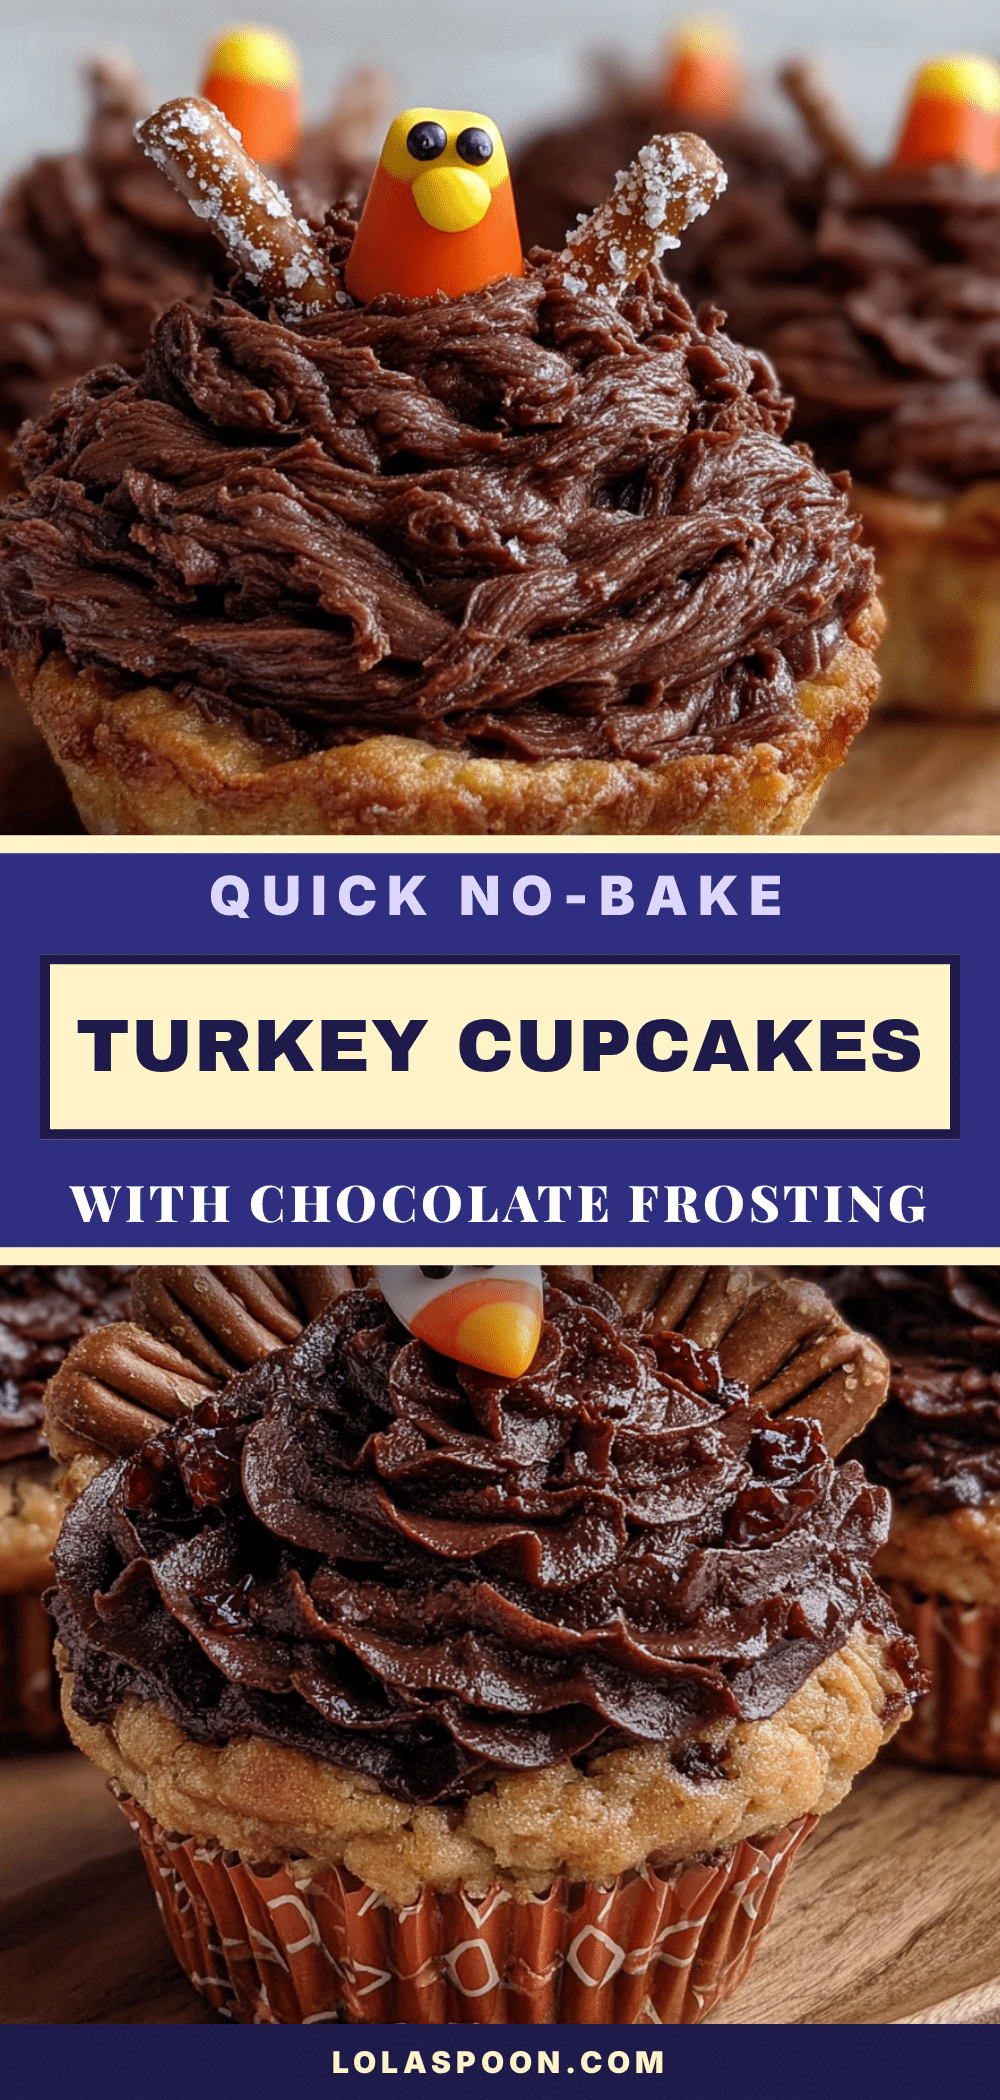
Easy No-Bake Turkey Cupcakes with Chocolate Frosting
These no-bake turkey cupcakes come together in under 20 minutes and look like you spent hours on them. Perfect for Thanksgiving parties, school events, or any fall gathering.
- Prep Time: 20 minutes
- Cook Time: 0 minutes
- Total Time: 20 minutes
- Yield: 12 servings 1x
- Category: Dessert
- Cuisine: American
Ingredients
- 12 chocolate cupcakes (store-bought or homemade)
- 1 can (16 oz) chocolate frosting
- 1 bag (about 40 pieces) candy corn
- 1 small package candy eyes
- Orange candy melts or orange icing (for the beak)
- Red candy melts or red icing (for the wattle)
- 12 chocolate wafer cookies or Oreos
- 12 pretzel sticks, broken in half
Instructions
- Prepare your workstation: Unwrap all 12 chocolate cupcakes and arrange them on your serving platter. Open your can of chocolate frosting and have your butter knife ready. Lay out all decorations.
- Make the turkey bodies: Take each chocolate wafer cookie or Oreo and spread a thin layer of chocolate frosting on one side. Press the frosted side onto the center of each cupcake.
- Add the feathers: Take 5-6 pieces of candy corn and arrange them in a fan pattern behind the wafer cookie. Press the wide end of each candy corn into the frosting on the cupcake, points facing outward.
- Attach the eyes: Using a toothpick, dab a tiny bit of chocolate frosting onto the back of each candy eye. Press them gently onto the wafer cookie face, slightly above center.
- Create the beak: If using orange candy melts, melt them in the microwave in 15-second intervals until smooth. Transfer to a small piping bag or zip-top bag with the corner snipped. Pipe a small triangle shape below the eyes.
- Add the wattle: Using red candy melts or red decorating icing, pipe a small teardrop shape hanging down from the bottom of the beak.
- Attach the legs: Break each pretzel stick in half. Insert two half-sticks into the bottom of each cupcake, angling them slightly outward.
- Final touches: Let the assembled turkeys sit for 5 minutes so everything sets.
Notes
Work in small batches for best results. Use fresh candy corn to avoid brittleness. Chill cupcakes for 15 minutes before decorating to help decorations stick. Store assembled cupcakes in an airtight container at room temperature for up to 2 days. Do not refrigerate.
Nutrition
- Serving Size: 1 turkey cupcake
- Calories: 350
- Sugar: 35
- Sodium: 280
- Fat: 16
- Saturated Fat: 6
- Carbohydrates: 52
- Fiber: 2
- Protein: 3.5
Keywords: no-bake turkey cupcakes, Thanksgiving cupcakes, turkey cupcakes, chocolate cupcakes, easy Thanksgiving dessert, no-bake dessert, fall dessert, turkey treat


