This was supposed to be a batch of my grandma’s famous caramel sauce. I had the butter softening on the counter, the cream measured out, and my favorite heavy-bottomed pot ready to go. But I grabbed the vanilla extract, not the vanilla bean paste. I had run out of brown sugar and only had white. The cream was closer to souring than I wanted to admit. And honestly, I was already running late for the school pickup line. I threw my hands up, tossed in some leftover Christmas cookie sprinkles I had from a baking disaster the week before, and figured I’d salvage it as a weird flavored simple syrup. I mean, what else was I going to do with a lukewarm pot of sugary, buttery liquid that refused to caramelize? The result was so much better than the original plan. It was a liquid Christmas cookie in a bottle. My neighbor, Karen, who is brutally honest, tried it in her morning coffee and literally asked for three bottles for her sisters. Maybe you’ve been there—staring down a kitchen failure that turns into a happy little secret weapon. That’s this syrup. It’s the gift that says you care without saying you spent a fortune, and it makes a regular cup of coffee taste like a holiday miracle.
Why You’ll Love This Recipe
This isn’t just another flavored syrup you can buy at the store. This is the one you’ll want to hoard for yourself and then feel guilty about not giving away. I’ve tested this recipe six times to get the sugar-to-butter ratio just right, and my family has officially declared it the official coffee syrup of December. Here’s why it’s a total winner:
- Budget-Friendly Gifting: You can make a whole batch of this for less than the cost of one fancy coffee shop bottle. We’re talking pennies per serving.
- Incredibly Simple Ingredients: You probably have sugar, butter, and vanilla in your pantry right now. No hunting down obscure extracts or fancy syrups.
- Perfect for Holiday Gifting: It’s a homemade gift that feels luxurious and thoughtful without requiring a ton of time or skill. It’s the ideal neighbor, teacher, or coworker present.
- Crowd-Pleaser: I’ve yet to meet a coffee drinker who doesn’t light up after a splash of this. It’s sweet, buttery, and tastes exactly like a sugar cookie.
- Unbelievably Delicious: The secret is the browned butter. It adds a nutty, rich depth that you just can’t get from a store-bought syrup. It’s next-level comfort in a mug.
This recipe is different because it starts with a browned butter base. It’s not just sugar and water; it’s a real, cooked sauce that mimics the flavor of a baked cookie. It’s the kind of thing that makes you close your eyes after your first sip. It’s comfort in a cup, and it’s so easy to make that you’ll wonder why you ever bought the bottled stuff.
What Ingredients You Will Need
This recipe uses simple, everyday ingredients to create a surprisingly complex and delicious flavor. The magic is in the technique, not the grocery list. You likely have everything you need already, which makes this a perfect last-minute gift idea.
- Unsalted butter (1/2 cup / 1 stick): This is the star. We’re going to brown it, which gives the syrup its signature nutty, toasty flavor. I recommend using a quality brand like Land O’Lakes for consistent results.
- Granulated sugar (2 cups): White sugar keeps the flavor clean and lets the browned butter and vanilla shine. It dissolves easily and creates a smooth syrup.
- Water (1 cup): Just regular tap water is fine. It helps dissolve the sugar and creates the syrup base.
- Vanilla extract (2 teaspoons): Use pure vanilla extract if you can. It makes a real difference in the depth of flavor. Imitation will work in a pinch, but the taste won’t be as rich.
- Butter extract (1/2 teaspoon): This is the secret weapon. It amplifies that buttery cookie flavor. You can find it in the baking aisle near the vanilla. (Adds that unmistakable cookie taste)
- Christmas cookie sprinkles (1/4 cup, optional): These are for the festive look. They add a tiny bit of crunch and a pop of color. Use the little round jimmies, not the big nonpareils, as they dissolve better. (Look for red and green mix for maximum holiday cheer)
Substitution Guidance: If you are watching your sugar intake, you can substitute up to half of the granulated sugar with a brown sugar alternative like Swerve. The flavor will be slightly different—more molasses-like—but still delicious. For a dairy-free version, use a high-quality vegan butter. I’ve had good luck with the Miyoko’s brand for browning.
Equipment Needed
You don’t need a fancy kitchen to make this syrup. A few basic tools will do the trick, and I’ve included some tips for making it easier.
- Medium-sized saucepan: A heavy-bottomed pan is best for even heat distribution and preventing the butter from burning. I use my old Calphalon, and it works perfectly.
- Wooden spoon or silicone spatula: You’ll need something to stir with. A wooden spoon is great for scraping the bottom of the pan to see the browning butter.
- Measuring cups and spoons: Accuracy is key for a syrup. Use dry measuring cups for the sugar and liquid ones for the water.
- Fine-mesh strainer: This is optional but highly recommended. It catches any burnt bits of butter or undissolved sprinkle pieces, giving you a perfectly smooth syrup. (A cheap one from the grocery store works fine)
- Glass jars or bottles: For storing and gifting. I use 8-ounce mason jars with a pour spout lid. You can find them at craft stores or online for a few dollars.
- Funnel (optional): Makes pouring the hot syrup into the jars much less messy. A small canning funnel is perfect.
Preparation Method
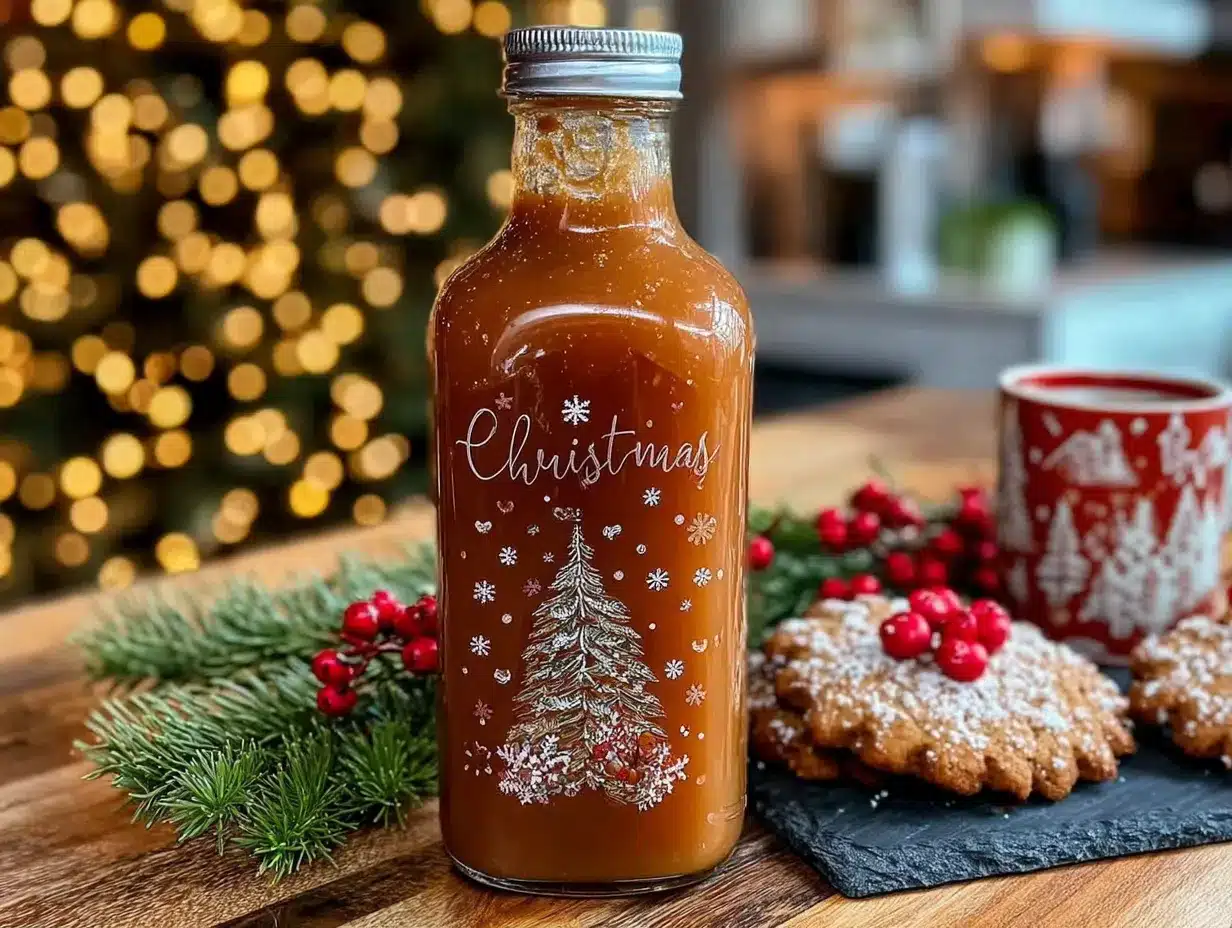
Making this syrup is easier than you think. The key is patience when browning the butter—don’t rush it! Here’s how to do it step-by-step.
- Brown the butter: Place the stick of unsalted butter in your medium saucepan over medium heat. Let it melt completely, then continue to cook, swirling the pan occasionally. You’ll hear it sizzle and pop. After a few minutes, the milk solids will start to turn a golden brown and the butter will smell nutty and amazing. This takes about 5-7 minutes. Watch it carefully—it can go from brown to burnt very quickly!
- Add the sugar and water: Once the butter is a lovely amber color, immediately pour in the 2 cups of granulated sugar and 1 cup of water. Stir constantly with your wooden spoon. The mixture will bubble up and look a bit separated at first. Don’t panic—just keep stirring.
- Bring to a simmer: Increase the heat to medium-high and bring the mixture to a gentle simmer. You want to see small bubbles breaking the surface, not a rolling boil. Stir until the sugar is completely dissolved, about 2-3 minutes. The liquid will become clear and smooth.
- Simmer and infuse: Reduce the heat to low and let the syrup simmer gently for 5 minutes. This helps it thicken slightly and allows the flavors to meld. Do not stir it during this time, or you might encourage crystallization.
- Remove from heat and add flavors: Take the pan off the burner. Stir in the 2 teaspoons of vanilla extract and 1/2 teaspoon of butter extract. The mixture will smell incredible—like a freshly baked sugar cookie.
- Strain the syrup (optional): If you want a perfectly clear syrup, pour it through a fine-mesh strainer into a heat-safe bowl or directly into your jars. This will catch any stray browned butter bits or undissolved sprinkle pieces.
- Add the sprinkles (optional): If you’re using the Christmas cookie sprinkles, stir them into the strained syrup while it’s still warm. They will soften slightly and add a festive touch. Do this right before you pour it into the jars so they stay suspended in the syrup.
- Cool and bottle: Let the syrup cool in the jars for about 20-30 minutes at room temperature. It will thicken as it cools. Do not put the lids on while it’s hot, or condensation will form. Once it’s completely cool, seal the jars and store them in the refrigerator.
Cooking Tips & Techniques
I’ve made this syrup more times than I can count, and I’ve learned a few things the hard way. Here are my best tips for a perfect batch every time.
- Don’t walk away from the browning butter. I made this mistake once. I thought I could quickly check my email, and the butter went from perfect to acrid black smoke in seconds. Seriously, stand right there and watch it. The color change happens fast.
- Use a light-colored pan if you have one. It makes it much easier to see the butter turn brown. A dark non-stick pan can hide the color, and you’ll end up with burnt butter before you know it.
- If the syrup crystallizes, don’t panic. Sometimes, a little sugar crystal forms and ruins the smooth texture. To fix it, add a teaspoon of lemon juice or corn syrup to the pan when you add the sugar. The acid or invert sugar prevents crystallization.
- Taste test before you bottle it. The syrup will be very hot, so let a tiny drop cool on a spoon. This is your chance to adjust the flavor. Need more vanilla? Add it now. Want it sweeter? You can dissolve a little more sugar in the warm syrup.
- Let it cool completely before you gift it. Warm syrup can create condensation inside the jar, which can lead to mold growth over time. Patience is a virtue here.
Variations & Adaptations
This recipe is a fantastic base for all kinds of creative twists. Here are a few of my favorite ways to change it up.
- Peppermint Sugar Cookie Syrup: Add 1/2 teaspoon of peppermint extract along with the vanilla. Crush a few candy canes and stir them in instead of the sprinkles. It’s like a candy cane cookie in a cup.
- Gingerbread Coffee Syrup: Replace the butter extract with 1 teaspoon of molasses and 1/2 teaspoon each of ground ginger, cinnamon, and cloves. This creates a warm, spicy syrup perfect for cold mornings.
- Dairy-Free & Vegan Version: Use a high-quality vegan butter that is designed for browning. Miyoko’s or Country Crock Plant Butter work well. The flavor will be slightly different, but it’s still delicious and creamy.
- Spiked Adult Version: For a grown-up gift, add a splash of bourbon or dark rum to the cooled syrup. It adds a lovely warmth and complexity. Just label it clearly so no one accidentally gets a boozy coffee at the office party!
- Low-Sugar Option: As mentioned, you can substitute half the sugar with a brown sugar alternative like Swerve or Lakanto. The texture will be a bit thinner, but the taste is still fantastic. I’ve done this for my father-in-law who is diabetic, and he loved it.
Serving & Storage Suggestions
This syrup is incredibly versatile. Here’s how to use it and keep it fresh.
Serving Suggestions: The most obvious use is in coffee. Add 1-2 tablespoons to a hot cup of black coffee, or use it in an iced latte. It’s also amazing drizzled over pancakes, waffles, or vanilla ice cream. I’ve even used it as a glaze for a simple pound cake. For a fun holiday cocktail, mix it with some milk and a shot of bourbon for a boozy eggnog alternative. Serve it warm for the best flavor.
Storage Instructions: Store the syrup in an airtight glass jar in the refrigerator. It will keep for up to 3 weeks. The butter will solidify slightly when cold, so just run the jar under warm water for a few seconds before using, or microwave it for 10-15 seconds. Do not leave it at room temperature for more than a day, as the butter can spoil.
How Flavors Develop: The flavors actually meld and deepen after a day or two in the fridge. The vanilla and butter extract become more pronounced, and the browned butter taste gets even richer. It’s one of those things that tastes better the next day.
Nutritional Information & Benefits
Let’s be honest—this is a treat. But here’s a breakdown of what you’re getting in a standard 1-tablespoon serving.
| Nutrient | Amount per serving (1 tbsp) |
|---|---|
| Calories | 45 |
| Total Fat | 2g |
| Saturated Fat | 1.5g |
| Carbohydrates | 7g |
| Sugar | 7g |
| Protein | 0g |
The main health benefit here is the joy it brings. Seriously, though, the butter does contain some fat-soluble vitamins like Vitamin A. The vanilla extract has trace amounts of antioxidants. For those with dietary restrictions, this recipe is naturally gluten-free and nut-free. The dairy and vegan variations are easily adaptable. Just remember, it’s a sweet treat—a little goes a long way to make your morning coffee feel special.
Frequently Asked Questions
Can I use salted butter instead of unsalted?
You can, but I recommend unsalted. Salted butter can make the syrup taste a little salty, which might clash with the sweet cookie flavor. If you only have salted butter, just reduce the amount you use by a tablespoon to compensate for the water content.
Why did my syrup turn out cloudy?
Cloudiness usually means the sugar didn’t fully dissolve, or you stirred it too vigorously after it started simmering. To avoid this, make sure the sugar is completely dissolved before you stop stirring, and then don’t stir it again until you add the extracts. Straining it through a fine-mesh strainer will also help clear it up.
How long does this syrup last in the fridge?
Properly stored in an airtight jar, this syrup will last for about 3 weeks. The butter can go rancid after that, so I don’t recommend keeping it longer. You’ll know it’s bad if it smells sour or develops an off-flavor.
Can I double this recipe?
Absolutely! This recipe scales up beautifully. Just use a larger pot to give the syrup room to bubble up. The browning time for the butter will be about the same, but the simmering time might need an extra minute or two to fully dissolve the sugar. I’ve made a triple batch for holiday gifts before.
What if I don’t have butter extract?
You can leave it out, but the syrup will taste more like a simple vanilla syrup than a sugar cookie. The butter extract is what gives it that distinct “cookie” flavor. You can find it at most grocery stores in the baking aisle, or you can order it online. It’s worth the small investment if you plan on making this a yearly tradition.
Conclusion
This homemade Christmas sugar cookie coffee syrup is the kind of recipe that makes you look like a kitchen genius without any of the stress. It started as a complete accident—a failed caramel sauce that turned into something so much better. It’s budget-friendly, incredibly easy, and it tastes like the holidays in a bottle. I love giving it as a gift because it feels personal and thoughtful, and I love keeping a jar for myself because it makes my morning coffee feel like a special occasion. I hope you give it a try and make it your own. Maybe you’ll add a little extra vanilla, or a pinch of cinnamon, or even a splash of bourbon. Whatever you do, just make it with love. And when you do, please come back and leave a comment to tell me how it turned out! I’d love to hear about your own happy accidents in the kitchen. Happy holidays, and happy sipping!
Pin This Recipe!
Homemade Christmas Sugar Cookie Coffee Syrup Budget Gift

This homemade Christmas sugar cookie coffee syrup is a budget-friendly gift that tastes like a holiday miracle. It’s a simple, delicious syrup made with browned butter, vanilla, and festive sprinkles, perfect for adding a touch of holiday cheer to your morning coffee.
- Prep Time: 5 minutes
- Cook Time: 15 minutes
- Total Time: 20 minutes
- Yield: 16 servings 1x
- Category: Condiment
- Cuisine: American
Ingredients
- 1/2 cup (1 stick) unsalted butter
- 2 cups granulated sugar
- 1 cup water
- 2 teaspoons pure vanilla extract
- 1/2 teaspoon butter extract
- 1/4 cup Christmas cookie sprinkles (optional)
Instructions
- Brown the butter: Place the stick of unsalted butter in a medium saucepan over medium heat. Let it melt completely, then continue to cook, swirling the pan occasionally, until the milk solids turn golden brown and the butter smells nutty, about 5-7 minutes. Watch carefully to avoid burning.
- Add the sugar and water: Immediately pour in the 2 cups of granulated sugar and 1 cup of water. Stir constantly with a wooden spoon. The mixture will bubble up and look separated at first; keep stirring.
- Bring to a simmer: Increase the heat to medium-high and bring the mixture to a gentle simmer (small bubbles breaking the surface). Stir until the sugar is completely dissolved, about 2-3 minutes. The liquid will become clear and smooth.
- Simmer and infuse: Reduce the heat to low and let the syrup simmer gently for 5 minutes. Do not stir during this time to prevent crystallization.
- Remove from heat and add flavors: Take the pan off the burner. Stir in the 2 teaspoons of vanilla extract and 1/2 teaspoon of butter extract.
- Strain the syrup (optional): Pour the syrup through a fine-mesh strainer into a heat-safe bowl or directly into jars to remove any burnt bits or undissolved sprinkle pieces.
- Add the sprinkles (optional): If using, stir the Christmas cookie sprinkles into the strained syrup while it’s still warm.
- Cool and bottle: Let the syrup cool in the jars for 20-30 minutes at room temperature. It will thicken as it cools. Do not put lids on while hot. Once completely cool, seal the jars and store in the refrigerator.
Notes
The syrup will keep in the refrigerator for up to 3 weeks. The butter will solidify slightly when cold; run the jar under warm water or microwave for 10-15 seconds before using. For a dairy-free version, use a high-quality vegan butter designed for browning. To prevent crystallization, add a teaspoon of lemon juice or corn syrup when adding the sugar.
Nutrition
- Serving Size: 1 tablespoon
- Calories: 45
- Sugar: 7
- Fat: 2
- Saturated Fat: 1.5
- Carbohydrates: 7
Keywords: sugar cookie syrup, coffee syrup, homemade gift, Christmas syrup, browned butter syrup, holiday gift, budget gift