It was 11:47 PM on a drizzly Tuesday in October, and I had a desperate need for something creamy, cold, and pumpkin-spiced. Not a slice of pie (too much work), not a pumpkin roll (too fussy), but something that felt like a hug in dessert form. I didn’t have cream cheese that had softened for hours, but I had a block straight from the fridge, a can of pumpkin puree that was about to expire, and the wild idea that maybe, just maybe, I could fake a cheesecake texture without turning on the oven. Honestly, I was tired. My kitchen was a mess from dinner. But that craving? It wasn’t going anywhere. So I grabbed my hand mixer, crossed my fingers, and started throwing things together in a way that felt almost reckless. The result was so good I actually texted my sister a photo at midnight, which is basically a culinary declaration of love in my world. These Light No-Bake Pumpkin Cheesecake Bars were born from a moment of late-night stubbornness, and they’ve become my secret weapon for fall gatherings ever since. Maybe you’ve been there—standing in your kitchen at an unreasonable hour, convinced that the perfect dessert is hiding somewhere between your pantry shelves.
Why You’ll Love This Recipe
Let me tell you why these bars have earned a permanent spot in my fall recipe rotation. I’ve tested this recipe at least seven times—once with low-fat cream cheese, once with dairy-free alternatives, and even a version where I accidentally used pumpkin pie filling instead of puree (spoiler: don’t do that). Each trial taught me something, and this final version is the one I’d serve to my pickiest friends without hesitation.
- Quick & Easy: Comes together in about 15 minutes of active prep, then the fridge does the rest of the work. Perfect for those evenings when you need dessert but your energy is gone.
- Simple Ingredients: No fancy grocery trips needed. You probably have most of these in your kitchen right now—graham crackers, cream cheese, pumpkin puree, and basic spices.
- Perfect for Fall Gatherings: Great for Thanksgiving, Friendsgiving, potlucks, or just a quiet Tuesday when you need something special.
- Crowd-Pleaser: I’ve watched people who claim they don’t like pumpkin desserts go back for seconds. The texture is that good.
- Unbelievably Delicious: The combination of buttery crust, silky pumpkin filling, and that hint of warm spices is next-level comfort food.
What makes these bars different from the rest? It’s the texture. Most no-bake pumpkin cheesecakes turn out either too dense or too mousse-like. This one hits that perfect sweet spot—creamy but firm enough to slice cleanly. The secret is how we handle the cream cheese and the ratio of pumpkin to dairy. I’ve balanced it so you get that rich pumpkin flavor without it feeling heavy. And honestly? The light version tastes just as indulgent as the full-fat original. You won’t miss a thing.
This recipe is the kind that makes you close your eyes after the first bite. It’s comfort food reimagined—lighter, faster, but with the same soul-soothing satisfaction. Perfect for impressing guests without stress, or turning a simple fall evening into something memorable.
What Ingredients You Will Need
This recipe uses simple, wholesome ingredients to deliver that creamy, spiced pumpkin flavor without the fuss. Most of these are pantry staples, especially if you do any fall baking.
For the Crust
- Graham cracker crumbs – 1 ½ cups (about 12 full sheets, crushed finely). You can buy pre-crushed or pulse whole crackers in a food processor.
- Unsalted butter – 6 tablespoons, melted. I use Land O’Lakes for consistent results.
- Granulated sugar – 2 tablespoons (adds just enough sweetness to balance the spices).
- Pinch of salt – A tiny pinch brings out the buttery flavor.
For the Pumpkin Cheesecake Filling
- Reduced-fat cream cheese – 16 ounces (two 8-ounce blocks), softened to room temperature. I prefer Philadelphia brand for the smoothest texture.
- Pumpkin puree – 1 cup (not pumpkin pie filling—make sure it’s 100% pure pumpkin). Libby’s is my go-to.
- Powdered sugar – ¾ cup (adds sweetness without grittiness).
- Vanilla extract – 1 teaspoon (pure vanilla, not imitation, if you have it).
- Pumpkin pie spice – 1 ½ teaspoons. You can make your own with 1 teaspoon cinnamon, ¼ teaspoon nutmeg, ¼ teaspoon ginger, and a pinch of cloves.
- Salt – ¼ teaspoon (balances sweetness and enhances the pumpkin flavor).
- Plain Greek yogurt – ½ cup (this is my secret for keeping it light while adding tanginess). Use full-fat or 2% for best texture.
For the Optional Topping
- Light whipped topping – 1 cup, thawed (like Cool Whip Lite, or make your own with heavy cream).
- Ground cinnamon – For dusting on top.
- Pecans or walnuts – ¼ cup, chopped (optional, for crunch).
Ingredient Selection Tips: Look for cream cheese that’s at room temperature—this is crucial for a smooth, lump-free filling. If you’re in a rush, cut the cold cream cheese into cubes and let it sit on the counter for 20 minutes. For the pumpkin puree, avoid anything labeled “pumpkin pie filling” as it has added sugar and spices that will throw off the balance. I’ve used both store-bought graham cracker crumbs and homemade, and honestly, homemade gives a better texture because you can control the fineness.
Substitution Guidance: Use dairy-free cream cheese and coconut yogurt for a dairy-free version. For a gluten-free crust, swap graham crackers with gluten-free vanilla cookies or almond flour mixed with butter. If you don’t have Greek yogurt, sour cream works beautifully too—just use full-fat for the best consistency.
Equipment Needed
- 8×8-inch baking pan – Glass or metal works fine. I prefer glass so I can see the crust layer.
- Parchment paper – For lining the pan so the bars lift out easily. Trust me on this one.
- Hand mixer or stand mixer – A hand mixer is perfect here. A stand mixer works too, but don’t overmix.
- Mixing bowls – One medium for the crust, one large for the filling.
- Measuring cups and spoons – For accuracy, especially with the spices.
- Spatula – Rubber or silicone, for scraping every bit of filling.
- Food processor or zip-top bag and rolling pin – For crushing graham crackers. I’ve used both methods; the food processor is faster but the bag-and-rolling-pin method is oddly satisfying.
- Plastic wrap – To cover the pan while chilling.
Budget-Friendly Alternative: If you don’t have a food processor, place graham crackers in a zip-top bag, remove the air, and crush them with a rolling pin or even a heavy can. It takes a few minutes but works perfectly. For the mixer, a whisk and some elbow grease will do in a pinch, but you’ll need to really beat the cream cheese until smooth.
Preparation Method
- Prepare the pan: Line your 8×8-inch pan with parchment paper, leaving an overhang on two opposite sides. This creates handles so you can lift the bars out later. Lightly grease the parchment with a tiny bit of butter or cooking spray.
- Make the crust: In a medium bowl, combine 1 ½ cups graham cracker crumbs, 2 tablespoons granulated sugar, and a pinch of salt. Pour in 6 tablespoons melted butter and stir with a fork until the mixture looks like wet sand and all crumbs are evenly coated. Press this mixture firmly into the bottom of your prepared pan. Use the bottom of a measuring cup or a flat glass to really compact it. Pop it in the fridge while you make the filling.
- Beat the cream cheese: In a large mixing bowl, add 16 ounces softened cream cheese. Beat with a hand mixer on medium speed for about 2 minutes until smooth and fluffy. Scrape down the sides and bottom of the bowl with a spatula. This step is important—lumps here will stay lumpy forever.
- Add the pumpkin and yogurt: Add 1 cup pumpkin puree and ½ cup Greek yogurt to the cream cheese. Beat on medium-low until combined, about 30 seconds. The mixture will look a bit looser now, which is perfect.
- Add the sweeteners and spices: Add ¾ cup powdered sugar, 1 teaspoon vanilla extract, 1 ½ teaspoons pumpkin pie spice, and ¼ teaspoon salt. Beat on low speed until just combined—don’t overmix or the filling can become too thin. Scrape the bowl once more to ensure everything is incorporated.
- Check the texture: The filling should be thick, creamy, and smooth. If it looks a bit soft, don’t worry—it will firm up in the fridge. If it seems too thick, add a tablespoon of milk or cream. If it’s too thin, it might need more chilling time later.
- Assemble the bars: Remove the crust from the fridge. Spoon the pumpkin cheesecake filling over the crust and spread it evenly with a spatula. Tap the pan gently on the counter a few times to release any air bubbles. Smooth the top as best you can—it doesn’t have to be perfect, but try to get it even.
- Add the topping (optional): If using whipped topping, spread it gently over the filling. You can also leave it plain and add whipped cream later per serving. I sometimes swirl the whipped topping into the filling for a marbled effect.
- Chill: Cover the pan with plastic wrap and refrigerate for at least 4 hours, but overnight is best. The bars need this time to set properly. Don’t rush it—I’ve tried cutting them after 2 hours and it was a mess. Trust the process.
- Slice and serve: When fully set, use the parchment overhang to lift the entire block out of the pan. Place on a cutting board and use a sharp knife to slice into 9 or 16 bars. For clean cuts, wipe the knife between slices with a damp paper towel.
Sensory Cues: When you press the crust into the pan, it should feel compact and slightly sandy. The filling should be thick enough that when you lift the spatula, it holds its shape briefly before slowly settling. After chilling, the bars should feel firm to the touch but still give slightly when pressed.
Personal Efficiency Tip: Set a timer for 2 minutes when beating the cream cheese—it’s easy to underbeat, and lumps are the enemy of smooth cheesecake. Also, let your cream cheese sit out for at least 30 minutes before starting. Cold cream cheese creates lumps that no amount of beating will fix.
Cooking Tips & Techniques
I’ve made this recipe enough times to know where things can go wrong. Here’s what I’ve learned the hard way so you don’t have to.
The Cream Cheese Temperature Trap: The biggest mistake I made was using cold cream cheese straight from the fridge. It created tiny lumps that never smoothed out, no matter how long I beat it. Now I always set it out for at least 30 minutes. If I’m in a rush, I cut it into small cubes and microwave it for 10 seconds on low power—just enough to take the chill off, not melt it.
The Crust Pressing Technique: A loose crust falls apart when you cut the bars. I learned this after my first batch crumbled everywhere. Use the bottom of a measuring cup or a flat glass to really press the crumbs down firmly. Take your time with this step—it makes a difference. I even press the edges with my fingers to make sure they’re compact.
Timing and Multitasking: While the cream cheese softens, crush your graham crackers and melt the butter. While the crust chills, make the filling. This way, everything flows together without waiting. The active prep time is only about 15 minutes, so it’s not like you’re juggling multiple hot pans.
The Patience Factor: I once tried to speed up the chilling process by putting the bars in the freezer for an hour. The edges froze while the center stayed soft, and the texture was uneven. Stick with the refrigerator for at least 4 hours. Overnight is truly best—the flavors meld and the texture becomes perfectly creamy.
Consistency Check: If your filling seems too thin after mixing, it might be because the cream cheese was too warm or you overmixed. Next time, beat the cream cheese alone first, then add the other ingredients on low speed. If it’s already too thin, don’t panic—it will still set, just take a bit longer in the fridge.
Variations & Adaptations
One of the best things about this recipe is how flexible it is. Here are some variations I’ve tried and loved.
Dairy-Free Version: Use dairy-free cream cheese (I like Kite Hill or Tofutti) and coconut yogurt instead of Greek yogurt. The texture will be slightly softer, so chill for at least 6 hours. For the crust, use vegan butter or coconut oil. I tested this for a friend with dairy sensitivity, and she said it was the best pumpkin dessert she’d had in years.
Gluten-Free Option: Swap graham crackers for gluten-free vanilla cookies or a mixture of almond flour and coconut flour. If using almond flour, add an extra tablespoon of butter to help it bind. The crust will be a bit more delicate, so press it firmly and chill well.
Extra Spiced Version: Add ¼ teaspoon of ground cardamom and a pinch of black pepper to the pumpkin pie spice. The cardamom adds a floral note that pairs beautifully with pumpkin. I tried this on a whim one Thanksgiving and it was a hit.
Chocolate Swirl Variation: Melt ¼ cup of dark chocolate chips and drizzle it over the filling before chilling. Use a knife to gently swirl it in for a marbled effect. The chocolate and pumpkin combination is surprisingly good—like a pumpkin chocolate chip cookie in bar form.
Individual Servings: Instead of an 8×8 pan, use small mason jars or ramekins. Layer the crust, filling, and topping in each jar. These are perfect for parties or gifting. Just reduce the chilling time to 2 hours since they’re smaller.
Serving & Storage Suggestions
These bars are best served cold, straight from the fridge. The texture is firm but creamy, and the flavors are more pronounced when chilled. I like to let them sit at room temperature for about 5 minutes before serving—just enough to take the chill off without losing the structure.
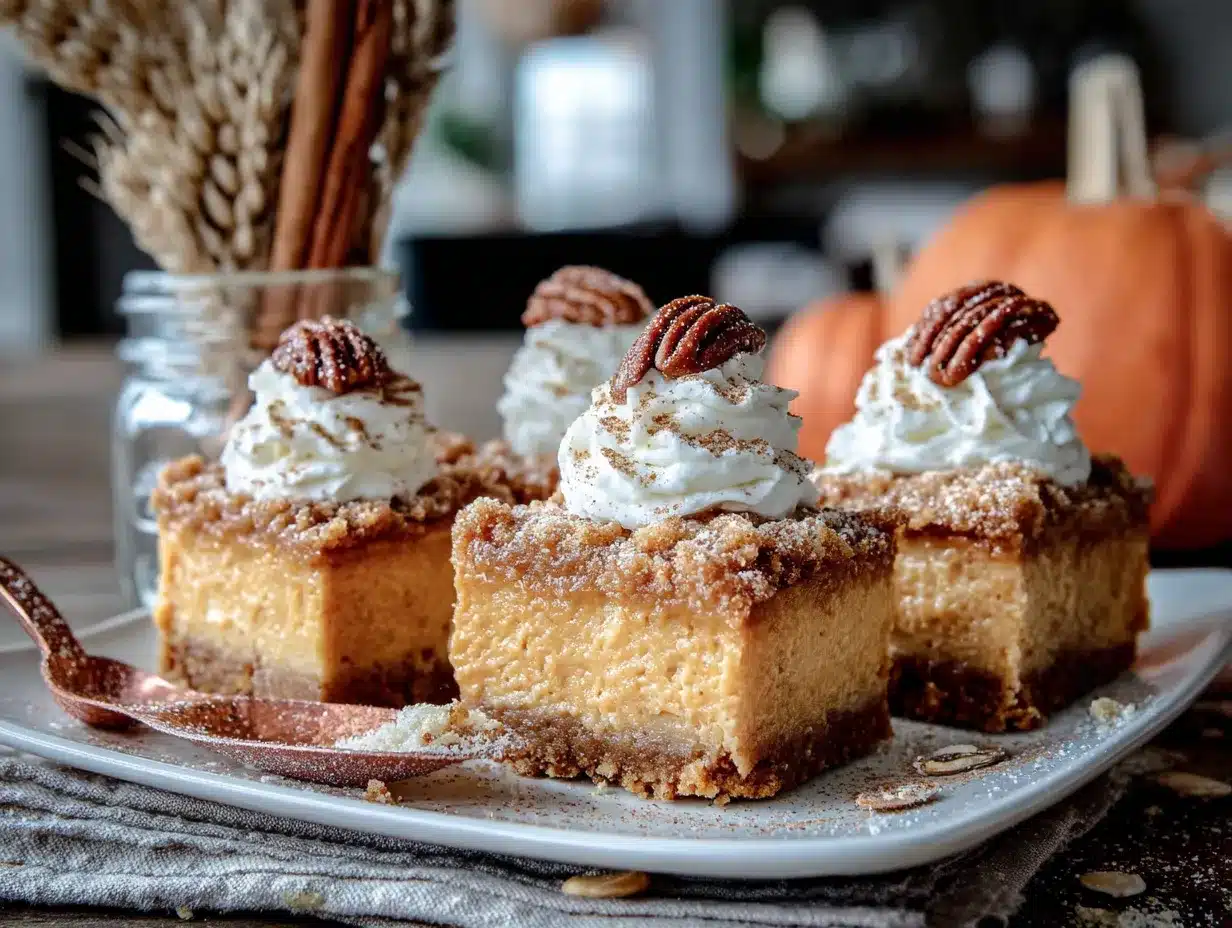
Presentation Ideas: Dust the top with a light sprinkle of cinnamon or pumpkin pie spice before serving. Add a dollop of whipped cream and a few toasted pecans for a more elegant look. For fall gatherings, I sometimes drizzle a little caramel sauce over the top—it adds sweetness and looks gorgeous.
Complementary Dishes: Serve these bars alongside a warm cup of coffee or chai tea. The spices in the bars complement the warmth of the drinks perfectly. For a full dessert spread, pair with apple cider donut cake or cranberry orange scones for a fall-themed treat table.
Storage Instructions: Store the bars in an airtight container in the refrigerator for up to 5 days. Place a sheet of parchment paper between layers to prevent sticking. They actually taste better on day two as the flavors continue to meld.
Freezer Instructions: These bars freeze beautifully. Wrap individual bars tightly in plastic wrap, then place them in a freezer-safe bag or container. They’ll keep for up to 2 months. To thaw, transfer to the refrigerator overnight or let sit at room temperature for 20 minutes. I always keep a stash in the freezer for unexpected guests or late-night cravings.
Reheating Note: These are meant to be served cold, but if you prefer a softer texture, let them sit at room temperature for 10-15 minutes. Do not microwave them—the filling will become runny.
Nutritional Information & Benefits
Here’s the nutritional breakdown per bar (based on 9 servings):
| Nutrient | Amount per Bar |
|---|---|
| Calories | 245 |
| Total Fat | 14g |
| Saturated Fat | 8g |
| Cholesterol | 45mg |
| Sodium | 280mg |
| Total Carbohydrates | 26g |
| Dietary Fiber | 2g |
| Sugars | 18g |
| Protein | 6g |
Health Benefits: Pumpkin is packed with vitamin A, which supports eye health and immune function. It’s also rich in fiber, which helps with digestion and keeps you feeling full. The Greek yogurt adds protein and probiotics, while the reduced-fat cream cheese cuts down on saturated fat compared to traditional recipes. This version has about 40% fewer calories than a standard pumpkin cheesecake, but you’d never guess it from the taste.
Dietary Considerations: This recipe is vegetarian and can be made gluten-free and dairy-free with the substitutions mentioned above. It’s not suitable for vegan diets unless you use vegan cream cheese and yogurt, though the texture will be slightly different. The bars are relatively low in sugar compared to many desserts, making them a lighter option for those watching their intake.
Conclusion
These Light No-Bake Pumpkin Cheesecake Bars have become my go-to fall dessert for a reason. They’re ridiculously easy to make, require no oven time, and taste like you spent hours in the kitchen. The creamy, spiced filling paired with that buttery graham cracker crust is pure comfort in every bite. And the best part? You can customize them to fit your dietary needs without sacrificing flavor.
I love this recipe because it proves that “light” doesn’t mean “boring.” You can have something indulgent and satisfying that also happens to be better for you. It’s the kind of dessert that makes you feel good about eating it—both in the moment and after.
I’d love to hear how these bars turn out for you! Leave a comment below and let me know if you tried any variations. Did you add chocolate? Go dairy-free? Make them for a holiday party? Share your photos and tag me on social media—I love seeing your creations. And if you’re looking for more fall inspiration, check out my pumpkin oatmeal cookies or maple roasted vegetables for a savory-sweet side dish. Happy baking (or rather, happy no-baking)!
Frequently Asked Questions
Can I use pumpkin pie filling instead of pumpkin puree?
No, I wouldn’t recommend it. Pumpkin pie filling has added sugar and spices, which will make your bars overly sweet and throw off the spice balance. Stick with 100% pure pumpkin puree for the best results. If you only have pie filling, reduce the sugar and spices, but the texture may still be off.
How long do these bars need to chill?
At least 4 hours, but overnight is ideal. The bars need time to set properly so they slice cleanly. If you’re in a rush, you can chill them for 3 hours, but they’ll be softer and harder to cut. I always make them the day before I need them.
Can I use a different crust?
Absolutely! Vanilla wafers, shortbread cookies, or even ginger snaps work beautifully. If using ginger snaps, reduce the sugar in the crust since they’re already sweet. For a nutty crust, try crushed pecans mixed with butter and a little sugar.
How do I get clean slices?
Use a sharp knife and wipe it clean with a damp paper towel between each cut. For the cleanest slices, chill the bars for at least 6 hours or overnight. You can also run the knife under hot water and dry it before cutting—the warmth helps glide through the filling.
Can I make these bars ahead of time for a party?
Yes, this is actually the perfect make-ahead dessert. They keep well in the fridge for up to 5 days, and the flavors actually improve after a day or two. You can also freeze them for up to 2 months. Just thaw in the fridge overnight before serving.
PrintLight No-Bake Pumpkin Cheesecake Bars
These Light No-Bake Pumpkin Cheesecake Bars are creamy, spiced, and incredibly easy to make with just 15 minutes of active prep. Perfect for fall gatherings, they deliver all the indulgence of cheesecake without turning on the oven.
- Prep Time: 15 minutes
- Cook Time: 0 minutes
- Total Time: 4 hours 15 minutes (includes chilling)
- Yield: 9 servings 1x
- Category: Dessert
- Cuisine: American
Ingredients
- 1 ½ cups graham cracker crumbs (about 12 full sheets)
- 6 tablespoons unsalted butter, melted
- 2 tablespoons granulated sugar
- Pinch of salt
- 16 ounces reduced-fat cream cheese, softened to room temperature
- 1 cup pumpkin puree (not pumpkin pie filling)
- ½ cup plain Greek yogurt (full-fat or 2%)
- ¾ cup powdered sugar
- 1 teaspoon vanilla extract
- 1 ½ teaspoons pumpkin pie spice
- ¼ teaspoon salt
- 1 cup light whipped topping, thawed (optional)
- Ground cinnamon for dusting (optional)
- ¼ cup chopped pecans or walnuts (optional)
Instructions
- Line an 8×8-inch baking pan with parchment paper, leaving an overhang on two opposite sides. Lightly grease the parchment.
- In a medium bowl, combine graham cracker crumbs, granulated sugar, and a pinch of salt. Pour in melted butter and stir until the mixture resembles wet sand. Press firmly into the bottom of the prepared pan. Refrigerate while making the filling.
- In a large mixing bowl, beat softened cream cheese with a hand mixer on medium speed for about 2 minutes until smooth and fluffy. Scrape down the sides.
- Add pumpkin puree and Greek yogurt. Beat on medium-low until combined, about 30 seconds.
- Add powdered sugar, vanilla extract, pumpkin pie spice, and salt. Beat on low speed until just combined. Scrape the bowl.
- Remove the crust from the fridge. Spoon the filling over the crust and spread evenly. Tap the pan gently to release air bubbles.
- If using, spread whipped topping over the filling or swirl it in for a marbled effect. Dust with cinnamon and sprinkle nuts if desired.
- Cover with plastic wrap and refrigerate for at least 4 hours, preferably overnight.
- When set, use the parchment overhang to lift the block out of the pan. Slice into 9 or 16 bars with a sharp knife, wiping the knife clean between cuts.
Notes
For best results, use room temperature cream cheese to avoid lumps. Chill overnight for cleanest slices. The bars can be stored in the refrigerator for up to 5 days or frozen for up to 2 months.
Nutrition
- Serving Size: 1 bar
- Calories: 245
- Sugar: 18
- Sodium: 280
- Fat: 14
- Saturated Fat: 8
- Carbohydrates: 26
- Fiber: 2
- Protein: 6
Keywords: no-bake pumpkin cheesecake bars, light pumpkin dessert, easy fall dessert, pumpkin cheesecake bars, no-bake dessert