My six-year-old niece looked up from the cookbook I’d bought her and asked, completely serious, “Auntie, why can’t we just put the gummy worms in the dirt? Like, real dirt?” I started to explain why that wouldn’t work—hygiene, obviously, and the texture, and the fact that real dirt is, well, dirt. Then I stopped. She wasn’t asking for an actual garden. She was asking for the *idea* of dirt—the crumbly, chocolatey, fun-to-eat kind. Honestly, it was one of those moments where you realize a kid’s brain works on a completely different, more creative level than ours. I closed my mouth, grabbed a bag of Oreos, and decided to build a whole pumpkin patch right in a cup. I mean, she was onto something. Why not make the dirt edible and the pumpkin the star of the show? That afternoon, covered in chocolate crumbs and laughing at our own mess, the Kid-Approved Pumpkin Patch Dirt Pudding Cups were born. And let me tell you, I was the one who learned the real lesson: sometimes the best ideas come from the smallest, messiest thinkers. This recipe has stayed with me because it’s not just a dessert—it’s a moment. A silly, delicious, unforgettable moment that makes everyone feel like a kid again.
Why You’ll Love This Recipe
Look, I’ve tested a lot of no-bake desserts in my time. Some are too sweet, some are too complicated, and some just don’t hold up after a few hours in the fridge. These Pumpkin Patch Dirt Pudding Cups? They’re the real deal. After about a dozen trials (and a few very happy taste-testers), I can tell you exactly why this version works.
- Quick & Easy: Comes together in under 20 minutes of active time. Perfect for a last-minute classroom treat or a rainy Saturday with the kids.
- Simple Ingredients: No fancy grocery trips needed. You likely already have pudding mix, cream cheese, and Oreos in your pantry.
- Perfect for Fall Gatherings: Great for Halloween parties, Thanksgiving dessert tables, or just a cozy afternoon snack.
- Crowd-Pleaser: I’ve seen picky eaters go back for thirds. The combination of creamy pumpkin pudding and crunchy chocolate “dirt” is irresistible.
- Unbelievably Delicious: The texture and flavor combo is next-level comfort food. It’s like autumn in a cup.
What makes this recipe different from the rest? It’s the balance. I’ve perfected the ratio of pumpkin to cream cheese so it’s not too heavy, and the crushed Oreos stay crunchy without getting soggy. This isn’t just another version—it’s the best version. You know that feeling when you take a bite and you just *know* you nailed it? That’s what this recipe delivers. Perfect for impressing guests without stress, or turning a simple family dinner into something memorable.
What Ingredients You Will Need
This recipe uses simple, wholesome ingredients to deliver bold flavor and satisfying texture without the fuss. Most of these are pantry staples, especially if you’re a fan of fall baking.
- For the Pumpkin Pudding Layer:
- 1 box (3.4 oz) instant vanilla pudding mix (I prefer Jell-O brand for consistent texture)
- 1 cup cold milk (whole milk gives the creamiest result, but 2% works fine)
- 1/2 cup canned pumpkin puree (not pumpkin pie filling—look for 100% pumpkin)
- 1 teaspoon pumpkin pie spice (adds warmth and depth)
- 1/2 teaspoon vanilla extract (pure is best, imitation works in a pinch)
- For the Cream Cheese Layer:
- 4 oz cream cheese, softened (full-fat is best for richness)
- 1/4 cup powdered sugar (adds sweetness without graininess)
- 1/2 cup heavy cream (or cold whipped topping like Cool Whip for a shortcut)
- For the “Dirt” & Topping:
- 1 package (14.3 oz) Oreo cookies (about 20 cookies, crushed into fine crumbs)
- 2 tablespoons melted butter (to help the “dirt” stick together a bit)
- Gummy worms (for the classic dirt cup look)
- Small pumpkin candies or candy corn (optional, for garnish)
- Green sprinkles or crushed graham crackers (to look like “grass” or “pumpkin patch soil”)
Ingredient Tips: If you can’t find pumpkin pie spice, mix 1/2 teaspoon cinnamon, 1/4 teaspoon nutmeg, 1/4 teaspoon ginger, and a pinch of cloves. For a dairy-free version, use oat milk and dairy-free cream cheese—it still tastes amazing. And honestly, don’t skip the melted butter in the Oreo crumbs; it helps the “dirt” maintain that crumbly, earthy texture instead of turning into a dusty mess.
Equipment Needed
You don’t need a fancy kitchen to pull these off. Here’s what you’ll need:
- 2 mixing bowls (medium and large)
- A hand mixer or stand mixer (a whisk works, but your arm will get tired)
- A food processor or a zip-top bag and rolling pin (for crushing Oreos)
- 6 to 8 small cups or jars (clear plastic cups are great for showing off the layers)
- A rubber spatula
- Measuring cups and spoons
If you don’t have a food processor, just put the Oreos in a zip-top bag, seal it, and let the kids go to town with a rolling pin. It’s more fun that way anyway. I’ve made these with both clear plastic cups from the dollar store and fancy mason jars—both work perfectly. Just make sure they’re at least 6 ounces so you have room for all the layers.
Preparation Method
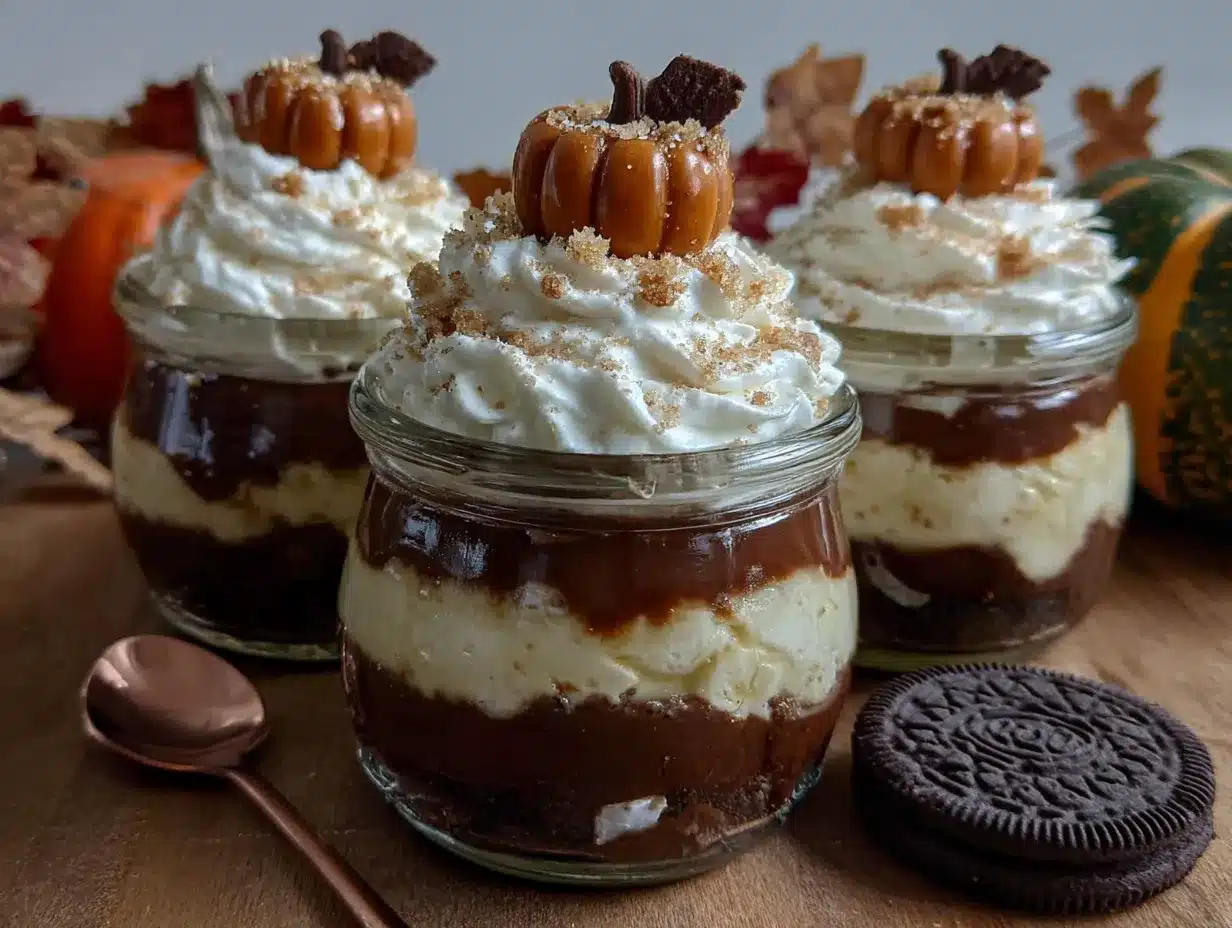
Let’s get to the fun part. This recipe comes together in layers, and each one is simple enough for little hands to help with.
- Make the “Dirt”: Place the Oreos (cream filling and all) in a food processor. Pulse until you get fine crumbs that look like soil. Transfer to a bowl and stir in the melted butter. Set aside. If you’re using the bag method, crush the cookies until no large chunks remain. The butter helps the crumbs hold their shape slightly—just like real dirt clumps.
- Prepare the Pumpkin Pudding: In a medium bowl, whisk together the instant vanilla pudding mix and cold milk for about 2 minutes until it thickens. It should be glossy and smooth. Fold in the pumpkin puree, pumpkin pie spice, and vanilla extract. Mix until completely combined. The color should be a beautiful, rich orange. Pop this in the fridge while you work on the next layer—it helps it set up firmer.
- Make the Cream Cheese Layer: In a large bowl, beat the softened cream cheese and powdered sugar together with a hand mixer until smooth and fluffy. In a separate small bowl, whip the heavy cream until stiff peaks form (about 3-4 minutes). Gently fold the whipped cream into the cream cheese mixture. This lightens the whole thing up so it’s not too heavy. If you’re using Cool Whip, just fold it in directly—no whipping needed.
- Assemble the Cups: Grab your cups or jars. Start with a layer of Oreo “dirt” at the bottom—about 2 tablespoons. Press it down lightly with the back of a spoon. Next, add a layer of the cream cheese mixture (about 2-3 tablespoons). Then a layer of the pumpkin pudding (another 2-3 tablespoons). Repeat the layers until you reach the top, finishing with a generous layer of Oreo dirt on top. You want about 3-4 layers total for the best visual effect.
- Add the Garnishes: Gently press a gummy worm into the top layer so it looks like it’s crawling out of the dirt. Add a few pumpkin candies or candy corn on top for that pumpkin patch feel. If you want, sprinkle a little green sprinkles or crushed graham crackers around the edges to look like grass or soil. The more whimsical, the better—kids love this part.
- Chill and Serve: Place the assembled cups in the refrigerator for at least 2 hours before serving. This allows the layers to set and the flavors to meld together. The pudding will firm up, and the Oreo crumbs will soften just a tiny bit, creating that perfect “dirt” texture. For best results, let them chill overnight—the flavors get even better.
Cooking Tips & Techniques
I’ve made these cups more times than I can count, and I’ve learned a few things the hard way. Here’s what I wish I knew from the start:
- Don’t overmix the pudding: Once the pudding mix and milk are combined, stop whisking as soon as it thickens. Overmixing can make it runny. Trust me, I learned this when I ended up with soup instead of pudding.
- Room temperature cream cheese is key: If your cream cheese is too cold, it won’t blend smoothly with the powdered sugar. You’ll get lumps. Leave it out on the counter for about 30 minutes before you start.
- Crush the Oreos finely enough: Big chunks look less like dirt and more like cookies. Pulse them until they’re almost powder-like. The melted butter helps them hold that crumbly texture.
- Layer strategically: For the best visual, make sure your cream cheese layer is slightly thicker than the pudding layer. It creates a nice contrast. And always end with the Oreo dirt on top—it’s the signature look.
- Timing is everything: These are best made the day before you serve them. The flavors meld together beautifully, and the texture is perfect. If you’re short on time, 2 hours in the fridge is the absolute minimum.
One time, I forgot to add the melted butter to the Oreo crumbs, and the “dirt” was just a dusty mess that flew everywhere when the kids tried to eat it. Lesson learned—that butter is non-negotiable. Also, if you’re making these with young children, expect a few spills. It’s part of the fun. Just keep some extra Oreo crumbs on hand for touch-ups.
Variations & Adaptations
This recipe is incredibly flexible. Here are a few ways to switch it up:
- Gluten-Free Version: Use gluten-free chocolate sandwich cookies (like Glutino) and ensure your pudding mix is certified gluten-free. Everything else is naturally gluten-free.
- Dairy-Free Version: Swap the milk for oat or almond milk, use dairy-free cream cheese, and replace the heavy cream with coconut cream. The texture will be slightly different but still delicious.
- Pumpkin Spice Lovers: Add an extra 1/2 teaspoon of pumpkin pie spice to the cream cheese layer for a more intense fall flavor.
- Chocolate Pumpkin Twist: Use chocolate pudding instead of vanilla for a deeper chocolate flavor that pairs beautifully with the pumpkin.
- No-Bake Pumpkin Cheesecake Cups: Skip the pudding layer altogether and double the cream cheese mixture. Add a tablespoon of pumpkin puree to the cream cheese for a cheesecake-like filling.
I’ve tried the dairy-free version with coconut cream, and honestly, it’s my go-to for friends with allergies. The coconut adds a subtle tropical note that works surprisingly well with the pumpkin. Just make sure to chill the coconut cream overnight before whipping it—it needs to be solid.
Serving & Storage Suggestions
These cups are best served cold, straight from the fridge. The contrast between the creamy layers and the crunchy Oreo dirt is perfect at around 40°F. For presentation, arrange them on a platter with a few extra gummy worms scattered around for a fun, Halloween-party vibe.
Store any leftovers in the refrigerator, covered with plastic wrap or in an airtight container. They’ll keep for up to 3 days, though the Oreo crumbs will soften over time. I actually prefer them on day two—the flavors meld together and the texture becomes more cohesive. If you want to keep the “dirt” crunchy, add a fresh layer of Oreo crumbs just before serving.
These are not freezer-friendly. The cream cheese layer can become grainy when thawed. If you need to make them ahead, assemble them up to 24 hours in advance and keep them chilled. They’re a lifesaver for party prep.
Nutritional Information & Benefits
Here’s an approximate breakdown per serving (based on 8 servings):
| Nutrient | Amount per Serving |
|---|---|
| Calories | 320 |
| Total Fat | 18g |
| Saturated Fat | 10g |
| Carbohydrates | 38g |
| Sugar | 28g |
| Protein | 4g |
| Fiber | 2g |
| Vitamin A | 45% DV |
The pumpkin puree is the real hero here—it’s packed with Vitamin A and fiber, which is rare for a dessert. The cream cheese adds a bit of protein and calcium. While this is definitely a treat, the pumpkin helps balance out the sugar a bit. For a lighter version, you can use low-fat cream cheese and skim milk, but honestly, the full-fat version is where the magic happens. It’s a dessert, after all—enjoy it!
Conclusion
These Kid-Approved Pumpkin Patch Dirt Pudding Cups are more than just a dessert—they’re an experience. From the moment you start crushing the Oreos to the final bite of creamy pumpkin goodness, they bring a little bit of magic to your table. I love this recipe because it’s forgiving, fun, and always gets a reaction. Whether you’re making them for a Halloween party, a Thanksgiving gathering, or just a random Tuesday, they never fail to bring smiles.
I’d love to see your versions! Leave a comment below and tell me how your family customized them. Did you add extra gummy worms? Use chocolate pudding? Make them dairy-free? Share your photos and tag me on Pinterest. And remember, the best recipes are the ones that make you laugh, make a mess, and taste amazing. Happy cooking!
Frequently Asked Questions
Can I make these Pumpkin Dirt Cups ahead of time?
Absolutely! Assemble them up to 24 hours in advance and keep them covered in the fridge. The flavors actually get better overnight. Just add the gummy worms right before serving so they don’t get too soft.
Can I use homemade pudding instead of instant?
Yes, but it will change the texture. Homemade pudding is thinner, so you’ll need to cook it longer and let it set completely before layering. Instant pudding is definitely easier and gives a firmer result that holds up better in the cups.
How do I keep the Oreo crumbs from getting soggy?
The melted butter helps, but the key is to not assemble them too far in advance. If you’re making them more than 24 hours ahead, store the Oreo crumbs separately and add them just before serving. That way, you get that perfect crunchy texture.
Can I use a different type of cookie for the “dirt”?
Sure! Chocolate wafer cookies, graham crackers, or even crushed pretzels work. Just keep in mind that different cookies have different textures. Oreos give the most authentic “dirt” look and flavor, but feel free to experiment.
Are these safe for kids with nut allergies?
Yes, as written, this recipe is nut-free. Just double-check your Oreo and pudding labels to ensure they’re made in a nut-free facility if you’re concerned. The gummy worms should also be checked for nut warnings.
Kid-Approved Pumpkin Dirt Cups: Easy No-Bake Dessert

These no-bake pumpkin dirt cups feature layers of creamy pumpkin pudding, a light cream cheese filling, and crunchy Oreo ‘dirt’ topped with gummy worms. Perfect for fall gatherings and kid-friendly fun.
- Prep Time: 20 minutes
- Cook Time: 0 minutes
- Total Time: 2 hours 20 minutes (includes chilling)
- Yield: 8 servings 1x
- Category: Dessert
- Cuisine: American
Ingredients
- 1 box (3.4 oz) instant vanilla pudding mix
- 1 cup cold milk
- 1/2 cup canned pumpkin puree
- 1 teaspoon pumpkin pie spice
- 1/2 teaspoon vanilla extract
- 4 oz cream cheese, softened
- 1/4 cup powdered sugar
- 1/2 cup heavy cream
- 1 package (14.3 oz) Oreo cookies (about 20 cookies)
- 2 tablespoons melted butter
- Gummy worms (for garnish)
- Small pumpkin candies or candy corn (optional, for garnish)
- Green sprinkles or crushed graham crackers (optional, for garnish)
Instructions
- Make the ‘Dirt’: Place Oreos in a food processor and pulse until fine crumbs form. Transfer to a bowl and stir in melted butter. Set aside.
- Prepare the Pumpkin Pudding: In a medium bowl, whisk together instant vanilla pudding mix and cold milk for about 2 minutes until thickened. Fold in pumpkin puree, pumpkin pie spice, and vanilla extract. Mix until combined. Refrigerate while preparing next layer.
- Make the Cream Cheese Layer: In a large bowl, beat softened cream cheese and powdered sugar with a hand mixer until smooth. In a separate bowl, whip heavy cream until stiff peaks form. Gently fold whipped cream into cream cheese mixture.
- Assemble the Cups: In each cup, layer about 2 tablespoons Oreo ‘dirt’, then 2-3 tablespoons cream cheese mixture, then 2-3 tablespoons pumpkin pudding. Repeat layers until cup is full, finishing with a generous layer of Oreo dirt on top.
- Add Garnishes: Press a gummy worm into the top layer. Add pumpkin candies or candy corn if desired. Sprinkle green sprinkles or crushed graham crackers around edges.
- Chill and Serve: Refrigerate for at least 2 hours before serving. For best results, chill overnight.
Notes
For best texture, chill overnight. Keep Oreo crumbs separate if making more than 24 hours ahead to prevent sogginess. For dairy-free, use oat milk and dairy-free cream cheese. For gluten-free, use gluten-free chocolate sandwich cookies.
Nutrition
- Serving Size: 1 cup
- Calories: 320
- Sugar: 28
- Fat: 18
- Saturated Fat: 10
- Carbohydrates: 38
- Fiber: 2
- Protein: 4
Keywords: pumpkin dirt cups, no-bake dessert, Halloween dessert, fall dessert, kid-friendly, pumpkin pudding, Oreo dirt