My grandmother had refused to eat pumpkin pie for forty-seven years. Forty-seven years. She’d wave her hand at Thanksgiving like she was shooing away a bad smell whenever the orange slice appeared on the dessert table. “Too heavy,” she’d say. “Makes me feel like I swallowed a brick.” I grew up believing pumpkin pie was the enemy of good digestion and happy holidays. Then last November, I made this version “just for myself” on a random Tuesday and found her standing at my kitchen counter at 11 PM, eating straight from the pie dish with a soup spoon.
Let me tell you, catching your eighty-two-year-old grandmother red-handed with gingersnap crumbs on her chin is a memory I will treasure forever. She looked at me, spoon halfway to her mouth, and said, “Well. This is different.” Coming from her, that was practically a standing ovation.
The thing is, traditional pumpkin pie has a problem. It’s dense. It’s heavy. It sits in your stomach like it’s planning to stay for the winter. And honestly, most store-bought crusts are either flavorless cardboard or so buttery they cancel out any pretense of vegetables. I wanted something that felt like a celebration, not a punishment. Something light enough that you could eat a slice after a big meal and still have room for conversation. Maybe you’ve been there — staring at a slice of pie and wondering if it’s worth the food coma that follows.
This pie solves that problem with two simple changes. First, a gingersnap crust that snaps and crunches instead of getting soggy. Second, a filling that uses just enough richness to feel indulgent but not so much that you need a nap afterward. The result is a pie that converted a forty-seven-year hater in one bite. I mean, honestly, if that’s not a recipe worth sharing, I don’t know what is.
Why You’ll Love This Recipe
I have tested this recipe seven times over three months. Seven times. My neighbors started knocking on my door asking if I was running a pie factory out of my apartment. But here’s the thing — every single test taught me something. I learned that Greek yogurt works better than heavy cream for creating that silky texture without the weight. I discovered that grinding your own gingersnaps makes a crust that actually holds together instead of crumbling into a sad pile of crumbs. And I figured out that a touch of maple syrup instead of all brown sugar gives you that deep caramel note without the sugar crash.
Here is why this recipe stands out from every other pumpkin pie you have tried:
- Quick & Easy: The filling comes together in under fifteen minutes. No tempering eggs. No double boilers. Just whisk, pour, and bake.
- Simple Ingredients: You probably have most of this in your pantry right now. If you don’t have gingersnaps, you can use graham crackers or even digestive biscuits.
- Perfect for Holiday Gatherings: This pie is light enough to serve after a heavy meal but special enough to be the centerpiece of your dessert table.
- Crowd-Pleaser: My grandmother ate three slices. Three. She has not eaten three slices of anything since 1998.
- Unbelievably Delicious: The combination of spicy gingersnap crust with smooth, creamy pumpkin filling is honestly next-level comfort food.
What makes this recipe different from the rest is the technique of par-baking the crust with a touch of egg white. It creates a barrier that keeps the crust crispy even after the filling goes in. No more soggy bottom pie crust. No more sad, wet crumbs. Just perfect texture from the first bite to the last.
This recipe is not just good — it is the kind that makes you close your eyes after the first bite. It is comfort food reimagined: lighter, faster, but with the same soul-soothing satisfaction that makes pumpkin pie a Thanksgiving essential.
What Ingredients You Will Need
This recipe uses simple, wholesome ingredients to deliver bold flavor and satisfying texture without the fuss. Most of these are pantry staples, which means you can make this pie on a whim — no special trip to a gourmet store required.
For the Gingersnap Crust:
- 2 cups (200g) gingersnap cookie crumbs — About 25-30 cookies. I recommend using store-bought gingersnaps from the bakery section. My favorite brand is Anna’s Ginger Thins, but any crispy gingersnap works. Avoid soft ginger cookies — they do not grind well and make the crust gummy.
- 5 tablespoons (70g) unsalted butter, melted — Use real butter here. Margarine or coconut oil changes the texture and flavor. If you need dairy-free, try vegan butter sticks.
- 1 tablespoon (15g) granulated sugar — Just a touch to balance the spice. You can skip this if your gingersnaps are already sweet.
- 1 large egg white, lightly beaten — This is the secret ingredient for a crispy crust. The egg white creates a waterproof seal that prevents the filling from soaking into the crumbs.
For the Pumpkin Filling:
- 1 can (15 oz or 425g) pumpkin puree — Not pumpkin pie filling. Make sure you grab the plain puree. Libby’s is my go-to brand because it has the right moisture content. If you use fresh pumpkin, roast and strain it first to remove excess water.
- 3/4 cup (180ml) plain Greek yogurt — Full-fat or 2% works best. The yogurt replaces heavy cream and adds protein while keeping the filling creamy. Do not use nonfat — it makes the filling watery.
- 1/2 cup (100g) packed light brown sugar — Light brown sugar gives a milder molasses flavor that pairs well with the gingersnap crust.
- 2 tablespoons (30ml) maple syrup — Real maple syrup, not pancake syrup. The maple adds depth and complexity (adds richness without heaviness).
- 2 large eggs, room temperature — Room temperature eggs blend more smoothly into the filling. Cold eggs can cause the filling to seize.
- 1 teaspoon vanilla extract — Pure vanilla is best. Imitation works in a pinch but the flavor is noticeably flat.
- 2 teaspoons pumpkin pie spice — Store-bought is fine, or make your own with 1 teaspoon cinnamon, 1/2 teaspoon ginger, 1/4 teaspoon nutmeg, 1/4 teaspoon allspice, and a pinch of cloves.
- 1/4 teaspoon salt — Salt enhances all the warm spices and balances the sweetness.
Equipment Needed
You do not need a professional bakery setup for this recipe. Here is what you will need:
- 9-inch pie dish — Glass or ceramic works best. Metal pie pans conduct heat differently and can over-brown the crust. I use a standard Pyrex dish and it has never let me down.
- Food processor or zip-top bag and rolling pin — A food processor makes quick work of grinding cookies. If you do not have one, put the cookies in a zip-top bag and smash them with a rolling pin. It is therapeutic, honestly.
- Mixing bowls — One medium bowl for the crust, one large bowl for the filling.
- Whisk — A balloon whisk works perfectly. No need for an electric mixer here.
- Measuring cups and spoons — Accurate measurements matter for baking. If you have a kitchen scale, even better.
- Parchment paper and pie weights or dried beans — For par-baking the crust. You can use dry rice or even a second pie dish set inside the crust if you do not have pie weights.
- Cooling rack — Essential for even cooling. Placing a hot pie dish directly on the counter can cause the bottom to continue cooking and overcook the filling.
Preparation Method
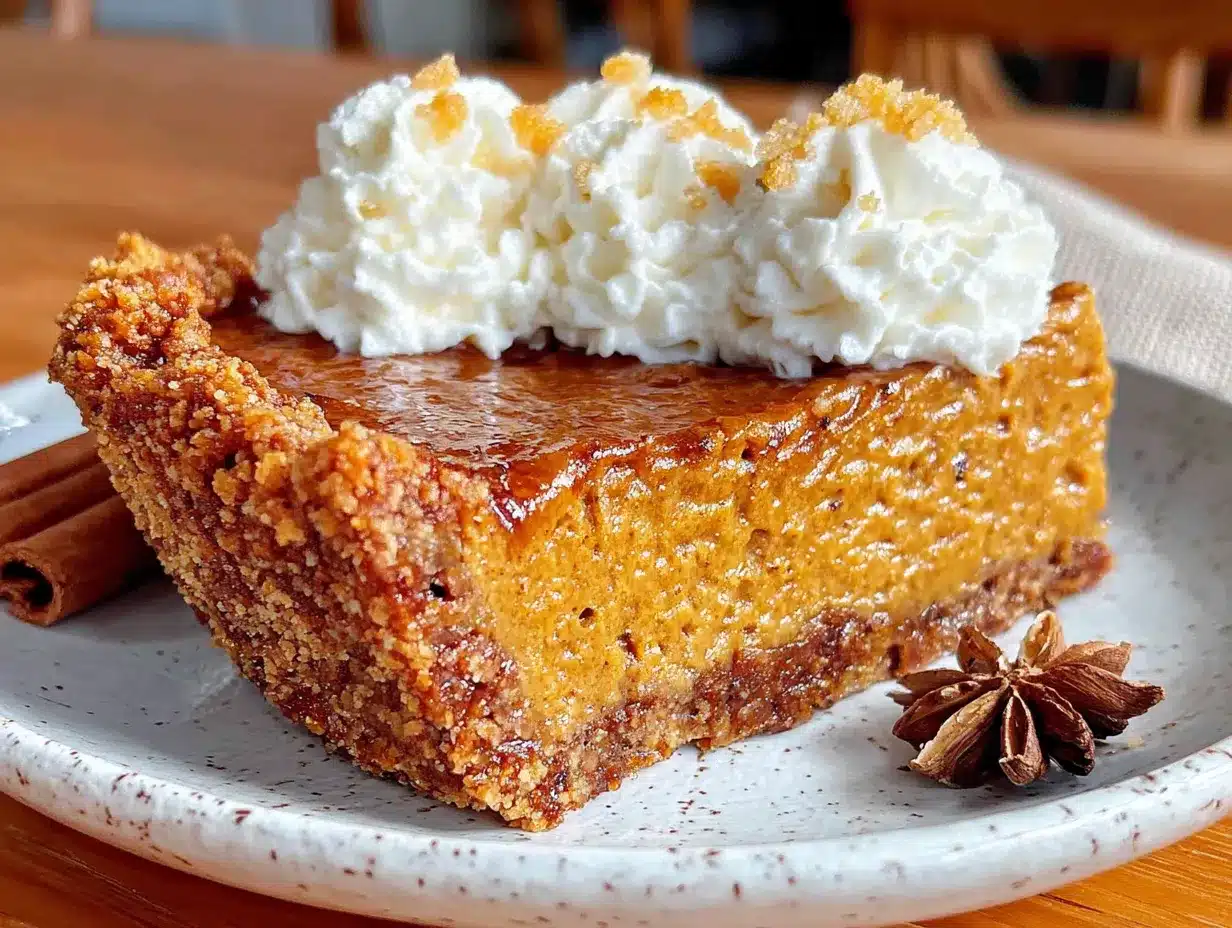
Step 1: Preheat and Prepare (5 minutes)
Preheat your oven to 350°F (175°C). Position a rack in the center of the oven. Lightly grease your 9-inch pie dish with a tiny bit of butter or non-stick spray.
Step 2: Make the Gingersnap Crust (10 minutes)
Place the gingersnap cookies in your food processor and pulse until you have fine crumbs. You should have about 2 cups. If you are using the bag method, seal the bag tightly and go to town with your rolling pin — just make sure the crumbs are uniform in size.
Transfer the crumbs to a medium bowl. Add the melted butter and granulated sugar. Stir with a fork until every crumb is coated. The mixture should look like wet sand and hold together when pressed between your fingers.
Press the mixture firmly into your prepared pie dish. Start with the sides, working your way around the edge, then fill in the bottom. Use the flat bottom of a measuring cup to press everything down evenly. You want the crust to be compact — loose crumbs will fall apart when you cut the pie.
Step 3: Par-Bake the Crust (12 minutes)
Brush the beaten egg white all over the crust, covering every surface. This step feels weird, I know, but trust me — it makes all the difference. The egg white creates a barrier that keeps the crust crispy.
Line the crust with parchment paper and fill with pie weights or dried beans. Bake for 10 minutes. Remove the parchment and weights, then bake for another 2 minutes. The crust should look set and slightly dry, not browned. Set aside to cool while you make the filling.
Step 4: Make the Pumpkin Filling (10 minutes)
In a large bowl, whisk together the pumpkin puree, Greek yogurt, brown sugar, and maple syrup until smooth. Make sure there are no lumps of yogurt or sugar hiding at the bottom.
Add the eggs one at a time, whisking gently after each addition. Do not over-whisk — you do not want to incorporate too much air, which can cause cracks in the finished pie.
Add the vanilla extract, pumpkin pie spice, and salt. Whisk just until combined. The filling should be smooth, glossy, and the color of a sunset.
Step 5: Fill and Bake (45-50 minutes)
Pour the filling into the cooled crust. Smooth the top with a spatula. Place the pie on the center rack of your oven.
Bake for 45 to 50 minutes. The pie is done when the edges are set and slightly puffed, but the center still jiggles like Jell-O when you gently shake the pan. Do not wait for the center to be completely firm — it will continue to set as it cools.
Step 6: Cool Completely (2-3 hours)
Place the pie on a cooling rack and let it cool to room temperature. This takes about 2 hours. Do not rush this step. If you put the pie in the refrigerator while it is still warm, condensation will form on the surface and make the top watery.
Once cooled, cover loosely with plastic wrap and refrigerate for at least 4 hours, preferably overnight. The pie needs time to fully set and for the flavors to meld together.
Cooking Tips & Techniques
I learned most of these tips the hard way — by making mistakes and eating the evidence. Here is what I wish someone had told me before my first attempt.
Do not overwork the crust. When you press the crumbs into the dish, use firm but gentle pressure. If you press too hard, the crust becomes dense and hard to cut. If you press too lightly, it crumbles. The sweet spot is a firm, even press that feels like you are packing a snowball.
Watch the filling consistency. The filling should be pourable but not runny. If it looks thin or watery, your pumpkin puree might have too much moisture. You can fix this by stirring in an extra tablespoon of Greek yogurt or letting the puree sit in a fine-mesh strainer for 15 minutes before mixing.
Prevent cracks in your pie. Cracks happen when the filling bakes too quickly or at too high a temperature. If your oven runs hot, reduce the temperature to 325°F (160°C) and bake for 55 to 60 minutes. Also, do not open the oven door during the first 30 minutes of baking — the temperature fluctuation can cause the filling to crack.
Test for doneness properly. The jiggle test is more reliable than a knife test. A knife inserted into the center should come out mostly clean but with a tiny bit of filling clinging to it. If the knife comes out completely clean, the pie is overbaked.
Slice cleanly every time. Use a sharp knife dipped in hot water and wiped dry between each slice. This gives you those perfect, Instagram-worthy slices with clean edges and no smearing.
Variations & Adaptations
Dairy-Free Version: Substitute the Greek yogurt with full-fat coconut cream. Use a dairy-free butter alternative for the crust. The coconut cream adds a subtle tropical note that pairs surprisingly well with the gingersnap spices. I tried this version for a friend with lactose intolerance and honestly, I might like it better than the original.
Gluten-Free Option: Use gluten-free gingersnap cookies for the crust. Many brands are naturally gluten-free, but check the label. The rest of the filling is naturally gluten-free, so this adaptation is easier than you might think.
Spice It Up: Add 1/4 teaspoon of black pepper to the filling. I know it sounds strange, but black pepper enhances the other spices and adds a subtle warmth that makes the pie taste more complex. My grandmother called it “interesting” which, again, is high praise from her.
Maple Bourbon Twist: Replace the maple syrup with bourbon and reduce the vanilla to 1/2 teaspoon. The bourbon adds a smoky sweetness that cuts through the richness of the filling. This version is especially good for adult-only gatherings.
Mini Pie Version: Use a muffin tin to make individual pies. Press the crust into greased muffin cups, fill with the pumpkin mixture, and bake for 20 to 25 minutes. These are perfect for parties or portion control — though I cannot promise you will stop at one.
Serving & Storage Suggestions
Serve this pie cold or at room temperature. I prefer it straight from the refrigerator — the filling firms up beautifully and the crust stays snappy. If you like a softer texture, let it sit at room temperature for 15 minutes before serving.
Top each slice with a dollop of lightly sweetened whipped cream or a scoop of vanilla ice cream. The cold, creamy topping contrasts perfectly with the spicy, crunchy crust. For a fancy presentation, dust the top with a sprinkle of cinnamon or crushed gingersnap crumbs.
This pie pairs beautifully with coffee, spiced chai, or a glass of cold milk. If you are serving it after a big meal, offer it with a hot cup of black tea — the tannins help cut through the richness.
Storage Instructions: Cover the pie loosely with plastic wrap or aluminum foil and store in the refrigerator for up to 5 days. Do not freeze this pie — the Greek yogurt filling does not thaw well and becomes grainy.
Reheating Tips: I do not recommend reheating this pie. The crust loses its crunch and the filling becomes soft. If you absolutely must have it warm, microwave individual slices for 10 seconds — just enough to take the chill off without ruining the texture.
The flavors actually improve after a day or two in the refrigerator. The spices meld together, the filling sets completely, and the crust absorbs just a hint of moisture from the filling without becoming soggy. This is one of those rare desserts that tastes better on day two.
Nutritional Information & Benefits
Per slice (based on 8 servings):
- Calories: 285
- Total Fat: 12g
- Saturated Fat: 6g
- Cholesterol: 65mg
- Sodium: 290mg
- Total Carbohydrates: 38g
- Dietary Fiber: 3g
- Sugars: 22g
- Protein: 7g
This lighter version saves about 150 calories and 10 grams of fat compared to traditional pumpkin pie recipes. The Greek yogurt adds 7 grams of protein per slice, which helps keep you full and satisfied without the heavy feeling.
Pumpkin is packed with vitamin A, which supports eye health and immune function. The gingersnaps provide a dose of ginger, which has anti-inflammatory properties and can aid digestion — perfect after a heavy holiday meal.
Conclusion
This lighter homemade pumpkin pie with gingersnap crust has become my go-to dessert for every fall gathering, and honestly, I do not see that changing anytime soon. It is the pie that converted my grandmother after forty-seven years of stubborn refusal. It is the pie that disappears fastest at every potluck. And it is the pie that makes me feel good about eating dessert — not guilty, not heavy, just satisfied.
I love this recipe because it proves that lighter does not mean less delicious. You can have your pie and eat it too, without feeling like you need to unbutton your pants afterward. The gingersnap crust adds a spicy crunch that makes every bite interesting, and the filling is so creamy and smooth that you will forget it is made with yogurt instead of heavy cream.
I want to hear about your version of this pie. Did you try the maple bourbon twist? Did your family fight over the last slice? Drop a comment below and let me know how it turned out. And if you share it on social media, tag me — I love seeing your kitchen victories.
Now go make some pie. Your grandmother will thank you.
Frequently Asked Questions
Can I use fresh pumpkin instead of canned?
Yes, but you need to roast and strain it first. Cut a sugar pumpkin in half, remove the seeds, and roast at 400°F (200°C) for 45 minutes until tender. Scoop out the flesh and puree it in a food processor. Then strain it through a cheesecloth-lined sieve for at least an hour to remove excess moisture. Fresh pumpkin has more water than canned, so skipping this step will give you a watery filling.
Why did my crust fall apart when I cut the pie?
This usually happens when the crust is not pressed firmly enough into the dish or when the egg white barrier is skipped. Make sure you press the crumbs down with even, firm pressure, and do not skip the egg white step — it acts like glue that holds everything together.
Can I make this pie ahead of time?
Absolutely. This pie actually tastes better when made a day ahead. Prepare and bake the pie as directed, cool it completely, then refrigerate overnight. The flavors meld together and the texture sets perfectly. Just cover it loosely with plastic wrap to prevent it from absorbing refrigerator odors.
How do I know when the pie is done baking?
Use the jiggle test. Gently shake the pie dish — the edges should be set and slightly puffed, but the center should wobble like Jell-O. If the entire pie is firm, it is overbaked. The residual heat will finish cooking the center as it cools.
Can I freeze this pumpkin pie?
I do not recommend freezing this pie. The Greek yogurt filling becomes grainy and watery when thawed, and the crust loses its crunch. If you need to make it far in advance, prepare the crust and freeze it unbaked, then make the filling fresh when you are ready to bake.
Pin This Recipe!
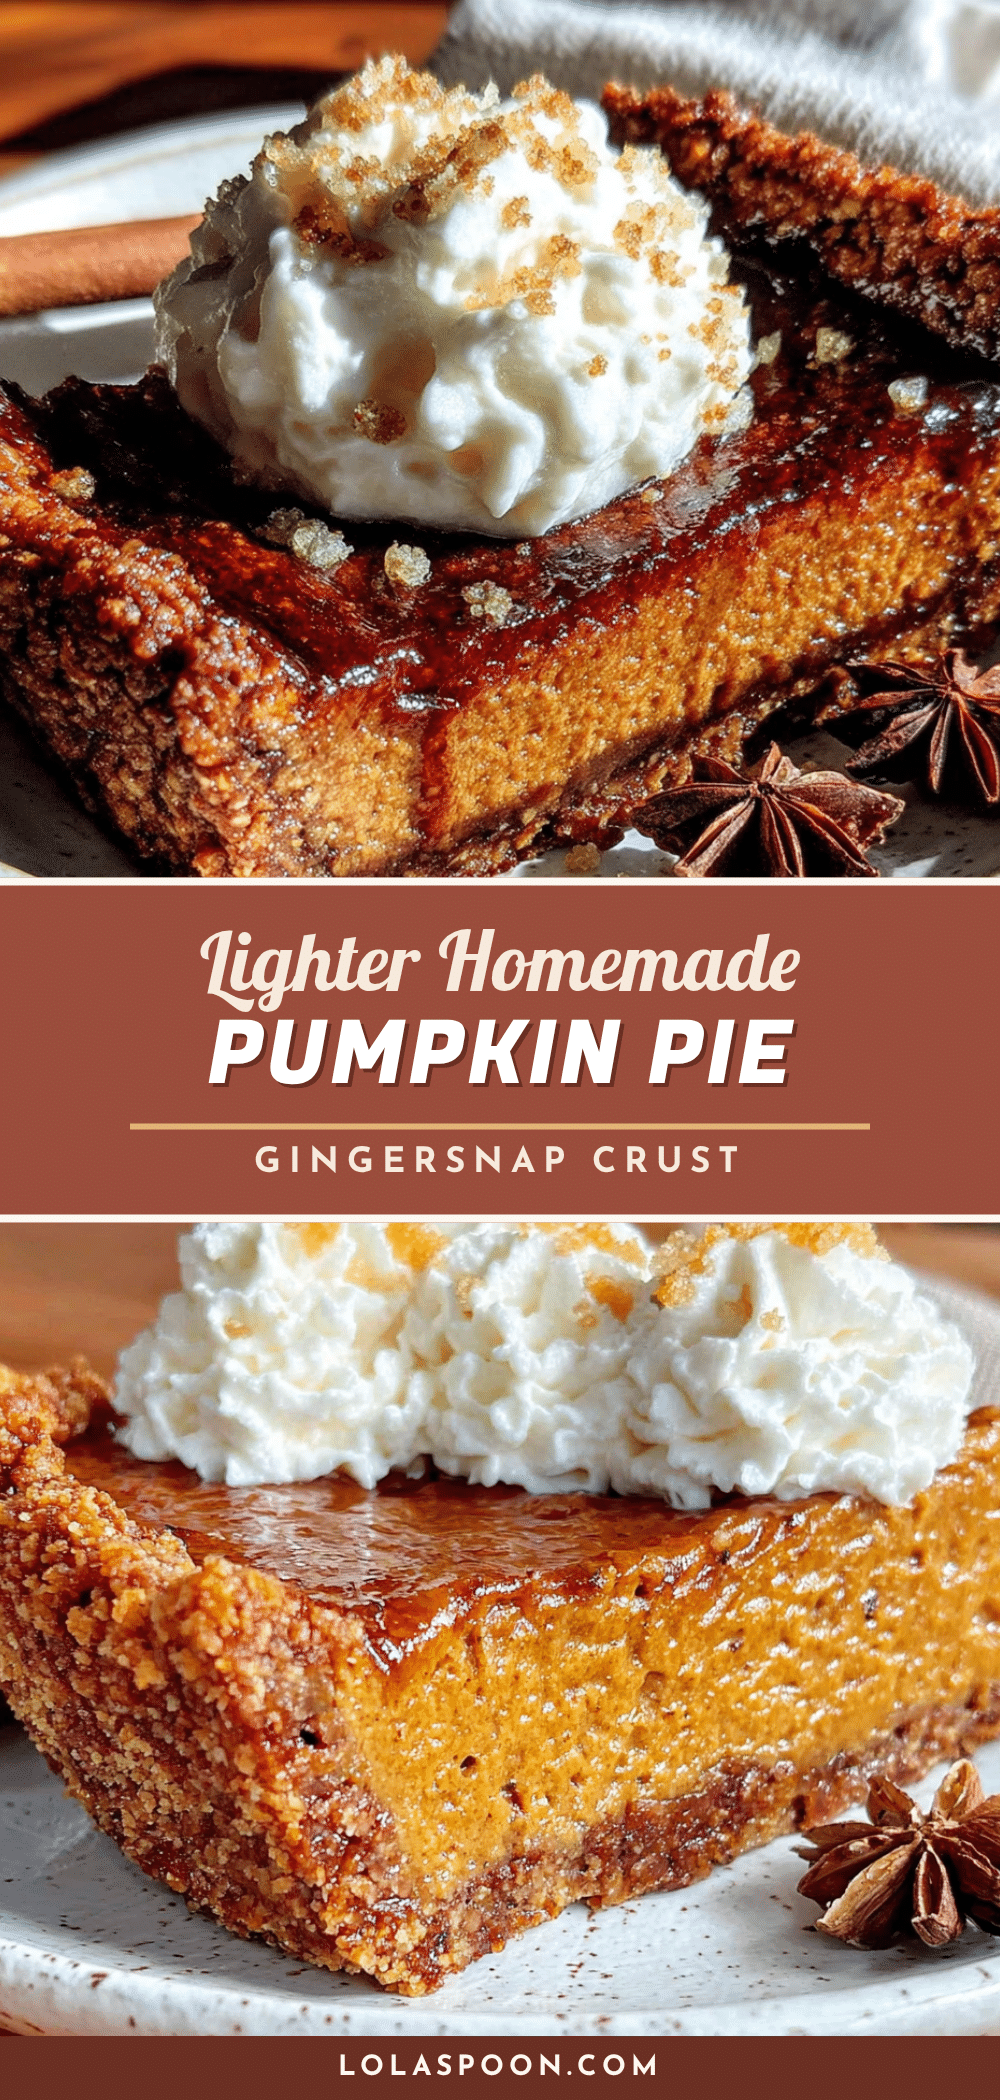
Lighter Homemade Pumpkin Pie with Gingersnap Crust
A light and creamy pumpkin pie with a crunchy gingersnap crust that converts even the most stubborn pumpkin pie skeptics. Made with Greek yogurt instead of heavy cream, this pie is indulgent yet light enough to enjoy after a big meal.
- Prep Time: 15 minutes
- Cook Time: 50 minutes
- Total Time: 2 hours 5 minutes (plus 4 hours chilling)
- Yield: 8 servings 1x
- Category: Dessert
- Cuisine: American
Ingredients
- 2 cups (200g) gingersnap cookie crumbs (about 25–30 cookies)
- 5 tablespoons (70g) unsalted butter, melted
- 1 tablespoon (15g) granulated sugar
- 1 large egg white, lightly beaten
- 1 can (15 oz or 425g) pumpkin puree (not pumpkin pie filling)
- 3/4 cup (180ml) plain Greek yogurt (full-fat or 2%)
- 1/2 cup (100g) packed light brown sugar
- 2 tablespoons (30ml) maple syrup
- 2 large eggs, room temperature
- 1 teaspoon vanilla extract
- 2 teaspoons pumpkin pie spice
- 1/4 teaspoon salt
Instructions
- Preheat your oven to 350°F (175°C). Position a rack in the center of the oven. Lightly grease your 9-inch pie dish with a tiny bit of butter or non-stick spray.
- Make the Gingersnap Crust: Place the gingersnap cookies in your food processor and pulse until you have fine crumbs (about 2 cups). Alternatively, seal cookies in a zip-top bag and crush with a rolling pin. Transfer crumbs to a medium bowl. Add melted butter and granulated sugar. Stir with a fork until every crumb is coated. The mixture should look like wet sand and hold together when pressed.
- Press the mixture firmly into your prepared pie dish. Start with the sides, working around the edge, then fill in the bottom. Use the flat bottom of a measuring cup to press everything down evenly and compactly.
- Par-Bake the Crust: Brush the beaten egg white all over the crust, covering every surface. Line the crust with parchment paper and fill with pie weights or dried beans. Bake for 10 minutes. Remove the parchment and weights, then bake for another 2 minutes. The crust should look set and slightly dry, not browned. Set aside to cool while you make the filling.
- Make the Pumpkin Filling: In a large bowl, whisk together the pumpkin puree, Greek yogurt, brown sugar, and maple syrup until smooth. Add the eggs one at a time, whisking gently after each addition. Do not over-whisk. Add the vanilla extract, pumpkin pie spice, and salt. Whisk just until combined. The filling should be smooth, glossy, and the color of a sunset.
- Fill and Bake: Pour the filling into the cooled crust. Smooth the top with a spatula. Place the pie on the center rack of your oven. Bake for 45 to 50 minutes. The pie is done when the edges are set and slightly puffed, but the center still jiggles like Jell-O when you gently shake the pan.
- Cool Completely: Place the pie on a cooling rack and let it cool to room temperature (about 2 hours). Once cooled, cover loosely with plastic wrap and refrigerate for at least 4 hours, preferably overnight.
Notes
Do not overwork the crust. Use firm but gentle pressure when pressing crumbs into the dish. For a dairy-free version, substitute Greek yogurt with full-fat coconut cream and use dairy-free butter. For a gluten-free option, use gluten-free gingersnap cookies. The pie tastes better on day two after the flavors meld. Do not freeze this pie as the Greek yogurt filling becomes grainy when thawed.
Nutrition
- Serving Size: 1 slice (1/8 of pie)
- Calories: 285
- Sugar: 22
- Sodium: 290
- Fat: 12
- Saturated Fat: 6
- Carbohydrates: 38
- Fiber: 3
- Protein: 7
Keywords: pumpkin pie, gingersnap crust, lighter pumpkin pie, Thanksgiving dessert, Greek yogurt pumpkin pie, homemade pumpkin pie


