It was 10:47 PM on a random Wednesday in early November, and I was supposed to be meal-prepping for the rest of the week. But my brain had other plans. I kept scrolling past these adorable turkey cookies on my feed, and the craving hit me like a truck. I didn’t have the fancy cookie cutters or the specific candies the “real” recipes called for, but I had a jar of peanut butter, some powdered sugar, and a wild idea that maybe, just maybe, I could make it work with what was sitting in my pantry.
Honestly, the best kitchen decisions happen when you stop overthinking. I mean, who needs a special turkey cookie cutter when you have a round measuring spoon and a little creativity? I grabbed my bag of chocolate chips and started experimenting right there on my messy counter, still in my pajamas. The dog watched me from the kitchen doorway like I had finally lost it. Maybe I had. But something about the quiet of the late night loosened the usual rules. I wasn’t trying to impress anyone. I was just chasing a silly, fun idea.
And you know what? It worked. These Easy Turkey-Shaped Peanut Butter Cookies for Kids came together in about 20 minutes, and they were absolutely adorable. The peanut butter dough was forgiving, the assembly was simple enough for little hands to help with, and the result was a plate full of little turkey faces that made me laugh out loud. I kept making them every year since. Maybe you’ve been there — staring at your pantry at an unreasonable hour, wondering if you can turn a few basic ingredients into something magical. Trust me, you can. This is that recipe.
Why You’ll Love This Recipe
Let me tell you why these cookies have become my go-to for school parties and Thanksgiving playdates. I’ve tested this recipe about six times now, tweaking the dough consistency and the candy placement until it was just right. Here’s what makes it special:
- Quick & Easy: From start to finish, these cookies take about 25 minutes. Seriously. The dough comes together in one bowl, and there is no chilling time. You can have a plate full of turkey cookies before your kids finish asking “are they ready yet?”
- Simple Ingredients: You probably already have everything in your kitchen right now. Peanut butter, sugar, an egg, and some candies for decorating. No special trips to the store for obscure ingredients.
- Perfect for Thanksgiving: These are the ultimate classroom treat, playdate snack, or after-school activity. They bring the holiday spirit without the stress of a full Thanksgiving dinner.
- Crowd-Pleaser: I brought these to my son’s kindergarten class last year, and the teacher asked for the recipe before I even left the building. Kids love them, and adults secretly love them too.
- Unbelievably Adorable: There is something so satisfying about seeing a cookie shaped like a turkey. The eyes, the beak, the little wattle — it makes everyone smile.
What makes this recipe different from the rest? It’s the dough. I spent a lot of time getting the peanut butter cookie base just right — not too crumbly, not too sticky, sturdy enough to hold candy decorations without falling apart. This isn’t just another version of a turkey cookie. It’s the one that actually works, every single time. The kind that makes you close your eyes after the first bite because it tastes like childhood and comfort and a little bit of holiday magic.
What Ingredients You Will Need
This recipe uses simple, wholesome ingredients that come together to create a soft, chewy peanut butter cookie that holds its shape beautifully. You likely have most of these in your pantry already.
For the Cookie Dough
- 1 cup creamy peanut butter (I prefer Jif or Skippy for consistent texture — natural peanut butter that separates can make the dough too oily)
- 1 cup granulated sugar (adds sweetness and helps with structure)
- 1 large egg (room temperature, helps bind everything together)
- 1 teaspoon vanilla extract (pure vanilla adds warmth and depth)
For Decorating the Turkeys
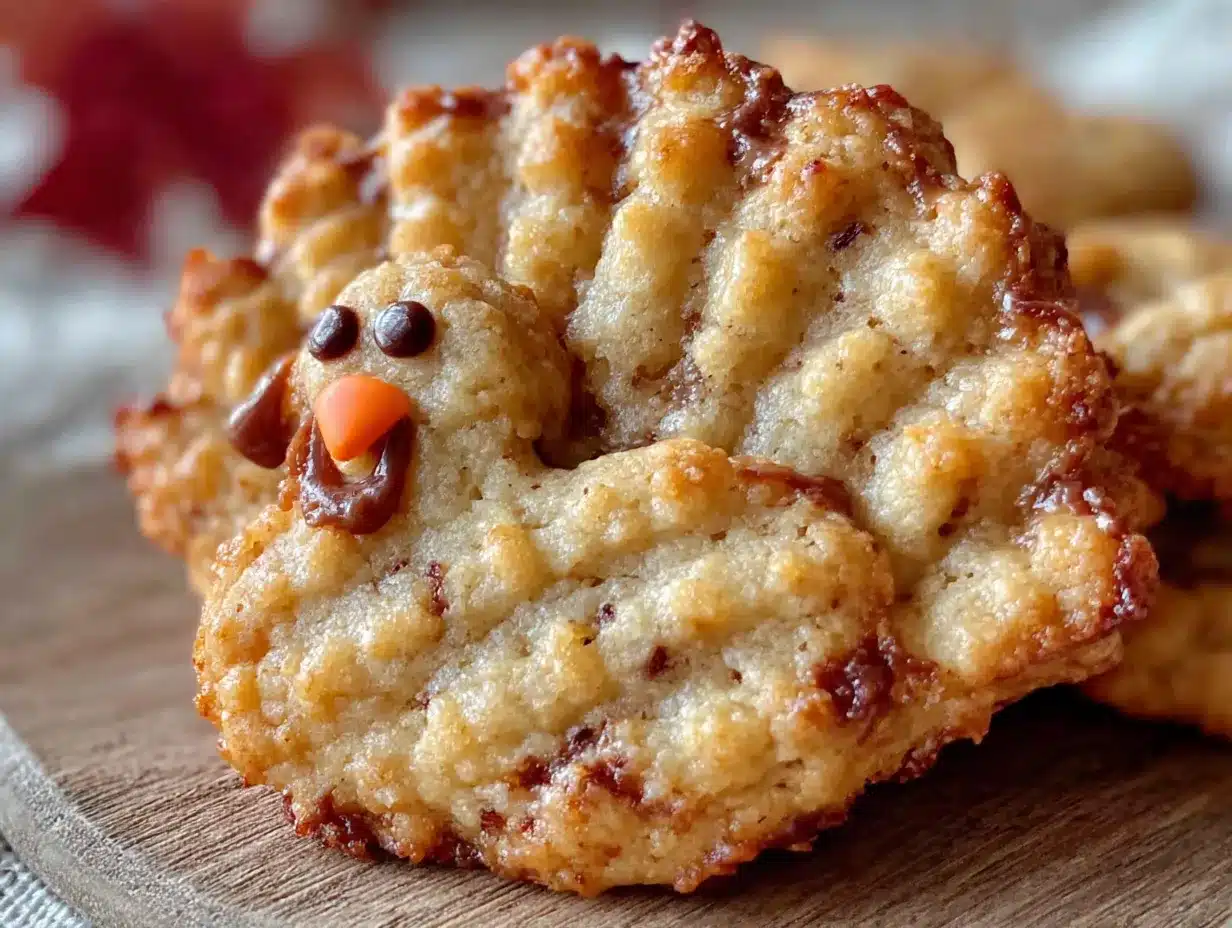
- Candy corn (for the feathers — you’ll need about 5-6 pieces per cookie)
- Candy eyes (the little white and black edible eyes work perfectly)
- Orange candy melts or orange frosting (for the beak — I use Wilton orange candy melts)
- Red candy melts or red frosting (for the wattle — the little red dangly part under the beak)
- Chocolate chips or mini chocolate chips (optional, for extra detail or a chocolate beak alternative)
Ingredient Tips
If you need a nut-free option for school, you can swap the peanut butter with sunflower seed butter (like SunButter). The cookies will be slightly darker in color and have a different flavor, but the texture works well. Just make sure your sunflower seed butter is well-stirred before measuring. For a gluten-free version, this recipe is naturally gluten-free since there is no flour — just double-check your vanilla extract and candy decorations to ensure they are certified gluten-free if needed. I recommend buying the candy eyes and candy melts at craft stores or online — they keep forever in your pantry and are perfect for last-minute holiday baking projects.
Equipment Needed
You don’t need much fancy equipment for these cookies. Here is what you will need:
- Large mixing bowl (any bowl you have will work)
- Electric mixer or wooden spoon (I use a hand mixer because it’s faster, but a good old-fashioned spoon works perfectly fine)
- Measuring cups and spoons (for accurate ingredient measurements)
- Baking sheet (lined with parchment paper or a silicone baking mat)
- Cooling rack (helps the cookies cool evenly without getting soggy on the bottom)
- Small piping bags or zip-top bags (for piping the candy melts — snip a tiny corner off the bag)
- Spatula (for transferring cookies to the cooling rack)
If you don’t have a piping bag, don’t worry. A small zip-top bag with the corner snipped off works like a charm. I’ve used this trick more times than I can count. Also, you don’t need a special cookie cutter for this recipe — we are shaping the cookies by hand, which is actually easier and more forgiving than using a cutter.
Preparation Method
Follow these steps carefully, and you will have the cutest turkey cookies on the block.
- Preheat your oven to 350°F (175°C). Line a baking sheet with parchment paper or a silicone baking mat. This prevents sticking and makes cleanup a breeze.
- Make the cookie dough. In a large mixing bowl, combine 1 cup creamy peanut butter, 1 cup granulated sugar, 1 large egg, and 1 teaspoon vanilla extract. Mix with an electric mixer on medium speed, or stir vigorously with a wooden spoon, until the dough comes together into a smooth, uniform ball. It should be slightly soft but not sticky. If it feels too dry, add a teaspoon of milk. If it feels too sticky, add a tablespoon of flour or a bit more sugar.
- Shape the cookie bases. Scoop about 1.5 tablespoons of dough per cookie and roll it into a ball. Place the balls on the prepared baking sheet, spacing them about 2 inches apart. Flatten each ball slightly with the palm of your hand to form a disc about 1/2 inch thick. This will be the turkey’s body.
- Bake the cookies. Bake for 8-10 minutes, or until the edges are just set and the cookies look slightly puffed. The centers will still look soft — that is perfect. Do not overbake, or the cookies will be dry. Let them cool on the baking sheet for 5 minutes, then transfer to a cooling rack to cool completely. This step is important because the cookies need to be firm enough to hold the decorations.
- Prepare the candy decorations. While the cookies cool, melt your orange and red candy melts according to the package directions. I usually microwave them in separate small bowls for 30-second intervals, stirring between each, until smooth. Transfer each color to a small piping bag or zip-top bag with a tiny corner snipped off.
- Assemble the turkey feathers. Once the cookies are completely cool, arrange 5-6 candy corn pieces in a fan shape on the back half of each cookie. The pointed ends should face outward, and the wide ends should overlap slightly near the center of the cookie. Press them gently into the cookie so they stick.
- Add the turkey face. Place two candy eyes near the front of the cookie, just above where the beak will go. Pipe a small orange triangle for the beak, pointing downward. Then pipe a small red teardrop shape below the beak for the wattle. Let the candy melts set for about 10 minutes before serving.
- Let the decorations harden. Allow the decorated cookies to sit at room temperature for about 15-20 minutes so the candy melts firm up completely. This makes them easier to handle and transport.
One thing I learned the hard way: do not try to decorate the cookies while they are still warm. The candy melts will slide right off, and you will end up with a sad, melted mess. I speak from experience. Let them cool completely — patience pays off here.
Cooking Tips & Techniques
Over the years, I’ve made plenty of mistakes with these cookies so you don’t have to. Here are my best tips:
- Don’t overmix the dough. Overmixing can make the cookies tough. Mix just until the ingredients are combined and the dough holds together. A few streaks of peanut butter are fine.
- Use room temperature egg. A cold egg can make the dough stiff and harder to mix. If you forgot to take the egg out of the fridge, place it in a bowl of warm water for 5 minutes.
- Flatten the dough balls evenly. If the cookies are uneven in thickness, they will bake unevenly. Use the palm of your hand to flatten them gently and consistently.
- Watch the baking time. Ovens vary, so start checking at 8 minutes. The cookies should be lightly golden around the edges but still soft in the center. They will continue to set as they cool.
- Let cookies cool completely. This is the most important tip. Warm cookies are too soft to hold the candy decorations. I usually bake the cookies the night before and decorate them the next day.
- Use a light hand with the candy melts. Too much melted candy can make the beak or wattle look messy. A small dot goes a long way.
I once tried to rush the cooling process by putting the cookies in the fridge. Bad idea. The condensation made the candy melts slide off. Now I just let them sit on the counter and practice patience. It’s worth it.
Variations & Adaptations
These cookies are incredibly versatile. Here are some fun ways to change them up:
- Chocolate Turkey Cookies: Swap the peanut butter for chocolate hazelnut spread (like Nutella). The dough will be a bit softer, so add 2 tablespoons of flour to help it hold together. The chocolate version is rich and decadent.
- Gluten-Free Version: This recipe is naturally gluten-free since it doesn’t use flour. Just make sure your candy decorations are certified gluten-free if you are serving someone with celiac disease.
- Nut-Free Option: Use sunflower seed butter (SunButter) instead of peanut butter. The cookies will be slightly darker and have a different flavor profile, but they are just as delicious and school-safe.
- Different Feather Colors: Instead of candy corn, use colorful candy melts or fruit leather cut into feather shapes. You can also use mini pretzel sticks for a salty-sweet twist.
- Mini Turkey Cookies: Use a teaspoon of dough per cookie to make mini turkeys. Reduce the baking time to 6-7 minutes. These are perfect for party platters.
- Spiced Version: Add 1/2 teaspoon of cinnamon and a pinch of nutmeg to the dough for a warm, fall-inspired flavor. It pairs beautifully with the peanut butter.
I tried the sunflower seed butter version last year for a classroom with allergy restrictions, and the kids devoured them. The flavor is slightly more savory, but with the sugar and candy decorations, they still taste like a treat.
Serving & Storage Suggestions
These cookies are best served at room temperature. Arrange them on a platter with the turkey faces facing forward for maximum cuteness. They make a fantastic centerpiece for a Thanksgiving dessert table or a fun addition to a school party.
For storage, place the decorated cookies in a single layer in an airtight container. Separate layers with parchment paper to prevent the candy decorations from sticking. They will stay fresh at room temperature for up to 5 days. Do not refrigerate them — the fridge can make the cookies dry and cause condensation on the candy melts.
You can freeze the undecorated cookies for up to 2 months. Just bake, cool completely, and place them in a freezer-safe container with parchment paper between layers. When you are ready to serve, thaw them at room temperature for about an hour, then decorate as directed. The candy melts will stick perfectly to the thawed cookies.
If you are making these for a party, I recommend baking the cookies a day or two ahead and decorating them the morning of the event. The flavors actually develop and meld together after a day, making the cookies even more delicious. Plus, decorating fresh cookies is a great activity to do with kids — it keeps them entertained and gives you a helping hand.
Nutritional Information & Benefits
Here is the approximate nutritional breakdown for one turkey cookie (based on a recipe that makes about 18 cookies):
| Nutrient | Amount per Cookie |
|---|---|
| Calories | 145 |
| Total Fat | 8g |
| Saturated Fat | 2g |
| Cholesterol | 10mg |
| Sodium | 95mg |
| Total Carbohydrates | 17g |
| Sugars | 14g |
| Protein | 4g |
These cookies offer a decent amount of protein from the peanut butter, which helps keep kids fuller for longer compared to a plain sugar cookie. Peanut butter also contains healthy monounsaturated fats and vitamin E. If you use natural peanut butter without added sugar, you can reduce the overall sugar content slightly. However, for the best texture and stability, I recommend using regular creamy peanut butter for this recipe.
Please note that these cookies contain peanuts and eggs, so they are not suitable for those with allergies unless you use the substitutions mentioned above. Always check your candy decorations for potential allergens as well.
Conclusion
These Easy Turkey-Shaped Peanut Butter Cookies for Kids have become a staple in our house every November. They are fun, fast, and foolproof — everything a busy parent needs during the holiday season. I love that I can make them with ingredients I already have, and the kids get so excited about decorating their own turkeys. It’s a little tradition that started on a random late night and has turned into something we look forward to every year.
I hope you give these a try and make them your own. Swap the candies, change the nut butter, or add some cinnamon — whatever feels right to you. And when you do, I would love to hear about it. Leave a comment below and let me know how your turkeys turned out. Did your kids help? Did you try a fun variation? Share a photo if you have one — seeing your creations honestly makes my day. Happy baking, and happy almost Thanksgiving!
Frequently Asked Questions
Can I use crunchy peanut butter instead of creamy?
You can, but the dough will have small peanut pieces that might make it harder to shape smoothly. The cookies will also have a slightly different texture. I recommend creamy peanut butter for the best results, especially if you are decorating with kids.
How do I keep the candy corn from falling off?
Press the candy corn gently but firmly into the cookie while the cookie is still slightly warm (but not hot). The residual warmth helps the candy stick. You can also pipe a tiny dot of melted candy melt under each piece of candy corn for extra adhesion.
Can I make these cookies ahead of time?
Yes! Bake the cookies up to 2 days in advance and store them in an airtight container at room temperature. Decorate them the day you plan to serve them for the freshest look. You can also freeze undecorated cookies for up to 2 months.
My cookies spread too much. What went wrong?
If your cookies spread too much, the dough was likely too warm or the baking sheet was too hot. Make sure your peanut butter is at room temperature and not overly oily. Also, let the baking sheet cool completely between batches. Chilling the dough for 15 minutes before baking can also help prevent spreading.
Can I use a different type of candy for the feathers?
Absolutely! You can use colorful candy melts, fruit leather cut into feather shapes, mini pretzel sticks, or even small colored marshmallows. Get creative with what you have on hand. The candy corn is traditional, but any colorful candy will work.
Pin This Recipe!
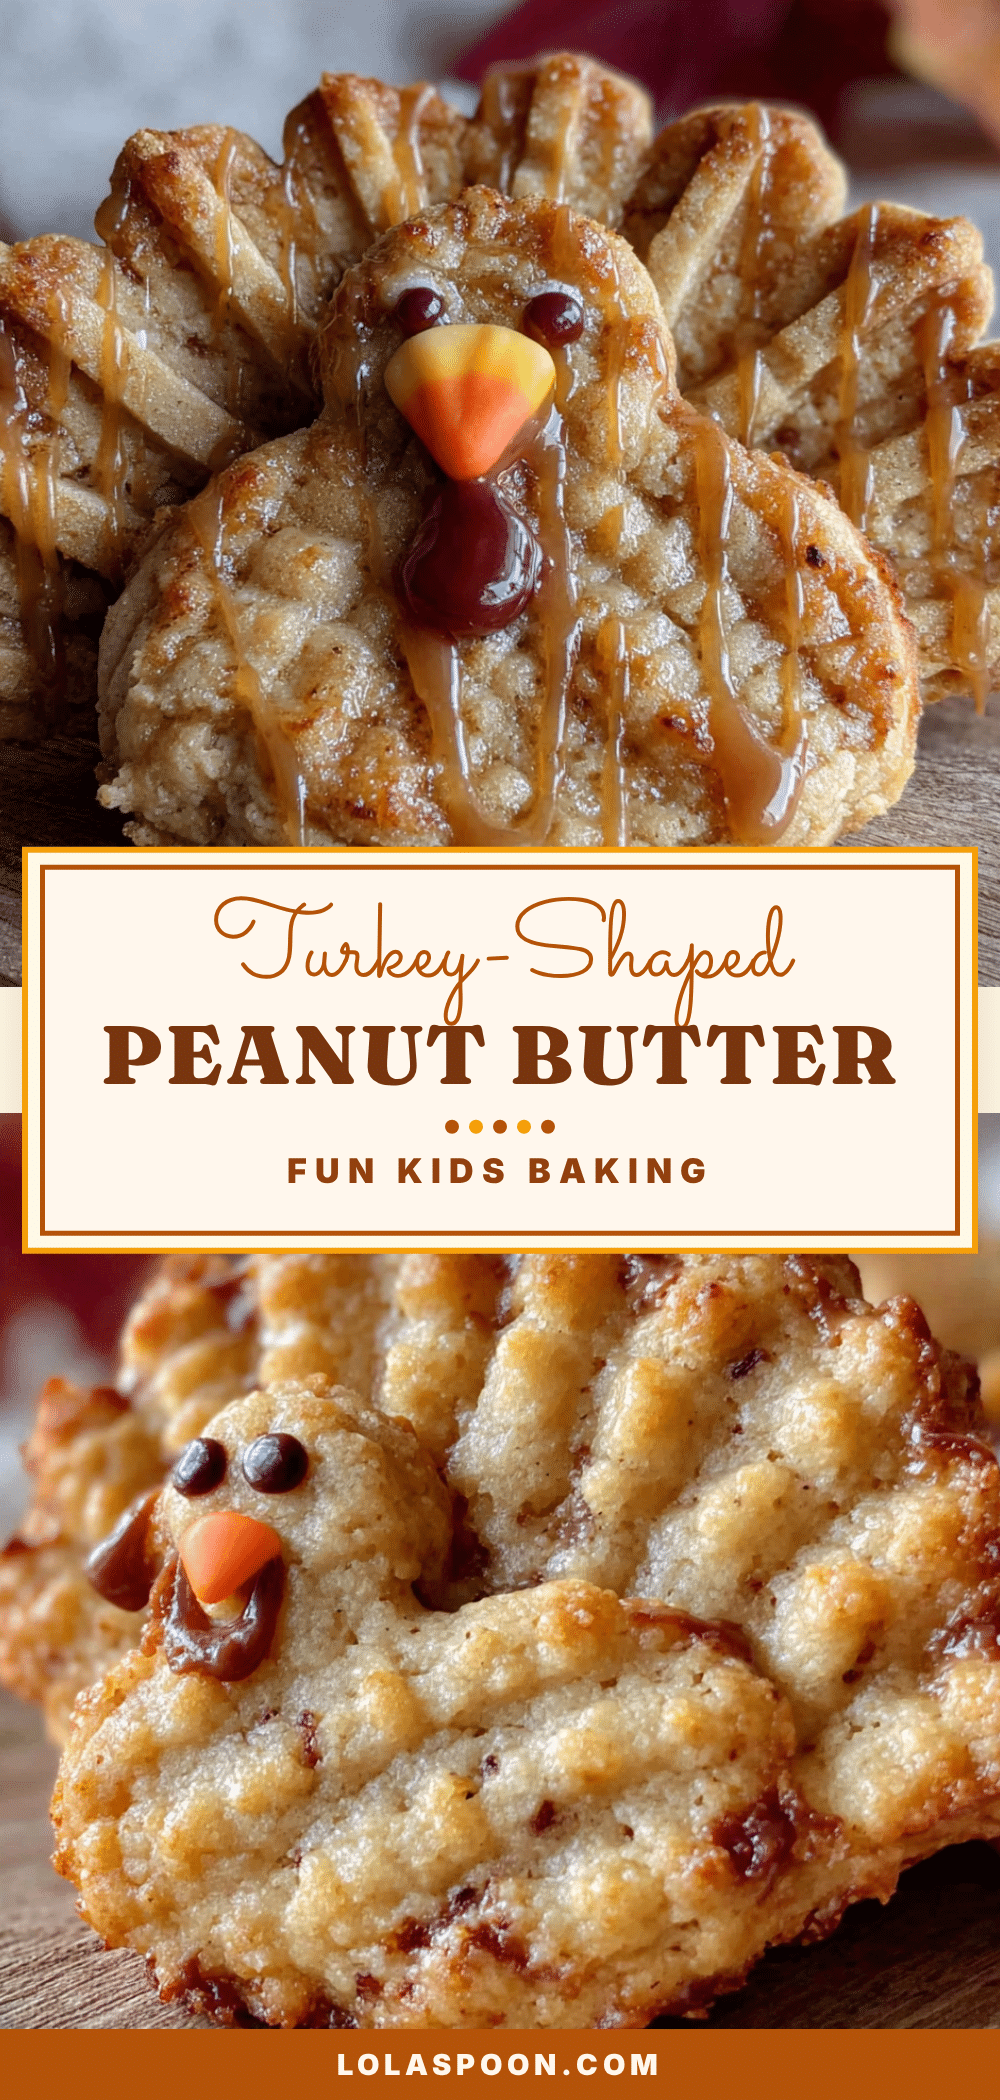
Easy Turkey-Shaped Peanut Butter Cookies for Kids
These adorable turkey-shaped peanut butter cookies are quick, easy, and perfect for Thanksgiving. Made with simple pantry ingredients, they come together in about 25 minutes and are a fun activity for kids.
- Prep Time: 15 minutes
- Cook Time: 10 minutes
- Total Time: 25 minutes
- Yield: 18 cookies 1x
- Category: Dessert
- Cuisine: American
Ingredients
- 1 cup creamy peanut butter
- 1 cup granulated sugar
- 1 large egg, room temperature
- 1 teaspoon vanilla extract
- Candy corn (5-6 pieces per cookie)
- Candy eyes
- Orange candy melts or orange frosting
- Red candy melts or red frosting
- Chocolate chips or mini chocolate chips (optional)
Instructions
- Preheat oven to 350°F (175°C). Line a baking sheet with parchment paper or a silicone baking mat.
- In a large mixing bowl, combine 1 cup creamy peanut butter, 1 cup granulated sugar, 1 large egg, and 1 teaspoon vanilla extract. Mix with an electric mixer on medium speed or stir with a wooden spoon until the dough forms a smooth, uniform ball.
- Scoop about 1.5 tablespoons of dough per cookie and roll into a ball. Place on prepared baking sheet, spacing 2 inches apart. Flatten each ball slightly with your palm to form a disc about 1/2 inch thick.
- Bake for 8-10 minutes, until edges are set and cookies look slightly puffed. Let cool on baking sheet for 5 minutes, then transfer to a cooling rack to cool completely.
- While cookies cool, melt orange and red candy melts according to package directions. Transfer each color to a small piping bag or zip-top bag with a tiny corner snipped off.
- Once cookies are completely cool, arrange 5-6 candy corn pieces in a fan shape on the back half of each cookie for feathers. Press gently to adhere.
- Place two candy eyes near the front of the cookie. Pipe a small orange triangle for the beak, pointing downward. Pipe a small red teardrop shape below the beak for the wattle.
- Let decorated cookies sit at room temperature for 15-20 minutes to allow candy melts to firm up completely before serving.
Notes
Do not decorate warm cookies; candy melts will slide off. For best results, bake cookies the night before and decorate the next day. Use room temperature egg for easier mixing. If dough is too sticky, add a tablespoon of flour; if too dry, add a teaspoon of milk.
Nutrition
- Serving Size: 1 cookie
- Calories: 145
- Sugar: 14
- Sodium: 95
- Fat: 8
- Saturated Fat: 2
- Carbohydrates: 17
- Fiber: 1
- Protein: 4
Keywords: turkey cookies, peanut butter cookies, Thanksgiving cookies, easy cookies, kids cookies, no-bake, holiday baking


