My daughter Clara asked why I couldn’t just skip the whole “cook the filling on the stove first” step for chicken pot pie. She was eight, sitting on the counter watching me dice carrots, and she said it so matter-of-factly that I almost laughed. “Just put everything in the dish raw,” she said, “and let the oven cook it all at once.” I started to explain why that wouldn’t work — the flour, the raw chicken juices, the sad, soggy crust. Then I stopped. Honestly, I had no good reason except “that’s how I’ve always done it.” So I shrugged, grabbed my biggest pie dish, and let her be the boss of dinner that night.
The result? The flakiest, most forgiving chicken pot pie I’ve ever made. The raw chicken released just enough moisture to steam the vegetables while the top crust got outrageously golden. No roux, no pre-cooking, no extra pot to wash. I stood there with my spatula hanging in the air, completely wrong and completely delighted. That was three years ago, and I haven’t gone back to the old way since. Maybe you’ve been there — convinced that a recipe has to be complicated to be good, only to discover the shortcut actually works better. This is that recipe.
The best homestyle chicken pot pie doesn’t need a dozen steps or a sink full of pans. It needs good butter, a hot oven, and someone willing to break the rules. Clara’s version has become our family’s Friday-night staple, the one that makes everyone actually sit down at the table without being called three times. It’s the kind of meal that fills your kitchen with that buttery, savory smell that says “everything is going to be okay.” And honestly, the fact that my eight-year-old figured out a better method than I had in fifteen years of cooking? That still makes me smile every single time I pull it out of the oven.
Why You’ll Love This Recipe
This isn’t just another chicken pot pie recipe floating around the internet. This is the one that actually works for real families on real Tuesday nights. I’ve tested it with picky eaters, with frozen vegetables when the fridge was bare, and with a toddler hanging off my leg — and it delivered every single time.
- One-Dish Wonder: No stovetop roux, no separate pan for vegetables, no extra bowls. Everything goes into the dish raw and the oven does the work. That means less cleanup and more time actually sitting with your family.
- Budget-Friendly Ingredients: Rotisserie chicken, frozen peas and carrots, pantry staples like flour and butter — this recipe respects your grocery budget. You won’t need to hunt down anything fancy or spend twenty dollars on specialty items.
- Kid-Approved Through and Through: My kids devour this, and I’ve heard the same from neighbors and friends who’ve tried it. The creamy filling, the tender chicken, that flaky crust — it’s comfort food that doesn’t require negotiation at the dinner table.
- Leftovers That Actually Reheat Well: This is huge for busy families. The filling stays creamy, the crust stays flaky, and the flavors actually get better overnight. Pack it for lunch or reheat it for a quick dinner the next day.
- Forgiving and Foolproof: Forget to thaw the peas? No problem. Only have half-and-half instead of milk? It still works. This recipe has wiggle room built in, which is exactly what you need when you’re cooking for real people.
What makes this version different from all the others is the no-stovetop method. Most recipes have you cook the filling first, which adds time, dishes, and a chance to mess up the roux. By letting the oven handle everything, you get a creamier texture, perfectly cooked vegetables, and a crust that stays flaky instead of getting soggy. It’s the kind of smart shortcut that makes you wonder why you ever did it the hard way.
What Ingredients You Will Need
This recipe uses simple, honest ingredients that you probably already have in your kitchen. No fancy grocery runs, no obscure spices — just good, basic food that comes together into something truly special.
- For the Filling:
- 3 cups cooked chicken, shredded or diced (rotisserie chicken works beautifully — grab one from the store and shred it while it’s still warm)
- 1 cup frozen peas and carrots, thawed (no need to cook them — just let them sit on the counter while you prep everything else)
- 1/2 cup frozen corn kernels, thawed (optional, but my kids love the little pops of sweetness)
- 1/3 cup all-purpose flour (this thickens the filling as it bakes — no roux needed!)
- 1 1/2 cups chicken broth (use low-sodium so you can control the salt)
- 1 cup whole milk (half-and-half or even heavy cream makes it extra luxurious, but regular milk works great)
- 2 tablespoons unsalted butter, melted (I use salted in a pinch, just reduce the added salt)
- 1 teaspoon garlic powder
- 1 teaspoon onion powder
- 1/2 teaspoon dried thyme (or 1 teaspoon fresh if you have it)
- Salt and black pepper to taste (start with 1/2 teaspoon salt and 1/4 teaspoon pepper)
- For the Crust:
- 2 1/2 cups all-purpose flour (plus more for dusting)
- 1 teaspoon salt
- 1 cup cold unsalted butter, cut into small cubes (this is the secret to a flaky crust — keep it cold!)
- 6 to 8 tablespoons ice water (you might not need all of it, so add slowly)
- 1 large egg, beaten with 1 tablespoon water (for the egg wash that gives you that gorgeous golden top)
Ingredient Tips from My Kitchen: For the best flavor, use a rotisserie chicken from the grocery store — the dark meat adds moisture and richness that plain chicken breast just can’t match. If you’re cooking your own chicken, poach it in the broth you’ll use for the filling so none of that flavor goes to waste. I recommend King Arthur Flour for consistent results in the crust, but any all-purpose flour will work. When it comes to butter, go with a good-quality unsalted brand like Kerrygold or Plugrà — the butter flavor really shines in the crust, and you want it to be delicious.
If you need a dairy-free option, swap the butter for a solid vegan butter (I like Miyoko’s) and use unsweetened oat milk instead of whole milk. The texture will be slightly different, but it still bakes up beautifully.
Equipment Needed
You don’t need a fancy kitchen to make this pot pie. Here’s what you’ll need:
- 9-inch pie dish or 2-quart baking dish: A deep-dish pie plate works best because it holds all that filling without overflowing. I use a ceramic one that my grandmother passed down, but glass or metal work just fine.
- Large mixing bowl: For the crust. A simple stainless steel bowl is perfect.
- Pastry cutter or two forks: To cut the butter into the flour. If you don’t have a pastry cutter, your hands work too — just work quickly so the butter stays cold.
- Rolling pin: A standard rolling pin is ideal, but a wine bottle works in a pinch. I’ve done it. No judgment here.
- Measuring cups and spoons: For accuracy. Baking is a science, even if this recipe is forgiving.
- Pastry brush: For the egg wash. A silicone brush is easiest to clean, but a paper towel dabbed on works too.
- Sharp knife or kitchen shears: For trimming the crust and cutting vents.
If you don’t have a rolling pin, press the dough into the dish with your fingers — it won’t look as perfect, but it’ll taste just as good. And if you’re short on time, a store-bought refrigerated pie crust works in a real pinch. I won’t tell anyone.
Preparation Method
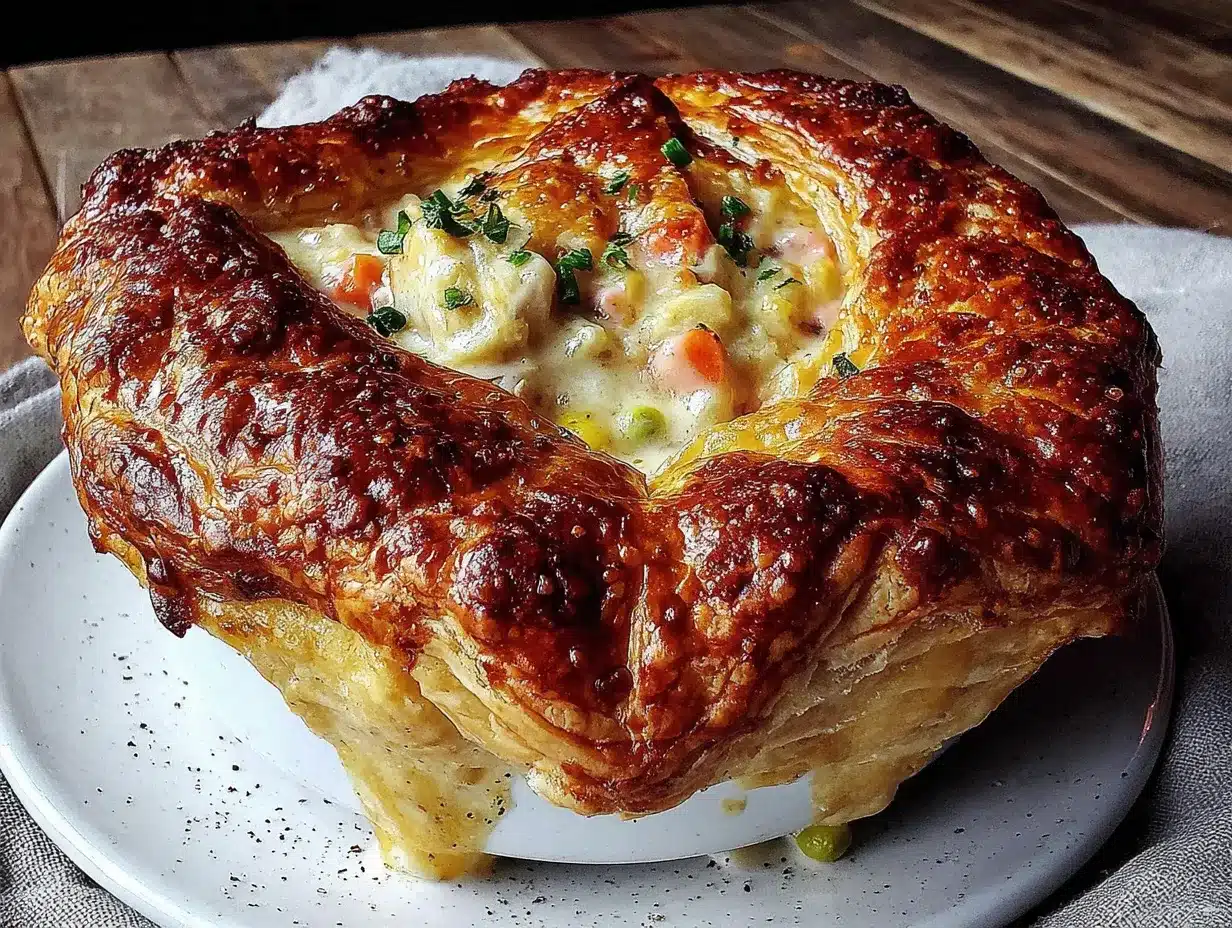
This is where the magic happens. Follow these steps, and you’ll have a pot pie that looks like you spent hours on it — even though you didn’t.
- Preheat your oven to 400°F (200°C). Place a baking sheet on the bottom rack to catch any drips. Trust me on this — even with the best crust, a little bubble-over happens, and you don’t want smoke filling your kitchen.
- Make the crust. In a large bowl, whisk together 2 1/2 cups flour and 1 teaspoon salt. Add the cold butter cubes and cut them in using a pastry cutter or your fingertips until the mixture looks like coarse meal with pea-sized butter pieces. Drizzle in 6 tablespoons of ice water, stirring with a fork until the dough just comes together. If it seems dry, add the remaining water, one tablespoon at a time. The dough should be shaggy but hold together when squeezed. Divide it in half, flatten each half into a disc, wrap in plastic, and refrigerate for at least 30 minutes. This rest is crucial — it lets the gluten relax and keeps the butter cold for that flaky texture.
- Prepare the filling. While the dough chills, grab your pie dish. In the dish itself, combine the shredded chicken, thawed peas and carrots, and corn if using. Sprinkle the flour, garlic powder, onion powder, and thyme evenly over the top. Pour in the chicken broth and milk, then drizzle the melted butter over everything. Give it a gentle stir right in the dish — just enough to combine, no need to be thorough. The oven will do the rest.
- Roll out the bottom crust. On a lightly floured surface, roll one disc of dough into a 12-inch circle, about 1/8-inch thick. Gently transfer it to the pie dish, pressing it into the bottom and up the sides. Don’t stretch the dough — that’ll make it shrink during baking. Leave the overhang for now.
- Add the filling. Pour the filling mixture into the crust-lined dish. It should come almost to the top — that’s okay, it will settle as it bakes.
- Roll out the top crust. Roll the second disc of dough into another 12-inch circle. Place it over the filling. Fold the overhang from the bottom crust over the top crust and crimp the edges together with your fingers or a fork. Cut 4 to 5 slits in the top crust to let steam escape — this is important, or your pie might explode in the oven. Brush the top crust with the egg wash for that beautiful golden finish.
- Bake. Place the pie dish on the middle rack of your preheated oven, with that baking sheet on the rack below. Bake for 45 to 55 minutes, until the crust is deep golden brown and you can see the filling bubbling through the vents. If the edges start browning too quickly, cover them loosely with foil or a pie shield ring after about 30 minutes.
- Rest before serving. This is the hardest part, I know. Let the pot pie rest on a cooling rack for at least 15 minutes before cutting. The filling needs time to set, or you’ll end up with a soupy mess on your plate. I learned this the hard way — we ate it immediately the first time, and it was delicious but definitely runny. Patience pays off here.
Sensory Cues: When it’s done, the crust should be a rich, even golden brown — not pale, not burnt. You should hear a gentle bubbling sound from inside the pie. The smell will be unmistakable: buttery pastry, savory chicken, and sweet vegetables all mingling together. When you cut into it, the filling should be thick and creamy, not watery. The vegetables should be tender but not mushy, and the chicken should be moist and flavorful.
Cooking Tips & Techniques
After making this pot pie more times than I can count, I’ve picked up a few tricks that make a real difference.
Keep everything cold for the crust. The flakiest pie crust comes from cold butter that melts in the oven, creating steam pockets that lift the layers. If your kitchen is warm, pop the flour and bowl in the freezer for 10 minutes before you start. I once made the mistake of making crust on a hot July afternoon with no air conditioning — the butter softened before I even got it in the oven, and the crust came out tough and greasy. Learn from my failure.
Don’t overwork the dough. Mix until it just comes together, then stop. Overmixing develops gluten, which makes the crust tough instead of tender. A few lumps are fine — actually, they’re good. They mean you haven’t overworked it.
Blind baking is not necessary here. Because the filling is raw and releases moisture as it bakes, the bottom crust cooks through perfectly without a soggy bottom. This is one of the biggest advantages of the no-stovetop method. I used to blind bake every pie crust, and it was such a hassle. This recipe eliminates that step entirely.
Use a hot oven. 400°F is hot enough to create steam quickly, which gives you that flaky texture. Don’t be tempted to lower the temperature — the high heat is essential for the crust to puff up properly. If the top is browning too fast, tent it with foil, but keep the oven temperature where it is.
Let it rest. I know I said this already, but it bears repeating. The filling needs time to set, or you’ll end up with a beautiful crust and a soupy mess inside. Fifteen minutes minimum. Use that time to set the table, pour drinks, or just stand there and enjoy the smell.
Multitask wisely. While the crust is chilling, you can shred the chicken and measure out the other ingredients. While the pot pie is baking, make a simple side salad or steam some green beans. The actual hands-on time for this recipe is about 20 minutes — the rest is oven time and resting time.
Variations & Adaptations
One of the best things about this recipe is how flexible it is. Here are some of my favorite variations:
- Vegetarian Version: Skip the chicken and double the vegetables. Add 1 cup of diced potatoes (parboiled for 5 minutes so they cook through), 1 cup of mushrooms, and an extra can of drained chickpeas for protein. Use vegetable broth instead of chicken broth. The texture is heartier, and it’s just as satisfying.
- Gluten-Free Adaptation: Use a gluten-free all-purpose flour blend that includes xanthan gum (I like Cup4Cup) for both the crust and the filling. The crust will be a bit more delicate, so handle it gently. For the filling, the gluten-free flour thickens just as well as regular flour — no need to adjust the amount.
- Cheesy Chicken Pot Pie: Add 1 cup of shredded sharp cheddar cheese to the filling mixture before baking. The cheese melts into the creamy sauce and adds a wonderful savory depth. My kids go absolutely crazy for this version.
- Herb Garden Twist: Add 2 tablespoons of fresh chopped parsley, 1 tablespoon of fresh chopped rosemary, and 1 tablespoon of fresh sage to the filling. The fresh herbs brighten up the whole dish and make it feel a little more elegant. I do this when we have company or when the herbs in my garden are getting out of control.
- Puff Pastry Shortcut: Instead of making the homemade crust, use a sheet of thawed puff pastry. Roll it out slightly, cut vents, and place it over the filling. Bake at 400°F for 35 to 40 minutes. The puff pastry gives you those beautiful, buttery layers without any of the work. It’s my go-to when I’m really short on time.
Serving & Storage Suggestions
This pot pie is a meal in itself, but a few simple sides can round it out beautifully.
Serving: Serve the pot pie warm, right after that 15-minute rest. Scoop generous portions onto plates, making sure everyone gets a good piece of crust. I like to serve it with a simple green salad dressed with lemon vinaigrette — the acidity cuts through the richness of the pie. Steamed green beans or roasted broccoli also work wonderfully. For a truly cozy meal, pair it with a bowl of tomato soup or a side of creamy mashed potatoes. Yes, that’s carb-on-carb, and yes, it’s delicious.
Storage: Leftover pot pie keeps beautifully in the refrigerator for up to 4 days. Cover the dish tightly with foil or transfer individual portions to airtight containers. The flavors actually meld and deepen overnight, making leftovers even better than the first serving.
Reheating: The best way to reheat pot pie is in the oven. Place it in a 350°F oven for 15 to 20 minutes, until heated through and the crust crisps back up. The microwave works in a pinch, but the crust will be soft rather than flaky. If you’re reheating a single serving, the microwave is fine — just know that the texture won’t be quite the same. To freeze, assemble the pie completely but don’t bake it. Wrap it tightly in plastic wrap and then foil, and freeze for up to 3 months. Bake from frozen at 375°F for 60 to 70 minutes, adding 10 to 15 minutes if needed. You may need to tent the crust with foil to prevent over-browning.
Flavor Development: The filling becomes thicker and more flavorful after a day in the fridge. The chicken absorbs more of the broth, the vegetables soften further, and the seasonings meld together. Honestly, I sometimes make this pie a day ahead on purpose just so I can enjoy the leftovers.
Nutritional Information & Benefits
This pot pie is comfort food, and it’s meant to be enjoyed. But it also has some nutritional bright spots worth noting.
| Nutrient | Per Serving (1/8 of pie) |
|---|---|
| Calories | 485 |
| Total Fat | 28g |
| Saturated Fat | 16g |
| Cholesterol | 115mg |
| Sodium | 620mg |
| Total Carbohydrates | 38g |
| Dietary Fiber | 3g |
| Sugars | 4g |
| Protein | 24g |
Chicken provides lean protein that keeps you full and satisfied. The carrots and peas add fiber, vitamin A, and antioxidants. Butter, in moderation, provides fat-soluble vitamins and that irreplaceable flavor. This isn’t a health food, but it’s a balanced meal that nourishes both body and soul. I feel good about serving it to my family because I know exactly what’s in it — real ingredients, no preservatives, no mystery additives.
Dietary Considerations: This recipe contains gluten and dairy. For gluten-free and dairy-free adaptations, see the variations section above. It is nut-free and egg-free (aside from the egg wash on the crust, which can be omitted or replaced with a milk wash).
Conclusion
This homestyle chicken pot pie is more than just a recipe — it’s a lesson I learned from my eight-year-old daughter about trusting simplicity. It’s the meal that brings my family to the table without fuss, the one that fills the house with a smell that says “you are home.” The flaky crust, the creamy filling, the tender chicken and sweet vegetables — every bite is a reminder that good food doesn’t have to be complicated.
I hope you’ll try it exactly as written first, then make it your own. Add more vegetables, swap the herbs, use puff pastry when you’re in a hurry. This recipe is built to adapt, just like real family cooking should be. And when you pull that golden pie out of the oven and hear your kids say “that smells amazing,” you’ll know exactly why I keep making it week after week.
If you make this pot pie, I’d love to hear about it. Leave a comment below and tell me how it turned out, what variations you tried, or whether your kids had any brilliant suggestions of their own. And if you’re looking for more family-friendly dinners, check out our easy chicken casserole recipes or our one-pot weeknight dinners for more meals that make busy evenings a little easier. Happy cooking, friends!
Frequently Asked Questions
Can I use leftover turkey instead of chicken?
Absolutely! This recipe works beautifully with leftover turkey from Thanksgiving or any other holiday meal. Just shred or dice the turkey and use it exactly as you would the chicken. The cooking time remains the same.
Why did my crust turn out tough?
Tough crust usually means the dough was overworked or too much water was added. Next time, mix the dough just until it comes together, and add the ice water slowly — you may not need all of it. Also, make sure your butter is very cold before you start.
Can I make this in a 9×13-inch baking dish?
Yes, you can. A 9×13-inch dish will give you a thinner pot pie with more crust-to-filling ratio. The baking time may be slightly shorter — start checking at 35 minutes. You may need to roll the crust a little thinner to cover the larger surface area.
How do I prevent a soggy bottom crust?
Because this recipe uses a no-stovetop method where the filling is raw, the bottom crust actually cooks through beautifully without getting soggy. The key is to bake at a high temperature (400°F) and let the pie rest for 15 minutes after baking so the filling can set.
Can I add other vegetables to the filling?
Definitely! Diced potatoes, chopped green beans, sliced mushrooms, or even a handful of spinach are all great additions. Just make sure any hard vegetables like potatoes are cut into small pieces (about 1/2-inch) so they cook through in the baking time.
Pin This Recipe!
Best Homestyle Chicken Pot Pie Recipe – Kid-Approved & Flaky

This homestyle chicken pot pie features a flaky, golden crust and a creamy filling made with rotisserie chicken, frozen peas and carrots, and a no-stovetop method that simplifies preparation. It’s a kid-approved, budget-friendly comfort food that comes together in one dish and reheats beautifully.
- Prep Time: 20 minutes
- Cook Time: 50 minutes
- Total Time: 1 hour 25 minutes
- Yield: 8 servings 1x
- Category: Main Course
- Cuisine: American
Ingredients
- 3 cups cooked chicken, shredded or diced (rotisserie chicken works beautifully)
- 1 cup frozen peas and carrots, thawed
- 1/2 cup frozen corn kernels, thawed (optional)
- 1/3 cup all-purpose flour
- 1 1/2 cups chicken broth (low-sodium)
- 1 cup whole milk (half-and-half or heavy cream also work)
- 2 tablespoons unsalted butter, melted
- 1 teaspoon garlic powder
- 1 teaspoon onion powder
- 1/2 teaspoon dried thyme (or 1 teaspoon fresh)
- Salt and black pepper to taste (start with 1/2 teaspoon salt and 1/4 teaspoon pepper)
- 2 1/2 cups all-purpose flour (for crust, plus more for dusting)
- 1 teaspoon salt (for crust)
- 1 cup cold unsalted butter, cut into small cubes (for crust)
- 6 to 8 tablespoons ice water (for crust)
- 1 large egg, beaten with 1 tablespoon water (for egg wash)
Instructions
- Preheat your oven to 400°F (200°C). Place a baking sheet on the bottom rack to catch any drips.
- Make the crust: In a large bowl, whisk together 2 1/2 cups flour and 1 teaspoon salt. Add the cold butter cubes and cut them in using a pastry cutter or your fingertips until the mixture looks like coarse meal with pea-sized butter pieces. Drizzle in 6 tablespoons of ice water, stirring with a fork until the dough just comes together. If it seems dry, add the remaining water, one tablespoon at a time. The dough should be shaggy but hold together when squeezed. Divide it in half, flatten each hal…
- Prepare the filling: In the pie dish, combine the shredded chicken, thawed peas and carrots, and corn if using. Sprinkle the flour, garlic powder, onion powder, and thyme evenly over the top. Pour in the chicken broth and milk, then drizzle the melted butter over everything. Give it a gentle stir right in the dish.
- Roll out the bottom crust: On a lightly floured surface, roll one disc of dough into a 12-inch circle, about 1/8-inch thick. Gently transfer it to the pie dish, pressing it into the bottom and up the sides. Leave the overhang.
- Add the filling: Pour the filling mixture into the crust-lined dish.
- Roll out the top crust: Roll the second disc of dough into another 12-inch circle. Place it over the filling. Fold the overhang from the bottom crust over the top crust and crimp the edges together. Cut 4 to 5 slits in the top crust to let steam escape. Brush the top crust with the egg wash.
- Bake: Place the pie dish on the middle rack of the preheated oven, with the baking sheet on the rack below. Bake for 45 to 55 minutes, until the crust is deep golden brown and the filling is bubbling through the vents. If the edges brown too quickly, cover them loosely with foil after about 30 minutes.
- Rest before serving: Let the pot pie rest on a cooling rack for at least 15 minutes before cutting.
Notes
Keep everything cold for the crust. Don’t overwork the dough. Blind baking is not necessary. Use a hot oven (400°F). Let the pie rest for at least 15 minutes before serving. For dairy-free, use solid vegan butter and unsweetened oat milk. For gluten-free, use a gluten-free all-purpose flour blend with xanthan gum.
Nutrition
- Serving Size: 1/8 of pie
- Calories: 485
- Sugar: 4
- Sodium: 620
- Fat: 28
- Saturated Fat: 16
- Carbohydrates: 38
- Fiber: 3
- Protein: 24
Keywords: chicken pot pie, homestyle, kid-approved, flaky crust, one-dish, comfort food, easy dinner, rotisserie chicken


