There used to be a tiny, red-brick place called The Hatch in Santa Fe, tucked between a dusty guitar shop and a laundromat, that made a green chili mac and cheese so good it ruined all other mac and cheese for me. When they closed their doors in 2018—some story about the owner retiring to sail around the world—I honestly felt a little lost. I mean, where do you go when your comfort food soulmate just ups and leaves? After twelve tries—twelve, let me tell you, including one where I accidentally used habaneros and my husband couldn’t speak for ten minutes—I finally got it. This is that recipe. The one that makes you close your eyes on the first bite and remember exactly where you were when you first tasted something perfect.
This Green Chili Mac and Cheese isn’t just a side dish, it’s the main event. It’s the dish I bring to every potluck, the one friends text me about the next day, and the one that made my neighbor, Sarah, actually knock on my door at 9 PM on a Tuesday asking for the recipe. Maybe you’ve been there—that moment when you’re hosting and you need something that feels special but doesn’t have you sweating in the kitchen while your guests are having fun. This is it. It’s creamy, it’s got a little kick, and it has that unmistakable roasted green chili flavor that just screams “I know what I’m doing.” Honestly, it’s the easiest way to look like a hero without breaking a sweat.
Why You’ll Love This Recipe
This isn’t your standard boxed mac and cheese, and it’s not some fussy, complicated thing either. It’s the perfect middle ground—impressive enough for a dinner party but simple enough for a Tuesday night. Here’s why it’s become my go-to for hosting:
- Quick & Easy: From start to table in about 45 minutes. Most of that is just the pasta boiling and the cheese melting. You can prep the green chilis and shred the cheese while the water heats up.
- Simple Ingredients: No fancy cheese shops or obscure spice blends. You can find everything at a regular grocery store. The star ingredient—canned roasted green chilis—is usually right in the international or canned vegetable aisle.
- Perfect for Crowds: This recipe scales beautifully. I’ve made it for a party of four and for a holiday gathering of twenty. It holds well in a slow cooker on warm, too.
- Crowd-Pleaser: Even people who say they “don’t like spicy food” love this. The green chilis add flavor and a gentle warmth, not overwhelming heat. Kids devour it, adults ask for seconds.
- Unbelievably Delicious: The combination of sharp cheddar, creamy monterey jack, and the smoky, tangy green chilis is pure magic. It’s comfort food that feels a little bit fancy.
What makes this recipe different from the dozens of other mac and cheese recipes out there? It’s the technique of blooming the chili powder in the butter before making the roux. That one little step deepens the flavor in a way that just stirring it in later never could. I learned that trick from a chef friend who said it’s the secret to any great chili dish, and he was right. This isn’t just another version—it’s the version that has won over every single person I’ve served it to.
This recipe is the kind that makes you lean back in your chair after the first bite and just smile. It’s comfort food reimagined—creamy, cheesy, with that little kick of green chili that keeps things interesting. Perfect for impressing guests without the stress, or turning a simple weeknight into something memorable.
What Ingredients You Will Need
This recipe uses simple, honest ingredients that come together to create something genuinely special. Most of these are pantry staples, but a few deserve a little explanation so you get the best result.
For the Pasta
- 1 pound (450g) elbow macaroni or cavatappi pasta (I prefer cavatappi for its corkscrew shape—it grabs the sauce better. Barilla is my go-to brand for consistent texture.)
- Salt for the pasta water (don’t skimp—this is your only chance to season the pasta itself)
For the Green Chili Cheese Sauce
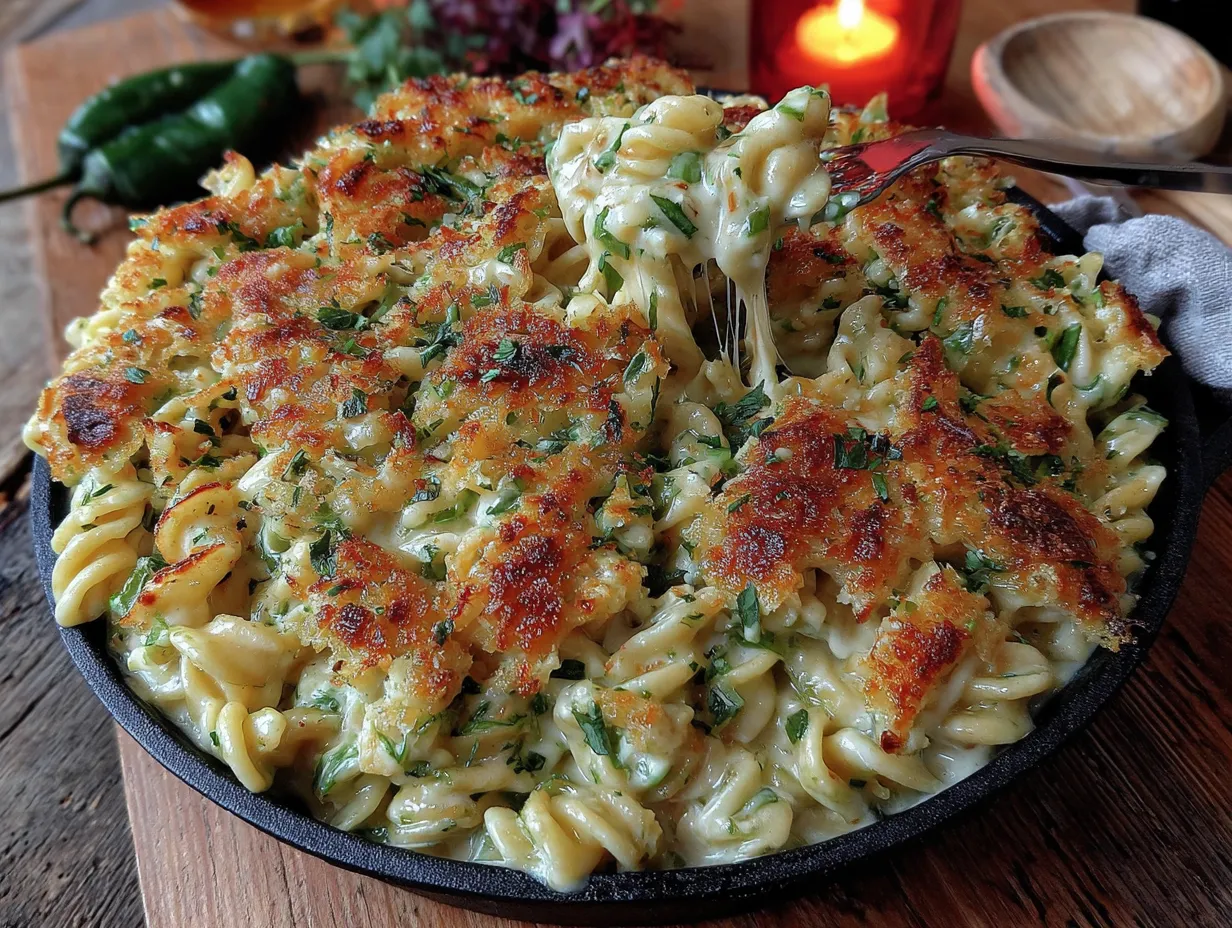
- 4 tablespoons (56g) unsalted butter (salted butter works too, just reduce the added salt later)
- 1/4 cup (30g) all-purpose flour (for the roux—this thickens the sauce)
- 1 teaspoon chili powder (bloom this in the butter for deeper flavor. I like Gebhardt brand for its balanced heat.)
- 1/2 teaspoon garlic powder
- 1/2 teaspoon onion powder
- 1/4 teaspoon smoked paprika (adds a subtle smokiness that pairs beautifully with the chilis)
- 3 cups (720ml) whole milk (room temperature is best to prevent lumps. You can use 2% but the sauce won’t be as luxuriously creamy.)
- 1 cup (240ml) heavy cream (adds richness—don’t skip it if you’re serving guests)
- 2 cups (225g) sharp cheddar cheese, shredded (shred it yourself from a block—pre-shredded cheese has anti-caking agents that prevent smooth melting. I use Cabot Extra Sharp.)
- 1 cup (115g) Monterey Jack cheese, shredded (for that perfect melt and mild creaminess)
- 1 can (7 ounces or 200g) diced roasted green chilis (mild or medium heat—your choice. I prefer Ortega or Hatch brand when I can find them.)
- 1/2 teaspoon salt (adjust to taste, especially if using salted butter)
- 1/4 teaspoon black pepper
For the Topping (Optional but Highly Recommended)
- 1/2 cup (55g) panko breadcrumbs (for that crispy, golden crust)
- 2 tablespoons (28g) unsalted butter, melted (to toss with the breadcrumbs)
- 1/4 cup (30g) Parmesan cheese, grated (adds a salty, nutty crunch)
Ingredient Selection Tip: When buying canned green chilis, look for “fire-roasted” on the label. This adds a deeper, slightly smoky flavor that really makes the dish sing. If you can find fresh Hatch chilis in season, roast and peel them yourself—it’s a labor of love that’s absolutely worth it.
Substitution Guidance: For a gluten-free version, use gluten-free pasta and substitute the all-purpose flour with a 1:1 gluten-free flour blend. For a lighter version, swap the heavy cream for half-and-half and use 2% milk. You can also use pepper jack cheese instead of Monterey Jack for extra heat, or add a can of drained, diced tomatoes with green chilis (like Rotel) for a different flavor profile.
Equipment Needed
You don’t need a professional kitchen to make this, but having the right tools makes the process smoother. Here’s what I use:
- Large pot (6-8 quart) for boiling the pasta. I use a heavy-bottomed stainless steel pot that heats evenly.
- Large saucepan or Dutch oven for making the cheese sauce. A Dutch oven is ideal because it retains heat well and you can finish the dish in it if you’re not baking it separately.
- Whisk for the roux and sauce. A flat whisk works best for getting into the corners of the pan.
- Wooden spoon or silicone spatula for stirring the pasta and sauce together.
- 9×13 inch (3-quart) baking dish if you’re baking it. Glass or ceramic both work fine.
- Box grater or food processor for shredding cheese. I honestly prefer a box grater—it’s faster to clean and gives you nice, even shreds.
- Measuring cups and spoons—accurate measurements matter for the roux.
- Colander for draining pasta.
Budget-friendly tip: If you don’t have a Dutch oven, a regular large saucepan works perfectly. For the baking dish, a disposable aluminum pan works in a pinch, though the results won’t be quite as good. And if you don’t have a whisk, you can use a fork—it just takes a little more elbow grease.
Maintenance tip: After making cheese sauce, soak your pan immediately with hot water and a drop of dish soap. Dried cheese sauce is a nightmare to scrub off. Trust me on this one—I learned the hard way.
Preparation Method
Let’s get cooking. This recipe comes together in about 45 minutes, and most of that is hands-off time while the pasta boils or the dish bakes. Here’s how to do it:
- Preheat your oven to 375°F (190°C). If you’re planning to bake the mac and cheese, get the oven heating now so it’s ready when you are.
- Bring a large pot of salted water to a boil. Add about 1 tablespoon of salt per 4 quarts of water. It should taste like the sea—this is the only chance to season the pasta itself. Add the 1 pound (450g) of elbow macaroni or cavatappi and cook according to package directions until al dente, usually 7-9 minutes. Important: Undercook it by about 1 minute! The pasta will continue to cook in the oven, and you don’t want mushy mac and cheese. Drain the pasta in a colander, but don’t rinse it—you want that starch to help the sauce stick. Set aside.
- While the pasta cooks, start the sauce. In a large saucepan or Dutch oven over medium heat, melt the 4 tablespoons (56g) of unsalted butter. Once it’s fully melted and starts to foam, add the 1 teaspoon of chili powder. Stir it into the butter and let it cook for about 30 seconds until it’s fragrant—this is the blooming step I mentioned. Your kitchen will smell amazing.
- Sprinkle the 1/4 cup (30g) of all-purpose flour over the butter and chili powder mixture. Whisk constantly for about 1-2 minutes until the mixture is smooth and bubbling. This is your roux, and it should be a light golden color. Don’t let it brown—you’re making a white sauce base, not a dark gravy.
- Slowly pour in the 3 cups (720ml) of whole milk, whisking constantly. Start with a thin stream and keep whisking to prevent lumps. Once all the milk is incorporated, add the 1 cup (240ml) of heavy cream. Continue whisking until the mixture is smooth and begins to thicken, about 3-5 minutes. You’ll know it’s ready when it coats the back of a spoon—dip a spoon in and run your finger across the back; if the line holds, it’s thick enough.
- Reduce the heat to low. Add the 1/2 teaspoon garlic powder, 1/2 teaspoon onion powder, 1/4 teaspoon smoked paprika, 1/2 teaspoon salt, and 1/4 teaspoon black pepper. Stir to combine.
- Add the shredded cheese, one handful at a time. Start with the 2 cups (225g) of sharp cheddar, then add the 1 cup (115g) of Monterey Jack. Stir gently after each addition until the cheese is fully melted and the sauce is smooth. Don’t rush this step—adding the cheese too quickly or over high heat can cause it to seize up and become grainy. Low and slow is the way to go.
- Stir in the entire can (7 ounces) of diced roasted green chilis, including any liquid. This is where the magic happens. The chilis add that signature flavor and a little texture. Taste the sauce and adjust the salt and pepper if needed. Remember, you’ll be adding pasta, so the sauce should be a little on the salty side.
- Add the drained pasta to the sauce and stir gently until every piece is coated. Make sure there are no clumps of pasta stuck together. This is your last chance to make sure everything is evenly distributed.
- If you’re baking it, transfer the mixture to a greased 9×13 inch baking dish. Spread it into an even layer. If you’re serving it stovetop-style, you’re done—just let it rest for 5 minutes before serving.
- For the topping, combine the 1/2 cup (55g) panko breadcrumbs, 2 tablespoons (28g) melted butter, and 1/4 cup (30g) grated Parmesan cheese in a small bowl. Toss until the breadcrumbs are evenly coated. Sprinkle this mixture over the top of the mac and cheese.
- Bake for 20-25 minutes until the top is golden brown and the edges are bubbling. Let it rest for 5-10 minutes before serving—this allows the sauce to set up a little so it’s not too runny.
Sensory cues: When you bloom the chili powder in the butter, you should smell a warm, earthy aroma—almost like toasted spices. When the sauce is ready, it should be thick enough that it doesn’t immediately run off a spoon but still pourable. The finished dish should have a golden-brown top with the sauce bubbling gently around the edges.
Cooking Tips & Techniques
I’ve made this recipe more times than I can count, and I’ve learned a few things along the way. Here are my best tips for success:
Don’t skip the roux. I know it’s tempting to just melt cheese into milk and call it a day, but a proper roux is what gives this sauce its silky, stable texture. It prevents the cheese from separating and keeps the sauce creamy even after baking. I once tried to rush it and ended up with a greasy, grainy mess—never again.
Shred your own cheese. I cannot stress this enough. Pre-shredded cheese is coated in cellulose and starches to prevent clumping, which also prevents it from melting smoothly. Your sauce will be grainy instead of velvety. Spend the two minutes shredding a block of cheese—your taste buds will thank you.
Room temperature dairy matters. Cold milk or cream added to a hot roux can cause it to seize up and become lumpy. Take your milk and cream out of the fridge when you start boiling the pasta, and they’ll be ready by the time you need them. If you forget, you can microwave them for 30 seconds—just don’t let them boil.
Toast your breadcrumbs for extra crunch. If you have an extra 5 minutes, toast the panko breadcrumbs in a dry skillet over medium heat until they’re golden brown before mixing them with the butter and Parmesan. This adds another layer of texture and ensures they stay crispy even after baking.
Multitasking strategy: Start the pasta water boiling while you shred the cheese. While the pasta cooks, make the roux and start the sauce. By the time the pasta is done, your sauce should be ready to go. This keeps the whole process under 45 minutes.
One mistake I made: The first time I made this for a party, I used low-fat milk because I thought it would be “healthier.” The sauce was thin and watery, and it didn’t hold up well in the oven. Whole milk and heavy cream aren’t just for indulgence—they’re structural. Trust the recipe.
Variations & Adaptations
This recipe is a great base, and I’ve played around with it quite a bit. Here are some variations that have worked well:
Spicy Southwest Version: Add 1/2 cup of fire-roasted corn, 1/2 cup of black beans (rinsed and drained), and an extra 1/2 teaspoon of chili powder. Top with crushed tortilla chips instead of panko for a crunchy, Tex-Mex twist. I made this for a Super Bowl party and it disappeared in minutes.
Smoky Bacon Version: Cook 6 slices of thick-cut bacon until crispy, crumble them, and stir half into the mac and cheese before baking. Reserve the other half for topping along with the breadcrumbs. The smoky, salty bacon is incredible with the green chilis. Just be prepared for people to ask for the recipe.
Vegetable-Packed Version: Sauté 1 cup of diced zucchini and 1 cup of diced bell peppers in a little olive oil until softened, then stir them into the mac and cheese before baking. This adds color, nutrients, and a nice texture contrast. My kids don’t even notice the vegetables.
Dairy-Free Adaptation: Use unsweetened oat milk or cashew milk instead of whole milk, and substitute the heavy cream with full-fat coconut cream. For the cheese, use a high-quality dairy-free cheddar shred that melts well (I like Violife or Daiya). The sauce won’t be quite as creamy, but it’s still delicious. Add an extra tablespoon of nutritional yeast for a cheesy flavor.
Gluten-Free Version: Use gluten-free pasta (I recommend Jovial or Barilla’s gluten-free line) and substitute the all-purpose flour with a 1:1 gluten-free flour blend. The rest of the recipe stays the same. For the topping, use gluten-free panko or crushed gluten-free crackers.
Personal variation: I once added a tablespoon of chopped pickled jalapeños to the sauce along with the green chilis, and it was a game-changer. The acidity cut through the richness perfectly. I now do this every time I make it for my book club—they expect it.
Serving & Storage Suggestions
This Green Chili Mac and Cheese is versatile enough for any occasion. Here’s how to serve and store it like a pro:
Serving temperature: Serve it hot, straight from the oven, after letting it rest for 5-10 minutes. The rest is crucial—it allows the sauce to set up so it’s creamy but not runny. If you serve it immediately, it might be a little loose.
Presentation: For a dinner party, serve it in a nice baking dish or transfer it to a warm serving bowl. Garnish with a sprinkle of fresh chopped cilantro or green onions and a few extra green chili slices on top for color. It’s a simple touch that makes it look intentional.
What to serve alongside: This dish is rich, so pair it with something lighter. A simple green salad with a tangy vinaigrette is perfect—the acidity cuts through the creaminess. Grilled or roasted chicken, steak, or fish also work beautifully. For a vegetarian spread, serve it with refried beans, rice, and a fresh salsa.
Storage instructions: Leftovers keep well in an airtight container in the refrigerator for up to 4 days. The pasta will absorb some of the sauce as it sits, so it won’t be quite as creamy the next day, but it’s still delicious.
Freezing instructions: You can freeze this dish for up to 3 months. Assemble the mac and cheese completely but don’t bake it. Cover tightly with plastic wrap and then aluminum foil. When you’re ready to serve, thaw it overnight in the refrigerator, then bake as directed, adding about 10 minutes to the baking time since you’re starting from cold.
Reheating methods: The best way to reheat individual portions is in a skillet over medium-low heat with a splash of milk. Stir gently until warmed through. This restores some of the creaminess. You can also reheat in the microwave in 30-second bursts, stirring between each, but add a little milk to prevent it from drying out. For a whole dish, reheat in a 350°F (175°C) oven, covered with foil, for about 15-20 minutes.
Flavor development: Honestly, this dish is even better the next day. The flavors meld together overnight, and the green chili flavor becomes more pronounced. I often make it a day ahead for parties just for this reason.
Nutritional Information & Benefits
Let’s be real—this is comfort food, and it’s meant to be indulgent. But it does have some redeeming qualities. Here’s a rough estimate per serving (based on 8 servings):
| Nutrient | Amount Per Serving |
|---|---|
| Calories | 520 |
| Total Fat | 28g |
| Saturated Fat | 17g |
| Cholesterol | 85mg |
| Sodium | 680mg |
| Total Carbohydrates | 48g |
| Dietary Fiber | 2g |
| Sugars | 6g |
| Protein | 18g |
| Calcium | 350mg (35% DV) |
| Vitamin A | 600IU (12% DV) |
Health benefits: The green chilis are a good source of vitamin C and capsaicin, which has anti-inflammatory properties. The dairy provides calcium and protein, which are essential for bone health and muscle repair. The whole milk and cheese also contain vitamin D and vitamin A.
Dietary considerations: This recipe is vegetarian (if you skip the bacon variation). It contains gluten and dairy, so it’s not suitable for gluten-free or dairy-free diets unless you use the adaptations mentioned above. It’s also not low-carb or keto-friendly due to the pasta.
Personal wellness perspective: I believe in balance. This isn’t a health food, and it’s not meant to be. It’s a celebration dish—the kind you make for birthdays, holidays, or when you just need a hug in a bowl. Enjoy it without guilt, and maybe pair it with that green salad I mentioned.
Conclusion
This Green Chili Mac and Cheese is more than just a recipe—it’s a little piece of that Santa Fe restaurant I still miss. It’s creamy, cheesy, with just enough kick to keep things interesting, and it’s the dish that has made me famous among my friends and family. Every time I make it, I think about that red-brick building and the way the air smelled like roasted chilis and melted cheese. And now, I get to share that feeling with everyone I cook for.
I honestly believe this is the best mac and cheese you’ll ever make. It’s forgiving, it’s adaptable, and it’s absolutely guaranteed to impress. Whether you’re hosting a dinner party, bringing a dish to a potluck, or just treating yourself on a Tuesday night, this recipe delivers. Don’t be afraid to make it your own—add more chilis if you like it spicy, throw in some bacon, or keep it classic. The beauty of this dish is that it works no matter what.
So go ahead, give it a try. I’d love to hear how it turns out for you. Did you add your own twist? Did your guests ask for the recipe? Drop a comment below and let me know. And if you share it on social media, tag me—I want to see your beautiful, bubbly, green chili masterpiece. Happy cooking, friends!
Frequently Asked Questions
Can I make this Green Chili Mac and Cheese ahead of time?
Absolutely! Assemble the dish completely but don’t bake it. Cover and refrigerate for up to 24 hours. When you’re ready to serve, add about 10 minutes to the baking time since you’re starting from cold. You might also want to add an extra splash of milk before baking since the pasta will absorb some of the sauce overnight.
What if I can’t find canned green chilis?
If you can’t find canned roasted green chilis, you can use fresh poblano peppers instead. Roast them under a broiler or over a gas flame until the skin is charred, then place them in a bowl covered with plastic wrap for 10 minutes. Peel off the skin, remove the seeds, and dice them. One large poblano equals about one 7-ounce can. You can also use canned diced jalapeños for a spicier version, but reduce the amount to about 4 ounces.
How do I prevent the cheese sauce from becoming grainy?
Grainy cheese sauce is usually caused by overheating or using pre-shredded cheese. Always shred your own cheese from a block, and add it to the sauce over low heat, stirring constantly. Don’t let the sauce boil after adding the cheese—just warm it gently until it melts. If your sauce does get grainy, you can sometimes save it by adding a splash of lemon juice or white wine and whisking vigorously.
Can I use a different type of pasta?
Yes, any short pasta shape works well. Cavatappi, shells, rotini, or even penne are great choices. The key is to choose a shape with nooks and crannies that can hold onto the sauce. Avoid long, thin pasta like spaghetti or angel hair—they just don’t work as well for a baked mac and cheese. And remember to undercook the pasta by about a minute since it will continue to cook in the oven.
Is this recipe very spicy?
No, this recipe is mild to medium in heat, depending on the brand of green chilis you use. Most canned green chilis are labeled “mild” and have a gentle warmth rather than intense heat. The flavor is more about the roasted, slightly smoky taste of the chilis than the spiciness. If you’re sensitive to heat, look for chilis labeled “mild” and consider removing the seeds if you’re using fresh peppers. If you want more heat, use “hot” chilis or add a chopped jalapeño.
Pin This Recipe!
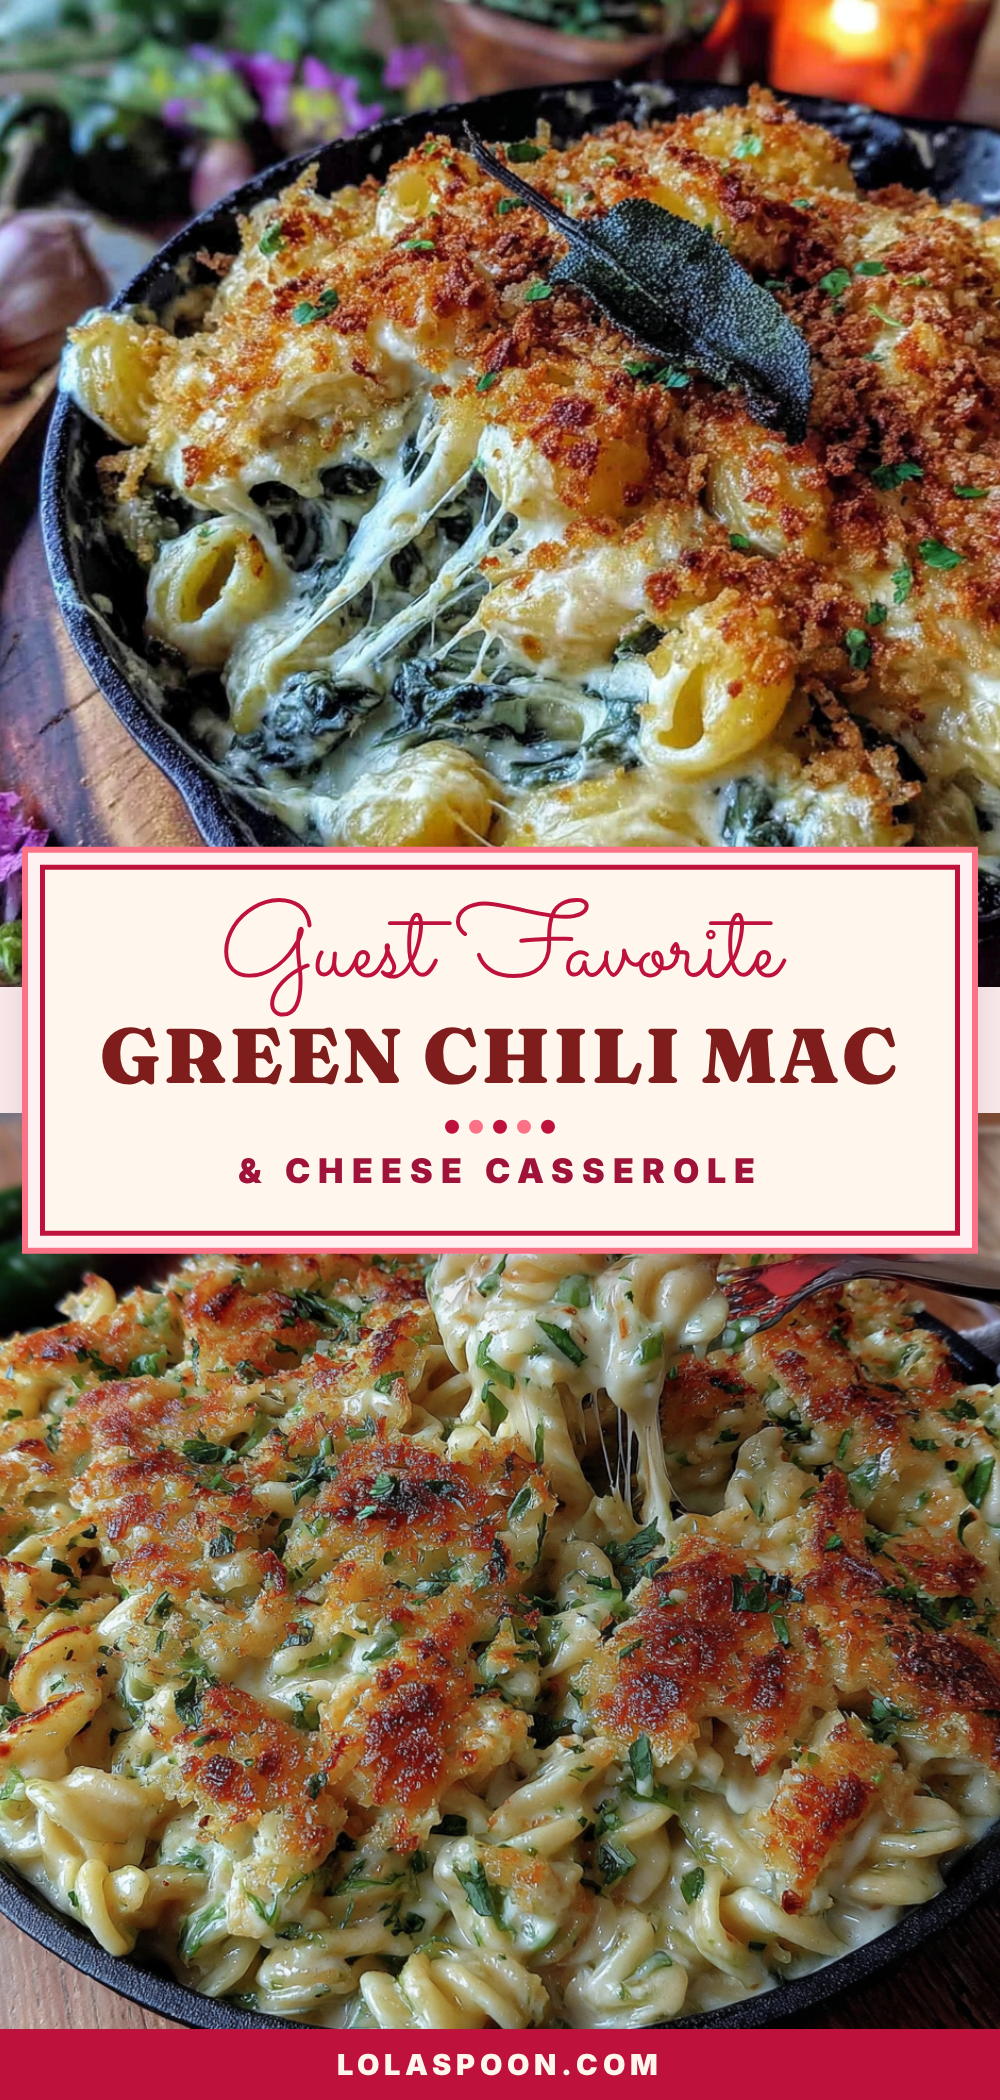
Best Green Chili Mac and Cheese – Easy Guest Recipe
This Green Chili Mac and Cheese is creamy, cheesy, with a little kick from roasted green chilis. It’s the perfect comfort food for potlucks, dinner parties, or a cozy weeknight meal.
- Prep Time: 15 minutes
- Cook Time: 30 minutes
- Total Time: 45 minutes
- Yield: 8 servings 1x
- Category: Main Course
- Cuisine: American
Ingredients
- 1 pound (450g) elbow macaroni or cavatappi pasta
- Salt for pasta water
- 4 tablespoons (56g) unsalted butter
- 1/4 cup (30g) all-purpose flour
- 1 teaspoon chili powder
- 1/2 teaspoon garlic powder
- 1/2 teaspoon onion powder
- 1/4 teaspoon smoked paprika
- 3 cups (720ml) whole milk, room temperature
- 1 cup (240ml) heavy cream
- 2 cups (225g) sharp cheddar cheese, shredded
- 1 cup (115g) Monterey Jack cheese, shredded
- 1 can (7 ounces or 200g) diced roasted green chilis
- 1/2 teaspoon salt
- 1/4 teaspoon black pepper
- 1/2 cup (55g) panko breadcrumbs (optional topping)
- 2 tablespoons (28g) unsalted butter, melted (for topping)
- 1/4 cup (30g) Parmesan cheese, grated (for topping)
Instructions
- Preheat oven to 375°F (190°C).
- Bring a large pot of salted water to a boil. Add pasta and cook until al dente, about 7-9 minutes, undercooking by 1 minute. Drain (do not rinse) and set aside.
- In a large saucepan or Dutch oven over medium heat, melt 4 tablespoons butter. Add chili powder and stir for 30 seconds until fragrant.
- Sprinkle flour over butter mixture and whisk constantly for 1-2 minutes until smooth and bubbling (do not brown).
- Slowly pour in milk, whisking constantly, then add heavy cream. Continue whisking until mixture thickens, about 3-5 minutes (coats back of spoon).
- Reduce heat to low. Stir in garlic powder, onion powder, smoked paprika, salt, and black pepper.
- Add shredded cheese one handful at a time, stirring until fully melted and smooth after each addition.
- Stir in diced green chilis (with liquid). Taste and adjust seasoning if needed.
- Add drained pasta to sauce and stir gently until evenly coated.
- Transfer mixture to a greased 9×13-inch baking dish. Spread evenly.
- For topping: In a small bowl, combine panko breadcrumbs, melted butter, and Parmesan cheese. Sprinkle over mac and cheese.
- Bake for 20-25 minutes until top is golden brown and edges are bubbling. Let rest 5-10 minutes before serving.
Notes
For best results, shred cheese from a block (pre-shredded has anti-caking agents). Use room temperature milk and cream to prevent lumps. Undercook pasta by 1 minute as it will continue cooking in the oven. For a gluten-free version, use gluten-free pasta and 1:1 gluten-free flour blend. For a lighter version, substitute heavy cream with half-and-half and use 2% milk.
Nutrition
- Serving Size: 1 serving (1/8 of re
- Calories: 520
- Sugar: 6
- Sodium: 680
- Fat: 28
- Saturated Fat: 17
- Carbohydrates: 48
- Fiber: 2
- Protein: 18
Keywords: green chili mac and cheese, hatch chili mac and cheese, easy mac and cheese, comfort food, potluck recipe, baked mac and cheese


