I was standing in the baking aisle of our local grocery store last October, staring at a bag of chocolate chips I didn’t need, when the weirdest thing happened. A kid ran past me—probably six or seven, wearing a too-big superhero costume that his mom was already apologizing for—and the smell of that synthetic costume fabric mixed with the faint vanilla from a nearby display of cake mixes hit me. And just like that, I was eight years old again, sitting on my Aunt Carol’s linoleum kitchen floor in Detroit, watching her pipe little white clouds onto a baking sheet.
Aunt Carol wasn’t really my aunt—she was my mom’s best friend from work, the kind of woman who kept a candy dish filled with those strawberry hard candies that grandmas always have. She made meringue cookies every Halloween, little ghost shapes with chocolate chip eyes that stared up at you from the plate like they knew a secret. I remember the way she’d hold the piping bag like it was an extension of her hand, her knuckles white from squeezing, and how she’d say “don’t rush them, honey” every time I tried to help. I never did get the hang of piping as a kid—my ghosts always looked more like lumpy snowmen.
She passed away a few years ago, and honestly, I hadn’t thought about those cookies in forever. But standing there in that grocery store, I felt this ache to make them again. To get it right this time. Maybe you’ve been there—that moment when a random smell or sound pulls you back to a kitchen you haven’t stood in for years, and you realize you need to recreate something before the memory fades completely. So I bought the chocolate chips, grabbed some egg whites I didn’t plan on buying, and went home determined to figure out those ghost cookies. This is what I came up with—my version of Aunt Carol’s spooky ghost meringue cookies with chocolate chip eyes.
Why You’ll Love This Recipe
Let me tell you why these little ghosts have become my go-to for every Halloween gathering, potluck, and dinner party where I need to bring something that looks impressive but doesn’t require a culinary degree.
- Quick & Easy: From start to finish, these come together in about 2 hours—but most of that is hands-off baking time. The actual work takes maybe 15 minutes. Perfect for those “I forgot about the party tomorrow” moments.
- Simple Ingredients: You probably have everything already. Egg whites, sugar, vanilla, cream of tartar, and chocolate chips. No special trips to a fancy baking store required.
- Perfect for Halloween: These are the star of any spooky spread. They look adorable on a dessert table, and kids absolutely lose their minds over them. I brought them to my neighbor’s Halloween party last year and they were gone in twenty minutes.
- Crowd-Pleaser: They’re naturally gluten-free and low-fat, so almost everyone can enjoy them. Plus, they’re so light and airy—like biting into a sweet cloud.
- Unbelievably Delicious: The outside is crisp and delicate, the inside is chewy and marshmallow-like, and those chocolate chip eyes add just the right amount of richness. It’s the kind of cookie that makes you close your eyes after the first bite.
What makes these different from every other meringue recipe out there? It’s the technique. I spent three batches figuring out the exact temperature and timing to get that perfect contrast between crunchy exterior and soft interior. Plus, I figured out a trick for piping the ghosts so they actually look like ghosts—not blobs. Trust me, my first batch looked like sad white potatoes.
What Ingredients You Will Need
This recipe uses simple, pantry-friendly ingredients to create something that feels magical. The key is getting the ratios right and using room-temperature ingredients for the fluffiest meringue.
- 4 large egg whites, at room temperature (cold eggs won’t whip up as high—trust me on this one)
- 1 cup (200g) granulated sugar (I prefer regular white sugar; it dissolves more evenly than superfine in my experience)
- 1/2 teaspoon cream of tartar (this stabilizes the egg whites and helps them hold their shape—don’t skip it)
- 1 teaspoon vanilla extract (pure vanilla, not imitation—it makes a real difference in flavor)
- 1/4 cup mini chocolate chips (for the eyes—I use Ghirardelli mini chips because they’re small enough to look like actual eyes)
- Pinch of salt (just a tiny one—it balances the sweetness)
A few notes on ingredient selection: Make sure your eggs are fresh—older eggs whip up better, actually, so if your eggs are a week old, that’s perfect. For the sugar, I’ve tried using organic cane sugar and it works fine, but the meringue comes out slightly grainier. Stick with regular granulated if you can. And please, please use room-temperature egg whites. I learned this the hard way when I tried to rush things with cold eggs and ended up with a soupy mess that wouldn’t hold peaks.
If you need substitutions, you can use cream of tartar substitutes like lemon juice or white vinegar—about 1/2 teaspoon of either will do the same job. For a dairy-free version, obviously these are already dairy-free since there’s no butter or milk. The chocolate chips are typically dairy-free too, but double-check the label if that’s a concern.
Equipment Needed
You don’t need much for these cookies, which is part of why I love making them when I’m short on time or patience.
- Electric stand mixer or hand mixer—you can technically whip meringue by hand with a whisk, but your arm will hate you. I’ve done it once. Never again.
- Large mixing bowl—make sure it’s completely clean and dry. Any grease will prevent your egg whites from whipping up properly.
- Piping bag with a round tip (I use a Wilton 1A tip, but any round tip works)
- Baking sheets lined with parchment paper or silicone baking mats
- Small offset spatula (optional, but helpful for shaping)
If you don’t have a piping bag, you can use a zip-top bag with the corner snipped off. It won’t be as precise, but it’ll work in a pinch. Just make sure the hole isn’t too big—start small and cut more if needed. I’ve definitely made the mistake of cutting too much and ended up with ghost puddles instead of ghost shapes.
Preparation Method
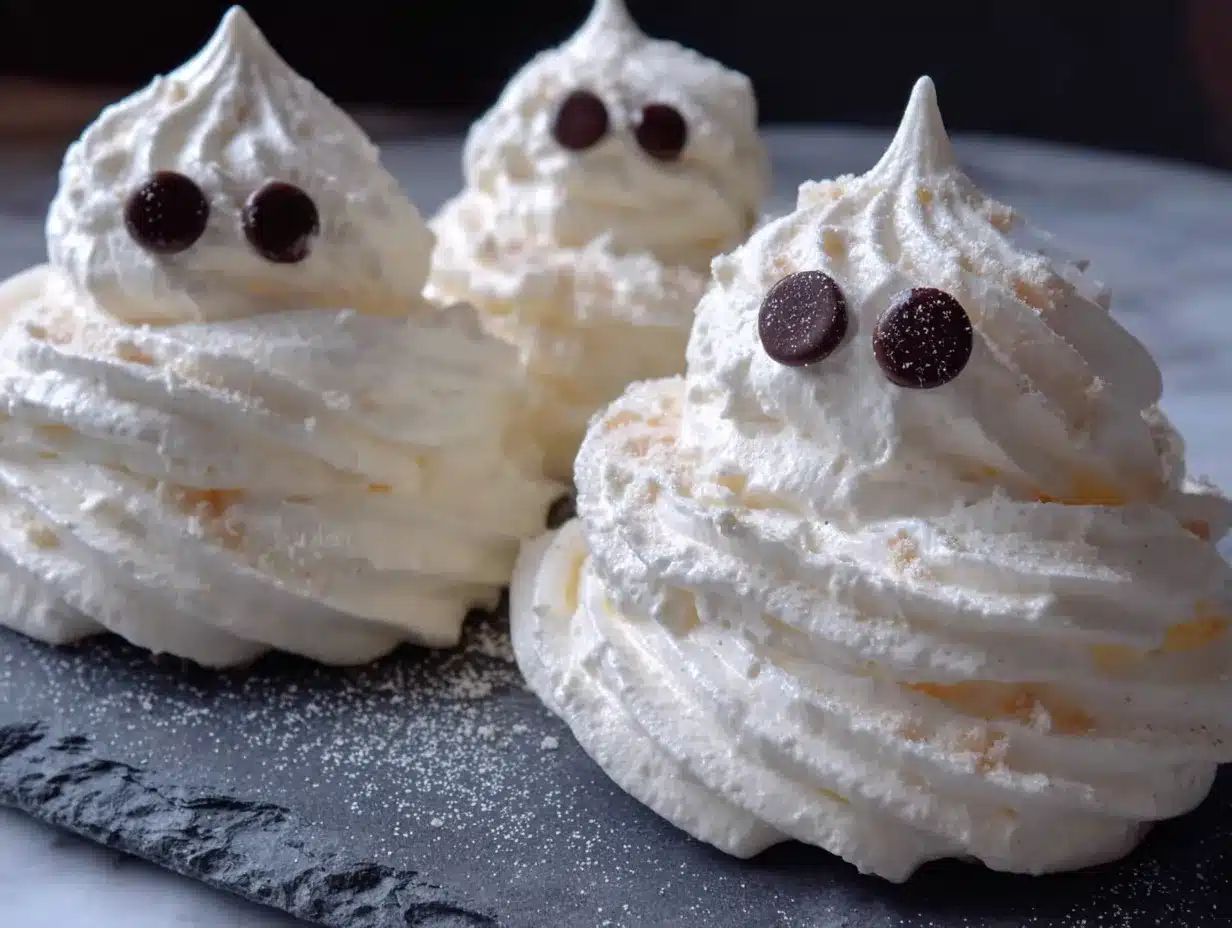
Alright, let’s make some ghosts! I’ll walk you through every step so you don’t make the same mistakes I did.
- Preheat your oven to 200°F (93°C). Yes, that low. We’re drying the meringues, not baking them. Line two baking sheets with parchment paper or silicone mats.
- Separate your eggs carefully. Make sure absolutely no yolk gets into the whites—even a tiny bit will prevent them from whipping. I separate each egg into a small bowl first, then transfer the white to the mixing bowl. That way if one breaks, you haven’t ruined the whole batch.
- Start whipping the egg whites on medium speed until they’re frothy and bubbly—about 1-2 minutes. You’ll see them go from clear liquid to white foam.
- Add the cream of tartar and salt while the mixer is running. Continue whipping on medium-high speed until soft peaks form—when you lift the beater, the meringue should form a peak that flops over slightly. This takes about 3-4 minutes.
- Start adding the sugar slowly. Here’s the trick: add it one tablespoon at a time, letting each addition dissolve completely before adding the next. This should take about 5-7 minutes total. If you dump all the sugar in at once, your meringue will be grainy and won’t hold its shape. I learned this the hard way when my first batch turned into a sugary puddle.
- Keep whipping until stiff peaks form. The meringue should be glossy and thick. When you lift the beater, the peak should stand straight up without flopping. Rub a little between your fingers—if it feels smooth and not grainy, the sugar is fully dissolved. This usually takes another 3-4 minutes.
- Add the vanilla extract and whip for another 30 seconds until combined. The meringue should be thick, glossy, and hold its shape perfectly.
- Transfer the meringue to your piping bag. If you’re using a zip-top bag, fill it about halfway and twist the top to push the meringue toward the corner.
- Pipe the ghost shapes. Hold the bag straight up and down, about 1/2 inch above the baking sheet. Squeeze gently to create a round base, then pull up slightly while continuing to squeeze to create the ghost body. Release pressure and pull away to create a little tail at the top. Space them about 2 inches apart—they don’t spread much, but you want room to work.
- Add the chocolate chip eyes. While the meringue is still wet, gently press two mini chocolate chips into each ghost for eyes. Don’t push too hard or you’ll deflate the meringue. I like to place them slightly unevenly—it gives the ghosts more personality.
- Bake for 60-75 minutes. The meringues should be dry to the touch and easily lift off the parchment paper. They shouldn’t be brown at all—if they start taking on color, your oven is too hot. Every oven is different, so check at 60 minutes and go from there.
- Turn off the oven and let them cool inside. Leave the door slightly ajar with a wooden spoon handle. Let them cool completely for at least 1 hour—this helps them dry out completely and develop that perfect crisp texture.
Cooking Tips & Techniques
After making these ghosts about a dozen times (and failing spectacularly at least three of those times), I’ve picked up some tricks that make all the difference.
Humidity is your enemy. Meringues hate moisture. If it’s a rainy or humid day, your meringues might come out sticky or weepy. I once made these during a thunderstorm and they never fully dried out—they were chewy in a bad way. Save this recipe for a dry day if you can.
Don’t over-whip. I know I said to whip until stiff peaks form, but there’s a fine line between stiff peaks and over-whipped meringue that starts looking grainy and separating. If you see the meringue start to look curdled or watery, you’ve gone too far. Stop immediately and pipe them anyway—they might not be perfect, but they’ll still taste good.
Pipe with confidence. The first time I tried piping ghosts, I was so tentative that they came out looking like sad little blobs. You want to squeeze firmly and pull up decisively. If you hesitate, you’ll get a lumpy mess. And if your first few look terrible? That’s fine. Just eat those ones yourself—that’s what I do.
Let them cool completely. I know it’s tempting to grab one right out of the oven, but they need that cooling time in the turned-off oven to fully dry out. If you pull them too early, they’ll be chewy and might even collapse. Patience, my friend.
Variations & Adaptations
Once you’ve mastered the basic ghost, you can get creative with these little guys.
- Colorful Ghosts: Add a drop of food coloring to the meringue before piping. I’ve made purple ghosts for a witch-themed party and green ones for a monster bash. Just don’t add too much liquid color—it can deflate the meringue. Gel food coloring works best.
- Flavor Variations: Swap the vanilla for peppermint extract (use 1/2 teaspoon—it’s stronger), almond extract, or even a little orange zest. I made a batch with lemon extract last year and they were surprisingly delicious—like little lemon clouds.
- Different Eyes: Use regular chocolate chips for bigger eyes, or try white chocolate chips with a dot of melted dark chocolate in the center for a more detailed look. You can even use candy eyes if you’re making these for a kids’ party—they look hilarious.
- Gluten-Free: These are naturally gluten-free, so no changes needed. Just double-check your vanilla extract and chocolate chips if you’re serving someone with celiac disease.
Serving & Storage Suggestions
These ghosts are best served at room temperature, right after they’ve cooled. I love arranging them on a dark plate or black serving tray—it makes the white ghosts pop and looks super spooky. For a Halloween party, I scatter them around a cake or arrange them in a ghostly cluster on a platter.
They pair beautifully with hot cider, coffee, or a glass of cold milk. If you’re serving them as part of a dessert spread, they go great with brownies (the chocolate-chocolate combo works) or fruit tarts. I once served them alongside a dark chocolate mousse and it was a hit.
For storage, keep them in an airtight container at room temperature for up to a week. Don’t refrigerate them—the moisture will make them sticky. If you need to store them longer, you can freeze them for up to 3 months. Just layer them between sheets of parchment paper in a freezer-safe container. Let them thaw at room temperature for about 30 minutes before serving.
The flavor actually gets better after a day or two—the meringue becomes even more crisp and the chocolate chips seem to meld with the sweetness. I always try to make these at least a day before I need them.
Nutritional Information & Benefits
Per ghost (based on 24 cookies): approximately 45 calories, 1g fat, 9g carbohydrates, 1g protein. They’re low in calories and fat, making them a lighter dessert option compared to traditional cookies. Plus, they’re naturally gluten-free and dairy-free.
The egg whites provide a good source of protein (about 1g per cookie) and are low in cholesterol compared to whole eggs. The chocolate chips add a small amount of antioxidants from the cocoa. And honestly? The biggest benefit is the joy they bring—there’s something deeply satisfying about biting into a ghost that looks back at you.
If you’re watching your sugar intake, you could try reducing the sugar slightly, but meringues are finicky—too little sugar and they won’t hold their structure. I wouldn’t recommend going below 3/4 cup.
Conclusion
These spooky ghost meringue cookies with chocolate chip eyes have become my Halloween tradition. Every year, I make a batch and think about Aunt Carol and her linoleum floor and the way she’d laugh when my ghosts came out lopsided. They’re not just cookies—they’re little edible memories.
I hope you give these a try, whether you’re hosting a Halloween party, bringing something to a potluck, or just want to make your kids smile. Don’t worry if your first batch looks more like ghosts that got hit by a truck—mine did too. The important thing is that they taste amazing and they’re made with love. And honestly, imperfect ghosts have more personality anyway.
If you make these, I’d love to hear how they turn out. Drop a comment below and tell me about your ghost-making adventures—or share your own memory of someone who taught you something in the kitchen. Happy Halloween, and happy baking!
Frequently Asked Questions
Can I make these without a piping bag?
Absolutely! Use a zip-top bag with the corner snipped off, or even a spoon to drop dollops of meringue onto the baking sheet. They won’t be as perfectly ghost-shaped, but they’ll still taste great. I’ve done the spoon method when I was too lazy to clean a piping bag.
Why did my meringue turn out flat?
This usually happens because there was a tiny bit of grease or yolk in the bowl or on your beaters. Make sure everything is squeaky clean. Also, make sure your egg whites are at room temperature—cold whites don’t whip up as well.
Can I use liquid egg whites from a carton?
You can, but they don’t whip up as well as fresh egg whites. They often have stabilizers added that can affect the texture. If you use carton whites, make sure they’re at room temperature and add an extra pinch of cream of tartar to help them hold their shape.
How do I know when the meringues are done?
They should be dry to the touch and lift easily off the parchment paper. If they’re still sticky or soft, give them more time. They shouldn’t be brown at all—if they’re taking on color, your oven is too hot. Every oven is different, so start checking at 60 minutes.
Can I make these ahead of time?
Yes! They actually keep well for up to a week in an airtight container at room temperature. I often make them 2-3 days before a party. Just don’t refrigerate them—the moisture will ruin the texture. Freeze them for longer storage.
Pin This Recipe!
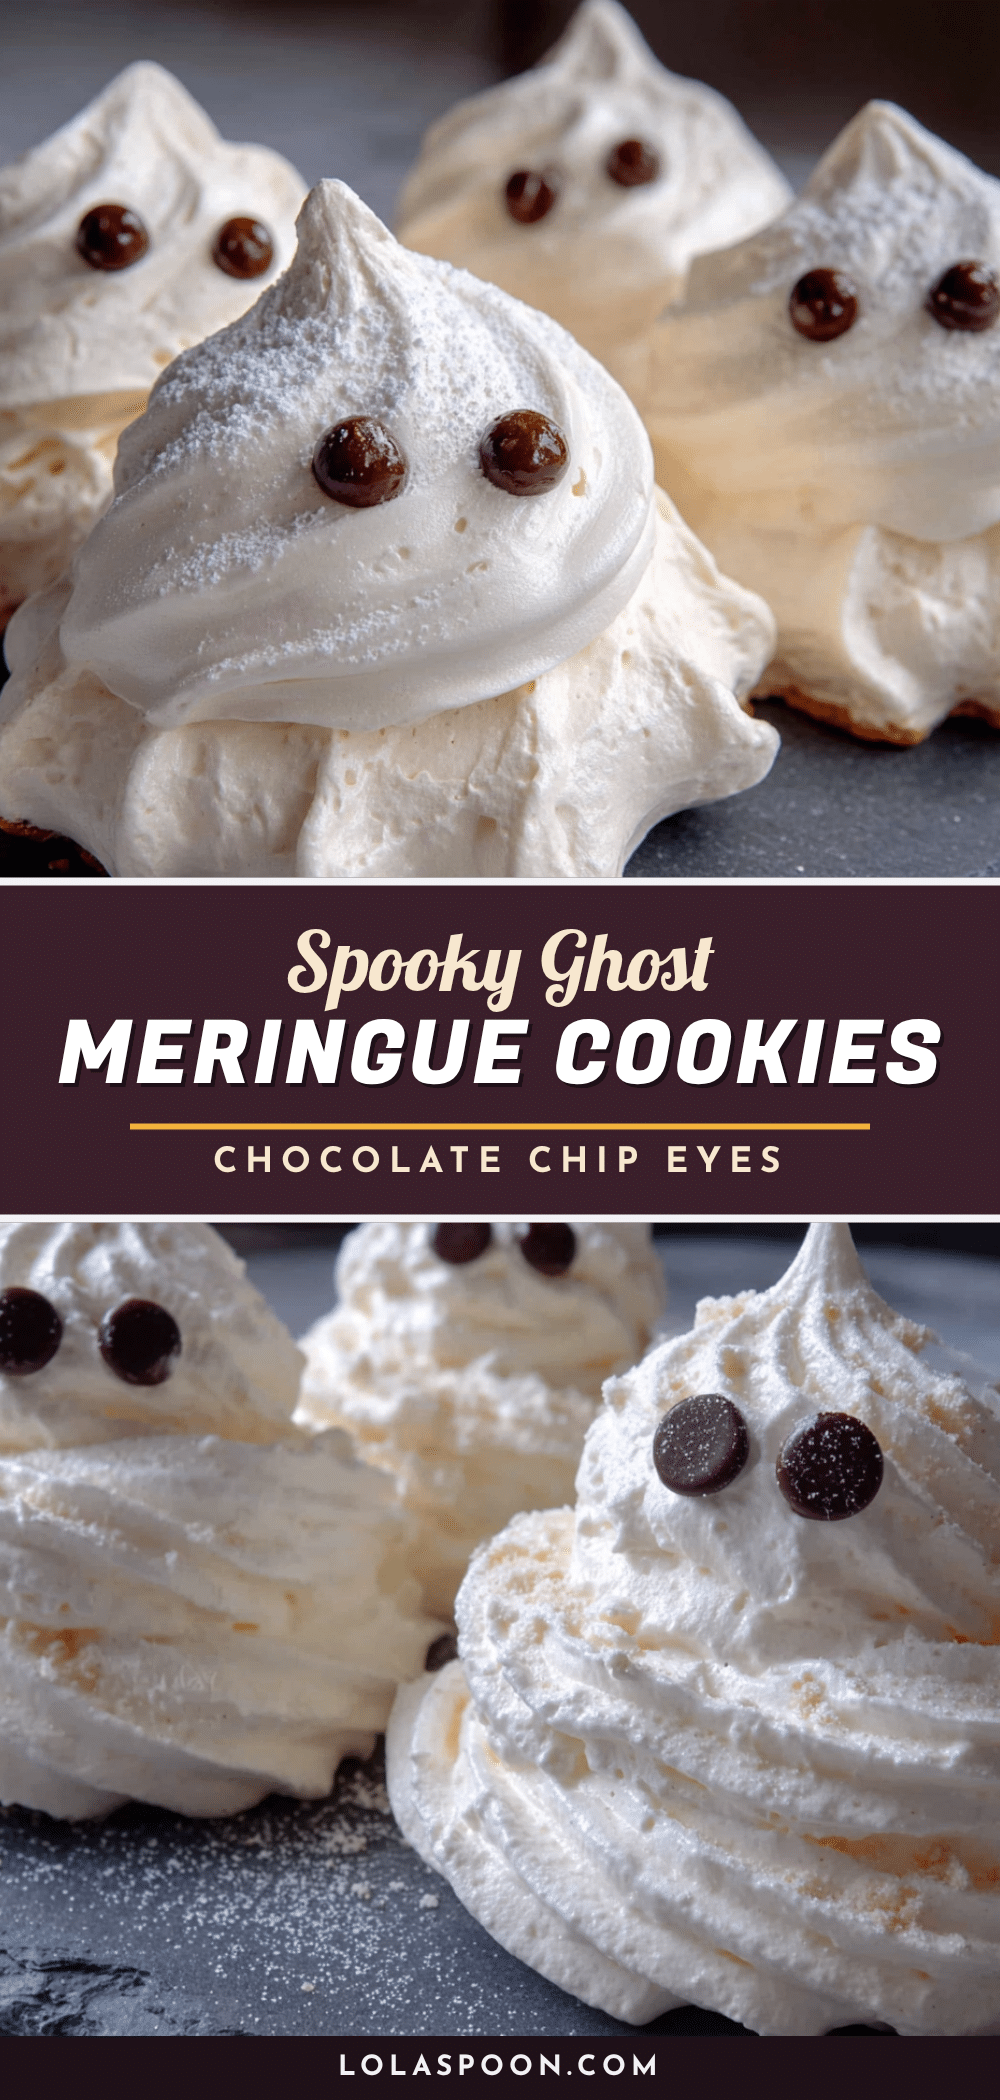
Spooky Ghost Meringue Cookies: Easy Chocolate Chip Eyes
These spooky ghost meringue cookies with chocolate chip eyes are light, airy, and perfect for Halloween. They’re easy to make with simple ingredients and are naturally gluten-free and dairy-free.
- Prep Time: 15 minutes
- Cook Time: 60-75 minutes
- Total Time: 2 hours
- Yield: 24 cookies 1x
- Category: Dessert
- Cuisine: American
Ingredients
- 4 large egg whites, at room temperature
- 1 cup (200g) granulated sugar
- 1/2 teaspoon cream of tartar
- 1 teaspoon vanilla extract
- 1/4 cup mini chocolate chips
- Pinch of salt
Instructions
- Preheat your oven to 200°F (93°C). Line two baking sheets with parchment paper or silicone mats.
- Separate your eggs carefully, ensuring no yolk gets into the whites.
- Start whipping the egg whites on medium speed until frothy and bubbly, about 1-2 minutes.
- Add the cream of tartar and salt while the mixer is running. Continue whipping on medium-high speed until soft peaks form, about 3-4 minutes.
- Start adding the sugar slowly, one tablespoon at a time, letting each addition dissolve completely before adding the next. This should take about 5-7 minutes total.
- Keep whipping until stiff peaks form. The meringue should be glossy and thick. When you lift the beater, the peak should stand straight up without flopping. Rub a little between your fingers—if it feels smooth and not grainy, the sugar is fully dissolved. This usually takes another 3-4 minutes.
- Add the vanilla extract and whip for another 30 seconds until combined.
- Transfer the meringue to your piping bag.
- Pipe the ghost shapes: Hold the bag straight up and down, about 1/2 inch above the baking sheet. Squeeze gently to create a round base, then pull up slightly while continuing to squeeze to create the ghost body. Release pressure and pull away to create a little tail at the top. Space them about 2 inches apart.
- Add the chocolate chip eyes: While the meringue is still wet, gently press two mini chocolate chips into each ghost for eyes. Don’t push too hard or you’ll deflate the meringue.
- Bake for 60-75 minutes. The meringues should be dry to the touch and easily lift off the parchment paper. They shouldn’t be brown at all.
- Turn off the oven and let them cool inside. Leave the door slightly ajar with a wooden spoon handle. Let them cool completely for at least 1 hour.
Notes
Humidity is your enemy—save this recipe for a dry day. Don’t over-whip the meringue; stop if it starts looking grainy or watery. Pipe with confidence for best shape. Let cookies cool completely in the turned-off oven to fully dry out. Store in an airtight container at room temperature for up to a week; do not refrigerate. Can be frozen for up to 3 months.
Nutrition
- Serving Size: 1 cookie
- Calories: 45
- Sugar: 9
- Sodium: 15
- Fat: 1
- Carbohydrates: 9
- Protein: 1
Keywords: Halloween cookies, meringue cookies, ghost cookies, chocolate chip eyes, gluten-free dessert, dairy-free dessert, easy Halloween recipe


