It was 11:47 PM on a random Wednesday in November, and I had a ridiculous, almost desperate craving for a sugar cookie. Not just any sugar cookie, mind you. I wanted one that was soft in the middle, crisp at the edges, and absolutely drowning in royal icing. The problem? I was supposed to be making a “proper” Thanksgiving dessert for a dinner party the next weekend. A pumpkin cheesecake, maybe, or a pecan pie. Something serious and grown-up. But I didn’t have cream cheese or pecans. I had butter, sugar, flour, and a bag of powdered sugar that was starting to look me in the eye. And then the idea hit me—what if I made the cookies I actually wanted to eat, but made them look like turkeys? I mean, it was November. It practically counts as holiday prep, right?
So there I was, standing in my kitchen in my pajamas, the only light coming from above the stove. I grabbed my trusty cookie cutters, a piping bag I’d bought on a whim months ago, and started mixing. Honestly, I didn’t know if it would work. I’d never done royal icing details that intricate before. But something about the late hour loosened the usual rules in my head. I wasn’t trying to impress anyone. I was just following a weird, specific craving. And you know what? That batch of decorated turkey sugar cookies turned out so good, I scrapped the fancy dessert entirely. I brought a platter of these goofy, gorgeous, perfectly iced turkeys to the party, and they were gone in twenty minutes. Someone even asked if I’d taken a class. Nope. Just a late-night whim and a whole lot of powdered sugar. Let’s make them together.
Why You’ll Love This Recipe
If you’re the kind of person who hosts Thanksgiving dinner or a Friendsgiving potluck, you know the pressure is real. You want a dessert that looks like you spent hours on it but doesn’t make you want to cry in the kitchen. These decorated turkey sugar cookies are that recipe. They look ridiculously impressive on a dessert table, but the process is actually pretty forgiving. I’ve tested this exact method about six times now (my coworkers were very happy taste-testers), and I can tell you—it works every time.
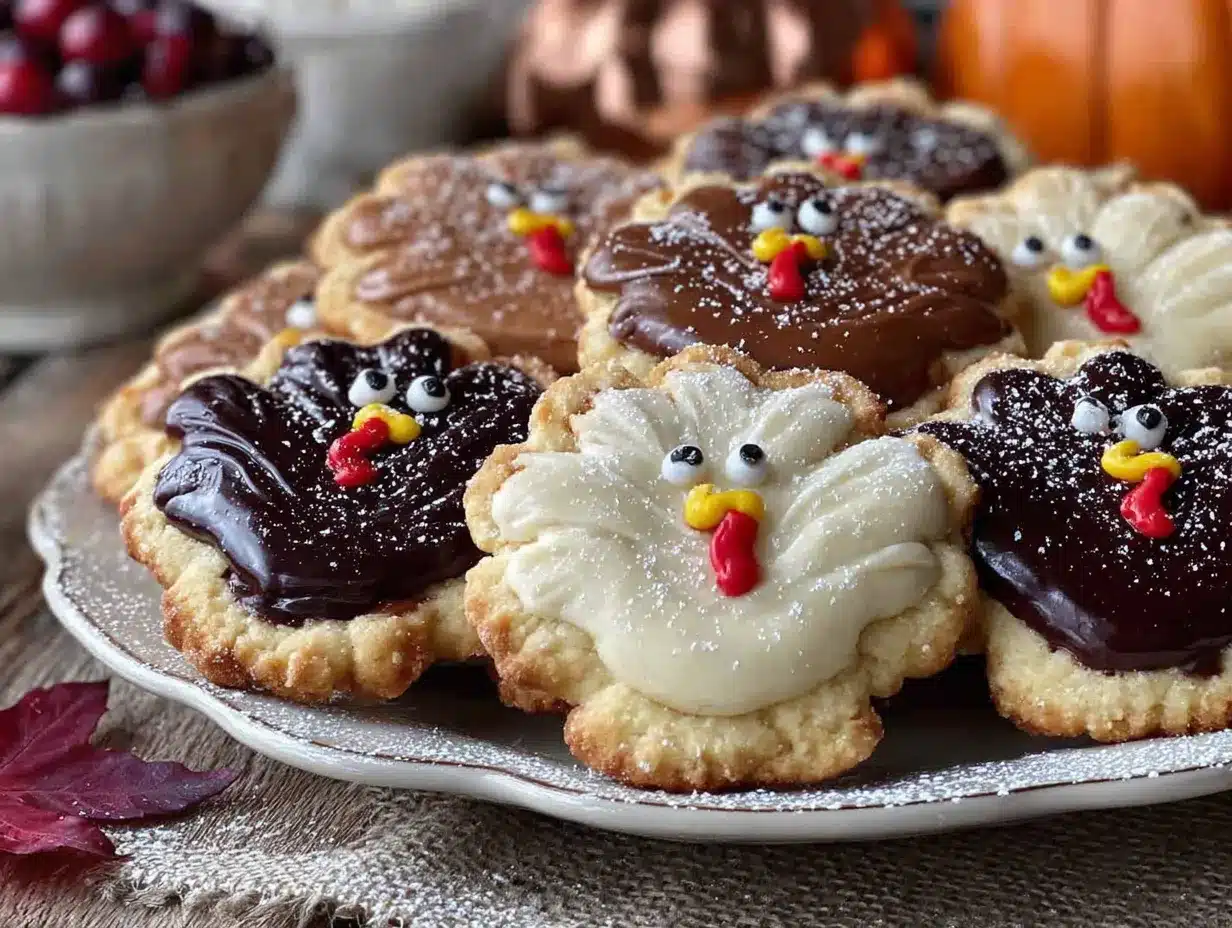
- Show-Stopping Presentation: These cookies look like little works of art. The royal icing feathers and gobbler details will have your guests snapping photos before they take a bite.
- Make-Ahead Magic: You can bake the cookies days in advance and decorate them the night before your gathering. Zero stress on the big day.
- Totally Customizable: Use your favorite sugar cookie recipe as the base, or go gluten-free. The royal icing adapts beautifully.
- Crowd-Pleasing Flavor: Let’s be honest—everyone loves a good sugar cookie. The royal icing adds that perfect snap and sweetness.
- Fun for All Ages: This is the kind of recipe that gets kids and adults alike gathered around the counter. It’s messy, creative, and absolutely worth it.
What makes this version different from the dozens of turkey cookie tutorials out there? It’s the royal icing consistency. I spent a whole weekend getting it just right—not too runny, not too stiff. You want it to hold a sharp edge for those tail feathers but still settle into a smooth, glossy finish. I also figured out a trick for piping the feathers that doesn’t require a steady hand or years of experience. You’ll feel like a pro, I promise.
What Ingredients You Will Need
This recipe uses simple, pantry-friendly ingredients to create cookies that are both beautiful and delicious. You probably have most of these already, which is the best feeling when a baking craving hits at 11 PM.
For the Sugar Cookies
- Unsalted butter, softened (1 cup / 2 sticks) – I always use Kerrygold for its rich flavor. Make sure it’s truly soft, not melted.
- Granulated sugar (1 cup / 200g) – Standard white sugar works perfectly here.
- Large egg (1, room temperature) – This helps the dough come together smoothly.
- Vanilla extract (1 ½ teaspoons) – Pure vanilla makes a noticeable difference. I prefer Nielsen-Massey.
- All-purpose flour (2 ½ cups / 312g) – Spoon and level it; don’t scoop directly from the bag.
- Baking powder (½ teaspoon) – Gives the cookies a slight lift without puffing them up too much.
- Salt (½ teaspoon) – Balances the sweetness. I use fine sea salt.
For the Royal Icing
- Powdered sugar (4 cups / 480g) – Sift it first to avoid lumps. Trust me on this one.
- Meringue powder (3 tablespoons) – This is the secret to stiff, glossy royal icing. I use Wilton brand.
- Warm water (about 5-6 tablespoons) – Add it slowly. The exact amount depends on humidity.
- Vanilla extract (½ teaspoon, clear if you want bright white icing) – Optional, but adds nice flavor.
- Gel food coloring (orange, red, brown, yellow, and green) – Americolor gels are my go-to. They don’t thin the icing.
For Decorating
- Piping bags (disposable or reusable) – I like the Wilton 12-inch disposable bags.
- Piping tips (round tips #2 and #3, and a small leaf tip #352) – These give you precision.
- Couplers (2-3) – Makes switching colors easy.
- Turkey cookie cutter (about 4 inches tall) – Any shape works, but a simple turkey silhouette is easiest for beginners.
- Toothpicks – For popping air bubbles and fixing small mistakes.
- Edible glitter or sanding sugar (optional) – Adds a festive shimmer.
Equipment Needed
You don’t need a professional bakery setup, but a few key tools will make your life much easier. I’ve learned the hard way that trying to pipe royal icing with a Ziploc bag and a snipped corner is a recipe for frustration. Just get the real piping bags—they’re cheap and worth every penny. A good baking sheet with a silicone mat or parchment paper is non-negotiable for even baking. I use Nordic Ware baking sheets; they don’t warp. If you don’t have a stand mixer, a hand mixer works fine for both the cookie dough and the royal icing. You’ll also want a small offset spatula for spreading icing if you decide to flood-fill the cookies. And please, for the love of all things sweet, get a kitchen scale. Measuring flour by weight is the only way to guarantee consistent cookies.
Preparation Method
Step 1: Make the Sugar Cookie Dough
In a large bowl, beat the softened butter and granulated sugar together until light and fluffy, about 2-3 minutes. Scrape down the sides. Add the egg and vanilla extract, and beat until combined. In a separate bowl, whisk together the flour, baking powder, and salt. Gradually add the dry ingredients to the wet mixture, mixing on low speed until a soft dough forms. Don’t overmix—stop as soon as it comes together. The dough should feel smooth and not sticky. If it’s too sticky, add a tablespoon more flour.
Step 2: Chill the Dough
Divide the dough into two discs, wrap each tightly in plastic wrap, and refrigerate for at least 1 hour. This step is crucial. Chilled dough holds its shape better when cut and doesn’t spread as much in the oven. I’ve skipped this before and ended up with turkey blobs instead of turkey shapes. Learn from my mistakes.
Step 3: Roll and Cut
Preheat your oven to 350°F (175°C). Line two baking sheets with parchment paper or silicone mats. On a lightly floured surface, roll one disc of dough to about ¼-inch thickness. Use your turkey cookie cutter to cut out shapes. Re-roll the scraps once; after that, the dough gets tough. Place the cut cookies about 2 inches apart on the prepared sheets. Pop the sheets in the fridge for 10 minutes before baking—this helps maintain sharp edges.
Step 4: Bake
Bake for 8-10 minutes, or until the edges are just barely golden. The centers should look set but not brown. Let the cookies cool on the baking sheet for 5 minutes, then transfer them to a wire rack to cool completely. Do not even think about icing them while they’re warm. The royal icing will melt right off.
Step 5: Make the Royal Icing
In the bowl of a stand mixer (or using a hand mixer), combine the powdered sugar and meringue powder. Add 5 tablespoons of warm water and the vanilla extract. Beat on low speed until combined, then increase to medium-high speed and beat for 4-5 minutes. The icing should be thick, glossy, and hold a stiff peak when you lift the beater. If it’s too thick, add water one teaspoon at a time. If it’s too thin, add more powdered sugar a tablespoon at a time. This is the consistency you want for piping details. For flooding (filling in large areas), thin a portion of the icing with water until it flows like honey and a ribbon of icing disappears back into itself in about 10 seconds.
Step 6: Color and Bag the Icing
Divide the stiff icing into small bowls for each color you need: brown for the body, orange for the beak and feet, red for the gobbler, yellow for the beak highlight, and green for the feathers. Use gel food coloring sparingly—a little goes a long way. For each color, transfer about 2 tablespoons to a separate bowl and thin it with a few drops of water for flooding. Spoon the stiff icing into piping bags fitted with #2 tips, and the flood icing into bags fitted with #3 tips.
Step 7: Outline and Flood
Start with the turkey body. Use the brown stiff icing to outline the entire cookie. Then, fill in the outline with the brown flood icing. Use a toothpick to guide the icing into corners and pop any air bubbles. Let this dry for at least 30 minutes before adding details. For the feathers, outline and flood each feather section with green or yellow flood icing. Let everything dry completely—about 2 hours.
Step 8: Add Details
Once the base colors are dry, use the stiff orange icing to pipe a small triangle beak. Add a tiny yellow dot on top for a highlight. Use the red stiff icing to pipe a gobbler (that’s the dangly red bit under the beak). Pipe small brown dots for eyes. For the feathers, use the green stiff icing and a leaf tip #352 to pipe small feather textures. You can also pipe little dots or lines in contrasting colors. Let the cookies dry uncovered for at least 4 hours, or overnight, before stacking or serving.
Cooking Tips & Techniques
Let me tell you about the first time I tried to make royal icing feathers. I was so excited, I thinned the icing too much, and it all ran off the cookie like a sad little waterfall. I stood there, spatula in hand, wondering if I could just call them “abstract art turkeys.” So here’s the deal—consistency is everything. When you’re piping details, the icing should hold a stiff peak. When you’re flooding, it should be thin enough to spread but thick enough to stay within the lines. If you’re unsure, do a test squeeze on a paper towel first. Another thing I learned the hard way: royal icing dries fast. Keep your piping bags covered with a damp paper towel when you’re not using them. Otherwise, the tips will clog, and you’ll be cursing while trying to unclog a #2 tip at midnight. Not that I’ve done that. Twice.
For perfect sugar cookies every time, make sure your butter is truly softened but not melted. Melted butter leads to spread-out, flat cookies. Also, don’t skip the chilling steps. I know it’s tempting, but cold dough is your best friend. If you’re baking for a crowd, double the recipe. These cookies disappear fast. And if you’re short on time, you can bake the cookies up to a week in advance and store them in an airtight container at room temperature. Decorate them the day before your party.
Variations & Adaptations
Gluten-Free Version
Swap the all-purpose flour with a 1:1 gluten-free baking flour blend. I’ve used King Arthur Measure for Measure with great results. Add an extra tablespoon of milk to the dough if it seems dry. The cookies won’t spread as much, so they’re actually easier to cut into shapes.
Vegan Royal Icing
Replace the meringue powder with 3 tablespoons of aquafaba (the liquid from a can of chickpeas). Beat it with the powdered sugar and water until stiff peaks form. It works surprisingly well, though the icing is slightly less glossy. Add a pinch of cream of tartar to help stabilize it.
Different Holiday Shapes
This royal icing technique works for any holiday cookie. Use a leaf cutter for fall, a snowflake for winter, or a heart for Valentine’s Day. The feather piping technique is especially pretty on leaf-shaped cookies.
Spiced Sugar Cookies
Add ½ teaspoon of cinnamon, ¼ teaspoon of nutmeg, and a pinch of cloves to the dry ingredients. It gives the cookies a warm, cozy flavor that pairs beautifully with the sweet royal icing.
Serving & Storage Suggestions
These cookies are best served at room temperature. Arrange them on a large platter or cake stand for maximum visual impact. I like to group them by color pattern—it looks more intentional. For a Thanksgiving table, they pair beautifully with a hot cup of apple cider or a spiced chai latte. If you’re serving them at a party, place them on a pedestal cake stand so they’re at eye level. Trust me, guests will hover.
To store, place the fully dried cookies in an airtight container, layered between sheets of parchment paper. They’ll keep at room temperature for up to two weeks. Do not refrigerate them—the moisture will make the royal icing sticky and soft. You can freeze the undecorated baked cookies for up to three months. Just thaw them at room temperature before icing. The flavors actually get better after a day or two, as the cookie softens slightly and the icing sets completely.
Nutritional Information & Benefits
Let’s be real—these are decorated sugar cookies. They’re a treat, not a health food. But here’s the breakdown per cookie (based on a 4-inch turkey shape): approximately 180 calories, 8g fat, 26g carbohydrates, 2g protein, and 15g sugar. The royal icing adds minimal fat but does increase the sugar content. If you’re watching your intake, you can reduce the sugar in the cookie dough by ¼ cup without affecting the texture too much. The good news? These cookies are free of common allergens like nuts and soy (check your food coloring). They’re also naturally egg-free if you use the vegan royal icing option. I see these as a once-a-year indulgence that brings people together. And honestly, that’s worth every calorie.
Conclusion
These decorated turkey sugar cookies are more than just a dessert—they’re a conversation starter, a memory-maker, and a way to show off without breaking a sweat. Whether you’re hosting a big Thanksgiving dinner or just bringing a plate to a friend’s potluck, these cookies will steal the show. I love them because they look like I spent hours and hours, but the process is actually really forgiving. You can mess up a feather and just cover it with another one. You can make the eyes a little crooked and call it “character.” That’s the beauty of royal icing—it’s paint, and you’re the artist.
So grab your cookie cutter, crank up some music, and get messy. I promise, the first bite of one of these little guys will make you smile. And when your friends ask where you learned to decorate like that, just smile mysteriously and say, “Late night inspiration.” They’ll never know it was 11:47 PM on a Wednesday.
Have you made these turkey cookies? Tag me in your photos—I’d love to see your creations! Drop a comment below if you tried a fun variation. Happy baking, friend.
Frequently Asked Questions
Can I use a different cookie recipe as the base?
Absolutely. Any sturdy cut-out sugar cookie recipe works. Avoid recipes that spread a lot, like chewy or cakey cookies. A shortbread-style dough is also a great option.
How far in advance can I make these cookies?
You can bake the cookies up to a week ahead and store them in an airtight container. Decorate them up to two days before serving. The royal icing needs at least 4 hours to dry completely.
My royal icing is too runny. How do I fix it?
Add more sifted powdered sugar, one tablespoon at a time, and beat on low speed until it thickens. If it’s too thick, add water one teaspoon at a time. Always test the consistency on a paper towel first.
Can I freeze decorated cookies?
It’s not recommended. The royal icing can become sticky and lose its shine when thawed. Freeze the undecorated cookies instead, then ice them after thawing.
What if I don’t have a turkey cookie cutter?
Use a large round cutter for the body and a small triangle cutter for the beak. Pipe the feathers freehand with royal icing. It’s actually easier than it sounds!
Pin This Recipe!
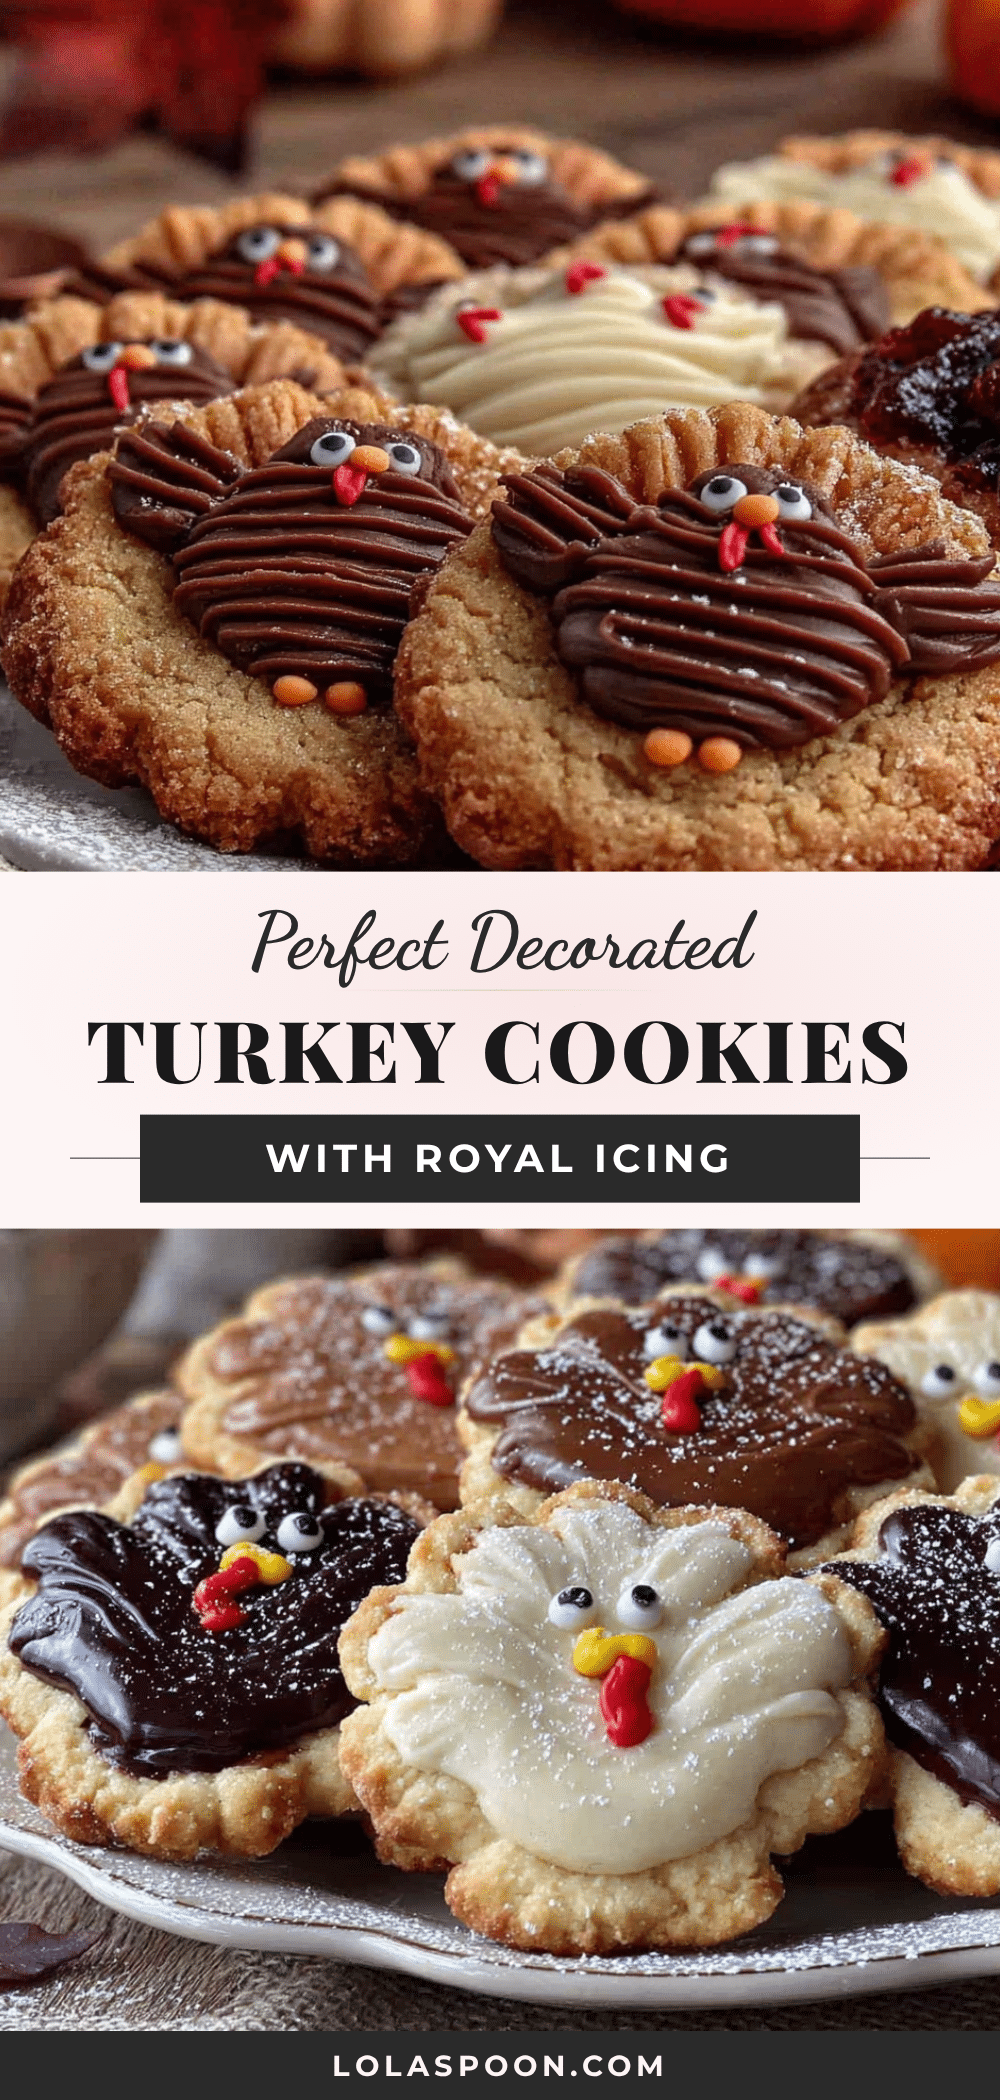
Perfect Decorated Turkey Sugar Cookies: Easy Royal Icing Recipe

These decorated turkey sugar cookies are soft in the middle, crisp at the edges, and absolutely drowning in royal icing. They look ridiculously impressive on a dessert table, but the process is actually pretty forgiving.
- Prep Time: 1 hour 30 minutes
- Cook Time: 10 minutes
- Total Time: 2 hours 40 minutes
- Yield: 24 servings 1x
- Category: Dessert
- Cuisine: American
Ingredients
- 1 cup (2 sticks) unsalted butter, softened
- 1 cup (200g) granulated sugar
- 1 large egg, room temperature
- 1 ½ teaspoons vanilla extract
- 2 ½ cups (312g) all-purpose flour
- ½ teaspoon baking powder
- ½ teaspoon fine sea salt
- 4 cups (480g) powdered sugar, sifted
- 3 tablespoons meringue powder
- 5–6 tablespoons warm water
- ½ teaspoon vanilla extract (clear for bright white icing)
- Gel food coloring (orange, red, brown, yellow, green)
- Piping bags (disposable or reusable)
- Piping tips (round tips #2 and #3, small leaf tip #352)
- Couplers (2-3)
- Turkey cookie cutter (about 4 inches tall)
- Toothpicks
- Edible glitter or sanding sugar (optional)
Instructions
- Make the sugar cookie dough: In a large bowl, beat the softened butter and granulated sugar together until light and fluffy, about 2-3 minutes. Scrape down the sides. Add the egg and vanilla extract, and beat until combined. In a separate bowl, whisk together the flour, baking powder, and salt. Gradually add the dry ingredients to the wet mixture, mixing on low speed until a soft dough forms. Don’t overmix—stop as soon as it comes together. The dough should feel smooth and not sticky. If it’s to…
- Chill the dough: Divide the dough into two discs, wrap each tightly in plastic wrap, and refrigerate for at least 1 hour.
- Roll and cut: Preheat your oven to 350°F (175°C). Line two baking sheets with parchment paper or silicone mats. On a lightly floured surface, roll one disc of dough to about ¼-inch thickness. Use your turkey cookie cutter to cut out shapes. Re-roll the scraps once; after that, the dough gets tough. Place the cut cookies about 2 inches apart on the prepared sheets. Pop the sheets in the fridge for 10 minutes before baking.
- Bake: Bake for 8-10 minutes, or until the edges are just barely golden. The centers should look set but not brown. Let the cookies cool on the baking sheet for 5 minutes, then transfer them to a wire rack to cool completely.
- Make the royal icing: In the bowl of a stand mixer (or using a hand mixer), combine the powdered sugar and meringue powder. Add 5 tablespoons of warm water and the vanilla extract. Beat on low speed until combined, then increase to medium-high speed and beat for 4-5 minutes. The icing should be thick, glossy, and hold a stiff peak when you lift the beater. If it’s too thick, add water one teaspoon at a time. If it’s too thin, add more powdered sugar a tablespoon at a time. For flooding, thin a p…
- Color and bag the icing: Divide the stiff icing into small bowls for each color you need: brown for the body, orange for the beak and feet, red for the gobbler, yellow for the beak highlight, and green for the feathers. Use gel food coloring sparingly. For each color, transfer about 2 tablespoons to a separate bowl and thin it with a few drops of water for flooding. Spoon the stiff icing into piping bags fitted with #2 tips, and the flood icing into bags fitted with #3 tips.
- Outline and flood: Start with the turkey body. Use the brown stiff icing to outline the entire cookie. Then, fill in the outline with the brown flood icing. Use a toothpick to guide the icing into corners and pop any air bubbles. Let this dry for at least 30 minutes before adding details. For the feathers, outline and flood each feather section with green or yellow flood icing. Let everything dry completely—about 2 hours.
- Add details: Once the base colors are dry, use the stiff orange icing to pipe a small triangle beak. Add a tiny yellow dot on top for a highlight. Use the red stiff icing to pipe a gobbler. Pipe small brown dots for eyes. For the feathers, use the green stiff icing and a leaf tip #352 to pipe small feather textures. You can also pipe little dots or lines in contrasting colors. Let the cookies dry uncovered for at least 4 hours, or overnight, before stacking or serving.
Notes
Consistency is everything for royal icing. When piping details, the icing should hold a stiff peak. When flooding, it should be thin enough to spread but thick enough to stay within the lines. Keep piping bags covered with a damp paper towel when not in use to prevent clogging. Do not skip chilling the dough—it helps maintain sharp edges. For best results, bake cookies up to a week in advance and decorate the day before serving.
Nutrition
- Serving Size: 1 cookie
- Calories: 180
- Sugar: 15
- Sodium: 80
- Fat: 8
- Saturated Fat: 5
- Carbohydrates: 26
- Protein: 2
Keywords: turkey cookies, sugar cookies, royal icing, Thanksgiving cookies, decorated cookies, turkey sugar cookies, easy royal icing


