I was standing in the frozen foods aisle last December, just trying to grab a bag of peas, when a woman walked past me carrying a tray of those store-bought cheesecake bites. And that smell—that faint, artificial chocolate-mint scent wafting off the plastic wrap—hit me like a freight train. Suddenly I was ten years old, sitting cross-legged on my aunt Carol’s linoleum kitchen floor, watching her crush candy canes with a wooden rolling pin while Christmas music crackled from a tiny radio. She’d let me lick the spatula clean, and I’d sit there, sticky-fingered and happy, while she stacked her famous dessert bars on a chipped platter. I haven’t seen that platter in fifteen years. But I can still feel the cold floor beneath me and hear her humming off-key.
Honestly, I’d forgotten all about those afternoons until that moment in the grocery store. I stood there holding my peas, feeling a little ridiculous, trying to remember exactly what those bars tasted like. They weren’t fancy—nothing my aunt made ever was—but they had this perfect balance of rich chocolate, cool peppermint, and creamy cheesecake that I’ve been chasing ever since. I mean, I’ve tried a dozen recipes over the years, and none of them got it right. They were either too sweet, or the crust fell apart, or the peppermint flavor tasted like toothpaste. You know that feeling when you’re trying to recreate a memory and you just can’t quite get there?
So last week, I decided to stop messing around and actually develop a version that works. Not a fussy, three-day project, but something you can pull together on a Tuesday night after work. Something that tastes like the holidays without requiring a culinary degree. These easy peppermint mocha cheesecake bars are the result of three test batches, a near-disaster with a springform pan, and one very patient husband who ate a lot of failed crusts. They’re rich, they’re creamy, they’ve got that coffee kick that makes them feel grown-up, and the peppermint crunch on top is exactly right. This is the recipe I’ve been looking for—and I think it might be the one you’ve been looking for too.
Why You’ll Love This Recipe
Let me tell you why these easy peppermint mocha cheesecake bars are about to become your new holiday go-to. I tested this recipe four times before I got it right, and every single batch taught me something. The first one was too dense. The second one cracked right down the middle. The third one? Well, let’s just say I learned that not all peppermint extracts are created equal. But by the fourth batch, I had it dialed in—creamy, smooth, and absolutely packed with flavor.
- Quick & Easy: These come together in about 30 minutes of active prep time. No water bath, no complicated techniques, no standing over a double boiler for an hour. Perfect for those busy December weeknights when you still want to bring something special to the party.
- Simple Ingredients: You probably already have most of these in your pantry. The shopping list is short, and there’s nothing weird or expensive. I’m talking butter, cream cheese, cocoa powder, and a good quality peppermint extract.
- Perfect for Holiday Gatherings: These bars are made for cookie swaps, office parties, and family dinners. They slice cleanly, they travel well, and they look impressive without any fancy decorating skills.
- Crowd-Pleaser: Every single person who tried these—including my picky neighbor who “doesn’t like mint desserts”—asked for the recipe. Kids love the crunch, adults love the coffee undertone, and everyone loves the cheesecake.
- Unbelievably Delicious: The texture is the real star here. A crunchy chocolate cookie crust, a silky mocha cheesecake filling, and that cool peppermint finish. It’s the kind of dessert that makes you close your eyes after the first bite.
What makes these different from every other peppermint cheesecake recipe out there? It’s the mocha element. Most recipes just dump in chocolate and call it a day, but the espresso powder here does something magical. It doesn’t make the bars taste like coffee—it deepens the chocolate flavor and balances the sweetness of the peppermint. It’s a subtle touch, but it’s the difference between a good bar and a great one.
What Ingredients You Will Need
This recipe uses simple, wholesome ingredients that work together to create something truly special. Most of these are pantry staples, and the ones that aren’t are easy to find at any grocery store. Here’s what you’ll need, broken down by component.
For the Crust
- 1 ½ cups (150g) chocolate cookie crumbs (about 20 Oreos, filling removed, or use chocolate graham crackers)
- 5 tablespoons (70g) unsalted butter, melted
- 2 tablespoons (25g) granulated sugar
- ¼ teaspoon salt
Pro tip from my test kitchen: I prefer using Oreos for the crust because they’re already perfectly chocolatey and they hold together beautifully. Just scrape off the cream filling first—I know, it feels wasteful, but the filling makes the crust too soft. If you’re in a hurry, chocolate graham crackers work great too.
For the Cheesecake Filling
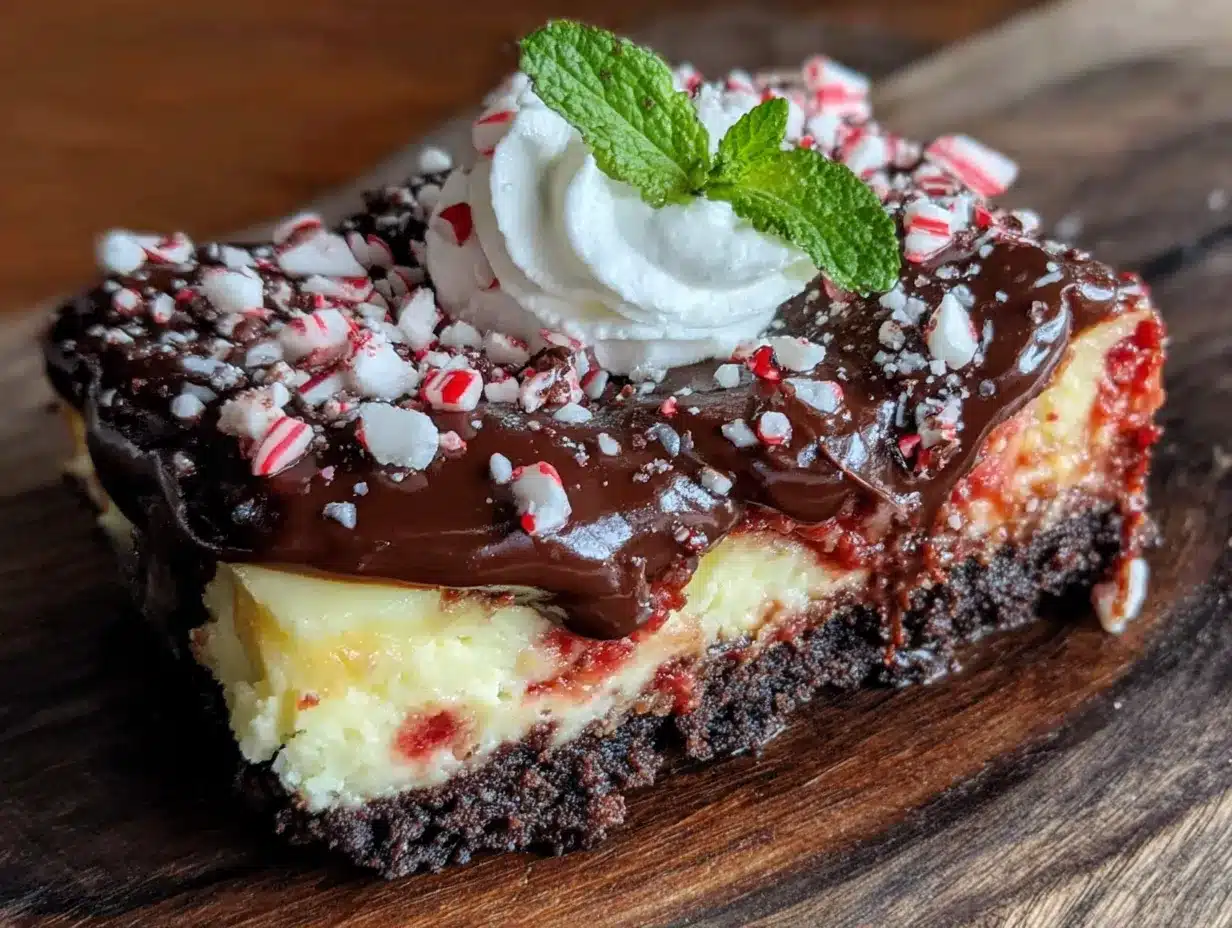
- 16 ounces (450g) cream cheese, softened to room temperature
- ½ cup (100g) granulated sugar
- 2 large eggs, room temperature
- 1 teaspoon vanilla extract
- ½ teaspoon peppermint extract (use a good brand—I like Nielsen-Massey)
- ¼ cup (60ml) heavy cream
- 1 tablespoon instant espresso powder (dissolved in 1 tablespoon hot water)
- ¼ cup (30g) unsweetened cocoa powder, sifted
A note on extracts: Peppermint extract is potent stuff. A little goes a long way, and cheap extracts can taste artificial or even medicinal. I learned this the hard way with batch number two. Spend the extra dollar on a quality brand—your cheesecake will thank you.
For the Topping
- ½ cup (120ml) heavy cream
- 1 tablespoon powdered sugar
- ¼ teaspoon vanilla extract
- ¼ cup (about 4-5) crushed candy canes or peppermint candies
- Optional: chocolate shavings for garnish
Equipment Needed
You don’t need a fancy kitchen to make these bars. Here’s what you’ll actually use:
- 8×8-inch baking pan — This is the perfect size for these bars. If you only have a 9×9, the bars will be slightly thinner and may need a few minutes less baking time.
- Parchment paper — Non-negotiable. Line your pan with two overlapping strips so you can lift the entire block of cheesecake out cleanly. Trust me on this.
- Electric hand mixer or stand mixer — You need this to get the cream cheese smooth and fluffy. A whisk will work if you have strong arms, but it’s not fun.
- Mixing bowls — One large, one medium.
- Food processor or zip-top bag and rolling pin — For crushing the cookies and candy canes. The food processor is faster, but there’s something satisfying about smashing things with a rolling pin.
- Spatula — A rubber spatula for scraping down the bowl.
- Measuring cups and spoons — Standard set.
I bought my 8×8 pan for twelve dollars at a discount store, and it’s still going strong five years later. You really don’t need expensive equipment here—just things that work.
Preparation Method
Let’s get to the good part. Here’s how to make these easy peppermint mocha cheesecake bars, step by step. I’ve included all the little details that made a difference in my testing.
- Preheat your oven to 325°F (160°C). Line your 8×8 baking pan with parchment paper, leaving some overhang on two opposite sides. This creates handles so you can lift the whole thing out later.
- Make the crust. In a food processor, pulse the chocolate cookies until they become fine crumbs. You should have about 1½ cups. Transfer to a medium bowl, add the melted butter, sugar, and salt, and stir until the mixture looks like wet sand. Press this firmly into the bottom of your prepared pan. I use the bottom of a measuring cup to really pack it down—this prevents a crumbly crust later.
- Bake the crust for 10 minutes. Set a timer. You want it to be fragrant and set, but not dark. Remove from the oven and let it cool while you make the filling. Leave the oven on.
- Make the cheesecake filling. In a large bowl, beat the softened cream cheese with an electric mixer on medium speed until smooth and creamy, about 2 minutes. Scrape down the sides of the bowl with your spatula. Add the sugar and beat for another minute until light and fluffy.
- Add the eggs one at a time. Beat on low speed after each addition until just combined. Overmixing at this stage incorporates too much air, which can cause cracks. Trust me—I learned this from batch one.
- Add the flavorings. Mix in the vanilla extract, peppermint extract, and heavy cream until combined. In a small bowl, dissolve the instant espresso powder in 1 tablespoon of hot water, then add it to the batter along with the sifted cocoa powder. Mix on low speed until the batter is smooth and uniformly chocolate-colored. Scrape the bowl one more time to make sure everything is incorporated.
- Pour the filling over the crust. Use your spatula to spread it evenly, right to the edges. Give the pan a gentle tap on the counter to release any air bubbles.
- Bake for 35-40 minutes. The edges should look set and slightly puffed, but the center should still jiggle just a little when you gently shake the pan. This is the sweet spot—it will continue to set as it cools. Overbaking leads to dry, cracked cheesecake.
- Cool completely at room temperature. This takes about 1-2 hours. Don’t rush this step. If you put warm cheesecake in the fridge, condensation will form on the surface and make it soggy.
- Chill for at least 4 hours, preferably overnight. This is the hardest part, I know. But the bars need this time to fully set and develop their flavor. Cover the pan with plastic wrap and refrigerate.
- Make the topping. When you’re ready to serve, whip the heavy cream, powdered sugar, and vanilla extract together until soft peaks form. Don’t overwhip—you want it billowy, not stiff.
- Assemble and serve. Lift the cheesecake block out of the pan using the parchment handles. Place it on a cutting board and slice into 16 squares. Top each square with a dollop of whipped cream and a sprinkle of crushed candy canes. Add chocolate shavings if you’re feeling fancy.
Cooking Tips & Techniques
After four batches and a lot of trial and error, here’s what I learned that actually makes a difference.
Room temperature ingredients matter more than you think. Cold cream cheese creates lumps that no amount of mixing can fix. Cold eggs can cause the batter to curdle. I know it’s annoying to plan ahead, but set your cream cheese and eggs on the counter about an hour before you start baking. Your future self will thank you.
Don’t skip the parchment paper. I almost did on batch three because I was out, and let me tell you, trying to pry cold cheesecake out of a pan is not a good time. The parchment handles make everything so much easier.
The jiggle test is your friend. When the cheesecake is done baking, the center should wobble like Jell-O when you gently shake the pan. If it’s completely firm, it’s overbaked. If it’s liquidy, it needs more time. That gentle jiggle is exactly what you’re looking for.
Crush the candy canes right before serving. If you crush them too early, they’ll absorb moisture from the air and turn into a sticky mess. I learned this the hard way when I tried to prep everything the night before. Keep the candy canes in their wrapper until you’re ready to sprinkle them on.
Use a sharp, wet knife for clean slices. Run your knife under hot water, dry it off, and make one clean cut. Wipe the blade clean between cuts. This gives you those beautiful, Instagram-worthy slices without the smeared edges.
Variations & Adaptations
One of the best things about this recipe is how flexible it is. Here are some ways to make it your own.
Gluten-Free Version: Use gluten-free chocolate sandwich cookies for the crust. Most brands work well, just check the label. The filling itself is naturally gluten-free, so this is an easy swap.
Dairy-Free Adaptation: Use dairy-free cream cheese (I like Kite Hill or Violife), coconut cream instead of heavy cream, and a vegan butter substitute. The texture will be slightly different—a little less firm—but the flavor is still fantastic.
Extra Minty: If you’re a peppermint fanatic like my sister, increase the peppermint extract to ¾ teaspoon. You can also add a layer of melted dark chocolate on top before the whipped cream for a double-chocolate-mint experience.
No-Coffee Version: If you’re avoiding caffeine, just omit the espresso powder and increase the cocoa powder to ⅓ cup. The chocolate flavor will be a little less deep, but it’s still delicious.
Individual Mini Bars: Line a muffin tin with paper liners and press the crust into the bottom of each cup. Fill with cheesecake batter and bake for about 18-20 minutes. These are perfect for parties where everyone wants their own little dessert.
I tried the extra minty version last week, and honestly, it might be my new favorite. The peppermint flavor is more pronounced without being overwhelming, and it pairs beautifully with the dark chocolate shavings on top.
Serving & Storage Suggestions
These bars are best served cold, straight from the fridge. The texture is firm and creamy, and the peppermint crunch on top stays crisp. If you let them sit at room temperature for more than 20 minutes, the cheesecake will soften and the candy canes might start to melt. So keep them chilled until you’re ready to serve.
For a beautiful presentation, arrange the bars on a white platter and garnish with fresh mint leaves and chocolate curls. They look stunning next to a cup of hot coffee or a glass of cold milk. If you’re serving them at a holiday party, you can even dust them with a little powdered sugar for a snowy effect.
Storage: Store leftover bars in an airtight container in the refrigerator for up to 5 days. Place a sheet of parchment paper between layers if you’re stacking them. The whipped cream topping is best added right before serving, but if you have leftovers with topping, they’ll still be fine for a day or two.
Freezing: These freeze beautifully. Freeze the unsliced cheesecake block (without the topping) wrapped tightly in plastic wrap and then foil, for up to 3 months. When you’re ready to serve, thaw in the refrigerator overnight, then slice and add the topping. The texture stays remarkably creamy.
I actually prefer the flavor on day two. The chocolate and peppermint have a chance to meld together, and the crust softens just slightly. It’s a different experience than fresh, but equally delicious.
Nutritional Information & Benefits
Let’s be real—this is a dessert, not a health food. But knowing what’s in it can help you enjoy it mindfully. Here’s the approximate nutritional breakdown for one bar (based on 16 servings):
| Nutrient | Amount per Serving |
|---|---|
| Calories | 285 |
| Total Fat | 19g |
| Saturated Fat | 11g |
| Cholesterol | 75mg |
| Sodium | 210mg |
| Total Carbohydrates | 26g |
| Dietary Fiber | 2g |
| Sugars | 18g |
| Protein | 5g |
Potential Allergens: This recipe contains dairy, eggs, and gluten (from the cookies). For a dairy-free or gluten-free version, see the variations section above.
On a positive note, the cocoa powder in these bars is rich in antioxidants, and the peppermint can aid digestion. The cream cheese provides a small amount of protein and calcium. It’s not a superfood, but hey—it’s a holiday treat, and it’s meant to be enjoyed.
Conclusion
These easy peppermint mocha cheesecake bars are everything I wanted them to be. They’re rich without being heavy, festive without being fussy, and they come together in a fraction of the time most cheesecakes require. Every time I make them, I think about my aunt Carol’s kitchen and that chipped platter, and I smile. This recipe finally captures that memory—the cool peppermint, the deep chocolate, the creamy filling—in a way that feels real and right.
I hope you’ll try them and make them your own. Maybe you’ll add extra chocolate, or swap the mint for orange, or serve them with a scoop of vanilla ice cream. That’s the beauty of a good base recipe—it’s a starting point, not a rulebook.
If you make these, I’d love to hear about it. Drop a comment below and tell me how they turned out, or share a photo of your creation. And if you have a favorite holiday dessert memory, I’d love to hear that too. Happy baking, friends—may your kitchen smell like chocolate and peppermint and joy.
Frequently Asked Questions
Can I use regular graham crackers instead of chocolate cookies for the crust?
Absolutely. The flavor will be different—lighter and less chocolaty—but it still works great. Just use the same amount (1½ cups of crumbs) and add an extra tablespoon of cocoa powder if you want to keep some chocolate flavor in the crust.
Why did my cheesecake crack on top?
Cracks usually happen for two reasons: overbaking or overmixing. Make sure you’re not baking past that gentle jiggle stage, and mix on low speed after adding the eggs. Also, letting the cheesecake cool gradually in the turned-off oven with the door cracked can help prevent cracking.
Can I use peppermint oil instead of peppermint extract?
You can, but be very careful. Peppermint oil is much more concentrated than extract. Start with just 2-3 drops and taste the batter before adding more. A little goes a very long way, and too much can make the bars taste like mouthwash.
How far in advance can I make these bars?
You can make the entire cheesecake (without the topping) up to 3 days ahead. Keep it tightly wrapped in the refrigerator. Add the whipped cream and crushed candy canes just before serving for the best texture and appearance.
Can I double this recipe for a 9×13 pan?
Yes! Double all the ingredients and use a 9×13 baking pan. The baking time will be similar, but start checking at 35 minutes. You may need an extra 5-10 minutes. The bars will be slightly thinner, so adjust your slice size accordingly.
Pin This Recipe!
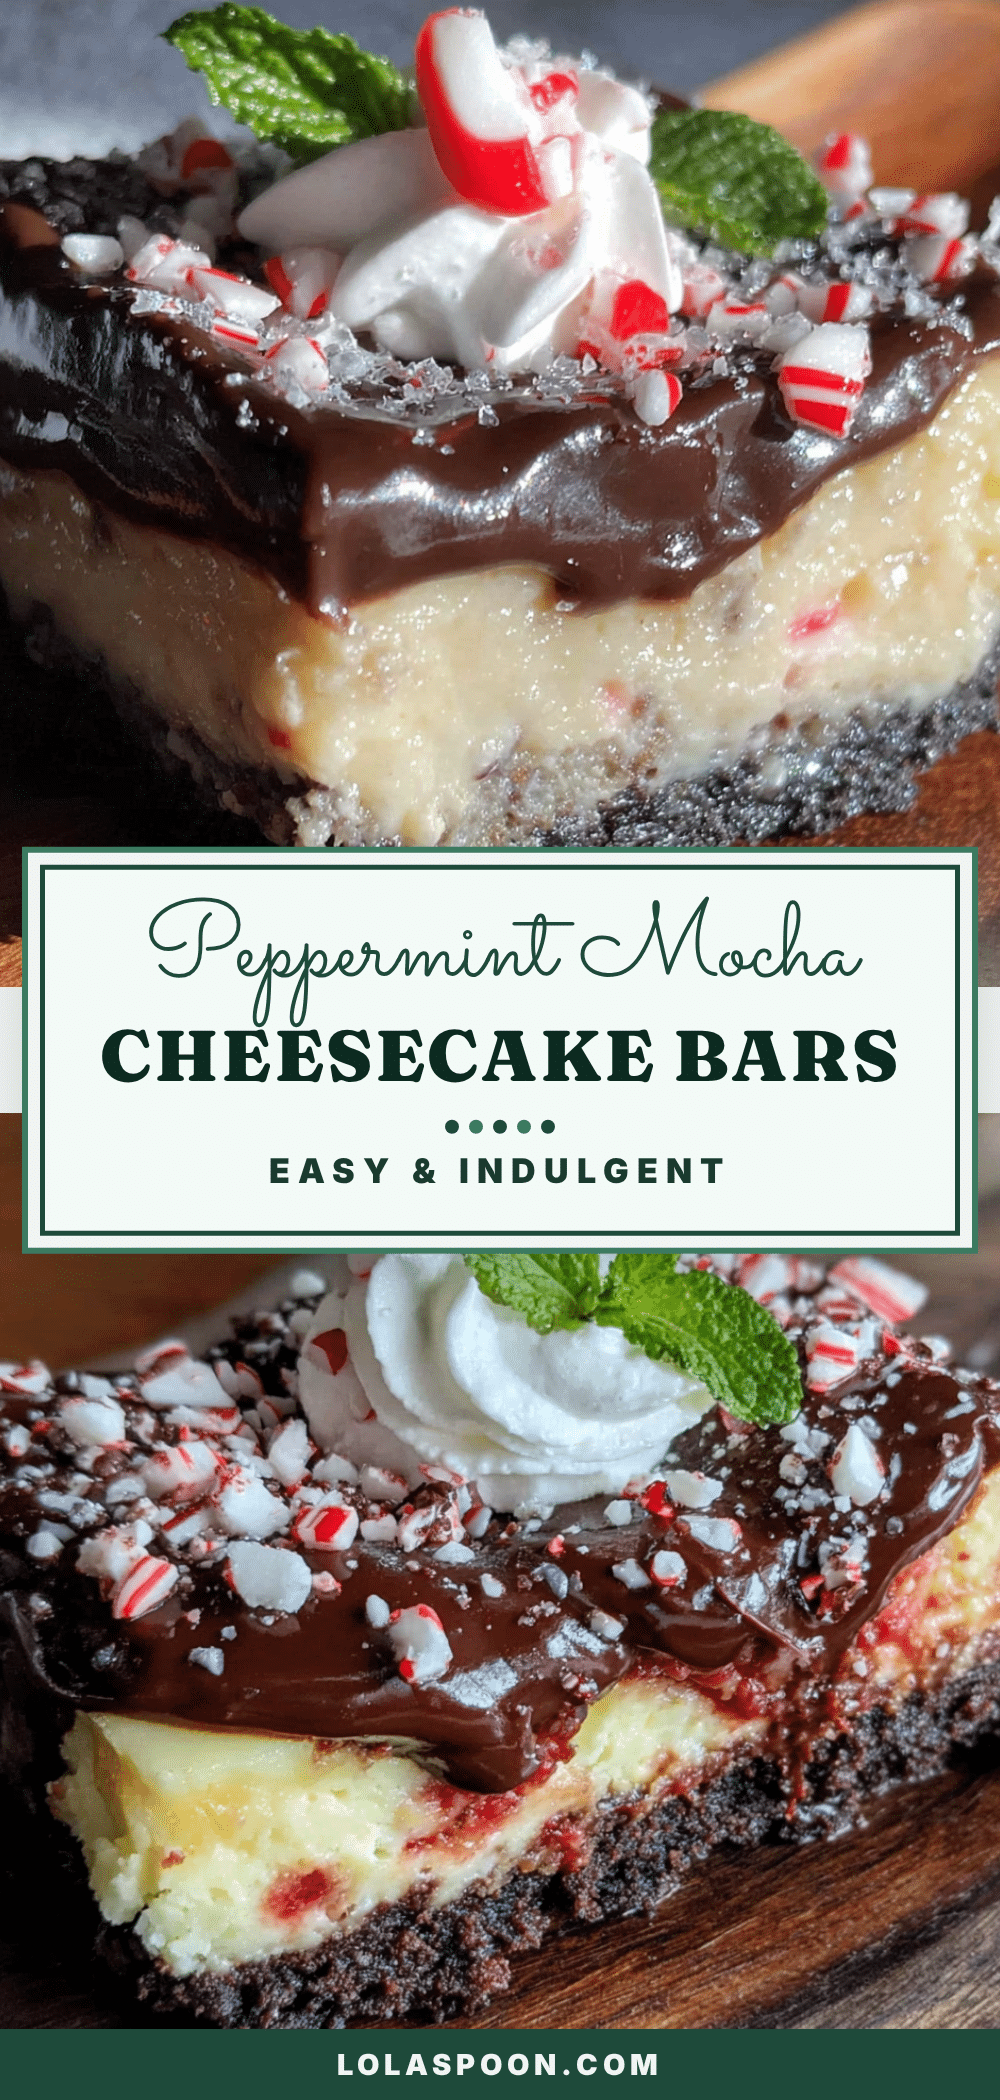
Easy Peppermint Mocha Cheesecake Bars: The Best Holiday Dessert
These easy peppermint mocha cheesecake bars are rich, creamy, and perfectly balanced with chocolate, cool peppermint, and a coffee kick. They come together in about 30 minutes of active prep time and are perfect for holiday gatherings.
- Prep Time: 30 minutes
- Cook Time: 35-40 minutes
- Total Time: 4 hours 35 minutes (includes chilling)
- Yield: 16 servings 1x
- Category: Dessert
- Cuisine: American
Ingredients
- 1 ½ cups (150g) chocolate cookie crumbs (about 20 Oreos, filling removed, or use chocolate graham crackers)
- 5 tablespoons (70g) unsalted butter, melted
- 2 tablespoons (25g) granulated sugar
- ¼ teaspoon salt
- 16 ounces (450g) cream cheese, softened to room temperature
- ½ cup (100g) granulated sugar
- 2 large eggs, room temperature
- 1 teaspoon vanilla extract
- ½ teaspoon peppermint extract (use a good brand—I like Nielsen-Massey)
- ¼ cup (60ml) heavy cream
- 1 tablespoon instant espresso powder (dissolved in 1 tablespoon hot water)
- ¼ cup (30g) unsweetened cocoa powder, sifted
- ½ cup (120ml) heavy cream (for topping)
- 1 tablespoon powdered sugar (for topping)
- ¼ teaspoon vanilla extract (for topping)
- ¼ cup (about 4-5) crushed candy canes or peppermint candies (for topping)
- Optional: chocolate shavings for garnish
Instructions
- Preheat your oven to 325°F (160°C). Line your 8×8 baking pan with parchment paper, leaving some overhang on two opposite sides.
- Make the crust: In a food processor, pulse the chocolate cookies until they become fine crumbs. Transfer to a medium bowl, add the melted butter, sugar, and salt, and stir until the mixture looks like wet sand. Press this firmly into the bottom of your prepared pan.
- Bake the crust for 10 minutes. Remove from the oven and let it cool while you make the filling. Leave the oven on.
- Make the cheesecake filling: In a large bowl, beat the softened cream cheese with an electric mixer on medium speed until smooth and creamy, about 2 minutes. Scrape down the sides of the bowl. Add the sugar and beat for another minute until light and fluffy.
- Add the eggs one at a time, beating on low speed after each addition until just combined.
- Mix in the vanilla extract, peppermint extract, and heavy cream until combined. In a small bowl, dissolve the instant espresso powder in 1 tablespoon of hot water, then add it to the batter along with the sifted cocoa powder. Mix on low speed until smooth.
- Pour the filling over the crust and spread evenly. Give the pan a gentle tap on the counter to release any air bubbles.
- Bake for 35-40 minutes. The edges should look set and slightly puffed, but the center should still jiggle just a little when you gently shake the pan.
- Cool completely at room temperature, about 1-2 hours.
- Chill for at least 4 hours, preferably overnight. Cover the pan with plastic wrap and refrigerate.
- Make the topping: When ready to serve, whip the heavy cream, powdered sugar, and vanilla extract together until soft peaks form.
- Assemble and serve: Lift the cheesecake block out of the pan using the parchment handles. Slice into 16 squares. Top each square with a dollop of whipped cream and a sprinkle of crushed candy canes. Add chocolate shavings if desired.
Notes
Room temperature ingredients matter. Don’t skip the parchment paper. Use the jiggle test to check doneness. Crush candy canes right before serving. Use a sharp, wet knife for clean slices. For gluten-free, use gluten-free chocolate sandwich cookies. For dairy-free, use dairy-free cream cheese, coconut cream, and vegan butter. For extra minty, increase peppermint extract to ¾ teaspoon. For no-coffee version, omit espresso powder and increase cocoa powder to ⅓ cup. Store in refrigerator for up to 5 days. Freeze unsliced block (without topping) for up to 3 months.
Nutrition
- Serving Size: 1 bar
- Calories: 285
- Sugar: 18
- Sodium: 210
- Fat: 19
- Saturated Fat: 11
- Carbohydrates: 26
- Fiber: 2
- Protein: 5
Keywords: peppermint mocha cheesecake bars, holiday dessert, easy cheesecake bars, peppermint dessert, chocolate mint cheesecake


