Our youngest had refused scones for years. “Too dry,” he’d say with a dramatic shudder every time I pulled a tray from the oven. “They’re like eating sand, Mom.” I mean, he wasn’t wrong about some of them. Then last Tuesday, I made this version of cranberry orange scones “just for myself” during nap time and found him standing on a stool at the counter, one hand buried in the bowl of vanilla glaze, licking it off his fingers like he’d discovered a secret.
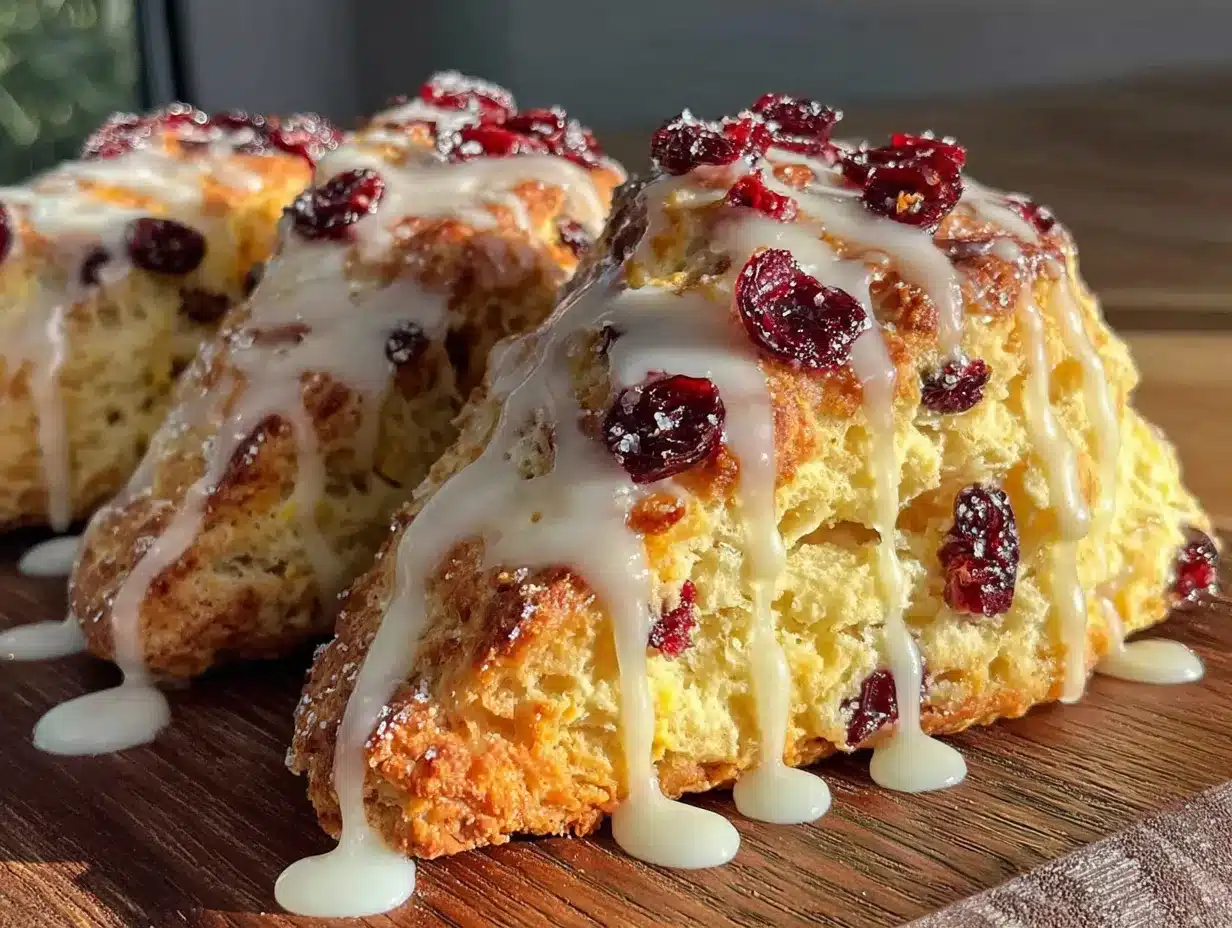
That’s the thing about these scones. They’re not those dense, dusty triangles you find at coffee shops that crumble into a million sad pieces. These are tender on the inside, with golden, slightly crisp edges and bursts of tart cranberry that cut through the sweet orange flavor. The vanilla glaze isn’t just a drizzle—it’s the kind that soaks into the warm scone just a little, making every bite feel like a small celebration. Honestly, I wasn’t even trying to convert anyone that day. I was just tired and wanted something pretty to eat with my afternoon coffee.
The power went out halfway through mixing the dough, which is classic for me. I stood there in the dim kitchen, butter softening on the counter, wondering if I should just give up. But something about the quiet made me keep going. I mixed by feel, relying on muscle memory from all those batches before. Maybe you’ve been there—when a recipe becomes so familiar you could make it with your eyes closed. That’s where I was, and honestly, that batch turned out better than any I’d made before. The dough came together perfectly, the cranberries stayed suspended instead of sinking, and the glaze? Let me tell you, it was the perfect consistency. This recipe stayed with me because it proved something I’d always suspected: sometimes the best food comes from the moments when you stop trying so hard and just cook for yourself.
Why You’ll Love This Recipe
I’ve tested this recipe more times than I care to admit—through dry winter months when cranberries are at their peak, through sticky summer mornings when I craved something bright, and through countless taste-testing sessions with my family. Here’s why these scones have earned a permanent spot in our weekly rotation:
- Kid-Approved: My own kids went from scone-haters to asking for these every weekend. The vanilla glaze is basically magic for winning over picky eaters.
- Budget-Friendly: You likely have most of these ingredients in your pantry right now. No expensive extracts or specialty flours needed.
- Quick & Easy: From mixing bowl to oven in under 15 minutes. Perfect for weekend mornings when everyone’s hungry and you haven’t had coffee yet.
- Perfect for Busy Families: These reheat beautifully, so you can make a batch on Sunday and enjoy them all week long.
- Crowd-Pleaser: I’ve brought these to school bake sales, neighborhood brunches, and holiday gatherings. They disappear every single time.
What makes these different from every other scone recipe out there? It’s the technique. Instead of cutting cold butter into the flour, I grate frozen butter directly into the dry ingredients. It sounds fussy, but trust me—it creates those flaky layers without any special equipment. The orange zest gets rubbed into the sugar first, releasing all those essential oils so the citrus flavor permeates every single bite. And the glaze? It’s thin enough to soak in, thick enough to leave a beautiful sheen. This isn’t just another scone recipe—it’s the one that changed my family’s mind about scones forever.
These scones are the kind that make you close your eyes after the first bite. It’s comfort food reimagined—brighter, more tender, but with the same soul-soothing satisfaction. Perfect for impressing guests without stress, or turning a simple Saturday morning into something memorable.
What Ingredients You Will Need
This recipe uses simple, wholesome ingredients to deliver that perfect balance of tart cranberries, bright orange, and sweet vanilla glaze. Most of these are probably already in your kitchen, which is exactly how I like it.
For the Scones
- 2 cups all-purpose flour (I use King Arthur for consistent results, but any brand works)
- 1/3 cup granulated sugar (plus extra for sprinkling on top)
- 1 tablespoon baking powder (make sure it’s fresh—this is crucial for fluffy scones)
- 1/2 teaspoon salt (fine sea salt works best)
- 1/2 cup unsalted butter, frozen (this is the secret to flaky layers—don’t skip freezing it)
- 1/2 cup dried cranberries (look for ones that are plump and moist; if they’re dry, soak them in warm water for 10 minutes first)
- 1 tablespoon orange zest (from about 1 large orange—organic is best since you’re eating the peel)
- 1/2 cup cold heavy cream (plus 2 tablespoons for brushing—you can substitute whole milk in a pinch)
- 1 large egg (room temperature if you remember, but cold works too)
- 1 teaspoon vanilla extract (I prefer pure vanilla, but imitation works fine for baking)
For the Vanilla Glaze
- 1 cup powdered sugar (sifted if it’s clumpy)
- 2 tablespoons whole milk (start with less and add more as needed)
- 1/2 teaspoon vanilla extract (the good stuff really shines here)
- Pinch of salt (optional, but it balances the sweetness beautifully)
A note on ingredient selection: When I’m making these for my family, I always reach for dried cranberries over fresh. Fresh cranberries release too much moisture during baking, making the scones dense and soggy in spots. Dried cranberries hold their shape and give you that lovely chewy pop of tartness in every bite. If you can find them, look for apple juice-sweetened dried cranberries—they’re less sugary and let the orange flavor shine even more.
For the orange zest, take the time to zest before you juice the orange. It’s one of those small steps that makes a huge difference. And if you’re dairy-free, I’ve had great success using cold coconut cream in place of the heavy cream. The scones come out slightly different in texture—a bit more tender, less flaky—but still absolutely delicious.
Equipment Needed
You don’t need anything fancy to make these scones, which is part of why I love this recipe. Here’s what you’ll need:
- Large mixing bowl (any bowl works, but a wide one makes mixing easier)
- Box grater (for grating the frozen butter—this is the one tool I’d say is non-negotiable)
- Pastry cutter or two forks (for cutting butter into flour, though you honestly might not need it)
- Baking sheet (lined with parchment paper for easy cleanup)
- Parchment paper (trust me on this—scones stick to everything else)
- Bench scraper or sharp knife (for cutting the dough into triangles)
- Small bowl (for the egg wash and glaze)
- Whisk (for mixing the glaze smooth)
- Pastry brush (for brushing cream on top—you can use your fingers in a pinch)
- Cooling rack (helps the glaze set properly)
I’ve made these scones in a tiny apartment kitchen with a broken oven and a plastic bowl, and they still turned out great. The box grater is really the only specialty item here, and if you don’t have one, you can cube the frozen butter with a sharp knife. It takes a bit longer, but it works. My first batch of scones was made with a butter knife and a cereal bowl—don’t let lack of equipment stop you.
Preparation Method
Preheat your oven to 400°F (200°C). Line a baking sheet with parchment paper. This step matters—scones love parchment paper, and you’ll thank yourself later when nothing sticks.
- Grate the frozen butter. Take your frozen stick of butter and grate it using the large holes of a box grater. Work quickly here—you want the butter shreds to stay cold. If they start to soften, pop the bowl in the freezer for 5 minutes. This takes about 2 minutes, and it’s the most important step in the whole recipe.
- Mix the dry ingredients. In a large bowl, whisk together the flour, sugar, baking powder, and salt. Rub the orange zest into the sugar with your fingertips before adding it to the bowl. This releases the oils and makes the orange flavor so much stronger. I learned this trick from a pastry chef friend, and it’s a game-changer.
- Add the grated butter. Toss the frozen butter shreds into the flour mixture. Use your fingers or a pastry cutter to gently work the butter into the flour until the mixture looks like coarse meal with some pea-sized butter pieces remaining. Don’t overwork it—those little butter chunks are what create flaky layers. This should take about 1 minute.
- Add the cranberries. Stir in the dried cranberries until they’re evenly distributed. If your cranberries are especially dry, toss them with a teaspoon of flour first to prevent them from sinking to the bottom.
- Mix the wet ingredients. In a small bowl or measuring cup, whisk together the heavy cream, egg, and vanilla extract. Make a well in the center of your flour mixture and pour the wet ingredients in all at once.
- Bring the dough together. Use a fork or your hands to mix until just combined. The dough will look shaggy and there might be some dry spots—that’s exactly what you want. Overmixing creates tough scones, so stop as soon as the dough holds together when pinched. This takes about 30 seconds.
- Shape the dough. Turn the dough out onto a lightly floured surface. Gently bring it together with your hands, patting it into a ¾-inch thick circle about 8 inches across. Don’t use a rolling pin—use your hands. The warmth of your hands helps everything come together without overworking the dough.
- Cut the scones. Use a bench scraper or sharp knife to cut the circle into 8 wedges, like you’re cutting a pizza. Place them on your prepared baking sheet, spacing them about 2 inches apart. They’ll spread a little, but not much.
- Brush with cream and sprinkle sugar. Brush the tops of the scones with the remaining 2 tablespoons of heavy cream. Sprinkle generously with granulated sugar—this gives them that beautiful sparkly top and a little crunch.
- Bake. Bake for 14-16 minutes, until the scones are golden brown on the edges and firm to the touch. The tops should be light golden, not dark brown. Every oven is different, so start checking at 12 minutes if yours runs hot.
- Cool. Let the scones cool on the baking sheet for 5 minutes, then transfer them to a cooling rack. This 5-minute rest is important—it lets the scones set up so they don’t crumble when you move them.
- Make the glaze. While the scones are cooling, whisk together the powdered sugar, milk, vanilla extract, and salt until smooth. The glaze should be thick but pourable—thin enough to drizzle off a spoon but thick enough to leave a white trail. Add more milk if it’s too thick, more sugar if it’s too thin.
- Glaze the scones. Drizzle the glaze over the warm scones. Use a spoon or a piping bag—I just use a spoon and let it drip naturally. The warmth of the scones will help the glaze set into a beautiful, slightly crackled finish.
Let the glaze set for about 10 minutes before serving. If you can wait that long. I usually can’t.
Cooking Tips & Techniques
After making these scones more times than I can count, I’ve collected a few hard-won lessons. Here’s what I wish someone had told me when I started:
Keep everything cold. This is the single most important rule of scone-making. Cold butter creates steam pockets in the oven, which creates flaky layers. If your dough starts to feel warm or sticky at any point, pop it in the fridge for 15 minutes. I once made the mistake of leaving my butter out while I answered the phone, and those scones turned out flat and greasy. Never again.
Don’t twist the cutter. If you’re using a biscuit cutter instead of cutting wedges, press straight down without twisting. Twisting seals the edges and prevents the scones from rising properly. I learned this after a whole batch of sad, lopsided scones that looked more like hockey pucks.
Use a light hand. The more you handle scone dough, the tougher it gets. Mix until just combined, shape gently, and resist the urge to keep patting and smoothing. Imperfect scones are better than tough ones.
Check your baking powder. If your baking powder is old, your scones won’t rise. Test it by dropping a teaspoon into hot water—if it fizzes vigorously, it’s good. If it barely bubbles, toss it and buy fresh. This simple test saved me from another flat batch.
Room temperature matters. If your kitchen is hot and humid, your butter will soften faster. Work quickly, and don’t be afraid to chill your baking sheet with the cut scones for 10 minutes before they go in the oven. I do this on summer mornings when my kitchen feels like a sauna.
Double the batch. These freeze beautifully, so I always make a double batch. Bake one tray fresh for immediate enjoyment, and freeze the second tray of unbaked scones on the baking sheet. Once frozen solid, transfer them to a freezer bag. You can bake them straight from frozen—just add 3-4 minutes to the baking time.
Variations & Adaptations
One of the best things about this recipe is how adaptable it is. Here are some variations I’ve tried and loved:
Chocolate Chip Orange Scones: Swap the dried cranberries for ½ cup of mini chocolate chips. The combination of orange and chocolate is classic for a reason. My kids actually prefer this version—they claim it tastes like a fancy orange chocolate bar in scone form.
Lemon Blueberry Scones: Replace the orange zest with lemon zest and the dried cranberries with fresh or frozen blueberries. If using frozen blueberries, don’t thaw them first—fold them in frozen to prevent the batter from turning purple. Add an extra tablespoon of flour to absorb any excess moisture.
Gluten-Free Version: Substitute the all-purpose flour with a 1:1 gluten-free baking flour blend that contains xanthan gum. I’ve had good results with Bob’s Red Mill. The texture is slightly more tender and less flaky, but the flavor is still fantastic. Add an extra tablespoon of cream to compensate for the drier gluten-free flour.
Dairy-Free Version: Use cold coconut cream or full-fat oat milk in place of the heavy cream, and substitute the butter with cold vegan butter sticks. Miyoko’s works beautifully. The scones won’t be quite as flaky, but they’re still delicious and tender.
Spiced Cranberry Orange: Add ½ teaspoon of cinnamon, ¼ teaspoon of nutmeg, and a pinch of cloves to the dry ingredients. The warm spices complement the tart cranberries and bright orange beautifully. This is my go-to version for fall baking.
Savory-Sweet Twist: Reduce the sugar to 2 tablespoons, omit the vanilla, and add ½ cup of sharp cheddar cheese and 2 tablespoons of chopped fresh rosemary. Drizzle with honey instead of the vanilla glaze. It sounds weird, but the combination of cheese, cranberries, and orange is surprisingly amazing.
I’ve personally tried every single one of these variations, and they all work. The lemon blueberry version is my summer favorite, while the spiced version gets made constantly from October through December. Don’t be afraid to experiment—scone dough is forgiving, and even failed experiments usually taste pretty good.
Serving & Storage Suggestions
These scones are best served warm, with the vanilla glaze still slightly soft and glossy. I like to serve them on a pretty plate with fresh orange slices scattered around for color. They’re perfect alongside a cup of coffee, a mug of hot tea, or a glass of cold milk for the kids.
For breakfast or brunch: Serve these scones with scrambled eggs and fresh fruit for a complete meal. The bright citrus flavor cuts through the richness of eggs beautifully. I often make these for weekend brunch when we have guests—they look impressive but come together with minimal effort.
As an afternoon snack: One scone with a cup of tea is the perfect afternoon pick-me-up. The combination of carbs and sugar gives you just enough energy to make it through the late afternoon slump. My kids grab these after school like they’re cookies.
For holiday gatherings: These scones are a staple on my Christmas morning table. The red cranberries and white glaze look festive, and the orange flavor feels special without being overpowering. They also make wonderful homemade gifts—wrap them in a pretty box with a ribbon.
Storage: Store leftover scones in an airtight container at room temperature for up to 3 days. The glaze will soften slightly over time, but they’ll still taste delicious. If you’re stacking them, place a sheet of parchment paper between layers to prevent the glaze from sticking.
Freezing: Unbaked scones freeze beautifully. Cut the scones, place them on a baking sheet, and freeze until solid. Transfer to a freezer bag and bake straight from frozen, adding 3-4 minutes to the baking time. Baked scones also freeze well—wrap each one individually in plastic wrap, then place in a freezer bag. Thaw at room temperature and reheat in a 300°F oven for 5 minutes.
Reheating: The best way to reheat scones is in a 300°F oven for 5-7 minutes. This restores the crispy exterior and soft interior. You can also microwave them for 15-20 seconds, but they’ll lose their crispness. If you’re reheating glazed scones, the microwave is actually better because it doesn’t melt the glaze further.
The flavors actually develop over time. Day-old scones have a deeper orange flavor, and the cranberries seem to plump up a bit. I honestly love them even more on the second day, especially if I warm them up just a little.
Nutritional Information & Benefits
Here’s the estimated nutritional breakdown for one scone (with glaze, based on 8 servings):
- Calories: 345
- Total Fat: 16g
- Saturated Fat: 10g
- Cholesterol: 65mg
- Sodium: 280mg
- Total Carbohydrates: 48g
- Dietary Fiber: 1g
- Sugars: 26g
- Protein: 5g
While these scones are certainly a treat, they do offer some nutritional benefits. The dried cranberries provide antioxidants and vitamin C, and the orange zest adds a boost of immune-supporting vitamin C as well. Using real butter and cream means you’re getting natural fats rather than processed alternatives.
For a slightly healthier version, you can reduce the sugar in the scone dough to ¼ cup and use a lighter hand with the glaze. The scones will still be delicious—just less sweet. I sometimes make a half-batch of glaze and drizzle it sparingly when I’m watching my sugar intake.
These scones are vegetarian-friendly and can easily be made gluten-free or dairy-free with the substitutions mentioned earlier. They do contain gluten, dairy, and eggs, so they’re not suitable for those with allergies to those ingredients. As always, I recommend enjoying these as part of a balanced diet—they’re a treat, not an everyday breakfast.
Conclusion
These cranberry orange scones with vanilla glaze have become a beloved staple in my kitchen, and I have a feeling they’ll become one in yours too. They’re the perfect balance of tart and sweet, tender and flaky, simple and special. Whether you’re making them for a lazy weekend breakfast, a holiday brunch, or just because you need something beautiful to brighten your Tuesday, they never disappoint.
I love how adaptable this recipe is—you can switch up the fruit, change the citrus, or go completely wild with add-ins, and the basic dough holds up beautifully. It’s the kind of recipe that rewards experimentation, so don’t be afraid to make it your own. Maybe you’ll discover a combination I haven’t tried yet.
If you make these scones, I’d love to hear about it. Leave a comment below and let me know how they turned out—did your family love them as much as mine does? Did you try any fun variations? Share your photos on social media and tag me so I can see your beautiful creations. Happy baking, friend. I hope these scones bring as much joy to your kitchen as they’ve brought to mine.
Frequently Asked Questions
Can I use fresh cranberries instead of dried?
I don’t recommend it. Fresh cranberries release too much moisture during baking, which can make the scones dense and soggy. If you only have fresh cranberries, try chopping them roughly and tossing them with a tablespoon of flour before adding them to the dough. Even then, the texture won’t be quite the same as using dried cranberries.
Why did my scones turn out flat?
Flat scones usually mean one of three things: your butter was too warm, your baking powder is old, or you overworked the dough. Make sure your butter is frozen solid before grating, check that your baking powder is fresh, and handle the dough as little as possible. Chilling the cut scones for 10 minutes before baking can also help them rise higher.
Can I make the dough ahead of time?
Absolutely. You can prepare the dough, cut the scones, and refrigerate them on the baking sheet for up to 24 hours before baking. Just cover them loosely with plastic wrap. You can also freeze unbaked scones for up to 3 months—bake straight from frozen, adding a few extra minutes to the baking time.
How do I get my scones to be more flaky?
The key to flaky scones is visible pieces of cold butter in the dough. When you’re mixing the butter into the flour, stop while you can still see some pea-sized butter chunks. Those chunks create steam pockets in the oven, which creates flaky layers. Also, handle the dough as little as possible—overworking it melts the butter and creates tough scones.
Can I skip the glaze?
You can, but I wouldn’t! The vanilla glaze adds sweetness and moisture that really makes these scones special. If you want a less sweet option, try brushing the warm scones with a mixture of honey and orange juice instead. Or just sprinkle them with coarse sugar before baking for a simpler finish.
Pin This Recipe!

Easy Kid-Approved Cranberry Orange Scones with Glaze

Tender, flaky scones with bursts of tart cranberry and bright orange flavor, topped with a vanilla glaze that soaks in just a little. Perfect for breakfast, brunch, or a special treat.
- Prep Time: 15 minutes
- Cook Time: 16 minutes
- Total Time: 31 minutes
- Yield: 8 servings 1x
- Category: Breakfast
- Cuisine: American
Ingredients
- 2 cups all-purpose flour
- 1/3 cup granulated sugar (plus extra for sprinkling)
- 1 tablespoon baking powder
- 1/2 teaspoon salt
- 1/2 cup unsalted butter, frozen
- 1/2 cup dried cranberries
- 1 tablespoon orange zest
- 1/2 cup cold heavy cream (plus 2 tablespoons for brushing)
- 1 large egg
- 1 teaspoon vanilla extract
- 1 cup powdered sugar
- 2 tablespoons whole milk
- 1/2 teaspoon vanilla extract
- Pinch of salt
Instructions
- Preheat oven to 400°F (200°C). Line a baking sheet with parchment paper.
- Grate the frozen butter using the large holes of a box grater. Work quickly to keep the butter cold.
- In a large bowl, whisk together flour, sugar, baking powder, and salt. Rub orange zest into the sugar with your fingertips before adding to the bowl.
- Add the grated butter to the flour mixture. Use your fingers or a pastry cutter to work the butter into the flour until the mixture looks like coarse meal with some pea-sized butter pieces remaining.
- Stir in the dried cranberries until evenly distributed.
- In a small bowl, whisk together heavy cream, egg, and vanilla extract. Make a well in the center of the flour mixture and pour in the wet ingredients.
- Mix until just combined. The dough will look shaggy with some dry spots.
- Turn the dough out onto a lightly floured surface. Gently bring it together with your hands, patting into a ¾-inch thick circle about 8 inches across.
- Cut the circle into 8 wedges. Place on the prepared baking sheet, spacing about 2 inches apart.
- Brush the tops with remaining 2 tablespoons of heavy cream and sprinkle generously with granulated sugar.
- Bake for 14-16 minutes, until golden brown on the edges and firm to the touch.
- Let cool on the baking sheet for 5 minutes, then transfer to a cooling rack.
- While the scones are cooling, whisk together powdered sugar, milk, vanilla extract, and salt until smooth. The glaze should be thick but pourable.
- Drizzle the glaze over the warm scones. Let set for about 10 minutes before serving.
Notes
Keep all ingredients cold for flaky scones. Do not overmix the dough. For best results, use fresh baking powder. Scones can be frozen unbaked for up to 3 months.
Nutrition
- Serving Size: 1 scone
- Calories: 345
- Sugar: 26
- Sodium: 280
- Fat: 16
- Saturated Fat: 10
- Carbohydrates: 48
- Fiber: 1
- Protein: 5
Keywords: cranberry orange scones, vanilla glaze, kid-friendly, breakfast, brunch, easy scone recipe


