The woman at the farmers market stall watched me circle back three times before she finally spoke. I’d been eyeing her fresh eggnog—thick, spiced, nothing like the cartons at the grocery store—but I kept walking past, not sure what I’d even do with it. “You keep coming back,” she said, not unkindly. “Just buy some. You’ll figure out the rest.” So I did. I bought a pint, tucked it into my bag, and walked home feeling like I’d adopted a stray ingredient I wasn’t sure how to care for.
That was two Decembers ago, and honestly? That pint of eggnog sat in my fridge for a full day while I stared at it. I mean, you know that feeling when something is too good to just drink, but you’re not sure what it wants to become? I tried it warm with a splash of bourbon—lovely, sure—but it felt unfinished. Then I remembered the bag of gingersnap cookies I’d accidentally bought instead of graham crackers. And somewhere between that mistake and that farmers market impulse, the idea for this cheesecake just clicked.
I won’t pretend the first attempt was pretty. The crust crumbled everywhere. The filling had a weird lumpy moment because I got distracted by my neighbor dropping off a fruitcake (bless her heart). But I kept at it because the flavor was already there—that cozy eggnog warmth wrapped in a spicy, crunchy shell. By the third try, I had something that made me close my eyes after the first bite. And that’s the version I’ve been making every holiday season since. It’s the kind of dessert that feels fancy enough for a party but honest enough for a quiet Tuesday night when you just need something good.
Why You’ll Love This Recipe
Let me tell you why this cozy eggnog cheesecake with gingersnap crust has become my most-requested holiday dessert. I’ve tested this recipe at least seven times across three different ovens (including my sister’s finicky rental apartment oven), and it delivers every single time.
- Quick & Easy: The hands-on time is about 25 minutes. The oven does the rest. Perfect for when you’re already juggling holiday chaos.
- Simple Ingredients: No hunting down obscure spices or specialty extracts. Your grocery store has everything, and you probably already have the pantry staples.
- Perfect for Holiday Gatherings: This cheesecake is the star of Christmas dinner, cookie swaps, and cozy nights by the fire. It travels well, too, which matters when you’re the one bringing dessert.
- Crowd-Pleaser: I’ve served this to eggnog lovers and eggnog skeptics. The skeptics always ask for seconds. The texture wins them over before they even register the flavor.
- Unbelievably Delicious: The creamy, spiced filling against that crunchy, molasses-rich crust is next-level comfort food. It’s the kind of dessert that makes people close their eyes and go quiet for a second.
What makes this recipe different from the dozens of eggnog cheesecakes out there? It’s the balance. I spent time figuring out exactly how much eggnog to use so the flavor is present without making the filling watery. The gingersnap crust isn’t just a gimmick—it’s the perfect spicy counterpoint to the sweet, custardy filling. This isn’t just another holiday cheesecake. It’s the one you’ll actually want to make again.
This recipe is comfort food reimagined—familiar enough to feel like a hug, but special enough to feel like an occasion. It’s for the evenings when you need something warm and indulgent, or the mornings after when a slice with coffee feels like the only sensible choice.
What Ingredients You Will Need
This recipe uses simple, wholesome ingredients to deliver that signature holiday flavor. Most of these are pantry staples or easy winter finds. I’ve tested substitutions where I could, so I’ll share what works and what doesn’t.
For the Gingersnap Crust
- 2 cups (about 240g) gingersnap cookie crumbs — I use Nabisco or Anna’s ginger thins. Pulse them in a food processor until fine. You can also crush them in a zip-top bag with a rolling pin if you need to work out some frustration.
- 6 tablespoons (85g) unsalted butter, melted — Salted butter works too, just reduce the added salt slightly. The butter binds the crumbs and adds richness.
- 2 tablespoons (25g) granulated sugar — Just a touch to balance the spice. You can skip it if your cookies are already very sweet.
- Pinch of salt — Only if using unsalted cookies. It sharpens the flavors.
For the Eggnog Cheesecake Filling
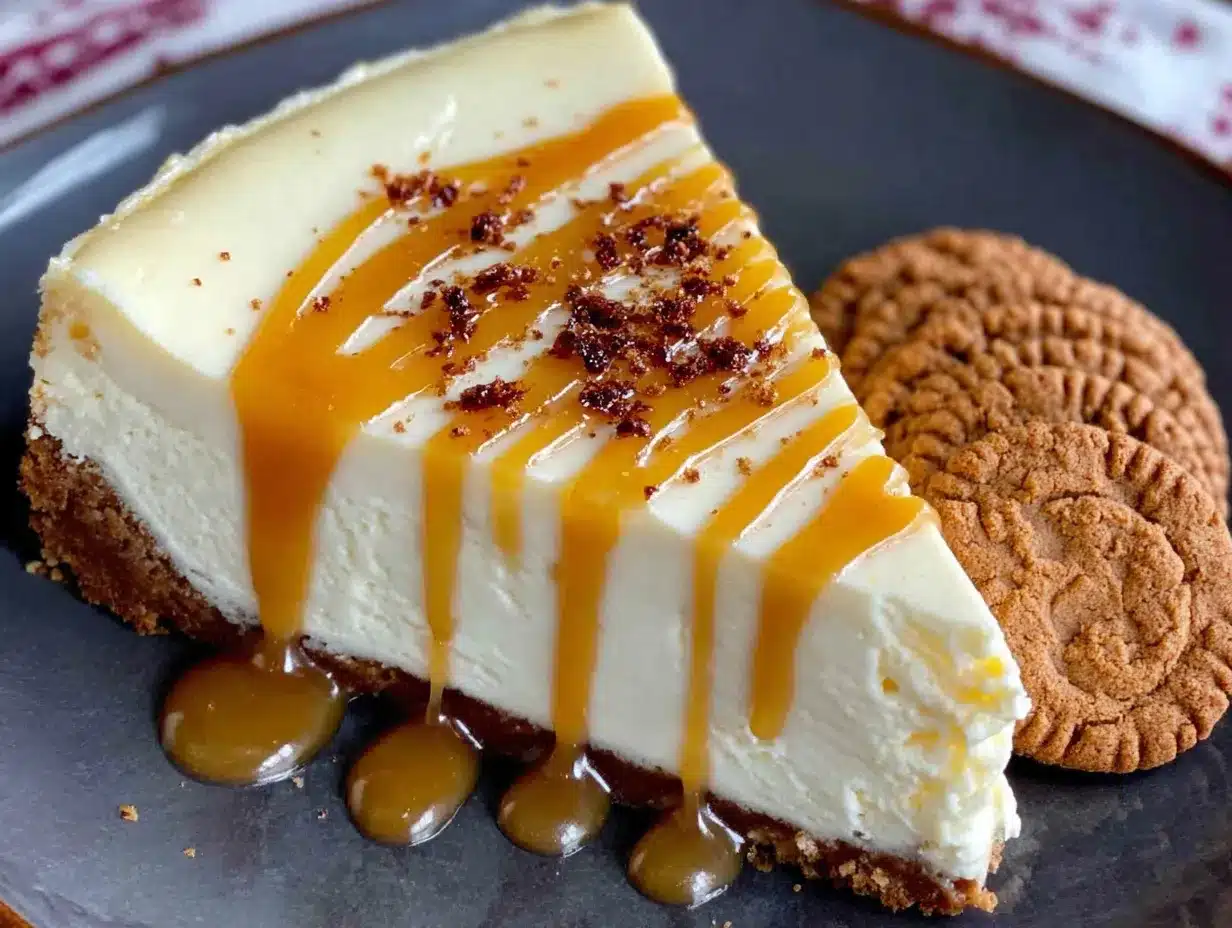
- 24 ounces (680g) cream cheese, softened — Full-fat is non-negotiable here. Low-fat cream cheese makes the filling too loose. Let it sit out for at least an hour before starting.
- 1 cup (200g) granulated sugar — Regular white sugar keeps the texture clean. Brown sugar would overpower the eggnog.
- 3 large eggs, room temperature — Cold eggs can make the filling lumpy. Set them in warm water for 5 minutes if you forgot to take them out.
- 1 ½ cups (360ml) high-quality eggnog — This is where it matters. Use the thick, creamy stuff from the refrigerated section, not the shelf-stable carton. I’ve tried both, and the difference is noticeable.
- 1 teaspoon vanilla extract — Pure vanilla, not imitation. It rounds out the spice notes.
- ½ teaspoon ground nutmeg — Freshly grated if you have it. Pre-ground works fine, but fresh is a noticeable upgrade.
- ½ teaspoon ground cinnamon — Adds warmth without being aggressive.
- ¼ teaspoon ground cloves — Just a whisper. Cloves are strong, so go easy.
- 3 tablespoons (24g) all-purpose flour — This stabilizes the filling so it doesn’t crack. Cornstarch works too (use 2 tablespoons instead).
For the Optional Topping
- ½ cup (120ml) heavy cream — For whipping into clouds of goodness.
- 1 tablespoon powdered sugar — Just enough to sweeten the cream without making it heavy.
- Extra grated nutmeg for garnish — Because it looks pretty and smells amazing.
Equipment Needed
You don’t need a professional bakery setup for this one. Here’s what I use, plus some workarounds if you’re missing something.
- 9-inch springform pan — This is the best tool for the job. The removable sides make serving a dream. If you don’t have one, you can use a deep-dish pie plate, but you’ll lose the tall, dramatic cheesecake look.
- Electric hand mixer or stand mixer — A hand mixer works perfectly. I actually prefer it because I have more control over not over-beating the filling. A whisk and strong arm works too, but your arm will hate you.
- Food processor — For crushing the gingersnaps. A zip-top bag and rolling pin work just fine if you don’t mind a little elbow grease.
- Large mixing bowls — One for the crust, one for the filling.
- Rubber spatula — For scraping every last bit of filling into the pan. Don’t waste a drop of that eggnog goodness.
- Roasting pan or large baking dish — For the water bath. You’ll place the springform pan inside this.
- Aluminum foil — To wrap the bottom of the springform pan so water doesn’t sneak in.
- Cooling rack — For letting the cheesecake cool gradually. A wire rack lets air circulate underneath.
I bought my springform pan at a thrift store for three dollars. It’s scratched and a little wonky, but it’s been through a dozen cheesecakes and still works perfectly. Don’t feel pressured to buy fancy equipment—borrow or thrift first.
Preparation Method
Take your time with this one. Cheesecake rewards patience. I learned that the hard way after rushing through a batch and ending up with a cracked, sad-looking dessert. Here’s the method that works.
- Preheat your oven to 325°F (163°C). Position the rack in the middle. While it’s heating, wrap the outside of your springform pan with two layers of heavy-duty aluminum foil. Make sure it goes up the sides at least two inches. This keeps water from seeping in during the bath.
- Make the crust. In your food processor, pulse the gingersnap cookies until they’re fine crumbs. You should have about 2 cups. Pour them into a medium bowl, add the sugar and salt, then pour in the melted butter. Stir with a fork until every crumb is moistened. It should look like wet sand that holds together when you squeeze it.
- Press the crust into the pan. Dump the mixture into your prepared springform pan. Use the bottom of a measuring cup or a flat-bottomed glass to press it firmly into an even layer. Go up the sides about an inch if you want a decorative edge, or keep it flat on the bottom. I prefer just the bottom—it’s simpler and the filling gets to shine.
- Bake the crust for 10 minutes. This sets it so it doesn’t get soggy later. Let it cool on a wire rack while you make the filling. Leave the oven on.
- Beat the cream cheese. In a large bowl, beat the softened cream cheese with an electric mixer on medium speed until smooth and creamy—about 2 minutes. Scrape down the sides and the bottom of the bowl. This step matters more than you think. Lumps here mean lumps later.
- Add the sugar. Gradually add the sugar while mixing on medium-low. Beat until combined, about 1 minute. Scrape the bowl again.
- Add the eggs one at a time. Crack each egg into a small bowl first (no shell surprises). Mix on low after each addition just until the yolk disappears. Over-beating at this stage incorporates too much air, which causes cracks.
- Mix in the wet ingredients. Add the eggnog and vanilla extract. Mix on low until just combined. The mixture will look a little thin—that’s normal. Don’t panic.
- Add the dry spices and flour. Sprinkle the nutmeg, cinnamon, cloves, and flour over the batter. Mix on low for about 15 seconds, just until the streaks disappear. Scrape the bowl one last time.
- Pour the filling over the crust. Use your rubber spatula to get every bit. Gently tap the pan on the counter a few times to release any air bubbles. You’ll see a few rise to the surface—that’s fine.
- Prepare the water bath. Place the foil-wrapped springform pan into your large roasting pan. Put the whole thing in the oven, then carefully pour hot water into the roasting pan until it reaches about halfway up the sides of the springform pan. Don’t splash water onto the cheesecake—I’ve done that, and it creates weird wet spots.
- Bake for 55 to 65 minutes. The edges should look set and slightly puffed, but the center should still jiggle like Jell-O when you gently shake the pan. A knife inserted near the center should come out with some moist crumbs, not wet batter. Mine usually takes exactly 58 minutes in my oven.
- Turn off the oven and crack the door. Let the cheesecake sit in the warm oven for 1 hour. This gradual cooling prevents the dreaded crack. I know it’s tempting to pull it out, but trust me on this.
- Remove from the water bath. Carefully lift the springform pan out of the water. Place it on a wire rack to cool completely at room temperature—about 2 hours. Don’t rush this. Warm cheesecake in the fridge = condensation = sad texture.
- Chill for at least 4 hours, preferably overnight. Cover the pan with plastic wrap and refrigerate. The flavor develops and the texture firms up beautifully overnight. I’ve made this two days ahead with excellent results.
- Serve. Run a thin knife around the edge before releasing the springform clasp. Slice with a sharp knife dipped in hot water and wiped dry between cuts. Top with whipped cream and a dusting of nutmeg.
Cooking Tips & Techniques
I’ve made enough cheesecake mistakes to fill a cookbook. Here’s what I’ve learned so you don’t have to repeat my errors.
Room temperature ingredients are not optional. I know, I know—you’re in a hurry. But cold cream cheese creates lumps that no amount of beating will fix. Cold eggs can cause the batter to separate. Set everything out an hour before you start. If you forgot, cut the cream cheese into small cubes and let it sit for 20 minutes. Submerge the eggs in warm (not hot) water for 5 minutes.
Don’t over-mix the filling. This is the number one cause of cracks. When you beat too much air into the batter, it expands in the oven and then collapses, leaving fissures. Mix on low speed and stop as soon as each ingredient is incorporated. A few tiny lumps are better than a canyon through the middle of your cheesecake.
The water bath is your friend. I tried skipping it once because I was feeling lazy. The cheesecake cracked, the edges were dry, and the texture was dense instead of creamy. The water bath provides gentle, even heat that keeps the filling from cooking too fast. Wrap the pan well with heavy-duty foil—I use two layers just to be safe.
Let it cool gradually. The oven-off-cracked-door method is the best thing I’ve ever learned. It prevents the sudden temperature change that causes cracks. If you’re in a rush, you can cool it on the counter for 30 minutes, then refrigerate, but the texture won’t be as silky.
Use the jiggle test. Don’t rely solely on time. Every oven runs differently. At the 55-minute mark, gently shake the pan. The center should wobble like a wave, not slosh like liquid. If it’s still very liquidy, give it 5 more minutes and check again.
Variations & Adaptations
This cozy eggnog cheesecake is wonderful as written, but it also plays well with others. Here are some variations I’ve tried and loved.
Bourbon Eggnog Cheesecake: Add 2 tablespoons of bourbon to the filling along with the vanilla. The alcohol mostly cooks off, leaving a warm, slightly smoky depth. I made this for a Friendsgiving and it disappeared in minutes. If you’re serving kids or avoiding alcohol, use 1 teaspoon of bourbon extract instead.
Gluten-Free Version: Use gluten-free gingersnap cookies for the crust. I’ve tested this with several brands, and they all work well. The filling is naturally gluten-free as long as you use gluten-free flour or cornstarch as the stabilizer. No one will know the difference.
Vegan Option: This one takes more work, but it’s possible. Use vegan cream cheese (I like Miyoko’s or Violife), silken tofu to replace some of the eggs, and a plant-based eggnog like So Delicious. The texture is slightly less firm but still delicious. I won’t pretend it’s identical—it’s its own thing, and it’s good in a different way.
Spiced Pecan Topping: Before serving, top the cheesecake with candied pecans. Melt 2 tablespoons of butter with 2 tablespoons of brown sugar, toss in ½ cup of pecan halves, and toast in a skillet for 3 minutes. Sprinkle over the whipped cream. The crunch is incredible.
Mini Cheesecakes: Use a muffin tin with liners instead of a springform pan. Press the crust into the bottom of each liner, fill with batter, and bake for 18-22 minutes. Perfect for parties where people want their own little portion. I did this for a cookie swap and everyone thought I was fancy.
Serving & Storage Suggestions
This cheesecake is best served cold, straight from the fridge. Let it sit at room temperature for about 10 minutes before slicing—it takes the chill off without making it soft.
For presentation, I like to dollop fresh whipped cream on each slice and grate a little nutmeg on top. Sometimes I add a single candied cranberry for color. It looks like something from a holiday magazine, but it takes maybe 2 minutes.
This cheesecake pairs beautifully with strong coffee or spiced tea. For a dessert spread, serve it alongside gingerbread cookies or a simple apple tart. A glass of cold milk is also a surprisingly perfect match—the creaminess plays off the spice.
Storage: Cover the cheesecake tightly with plastic wrap or store it in an airtight container in the refrigerator. It keeps well for up to 5 days. The flavor actually improves after the first day as the spices meld together.
Freezing: This cheesecake freezes beautifully. Wrap the completely cooled (and fully set) cheesecake in two layers of plastic wrap, then a layer of aluminum foil. Freeze for up to 3 months. To thaw, move it to the refrigerator for 24 hours. Don’t try to rush it at room temperature—the texture gets weepy.
Reheating: Don’t. This is a cold dessert. If you want a warm cheesecake experience, try my eggnog cheesecake bars instead (different recipe, different texture).
Nutritional Information & Benefits
Let’s be honest—this is a holiday indulgence. But here’s what I tell myself when I go back for a second slice.
Per slice (based on 12 servings): Approximately 420 calories, 28g fat, 38g carbohydrates, 8g protein, 22g sugar. These are estimates and will vary based on your specific ingredients.
Eggnog itself contains protein and calcium from the milk and eggs. The spices—nutmeg, cinnamon, and cloves—have anti-inflammatory properties and add warmth without extra sugar. Gingersnaps provide a little iron and fiber from the molasses.
This dessert is not low-carb, gluten-free (in its standard form), or dairy-free. It contains eggs, dairy, and gluten. If you have allergies, please check the variations section for adaptations.
I believe in balance. This cheesecake is for the moments when you want something rich and special. It’s not an everyday thing, and that’s what makes it so good when you do have it. One slice, shared with people you love, is a beautiful thing.
Conclusion
This cozy eggnog cheesecake with gingersnap crust is the dessert I look forward to all year. It started as a random impulse at a farmers market, turned into a kitchen disaster, and became a holiday tradition I genuinely love making. The creamy, spiced filling against that crunchy, molasses-rich crust is comfort food at its finest.
I hope you make this your own. Maybe you’ll add the bourbon. Maybe you’ll skip the whipped cream. Maybe you’ll serve it on Christmas Eve with your family, or on a random Tuesday in January when you need a little warmth. However you make it, I hope it brings you the same cozy feeling it brings me.
If you try this recipe, I’d love to hear about it. Leave a comment below and tell me how it turned out. Did you make any changes? Did your family fight over the last slice? Share your stories—they make this whole thing worth it.
Now go preheat your oven. Your new favorite holiday dessert is waiting.
Frequently Asked Questions
Can I use store-bought graham cracker crust instead of making the gingersnap crust?
You can, but you’ll lose that signature spicy flavor that makes this cheesecake special. The gingersnap crust is what sets this recipe apart. If you’re in a real pinch, use a pre-made graham cracker crust and add ½ teaspoon of ground ginger and ¼ teaspoon of cloves to the filling to compensate.
My cheesecake cracked. What did I do wrong?
Don’t worry—it still tastes amazing. Cracks usually happen from over-mixing the batter (too much air), baking too long, or cooling too quickly. Next time, mix on low speed, pull the cheesecake when the center still jiggles, and let it cool gradually in the turned-off oven. You can also cover cracks with whipped cream—no one will ever know.
Can I make this cheesecake ahead of time?
Absolutely. This is actually a great make-ahead dessert. Prepare it up to two days in advance and keep it covered in the refrigerator. The flavors develop and the texture firms up beautifully. You can also freeze it for up to three months—just wrap it well and thaw overnight in the fridge.
Can I use low-fat cream cheese or eggnog?
I don’t recommend it. Low-fat cream cheese contains more water, which makes the filling loose and prone to cracking. Low-fat eggnog is thinner and won’t provide the same rich flavor and texture. If you need a lighter option, consider making mini cheesecakes in a muffin tin and controlling your portion size instead.
How do I know when the cheesecake is done baking?
Use the jiggle test. At 55 minutes, gently shake the pan. The edges should be set and slightly puffed, but the center should wobble like a wave when you move the pan. If it sloshes like liquid, give it 5 more minutes. A knife inserted near the center should come out with moist crumbs, not wet batter. The cheesecake will continue to set as it cools.
Pin This Recipe!
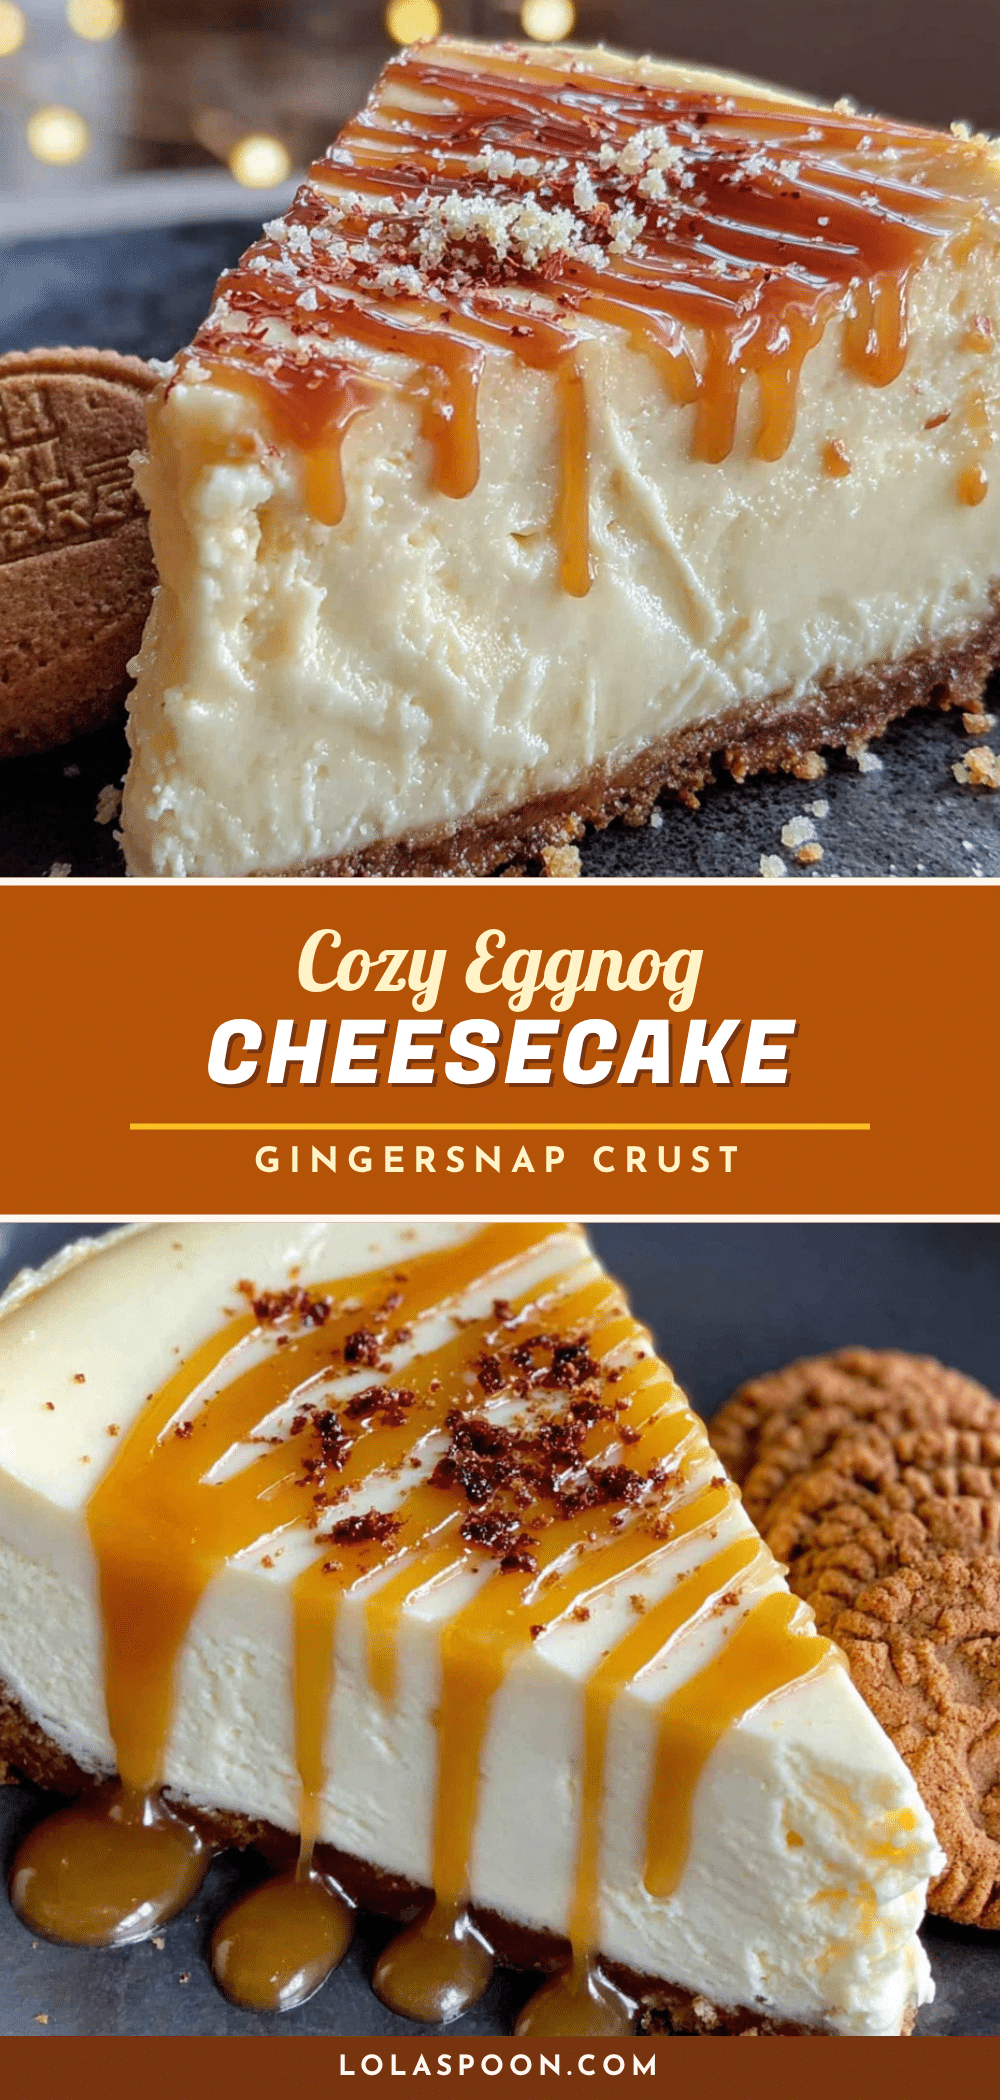
Cozy Eggnog Cheesecake with Gingersnap Crust (Easy Holiday Recipe)
A creamy, spiced eggnog cheesecake with a crunchy gingersnap crust, perfect for holiday gatherings. This easy recipe delivers a rich, comforting dessert that will impress both eggnog lovers and skeptics alike.
- Prep Time: 25 minutes
- Cook Time: 55-65 minutes
- Total Time: 1 hour 20 minutes (plus 4 hours chilling)
- Yield: 12 servings 1x
- Category: Dessert
- Cuisine: American
Ingredients
- 2 cups (about 240g) gingersnap cookie crumbs
- 6 tablespoons (85g) unsalted butter, melted
- 2 tablespoons (25g) granulated sugar
- Pinch of salt
- 24 ounces (680g) cream cheese, softened
- 1 cup (200g) granulated sugar
- 3 large eggs, room temperature
- 1 ½ cups (360ml) high-quality eggnog
- 1 teaspoon vanilla extract
- ½ teaspoon ground nutmeg
- ½ teaspoon ground cinnamon
- ¼ teaspoon ground cloves
- 3 tablespoons (24g) all-purpose flour
- ½ cup (120ml) heavy cream
- 1 tablespoon powdered sugar
- Extra grated nutmeg for garnish
Instructions
- Preheat your oven to 325°F (163°C). Position the rack in the middle. Wrap the outside of your springform pan with two layers of heavy-duty aluminum foil, going up the sides at least two inches.
- Make the crust: In a food processor, pulse the gingersnap cookies until fine crumbs. Pour into a medium bowl, add sugar and salt, then pour in melted butter. Stir until every crumb is moistened.
- Press the crust into the prepared springform pan using the bottom of a measuring cup or flat-bottomed glass. Press firmly into an even layer on the bottom (optional: go up the sides about an inch).
- Bake the crust for 10 minutes. Let cool on a wire rack while you make the filling. Leave the oven on.
- Beat the cream cheese: In a large bowl, beat softened cream cheese with an electric mixer on medium speed until smooth and creamy, about 2 minutes. Scrape down the sides and bottom.
- Add the sugar gradually while mixing on medium-low. Beat until combined, about 1 minute. Scrape the bowl again.
- Add the eggs one at a time, mixing on low after each addition just until the yolk disappears. Do not over-beat.
- Mix in the wet ingredients: Add the eggnog and vanilla extract. Mix on low until just combined.
- Add the dry spices and flour: Sprinkle nutmeg, cinnamon, cloves, and flour over the batter. Mix on low for about 15 seconds, just until streaks disappear. Scrape the bowl one last time.
- Pour the filling over the crust. Gently tap the pan on the counter a few times to release air bubbles.
- Prepare the water bath: Place the foil-wrapped springform pan into a large roasting pan. Put the whole thing in the oven, then carefully pour hot water into the roasting pan until it reaches about halfway up the sides of the springform pan.
- Bake for 55 to 65 minutes. The edges should look set and slightly puffed, but the center should still jiggle like Jell-O when gently shaken.
- Turn off the oven and crack the door. Let the cheesecake sit in the warm oven for 1 hour.
- Remove from the water bath and place on a wire rack to cool completely at room temperature, about 2 hours.
- Chill for at least 4 hours, preferably overnight. Cover with plastic wrap and refrigerate.
- Serve: Run a thin knife around the edge before releasing the springform clasp. Slice with a sharp knife dipped in hot water and wiped dry between cuts. Top with whipped cream and a dusting of nutmeg.
Notes
Room temperature ingredients are essential for a smooth filling. Do not over-mix the batter to avoid cracks. The water bath provides gentle, even heat. Let the cheesecake cool gradually in the turned-off oven to prevent cracking. For best results, chill overnight.
Nutrition
- Serving Size: 1 slice
- Calories: 420
- Sugar: 22
- Sodium: 320
- Fat: 28
- Saturated Fat: 16
- Carbohydrates: 38
- Fiber: 1
- Protein: 8
Keywords: eggnog cheesecake, gingersnap crust, holiday dessert, Christmas cheesecake, easy cheesecake recipe