I was at the hardware store, of all places, buying a new faucet washer when the woman behind me in line started talking about banana bread. Not just any banana bread, mind you. She was describing it with this level of detail that you’d normally reserve for a work of art—the way the browned butter smelled like toasted nuts, how the crust got all craggy and golden, and that you didn’t even need a mixer. I just stood there, holding my washer, completely captivated. Her name was Mrs. Gable, and she was the quietest person on my street. I’d waved at her for three years and never gotten more than a nod back. But that day, she just started talking, and I couldn’t stop listening.
I mean, honestly, who gets a life-changing recipe from the plumbing aisle at the hardware store? But there I was, scribbling notes on the back of a receipt because my phone was dead. She told me she’d been making this bread for forty years, ever since her mother-in-law taught her. The secret, she said, was burning the butter just a little bit on purpose. I remember laughing, and she gave me this look like she was testing if I was serious enough to handle the information. I must have passed, because she smiled and said, “You’ll never go back to the other way.”
Later that week, with three spotty bananas sitting on my counter, I finally tried it. I was skeptical, honestly. I mean, no mixer? And I had to babysit butter in a pan? It felt like more work, not less. But the moment that butter started turning amber and smelling like heaven, I knew she was onto something. The bread came out so moist and tender, with this deep, nutty flavor that regular banana bread just doesn’t have. Now, maybe you’ve been there—staring at overripe bananas and feeling like you have to make the same old loaf again. Let me tell you, this one is different. It’s the kind of recipe that makes you feel like a genius with almost no effort, and I keep making it because it never, ever fails to impress. Even when I forget to set the timer and the top gets a little too dark—which, let’s be real, happens more than I’d like—it’s still the best banana bread I’ve ever had.
Why You’ll Love This Recipe
This isn’t just another banana bread recipe. It’s the one you’ll come back to again and again, especially when you’re feeding a family on a budget and need something that feels special without the fuss. Here’s why it works so well for real home cooks:
- No Mixer Required: You don’t need a stand mixer, a hand mixer, or even a whisk if you’re feeling brave. A fork and a wooden spoon are all you need. Less equipment means less cleanup, and that’s a win for any busy weeknight or lazy Sunday morning.
- Simple Pantry Ingredients: Butter, bananas, flour, sugar, eggs—these are things you probably already have. No fancy extracts, no obscure flours, no trips to a specialty store. It’s budget-friendly cooking at its finest.
- Perfect for Picky Eaters: The browned butter adds a toasty, almost caramel-like flavor that even kids love. It’s not too sweet, not too dense, and that golden crust is just irresistible. My own kids, who claim to hate bananas, eat this bread without a single complaint.
- Leftovers That Reheat Like a Dream: This bread actually gets better on day two. The flavors meld together, and a quick 10-second zap in the microwave makes it taste freshly baked. It’s perfect for school lunches or a quick breakfast when you’re running late.
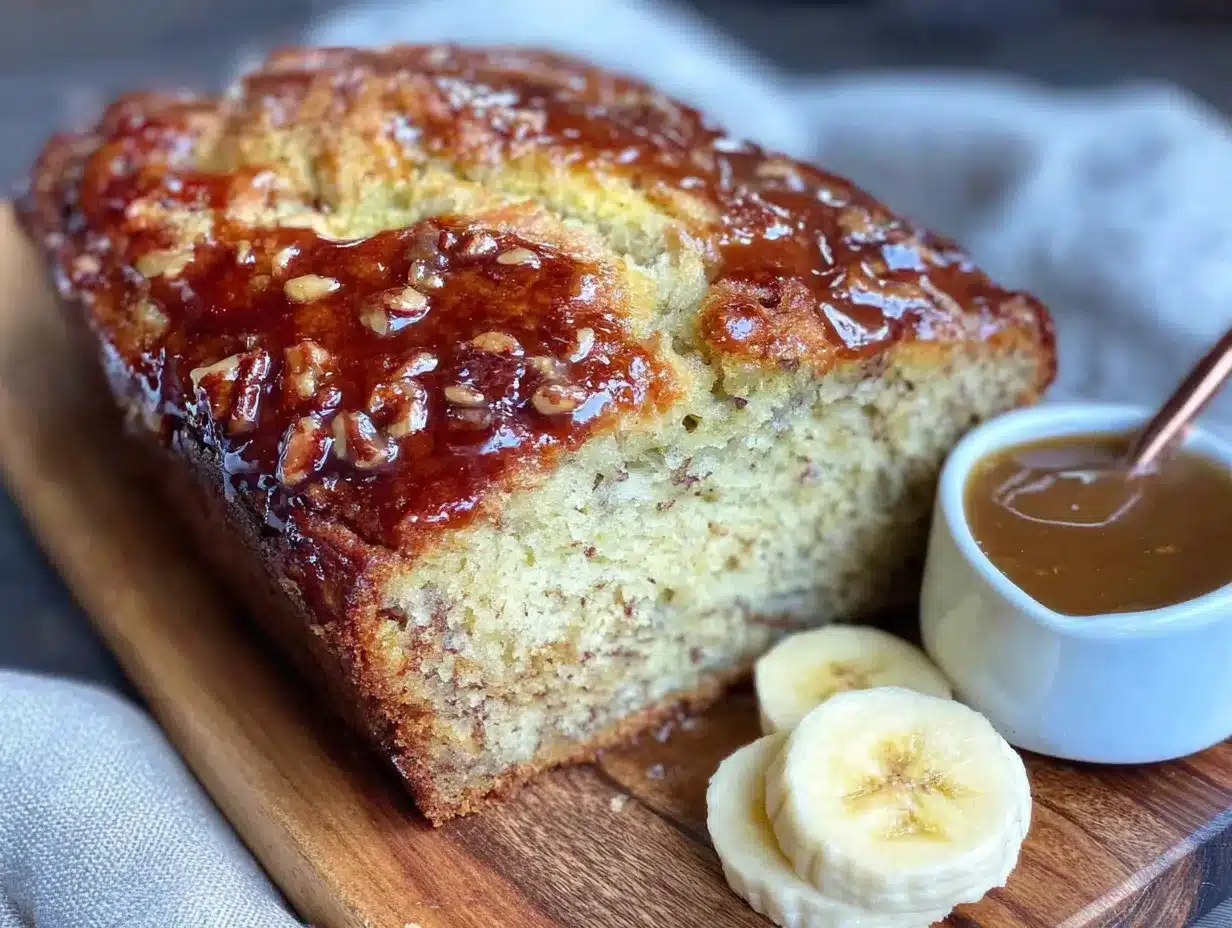
- Unbelievably Delicious: The texture is what gets everyone. It’s incredibly moist and tender, with a slightly crisp, buttery crust. The browned butter gives it this nutty depth that regular banana bread just can’t touch. Honestly, it’s next-level comfort food.
What makes this recipe different from every other banana bread out there is the technique. Browning the butter is a small step that transforms the entire flavor profile. It’s not complicated—you just watch butter melt and swirl it until it turns amber—but the payoff is enormous. This is the kind of recipe that makes you look like a hero at a potluck or a brunch, without any of the stress. It’s comfort food reimagined: faster, simpler, but with the same soul-soothing satisfaction that makes you close your eyes after the first bite.
What Ingredients You Will Need
This recipe uses simple, wholesome ingredients to deliver that deep, nutty flavor and perfectly moist texture. Most of these are pantry staples, and the few that aren’t are easy to find and easy on the wallet.
For the Banana Bread
- 1/2 cup (113g) unsalted butter: This is the star of the show. I use unsalted so I can control the salt level. Land O’Lakes or Kerrygold work beautifully, but any good-quality butter will do. You’ll be browning it, so don’t use margarine or spreads—they won’t brown properly.
- 3 large ripe bananas, mashed (about 1 1/2 cups or 340g): The riper, the better. Look for bananas with lots of brown spots—they’re sweeter and easier to mash. If your bananas aren’t ripe enough, you can speed things up by baking them at 300°F for 15 minutes until the skins turn black. Let them cool before mashing.
- 3/4 cup (150g) granulated sugar: Regular white sugar works perfectly. You can reduce this to 1/2 cup if your bananas are very sweet, but I find 3/4 cup gives the bread a nice structure and sweetness without being cloying.
- 2 large eggs, room temperature: Room-temperature eggs mix into the batter more evenly, creating a smoother texture. If you forgot to take them out of the fridge, place them in a bowl of warm water for 5 minutes.
- 1 teaspoon vanilla extract: Pure vanilla extract is best, but imitation vanilla works in a pinch. It adds warmth and depth to the flavor.
- 1 1/2 cups (190g) all-purpose flour: Spoon and level your flour—don’t scoop directly from the bag, or you’ll end up with too much. For a whole wheat version, swap half the flour for whole wheat pastry flour.
- 1 teaspoon baking soda: This is the only leavening agent you need. Make sure it’s fresh—if it doesn’t fizz when mixed with a little vinegar, it’s time to buy a new box.
- 1/2 teaspoon salt: Fine sea salt or table salt is fine. It balances the sweetness and enhances the browned butter flavor.
- 1/2 cup (60g) chopped walnuts or pecans (optional): I love the crunch they add. Toast them lightly in a dry pan for 3-4 minutes before adding to the batter for extra flavor. You can leave them out or swap for chocolate chips if that’s your thing.
Ingredient Selection Tips: For the best texture, use firm, spotty bananas that are still a bit firm to the touch. Overly mushy bananas can make the bread gummy. And please, don’t skip the salt—it’s what makes the browned butter sing.
Equipment Needed
You don’t need a fancy kitchen to make this bread. Here’s what you’ll need:
- A 9×5-inch loaf pan: This is the standard size. If you use an 8×4-inch pan, your bread will take longer to bake and might have a domed top. A 10-inch pan will give you a shorter, wider loaf.
- A light-colored saucepan or skillet: Use a stainless steel or light-colored nonstick pan to brown the butter. Dark pans make it hard to see the color change, and you might end up with burnt butter.
- A large mixing bowl: Any bowl will do, but a wide one makes mashing bananas and mixing easier.
- A wooden spoon or rubber spatula: For mixing the batter. A fork works too, but a spatula helps you scrape the sides better.
- Parchment paper: Lining the pan makes lifting the bread out a breeze. If you don’t have it, grease the pan well with butter and dust with flour.
- Cooling rack: Essential for cooling the bread evenly. If you don’t have one, you can use the grates from your oven—just make sure they’re clean!
Budget-Friendly Tip: You don’t need a mixer, but if you have a whisk, it helps incorporate the eggs faster. Honestly, a fork works just fine. I’ve made this bread in a rental cabin with nothing but a bowl and a spoon, and it turned out perfect.
Preparation Method
This recipe comes together in about 15 minutes of active work. The hardest part is waiting for it to bake! Follow these steps carefully, and you’ll have the best banana bread of your life.
- Preheat your oven to 350°F (175°C). Position the rack in the center of the oven. While it’s heating, line your loaf pan with parchment paper, leaving an overhang on the two long sides. This creates “handles” for lifting the bread out later.
- Brown the butter. Place the 1/2 cup of butter in a light-colored saucepan over medium heat. Let it melt completely, then start swirling the pan gently. You’ll hear it sizzle and pop—that’s the water evaporating. After about 3-4 minutes, the butter will start to foam. Keep swirling. Soon, you’ll see little brown specks forming at the bottom of the pan, and the butter will smell nutty and toasty. Once it’s a deep amber color (think the color of a brown paper bag), remove it from the heat immediately. Pour it into a heatproof bowl to stop the cooking. Let it cool for 5 minutes.
- Mash the bananas. In your large mixing bowl, mash the bananas with a fork until mostly smooth. A few small lumps are fine—they add texture. You should have about 1 1/2 cups of mashed banana.
- Mix the wet ingredients. Add the cooled browned butter, sugar, eggs, and vanilla extract to the mashed bananas. Stir with your wooden spoon or spatula until everything is well combined. The mixture will look a little thin, and that’s okay. Don’t overmix—just stir until the sugar is mostly dissolved.
- Combine the dry ingredients. In a separate small bowl, whisk together the flour, baking soda, and salt. This ensures the baking soda is evenly distributed so your bread rises evenly.
- Fold the dry into the wet. Add the flour mixture to the banana mixture. Use a gentle folding motion—scrape the bottom and sides of the bowl, then fold the batter over itself. Stop as soon as you no longer see streaks of flour. Overmixing will make the bread tough. If you’re adding nuts or chocolate chips, fold them in at this stage.
- Pour and smooth. Scrape the batter into your prepared loaf pan. Use your spatula to spread it evenly. Give the pan a gentle tap on the counter to release any air bubbles.
- Bake. Place the pan in the preheated oven and bake for 50-60 minutes. Start checking at 50 minutes. The bread is done when a toothpick inserted into the center comes out clean or with just a few moist crumbs. The top should be a deep golden brown and cracked beautifully. If the top is browning too quickly (after about 40 minutes), tent the pan loosely with aluminum foil.
- Cool. Let the bread cool in the pan on a wire rack for 10 minutes. Then, use the parchment handles to lift it out and transfer it to the rack to cool completely. Don’t skip this step—cooling on the rack prevents the bottom from getting soggy.
- Slice and enjoy. Wait until the bread is completely cool before slicing, if you can. Warm bread is delicious, but it crumbles easily. For clean slices, use a serrated knife and a gentle sawing motion.
Sensory Cues: When the butter is browning, you’ll smell a warm, nutty aroma that fills the kitchen. The batter should be thick but pourable—like a thick milkshake. When the bread is done, the top will be a rich golden brown, and the crack down the center should look dry and slightly crumbly.
Cooking Tips & Techniques
I’ve made this bread more times than I can count, and I’ve learned a few things the hard way. Here are my best tips to ensure success every time.
Don’t Walk Away from the Butter. Browning butter happens fast. One minute it’s golden, the next it’s burnt. I once got distracted by a phone call and ended up with black butter that smelled like a campfire. It was a complete waste. Stay at the stove, swirl constantly, and pull it off the heat the moment it turns amber. The residual heat will continue to cook it, so don’t wait until it’s the color you want—stop it a shade lighter.
Measure Your Bananas by Weight, Not Count. Bananas vary wildly in size. Three small bananas might only give you 1 cup of mash, while three huge ones could give you 2 cups. Too much banana makes the bread dense and gummy. Too little makes it dry. I always mash first, then measure. If you have extra, save it for smoothies. If you’re short, add a splash of milk or yogurt.
Room Temperature Eggs Are Non-Negotiable. Cold eggs seize the browned butter, creating lumps. If you add cold eggs to warm butter, you’ll get a greasy, separated batter. Let your eggs sit out for 30 minutes, or warm them in a bowl of warm water for 5 minutes. The batter should be smooth and emulsified, not oily.
The Toothpick Test Is Your Friend. Oven temperatures vary. My oven runs hot, so I start checking at 45 minutes. Insert the toothpick into the center of the crack—that’s the thickest part. If it comes out with wet batter, it needs more time. If it comes out clean, it’s done. A few moist crumbs are okay—the bread will continue to cook as it cools.
Let It Cool Completely. I know it’s tempting to cut into it while it’s warm, but the bread needs time to set. Cutting too early will give you a crumbly, gummy mess. I’ve done it, and I regretted it. Patience is key here. Give it at least an hour on the cooling rack.
Variations & Adaptations
This recipe is wonderfully flexible. Here are a few ways to make it your own, depending on what you have in your pantry or who you’re feeding.
- Chocolate Chip Banana Bread: Fold in 1/2 cup of semi-sweet or dark chocolate chips along with the dry ingredients. The chocolate pairs beautifully with the nutty browned butter. My kids beg for this version every time.
- Gluten-Free Option: Swap the all-purpose flour for a 1:1 gluten-free baking blend that contains xanthan gum. I’ve used Bob’s Red Mill and King Arthur brands with great success. The texture will be slightly more tender, but still delicious.
- Vegan Adaptation: Use vegan butter (like Miyoko’s or Earth Balance) for browning. Replace the eggs with 2 flax eggs (2 tablespoons ground flaxseed mixed with 6 tablespoons water, left to sit for 5 minutes). The bread will be a bit denser, but the flavor is still fantastic.
- Spiced Banana Bread: Add 1 teaspoon of cinnamon, 1/2 teaspoon of nutmeg, and a pinch of cloves to the dry ingredients. This gives the bread a cozy, fall-inspired flavor that’s perfect with a cup of coffee.
- Streusel Topping: Mix 1/4 cup flour, 1/4 cup brown sugar, 2 tablespoons cold butter, and a pinch of cinnamon in a small bowl until crumbly. Sprinkle over the batter before baking. It creates a crunchy, buttery top crust that’s absolutely divine.
I personally love the streusel topping variation. It adds a little extra texture and sweetness that feels special without being complicated. Just remember to tent the bread with foil if the streusel browns too quickly.
Serving & Storage Suggestions
This banana bread is delicious in so many ways. Here’s how to serve it and keep it fresh.
Serving: Serve the bread at room temperature or slightly warm. A slice with a pat of salted butter is pure heaven. For a more decadent treat, toast a slice and drizzle with honey or maple syrup. It’s also wonderful with a smear of cream cheese or a dollop of Greek yogurt. For breakfast, it’s perfect alongside a cup of coffee or a glass of cold milk.
Storage: Store the bread in an airtight container at room temperature for up to 4 days. The flavors actually improve after a day—the browned butter flavor becomes more pronounced. If your kitchen is very warm, you can refrigerate it, but let it come to room temperature before serving for the best texture.
Freezing: This bread freezes beautifully. Wrap the cooled loaf tightly in plastic wrap, then in a layer of aluminum foil. Freeze for up to 3 months. To thaw, leave it on the counter overnight, or unwrap and microwave individual slices for 20-30 seconds. You can also freeze pre-sliced bread—just separate slices with parchment paper so they don’t stick together.
Reheating: For that fresh-baked taste, warm a slice in a 300°F oven for 5-7 minutes, or microwave for 10-15 seconds. The crust will crisp up slightly, and the inside will be soft and tender. It’s almost better than fresh!
Nutritional Information & Benefits
Here’s a rough estimate of the nutritional content per slice (based on 10 slices, without nuts or chocolate chips):
- Calories: 260
- Fat: 12g
- Carbohydrates: 36g
- Fiber: 1g
- Sugar: 18g
- Protein: 4g
Health Benefits: Bananas are a great source of potassium, which supports heart health and muscle function. They also provide vitamin B6 and vitamin C. The browned butter, while indulgent, adds a rich flavor that means you can use less sugar overall. This bread is a treat, but it’s made with real, whole ingredients.
Dietary Considerations: This recipe contains gluten, dairy, and eggs. For a gluten-free version, see the variations section. For a dairy-free version, use vegan butter. This bread is naturally nut-free if you omit the walnuts, making it safe for school lunches.
I like to think of this bread as a “better-for-you” indulgence. It’s not health food, but it’s made from scratch with ingredients you can feel good about. And honestly, the joy it brings to the table is worth every calorie.
Conclusion
This easy no-mixer banana bread with browned butter is the recipe you’ll turn to again and again. It’s simple enough for a Tuesday afternoon, yet special enough for a holiday brunch. The browned butter adds a depth of flavor that feels gourmet, but the process is so straightforward that anyone can do it. Whether you’re a seasoned baker or a total beginner, this bread will make you look like a pro.
I love this recipe because it reminds me of Mrs. Gable and that unexpected moment in the hardware store. It’s a reminder that the best things often come from the most surprising places. So go ahead—grab those spotty bananas, brown that butter, and make a loaf. I promise you won’t regret it.
I’d love to hear how yours turns out! Did you add chocolate chips? Try the streusel topping? Share your creations in the comments below, and don’t forget to tag me on Pinterest. Happy baking, friends!
Frequently Asked Questions
Can I use salted butter instead of unsalted?
Yes, you can. Just reduce the added salt in the recipe to 1/4 teaspoon to avoid an overly salty bread. The browned butter flavor will still shine through.
Why did my banana bread turn out dry?
This usually happens from overmixing the batter or overbaking. Mix just until the flour disappears, and start checking for doneness at 50 minutes. Also, make sure your bananas are very ripe—underripe bananas have less moisture.
Can I make this recipe into muffins?
Absolutely! Grease a 12-cup muffin tin or line with paper liners. Fill each cup about 3/4 full. Bake at 350°F for 18-22 minutes, or until a toothpick inserted into the center comes out clean. This is a great way to portion them for school lunches or snacks.
How do I know when the butter is properly browned?
Look for a deep amber color, similar to the color of a brown paper bag or a toasted hazelnut. You’ll also see small brown specks at the bottom of the pan, and the butter will smell nutty and rich. The whole process takes about 4-5 minutes over medium heat.
Can I use frozen bananas?
Yes, frozen bananas work great. Thaw them completely at room temperature or in the microwave. They will release a lot of liquid—don’t drain it! That liquid is full of banana flavor. Just mash them well, and proceed with the recipe. You may need to add an extra minute or two to the baking time.
Pin This Recipe!
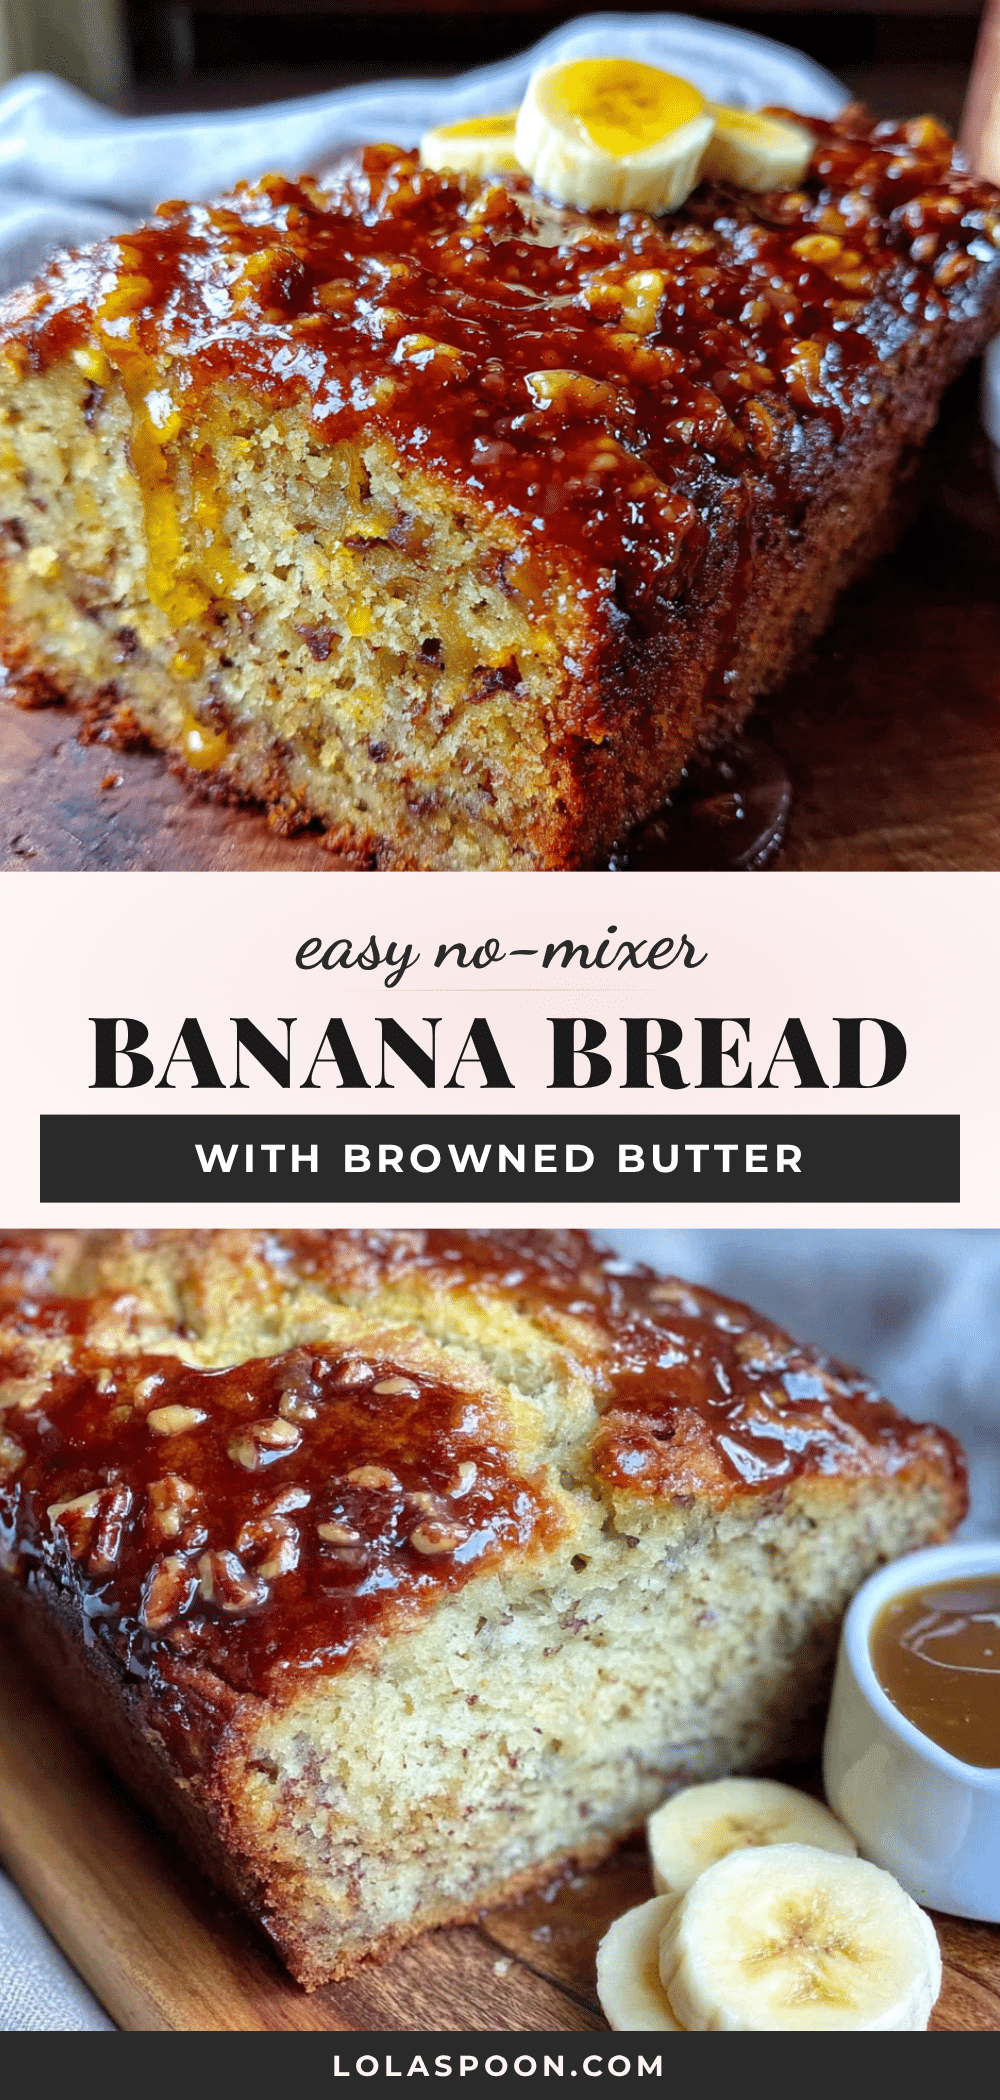
Easy No-Mixer Banana Bread with Browned Butter: Best Homemade Recipe
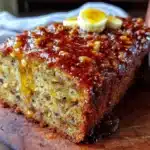
This easy no-mixer banana bread with browned butter is the recipe you’ll turn to again and again. It’s simple enough for a Tuesday afternoon, yet special enough for a holiday brunch.
- Prep Time: 15 minutes
- Cook Time: 50-60 minutes
- Total Time: 1 hour 15 minutes
- Yield: 10 servings 1x
- Category: Dessert
- Cuisine: American
Ingredients
- 1/2 cup (113g) unsalted butter
- 3 large ripe bananas, mashed (about 1 1/2 cups or 340g)
- 3/4 cup (150g) granulated sugar
- 2 large eggs, room temperature
- 1 teaspoon vanilla extract
- 1 1/2 cups (190g) all-purpose flour
- 1 teaspoon baking soda
- 1/2 teaspoon salt
- 1/2 cup (60g) chopped walnuts or pecans (optional)
Instructions
- Preheat your oven to 350°F (175°C). Position the rack in the center of the oven. Line your loaf pan with parchment paper, leaving an overhang on the two long sides.
- Brown the butter. Place the 1/2 cup of butter in a light-colored saucepan over medium heat. Let it melt completely, then start swirling the pan gently. After about 3-4 minutes, the butter will start to foam. Keep swirling until you see little brown specks forming at the bottom of the pan and the butter smells nutty and toasty. Once it’s a deep amber color, remove from heat immediately and pour into a heatproof bowl to stop cooking. Let cool for 5 minutes.
- Mash the bananas in a large mixing bowl with a fork until mostly smooth. You should have about 1 1/2 cups of mashed banana.
- Add the cooled browned butter, sugar, eggs, and vanilla extract to the mashed bananas. Stir with a wooden spoon or spatula until well combined. The mixture will look a little thin.
- In a separate small bowl, whisk together the flour, baking soda, and salt.
- Add the flour mixture to the banana mixture. Use a gentle folding motion until no streaks of flour remain. If adding nuts or chocolate chips, fold them in at this stage.
- Scrape the batter into the prepared loaf pan and spread evenly. Give the pan a gentle tap on the counter to release air bubbles.
- Bake for 50-60 minutes. Start checking at 50 minutes. The bread is done when a toothpick inserted into the center comes out clean or with just a few moist crumbs. If the top is browning too quickly, tent the pan loosely with aluminum foil.
- Let the bread cool in the pan on a wire rack for 10 minutes. Then use the parchment handles to lift it out and transfer to the rack to cool completely.
- Wait until the bread is completely cool before slicing. For clean slices, use a serrated knife and a gentle sawing motion.
Notes
Don’t walk away from the butter while browning. Measure bananas by weight for best results. Use room temperature eggs. Let the bread cool completely before slicing for clean cuts.
Nutrition
- Serving Size: 1 slice
- Calories: 260
- Sugar: 18
- Sodium: 220
- Fat: 12
- Saturated Fat: 7
- Carbohydrates: 36
- Fiber: 1
- Protein: 4
Keywords: banana bread, browned butter, no mixer, easy banana bread, homemade banana bread, moist banana bread