She wasn’t trying to impress anyone. I’d stopped by my neighbor, Carol’s, place on a Tuesday afternoon to borrow a bag of flour—mine had mysteriously walked off, probably into a batch of cookies my husband swore he didn’t make—and the smell hit me before I even got to her back door. It was warm, savory, and a little bit smoky, like someone had captured the essence of a campfire and a bakery and mixed them together in her cozy kitchen. I walked in, and there she was, totally nonchalant, pulling a baking sheet out of the oven. It was covered in what looked like pale, knobby fingers, and my first thought was, Okay, Carol has finally lost it.
But then she turned, saw my face, and just laughed. “Relax, they’re pretzels,” she said, as if that explained everything. She pointed to a cutting board on the counter, which was already covered in little bowls of cheese sauce, spicy mustard, and what looked like a tiny cauldron of queso. “For the kids’ Halloween party,” she added, shrugging like it was the most normal thing in the world to have a board full of edible witch fingers on a random weekday. Honestly, I was speechless. I mean, I’ve seen a lot of Halloween snacks in my day—those sad, store-bought cookies with orange frosting and the pumpkin-shaped cheese puffs that stain your fingers—but this was different. This was clever. It was spooky without being gross, and it looked… well, it looked cozy.
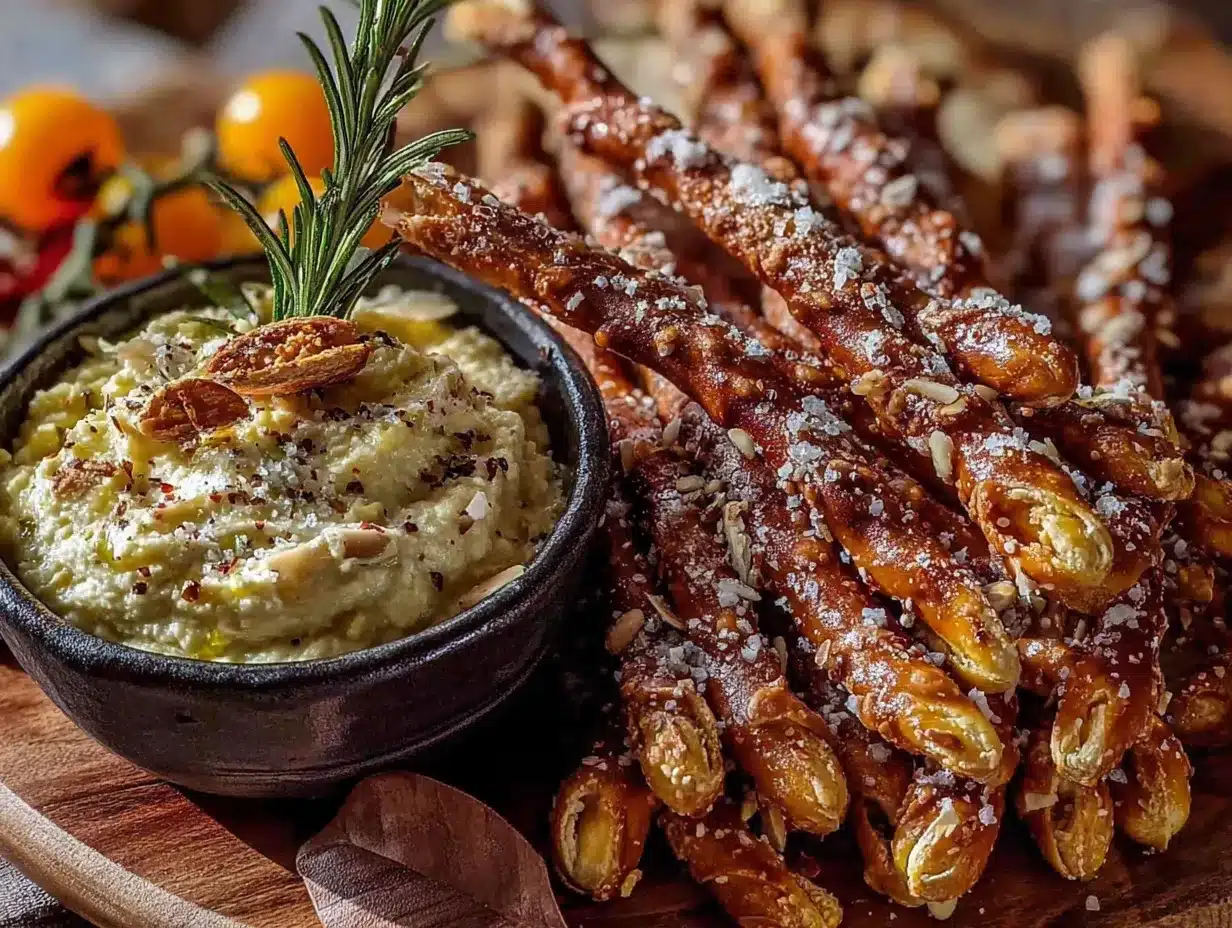
I stood there for a solid minute, just staring at the “fingers.” The almond slivers for fingernails were perfectly placed, and the little “knuckles” were marked by tiny cuts in the dough. Carol, meanwhile, was completely unfazed, wiping down the counter and asking if I wanted to keep the flour. And that moment—the casualness of it all—is what stuck with me. She wasn’t trying to be the coolest mom on the block. She was just making a snack for her kids, and it happened to be the most brilliant Halloween appetizer I’d ever seen. I knew right then I had to recreate it, and that’s how this Cozy Witches’ Finger Pretzel Dip Board was born. Maybe you’ve been there, staring at a board of snacks and thinking, I need to make this for my next gathering. This is that board.
Why You’ll Love This Recipe
This isn’t your average Halloween snack. It’s a conversation starter, a crowd-pleaser, and honestly, it’s the kind of recipe that makes you look like a kitchen wizard without spending all day in the kitchen. Here’s why this dip board is going to be your new go-to for spooky season.
- Quick & Easy: The pretzel fingers come together in under 30 minutes—perfect for those last-minute Halloween parties or a fun Friday night treat. You don’t need to be a bread expert to nail this.
- Simple Ingredients: You probably already have most of the ingredients in your pantry. Flour, yeast, butter, salt—and the dips are just your favorite store-bought or homemade sauces. No fancy grocery trips required.
- Perfect for Halloween: This board is designed for the occasion. It’s spooky, playful, and totally Instagram-worthy. Kids and adults will both get a kick out of the witch fingers.
- Crowd-Pleaser: I’ve tested this at a few gatherings now, and it always gets rave reviews. People love the novelty of the fingers, but they stay for the soft, warm pretzel bites and the array of dipping sauces.
- Unbelievably Delicious: Let’s be real—novelty snacks often taste terrible. Not these. The pretzels are soft, chewy, and salty, with that classic baked pretzel flavor that’s impossible to resist.
What makes this recipe different from the rest is the dip board concept. Instead of just serving a plate of pretzel fingers, you’re creating an entire experience. The board itself becomes part of the decor. And the best part? You can customize it with any dips you love. I’ve tried it with a spicy queso, a honey mustard, and even a chocolate sauce for a sweet twist. It’s comfort food reimagined for the spooky season—faster, easier, but with the same soul-soothing satisfaction of a warm pretzel.
What Ingredients You Will Need
This recipe uses simple, wholesome ingredients to deliver that classic pretzel flavor and satisfying texture without the fuss. Most of these are pantry staples, so you’re probably already set.
For the Pretzel Fingers
- 1 ½ cups warm water (110°F-115°F): This is key for activating the yeast. Too hot, and you’ll kill it. Too cold, and it won’t wake up. I use a thermometer, but if you don’t have one, the water should feel like a warm bath.
- 1 packet (2 ¼ teaspoons) active dry yeast: I prefer Fleischmann’s for reliability, but any brand works. You can also use instant yeast—just skip the proofing step and mix it directly with the flour.
- 1 tablespoon brown sugar: This feeds the yeast and adds a tiny bit of sweetness to the dough. You can use white sugar if that’s all you have.
- 3 ½ cups all-purpose flour: No need for bread flour here. All-purpose gives a perfectly soft, chewy pretzel. I’ve used King Arthur Flour for years and love the consistency.
- 1 teaspoon salt: Table salt is fine, but kosher salt gives a better flavor. Don’t skip it—it balances the sweetness.
- 2 tablespoons unsalted butter, melted: This adds richness to the dough. You can use salted butter, but reduce the added salt by a pinch.
For the Baking Soda Bath
- ½ cup baking soda: This is what gives pretzels their signature dark, chewy crust. It’s non-negotiable. Don’t try to substitute it with baking powder—it won’t work the same way.
- 8 cups water: For the bath. You’ll boil the pretzels briefly before baking, which sets the crust.
For the Topping & Assembly
- 1 large egg, beaten: For the wash. It gives the pretzels that beautiful golden sheen.
- Coarse sea salt or pretzel salt: I love the crunch of Maldon sea salt. Regular table salt will dissolve too quickly.
- 24 whole almonds (sliced almonds work too): These become the “fingernails.” You can also use slivered almonds for a more delicate look.
For the Dip Board
- Your choice of dips: I usually go with a classic beer cheese (store-bought is fine!), a spicy queso, and a honey mustard. For a sweet option, try a warm chocolate sauce or a caramel dip.
- Optional garnishes: Fresh rosemary sprigs (for a “cauldron” look), black olives, or pretzel sticks for “bones.”
Equipment Needed
You don’t need a ton of fancy tools for this recipe. Here’s what I use, plus some alternatives if you’re working with a basic kitchen setup.
- Large mixing bowl: Any big bowl works. I use a glass one so I can see the dough rise.
- Wooden spoon or dough hook: A sturdy spoon is fine, but a stand mixer with a dough hook makes kneading effortless. If you’re kneading by hand, expect about 8 minutes of work.
- Baking sheet: A standard half-sheet pan works perfectly. Line it with parchment paper or a silicone baking mat for easy cleanup.
- Large pot: For the baking soda bath. You need enough room for the water and the pretzels to float. I use a 5-quart pot.
- Slotted spoon: For transferring the pretzels from the bath to the baking sheet. A spider skimmer works even better.
- Sharp knife or bench scraper: For cutting the dough into finger-sized pieces. A pizza cutter works too.
- Cutting board or serving board: For the final presentation. A wooden board looks great, but a large platter works too.
- Small bowls: For the dips. I use ramekins or tiny cauldron-shaped bowls for the Halloween vibe.
One tip I learned the hard way: Don’t use a cheap baking sheet for the soda bath. The baking soda can react with some metals and leave a weird taste. Stick with stainless steel or enameled pots.
Preparation Method
Alright, let’s get into the fun part. This recipe has a few steps, but I promise it’s not complicated. Just follow along, and you’ll have a board full of spooky pretzel fingers in no time.
Step 1: Activate the Yeast
In your large mixing bowl, combine the warm water (110°F-115°F) and the brown sugar. Sprinkle the yeast on top and give it a gentle stir. Let it sit for about 5 minutes until it becomes frothy and bubbly. If it doesn’t foam up, your yeast might be dead—start over with fresh yeast.
Step 2: Make the Dough
Add the flour, salt, and melted butter to the yeast mixture. Stir with a wooden spoon until a shaggy dough forms. If using a stand mixer, fit it with the dough hook and mix on low speed for about 2 minutes. If kneading by hand, turn the dough onto a lightly floured surface and knead for 6-8 minutes until smooth and elastic. The dough should feel soft and slightly tacky, but not sticky.
Step 3: Let It Rise
Place the dough in a lightly greased bowl (I use a drizzle of olive oil), cover it with a clean kitchen towel, and let it rise in a warm spot for about 30 minutes. It should double in size. While it rises, preheat your oven to 425°F (220°C) and line a baking sheet with parchment paper.
Step 4: Shape the Fingers
Punch down the dough and turn it onto a lightly floured surface. Divide it into 12 equal pieces. Take one piece and roll it into a rope about 6 inches long. Pinch one end slightly to form the “fingertip” and press an almond sliver into the tip for the “nail.” Use a sharp knife to make 2-3 shallow cuts on the rope for “knuckles.” Repeat with the remaining dough. This is the fun part—don’t worry about making them perfect. The imperfections make them look more realistic!
Step 5: The Baking Soda Bath
In a large pot, bring 8 cups of water to a boil. Carefully add the baking soda—it will bubble up vigorously, so be cautious. Reduce the heat to a simmer. Using a slotted spoon, gently lower 2-3 pretzel fingers into the bath for 20-30 seconds. They should float. Remove them and place them on the prepared baking sheet, spacing them about 2 inches apart. Repeat with the remaining fingers.
Step 6: Bake
Brush each pretzel finger with the beaten egg wash. Sprinkle with coarse salt. Bake for 12-15 minutes, until they are deep golden brown and puffed up. The almond “nails” might darken a bit, which actually makes them look more realistic.
Step 7: Assemble the Board
While the pretzels are still warm, arrange them on your serving board. Place the small bowls of dips around them. I like to add a few sprigs of rosemary to look like “witch’s broomsticks” and some black olives for a creepy vibe. Serve warm.
Cooking Tips & Techniques
I’ve made this recipe about a dozen times now, and I’ve definitely learned a few things along the way. Here are my best tips to make sure your witch fingers turn out perfectly.
- Don’t overboil the pretzels: The baking soda bath is crucial for the crust, but if you leave them in too long, the dough can get a weird, metallic taste. Stick to 20-30 seconds max.
- Keep the dough covered: While you’re shaping the fingers, keep the unused dough covered with a towel. It dries out fast, and dry dough doesn’t shape well.
- Use a sharp knife for the knuckles: A dull knife will just squish the dough. I use a serrated knife for clean cuts.
- Watch the almond nails: They can burn quickly in the oven. If they start to look too dark, cover the tips with a small piece of foil halfway through baking.
- Make ahead: You can shape the pretzels and refrigerate them on the baking sheet for up to 4 hours before the bath and baking. Just cover them with plastic wrap.
One mistake I made early on was using too much flour when shaping. The dough got tough, and the fingers came out dense. Now I use just a light dusting of flour on my hands and the surface. The dough should be soft and pliable.
Variations & Adaptations
This recipe is super flexible. Here are a few ways to change it up based on what you have on hand or who you’re serving.
- Gluten-Free Option: Use a 1:1 gluten-free all-purpose flour blend. I’ve tried it with Bob’s Red Mill, and it works great. Just note that the dough will be a bit stickier, so use extra flour when shaping.
- Vegan Version: Swap the butter for a plant-based butter and use a flax egg (1 tablespoon ground flaxseed + 3 tablespoons water) for the wash. The texture will be slightly different, but still delicious.
- Spicy Twist: Add ½ teaspoon of cayenne pepper or smoked paprika to the dough for a kick. It pairs perfectly with a spicy queso dip.
- Sweet Fingers: Skip the salt and brush the baked pretzels with melted butter and cinnamon sugar. Serve with a chocolate or caramel dip for a dessert board.
- Different “Nails”: If you don’t have almonds, use sunflower seeds, pumpkin seeds, or even a small piece of dried apricot for a bloody-looking nail.
I once tried a version with everything bagel seasoning on top instead of salt. It was amazing. The sesame seeds and garlic flakes gave the fingers a whole new flavor profile. Definitely worth a try.
Serving & Storage Suggestions
This dip board is best served warm, right after the pretzels come out of the oven. The contrast of the warm, chewy pretzels with the cool dips is just perfect. For the board itself, I like to use a large wooden cutting board, but a sheet pan lined with parchment paper works just as well.
For dips, I recommend at least three options. My go-to combo is:
- Beer Cheese: Rich, creamy, and perfect for dipping. You can make it from scratch or use a good store-bought version.
- Spicy Queso: Add some diced jalapeños or a dash of hot sauce to your queso for a kick.
- Honey Mustard: The sweetness balances the saltiness of the pretzels beautifully.
To store leftovers, keep the pretzels in an airtight container at room temperature for up to 2 days. They will lose their crispness, but they’re still good. To reheat, pop them in a 350°F (175°C) oven for 5 minutes. Avoid the microwave—it makes them rubbery.
The dips should be refrigerated separately. The pretzels don’t freeze well, so I recommend making only what you’ll eat in a day or two. The flavors are definitely best fresh.
Nutritional Information & Benefits
While this is definitely a treat, it’s not as bad as you might think. Here’s a rough estimate per serving (1 pretzel finger with 2 tablespoons of dip):
- Calories: ~180
- Fat: 6g
- Carbohydrates: 26g
- Protein: 5g
- Fiber: 1g
The pretzels themselves are relatively low in sugar, and the whole wheat option adds a bit of fiber. The almonds provide healthy fats and vitamin E. Of course, the dips can add extra calories, but you control the portions. If you’re watching your sodium, use less salt on top.
For a lighter option, serve with a Greek yogurt-based dip or a salsa. And remember, this is about having fun and enjoying the moment—not counting every calorie. It’s Halloween, after all.
Conclusion
This Cozy Witches’ Finger Pretzel Dip Board is more than just a snack—it’s an experience. It’s the kind of recipe that makes people stop, laugh, and take a picture before they even take a bite. And honestly, that’s what I love about it. It’s playful, it’s delicious, and it brings a little bit of magic to your Halloween gathering.
I hope you give this recipe a try and make it your own. Maybe you’ll swap out the dips for your family’s favorites, or add a few extra spooky decorations to the board. That’s the beauty of it—it’s completely customizable. And if you do make it, I’d love to hear how it turned out. Leave a comment below, share a photo, or tag me in your post. Let’s make this Halloween one to remember, one cozy pretzel finger at a time.
Happy haunting, and happy dipping!
Frequently Asked Questions
Can I make these pretzel fingers ahead of time?
Yes! You can shape the pretzels and refrigerate them on the baking sheet for up to 4 hours before the baking soda bath and baking. Just cover them with plastic wrap. When you’re ready, proceed with the bath and baking as directed.
Why did my pretzels turn out hard?
Overboiling is the most common culprit. The baking soda bath should only last 20-30 seconds. Any longer, and the dough can become tough. Also, make sure you’re not overkneading the dough—it should be soft and pliable, not stiff.
Can I use self-rising flour instead of all-purpose flour?
I wouldn’t recommend it. Self-rising flour has baking powder and salt already added, which can throw off the yeast’s reaction and the texture of the pretzels. Stick with all-purpose flour for the best results.
What can I use instead of a baking soda bath?
Some recipes use a lye solution, but that’s not safe for home kitchens. The baking soda bath is the safest option and still gives you that classic pretzel crust. Don’t skip it—it’s essential for the flavor and texture.
How do I make the pretzels look more realistic?
Focus on the details. Use a sharp knife to make clean, shallow cuts for the knuckles. Press the almond nail firmly into the dough so it stays in place during baking. And don’t worry about perfection—realistic fingers are a little uneven!
Pin This Recipe!
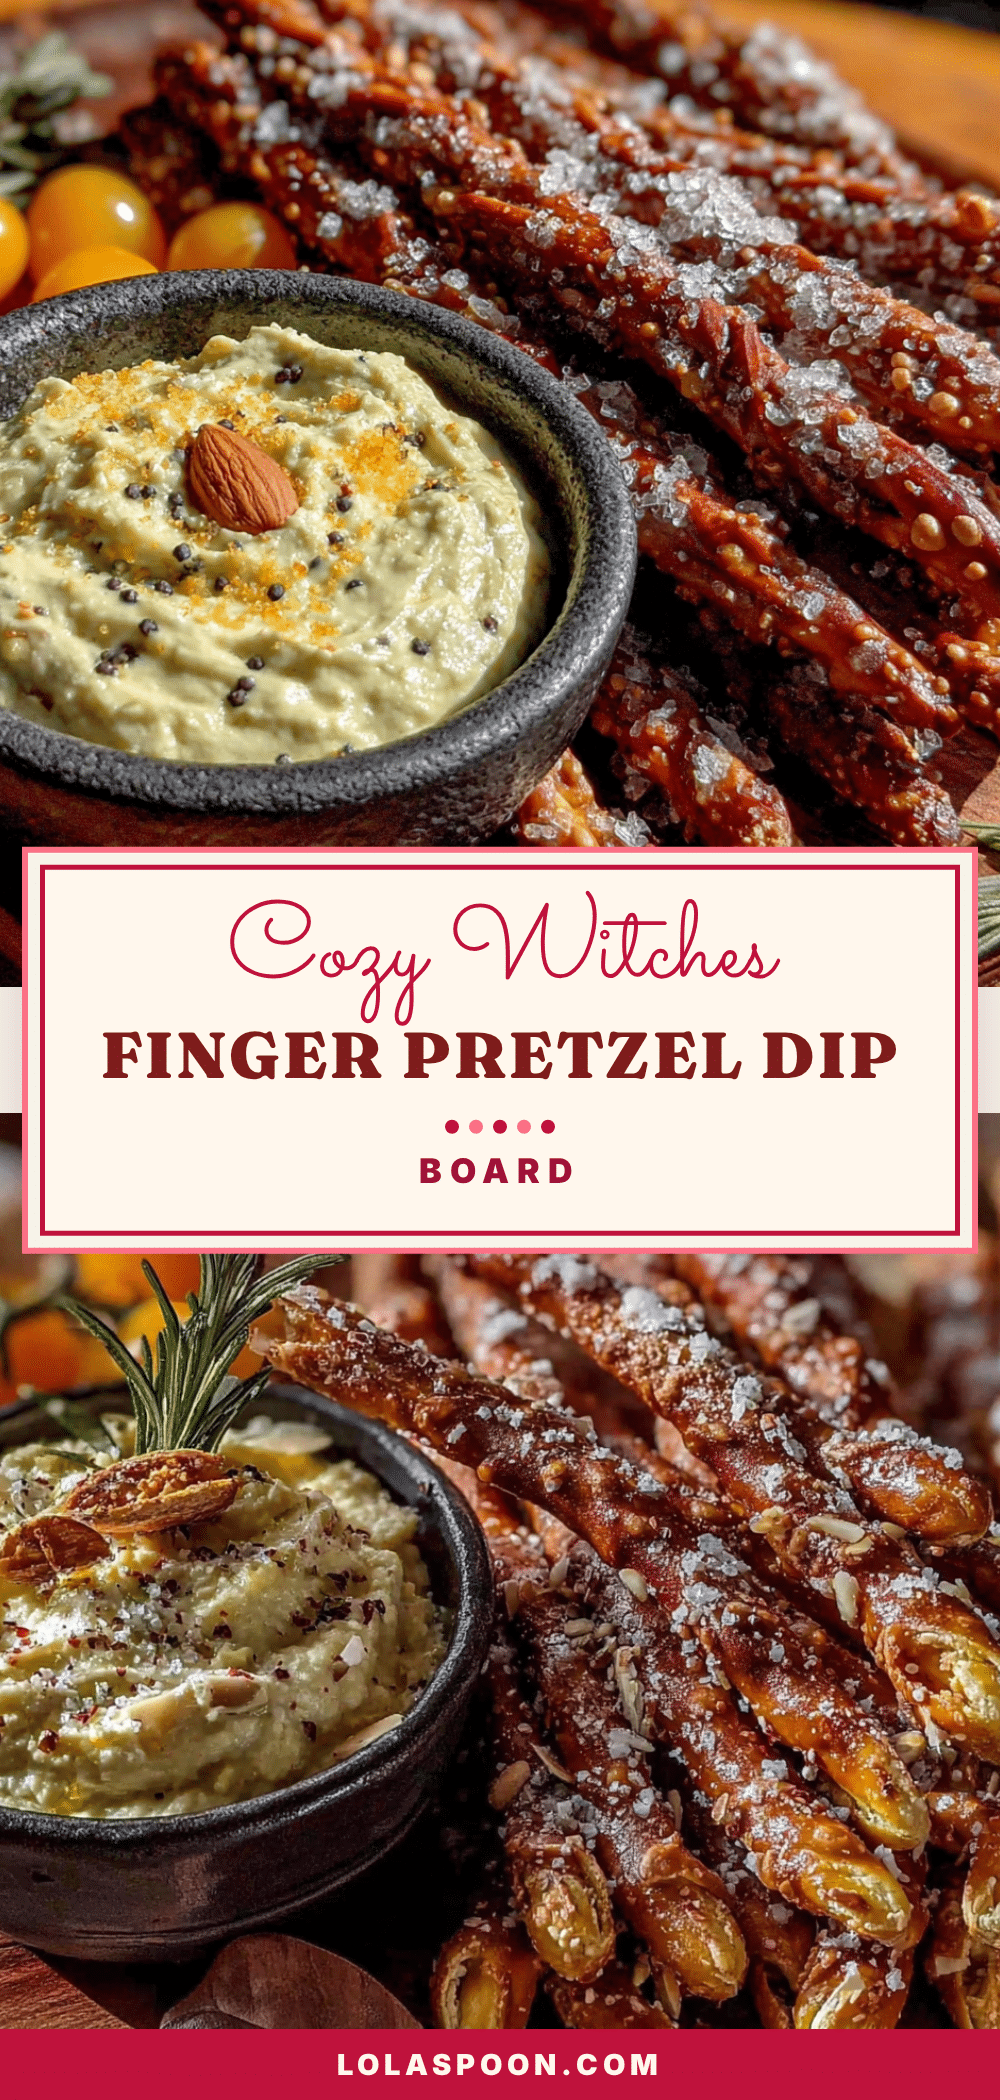
Cozy Witches Finger Pretzel Dip Board
A fun and spooky Halloween appetizer featuring soft pretzel fingers shaped like witch fingers, served with a variety of dipping sauces on a board. Perfect for parties and gatherings.
- Prep Time: 20 minutes
- Cook Time: 15 minutes
- Total Time: 35 minutes
- Yield: 12 servings 1x
- Category: Appetizer
- Cuisine: American
Ingredients
- 1 ½ cups warm water (110°F-115°F)
- 1 packet (2 ¼ teaspoons) active dry yeast
- 1 tablespoon brown sugar
- 3 ½ cups all-purpose flour
- 1 teaspoon salt
- 2 tablespoons unsalted butter, melted
- ½ cup baking soda
- 8 cups water
- 1 large egg, beaten
- Coarse sea salt or pretzel salt
- 24 whole almonds (sliced almonds work too)
- Your choice of dips (beer cheese, spicy queso, honey mustard, etc.)
- Optional garnishes: fresh rosemary sprigs, black olives, pretzel sticks
Instructions
- In a large mixing bowl, combine warm water (110°F-115°F) and brown sugar. Sprinkle yeast on top and let sit for 5 minutes until frothy.
- Add flour, salt, and melted butter to the yeast mixture. Stir until a shaggy dough forms. Knead by hand for 6-8 minutes or with a dough hook for 2 minutes until smooth and elastic.
- Place dough in a lightly greased bowl, cover with a towel, and let rise in a warm spot for 30 minutes until doubled in size. Preheat oven to 425°F (220°C) and line a baking sheet with parchment paper.
- Punch down dough and divide into 12 equal pieces. Roll each piece into a 6-inch rope. Pinch one end to form a fingertip and press an almond sliver into the tip for the nail. Make 2-3 shallow cuts on the rope for knuckles.
- In a large pot, bring 8 cups of water to a boil. Carefully add baking soda (it will bubble). Reduce to a simmer. Using a slotted spoon, lower 2-3 pretzel fingers into the bath for 20-30 seconds. Remove and place on prepared baking sheet, spacing 2 inches apart. Repeat with remaining fingers.
- Brush each pretzel finger with beaten egg wash and sprinkle with coarse salt. Bake for 12-15 minutes until deep golden brown and puffed.
- While warm, arrange pretzel fingers on a serving board with small bowls of dips. Garnish with rosemary sprigs and black olives if desired. Serve warm.
Notes
Don’t overboil the pretzels (20-30 seconds max). Keep unused dough covered while shaping. Watch almond nails to prevent burning; cover with foil if needed. Can shape pretzels and refrigerate up to 4 hours before baking.
Nutrition
- Serving Size: 1 pretzel finger wit
- Calories: 180
- Sugar: 2
- Sodium: 450
- Fat: 6
- Saturated Fat: 2
- Carbohydrates: 26
- Fiber: 1
- Protein: 5
Keywords: Halloween, pretzel, witch fingers, dip board, appetizer, spooky, party snack


