My neighbor, a retired baker named Margie, asked why I couldn’t just whisk the pumpkin filling by hand instead of dragging out my stand mixer. I started to explain why that wouldn’t work—something about air incorporation and texture consistency—then stopped. She was holding a wooden spoon with this look of gentle amusement, like she already knew the answer. So I handed her the bowl. And honestly? That pie filling was the silkiest, most perfectly blended batch I’d ever made. I learned something that Tuesday afternoon: sometimes the simplest tools do the best job, and being wrong about cooking feels a lot better when the result is this good.
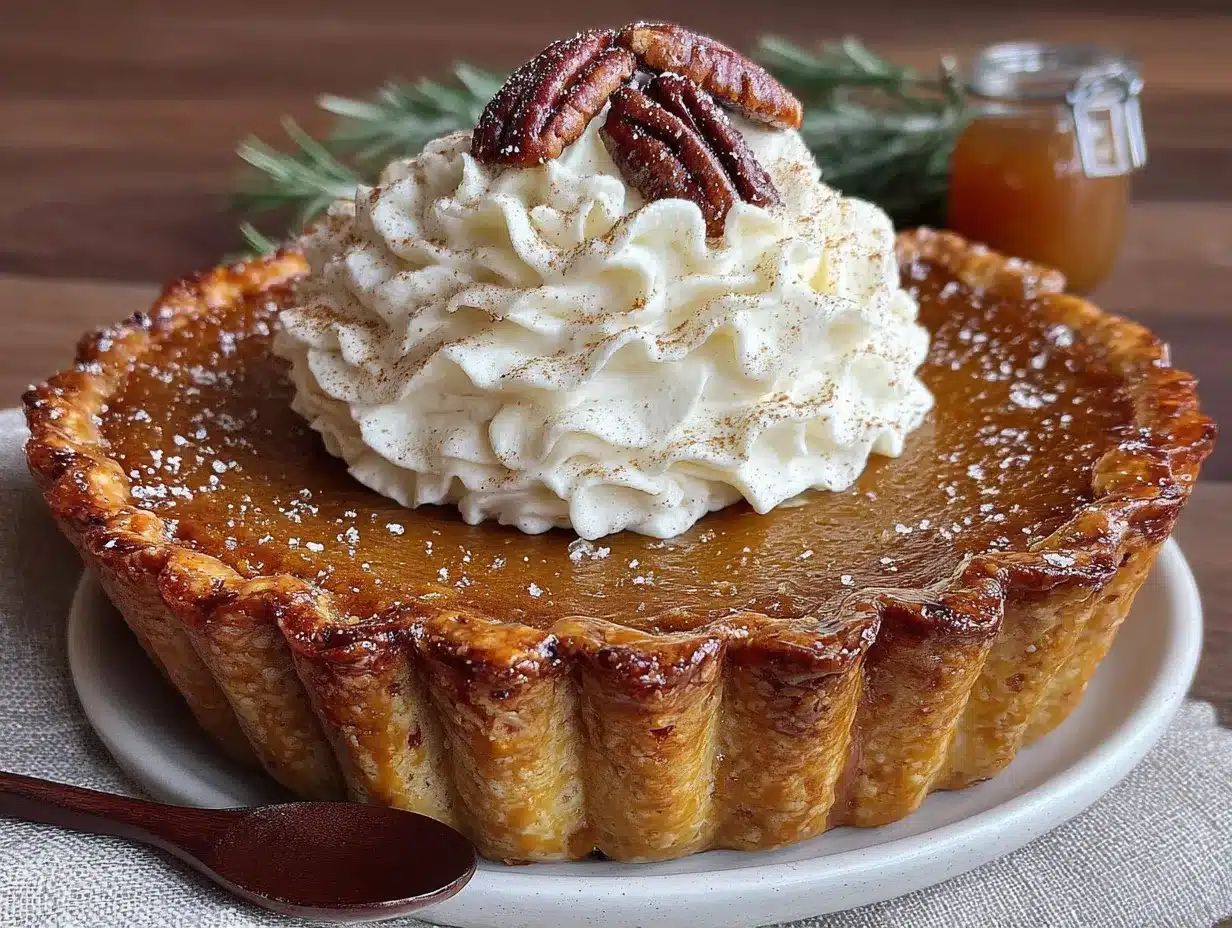
That moment changed how I approach this classic pumpkin pie. I used to think you needed serious equipment to get that velvety texture we all crave. Margie proved me wrong with a single wooden spoon and maybe thirty seconds of patience. Maybe you’ve been there too—overcomplicating a recipe because you think “professional” means “complicated.” The truth is, this pumpkin pie recipe shines because of its simplicity, not in spite of it. The filling comes together in one bowl, the crust stays flaky and buttery, and that maple whipped cream on top? It’s the kind of finishing touch that makes people close their eyes after the first bite.
I’ve been making this pie for every Thanksgiving, Friendsgiving, and random Tuesday gathering for the last six years. It never fails. The spices warm your kitchen before the pie even hits the table, and the way that maple cream melts into each slice is honestly addictive. This is the pie that gets requested, the one people text me about in October asking if I’m “making that pumpkin thing again.” And I always am. Because once you taste how easy and perfect this version is, you won’t go back to canned filling or store-bought whipped cream either.
Why You’ll Love This Recipe
This isn’t just another pumpkin pie recipe floating around the internet. It’s the one I’ve tested, tweaked, and served to dozens of skeptical dinner guests who swore they “didn’t like pumpkin pie.” Spoiler: they changed their minds. Here’s why this version wins every time:
- Incredibly Simple Ingredients – You probably have most of these in your pantry right now. No weird extracts, no specialty flours. Just real, honest ingredients that work together beautifully.
- One-Bowl Filling – No stand mixer needed. No blender required. Just a bowl and a whisk (or a wooden spoon, if you’re taking Margie’s advice). Less cleanup, more time with your guests.
- Perfect for Hosting – This pie actually gets better after a day in the fridge. Make it ahead, relax, and let your oven work its magic while you focus on your guests. It’s the ultimate stress-free dessert for dinner parties and holiday gatherings.
- That Maple Whipped Cream – Let’s be honest, this is the star. The maple flavor cuts through the warm spices in a way that regular whipped cream just can’t. It’s fancy without being fussy.
- Crowd-Pleaser Guaranteed – I’ve served this at potlucks, family dinners, and even a casual work gathering. The plate always comes back empty. Kids love it, adults rave about it, and people ask for the recipe every single time.
What makes this recipe different from all the others? It’s the balance. The spices are warm but not overwhelming. The filling is creamy but holds its shape when sliced. The crust stays flaky even after a day or two in the fridge. And that maple whipped cream? It’s sweet enough to feel indulgent but light enough that you don’t feel guilty going back for seconds. This is comfort food at its finest—the kind that makes you slow down and actually taste what you’re eating.
What Ingredients You Will Need
Every ingredient in this recipe plays a specific role, from the deep richness of the pumpkin to the subtle warmth of the spices. I’ve kept things straightforward because complicated ingredient lists don’t make better pies—they just make more dishes.
For the Pie Filling
- 1 can (15 oz) pure pumpkin puree – Not pumpkin pie filling. Look for 100% pure pumpkin. I prefer Libby’s for consistent texture, but store brands work fine too.
- 1 can (12 oz) evaporated milk – This gives the filling its signature creamy texture without making it too heavy. Regular milk won’t work the same way, so stick with evaporated.
- 3/4 cup granulated sugar – Just enough sweetness to balance the earthy pumpkin and warm spices.
- 2 large eggs – Room temperature is best. They incorporate more smoothly and create a silkier texture.
- 2 teaspoons pumpkin pie spice – Store-bought is fine, but I’ll share my homemade blend in the tips section if you want to mix your own.
- 1 teaspoon vanilla extract – Pure vanilla makes a difference here. Skip the imitation stuff for this one.
- 1/2 teaspoon salt – Don’t skip this. Salt makes the spices sing and balances the sweetness.
For the Pie Crust
- 1 1/4 cups all-purpose flour – Spoon and level your flour for the best results. Scooping directly from the bag packs in too much.
- 1/2 cup cold unsalted butter, cubed – Cold butter is non-negotiable for a flaky crust. Pop it in the freezer for 10 minutes before cutting if your kitchen is warm.
- 1/4 teaspoon salt – Enhances the buttery flavor.
- 3 to 4 tablespoons ice water – Start with 3 and add more only if needed. The dough should just hold together when squeezed.
For the Maple Whipped Cream
- 1 cup heavy whipping cream – Cold cream whips up faster and holds its shape better. Stick it in the fridge until the last minute.
- 2 tablespoons pure maple syrup – Real maple syrup, not pancake syrup. The flavor is completely different, and you’ll taste the difference.
- 1/2 teaspoon vanilla extract – A little extra vanilla never hurts.
Ingredient Selection Tips: When choosing pumpkin puree, give the can a shake. You want to hear it slosh a little—that means it’s not overly thick or dry. For the evaporated milk, any brand works, but I’ve found that Carnation gives the creamiest results. And please, please use real butter in the crust. Margarine changes the texture completely, and you deserve the real thing for a pie this good.
Substitution Guidance: If you’re dairy-free, full-fat coconut milk can replace the evaporated milk, though the texture will be slightly different. For a gluten-free crust, use a 1:1 gluten-free flour blend with xanthan gum already added. And if maple syrup isn’t your thing, honey makes a lovely alternative in the whipped cream—just use a little less since honey is sweeter.
Equipment Needed
You don’t need a fancy kitchen to make this pie. In fact, most of these tools are things you probably already own. Here’s what you’ll need:
- 9-inch pie dish – Glass or ceramic works best. Metal pie pans can lead to uneven browning. I use a deep-dish glass pie plate because I can see when the crust is golden underneath.
- Large mixing bowl – For the filling. Any bowl works, but a wide one makes whisking easier.
- Whisk – A good whisk is your best friend here. No electric mixer needed.
- Rolling pin – For rolling out the crust. A wine bottle works in a pinch—I’ve done it.
- Parchment paper – Makes rolling and transferring the crust so much easier. Also great for blind baking.
- Pie weights or dried beans – For blind baking the crust. I keep a bag of cheap dried beans in my pantry just for this purpose.
- Electric mixer or whisk – For the whipped cream. A hand mixer is easiest, but a whisk and some elbow grease work too.
- Cooling rack – Essential for even cooling. Setting a hot pie on the counter can lead to a soggy bottom.
Budget-Friendly Options: Skip the expensive pie weights and use dried beans or even uncooked rice. They work exactly the same way and cost pennies. Also, that rolling pin from the thrift store? It’ll work just as well as a fancy marble one. I found mine for three dollars, and it’s been going strong for years.
Preparation Method
Take your time with this one. Rushing the crust or overmixing the filling are the two biggest mistakes people make. Trust the process, and you’ll be rewarded with the best pumpkin pie you’ve ever made.
Step 1: Make the Pie Crust
In a large bowl, whisk together the flour and salt. Add the cold butter cubes and use a pastry cutter or your fingertips to work the butter into the flour until it resembles coarse meal with some pea-sized butter pieces remaining. Drizzle 3 tablespoons of ice water over the mixture and stir with a fork until the dough starts to come together. If it seems dry, add the remaining tablespoon of water. Turn the dough out onto a lightly floured surface, shape it into a disk, wrap it in plastic wrap, and refrigerate for at least 30 minutes. This rest is crucial—it relaxes the gluten and keeps the crust tender.
Step 2: Blind Bake the Crust
Preheat your oven to 375°F (190°C). On a floured surface, roll the chilled dough into a 12-inch circle, about 1/8-inch thick. Carefully transfer it to your pie dish, pressing it gently into the bottom and up the sides. Trim the excess dough, leaving about a 1/2-inch overhang, then fold it under and crimp the edges. Line the crust with parchment paper and fill with pie weights or dried beans. Bake for 15 minutes, then remove the parchment and weights and bake for another 8 to 10 minutes, until the bottom looks dry and lightly golden. Set aside to cool slightly while you make the filling.
Step 3: Make the Filling
In a large bowl, whisk together the pumpkin puree, evaporated milk, sugar, eggs, pumpkin pie spice, vanilla extract, and salt. Whisk until completely smooth, about 30 seconds. Don’t overmix—you just want everything combined. The mixture should be thick but pourable. Give it a taste (yes, raw eggs, but just a tiny dab on your finger) to check the seasoning. It should taste warm and balanced, not overly sweet.
Step 4: Bake the Pie
Reduce the oven temperature to 350°F (175°C). Pour the filling into the pre-baked crust. Place the pie on the middle rack and bake for 50 to 60 minutes. The edges should be set, and the center should jiggle slightly when you gently shake the pan—like Jell-O, not like soup. If the crust edges are browning too quickly, tent them with foil or a pie shield after about 30 minutes.
Step 5: Cool Completely
Transfer the pie to a wire rack and let it cool completely at room temperature, about 2 hours. The filling will continue to set as it cools. Don’t rush this step—refrigerating a warm pie can cause condensation on the surface, which makes the top weepy. Once completely cool, you can cover it and refrigerate for up to 2 days before serving.
Step 6: Make the Maple Whipped Cream
Just before serving, pour the cold heavy cream into a chilled bowl. Add the maple syrup and vanilla extract. Beat with an electric mixer on medium-high speed until soft peaks form, about 2 to 3 minutes. Be careful not to overbeat, or you’ll end up with butter. The cream should be light, fluffy, and hold its shape when you lift the beaters.
Step 7: Serve
Slice the pie with a sharp knife, wiping the blade clean between cuts for neat slices. Top each slice with a generous dollop of maple whipped cream. A light dusting of cinnamon or a drizzle of extra maple syrup makes for a beautiful presentation.
Cooking Tips & Techniques
I’ve made this pie more times than I can count, and I’ve learned a few things the hard way. Here are the tips that make the biggest difference:
Don’t Skip the Blind Bake. I know it’s an extra step, but trust me on this. A blind-baked crust stays crisp and flaky, even under a moist pumpkin filling. Skip it, and you’ll end up with a soggy bottom every single time. I learned this lesson after serving a pie with a crust that was basically paste. Never again.
Watch the Oven Temperature. Ovens run differently, so start checking your pie at the 45-minute mark. The center should jiggle slightly—that’s your cue that it’s done. Overbaked pumpkin pie develops cracks and a rubbery texture. If you see cracks forming, take the pie out immediately, even if it’s early. Carryover cooking will finish the job.
Use Room Temperature Eggs. Cold eggs can seize up the filling and create a lumpy texture. Just let them sit on the counter for 20 minutes before you start. It’s a small thing that makes a big difference.
Make Your Own Pumpkin Pie Spice. If you have cinnamon, nutmeg, ginger, and cloves in your pantry, you already have everything you need. Mix 1 teaspoon cinnamon, 1/2 teaspoon ginger, 1/4 teaspoon nutmeg, and 1/4 teaspoon cloves. It’s fresher and more aromatic than most store-bought blends.
Chill Your Bowl for Whipped Cream. Pop your mixing bowl and beaters in the freezer for 10 minutes before making the whipped cream. Cold equipment helps the cream whip faster and hold its shape longer. This is especially important if you’re serving the pie buffet-style and the cream will sit out for a while.
Variations & Adaptations
This recipe is wonderfully adaptable. Here are some of my favorite ways to change it up:
Gluten-Free Version: Use a gluten-free flour blend in the crust. I’ve had great results with Bob’s Red Mill 1:1 Baking Flour. The texture is slightly more delicate, so handle the dough gently. Everything else stays the same.
Dairy-Free Version: Replace the evaporated milk with full-fat coconut milk and use a vegan butter stick in the crust. The coconut flavor is subtle and actually complements the pumpkin nicely. For the whipped cream, use chilled full-fat coconut cream and whip it with the maple syrup and vanilla.
Spiced-Up Version: Add 1/4 teaspoon of cayenne pepper or chipotle powder to the filling for a subtle heat that plays beautifully with the sweet maple cream. I tried this on a whim last year, and it was a huge hit at a Friendsgiving gathering.
Bourbon Maple Cream: Swap 1 tablespoon of the maple syrup in the whipped cream for bourbon. The smoky warmth of bourbon pairs incredibly with pumpkin. Just be careful not to add too much liquid, or the cream won’t whip properly.
Mini Pie Version: Use a muffin tin to make individual mini pies. They bake in about 20 to 25 minutes and are perfect for parties where people want their own little dessert. Plus, they look adorable on a dessert table.
Serving & Storage Suggestions
This pie is best served at room temperature or slightly chilled. If you’ve refrigerated it, let it sit on the counter for about 30 minutes before slicing. Cold pumpkin pie tastes less flavorful, and the texture firms up too much.
Presentation Tips for Hosting: Transfer the maple whipped cream to a serving bowl and top with a sprinkle of cinnamon or a drizzle of maple syrup. For a dinner party, I like to set out the whole pie with the whipped cream in a separate bowl so guests can serve themselves. It feels more interactive and less fussy than plating each slice.
What to Serve Alongside: This pie pairs beautifully with a cup of hot coffee, spiced cider, or even a glass of bourbon. If you’re serving it as part of a larger dessert spread, it goes well with apple crisp, pecan bars, or a simple vanilla ice cream.
Storage: Cover the pie loosely with foil or plastic wrap and refrigerate for up to 4 days. The flavors actually deepen after a day or two, so don’t be afraid to make it ahead. The maple whipped cream is best made fresh, but you can make it up to 4 hours in advance and keep it refrigerated. Just give it a quick whisk before serving if it starts to separate.
Freezing: You can freeze the fully baked and cooled pie for up to 3 months. Wrap it tightly in plastic wrap, then foil. Thaw overnight in the refrigerator before serving. Don’t freeze the whipped cream—it doesn’t thaw well and will turn watery.
Nutritional Information & Benefits
Pumpkin pie isn’t exactly health food, but it does have some redeeming qualities. Pumpkin itself is packed with vitamin A, fiber, and antioxidants. The eggs add protein, and the spices like cinnamon and ginger have anti-inflammatory properties. That maple whipped cream? Well, it’s a treat, but real maple syrup contains antioxidants and minerals like zinc and manganese.
Here are the approximate nutritional values per slice (based on 8 servings):
- Calories: 380
- Total Fat: 22g
- Saturated Fat: 13g
- Cholesterol: 110mg
- Sodium: 320mg
- Total Carbohydrates: 42g
- Dietary Fiber: 2g
- Sugars: 26g
- Protein: 6g
Dietary Considerations: This recipe contains dairy (butter, evaporated milk, heavy cream), eggs, and gluten (flour). It can be adapted for gluten-free and dairy-free diets using the substitutions mentioned above. It is not suitable for vegan diets in its current form.
My personal take? This pie is about balance. It’s a special occasion dessert, not an everyday snack. Enjoy a slice, savor every bite, and don’t stress about the numbers. Food is meant to bring joy, and this pie does exactly that.
Conclusion
This classic pumpkin pie with maple whipped cream has become my go-to dessert for every fall gathering, and I honestly can’t imagine the holiday season without it. It’s the recipe that made me realize simple is often better, that a wooden spoon can beat a stand mixer, and that being wrong about cooking sometimes leads to the best discoveries.
I hope you give this pie a try, whether it’s for Thanksgiving, a cozy dinner party, or just a random Tuesday when you need something warm and comforting. Don’t be afraid to make it your own—swap the spices, try a different crust, or experiment with the toppings. That’s what cooking is all about.
I’d love to hear how yours turns out. Leave a comment below and let me know if you tried any variations, or share a photo of your pie on social media and tag me. Happy baking, friends. You’ve got this.
Frequently Asked Questions
Can I use canned pumpkin pie filling instead of pure pumpkin puree?
I wouldn’t recommend it. Canned pumpkin pie filling already has sugar and spices added, so it will throw off the balance of this recipe. Stick with 100% pure pumpkin puree for the best results.
Why did my pumpkin pie crack on top?
Cracks usually mean the pie was overbaked. The filling expands as it cooks, and if it sets too firmly, it cracks as it cools. Take the pie out when the center still jiggles slightly. Carryover cooking will finish setting it without cracking.
Can I make this pie a day ahead?
Absolutely. In fact, I prefer making it a day ahead. The flavors meld together beautifully overnight, and the texture firms up perfectly. Just cool the pie completely, cover it loosely, and refrigerate. Add the whipped cream right before serving.
How do I prevent a soggy bottom crust?
Blind baking is the key. Pre-baking the crust for about 25 minutes before adding the filling creates a barrier that keeps the crust crisp. Also, make sure your filling isn’t too hot when you pour it in—let it cool slightly after whisking.
Can I freeze the leftover pie?
Yes! Wrap the fully cooled pie tightly in plastic wrap, then a layer of foil, and freeze for up to 3 months. Thaw overnight in the refrigerator. The texture will be slightly softer than fresh, but it’s still delicious. Don’t freeze the whipped cream though—make that fresh.
Pin This Recipe!
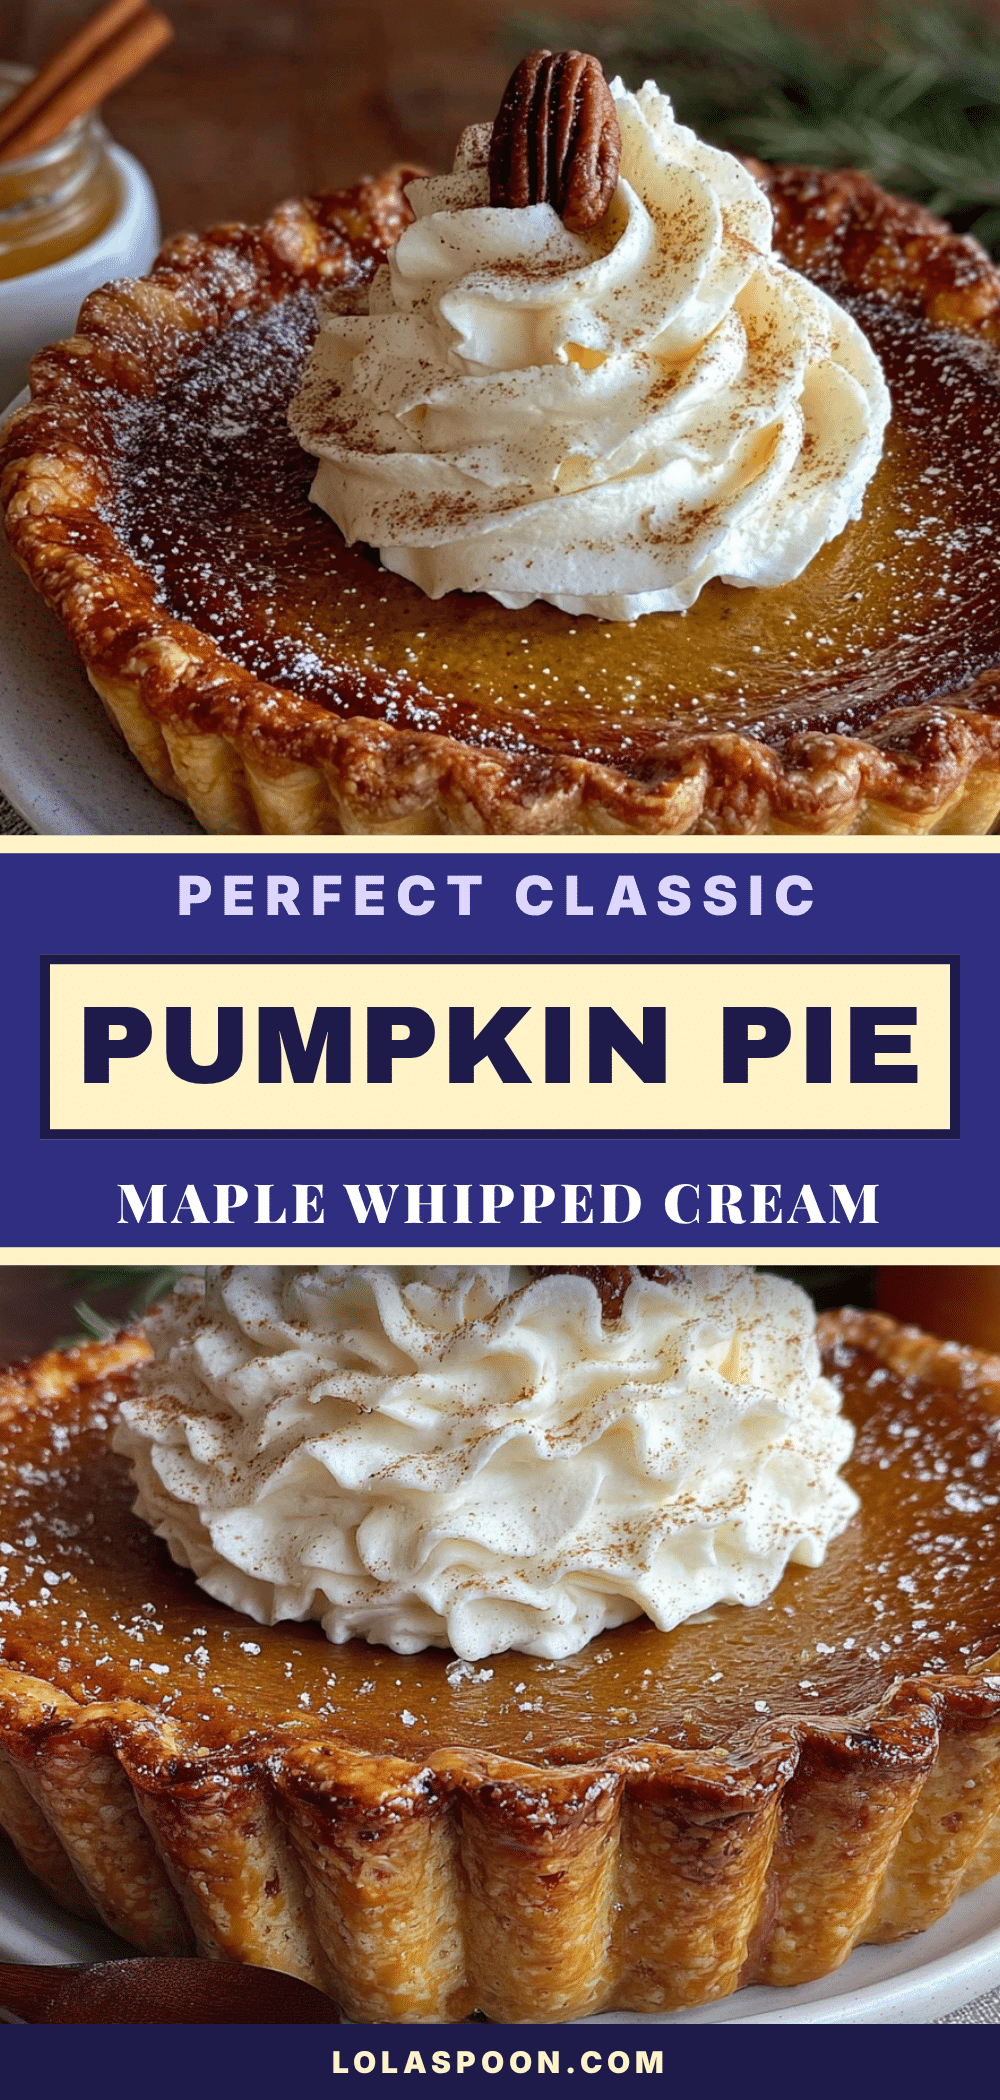
Perfect Classic Pumpkin Pie with Easy Maple Whipped Cream
This classic pumpkin pie features a silky, perfectly spiced filling in a flaky buttery crust, topped with a light and fluffy maple whipped cream. It’s a simple, one-bowl recipe that proves the best tools are often the simplest, making it the ultimate stress-free dessert for any fall gathering.
- Prep Time: 30 minutes
- Cook Time: 1 hour 10 minutes
- Total Time: 3 hours 40 minutes (includes cooling)
- Yield: 8 servings 1x
- Category: Dessert
- Cuisine: American
Ingredients
- 1 can (15 oz) pure pumpkin puree
- 1 can (12 oz) evaporated milk
- 3/4 cup granulated sugar
- 2 large eggs, room temperature
- 2 teaspoons pumpkin pie spice
- 1 teaspoon vanilla extract
- 1/2 teaspoon salt
- 1 1/4 cups all-purpose flour
- 1/2 cup cold unsalted butter, cubed
- 1/4 teaspoon salt
- 3 to 4 tablespoons ice water
- 1 cup heavy whipping cream, cold
- 2 tablespoons pure maple syrup
- 1/2 teaspoon vanilla extract
Instructions
- Make the Pie Crust: In a large bowl, whisk together flour and salt. Add cold butter cubes and use a pastry cutter or fingertips to work the butter into the flour until it resembles coarse meal with some pea-sized butter pieces remaining. Drizzle 3 tablespoons of ice water over the mixture and stir with a fork until the dough starts to come together. If it seems dry, add the remaining tablespoon of water. Turn the dough out onto a lightly floured surface, shape it into a disk, wrap it in plastic …
- Blind Bake the Crust: Preheat oven to 375°F (190°C). On a floured surface, roll the chilled dough into a 12-inch circle, about 1/8-inch thick. Carefully transfer it to your pie dish, pressing it gently into the bottom and up the sides. Trim the excess dough, leaving about a 1/2-inch overhang, then fold it under and crimp the edges. Line the crust with parchment paper and fill with pie weights or dried beans. Bake for 15 minutes, then remove the parchment and weights and bake for another 8 to 10 …
- Make the Filling: In a large bowl, whisk together the pumpkin puree, evaporated milk, sugar, eggs, pumpkin pie spice, vanilla extract, and salt. Whisk until completely smooth, about 30 seconds. Do not overmix.
- Bake the Pie: Reduce oven temperature to 350°F (175°C). Pour the filling into the pre-baked crust. Place the pie on the middle rack and bake for 50 to 60 minutes. The edges should be set, and the center should jiggle slightly when you gently shake the pan. If the crust edges are browning too quickly, tent them with foil after about 30 minutes.
- Cool Completely: Transfer the pie to a wire rack and let it cool completely at room temperature, about 2 hours. The filling will continue to set as it cools. Once completely cool, cover and refrigerate for up to 2 days before serving.
- Make the Maple Whipped Cream: Just before serving, pour the cold heavy cream into a chilled bowl. Add the maple syrup and vanilla extract. Beat with an electric mixer on medium-high speed until soft peaks form, about 2 to 3 minutes. Be careful not to overbeat.
- Serve: Slice the pie with a sharp knife, wiping the blade clean between cuts. Top each slice with a generous dollop of maple whipped cream.
Notes
Don’t skip blind baking the crust to avoid a soggy bottom. Use room temperature eggs for a smoother filling. The pie is best made a day ahead as flavors deepen. For the whipped cream, chill your bowl and beaters for best results. To prevent cracking, remove the pie from the oven when the center still jiggles slightly.
Nutrition
- Serving Size: 1 slice
- Calories: 380
- Sugar: 26
- Sodium: 320
- Fat: 22
- Saturated Fat: 13
- Carbohydrates: 42
- Fiber: 2
- Protein: 6
Keywords: pumpkin pie, classic pumpkin pie, maple whipped cream, Thanksgiving dessert, fall dessert, easy pumpkin pie, homemade pie


