I wasn’t expecting cooking advice from my plumber, but there I was, standing in my kitchen with a leaky faucet, listening to him describe exactly how to make mini chicken pot pies in muffin tins. His name was Frank, and he’d been fixing pipes in our neighborhood for thirty years. While he tightened a valve under my sink, he started talking about how his wife used to make these little pies for their kids’ lunchboxes. I remember holding a wrench for him, completely distracted by the image of golden, buttery crusts peeking out of muffin cups. Frank told me the secret was using leftover rotisserie chicken and frozen mixed vegetables, which honestly sounded too simple to be good. But there was something about the way he said “my kids still ask for these” that made me grab a notepad.
The funny thing is, I’d been trying to perfect a full-sized chicken pot pie for months, and it always came out soggy in the middle. Frank’s method turned everything around. I mean, who would’ve thought the guy who unclogs drains would become my recipe hero? The first batch I made smelled so good that my neighbor actually knocked on the door to ask what I was baking. These little pies have this way of making your whole house feel warm, even on the coldest days. Maybe you’ve been there, standing over a hot oven, hoping for something that feels like a hug in food form. That’s exactly what these are.
I’ve tweaked Frank’s original idea over the years, adding a splash of heavy cream and a pinch of thyme, but the heart of the recipe stays the same. It’s honest, simple, and completely reliable. Every time I pull a tray of these golden beauties out of the oven, I think about that afternoon with the leaky faucet and the unexpected cooking lesson. Some recipes find you when you least expect them, and this one has become a permanent part of my cozy kitchen rotation.
Why You’ll Love This Recipe
These mini chicken pot pies are the kind of comfort food that makes you close your eyes after the first bite. I’ve tested this recipe at least a dozen times, tweaking the filling consistency and the baking time until every single pie came out perfect. Here’s what makes them stand out:
- Quick & Easy: From start to finish, these come together in about 45 minutes. Perfect for those busy weeknights when you need something cozy but don’t have hours to spend in the kitchen.
- Simple Ingredients: No fancy grocery trips required. You probably have most of these ingredients in your pantry and fridge right now. Rotisserie chicken, frozen veggies, cream of chicken soup, and refrigerated pie crusts are all you need.
- Perfect for Cozy Nights: These little pies are ideal for cold weather, rainy evenings, or any time you need a little comfort. They’re also great for parties, potlucks, or making ahead for busy weeks.
- Crowd-Pleaser: Kids love the individual portions, and adults appreciate the familiar flavors. I’ve brought these to family gatherings and watched them disappear within minutes.
- Unbelievably Delicious: The flaky crust, creamy filling, and tender chicken create a combination that’s pure comfort. The muffin tin makes the crust-to-filling ratio absolutely perfect.
What makes this recipe different from other pot pie recipes is the muffin tin method. Baking them in individual portions means every pie gets a crispy bottom and golden top. No more soggy bottoms or undercooked centers. The filling stays creamy and thick, not watery, because the smaller portions cook more evenly. Plus, the individual servings feel special, like you’re getting your own little pie.
This recipe is the kind that makes you feel like a great cook without any stress. It’s comfort food reimagined—faster, easier, but with the same soul-soothing satisfaction. Perfect for impressing guests without breaking a sweat, or turning a simple Tuesday dinner into something memorable.
What Ingredients You Will Need
This recipe uses simple, wholesome ingredients to deliver bold flavor and satisfying texture without the fuss. Most of these are pantry staples or easy to find at any grocery store.
- Rotisserie chicken, shredded (about 2 cups) – I prefer buying a rotisserie chicken from the store for convenience. The dark meat adds more flavor, but white meat works too. You can also use leftover roasted chicken or turkey.
- Frozen mixed vegetables (1 cup) – Look for a blend with peas, carrots, corn, and green beans. No need to thaw them first. I like the Birds Eye brand for consistent quality.
- Cream of chicken soup (1 can, 10.5 ounces) – This is the shortcut that makes the filling so creamy. Use the condensed version. For a lighter option, try cream of mushroom or cream of celery soup.
- Heavy cream (1/4 cup) – Adds richness and helps create that velvety texture. You can substitute with whole milk or half-and-half, but the filling won’t be as thick.
- Refrigerated pie crusts (1 package, 2 crusts) – Pillsbury is my go-to brand. They’re buttery and flaky, and they save so much time. You can also use homemade crust if you prefer.
- Butter (2 tablespoons, melted) – Brushed on top of the crusts for that golden, glossy finish. Use unsalted butter to control the salt level.
- Dried thyme (1/2 teaspoon) – Adds a warm, earthy flavor that pairs beautifully with chicken. Fresh thyme works too, just use 1 teaspoon.
- Garlic powder (1/2 teaspoon) – Gives the filling a subtle savory depth without being overpowering.
- Salt and black pepper (to taste) – Start with 1/2 teaspoon salt and 1/4 teaspoon pepper, then adjust as needed.
- Egg (1 large, beaten) – For an egg wash that makes the crust extra shiny and golden. Optional but recommended.
For substitutions, you can use cooked chicken breast instead of rotisserie chicken. Just season it well with salt and pepper before cooking. If you’re avoiding dairy, use a dairy-free cream soup and substitute the heavy cream with unsweetened almond milk mixed with a tablespoon of cornstarch. The texture will be slightly different, but still delicious.
Equipment Needed
You don’t need any fancy equipment to make these mini chicken pot pies. Here’s what you’ll need:
- 12-cup muffin tin – This is essential for the individual portions. A standard muffin tin works perfectly. If you only have a 6-cup tin, just bake in batches.
- Mixing bowls – One medium bowl for the filling and one small bowl for the egg wash.
- Rolling pin – For rolling out the pie crusts if they’re a bit thick. You can also use a floured surface and your hands.
- Round cookie cutter or glass – About 3 inches in diameter to cut the crust circles. A drinking glass works great if you don’t have a cookie cutter.
- Pastry brush – For brushing the melted butter or egg wash on top. A silicone brush is easy to clean.
- Small saucepan – For warming the filling mixture if needed. You can also use a microwave-safe bowl.
- Measuring cups and spoons – For accurate measurements.
If you don’t have a rolling pin, a clean wine bottle works surprisingly well. I’ve done it plenty of times when mine was in the dishwasher. The key is to have a smooth surface and a little flour to prevent sticking. Budget-friendly tip: most of these items you already have in your kitchen, so there’s no need to buy anything special.
Preparation Method

Follow these steps carefully, and you’ll have perfect mini chicken pot pies every time.
- Preheat your oven to 375°F (190°C). Place the oven rack in the center position. While the oven heats, take the pie crusts out of the refrigerator to soften slightly, about 10 minutes.
- Prepare the filling. In a medium mixing bowl, combine 2 cups shredded rotisserie chicken, 1 cup frozen mixed vegetables, 1 can cream of chicken soup, 1/4 cup heavy cream, 1/2 teaspoon dried thyme, 1/2 teaspoon garlic powder, and a pinch of salt and pepper. Stir everything together until well combined. The mixture should be thick and creamy. If it looks too dry, add another tablespoon of heavy cream.
- Roll out the pie crusts. Lightly flour your work surface. Unroll one pie crust and use a rolling pin to smooth it out to about 1/8-inch thickness. Using a 3-inch round cookie cutter or a glass, cut out 6 circles from each crust. You should get 12 circles total. If the crust tears, just press it back together with your fingers.
- Line the muffin tin. Gently press each crust circle into a muffin cup, making sure the dough comes up the sides. Don’t worry if the edges are a little uneven. Leave the crust slightly above the rim to create a little border.
- Fill the pies. Spoon the chicken mixture into each crust-lined muffin cup, filling them almost to the top. Use about 2-3 tablespoons of filling per pie. Don’t overfill, or they’ll spill over during baking.
- Add the tops. If you want a full top crust, cut smaller circles (about 2.5 inches) from the remaining dough and place them on top of the filling. Press the edges gently to seal. For a lattice top, cut the remaining dough into thin strips and weave them over the filling. I usually just do a simple top crust because it’s faster.
- Brush with butter or egg wash. Using a pastry brush, lightly brush the tops with melted butter or beaten egg. This gives the crust that beautiful golden color. Sprinkle a tiny pinch of salt on top if you like.
- Cut small slits. Use a sharp knife to cut 2-3 small slits in the top of each pie. This lets steam escape and prevents the filling from bubbling over.
- Bake for 20-25 minutes. Place the muffin tin in the preheated oven and bake until the crusts are golden brown and the filling is bubbly. Check at 20 minutes, and if the tops are browning too quickly, tent loosely with aluminum foil.
- Cool before serving. Let the pies cool in the muffin tin for 5-10 minutes. Use a butter knife to gently loosen the edges, then lift them out. They’ll be very hot inside, so let them sit for another 2-3 minutes before eating.
A helpful tip: if the filling seems too thick after mixing, that’s fine. It will thin out slightly during baking. If it seems too thin, add a tablespoon of flour or cornstarch. The frozen vegetables will release some moisture, so the filling should be on the thicker side before baking.
Cooking Tips & Techniques
Over the years, I’ve learned a few tricks that make these mini pot pies even better. Here are my top tips:
Don’t overwork the crust. When you’re pressing the dough into the muffin cups, handle it gently. Overworking the dough makes it tough. If the crust tears, just patch it with a small piece of dough. Nobody will notice after it’s baked.
Pre-bake the bottom crust for extra crispness. If you want a really crispy bottom, pre-bake the empty crusts for 5 minutes at 375°F before adding the filling. This is especially helpful if you’re using a very wet filling. I don’t always do this, but it makes a noticeable difference.
Let the filling cool slightly before filling. If you’re using warm filling, it can start to soften the raw crust. Let the filling sit for 5-10 minutes after mixing to cool down a bit. This helps the crust stay flaky.
Use a muffin tin liner for easy removal. While not necessary, using parchment paper liners or silicone muffin cups makes lifting the pies out much easier. Just make sure to grease them lightly first. I learned this the hard way after my first batch stuck to the pan.
Don’t skip the slits. I once forgot to cut slits in the tops, and the pies exploded in the oven. The filling bubbled over and made a huge mess. Those little slits are crucial for releasing steam.
Make extra for the freezer. These freeze beautifully. Bake them as directed, let them cool completely, then wrap each pie individually in plastic wrap and place in a freezer bag. To reheat, bake at 350°F for 15-20 minutes directly from frozen.
Variations & Adaptations
One of the best things about this recipe is how easy it is to customize. Here are some variations I’ve tried and loved:
Turkey and Stuffing Pot Pies: After Thanksgiving, I swap the chicken for leftover turkey and add 1/2 cup of leftover stuffing to the filling. It’s like having Thanksgiving dinner in a little pie. Use cream of mushroom soup instead of chicken for extra earthy flavor.
Vegetarian Mushroom Pot Pies: Replace the chicken with 2 cups of sautéed mushrooms and add an extra 1/2 cup of frozen vegetables. Use cream of mushroom soup and add a teaspoon of soy sauce for umami. These are hearty enough that even meat-eaters won’t miss the chicken.
Spicy Buffalo Chicken Pot Pies: Mix 1/4 cup of buffalo sauce into the filling and use shredded cheddar cheese on top before adding the crust. Serve with a side of ranch or blue cheese dressing. These are perfect for game day or when you want a little heat.
Gluten-Free Version: Use a gluten-free pie crust mix or store-bought gluten-free crust. Make sure your cream of chicken soup is gluten-free (many brands offer this). The filling will be slightly less thick, but still delicious.
Dairy-Free Version: Use a dairy-free cream soup and substitute the heavy cream with unsweetened coconut cream or cashew cream. Use vegan butter or olive oil for brushing the tops. The flavor will be a bit different, but still comforting.
My personal favorite variation is adding a handful of shredded cheddar cheese to the filling. It melts into the creamy mixture and adds this amazing savory depth. I tried it on a whim one night and now I do it almost every time.
Serving & Storage Suggestions
These mini chicken pot pies are best served warm, right after they’ve cooled slightly. The contrast between the flaky crust and the creamy filling is at its peak when they’re fresh from the oven.
For presentation, I like to serve them on a small plate with a side salad or steamed green beans. The bright green vegetables balance the richness of the pies. You can also serve them with a dollop of cranberry sauce or a sprinkle of fresh parsley for color.
These pies pair beautifully with a simple soup like tomato or butternut squash. For drinks, a crisp white wine like Sauvignon Blanc or a cold glass of apple cider complements the savory flavors. If you’re serving them for a party, arrange them on a platter with toothpicks for easy grabbing.
Storage Instructions: Store leftover pies in an airtight container in the refrigerator for up to 4 days. The crust may soften slightly, but they’ll still taste great. To reheat, place them on a baking sheet and warm in a 350°F oven for 10-12 minutes. The microwave works too, but the crust won’t be as crispy.
Freezer Instructions: These freeze wonderfully. Let the baked pies cool completely, then wrap each one individually in plastic wrap. Place them in a freezer-safe bag or container. They’ll keep for up to 3 months. To reheat, bake from frozen at 350°F for 20-25 minutes, or until heated through.
The flavors actually develop over time, so day-old pies can taste even better. The filling gets thicker and the seasonings meld together. I’ve been known to make a double batch just so I have leftovers for lunch.
Nutritional Information & Benefits
Here’s the estimated nutritional information for one mini chicken pot pie (based on 12 pies per recipe):
| Nutrient | Amount per Pie |
|---|---|
| Calories | 220 |
| Total Fat | 12g |
| Saturated Fat | 5g |
| Cholesterol | 45mg |
| Sodium | 480mg |
| Total Carbohydrates | 18g |
| Dietary Fiber | 2g |
| Sugars | 3g |
| Protein | 12g |
These mini pies offer a good balance of protein from the chicken and carbohydrates from the crust. The frozen vegetables add fiber and essential vitamins like vitamin A from the carrots and vitamin C from the peas. Using rotisserie chicken provides lean protein that keeps you full and satisfied.
For dietary considerations, this recipe can be made gluten-free and dairy-free with simple substitutions. It’s not suitable for vegan diets unless you use plant-based chicken alternatives and vegan cream soup. The main allergens are wheat (from the crust) and dairy (from the cream and butter).
From a wellness perspective, these pies are a comfort food that can fit into a balanced diet. They’re portion-controlled, which helps with mindful eating. I find that having one or two pies with a side of vegetables makes for a satisfying, nourishing meal that doesn’t leave me feeling overly full.
FAQs
Can I use homemade pie crust instead of refrigerated?
Absolutely! Homemade pie crust works beautifully. Just make sure to roll it out to about 1/8-inch thickness and cut it into circles. The baking time may need to increase by 2-3 minutes if your crust is thicker.
Can I make these ahead of time?
Yes, you can assemble the pies completely and refrigerate them unbaked for up to 24 hours. Just add an extra 5 minutes to the baking time since they’ll be starting from cold. You can also bake them fully and reheat as needed.
Why is my filling watery?
This usually happens if the frozen vegetables weren’t drained properly or if you added too much liquid. Make sure to measure the cream carefully and don’t add extra liquid. If the filling seems thin, mix in a tablespoon of cornstarch before baking.
Can I use a different type of meat?
Definitely! Cooked turkey, shredded pork, or even canned tuna work well. Just make sure the meat is fully cooked and shredded or diced into small pieces. For a vegetarian version, use two cans of chickpeas or extra mushrooms.
How do I prevent the bottoms from getting soggy?
Pre-baking the empty crusts for 5 minutes helps a lot. You can also sprinkle a thin layer of breadcrumbs or grated cheese on the bottom of the crust before adding the filling. This creates a barrier that absorbs excess moisture.
Conclusion
These mini chicken pot pies in muffin tins have become a staple in my kitchen for good reason. They’re easy, forgiving, and absolutely delicious. The individual portions make them perfect for cozy nights, family dinners, or even holiday gatherings. I love that I can make a batch ahead of time and have comfort food ready whenever I need it.
I encourage you to make this recipe your own. Add extra vegetables, swap the herbs, or experiment with different cheeses. That’s the beauty of cooking—you can tweak and adjust until it’s exactly what you love. And honestly, there’s no wrong way to enjoy a warm, flaky pot pie.
If you try these, I’d love to hear how they turned out. Leave a comment below or tag me in your photos. Happy cooking, and may your kitchen always smell like butter and thyme!
Pin This Recipe!
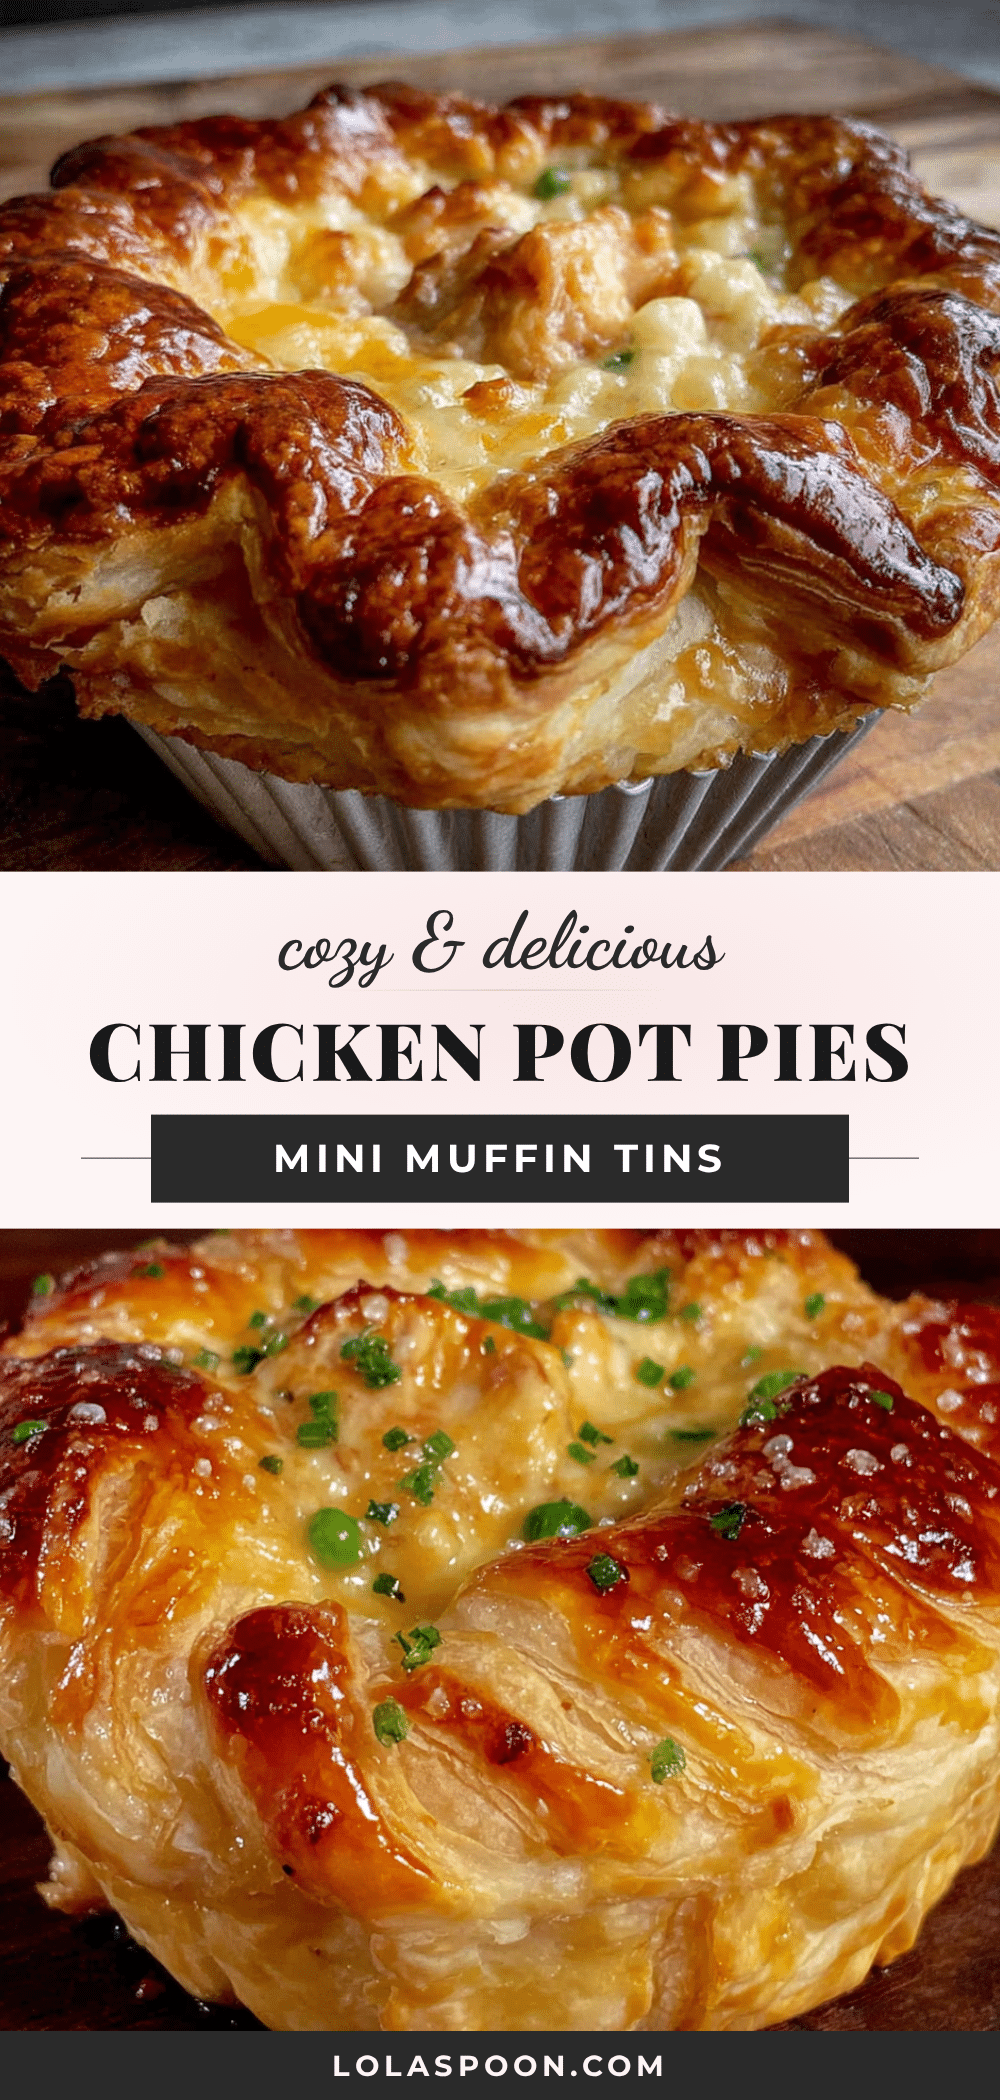
Easy Mini Chicken Pot Pies: Best Cozy Muffin Tin Recipe

These mini chicken pot pies are the ultimate comfort food, made easy in a muffin tin with a flaky crust and creamy filling. Perfect for busy weeknights, they come together in about 45 minutes using simple ingredients like rotisserie chicken and frozen vegetables.
- Prep Time: 20 minutes
- Cook Time: 25 minutes
- Total Time: 45 minutes
- Yield: 12 servings 1x
- Category: Main Course
- Cuisine: American
Ingredients
- 2 cups rotisserie chicken, shredded
- 1 cup frozen mixed vegetables (peas, carrots, corn, green beans)
- 1 can (10.5 ounces) cream of chicken soup, condensed
- 1/4 cup heavy cream
- 1 package (2 crusts) refrigerated pie crusts (e.g., Pillsbury)
- 2 tablespoons unsalted butter, melted
- 1/2 teaspoon dried thyme
- 1/2 teaspoon garlic powder
- Salt and black pepper to taste (start with 1/2 tsp salt and 1/4 tsp pepper)
- 1 large egg, beaten (for egg wash, optional)
Instructions
- Preheat your oven to 375°F (190°C). Place the oven rack in the center position. While the oven heats, take the pie crusts out of the refrigerator to soften slightly, about 10 minutes.
- Prepare the filling: In a medium mixing bowl, combine 2 cups shredded rotisserie chicken, 1 cup frozen mixed vegetables, 1 can cream of chicken soup, 1/4 cup heavy cream, 1/2 teaspoon dried thyme, 1/2 teaspoon garlic powder, and a pinch of salt and pepper. Stir everything together until well combined. The mixture should be thick and creamy. If it looks too dry, add another tablespoon of heavy cream.
- Roll out the pie crusts: Lightly flour your work surface. Unroll one pie crust and use a rolling pin to smooth it out to about 1/8-inch thickness. Using a 3-inch round cookie cutter or a glass, cut out 6 circles from each crust. You should get 12 circles total. If the crust tears, just press it back together with your fingers.
- Line the muffin tin: Gently press each crust circle into a muffin cup, making sure the dough comes up the sides. Don’t worry if the edges are a little uneven. Leave the crust slightly above the rim to create a little border.
- Fill the pies: Spoon the chicken mixture into each crust-lined muffin cup, filling them almost to the top. Use about 2-3 tablespoons of filling per pie. Don’t overfill, or they’ll spill over during baking.
- Add the tops: If you want a full top crust, cut smaller circles (about 2.5 inches) from the remaining dough and place them on top of the filling. Press the edges gently to seal. For a lattice top, cut the remaining dough into thin strips and weave them over the filling. I usually just do a simple top crust because it’s faster.
- Brush with butter or egg wash: Using a pastry brush, lightly brush the tops with melted butter or beaten egg. This gives the crust that beautiful golden color. Sprinkle a tiny pinch of salt on top if you like.
- Cut small slits: Use a sharp knife to cut 2-3 small slits in the top of each pie. This lets steam escape and prevents the filling from bubbling over.
- Bake for 20-25 minutes: Place the muffin tin in the preheated oven and bake until the crusts are golden brown and the filling is bubbly. Check at 20 minutes, and if the tops are browning too quickly, tent loosely with aluminum foil.
- Cool before serving: Let the pies cool in the muffin tin for 5-10 minutes. Use a butter knife to gently loosen the edges, then lift them out. They’ll be very hot inside, so let them sit for another 2-3 minutes before eating.
Notes
For a crispier bottom crust, pre-bake the empty crusts for 5 minutes at 375°F before adding the filling. Let the filling cool slightly before filling to prevent softening the raw crust. Use a muffin tin liner for easy removal. Don’t skip cutting slits in the tops to prevent explosions. These freeze beautifully: bake as directed, cool completely, wrap individually in plastic wrap, and store in a freezer bag for up to 3 months. Reheat from frozen at 350°F for 20-25 minutes.
Nutrition
- Serving Size: 1 mini pie
- Calories: 220
- Sugar: 3
- Sodium: 480
- Fat: 12
- Saturated Fat: 5
- Carbohydrates: 18
- Fiber: 2
- Protein: 12
Keywords: mini chicken pot pies, muffin tin recipe, comfort food, easy dinner, rotisserie chicken, frozen vegetables, individual pot pies, cozy meal


