My neighbor Carrie wasn’t trying to impress anyone. I’d stopped by to borrow a ladder—ours had mysteriously vanished after the last garage sale—and the smell hit me before I even got past her screen door. Butter, toasted pecans, something sweet and almost caramel-like. She was standing at her kitchen counter in old yoga pants, eating one of these bars with a cup of coffee like it was the most normal thing in the world.
“Oh, those are just something I threw together,” she said when I asked. Just something she threw together. I mean, the crust was perfectly golden, the filling had that crackly top that pecan pie is famous for, and she was acting like it was a bowl of cereal. She handed me one without even asking, and let me tell you—that first bite stopped me mid-sentence. It had all the sticky, nutty, buttery goodness of pecan pie, but it didn’t sit heavy. It felt lighter, somehow. Less like a holiday indulgence and more like something you could eat on a random Thursday and not feel weird about it.
I stood there in her kitchen for another twenty minutes, ladder completely forgotten, watching her move around like it was nothing. She told me she’d been playing around with the recipe because her husband loves pecan pie but neither of them needs a whole pie sitting around. “We’re empty nesters now,” she laughed. “We don’t need a nine-inch pie staring at us for a week.” Smart woman. Really smart woman.
I asked for the recipe before I left, and she scribbled it on a sticky note that I still have stuck to my fridge. I’ve made these Lightened-Up Pecan Pie Bars for Two at least a dozen times since that day. Maybe you’ve been there—craving something decadent but not wanting a whole dessert haunting your kitchen counters for days. These bars are the answer. They give you that rich, gooey, pecan-pie experience in a perfectly portioned package. Honestly, I think I like them more than the original pie now. Don’t tell my grandmother I said that.
Why You’ll Love This Recipe
These Lightened-Up Pecan Pie Bars for Two aren’t just another dessert recipe—they’re the kind of thing that makes you feel like you’re getting away with something. I’ve tested this recipe more times than I care to admit (Carrie’s sticky note was a little vague on measurements), and I can confidently say this version hits every single note you want from pecan pie without the heavy aftermath.
- Quick & Easy : From start to finish, these bars come together in about 35 minutes. No rolling pins, no blind baking, no complicated candy thermometers. Just simple steps that anyone can handle on a weeknight.
- Simple Ingredients : You probably have most of these in your kitchen right now. Butter, flour, brown sugar, maple syrup, eggs, pecans—nothing that requires a special trip to a fancy grocery store. I keep pecans in my freezer specifically for this recipe.
- Perfect for Portion Control : This recipe makes exactly two generous bars. No leftovers calling your name from the fridge at 10 PM. No guilt about eating a third slice because there isn’t a third slice. It’s dessert freedom, honestly.
- Lightened-Up Without Sacrifice : I swapped some of the corn syrup for maple syrup and cut back on the butter in the filling. You won’t miss it. The texture is still perfectly gooey, and the flavor is actually more interesting with that subtle maple note.
- Crowd-Pleaser : Every single person I’ve made these for has asked for the recipe. My husband ate his in about thirty seconds and then looked at my bar with hopeful eyes. I protected my plate.
What makes these bars different from every other pecan pie bar recipe out there? It’s the balance. The crust isn’t a dry, crumbly afterthought—it’s buttery and sturdy enough to hold the filling without getting soggy. The filling is rich but not cloying, with just enough salt to make the pecans sing. And the portion size? Genius. You get the full experience without the commitment of a whole pie. This is comfort food reimagined—lighter, faster, and somehow even more satisfying than the original.
What Ingredients You Will Need
This recipe uses simple, wholesome ingredients to deliver that classic pecan pie flavor with a lighter touch. Most of these are pantry staples, and I’ve included notes on what to look for so you get the best results every time.
For the Crust
- All-purpose flour , ½ cup (60g) — regular white flour works perfectly here. No need for anything fancy.
- Unsalted butter , 3 tablespoons (42g), cold and cut into small cubes — I use Kerrygold when I have it, but any good unsalted butter works. The cold butter is key for a flaky, tender crust.
- Powdered sugar , 1 tablespoon (8g) — this gives the crust a subtle sweetness and a melt-in-your-mouth texture that granulated sugar just can’t match.
- Vanilla extract , ¼ teaspoon — pure vanilla, not imitation, if you can swing it. It makes a difference.
- Salt , a pinch — just enough to balance the sweetness and bring out the buttery flavor.
- Ice water , 1 to 2 teaspoons — only as needed to bring the dough together. Start with one teaspoon and add more if the dough seems dry.
For the Filling
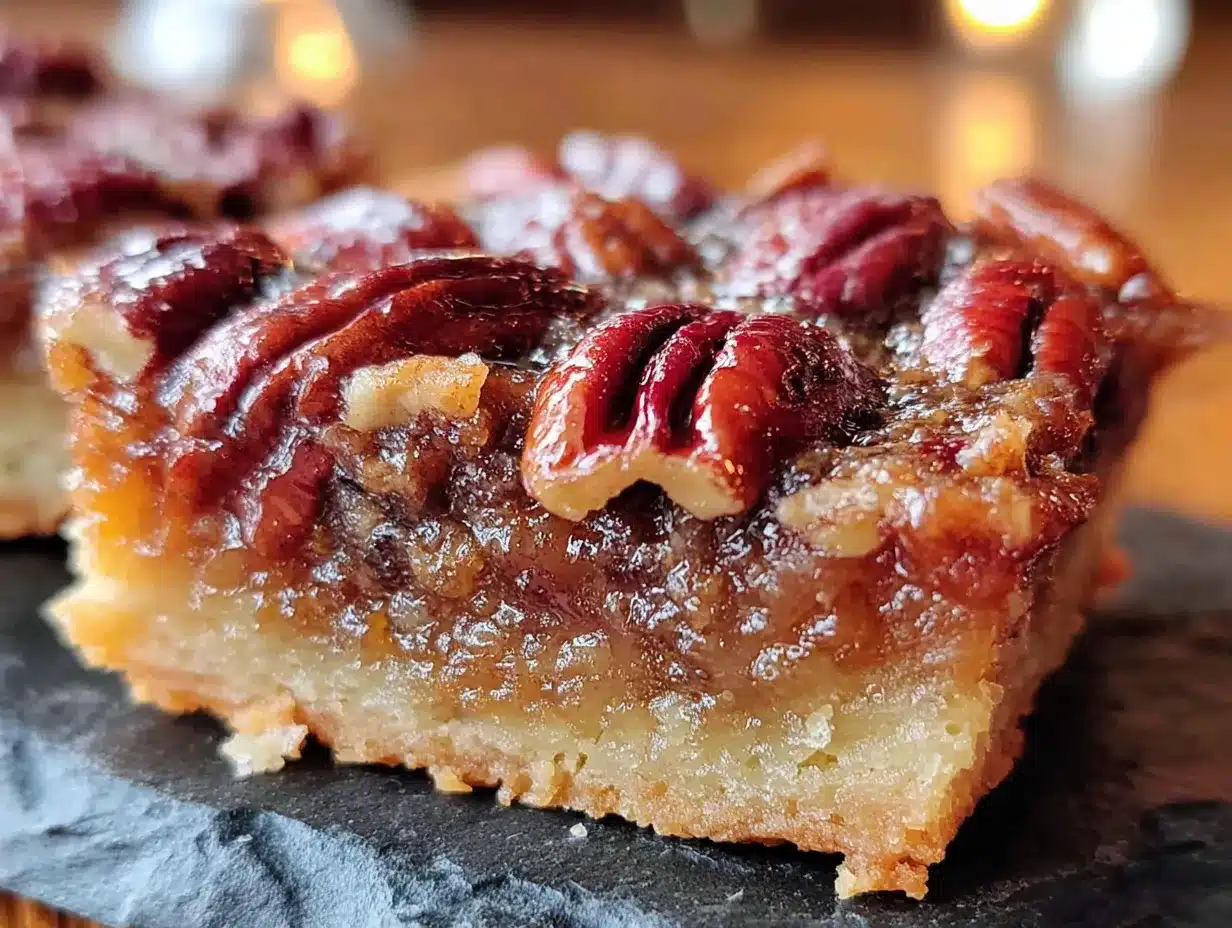
- Pecan halves , ½ cup (55g) — I prefer raw pecans for this. You can toast them lightly beforehand if you want extra depth, but it’s not required. Chop them roughly if you like smaller pieces throughout.
- Pure maple syrup , 3 tablespoons (45ml) — use the real stuff, not pancake syrup. Grade A dark amber has a lovely robust flavor that stands up well here.
- Light brown sugar , 2 tablespoons (25g), packed — this gives the filling that classic caramel-like depth. Dark brown sugar works too, but the flavor will be a bit more molasses-forward.
- Large egg , 1 — bring it to room temperature before using. Cold egg can make the filling seize up slightly.
- Unsalted butter , 1 tablespoon (14g), melted — for richness without overdoing it.
- Vanilla extract , ½ teaspoon — again, pure vanilla is worth it here.
- Salt , ⅛ teaspoon — don’t skip this. Salt is what makes pecan pie taste like pecan pie, not just sugar syrup.
Ingredient Selection Tip : For the pecans, look for pieces that are mostly whole and uniform in color. Avoid any that look shriveled or smell rancid. I store my pecans in the freezer because they go stale quickly at room temperature. You can use them straight from frozen in this recipe—no need to thaw first.
Substitution Guidance : If you need a dairy-free option, use a high-quality vegan butter in both the crust and filling. For a gluten-free version, swap the all-purpose flour with a 1:1 gluten-free baking blend. I’ve tried both, and they work surprisingly well. The texture is slightly different but still delicious.
Equipment Needed
You don’t need a lot of fancy tools for these bars, which is part of why I love this recipe so much. Here’s what you’ll need:
- Two 4-inch mini tart pans or a small baking dish — I use 4-inch tart pans with removable bottoms, but you can also use a small loaf pan or even a 5-inch cast iron skillet. If you’re using a single dish, just cut the finished bars into two portions.
- Mixing bowls — one small bowl for the crust, one medium bowl for the filling.
- Pastry cutter or fork — for cutting the butter into the flour. A pastry cutter is faster, but two forks work perfectly fine. I’ve used my fingers in a pinch too.
- Measuring cups and spoons — accuracy matters in a small-batch recipe like this one.
- Rolling pin — optional, since you can press the crust into the pans with your fingers. I usually just press it in to save on dishes.
- Baking sheet — place your tart pans on a baking sheet to catch any drips. Trust me on this one. I learned the hard way.
- Cooling rack — for letting the bars cool completely before slicing. Patience is hard, but it’s worth it.
If you don’t have mini tart pans, don’t let that stop you. A small 6-inch cake pan or even a ramekin can work in a pinch. The baking time might need slight adjustment, so keep an eye on them. I’ve made these in a tiny cast iron skillet before, and they came out beautifully—just a little thicker and slightly more gooey in the center.
Preparation Method
Alright, let’s make these bars. I’ve broken this down into clear steps with all the little details I wish someone had told me the first time I made them.
- Preheat your oven to 350°F (175°C). Position the rack in the center of the oven. While it’s heating up, lightly grease your two mini tart pans or whatever baking vessel you’re using. A little butter or non-stick spray works fine.
- Make the crust. In a small mixing bowl, combine the flour, powdered sugar, and salt. Add the cold butter cubes. Using a pastry cutter or two forks, cut the butter into the flour mixture until it looks like coarse meal with some pea-sized butter pieces remaining. This takes about 2 minutes if you’re using a pastry cutter. Don’t overwork it—those little butter pockets are what make the crust tender.
- Add the vanilla and ice water. Drizzle the vanilla over the flour mixture, then add 1 teaspoon of ice water. Stir with a fork until the dough starts to come together. If it seems too dry to hold together when pressed, add the second teaspoon of water. The dough should feel slightly moist but not sticky. I’ve had times where I added too much water and the crust turned out tough—so go slow here.
- Press the crust into the pans. Divide the dough evenly between your two tart pans. Press it firmly into the bottom and up the sides. Don’t worry about making it perfect—rustic edges are charming. The crust should be about ⅛-inch thick. Place the pans on a baking sheet to catch any drips later.
- Pre-bake the crust. Pop the baking sheet with the crusts into the oven and bake for 10 minutes. You want the edges to look just barely golden. The crust will continue to bake with the filling, so don’t overdo it at this stage. Remove from the oven and set aside on a cooling rack while you make the filling. Leave the oven on.
- Prepare the pecans. If you want to toast your pecans for extra flavor, spread them on a small baking sheet and toast them in the oven for 3-4 minutes while the crust is pre-baking. Keep a close eye on them—pecans go from perfectly toasted to burnt in about 30 seconds. Let them cool slightly, then chop them roughly if desired. I like leaving some halves whole for visual appeal.
- Make the filling. In a medium bowl, whisk together the maple syrup, packed brown sugar, melted butter, egg, vanilla extract, and salt. Whisk until everything is smooth and well combined. The mixture should look like a thin caramel. Don’t over-whisk—you don’t want to incorporate too much air.
- Assemble the bars. Sprinkle the pecans evenly over the pre-baked crusts. Pour the filling over the pecans, dividing it equally between the two pans. Some pecans might float to the top—that’s fine. The filling should come almost to the rim of the crust. If it looks like it might overflow, don’t worry; it will settle as it bakes.
- Bake the bars. Place the baking sheet with the filled tart pans back in the oven. Bake for 18-22 minutes, or until the filling is set around the edges but still slightly jiggly in the center. The top should be golden brown and slightly crackly. I start checking at 18 minutes because ovens vary. The filling will continue to set as it cools.
- Cool completely. This is the hardest part, I know. Remove the pans from the oven and place them on a cooling rack. Let them cool for at least 30 minutes at room temperature, then refrigerate for another 30 minutes if you want cleaner slices. The bars are easiest to remove from the pans when they’re completely cool. If you used tart pans with removable bottoms, push up from the bottom to release. If you used a single dish, slice and lift out carefully.
- Slice and serve. Use a sharp knife to cut each bar in half or serve them whole. I like to warm mine slightly in the microwave for about 10 seconds before serving—it softens the filling back to that perfect gooey texture. But they’re also delicious at room temperature straight from the fridge.
Sensory Cue : When the bars are done, the filling should look set at the edges with a slight dome in the center that barely wobbles when you gently shake the pan. The top will be a deep golden brown with some cracks, and you’ll smell that unmistakable toasted pecan and caramel aroma. Your kitchen is about to smell incredible.
Cooking Tips & Techniques
I’ve made these Lightened-Up Pecan Pie Bars for Two more times than I can count, and I’ve learned a few things along the way. Let me save you some of my mistakes.
Don’t overwork the crust. I know I said this already, but it bears repeating. The first time I made these, I kneaded the dough like bread, and the crust came out tough and dense. You want to handle it just enough to bring it together. The cold butter pieces should still be visible in the dough. That’s what creates that flaky, tender texture.
Watch your baking time carefully. The difference between perfectly gooey and overbaked is about two minutes. I once got distracted by a phone call and left the bars in for 25 minutes. They were still edible, but the filling was firmer than I wanted—more like candy than pecan pie. Start checking at 18 minutes and trust your eyes more than the timer.
Use room temperature egg. Cold egg straight from the fridge can make the filling lumpy and prevent it from emulsifying properly. Take your egg out about 30 minutes before you start baking, or place it in a bowl of warm water for 5 minutes if you’re in a hurry. This is one of those little things that makes a real difference.
Let them cool properly. I know the smell is intoxicating, and you want to dig in immediately. But cutting these bars while they’re hot will result in a runny mess. The filling needs time to set up and become that perfect gooey consistency. I’ve learned this lesson multiple times—some lessons just need repeating, apparently.
Toast your pecans. This step is optional but highly recommended. Toasting brings out the natural oils in the pecans and adds a deeper, nuttier flavor that takes these bars from good to unforgettable. Just 3-4 minutes in a 350°F oven does the trick. Watch them like a hawk—burnt pecans have a bitter taste that can ruin the whole bar.
Use a baking sheet. Always place your tart pans on a baking sheet before putting them in the oven. The filling can bubble up and spill over, and cleaning caramelized sugar off your oven floor is not a fun way to spend an evening. Trust me on this one. I have the scorch marks to prove it.
Variations & Adaptations
One of the things I love about this recipe is how flexible it is. Here are some variations I’ve tried and loved:
Chocolate Pecan Bars : Add 2 tablespoons of dark chocolate chips to the filling along with the pecans. The chocolate melts into the filling and creates these little pockets of richness that pair beautifully with the maple and brown sugar. I did this on a whim one night and my husband declared it his new favorite.
Bourbon Maple Pecan Bars : Replace 1 tablespoon of the maple syrup with bourbon. The alcohol cooks off, leaving behind a warm, smoky depth that’s absolutely incredible. This version feels a little more grown-up and is perfect for serving after dinner with coffee. I’ve made these for holiday gatherings and they disappear fast.
Gluten-Free Version : Swap the all-purpose flour with a 1:1 gluten-free baking blend that contains xanthan gum. I’ve tried this with Bob’s Red Mill 1:1 Baking Flour and the crust turns out surprisingly tender. Just make sure your blend has a binder, or the crust might be crumbly.
Vegan Adaptation : Use vegan butter in both the crust and filling, and replace the egg with a flax egg (1 tablespoon ground flaxseed mixed with 3 tablespoons water, let sit for 5 minutes). The texture is slightly less rich, but the flavor is still spot-on. I’ve made these for a vegan friend and she couldn’t stop eating them.
Spiced Pecan Bars : Add ¼ teaspoon of cinnamon and a pinch of nutmeg to the filling. The warm spices complement the pecans beautifully and make these bars feel extra cozy. This is my go-to version in the fall when I’m craving all things pumpkin-spice-adjacent but want something different.
Serving & Storage Suggestions
These Lightened-Up Pecan Pie Bars for Two are versatile little treats. Here’s how I like to serve and store them:
Serving Temperature : I prefer these bars slightly warm. A quick 10-second zap in the microwave softens the filling to that perfect gooey texture. At room temperature, they’re still fantastic—the filling firms up a bit and becomes more like traditional pecan pie. Straight from the fridge, they’re denser and almost candy-like. All three ways are delicious, so go with whatever mood strikes you.
Presentation Ideas : Serve each bar on a small plate with a dollop of lightly sweetened whipped cream or a scoop of vanilla ice cream. The cold creaminess against the warm, nutty bar is a match made in heaven. For a fancier presentation, drizzle a little extra maple syrup over the top and add a sprinkle of flaky sea salt. That salt really makes the flavors pop.
Complementary Dishes : These bars pair beautifully with coffee, espresso, or a strong cup of black tea. For a dessert spread, serve them alongside fresh berries or a simple fruit salad to balance the richness. I’ve also served them as part of a brunch buffet alongside quiche and fresh fruit—they work surprisingly well in the morning with a cup of coffee.
Storage Instructions : Store leftover bars in an airtight container in the refrigerator for up to 5 days. Place a piece of parchment paper between layers if you’re stacking them. The bars actually improve after a day in the fridge—the flavors meld together and become even more cohesive.
Freezing Instructions : These bars freeze beautifully. Wrap each bar individually in plastic wrap, then place them in a freezer-safe bag or container. They’ll keep for up to 3 months. To thaw, transfer to the refrigerator overnight or let sit at room temperature for about 30 minutes. You can also reheat directly from frozen in a 300°F oven for about 10 minutes.
Make-Ahead Note : You can prepare the crust dough up to 2 days in advance and keep it wrapped in the refrigerator. You can also bake the bars completely and refrigerate them for up to 2 days before serving. Just bring them to room temperature or warm them slightly before serving.
Nutritional Information & Benefits
These Lightened-Up Pecan Pie Bars for Two are designed to satisfy your dessert cravings without derailing your healthy eating goals. Here’s a rough estimate of what you’re looking at per bar:
| Nutrient | Amount Per Bar |
|---|---|
| Calories | ~320 |
| Total Fat | 20g |
| Saturated Fat | 8g |
| Carbohydrates | 34g |
| Fiber | 2g |
| Sugar | 22g |
| Protein | 5g |
Compared to a traditional slice of pecan pie, which can clock in at over 500 calories and 30 grams of sugar, these bars are a significant improvement. The swap from corn syrup to maple syrup gives you a more complex sweetness with a lower glycemic impact. Pecans themselves are packed with healthy monounsaturated fats, fiber, and minerals like magnesium and zinc. They’re also a good source of antioxidants.
This recipe is naturally vegetarian and can be adapted to be gluten-free, dairy-free, or vegan with the substitutions I mentioned earlier. It contains nuts and eggs, so keep that in mind if you’re serving someone with allergies. The portion-controlled size makes it easy to enjoy a satisfying dessert without overindulging—something I really appreciate when I’m trying to eat well but still want something special.
Conclusion
These Lightened-Up Pecan Pie Bars for Two have earned a permanent spot in my dessert rotation. They give you everything you love about pecan pie—the buttery crust, the gooey filling, the crunchy nuts—in a perfectly portioned package that doesn’t leave you with a week’s worth of leftovers calling your name. Carrie’s casual kitchen creation turned out to be one of the best recipe discoveries I’ve ever made, and I’m so glad she scribbled it on that sticky note.
I hope you give these bars a try and make them your own. Maybe you’ll add chocolate, or bourbon, or a pinch of cinnamon. Maybe you’ll serve them with ice cream or eat them straight from the pan like I sometimes do (no judgment here). The beauty of this recipe is that it’s forgiving, flexible, and genuinely delicious every single time.
If you make these Lightened-Up Pecan Pie Bars for Two, I’d love to hear about it. Drop a comment below and let me know how they turned out, what variations you tried, or if you have any questions. And if you’re looking for more small-batch desserts, check out my recipe for small batch chocolate chip cookies—they’re another one of my favorites for when you want something sweet without the commitment of a full batch. Happy baking, friends!
Frequently Asked Questions
Can I use corn syrup instead of maple syrup?
Absolutely. You can substitute the maple syrup with an equal amount of light corn syrup if that’s what you have on hand. The flavor will be closer to traditional pecan pie, but you’ll lose that subtle maple note. The texture will be nearly identical.
Can I double this recipe?
Yes, this recipe doubles beautifully. Just use an 8×8 inch baking pan and increase the baking time by about 5-8 minutes. Keep an eye on the filling and use the same visual cues—set edges with a slightly jiggly center.
Why did my filling turn out runny?
Runny filling usually means the bars were underbaked. The filling needs to reach a certain temperature to set properly. Make sure you’re baking until the edges are set and the center only has a slight jiggle. Also, let them cool completely before slicing—the filling continues to set as it cools.
Can I use a different type of nut?
You can, but the flavor and texture will change. Walnuts are the closest substitute and work well. I’ve also made these with a mix of pecans and almonds, which adds a nice crunch. Just keep the total amount of nuts the same.
How do I know when the bars are done baking?
Look for these signs: the edges of the filling will be set and slightly puffed, the top will be golden brown with some cracks, and the center will have a slight jiggle when you gently shake the pan. If the center still looks liquid and wobbly, give it another 2-3 minutes and check again.
Pin This Recipe!
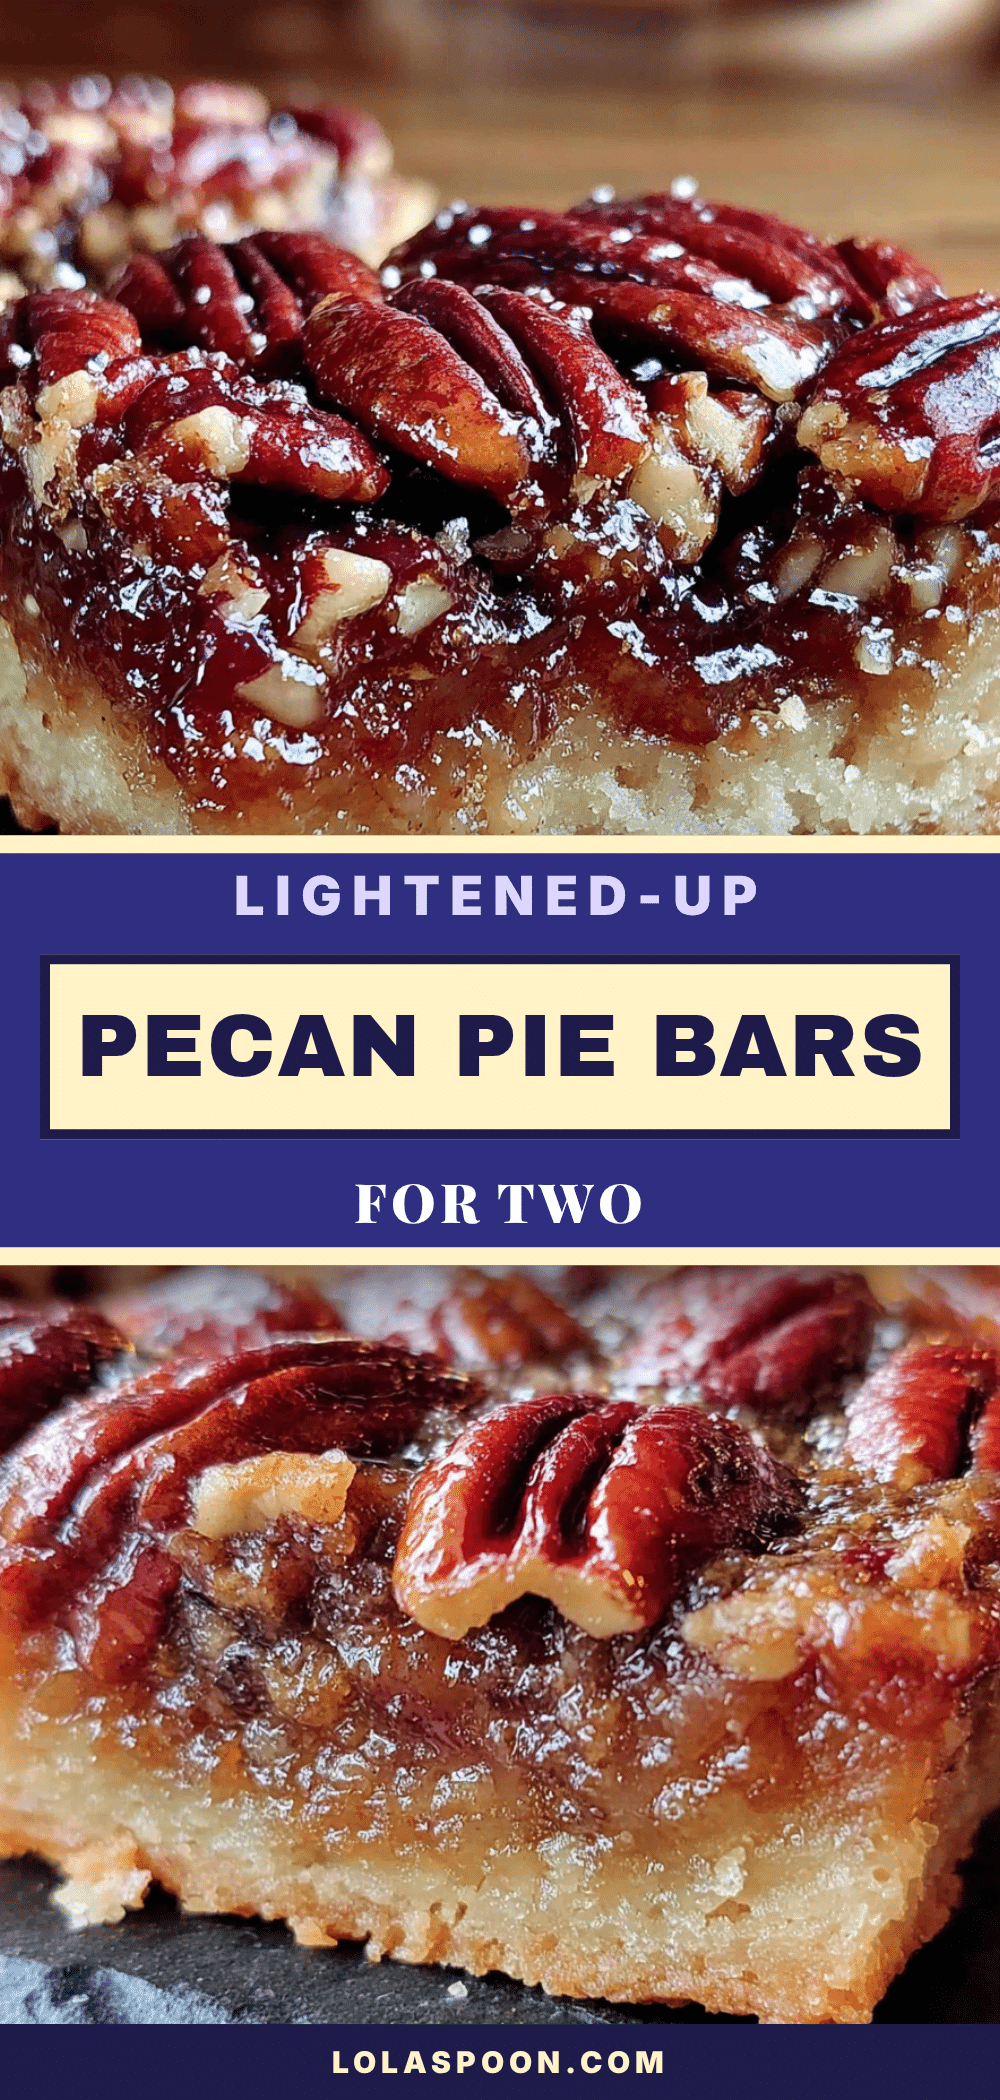
Lightened-Up Pecan Pie Bars for Two Easy Dessert
These Lightened-Up Pecan Pie Bars for Two give you all the sticky, nutty, buttery goodness of pecan pie in a perfectly portioned package. Made with maple syrup and less butter, they’re a lighter take on the classic that comes together in about 35 minutes.
- Prep Time: 15 minutes
- Cook Time: 20 minutes
- Total Time: 35 minutes
- Yield: 2 servings
- Category: Dessert
- Cuisine: American
Ingredients
- All-purpose flour, ½ cup (60g)
- Unsalted butter, 3 tablespoons (42g), cold and cut into small cubes
- Powdered sugar, 1 tablespoon (8g)
- Vanilla extract, ¼ teaspoon
- Salt, a pinch
- Ice water, 1 to 2 teaspoons
- Pecan halves, ½ cup (55g)
- Pure maple syrup, 3 tablespoons (45ml)
- Light brown sugar, 2 tablespoons (25g), packed
- Large egg, 1, room temperature
- Unsalted butter, 1 tablespoon (14g), melted
- Vanilla extract, ½ teaspoon
- Salt, ⅛ teaspoon
Instructions
- Preheat your oven to 350°F (175°C). Lightly grease two 4-inch mini tart pans or a small baking dish.
- Make the crust: In a small mixing bowl, combine the flour, powdered sugar, and salt. Add the cold butter cubes. Using a pastry cutter or two forks, cut the butter into the flour mixture until it looks like coarse meal with some pea-sized butter pieces remaining.
- Add the vanilla and ice water: Drizzle the vanilla over the flour mixture, then add 1 teaspoon of ice water. Stir with a fork until the dough starts to come together. If too dry, add the second teaspoon of water.
- Press the crust into the pans: Divide the dough evenly between your two tart pans. Press it firmly into the bottom and up the sides to about ⅛-inch thick. Place the pans on a baking sheet.
- Pre-bake the crust: Bake for 10 minutes until edges are just barely golden. Remove from oven and set aside on a cooling rack. Leave the oven on.
- Prepare the pecans (optional): If toasting, spread pecans on a small baking sheet and toast in the oven for 3-4 minutes while the crust pre-bakes. Let cool slightly, then chop roughly if desired.
- Make the filling: In a medium bowl, whisk together the maple syrup, packed brown sugar, melted butter, egg, vanilla extract, and salt until smooth and well combined.
- Assemble the bars: Sprinkle the pecans evenly over the pre-baked crusts. Pour the filling over the pecans, dividing it equally between the two pans.
- Bake the bars: Place the baking sheet back in the oven. Bake for 18-22 minutes, until the filling is set around the edges but still slightly jiggly in the center. The top should be golden brown and slightly crackly.
- Cool completely: Remove from oven and place on a cooling rack. Let cool for at least 30 minutes at room temperature, then refrigerate for another 30 minutes for cleaner slices.
- Slice and serve: Use a sharp knife to cut each bar in half or serve whole. Warm slightly in the microwave for about 10 seconds before serving if desired.
Notes
Don’t overwork the crust; handle just enough to bring together. Watch baking time carefully—the difference between perfectly gooey and overbaked is about two minutes. Use room temperature egg for best results. Let bars cool completely before slicing to allow filling to set. Toasting pecans is optional but recommended for deeper flavor. Always place tart pans on a baking sheet to catch drips.
Nutrition
- Serving Size: 1 bar
- Calories: 320
- Sugar: 22
- Fat: 20
- Saturated Fat: 8
- Carbohydrates: 34
- Fiber: 2
- Protein: 5
Keywords: pecan pie bars, small batch dessert, lightened up pecan pie, pecan bars for two, easy dessert


