I was standing in the baking aisle at Target last December, staring at a bag of Hershey Kisses like they held the secrets to the universe. The holiday music was playing just a little too loud, and somewhere nearby a kid was having a full meltdown over not getting a toy. But none of that registered. Because the smell—that specific mix of chocolate and the faint, waxy scent of the foil wrappers—hit me, and suddenly I was seven years old at my Aunt Carol’s kitchen table.
Aunt Carol wasn’t really my aunt. She was our next-door neighbor, a retired schoolteacher with a perpetually flour-dusted apron and a laugh that sounded like a rusty hinge. Every December 23rd, she’d invite me over to “help” bake her famous Peanut Butter Blossoms. “Help” meant I got to unwrap about forty Kisses while she did the actual work, but I didn’t care. I remember the way the dough felt—soft, a little greasy, and impossibly warm from her hands. I remember the precise, satisfying *thump* as she rolled each ball in sugar. And I remember the moment she’d press a Kiss into the center of a hot cookie, the chocolate melting just slightly, creating that perfect little crater. She passed away three years ago, and honestly, I haven’t had a Peanut Butter Blossom since that felt right.
Until now. But here’s the thing—I’m not the same person I was at seven. I’m an adult who thinks about things like protein content and sugar intake. I wanted that memory, that feeling, but I didn’t want the sugar crash that usually follows. So I went home, dumped my grocery bag on the counter, and got to work figuring out how to make a Lighter Peanut Butter Blossom Cookie that still tasted like Aunt Carol’s kitchen. Maybe you’ve been there—wanting the comfort without the guilt. Let me tell you, it is possible.
Why You’ll Love This Recipe
These aren’t just “healthy” cookies that taste like cardboard and regret. These are the real deal—soft, peanut-buttery, with that iconic chocolate center—just made with a few smarter choices. I’ve tested this recipe about six times (my coworkers were very happy taste-testers), and I can confidently say this version holds its own against the original.
- Quick & Easy: From start to finish, these come together in about 30 minutes. Perfect for when a cookie craving hits out of nowhere or you need a last-minute contribution to a holiday party.
- Simple Ingredients: No weird health food store finds here. You probably have most of these in your pantry right now. I swapped a few things, but nothing that requires a special trip.
- Perfect for the Holidays: Let’s be real—Peanut Butter Blossoms are a Christmas classic. But they’re also great for bake sales, potlucks, or just a Tuesday when you need a little joy.
- Crowd-Pleaser: I brought a batch to my book club, and no one guessed they were “lighter.” One friend asked for the recipe, and when I told her, she just said, “Well, damn.” That’s a win in my book.
- Unbelievably Delicious: The texture is spot on—slightly crisp on the outside, soft and tender on the inside. And that chocolate kiss? Still perfect.
What makes these different is the technique. Instead of using all butter and white sugar, I swapped in some Greek yogurt and a sugar blend that cuts the calories without cutting the flavor. It’s not about deprivation—it’s about making a classic cookie work for how we eat today. This recipe gives you that same soul-soothing satisfaction of the original, just without the sugar hangover.
What Ingredients You Will Need
This recipe uses simple, wholesome ingredients to deliver that classic peanut butter blossom flavor and texture without the extra sugar and fat. Most of these are pantry staples, and I’ve included notes on substitutions where they work well.
For the Cookie Dough
- 1 cup creamy peanut butter (natural, no-stir works best—I prefer Skippy Natural or Jif Natural for consistent texture)
- 1/2 cup unsalted butter, softened (this is where we cut some fat—only half a stick instead of a full one)
- 1/3 cup granulated sugar (plus extra for rolling)
- 1/3 cup packed light brown sugar
- 1/4 cup plain Greek yogurt (full-fat or 2% works best—this replaces some of the butter and adds moisture without the calories)
- 1 large egg, room temperature
- 1 teaspoon vanilla extract
- 1 1/2 cups all-purpose flour (or use a 1:1 gluten-free baking flour if needed)
- 1 teaspoon baking soda
- 1/2 teaspoon salt
For the Topping
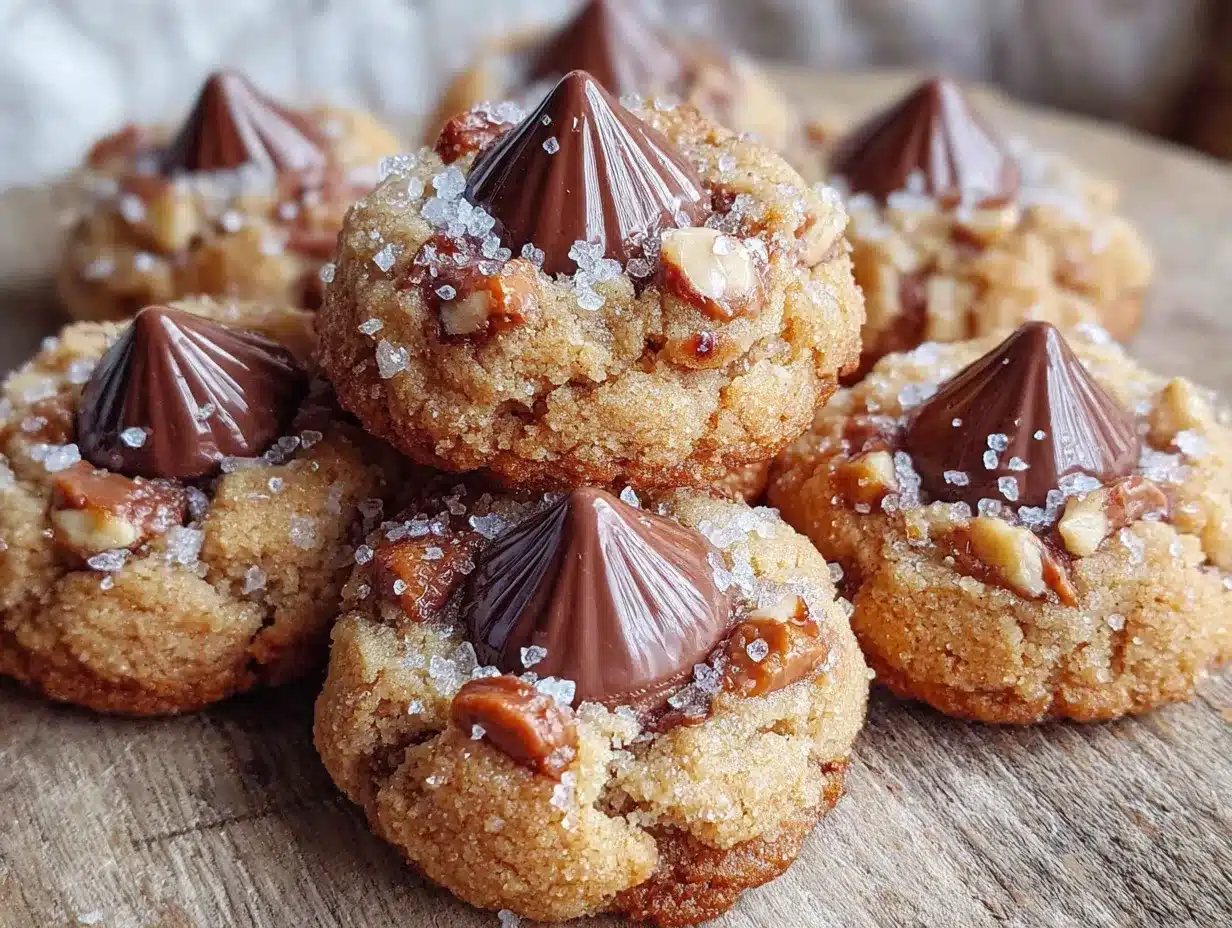
- 24-30 Hershey’s Kisses, unwrapped (about one standard bag—get the milk chocolate kind, that’s non-negotiable)
- 2-3 tablespoons granulated sugar, for rolling the dough balls
Ingredient Tips: For the peanut butter, avoid the oily, stir-it-yourself kind from the health food section. It’s too runny and will make your cookies spread into flat puddles. Stick with a creamy, no-stir natural peanut butter. For the Greek yogurt, I recommend Fage or Chobani—they’re thick and won’t make the dough too wet. And yes, you can use dairy-free yogurt if you’re avoiding dairy, just make sure it’s plain and unsweetened.
Equipment Needed
- Electric mixer (handheld or stand mixer—I’ve made these with both, and a handheld works perfectly fine)
- Large mixing bowl
- Medium mixing bowl
- Baking sheets (two, if you have them, to speed things up)
- Parchment paper or silicone baking mats (highly recommend—these cookies can stick)
- Small bowl for the rolling sugar
- Cooling rack
- Cookie scoop (1-tablespoon size—this helps keep the cookies uniform, but you can use a regular spoon too)
- Measuring cups and spoons
If you don’t have a cookie scoop, just eyeball it—each ball should be about the size of a walnut. And if you don’t have parchment paper, you can grease your baking sheets lightly, but honestly, parchment makes cleanup so much easier. I learned that the hard way after scrubbing a pan for twenty minutes.
Preparation Method
- Preheat your oven to 375°F (190°C). Line two baking sheets with parchment paper or silicone mats. This is one of those steps you don’t want to skip—trust me, the first time I made these, I forgot, and the cookies stuck like glue.
- In a large mixing bowl, cream together the softened butter, peanut butter, granulated sugar, and brown sugar. Use your electric mixer on medium speed for about 2-3 minutes, until the mixture is light, fluffy, and slightly pale in color. You’ll know it’s ready when it looks like a smooth, spreadable paste. Scrape down the sides of the bowl halfway through.
- Add the Greek yogurt, egg, and vanilla extract. Mix on low speed until just combined—about 30 seconds. Don’t overmix here, or the cookies will be tough. The batter might look a little curdled at this point, but that’s totally normal. I panicked the first time I saw this, but it comes together once you add the flour.
- In a separate medium bowl, whisk together the flour, baking soda, and salt. This ensures the baking soda is evenly distributed so you don’t get one cookie that’s puffy and another that’s flat.
- Gradually add the dry ingredients to the wet ingredients, mixing on low speed. Add about a third of the flour mixture at a time, mixing until just incorporated after each addition. The dough will be soft, slightly sticky, and very fragrant. If it feels too sticky to handle, pop it in the fridge for 15 minutes.
- Place the extra granulated sugar in a small bowl. Using a cookie scoop or a spoon, portion out about 1 tablespoon of dough and roll it into a smooth ball between your palms. Roll each ball in the sugar until coated. Place the sugared dough balls on the prepared baking sheets, spacing them about 2 inches apart. They will spread a little, so don’t crowd them.
- Bake for 8-10 minutes, or until the cookies are puffed and the edges are just starting to turn golden. The centers will still look slightly soft and underdone—that’s exactly what you want. Don’t overbake them, or they’ll be dry. My first batch came out like hockey pucks because I left them in an extra two minutes.
- Remove the baking sheets from the oven and let the cookies cool on the sheets for 2-3 minutes. This is the crucial window. While the cookies are still warm and soft, gently press a Hershey’s Kiss into the center of each cookie. The chocolate will soften and create that classic blossom look. If the cookie cracks a little around the edges, that’s fine—it adds character.
- Transfer the cookies to a wire cooling rack to cool completely. The chocolate will firm up as they cool. Resist the urge to eat one immediately—the Kiss will be molten hot and will burn your mouth. I speak from experience.
Cooking Tips & Techniques
The first time I tried making these lighter, I used all Greek yogurt and no butter. Big mistake. The cookies were dense, almost rubbery, and they didn’t spread at all. That’s when I learned you need a balance—some fat for tenderness, some yogurt for moisture. The 50/50 split is the sweet spot.
Don’t overmix the dough. I know I said this already, but it’s worth repeating. Overmixing develops the gluten in the flour, which makes cookies tough and cakey instead of tender. Mix just until the flour disappears into the dough.
Chill the dough if needed. If your kitchen is warm or your butter got too soft, the dough might be sticky. Pop it in the fridge for 15-20 minutes before rolling. It makes the dough easier to handle and helps the cookies hold their shape better in the oven.
Use a timer for the baking. These cookies go from perfectly soft to overdone in about 60 seconds. Set your timer for 8 minutes, check them, and add time in 1-minute increments if needed. The edges should be just barely golden, and the centers should look puffy and slightly underbaked.
Press the Kisses in at the right moment. If you press them in right out of the oven, the cookie might crumble. If you wait too long, the chocolate won’t soften enough to stick. The sweet spot is about 2-3 minutes after they come out of the oven. The cookies should still be warm but firm enough to hold the chocolate without collapsing.
Variations & Adaptations
Gluten-Free Version: Swap the all-purpose flour for a 1:1 gluten-free baking flour blend. I’ve used Bob’s Red Mill and King Arthur, and both work well. The texture will be slightly more crumbly, but the flavor is still there.
Dairy-Free Version: Use a plant-based butter substitute (like Earth Balance) and a dairy-free plain yogurt (like Kite Hill or So Delicious). Make sure your chocolate Kisses are dairy-free too—some dark chocolate varieties are, but check the label.
Flavor Twist: Add 1/2 teaspoon of cinnamon to the flour mixture for a warm, spiced note. Or swap the vanilla extract for almond extract—it pairs beautifully with peanut butter and chocolate. I tried this by accident once (grabbed the wrong bottle) and it was honestly amazing.
Lower Sugar Option: You can reduce the granulated sugar to 1/4 cup and the brown sugar to 1/4 cup. The cookies will be slightly less sweet, but the chocolate Kiss provides plenty of sweetness on top. I’d recommend using a sugar substitute like Swerve or Monk Fruit if you want to cut sugar further.
Different Chocolate Centers: While Hershey’s Kisses are classic, you can use any small chocolate candy. Try dark chocolate Kisses, caramel-filled Kisses, or even a mini Reese’s cup pressed into the center. Just make sure whatever you use is about the same size so it fits in the cookie.
Serving & Storage Suggestions
These cookies are best served at room temperature, when the chocolate is set but still soft enough to give when you bite into them. Arrange them on a pretty plate or in a cookie tin lined with parchment paper—they make a great gift for neighbors, teachers, or coworkers.
Storage: Store the cookies in an airtight container at room temperature for up to 5 days. Place a sheet of parchment paper between layers to prevent the chocolate from sticking. I’ve found they actually taste even better on day two—the flavors meld together and the cookies get a little softer.
Freezing: You can freeze the baked cookies for up to 3 months. Place them in a single layer on a baking sheet and freeze until solid, then transfer to a freezer-safe bag or container. To thaw, let them sit at room temperature for about 30 minutes. You can also freeze the unbaked dough balls (without the Kisses) for up to 3 months. Just bake them straight from frozen, adding 2-3 minutes to the baking time.
Reheating: If you want that just-baked warmth, pop a cookie in the microwave for 8-10 seconds. The chocolate will get melty again, and the cookie will be soft and comforting. Perfect with a glass of cold milk or a hot cup of coffee.
Nutritional Information & Benefits
Compared to a traditional Peanut Butter Blossom cookie, this lighter version saves you about 60 calories and 5 grams of sugar per cookie. That might not sound like a lot, but when you’re eating three or four (no judgment here), it adds up fast.
Estimated per cookie (based on 28 cookies):
- Calories: 145
- Fat: 8g
- Carbohydrates: 16g
- Fiber: 1g
- Sugar: 9g
- Protein: 4g
The Greek yogurt adds a boost of protein and calcium without changing the flavor. Peanut butter provides healthy fats and a little more protein, which helps keep you full and satisfied. And by using less butter and sugar, you’re cutting down on saturated fat and empty calories. These cookies fit nicely into a balanced diet—they’re a treat, but they’re not a sugar bomb.
If you’re watching your sugar intake or following a lower-carb lifestyle, this recipe is a great way to enjoy a classic holiday cookie without derailing your goals. It’s all about balance, right?
Conclusion
These Lighter Peanut Butter Blossom Cookies are proof that you don’t have to choose between eating well and enjoying yourself. They have all the nostalgia, all the peanut butter-chocolate magic, and all the soft, tender texture of the original—just with a few smart swaps that make them work for how we eat today.
I love this recipe because it brings me back to Aunt Carol’s kitchen without the sugar crash that used to follow. It’s a way to honor that memory while taking care of myself. And honestly, that’s a pretty good feeling.
I’d love to hear how these turn out for you! Leave a comment below and let me know if you tried any variations or if these became a new favorite in your household. And if you’re looking for another lighter dessert to add to your rotation, check out our healthy banana oatmeal cookies—they’re just as easy and just as satisfying. Happy baking, friends!
Frequently Asked Questions
Can I use crunchy peanut butter instead of creamy?
Technically yes, but the texture will be different. The crunchy bits can make the dough a little harder to roll into smooth balls, and they might poke through the surface. If that doesn’t bother you, go for it. I’d recommend using a natural crunchy peanut butter that’s not too oily.
Why did my cookies spread too much?
This usually happens if the butter was too soft or the dough was too warm. Next time, try chilling the dough for 20-30 minutes before rolling and baking. Also, make sure you’re using a natural peanut butter that’s not too runny—some brands have more oil than others.
Can I make these cookies vegan?
Yes, with a few swaps. Use a flax egg (1 tablespoon ground flaxseed mixed with 3 tablespoons water, let sit for 5 minutes) instead of the regular egg, a plant-based butter, and a dairy-free yogurt. Make sure your chocolate Kisses are vegan-friendly too. The texture will be slightly different, but they’ll still be delicious.
How do I keep the chocolate kisses from melting completely?
The key is to press them in at the right time—about 2-3 minutes after the cookies come out of the oven. If you press them in immediately, the cookies are too hot and the chocolate will melt into a puddle. If you wait too long, the chocolate won’t stick. That 2-3 minute window is your sweet spot.
Can I double this recipe?
Absolutely! This recipe doubles beautifully. Just make sure you have enough baking sheets and space in your oven. You might need to bake in batches, and that’s totally fine. The dough keeps well in the fridge for up to 3 days, so you can bake fresh cookies whenever you want.
Pin This Recipe!
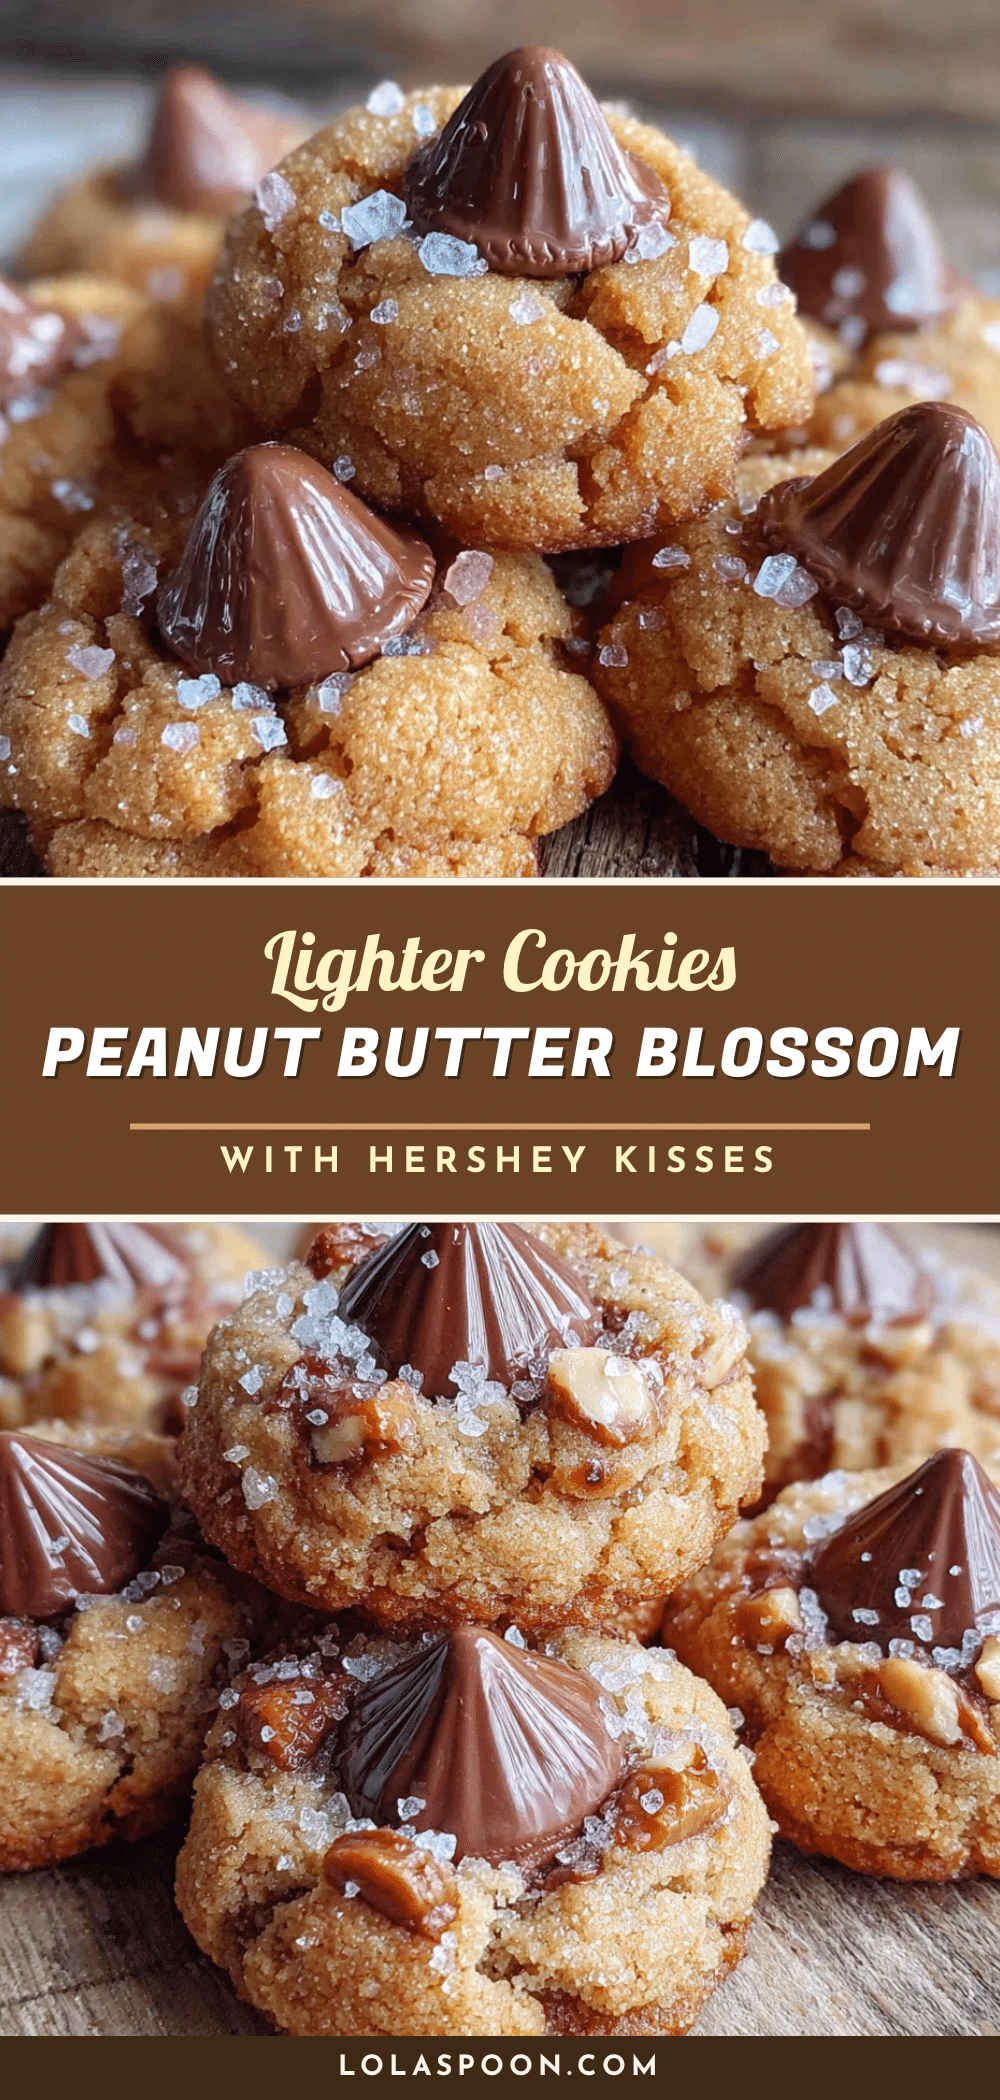
Lighter Peanut Butter Blossom Cookies: 5 Easy Tips
These lighter peanut butter blossom cookies have all the nostalgia and peanut butter-chocolate magic of the original, but with fewer calories and less sugar. Made with Greek yogurt and a sugar blend, they’re soft, tender, and perfect for holiday baking or any time you want a guilt-free treat.
- Prep Time: 15 minutes
- Cook Time: 10 minutes
- Total Time: 25 minutes
- Yield: 28 cookies 1x
- Category: Dessert
- Cuisine: American
Ingredients
- 1 cup creamy peanut butter (natural, no-stir)
- 1/2 cup unsalted butter, softened
- 1/3 cup granulated sugar (plus extra for rolling)
- 1/3 cup packed light brown sugar
- 1/4 cup plain Greek yogurt (full-fat or 2%)
- 1 large egg, room temperature
- 1 teaspoon vanilla extract
- 1 1/2 cups all-purpose flour
- 1 teaspoon baking soda
- 1/2 teaspoon salt
- 24–30 Hershey’s Kisses, unwrapped
- 2–3 tablespoons granulated sugar (for rolling)
Instructions
- Preheat your oven to 375°F (190°C). Line two baking sheets with parchment paper or silicone mats.
- In a large mixing bowl, cream together the softened butter, peanut butter, granulated sugar, and brown sugar. Use an electric mixer on medium speed for about 2-3 minutes, until light, fluffy, and slightly pale. Scrape down the sides halfway through.
- Add the Greek yogurt, egg, and vanilla extract. Mix on low speed until just combined, about 30 seconds. Do not overmix.
- In a separate medium bowl, whisk together the flour, baking soda, and salt.
- Gradually add the dry ingredients to the wet ingredients, mixing on low speed. Add about a third of the flour mixture at a time, mixing until just incorporated after each addition. The dough will be soft and slightly sticky.
- Place the extra granulated sugar in a small bowl. Using a cookie scoop or spoon, portion out about 1 tablespoon of dough and roll into a smooth ball. Roll each ball in the sugar until coated. Place on prepared baking sheets, spacing about 2 inches apart.
- Bake for 8-10 minutes, until puffed and edges are just starting to turn golden. Centers should still look slightly soft.
- Remove from oven and let cool on baking sheets for 2-3 minutes. While still warm, gently press a Hershey’s Kiss into the center of each cookie.
- Transfer cookies to a wire cooling rack to cool completely.
Notes
For best results, use a creamy no-stir natural peanut butter. Avoid oily, stir-it-yourself peanut butter as it will cause cookies to spread. If dough is too sticky, chill for 15-20 minutes before rolling. Press the chocolate kisses into the cookies 2-3 minutes after baking for the perfect melt. Store in an airtight container at room temperature for up to 5 days. Freeze baked cookies for up to 3 months.
Nutrition
- Serving Size: 1 cookie
- Calories: 145
- Sugar: 9
- Sodium: 120
- Fat: 8
- Saturated Fat: 3
- Carbohydrates: 16
- Fiber: 1
- Protein: 4
Keywords: peanut butter blossom cookies, lighter cookies, healthy cookies, Christmas cookies, peanut butter cookies, chocolate kiss cookies, low sugar cookies


