My aunt had refused to make a gingerbread house with her kids for six years. Six years. She claimed royal icing was “temperamental” and “a disaster waiting to happen.” She’d tell anyone who’d listen about the Christmas her roof slid off, the year the walls collapsed, and the time she found a puddle of sticky goo on her counter the next morning. Honestly, I didn’t blame her. I’d seen the pictures. Then, last December, I showed up at her place for our annual cookie swap and found her standing at the kitchen counter, piping bag in hand, with a fully assembled gingerbread village spread across her table. She didn’t even look guilty. She just shrugged and said, “This recipe is different.” You know that feeling when someone who swore they’d never do something gets caught red-handed? That was the moment I knew this icing was something special.
I’d been tinkering with royal icing recipes for years, trying to find one that was actually reliable. Not the kind that works perfectly in a climate-controlled test kitchen, but the kind that works on a Tuesday night when the kids are cranky, the kitchen is a mess, and you’ve got a stack of gingerbread walls that need gluing together. This is that recipe. It’s the one that made my aunt a believer, and it’s the one I’ve used every single year since. It holds tight, dries hard, and doesn’t crack under pressure — literally. So if you’ve been burned by royal icing before, I get it. Let me tell you, this one’s different.
Why You’ll Love This Recipe
Let’s be real — royal icing can be a pain. It’s finicky, it dries too fast, or it doesn’t dry at all. You’ve probably got a horror story of your own, right? This recipe is built to be the opposite of all that. It’s the no-fuss, no-fail version you’ve been looking for.
- Quick & Easy : You can whip this up in under 10 minutes. No heating, no complicated techniques. Just dump, mix, and go. Perfect for those last-minute holiday projects when you realize you have nothing to glue your house together with.
- Simple Ingredients : You probably have everything in your pantry right now. Powdered sugar, meringue powder, water, and a little cream of tartar. That’s it. No egg whites to worry about, no raw eggs for the kids to handle.
- Perfect for Gingerbread Houses : This icing dries rock hard. I mean it. Your walls won’t slide, your roof won’t sag, and your candy decorations will stay put. It’s the structural engineer of the icing world.
- Crowd-Pleaser : Kids love helping with this because it’s not fussy. They can pipe, they can spread, they can make a mess — and it still works. My niece once dumped half a cup of sprinkles into the bowl, and the icing still held up.
- Unbelievably Delicious : Okay, let’s be honest — royal icing isn’t exactly a gourmet treat. But this one has a nice, smooth sweetness that’s not cloying. It’s the perfect edible glue.
What makes this recipe different from all the others? It’s the meringue powder and cream of tartar combo. The meringue powder gives you that stiff, stable structure, while the cream of tartar keeps the icing from getting too brittle. It’s a balance I’ve tested over and over, and it works every single time. No more cracked roofs or leaning walls.
This recipe isn’t just good — it’s the kind that makes you breathe a sigh of relief when you’re assembling your house. It’s the difference between a fun family activity and a stressful disaster. Trust me, I’ve been on both sides.
What Ingredients You Will Need
This recipe uses simple, pantry-friendly ingredients to create a sturdy, reliable icing. No fancy grocery trips needed — you likely already have most of these on hand.
- Powdered Sugar (Confectioners’ Sugar): 4 cups (480 grams). This is the base of the icing. Sift it if you can — it prevents lumps. I’ve used both store-brand and name-brand, and they all work fine. Just make sure it’s fresh and not clumpy.
- Meringue Powder: 3 tablespoons (about 30 grams). This is the secret weapon. It stabilizes the icing and gives it that rock-hard finish. I prefer Wilton brand, but any brand works. Don’t skip this — it’s what makes the icing no-fail.
- Water: 1/2 cup (120 ml) plus 1 to 2 tablespoons as needed. Use room temperature water. Cold water can make the icing seize up, and hot water can break down the meringue powder. Just plain tap water works great.
- Cream of Tartar: 1 teaspoon (about 4 grams). This is my little trick. It prevents the icing from getting too hard and brittle, so it’s less likely to crack. It also helps stabilize the meringue powder.
- Vanilla Extract (Optional): 1/2 teaspoon. This is for flavor only. It won’t affect the structure. If you want a pure white icing for piping, skip the vanilla or use clear vanilla extract. I usually add it because I like the hint of flavor.
Ingredient Selection Tips: Look for meringue powder in the baking aisle of most grocery stores or online. It’s usually near the cake decorating supplies. If you can’t find it, you can substitute with powdered egg whites, but the texture might be slightly different. For the powdered sugar, I recommend Domino or C&H — they’re consistently smooth and don’t have that weird aftertaste some budget brands have.
Substitution Guidance: If you’re vegan, you can try using aquafaba (the liquid from a can of chickpeas) instead of meringue powder, but the consistency will be different and it won’t be as stable. For a gluten-free option, this recipe is naturally gluten-free as long as your powdered sugar is gluten-free (most are).
Equipment Needed
You don’t need fancy tools for this recipe. Here’s what you’ll need:
- Stand Mixer or Hand Mixer: A stand mixer is easiest, but a hand mixer works just fine. You could even whisk by hand, but your arm will get tired. I’ve done it — it’s not fun.
- Large Mixing Bowl: Any large bowl will do. Glass or stainless steel is best because they’re non-reactive.
- Rubber Spatula: For scraping down the sides of the bowl. Don’t skip this — you’ll have unmixed sugar hiding in the corners.
- Piping Bags and Tips: You’ll need piping bags for applying the icing. I like disposable ones because they’re easy to clean up. For the tip, a small round tip (like Wilton #2 or #3) is perfect for piping outlines and details.
- Small Offset Spatula or Butter Knife: For spreading icing on larger surfaces, like the roof of your gingerbread house.
- Damp Cloth or Paper Towel: Keep this handy to cover your bowl of icing while you’re working. Royal icing dries fast, and you don’t want it to crust over.
Budget-Friendly Options: If you don’t have piping bags, you can use a zip-top bag with a tiny corner snipped off. It works surprisingly well. Just don’t cut too much off, or you’ll get a flood of icing instead of a steady stream.
Preparation Method

This is the part where the magic happens. Follow these steps carefully, and you’ll have perfect royal icing every time.
- Combine the dry ingredients: In your large mixing bowl, whisk together the 4 cups of powdered sugar, 3 tablespoons of meringue powder, and 1 teaspoon of cream of tartar. Whisking them together first helps prevent the meringue powder from clumping when you add the water. I learned this the hard way after finding little white lumps in my icing.
- Add the water: Pour in 1/2 cup of room temperature water. If you’re using vanilla extract, add it now. Start mixing on low speed to avoid a cloud of powdered sugar flying everywhere. I speak from experience — it looks like a snow globe in your kitchen.
- Mix until combined: Once the sugar is incorporated, increase the speed to medium-high. Beat for about 5 to 7 minutes. The icing should become thick, glossy, and smooth. You’re looking for “stiff peaks” — when you lift the beater, the icing should form a peak that holds its shape without drooping. If it’s too runny, add a little more powdered sugar (a tablespoon at a time). If it’s too thick, add water a teaspoon at a time.
- Test the consistency: This is the most important step. For gingerbread house assembly, you want a stiff consistency. The icing should hold its shape when piped. If you’re planning to pipe details (like windows or snowflakes), you might want a slightly thinner consistency. To test, pipe a small dot on a piece of parchment paper. If it holds its shape without spreading, you’re good to go.
- Cover and rest: Royal icing dries out fast. Immediately cover the bowl with a damp cloth or plastic wrap. Let it rest for about 5 minutes. This gives the meringue powder time to fully hydrate, which makes the icing even stronger.
- Fill your piping bags: While the icing rests, prepare your piping bags. Fit them with your desired tips. If you’re using a zip-top bag, snip a tiny corner off — start small, you can always cut more.
- Pipe and assemble: Now the fun part. Pipe a thick line of icing along the edges of your gingerbread pieces. Press them together firmly and hold for about 30 seconds. The icing will start to set quickly. For the roof, pipe a line along the top edges of the walls, then press the roof pieces on. Use cans or jars to prop up the walls if they need extra support while drying.
- Let it dry completely: This is the hardest part — waiting. Let your gingerbread house dry for at least 2 to 3 hours before you start decorating. For best results, let it dry overnight. I know, I know. But trust me, a fully dried house is a stable house.
Sensory Cues: When the icing is ready, it should look like thick, glossy marshmallow fluff. It should smell sweet and clean, with a faint hint of vanilla if you added it. When you pipe it, you should hear a slight “pop” as it comes out of the bag. When it’s dry, it should be hard to the touch — like a sugar cookie that’s been left out too long.
Cooking Tips & Techniques
Here’s the stuff I wish someone had told me when I started making gingerbread houses.
Don’t overmix. I know I said to beat it for 5 to 7 minutes, but if you go too long, the icing can get stiff and grainy. Stop as soon as it reaches stiff peaks. I once walked away to answer the phone and came back to a bowl of sugary cement. Not fun.
Keep it covered. Royal icing crusts over in minutes. Every time you fill a piping bag, cover the bowl. Every time you take a break, cover the bowl. I’ve ruined more than one batch by leaving it uncovered while I helped my niece “organize” her candy decorations.
Work in sections. Don’t try to assemble the whole house at once. Start with the walls, let them dry, then add the roof. It takes longer, but it’s way more stable. I learned this after a spectacular collapse that sent gumdrops flying across the kitchen.
Use the right pressure. When piping, apply steady, even pressure. If you squeeze too hard, you’ll get a blob. Too soft, and the line will break. Practice on a piece of parchment paper first. It feels silly, but it saves you from a messy disaster on your actual house.
Fix mistakes fast. If you pipe a line and it’s wonky, wipe it off immediately with a damp paper towel. Once the icing sets, it’s stuck. I’ve got a gingerbread house with a permanent “artistic” roofline to prove it.
Timing is everything. Make your icing right before you plan to use it. It doesn’t store well once it’s mixed. If you absolutely must make it ahead, keep it in an airtight container at room temperature for up to 24 hours. But honestly, it’s so quick to make, just do it fresh.
Variations & Adaptations
This recipe is a blank canvas. Here are some ways to make it your own.
Flavor Variations: Add a few drops of peppermint extract for a festive twist. Or try almond extract for a nutty flavor. Lemon extract is also lovely — it gives the icing a bright, fresh taste. Just don’t go overboard; extracts are strong. A quarter teaspoon is plenty.
Color Variations: Divide the icing into bowls and add gel food coloring. Gel colors are best because they don’t thin out the icing like liquid colors do. I love making a batch of red and green for Christmas houses, but you can do any color you want. My daughter once insisted on purple and orange for a “Halloween gingerbread house.” It was… interesting.
Dietary Adaptations: For a vegan version, you can try using aquafaba instead of meringue powder. The consistency won’t be as stiff, but it can work for lighter projects. For a sugar-free version, use powdered erythritol or monk fruit sweetener, but note that the texture will be different and it may not dry as hard.
Different Uses: This icing isn’t just for gingerbread houses. Use it to glue together graham cracker houses, decorate sugar cookies, or pipe intricate designs on cakes. I’ve even used it to “glue” candy decorations onto a birthday cake. It works like a charm.
Personal Variation: I once added a tablespoon of cocoa powder to a batch for a “chocolate royal icing.” It didn’t dry as hard, but it tasted amazing. I used it to pipe a chocolate roof on a gingerbread cabin, and it looked incredible. Just don’t expect it to hold up a heavy structure.
Serving & Storage Suggestions
Once your gingerbread house is assembled and decorated, it’s time to show it off.
Serving Temperature: Gingerbread houses are best served at room temperature. They’re more of a display piece than an actual dessert, but if you do plan to eat it, let it sit out for about 30 minutes before serving. The icing softens slightly, making it easier to cut.
Presentation: Place your house on a sturdy platter or cake board. You can create a “snowy” base by spreading a thin layer of icing on the board and dusting it with powdered sugar. Add some candy trees, a pretzel fence, or a marshmallow snowman for a complete scene. I like to add a few LED tea lights inside the house for a warm glow — just make sure they’re battery-operated and not real flames.
Storage: A fully assembled gingerbread house can last for weeks if stored properly. Keep it in a cool, dry place away from direct sunlight. Humidity is the enemy — it will soften the icing and make the gingerbread soggy. If you live in a humid climate, consider storing it in a sealed container or wrapping it loosely in plastic wrap.
Reheating: You don’t really reheat a gingerbread house. But if the gingerbread itself seems stale, you can pop a piece in the microwave for 10 seconds. It won’t be as crisp, but it’ll be softer. Honestly, this icing is so sturdy, you could probably use it to repair a small crack in your drywall. Not that I’ve tried.
Flavor Development: Over time, the gingerbread will soften slightly as it absorbs moisture from the icing. Some people actually prefer this — it makes the house easier to eat. If you’re planning to keep the house as a decoration, it’ll look great for at least a month. After that, the colors might fade and the gingerbread might start to crack.
Nutritional Information & Benefits
Let’s be honest — this isn’t health food. But here’s the breakdown anyway.
Estimated Nutritional Values (per 1 tablespoon serving):
- Calories: 45
- Total Fat: 0g
- Sodium: 5mg
- Total Carbohydrates: 11g
- Sugars: 11g
- Protein: 0g
Health Benefits: The meringue powder in this recipe is pasteurized egg whites, so it’s safe for kids and pregnant women to handle. No raw eggs means no salmonella worries. The cream of tartar is a natural byproduct of winemaking, and it helps stabilize the icing without adding any weird chemicals. So while this isn’t a health food, it’s at least a little better than some other icings out there.
Dietary Considerations: This recipe is naturally gluten-free, nut-free, and dairy-free. It contains no common allergens besides eggs (from the meringue powder). If you’re vegan, check the meringue powder — some brands use egg whites, while others use plant-based alternatives.
Personal Wellness Perspective: I’m not one to stress about sugar during the holidays. This is a treat, and it’s meant to be enjoyed. The joy of making a gingerbread house with your family is worth a few extra grams of sugar. Just don’t eat the whole bowl of icing in one sitting. I may or may not have done that once. Twice.
Conclusion
This easy no-fail royal icing is the key to a stress-free gingerbread house experience. It’s reliable, it’s simple, and it works every single time. No more crying over collapsed walls or sliding roofs. No more last-minute trips to the store because your icing turned into a puddle. This is the recipe that saved my Christmas baking, and I’m pretty sure it’ll save yours too.
I love this recipe because it takes the pressure off. You can focus on the fun parts — decorating, laughing, and maybe sneaking a few gumdrops — instead of worrying about whether your house will hold together. It’s the kind of recipe that makes you feel like a pro, even if you’ve never made a gingerbread house in your life.
So go ahead. Make a mess. Pipe a wonky line. Let the kids go wild with sprinkles. This icing can handle it. And when you’re done, I’d love to hear how it went. Drop a comment below and tell me about your gingerbread house adventure. Did your roof stay on? Did you try a fun variation? I’m all ears. Happy building!
Frequently Asked Questions
Can I make this royal icing without a mixer?
Yes, you can whisk it by hand, but it will take about 10 to 15 minutes of vigorous whisking. Your arm will get tired, but it will work. Just make sure you whisk until the icing forms stiff peaks.
How long does royal icing take to dry on a gingerbread house?
It depends on the thickness. For assembling walls, let it dry for at least 2 to 3 hours. For full structural stability, I recommend letting it dry overnight. The icing will be rock hard by morning.
Can I freeze royal icing?
You can, but I don’t recommend it. Freezing can change the texture and make it grainy. It’s better to make it fresh. If you must freeze it, store it in an airtight container and re-whip it after thawing.
Why is my royal icing too runny?
You likely added too much water. Add more powdered sugar, one tablespoon at a time, and beat until it reaches stiff peaks. If it’s still runny after adding sugar, you may have overmixed it. Start over if needed.
Can I use this icing for sugar cookies?
Absolutely! For cookies, you’ll want a slightly thinner consistency — add a teaspoon or two of water until the icing flows slowly off a spoon. This is called “flood consistency” and it’s perfect for decorating cookies.
Pin This Recipe!
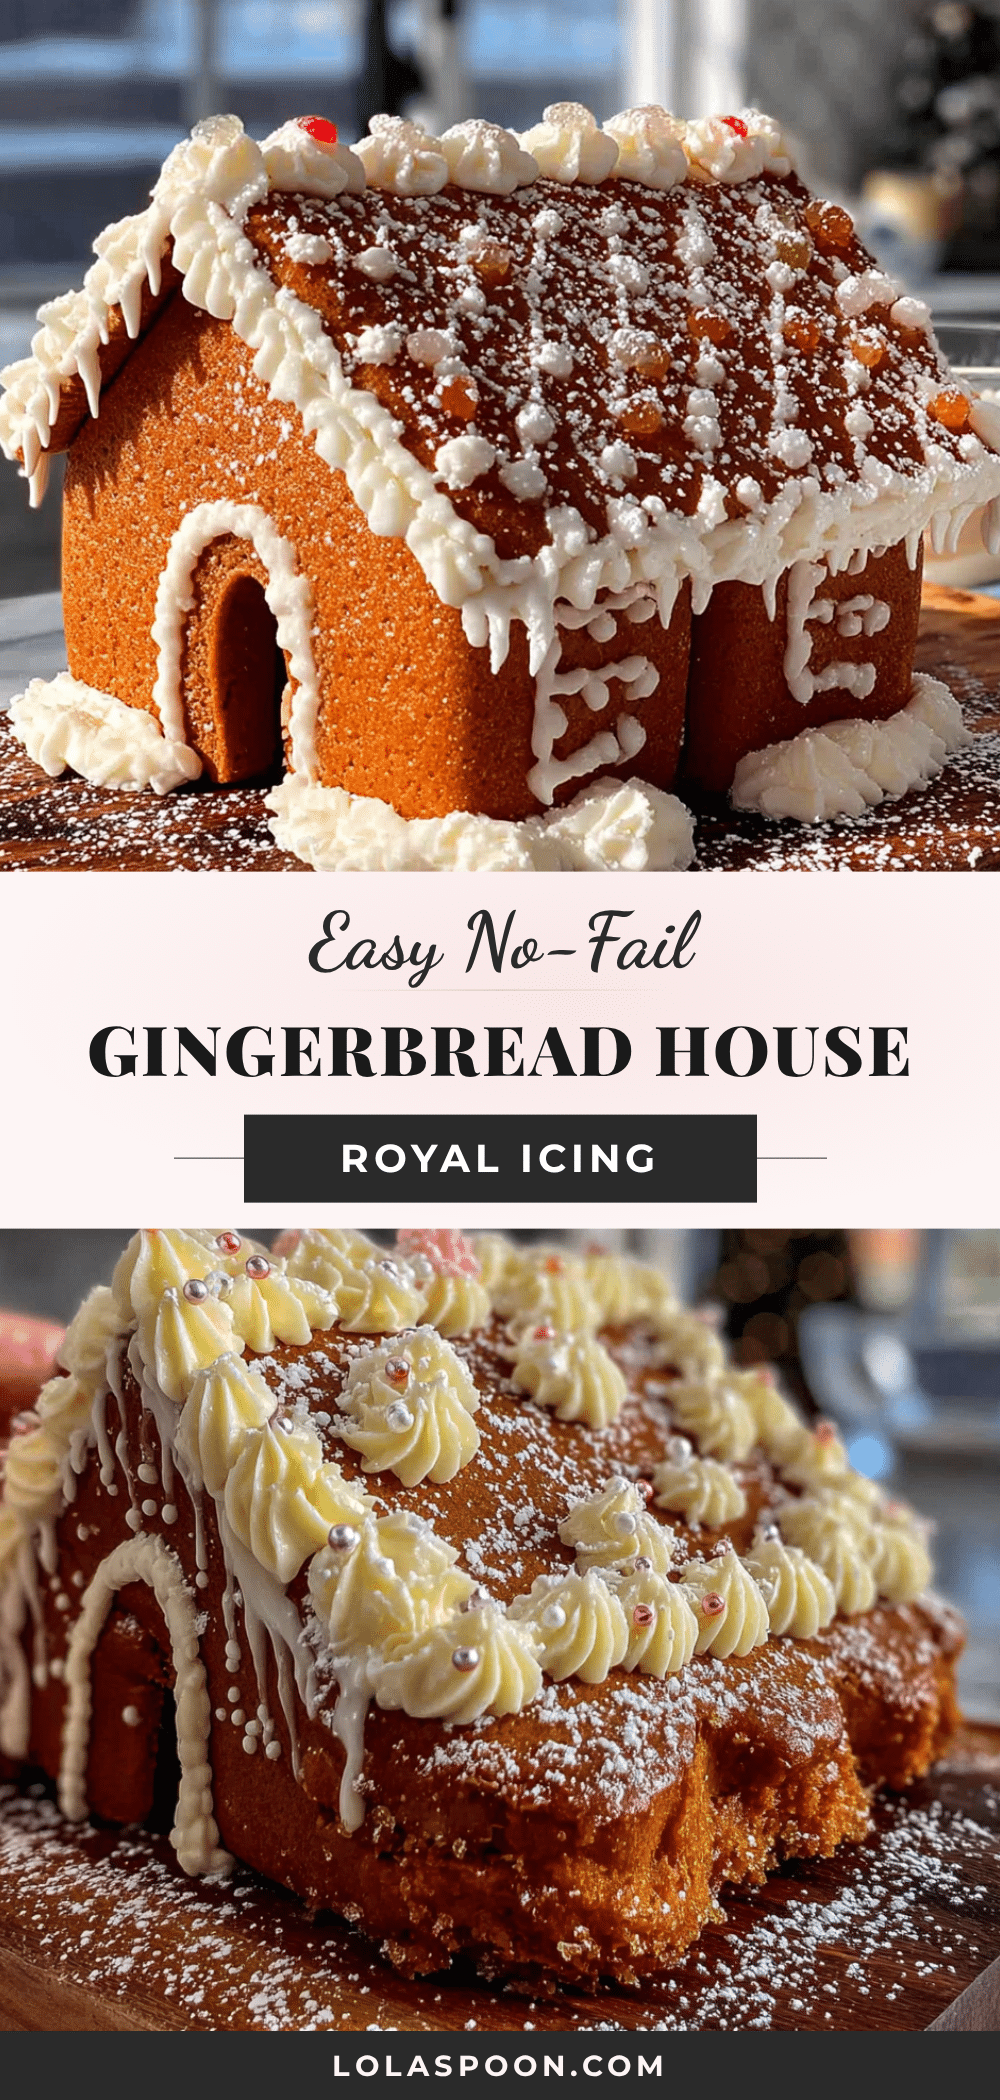
Best Easy No-Fail Royal Icing for Gingerbread Houses

This no-fail royal icing recipe is perfect for gingerbread houses. It dries rock hard, holds tight, and is quick and easy to make with simple ingredients like powdered sugar, meringue powder, and cream of tartar.
- Prep Time: 10 minutes
- Cook Time: 0 minutes
- Total Time: 10 minutes (plus drying time)
- Yield: About 2 cups of icing (enough for 1 standard gingerbread house) 1x
- Category: Dessert
- Cuisine: American
Ingredients
- 4 cups (480 grams) powdered sugar (confectioners’ sugar), sifted if possible
- 3 tablespoons (about 30 grams) meringue powder (preferably Wilton brand)
- 1/2 cup (120 ml) room temperature water, plus 1 to 2 tablespoons as needed
- 1 teaspoon (about 4 grams) cream of tartar
- 1/2 teaspoon vanilla extract (optional, for flavor; use clear vanilla for pure white icing)
Instructions
- Combine the dry ingredients: In a large mixing bowl, whisk together the 4 cups of powdered sugar, 3 tablespoons of meringue powder, and 1 teaspoon of cream of tartar. Whisking them together first helps prevent the meringue powder from clumping when you add the water.
- Add the water: Pour in 1/2 cup of room temperature water. If using vanilla extract, add it now. Start mixing on low speed to avoid a cloud of powdered sugar flying everywhere.
- Mix until combined: Once the sugar is incorporated, increase the speed to medium-high. Beat for about 5 to 7 minutes. The icing should become thick, glossy, and smooth. You’re looking for ‘stiff peaks’ — when you lift the beater, the icing should form a peak that holds its shape without drooping. If it’s too runny, add a little more powdered sugar (a tablespoon at a time). If it’s too thick, add water a teaspoon at a time.
- Test the consistency: For gingerbread house assembly, you want a stiff consistency. The icing should hold its shape when piped. To test, pipe a small dot on a piece of parchment paper. If it holds its shape without spreading, you’re good to go.
- Cover and rest: Immediately cover the bowl with a damp cloth or plastic wrap. Let it rest for about 5 minutes. This gives the meringue powder time to fully hydrate, which makes the icing even stronger.
- Fill your piping bags: While the icing rests, prepare your piping bags. Fit them with your desired tips. If using a zip-top bag, snip a tiny corner off — start small, you can always cut more.
- Pipe and assemble: Pipe a thick line of icing along the edges of your gingerbread pieces. Press them together firmly and hold for about 30 seconds. The icing will start to set quickly. For the roof, pipe a line along the top edges of the walls, then press the roof pieces on. Use cans or jars to prop up the walls if they need extra support while drying.
- Let it dry completely: Let your gingerbread house dry for at least 2 to 3 hours before you start decorating. For best results, let it dry overnight.
Notes
Keep the icing covered with a damp cloth at all times to prevent it from drying out. For best structural stability, let the assembled house dry overnight. If the icing is too runny, add more powdered sugar; if too thick, add water a teaspoon at a time. This icing is not recommended for freezing.
Nutrition
- Serving Size: 1 tablespoon
- Calories: 45
- Sugar: 11
- Sodium: 5
- Carbohydrates: 11
Keywords: royal icing, gingerbread house, no-fail, easy, Christmas, holiday, meringue powder, edible glue


