Rachel wasn’t trying to impress anyone. I’d stopped by her place on a freezing Tuesday night to grab a book I’d lent her months ago, and the smell of something warm and sweet hit me before I even got my coat off. She was standing in her kitchen, holding a whisk, looking at her phone like she was waiting for a text back. “Oh, you want some?” she said, barely looking up. “It’s just hot chocolate. I’m trying to make it faster.”
Faster. That word stuck with me. Because what she handed me a few minutes later wasn’t just hot chocolate. It was this deeply rich, perfectly sweet, slightly salty mug of pure comfort that tasted like it had been simmering for an hour. But she’d made it in the time it takes to microwave a bowl of oatmeal. I stood there in her tiny kitchen, holding that mug with both hands, and I think I said something brilliant like, “What did you do?” She shrugged and pointed at the stove. “It’s nothing. Salted caramel. Ten minutes.”
Honestly, I almost forgot to grab my book. I just stood there, taking tiny sips, trying to figure out how something this good came together so fast. Maybe you’ve been there—you taste something at a friend’s house and you know you’re going to be thinking about it for days. That was this hot cocoa for me. I went home, texted her for the details, and I’ve been making it ever since. Let me tell you, it’s the kind of recipe that makes you wonder why you ever bought the powdered stuff.
Why You’ll Love This Recipe
This Quick Salted Caramel Hot Cocoa isn’t just another hot drink recipe. It’s the one you’ll turn to when you need something warm and satisfying but you’re short on time and energy. I’ve tested this about a dozen times now, tweaking the ratios and the timing, and I can honestly say this version is the sweet spot—pun intended.
- Quick & Easy: From start to finish, you’re looking at 10 minutes. Maybe less if you’re efficient. This is weeknight-friendly, after-school-friendly, and “I just got home from work and I’m freezing” friendly.
- Simple Ingredients: You probably have most of this in your pantry right now. No fancy syrups, no special equipment. Just milk, cocoa powder, sugar, butter, and salt.
- Perfect for Cozy Nights: This is the drink you make when you’re curled up on the couch, watching a movie, or trying to warm up after shoveling snow.
- Crowd-Pleaser: Every single person I’ve made this for has asked for the recipe. Kids love it, adults love it, and it’s fancy enough to serve at a holiday gathering without any stress.
- Unbelievably Delicious: The salted caramel is made right in the pot—no separate pan, no candy thermometer. It’s rich, it’s silky, and that pinch of salt at the end makes all the difference.
What sets this apart from other hot cocoa recipes is the technique. Instead of relying on pre-made caramel sauce or a packet mix, you’re building the caramel flavor directly into the milk base. It takes an extra two minutes but the result is a depth of flavor that tastes like you spent way more effort than you actually did. This isn’t just another version of hot cocoa—it’s the version you’ll come back to again and again.
What Ingredients You Will Need
This recipe uses simple, everyday ingredients to create something that feels special. No hunting down obscure items at the store—just good, basic staples that come together beautifully.
- Whole milk, 2 cups (480 ml) – Whole milk gives the creamiest result, but 2% works fine too. Avoid skim milk here; it won’t be as rich and the caramel flavor needs a little fat to cling to.
- Granulated sugar, ¼ cup (50 g) – This is what we’ll caramelize to create that deep, toasty flavor. Regular white sugar is perfect.
- Unsweetened cocoa powder, 2 tablespoons (10 g) – Use a good quality cocoa powder. I prefer Ghirardelli or Hershey’s Special Dark for a richer chocolate flavor. Dutch-process cocoa also works beautifully here.
- Unsalted butter, 1 tablespoon (14 g) – The butter adds richness and helps smooth out the caramel. If you only have salted butter, just reduce the added salt at the end.
- Vanilla extract, ½ teaspoon – Pure vanilla extract is worth using here. It rounds out the flavors and makes everything taste more complex.
- Flaky sea salt, ¼ teaspoon, plus more for garnish – Maldon or any flaky sea salt is ideal. The little crunchy crystals on top are part of the magic. Regular table salt can be used in a pinch, but use less.
- Optional: Whipped cream or marshmallows for serving – Not required, but highly recommended. Homemade whipped cream takes this over the top.
One quick note on the cocoa powder: Don’t skip sifting it if it looks clumpy. Nobody wants a lump of dry cocoa in their otherwise perfect drink. Also, if you’re dairy-free, you can substitute oat milk or full-fat coconut milk. Just know that the caramelization step works a little differently with non-dairy milks, so keep a close eye on it.
Equipment Needed
You don’t need much for this recipe, which is part of the beauty of it. Here’s what you’ll need:
- Small saucepan – A 2-quart saucepan is perfect. If you use something too large, the milk will spread out too thin and take longer to heat.
- Whisk – A good whisk is essential for getting the cocoa powder to blend smoothly. I’ve used a fork in a pinch, but a whisk is much better.
- Measuring cups and spoons – Standard set. Nothing fancy.
- Mugs – Two standard 12-ounce mugs. Warm them up by filling them with hot water while you make the cocoa, then empty them right before pouring.
- Optional: Small fine-mesh sieve – If your cocoa powder is particularly clumpy, a quick sift can save you from lumps.
I’ve made this in a stainless steel saucepan and a non-stick one, and both work fine. The non-stick makes cleanup a little easier if you accidentally get some caramel stuck to the bottom. Also, I’ll be honest—I’ve used a silicone spatula to stir when I couldn’t find my whisk, and it worked okay. But the whisk really does a better job of incorporating the cocoa powder without leaving streaks.
Preparation Method
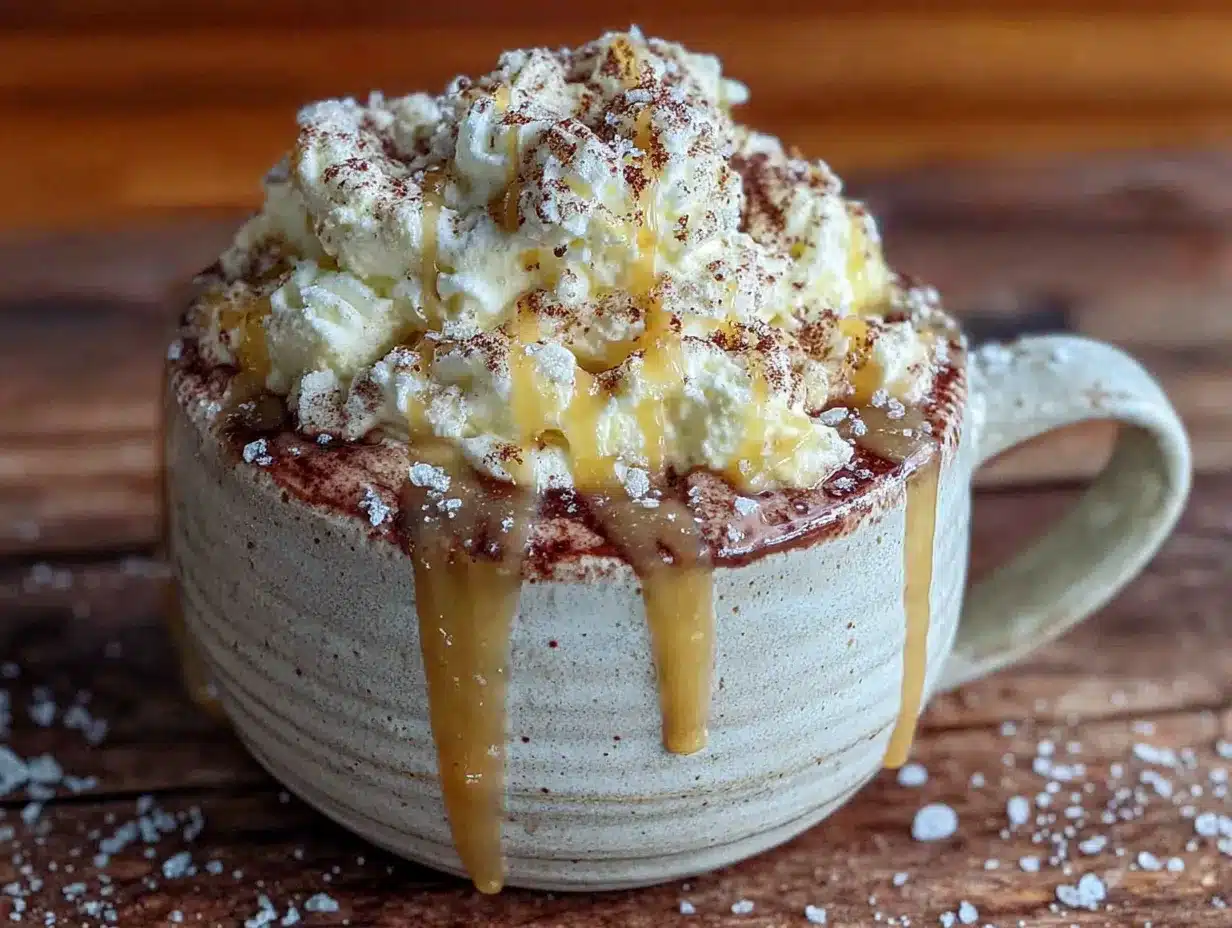
- Start the caramel base. Place your small saucepan over medium heat. Add the granulated sugar and let it sit for about 30 seconds. Then start stirring with your whisk. The sugar will clump at first—that’s normal. Keep stirring. After about 2 minutes, it will start to melt and turn a warm amber color. Don’t walk away; this happens fast. Once it’s a deep golden brown (think the color of a penny), immediately move to the next step.
- Add the butter. Drop in the tablespoon of butter and whisk vigorously. The mixture will bubble up and might look like it’s separating. That’s okay. Keep whisking until the butter is fully melted and combined with the caramelized sugar. This takes about 30 seconds. The smell at this point is incredible—like a carnival and a bakery had a baby.
- Slowly add the milk. Pour in about ¼ cup of the milk while whisking constantly. The caramel will seize up and harden a little—don’t panic. Just keep whisking over the heat. It will melt back down as the milk warms. Once it’s smooth, pour in the rest of the milk and continue whisking.
- Whisk in the cocoa powder. Add the cocoa powder and whisk until there are no dry spots. Make sure you scrape the corners of the pan. This should take about 30 seconds. The mixture will look a little grainy at this point, but that’s just the cocoa powder not being fully dissolved yet.
- Heat through. Continue heating the mixture over medium heat, whisking occasionally, until it’s steaming hot but not boiling. You want it hot enough to drink comfortably, but if it boils, the milk can scorch and the caramel can separate. This takes about 3 to 4 minutes. You’ll see tiny bubbles forming around the edges of the pan—that’s your cue.
- Finish with vanilla and salt. Remove the pan from the heat. Stir in the vanilla extract and the flaky sea salt. Give it one final whisk to make sure everything is combined. Taste it. If you want it a little sweeter, add a tiny pinch more sugar. If you want more salt, add another pinch.
- Pour and serve. Pour the hot cocoa into your warmed mugs. Top with whipped cream or marshmallows if you’re using them, and sprinkle a tiny bit more flaky sea salt on top. Serve immediately.
One thing I learned the hard way: Don’t rush the caramelization step. The first time I made this, I got impatient and turned the heat up too high. The sugar burned in about 30 seconds and I had to start over. Low and slow is the way to go. Also, if you’re making this for a crowd, you can easily double the recipe. Just use a larger saucepan and give it an extra minute or two to heat through.
Cooking Tips & Techniques
I’ve made this Quick Salted Caramel Hot Cocoa more times than I can count, and I’ve definitely made some mistakes along the way. Here’s what I’ve learned so you don’t have to repeat my errors.
Watch the sugar like a hawk. Caramelizing sugar is one of those things that feels like nothing is happening for two minutes, and then suddenly everything is happening. It goes from pale yellow to amber to burnt in about 15 seconds. The moment you see it turn a light golden color, start paying close attention. When it’s a deep amber, you’re ready. Don’t walk away, don’t check your phone. Just stand there and watch it.
Use room temperature milk if you can. Cold milk hitting hot caramel can cause it to seize up more dramatically. If you have time, let the milk sit out for 10 minutes before you start. If you don’t, just add it slowly and whisk like crazy. It will still work, it just takes a little more elbow grease.
Don’t skip the salt. I know it sounds weird to put salt in a sweet drink, but it’s absolutely essential. The salt doesn’t make it salty—it makes the caramel taste more like caramel and the chocolate taste more like chocolate. It balances everything out. If you only have table salt, use half the amount and stir it in well.
Multitask wisely. While the sugar is caramelizing, you can measure out your milk and cocoa powder. But don’t try to do anything that requires your full attention. The caramelization step is the most important part, and it only takes a few minutes. Everything else can wait.
I once tried to make this while also answering an email. The sugar burned. I had to dump the pan, wash it, and start over. That was a frustrating 10 minutes. Now I just stand at the stove and focus. It’s honestly kind of meditative.
Variations & Adaptations
One of the best things about this recipe is how easy it is to adapt. Here are a few variations I’ve tried and loved:
Spiced Salted Caramel Hot Cocoa: Add ¼ teaspoon of cinnamon and a tiny pinch of cayenne pepper along with the cocoa powder. The warmth of the spices pairs beautifully with the caramel. I made this for a Christmas gathering and it was gone in 20 minutes.
Peppermint Salted Caramel Hot Cocoa: Stir in ¼ teaspoon of peppermint extract at the very end, along with the vanilla. Top with crushed candy canes instead of salt. This is perfect for holiday parties or snowy evenings.
Dairy-Free Version: Substitute the whole milk with oat milk or full-fat coconut milk. Use a vegan butter stick instead of regular butter. The caramelization step works a little differently with oat milk—it tends to foam up more—so just keep whisking and it will settle down. Coconut milk gives it a slightly tropical undertone that’s actually really nice.
Extra Chocolatey Version: Add an extra tablespoon of cocoa powder and a handful of dark chocolate chips (about ¼ cup) along with the milk. Stir until the chocolate is melted and smooth. This version is almost pudding-like in its richness.
I personally love the spiced version on a cold winter night. It feels like a hug in a mug. But honestly, the original is so good that I usually just stick with that. It’s hard to improve on perfection.
Serving & Storage Suggestions
This hot cocoa is best served immediately, while it’s hot and the caramel is still silky. Pour it into warmed mugs (just fill them with hot water while you cook, then empty them) and top with a generous dollop of whipped cream. A sprinkle of flaky sea salt on top is non-negotiable in my book. If you’re using marshmallows, go for the mini ones—they melt faster and distribute more evenly.
As for what to serve alongside it, I love a good buttery shortbread cookie or a piece of dark chocolate. The saltiness of the cookie or the bitterness of the chocolate plays off the sweet caramel beautifully. If you’re feeling fancy, a little dish of salted almonds on the side is also amazing.
Storage: If you somehow have leftovers (unlikely, but possible), let the cocoa cool completely, then transfer it to an airtight container and refrigerate for up to 3 days. The caramel might separate a little as it sits, but don’t worry. To reheat, pour it into a saucepan and warm it over low heat, whisking constantly, until it’s hot and smooth. You can also microwave it in 30-second bursts, stirring between each, but the stovetop gives a better result.
Freezer: I don’t recommend freezing this one. The dairy can separate when thawed, and the texture won’t be the same. This is a recipe best enjoyed fresh.
One thing I’ve noticed: the flavors actually meld together a bit if you let it sit in the fridge overnight. The second day, the caramel and chocolate taste even more integrated. So if you’re making it ahead for a party, you can absolutely do that—just reheat gently and give it a good whisk before serving.
Nutritional Information & Benefits
This recipe makes two servings. Here are the approximate nutritional values per serving (without whipped cream or marshmallows):
| Nutrient | Amount per Serving |
|---|---|
| Calories | 280 |
| Total Fat | 12g |
| Saturated Fat | 7g |
| Cholesterol | 35mg |
| Sodium | 220mg |
| Total Carbohydrates | 38g |
| Dietary Fiber | 2g |
| Sugars | 32g |
| Protein | 8g |
This hot cocoa does have a fair amount of sugar, but it’s a treat, not an everyday thing. The good news is that cocoa powder is rich in antioxidants, and milk provides calcium and protein. If you want to cut back on sugar, you can reduce the caramelized sugar to 3 tablespoons—it will still be sweet, just less intensely caramel-flavored.
For anyone watching their dairy intake, the oat milk version works great and reduces the saturated fat. And if you’re avoiding gluten, this recipe is naturally gluten-free, so no worries there.
Conclusion
This Quick Salted Caramel Hot Cocoa is the kind of recipe that makes you feel like you’ve discovered a secret. It’s fast, it’s simple, and it tastes like something you’d pay eight dollars for at a fancy cafe. I make it on cold nights, on lazy Sunday afternoons, and whenever I need a little pick-me-up. It never fails to make me feel warmer and happier.
I hope you give it a try. And don’t be afraid to make it your own—add a little extra salt, throw in some cinnamon, or pile on the marshmallows. The beauty of this recipe is that it’s forgiving and flexible. Once you know the basic technique, you can tweak it however you like.
If you make this, I’d love to hear about it. Leave a comment below and let me know how it turned out. Did you add your own twist? Did it warm you up on a cold night? Share your experience—I read every comment and I love hearing from you. Until next time, stay warm and keep stirring!
Frequently Asked Questions
Can I use dark chocolate instead of cocoa powder?
You can, but it will change the texture and sweetness. If you want to use dark chocolate, chop up about 2 ounces and add it along with the milk. You may need to reduce the sugar slightly since chocolate already contains sugar. The result will be richer and less cocoa-forward.
Why did my caramel turn out grainy?
Grainy caramel usually happens when sugar crystals form on the sides of the pan and fall back into the mixture. To avoid this, use a clean, dry pan and whisk continuously. If it does get grainy, don’t worry—it will still taste good, just with a slightly different texture. You can also add a tiny splash of lemon juice to the sugar before heating to help prevent crystallization.
Can I make this in the microwave?
Technically yes, but you won’t get the same caramelized flavor. The magic of this recipe comes from browning the sugar on the stovetop. If you’re in a real pinch, you can heat the milk in the microwave, stir in cocoa powder and sugar, and add a splash of store-bought caramel sauce. It won’t be the same, but it will still be a decent hot cocoa.
How do I make this for a crowd?
Simply multiply the ingredients by the number of servings you need. Use a larger saucepan or a Dutch oven. The caramelization step takes the same amount of time, but the heating-through step will take a few minutes longer. Just keep whisking and watch for the steam. You can also keep it warm in a slow cooker on low for up to an hour.
Is there a way to make this less sweet?
Absolutely. Reduce the granulated sugar to 3 tablespoons. The caramel will be less pronounced, but the cocoa will still be sweet and satisfying. You can also use a darker cocoa powder, which has a more bitter flavor that balances the sweetness. And don’t skip the salt—it helps cut through the sugar and makes everything taste more balanced.
Pin This Recipe!
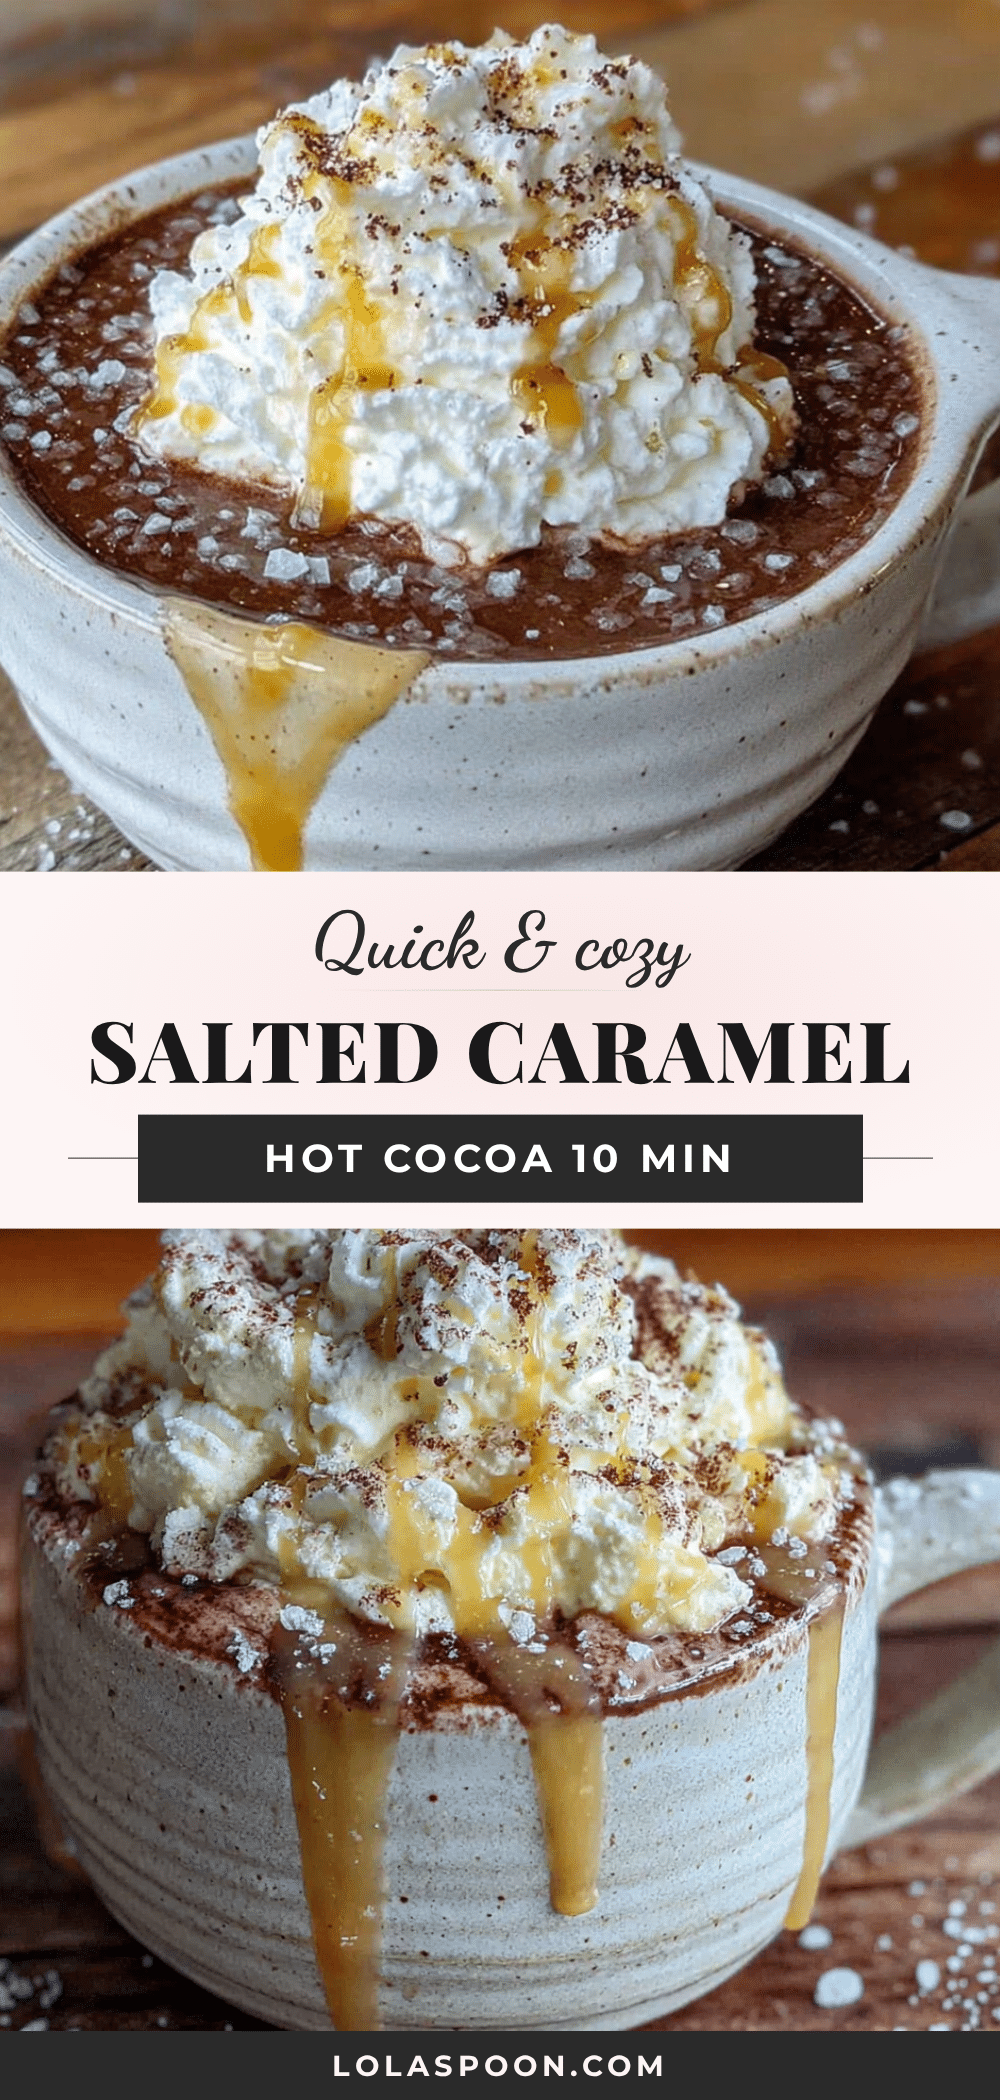
Quick Salted Caramel Hot Cocoa Ready in 10 Minutes
This Quick Salted Caramel Hot Cocoa is a deeply rich, perfectly sweet, slightly salty mug of pure comfort that tastes like it has been simmering for an hour but is ready in just 10 minutes. It’s the perfect weeknight-friendly treat for cozy nights.
- Prep Time: 5 minutes
- Cook Time: 5 minutes
- Total Time: 10 minutes
- Yield: 2 servings 1x
- Category: Beverage
- Cuisine: American
Ingredients
- 2 cups (480 ml) whole milk
- 1/4 cup (50 g) granulated sugar
- 2 tablespoons (10 g) unsweetened cocoa powder
- 1 tablespoon (14 g) unsalted butter
- 1/2 teaspoon vanilla extract
- 1/4 teaspoon flaky sea salt, plus more for garnish
- Optional: whipped cream or marshmallows for serving
Instructions
- Start the caramel base. Place a small saucepan over medium heat. Add the granulated sugar and let it sit for about 30 seconds. Then start stirring with a whisk. The sugar will clump at first—that’s normal. Keep stirring. After about 2 minutes, it will start to melt and turn a warm amber color. Once it’s a deep golden brown (the color of a penny), immediately move to the next step.
- Add the butter. Drop in the tablespoon of butter and whisk vigorously. The mixture will bubble up and might look like it’s separating. Keep whisking until the butter is fully melted and combined with the caramelized sugar, about 30 seconds.
- Slowly add the milk. Pour in about 1/4 cup of the milk while whisking constantly. The caramel will seize up and harden a little—don’t panic. Just keep whisking over the heat. It will melt back down as the milk warms. Once it’s smooth, pour in the rest of the milk and continue whisking.
- Whisk in the cocoa powder. Add the cocoa powder and whisk until there are no dry spots, about 30 seconds. The mixture will look a little grainy at this point.
- Heat through. Continue heating the mixture over medium heat, whisking occasionally, until it’s steaming hot but not boiling, about 3 to 4 minutes. You’ll see tiny bubbles forming around the edges of the pan.
- Finish with vanilla and salt. Remove the pan from the heat. Stir in the vanilla extract and the flaky sea salt. Give it one final whisk. Taste and adjust sweetness or saltiness if desired.
- Pour and serve. Pour the hot cocoa into warmed mugs. Top with whipped cream or marshmallows if using, and sprinkle a tiny bit more flaky sea salt on top. Serve immediately.
Notes
Don’t rush the caramelization step; watch the sugar closely as it can burn quickly. Use room temperature milk if possible to prevent the caramel from seizing. The salt is essential for balancing the sweetness. For a dairy-free version, substitute oat milk or full-fat coconut milk and use vegan butter. Leftovers can be refrigerated for up to 3 days and reheated gently on the stovetop.
Nutrition
- Serving Size: 1 mug (about 12 oz)
- Calories: 280
- Sugar: 32
- Sodium: 220
- Fat: 12
- Saturated Fat: 7
- Carbohydrates: 38
- Fiber: 2
- Protein: 8
Keywords: salted caramel hot cocoa, quick hot chocolate, 10 minute hot cocoa, homemade hot chocolate, caramel hot cocoa