My cousin Leah wasn’t trying to impress anyone. I’d stopped by to drop off a book she’d lent me, and the smell of vanilla and something faintly cocoa-y hit me before I even got past her front door. It was a Thursday afternoon, nothing special, and she was standing in her kitchen with a bowl of the most glorious pink batter I’d ever seen, licking the spatula like she was ten years old.
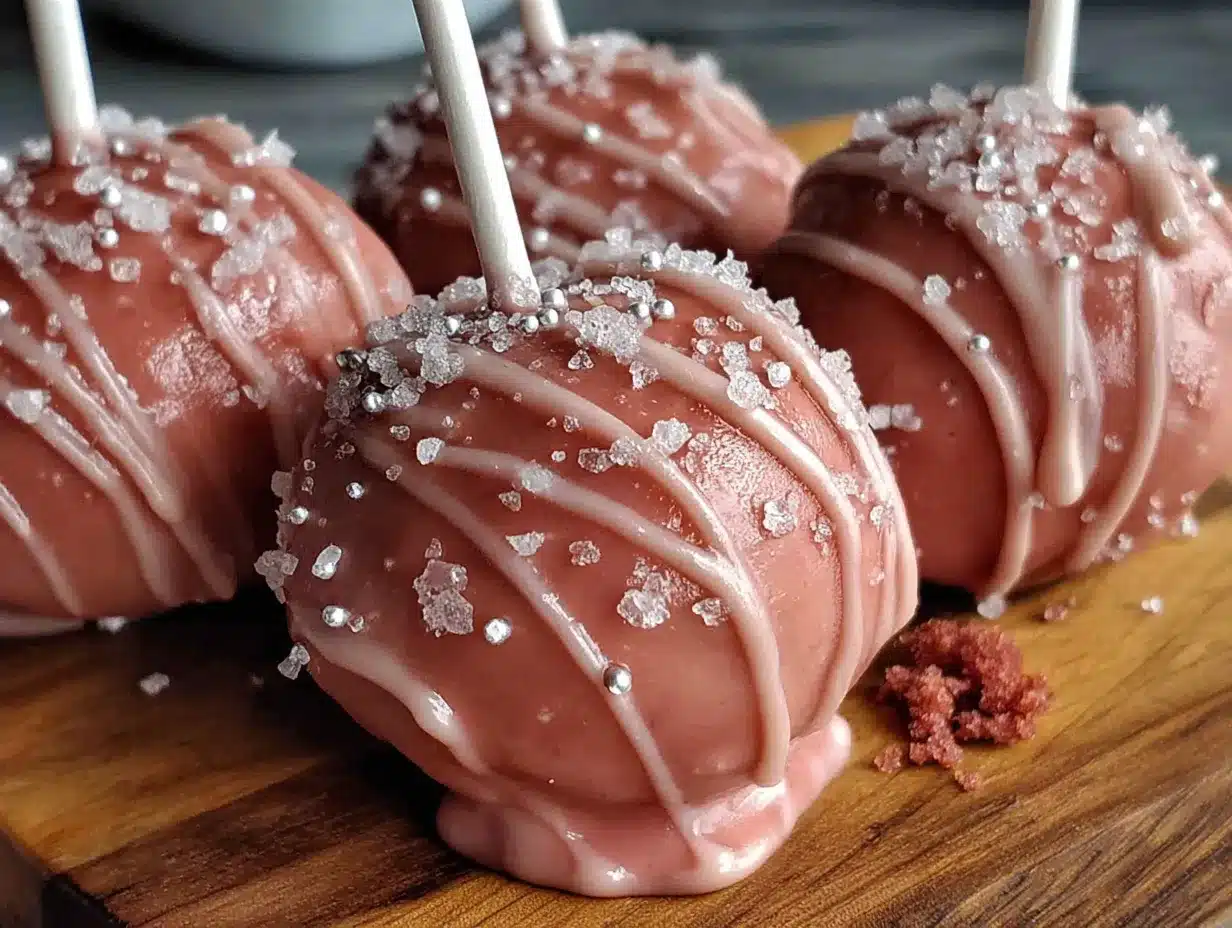
“Oh, those are just cake pops,” she said when I asked, waving her hand like it was no big deal. “My kid wanted something pink for her class party.” Just cake pops. As if she hadn’t created these perfect little spheres of what I can only describe as edible joy. The crumb was so tender it practically dissolved on my tongue, and the coating had this delicate snap that gave way to pure creaminess. I stood there in her doorway, book still in hand, eating three of them before I even said another word.
Honestly, I’ve made cake pops before. And let me tell you, they were always a disaster. Dry, crumbly, falling off the sticks, the whole sad situation. But these? These were different. Light. Dreamy. Not too sweet, which is rare for anything pink and coated in candy melts. I asked her what her secret was, and she just shrugged and said, “I dunno, I just winged it.” That’s the thing about the best recipes, you know? They come from people who aren’t trying to be fancy. They’re just making something good, and we’re lucky enough to be standing nearby.
I begged her to walk me through it while she packed the rest into a container, and I scribbled notes on the back of an old receipt I found in my purse. That’s the version I’ve been making ever since, tweaking it just a little to make it even lighter, even dreamier. Because some recipes are too good to keep as just a happy memory from your cousin’s kitchen on a random Thursday. They deserve to be made again and again.
Why You’ll Love This Recipe
These Light & Dreamy Pink Velvet Cake Pops are the kind of treat that makes you feel like you’ve discovered a secret. They’re not your average cake pop—dry, dense, and disappointing. No, these are something else entirely.
- Unbelievably Light Texture: The crumb is tender and airy, almost like a cloud. You get that classic velvet softness without any of the heaviness.
- Perfectly Balanced Sweetness: They’re sweet enough to feel like a dessert, but not so sugary that you regret having more than one. The cream cheese frosting adds a subtle tang that keeps everything in check.
- Simple, Everyday Ingredients: Nothing weird or hard to find. You probably have most of this in your pantry right now, which means you can make these on a whim.
- No Special Skills Required: If you can bake a cake and roll a ball, you can make these. I promise. Even my first batch (before I figured out the tricks) was still delicious.
- Perfect for Any Occasion: Birthday parties, Valentine’s Day, baby showers, or just a Tuesday when you need something pretty and pink. They always get the biggest reactions.
- Kid-Friendly and Adult-Approved: My niece calls them “unicorn bites” and my dad, who claims he doesn’t like cake pops, ate six of them in one sitting.
What really sets these apart is the technique. Most cake pop recipes use a dry cake base that you have to soak in frosting just to get it to hold together. This one starts with a cake that’s already moist and tender, so you need way less binder. The result? A cake pop that actually tastes like cake, not like a ball of frosting with some crumbs mixed in. It’s the difference between something that’s just okay and something that makes people close their eyes when they take a bite.
What Ingredients You Will Need
This recipe uses simple, wholesome ingredients to create that signature light and dreamy texture. The magic is in how they work together, not in any fancy additions.
For the Pink Velvet Cake
- 2 ½ cups all-purpose flour (spooned and leveled – don’t scoop straight from the bag)
- 1 ½ cups granulated sugar
- 1 teaspoon baking soda
- 1 teaspoon baking powder
- ½ teaspoon salt
- 1 tablespoon unsweetened cocoa powder (just enough for that subtle velvet flavor, not chocolate)
- 1 cup buttermilk, room temperature (this is key for tenderness – make your own with milk + lemon juice if needed)
- ½ cup vegetable oil (keeps the cake moist without making it greasy)
- 2 large eggs, room temperature
- 2 teaspoons vanilla extract
- 1 teaspoon white vinegar (reacts with the baking soda for extra lift)
- Pink gel food coloring (I prefer gel over liquid – it gives you that pretty pastel without thinning the batter. Start with 1 teaspoon and add more until it’s your perfect shade of pink)
For the Cream Cheese Frosting (Binder)
- 4 ounces cream cheese, softened (full-fat works best for stability)
- ¼ cup unsalted butter, softened
- 1 ½ cups powdered sugar
- ½ teaspoon vanilla extract
- Pinch of salt
For the Coating
- 16 ounces pink candy melts (I like the Wilton brand for smooth melting – you can also use white chocolate with pink coloring)
- 1 tablespoon coconut oil or vegetable shortening (this thins the coating so it’s easier to dip and gives that beautiful shine)
- Optional: sprinkles, edible glitter, or white sanding sugar for decoration
For Assembly
- 50 lollipop sticks (paper or plastic both work fine)
- A block of styrofoam or a cake pop stand for drying
Ingredient Tips: For the best texture, make sure your buttermilk and eggs are truly at room temperature. Cold ingredients won’t emulsify properly, and you’ll end up with a denser cake. I usually set mine out on the counter about 30 minutes before I start baking. Also, don’t skip the vinegar – I know it sounds weird, but it helps the cake rise higher and stay tender. You won’t taste it at all, I promise.
Equipment Needed
You don’t need a ton of fancy tools for these cake pops, but a few things will make your life a lot easier.
- 9×13-inch baking pan (or two 8-inch round pans if that’s what you have)
- Electric hand mixer or stand mixer (you can mix by hand, but the paddle attachment makes it effortless)
- Large mixing bowls
- Rubber spatula
- Cookie scoop or small ice cream scoop (for evenly sized cake balls – I use a #50 scoop which gives about 1.5 tablespoons)
- Baking sheet lined with parchment paper (for freezing the cake balls)
- Microwave-safe bowl (for melting the candy coating)
- Lollipop sticks (about 50 of them)
- Styrofoam block or cake pop stand (for upright drying – a cardboard box with holes poked in it works in a pinch)
- Small paring knife or toothpick (for making the hole for the stick)
Budget-Friendly Tip: If you don’t have a cake pop stand, just poke holes in a cardboard box and stick the pops in there. It’s not pretty, but it works perfectly. I’ve been using the same box for years – it’s got pink smudges all over it and I refuse to throw it away.
Preparation Method
Let’s get to the good part. This method is broken down into stages so you don’t get overwhelmed. Trust the process, especially the chilling steps – they’re not optional if you want perfect pops.
Step 1: Bake the Cake (Total Time: About 1 hour including cooling)
- Preheat your oven to 350°F (175°C). Grease your 9×13-inch pan lightly with butter or non-stick spray.
- In a medium bowl, whisk together the flour, sugar, baking soda, baking powder, salt, and cocoa powder. Make sure everything is evenly distributed – nobody wants a pocket of baking soda in their cake pop.
- In a large bowl (or the bowl of your stand mixer), whisk together the buttermilk, oil, eggs, vanilla extract, and white vinegar until smooth. It should look pale and slightly frothy.
- Gradually add the dry ingredients to the wet ingredients, mixing on low speed until just combined. Stop and scrape the bowl once or twice. Overmixing will make the cake tough, so stop as soon as you don’t see any more flour streaks.
- Add your pink gel food coloring. Start with 1 teaspoon and mix well. The batter will look lighter than you want – it deepens slightly as it bakes. I usually go for a shade that’s a little darker than a ballet slipper. Add more gel a few drops at a time until you’re happy.
- Pour the batter into your prepared pan and spread it evenly. Bake for 22-26 minutes, or until a toothpick inserted in the center comes out clean or with just a few moist crumbs. The edges should be pulling away from the pan slightly.
- Let the cake cool in the pan for 10 minutes, then turn it out onto a wire rack to cool completely. And I mean completely – warm cake will make your frosting melt and turn everything into a sticky mess. I usually let mine cool for at least 1 hour.
Step 2: Make the Cake Pop Dough (Total Time: 15 minutes)
- While the cake is cooling, make your cream cheese frosting. Beat the softened cream cheese and butter together until smooth and fluffy, about 2 minutes. Add the powdered sugar, vanilla, and salt, and beat until combined. Don’t overbeat or it’ll get too soft.
- Once the cake is completely cool, crumble it into a large bowl. Use your hands – it’s the most efficient way. Get it down to fine, even crumbs with no large chunks. This should look like wet sand when you’re done.
- Add about ¾ cup of the cream cheese frosting to the cake crumbs. Mix it in with your hands or a spatula until the dough holds together when you squeeze it. It should feel like play-dough – not sticky, not dry, but moldable. If it’s too dry, add more frosting a tablespoon at a time. If it’s too wet (it shouldn’t be, but just in case), add a few more cake crumbs.
- Roll the dough into 1-inch balls (about 1.5 tablespoons each) and place them on a parchment-lined baking sheet. You should get around 45-50 pops. I always eat a little bit of the dough at this stage – quality control, you know.
Step 3: Chill and Insert Sticks (Total Time: 2 hours minimum)
- Pop the baking sheet with the cake balls into the freezer for at least 2 hours. This is non-negotiable. Frozen cake balls are the secret to smooth, perfect dipping. If they’re even slightly warm, they’ll fall off the stick into your coating.
- After they’re good and frozen, take them out in batches (keep the rest in the freezer). Melt about ¼ cup of your candy coating in the microwave (15-second bursts, stirring in between). Dip the tip of a lollipop stick into the melted coating, then insert it about halfway into a cake ball. The coating acts like glue. Repeat with all the pops.
- Return them to the freezer for another 15-20 minutes to set the stick in place. This step saves so much frustration later.
Step 4: Dip and Decorate (Total Time: 30-45 minutes)
- Melt the rest of your pink candy coating in a deep, microwave-safe bowl. Add the coconut oil or shortening and stir until smooth. The bowl should be deep enough to submerge the cake ball completely – a tall drinking glass works great if your bowl isn’t deep enough.
- Take a few cake pops out of the freezer at a time. Dip each one straight down into the melted coating until it covers the cake ball completely. Lift it out and gently tap the stick on the edge of the bowl to let the excess drip off. Don’t swirl or shake it – that creates air bubbles.
- If you’re adding sprinkles, do it immediately after dipping while the coating is still wet. Otherwise, let the pop dry upright in your styrofoam block or stand. The coating will harden in about 10-15 minutes.
- Repeat with all the pops. If the coating starts to thicken, pop it back in the microwave for 10 seconds and stir.
Troubleshooting Tip: If a cake ball falls off the stick into the coating, don’t panic. Fish it out with a fork, let it dry on parchment paper, and eat it as a “cake pop fail.” We’ve all been there. Just make sure you don’t leave any crumbs in your coating – they’ll make the rest of your pops lumpy.
Cooking Tips & Techniques
I’ve made these cake pops more times than I can count, and I’ve learned a few things the hard way. Here’s what I wish someone had told me from the start.
Don’t Overbake the Cake. A dry cake makes dry cake pops, and then you have to add way too much frosting to get them to hold together. Bake just until a toothpick comes out clean. The cake should be tender and moist, not crumbly. I once left mine in for an extra 5 minutes while I was on the phone, and the resulting cake pops were sad, dense little things. Learn from my mistake.
The Freezer Is Your Best Friend. I cannot stress this enough. Frozen cake balls are the difference between smooth, beautiful pops and a disaster. They dip cleanly, they don’t fall off the sticks, and the coating sets evenly. I’ve tried making these with just refrigerated cake balls, and it was a mess. Do yourself a favor and freeze them solid.
Thin Your Coating. Candy melts straight out of the bag are too thick for smooth dipping. Adding a little coconut oil or shortening makes them flow like a dream. You want the coating to be about the consistency of warm honey – thick enough to coat, thin enough to drip off easily. If it’s too thick, your pops will look lumpy. If it’s too thin, they’ll be streaky.
Work in Small Batches. Only take a few cake balls out of the freezer at a time. The rest should stay frozen until you’re ready for them. If they start to warm up while you’re dipping, they’ll crack or fall off. I usually work with 5-6 pops at a time, and it keeps everything under control.
Tap, Don’t Swirl. When you lift the dipped pop out of the coating, tap the stick gently on the edge of the bowl. This helps the excess drip off and gives you a smooth, even coat. Don’t swirl or rotate the pop – that creates air bubbles that’ll show up as little holes when the coating dries.
Multitasking Strategy: While your cake is baking and cooling, you can make the frosting and get your equipment set up. While the cake balls are freezing, clean up your kitchen so you have a clear workspace for dipping. It makes the whole process feel a lot less chaotic.
Variations & Adaptations
One of the best things about this recipe is how easy it is to change up. Here are some of my favorite variations.
Classic Red Velvet: Skip the pink food coloring and use a full 2 tablespoons of cocoa powder instead of 1. Dip in white or dark chocolate coating for that classic red velvet look. I made these for Christmas one year and they disappeared faster than the cookies.
Lemon Velvet: Replace the buttermilk with regular milk and add 2 tablespoons of lemon juice. Omit the cocoa powder entirely and add the zest of one lemon to the batter. Use yellow or white candy coating. These taste like spring in a bite – bright, fresh, and a little tangy.
Chocolate Lover’s Version: Increase the cocoa powder to ¼ cup and use chocolate frosting instead of cream cheese. Dip in milk chocolate coating. These are dangerously good – I can’t have them in the house or I’ll eat the whole batch.
Vegan Adaptation: Use a flax egg (1 tablespoon flaxseed meal + 3 tablespoons water per egg) and your favorite plant-based buttermilk (almond milk + lemon juice). Replace the cream cheese frosting with a vegan version using plant-based cream cheese and butter. The texture is slightly different – a little denser – but still delicious. I’ve made these for a friend’s vegan birthday party and nobody knew the difference.
Gluten-Free Option: Substitute the all-purpose flour with a 1:1 gluten-free baking flour blend. I’ve had good luck with the King Arthur brand. Make sure your candy melts are certified gluten-free if that’s a concern. The texture is a tiny bit more delicate, so handle the cake balls gently.
Personal Variation: My favorite way to make these is with a swirl of white chocolate on top after dipping. I just melt a little white candy coating, put it in a small zip-top bag, snip the corner, and drizzle it over the set pink coating. It looks fancy with almost zero effort, which is my favorite kind of fancy.
Serving & Storage Suggestions
These cake pops are best served at room temperature. Take them out of the fridge about 15-20 minutes before you want to serve them. The coating should be firm but not rock hard, and the inside should be soft and creamy.
Presentation Ideas: Arrange them upright in a pretty jar, a vase, or a styrofoam block covered in wrapping paper. For parties, I like to put them in a small bucket with some tissue paper at the bottom – it looks cute and makes it easy for people to grab one. You can also wrap individual pops in clear cellophane bags tied with a ribbon for party favors or gifts.
What to Serve With Them: These are sweet enough on their own, but they pair beautifully with a cup of coffee, a glass of cold milk, or a hot cup of tea. For a dessert board, arrange them alongside fresh strawberries, shortbread cookies, and a few squares of dark chocolate. It makes for a stunning spread.
Storage Instructions: Store your cake pops in an airtight container in the refrigerator for up to 1 week. Layer them between sheets of parchment paper so they don’t stick together. I don’t recommend leaving them at room temperature for more than a few hours, especially if you’re using cream cheese frosting – it needs to stay chilled.
Freezing Instructions: You can freeze the finished cake pops for up to 3 months. Place them in a single layer in a freezer-safe container with parchment paper between layers. To thaw, move them to the refrigerator overnight. The coating might get a little condensation on it when it thaws, but it’ll dry off once it comes to room temperature.
Flavor Development: Honestly, these taste even better the next day. The flavors have time to meld together, and the texture gets even creamier. I always try to make them a day ahead if I’m serving them for a party. The anticipation is part of the fun, you know?
Nutritional Information & Benefits
Let’s be real – these are a treat, not a health food. But there are a few bright spots worth mentioning.
Estimated Nutrition Per Cake Pop (based on 50 pops):
- Calories: 120-140
- Fat: 6-7g
- Carbohydrates: 16-18g
- Sugar: 12-14g
- Protein: 1-2g
Health Highlights: The cream cheese frosting adds a small amount of calcium and protein from the dairy. The cocoa powder (even just that 1 tablespoon) contains antioxidants called flavonoids, which are good for heart health. And because these are smaller than a slice of cake, portion control is built right in – you get that satisfying dessert experience without overdoing it.
Dietary Considerations: This recipe contains gluten, dairy, and eggs. For gluten-free and vegan options, check the variations section above. The sugar content is moderate for a dessert, but if you’re watching your sugar intake, you can reduce the sugar in the cake by ¼ cup without affecting the texture too much.
My Perspective: I believe in balance. These cake pops are a celebration treat, not an everyday snack. They’re meant to be enjoyed with joy and without guilt. One or two of these with a cup of tea is a lovely way to treat yourself, and that’s a good thing. Food should make us happy, and these definitely do that.
Conclusion
These Light & Dreamy Pink Velvet Cake Pops are more than just a pretty dessert. They’re the kind of recipe that makes you feel like you’ve discovered something special – a little bit of magic that you can recreate anytime you want. They’re the recipe that people will ask you for, the one you’ll bring to parties and watch disappear, the one that makes you feel like a baking pro even on your first try.
I love that they start with a simple cake and turn into something so elegant. I love that they’re forgiving enough for beginners but impressive enough for experienced bakers. And I love that they came from a random Thursday afternoon at my cousin’s house, where she was just making something for her kid and didn’t think twice about it. That’s the best kind of recipe, if you ask me.
So go ahead – make a batch for your next party, your kid’s class, or just because it’s Wednesday and you want something pink and pretty. Customize them however you like, make a mess, lick the spatula, and enjoy every single bite. And when you do, I’d love to hear about it. Leave a comment below and tell me how yours turned out, what variations you tried, or just share a photo. It makes my day to see these cake pops bringing joy to other kitchens.
Happy baking, friend. You’ve got this.
Frequently Asked Questions
Why did my cake pops crack?
Cracking usually happens when the cake balls are too cold when you dip them, or when the coating is too thick. Make sure your coating is thin enough (add more coconut oil if needed) and let the frozen cake balls sit at room temperature for 2-3 minutes before dipping. Also, don’t tap too hard – gentle taps are your friend.
Can I use a box cake mix instead?
Absolutely. If you’re short on time, a white or vanilla box cake mix works perfectly. Just bake it according to the package directions, let it cool, and proceed with the recipe. The texture will be slightly different, but still delicious. I’ve done this when I needed a quick batch for a school event and nobody complained.
How do I get that perfect smooth coating?
The secret is thin coating and frozen cake balls. Make sure your candy melts are thinned with coconut oil or shortening, and dip the frozen balls straight in. Let the excess drip off by tapping gently, and don’t touch the coating while it’s drying. Any little fingerprint will show up, so just leave them alone in their stand.
Can I make these ahead of time?
Yes! You can make the cake balls and freeze them (undipped) for up to a month. When you’re ready to serve, just dip them straight from the freezer. You can also dip them completely and store them in the fridge for up to a week. They actually taste better the next day, so making them ahead is a great idea.
My coating is lumpy – what went wrong?
Lumpy coating usually means water got into your candy melts, or you overheated them. Never use a wet spoon or bowl, and microwave in short 15-second bursts, stirring well between each. If your coating seizes up (gets thick and grainy), you can try adding a little more coconut oil, but sometimes it’s better to just start fresh with a new batch.
Pin This Recipe!
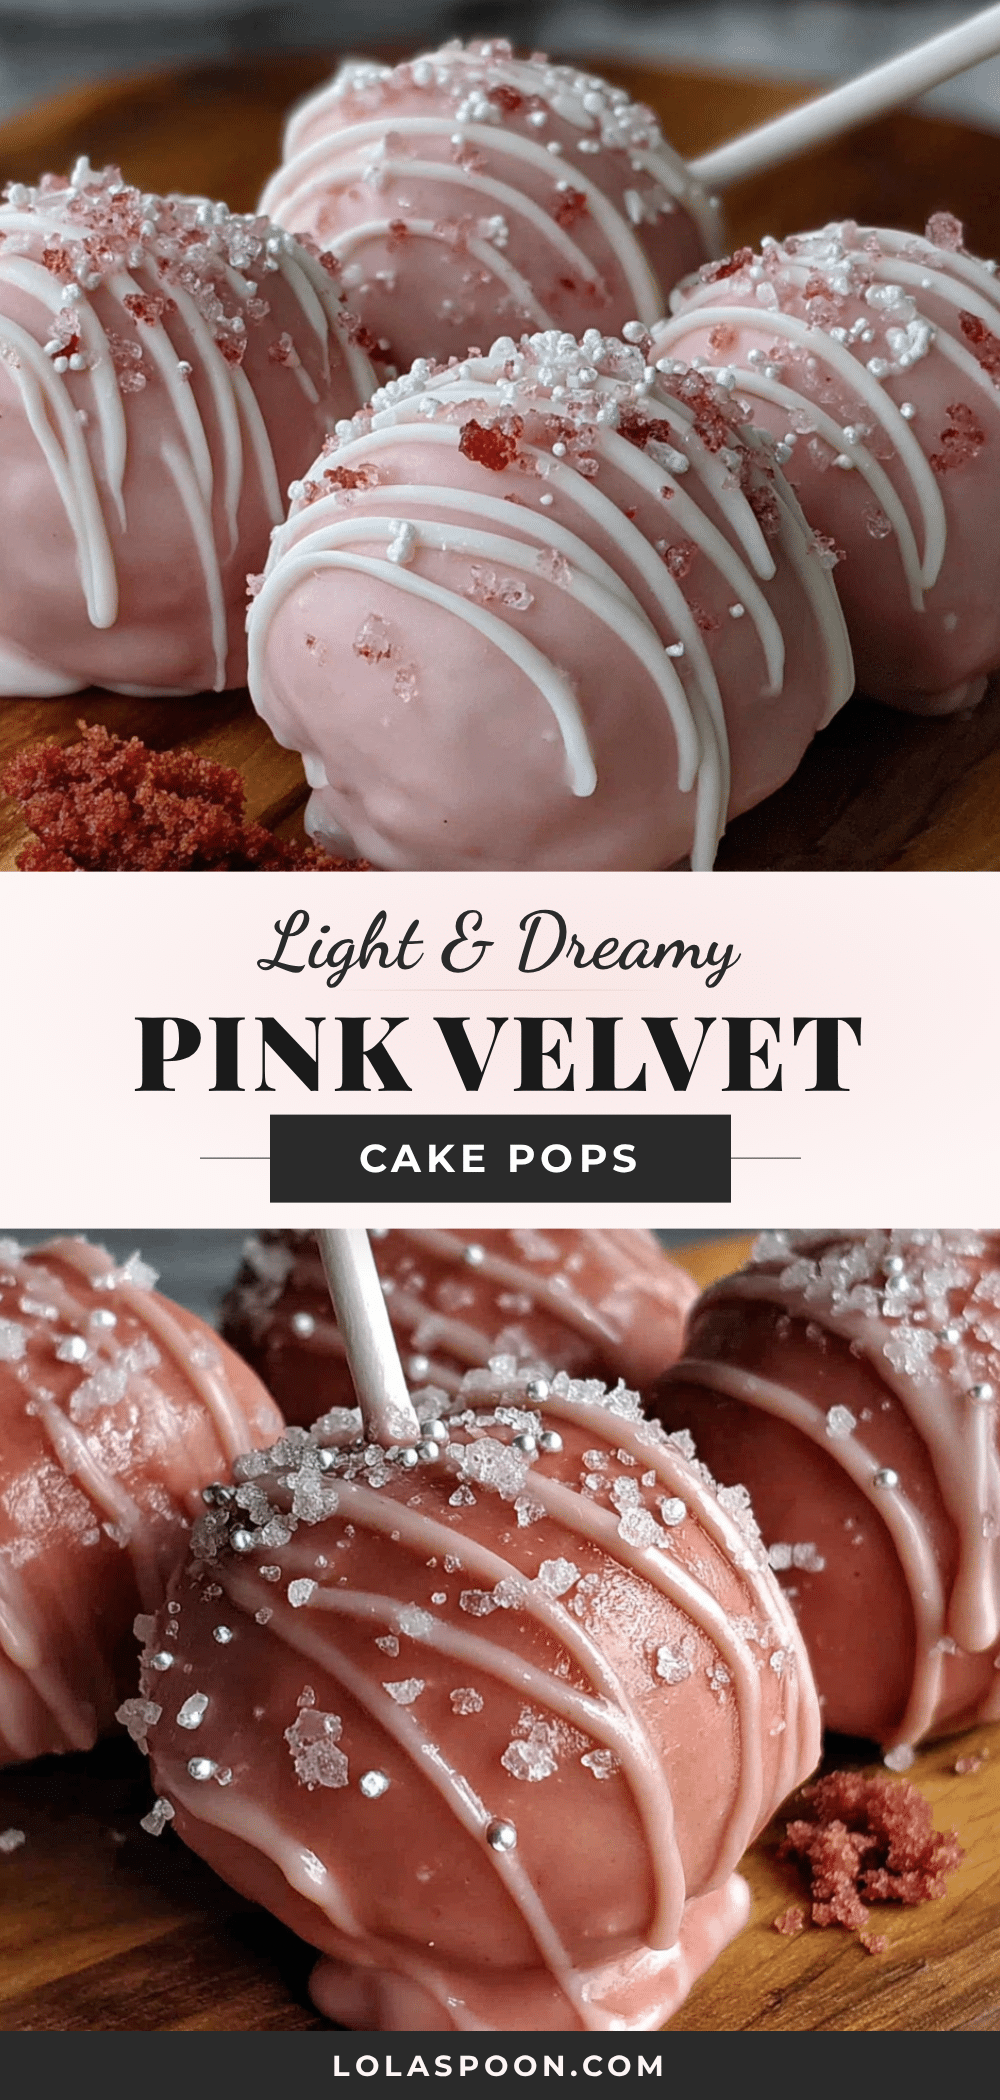
Light & Dreamy Pink Velvet Cake Pops: Easy Homemade Treats

These light and dreamy pink velvet cake pops are tender, perfectly sweet, and coated in a smooth pink candy shell. Made with simple ingredients and a foolproof technique, they’re perfect for any occasion.
- Prep Time: 30 minutes
- Cook Time: 25 minutes
- Total Time: 3 hours 55 minutes (includes cooling and freezing)
- Yield: 50 cake pops 1x
- Category: Dessert
- Cuisine: American
Ingredients
- 2 ½ cups all-purpose flour (spooned and leveled)
- 1 ½ cups granulated sugar
- 1 teaspoon baking soda
- 1 teaspoon baking powder
- ½ teaspoon salt
- 1 tablespoon unsweetened cocoa powder
- 1 cup buttermilk, room temperature
- ½ cup vegetable oil
- 2 large eggs, room temperature
- 2 teaspoons vanilla extract
- 1 teaspoon white vinegar
- Pink gel food coloring (start with 1 teaspoon)
- 4 ounces cream cheese, softened
- ¼ cup unsalted butter, softened
- 1 ½ cups powdered sugar
- ½ teaspoon vanilla extract
- Pinch of salt
- 16 ounces pink candy melts
- 1 tablespoon coconut oil or vegetable shortening
- Optional: sprinkles, edible glitter, or white sanding sugar for decoration
- 50 lollipop sticks
Instructions
- Preheat oven to 350°F (175°C). Grease a 9×13-inch baking pan.
- In a medium bowl, whisk together flour, sugar, baking soda, baking powder, salt, and cocoa powder.
- In a large bowl, whisk together buttermilk, oil, eggs, vanilla extract, and white vinegar until smooth.
- Gradually add dry ingredients to wet ingredients, mixing on low speed until just combined. Do not overmix.
- Add pink gel food coloring, starting with 1 teaspoon, and mix until desired shade is reached.
- Pour batter into prepared pan and bake for 22-26 minutes, until a toothpick inserted in center comes out clean.
- Cool cake in pan for 10 minutes, then turn out onto a wire rack to cool completely (at least 1 hour).
- For the frosting: Beat cream cheese and butter together until smooth and fluffy, about 2 minutes. Add powdered sugar, vanilla, and salt; beat until combined.
- Once cake is completely cool, crumble it into a large bowl into fine, even crumbs.
- Add about ¾ cup of cream cheese frosting to the crumbs and mix until dough holds together when squeezed. Add more frosting if needed.
- Roll dough into 1-inch balls (about 1.5 tablespoons each) and place on a parchment-lined baking sheet. You should get about 45-50 balls.
- Freeze cake balls for at least 2 hours.
- Melt about ¼ cup of candy coating in the microwave in 15-second bursts. Dip the tip of a lollipop stick into the melted coating, then insert it about halfway into a frozen cake ball. Repeat with all pops.
- Return pops to freezer for 15-20 minutes to set the sticks.
- Melt remaining pink candy coating with coconut oil or shortening until smooth and thin (consistency of warm honey).
- Working in small batches, dip each frozen cake pop straight down into the coating until covered. Lift out and gently tap the stick on the bowl edge to remove excess. Do not swirl.
- If adding sprinkles, do so immediately. Place pops upright in a styrofoam block or stand to dry (about 10-15 minutes).
- Repeat with all pops. If coating thickens, microwave for 10 seconds and stir.
Notes
For best results, ensure buttermilk and eggs are at room temperature. Freeze cake balls solid before dipping for smooth coating. If coating thickens, reheat in short bursts. Cake pops taste even better the next day.
Nutrition
- Serving Size: 1 cake pop
- Calories: 130
- Sugar: 13
- Sodium: 95
- Fat: 6.5
- Saturated Fat: 2.5
- Carbohydrates: 17
- Fiber: 0.5
- Protein: 1.5
Keywords: cake pops, pink velvet, red velvet, cream cheese frosting, easy dessert, party treats, homemade cake pops