There used to be this tiny bakery tucked between a dry cleaner and a vintage shop in my old neighborhood. It was called “The Little Red Hen,” and it was the kind of place where the floor squeaked when you walked in and the owner knew everyone’s name. Every February, they’d put out a single tray of red velvet crinkle cookies, dusted with so much powdered sugar they looked like little snowdrifts in a field of crimson. When the bakery closed its doors three years ago—the owner finally retired to Florida—I honestly felt a little lost. Those cookies were my Valentine’s Day tradition. After twelve tries—twelve!—I finally cracked the code. The first batch that worked came out of the oven on a random Tuesday night, and I may have cried a little. It wasn’t just about the cookie; it was about getting that specific moment back. The way the edges were just slightly crisp, the centers impossibly soft, that perfect crackle pattern that looks like stained glass. I mean, maybe you’ve been there—that one thing you just can’t find anywhere else. Well, now you can make it at home. Let me tell you, these perfect red velvet crinkle cookies are the Valentine’s Day dessert you didn’t know you needed.
Why You’ll Love This Recipe
I’ve tested this recipe more times than I care to admit, and let me be honest—the first few batches were disasters. Too flat, too cakey, too sweet. But I kept notes, adjusted temperatures, and even called my friend Maria who used to be a pastry chef. What I landed on is something special. Here is why these cookies will become your new favorite:
- Quick & Easy: From start to finish, these come together in under 45 minutes. No chilling required—just mix, scoop, and bake. Perfect for a last-minute Valentine’s Day treat.
- Simple Ingredients: You probably have most of these in your pantry right now. No weird extracts or hard-to-find specialty items. Just good, honest baking staples.
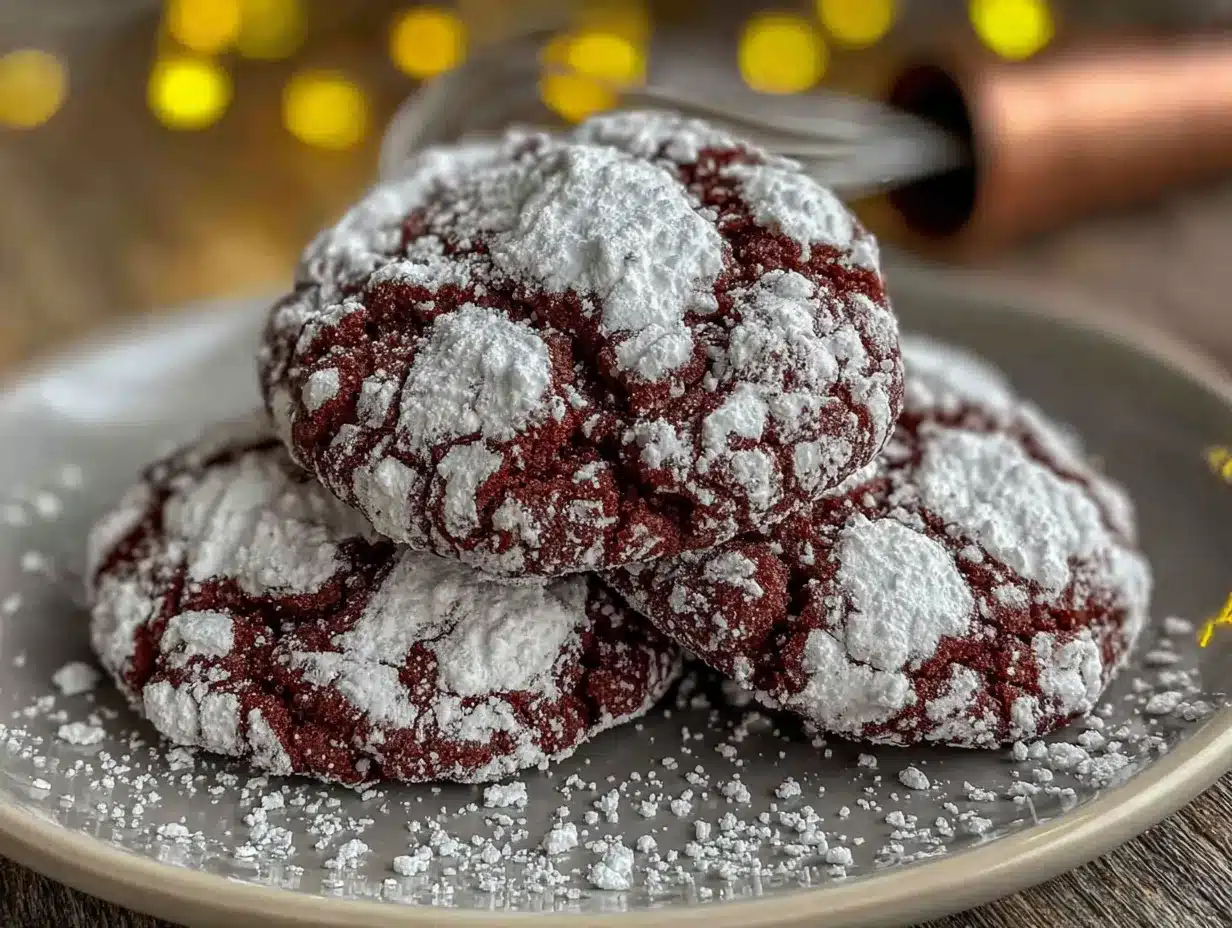
- Perfect for Valentine’s Day: That stunning red color and snowy powdered sugar finish? It’s basically edible confetti. Great for classroom parties, date night, or just treating yourself.
- Crowd-Pleaser: I brought a batch to my book club last month, and they disappeared before we even discussed chapter three. Kids love them, adults love them—everyone loves them.
- Unbelievably Delicious: The texture is where these shine. That crackly exterior gives way to a soft, almost fudgy center with just a hint of cocoa. It’s comfort food in cookie form.
What makes these different from every other red velvet cookie recipe out there? It’s the technique. I use a combination of melted butter and oil to get that perfect chewy texture without spreading too thin. And I’ve figured out the exact amount of cocoa powder so you get that subtle chocolate flavor without overpowering the classic red velvet taste. This isn’t just another version—it’s the version. The one that makes you close your eyes after the first bite, I swear.
What Ingredients You Will Need
This recipe uses simple, wholesome ingredients that come together to create something truly special. Nothing fancy here—just the good stuff you probably already have in your kitchen. Let me walk you through each one and share a few tips I’ve learned along the way.
For the Cookie Dough
- 2 ¼ cups all-purpose flour (spooned and leveled—don’t scoop straight from the bag, you’ll get too much)
- ¼ cup unsweetened cocoa powder (I prefer Hershey’s for its smooth flavor, but any brand works)
- 1 teaspoon baking powder (make sure it’s fresh—test by dropping a bit in warm water; if it fizzes, it’s good)
- ½ teaspoon salt (fine sea salt or table salt, not kosher)
- ½ cup unsalted butter, melted (let it cool slightly so it doesn’t cook the eggs)
- ¼ cup vegetable oil (this is my secret for keeping them soft for days)
- 1 cup granulated sugar (adds sweetness and helps create that crackly top)
- 2 large eggs, room temperature (cold eggs will seize the butter—trust me on this one)
- 2 teaspoons vanilla extract (pure vanilla, not imitation, for the best flavor)
- 1 tablespoon red gel food coloring (liquid coloring won’t give you that vibrant red—gel is the way to go)
- 1 teaspoon white vinegar (this reacts with the baking powder for extra puffiness)
For Rolling
- ½ cup granulated sugar (for the first roll)
- ½ cup powdered sugar (for the second roll—this creates that snowy look)
A quick note on the food coloring: I’ve tried natural alternatives like beet powder, and honestly, they don’t give you that classic red velvet color. If you’re avoiding artificial dyes, you can use a natural red gel coloring, but the color will be more of a deep burgundy. Still pretty, just different. Also, make sure your eggs are truly room temperature—leave them on the counter for about 30 minutes before starting. I learned this the hard way when my first batch came out flat and greasy because the cold eggs solidified the melted butter.
Equipment Needed
You don’t need a fancy kitchen to make these cookies. Here’s what you’ll need:
- Large mixing bowl (glass or stainless steel works best)
- Medium mixing bowl (for dry ingredients)
- Whisk (for combining dry ingredients evenly)
- Electric mixer (handheld or stand mixer—I’ve used both, and either works fine)
- Rubber spatula (for scraping down the sides of the bowl)
- Cookie scoop (a 1.5-tablespoon scoop gives consistent sizes—I got mine for $8 on Amazon)
- Baking sheets (light-colored metal sheets work best; dark sheets can over-brown the bottoms)
- Parchment paper (or silicone baking mats—both work great)
- Cooling rack (wire rack for even cooling)
- Small bowls (for the granulated and powdered sugar for rolling)
If you don’t have a cookie scoop, just use two spoons to portion the dough. And honestly, if you don’t have parchment paper, you can grease the baking sheet lightly with butter or cooking spray. The cookies might spread a tiny bit more, but they’ll still be delicious. I’ve made these in a tiny apartment kitchen with mismatched bowls, and they turned out just fine.
Preparation Method
Alright, let’s get to the fun part. Follow these steps carefully, and you’ll have a batch of perfect red velvet crinkle cookies in no time.
- Preheat your oven to 350°F (175°C). Line two baking sheets with parchment paper. This is important—don’t skip the parchment. It prevents sticking and helps the cookies bake evenly.
- Whisk the dry ingredients together. In a medium bowl, whisk together the flour, cocoa powder, baking powder, and salt. Make sure there are no lumps—cocoa powder loves to clump. I usually give it an extra 30 seconds of whisking just to be safe.
- Mix the wet ingredients. In a large bowl, combine the melted butter, vegetable oil, and granulated sugar. Beat with an electric mixer on medium speed until well combined, about 1 minute. The mixture should look smooth and slightly glossy.
- Add the eggs and vanilla. Add the eggs one at a time, beating well after each addition. Then add the vanilla extract and beat until combined. The mixture should be pale and creamy at this point.
- Add the food coloring and vinegar. Add the red gel food coloring and white vinegar. Beat on low speed until the color is evenly distributed. Don’t worry if it looks a bit streaky at first—keep mixing until it’s uniform. You’re looking for a deep, vibrant red.
- Combine wet and dry ingredients. Gradually add the dry ingredients to the wet mixture, mixing on low speed just until combined. Do not overmix! Stop as soon as you no longer see streaks of flour. Overmixing will make the cookies tough.
- Scrape the bowl. Use your rubber spatula to scrape down the sides and bottom of the bowl. Give the dough a few gentle folds to make sure everything is incorporated. The dough will be soft and slightly sticky—that’s exactly what you want.
- Set up your rolling stations. Place the granulated sugar in one small bowl and the powdered sugar in another. You’ll roll each cookie dough ball in the granulated sugar first, then in the powdered sugar.
- Scoop and roll. Using your cookie scoop or a spoon, portion out about 1.5 tablespoons of dough. Roll it into a ball between your palms. The dough will be soft, so work gently. Roll the ball first in the granulated sugar, coating it completely. Then roll it in the powdered sugar, making sure it’s generously coated. Place the coated dough balls on the prepared baking sheets, spacing them about 2 inches apart.
- Bake. Bake the cookies for 10-12 minutes. The edges should be set and the tops should look cracked and slightly puffed. The centers will still look a bit soft—that’s okay. They’ll continue to set as they cool. For softer, fudgier cookies, bake for 10 minutes. For slightly crisper edges, go for 12.
- Cool. Let the cookies cool on the baking sheet for 5 minutes. This is crucial—if you try to move them too soon, they’ll fall apart. After 5 minutes, transfer them to a wire rack to cool completely. The powdered sugar will continue to set and create that beautiful crackled look as they cool.
A few things I’ve learned the hard way: don’t skip the granulated sugar coating. It creates a barrier that helps the powdered sugar stick and gives you that dramatic crackle. And if your cookies are spreading too much, your butter might have been too warm, or your baking powder might be old. Also, if you’re baking in batches, let the baking sheet cool completely between batches. A hot sheet will melt the dough before it even goes in the oven.
Cooking Tips & Techniques
After making these cookies more times than I’d like to admit, I’ve picked up a few tricks that make a real difference. Let me share them with you so you don’t have to learn the hard way like I did.
Get the right food coloring. This is probably the most important tip. Liquid food coloring won’t give you that vibrant red—you’ll end up with a dull pink at best. Gel food coloring is concentrated and gives you that gorgeous crimson color with just a tablespoon. I buy mine at craft stores or online, and it lasts forever. A little goes a long way.
Don’t overmix the dough. I know I said this before, but it bears repeating. Overmixing develops the gluten in the flour, which makes the cookies tough and cakey instead of soft and tender. Mix just until the flour disappears into the dough, then stop. A few streaks of flour are better than overmixed dough.
Watch the baking time. Every oven is different. My old oven ran hot, and I’d pull the cookies at 9 minutes. My current oven is more accurate, and 11 minutes is perfect. Start checking at the 9-minute mark. The cookies are done when the edges are set and the tops look cracked. The centers should still look a little soft—they’ll firm up as they cool.
Use a cookie scoop for consistency. I know it seems like a small thing, but using a cookie scoop ensures all your cookies are the same size, which means they’ll bake evenly. No more tiny burnt cookies next to giant underdone ones. If you don’t have a scoop, use a measuring tablespoon to portion the dough.
Let them cool properly. Those first 5 minutes on the baking sheet are critical. The cookies are still setting up internally, and moving them too soon will cause them to break. I once tried to speed things up and ended up with a tray of cookie crumbs. Patience, my friend.
Double coat the powdered sugar. For the most dramatic crackle effect, roll the dough balls in powdered sugar twice. After the first coating, let them sit for a minute, then roll them again. The extra layer of sugar creates deeper cracks as the cookies spread in the oven. It’s a small step that makes a big visual difference.
Variations & Adaptations
One of the best things about this recipe is how easy it is to adapt. Here are some variations I’ve tried and loved:
Chocolate Lover’s Version: Add ½ cup of semi-sweet chocolate chips or mini chocolate chips to the dough. The chocolate chunks add little pockets of melty goodness that complement the red velvet flavor perfectly. I tried this for a friend who claims she “doesn’t like red velvet” (blasphemy, I know), and she ate four of them.
Gluten-Free Adaptation: Substitute the all-purpose flour with a 1:1 gluten-free baking flour blend. I’ve had good luck with Bob’s Red Mill and King Arthur brands. The texture will be slightly more delicate, so handle the dough gently. Add an extra tablespoon of flour if the dough feels too sticky.
Dairy-Free Version: Use vegan butter or coconut oil instead of regular butter. The cookies will spread a bit more, so chill the dough for 15 minutes before baking. I’ve also used almond milk in place of the eggs (¼ cup per egg), but the texture is a little different—still good, just not as rich.
White Chocolate Drizzle: Once the cookies are completely cool, melt ½ cup of white chocolate chips with 1 teaspoon of coconut oil and drizzle over the top. The white against the red is stunning and adds a sweet, creamy contrast. Perfect for Valentine’s Day gifting.
Smaller Cookie Version: Use a teaspoon-sized scoop and bake for 7-8 minutes for mini cookies. These are great for cookie platters or for portion control (though I can’t say I’ve ever exercised much of that with these).
I once tried adding a teaspoon of cinnamon to the dough, thinking it would add warmth. It didn’t—it just tasted like a cinnamon cookie that happened to be red. Stick with the classic, or try a pinch of espresso powder to deepen the chocolate flavor instead.
Serving & Storage Suggestions
These cookies are best served at room temperature, with a tall glass of cold milk or a warm cup of coffee. The contrast between the snowy powdered sugar and the deep red cookie is just gorgeous on a dessert plate. For Valentine’s Day, I like to arrange them on a white platter with a few fresh strawberries and a dusting of extra powdered sugar. It looks like something from a bakery window.
If you’re feeling fancy, sandwich two cookies with a dollop of cream cheese frosting in the middle. It takes them from “great cookie” to “show-stopping dessert” in about 30 seconds. I did this for a Valentine’s Day party last year, and people were literally fighting over the last one.
Storage Instructions: Store the cookies in an airtight container at room temperature for up to 5 days. Place a slice of bread in the container—it absorbs excess moisture and keeps the cookies soft. Replace the bread slice every other day. I’ve tested this method extensively, and it works like magic.
Freezer Instructions: These cookies freeze beautifully. Place them in a single layer in a freezer-safe container, with parchment paper between layers. They’ll keep for up to 3 months. To thaw, let them sit at room temperature for about 30 minutes. You can also freeze the unbaked dough balls—just roll them in sugar, place them on a baking sheet, freeze until solid, then transfer to a freezer bag. Bake from frozen, adding 2-3 minutes to the baking time.
Reheating Tip: If you like your cookies warm, pop one in the microwave for 8-10 seconds. It softens the center and makes it taste just-baked. Don’t overdo it, or you’ll end up with a puddle of cookie goo.
A note on flavor development: These cookies actually taste better the next day. The flavors meld together overnight, and the texture becomes even softer and more fudgy. So if you can resist eating them all on day one, you’re in for a treat on day two.
Nutritional Information & Benefits
Let’s be real—these are cookies, not health food. But here’s the nutritional breakdown for one cookie (based on 24 cookies per batch):
| Nutrient | Amount per Cookie |
|---|---|
| Calories | 145 |
| Total Fat | 7g |
| Saturated Fat | 3g |
| Carbohydrates | 20g |
| Sugar | 12g |
| Protein | 2g |
| Fiber | 0.5g |
Now, here’s the good news: cocoa powder is actually packed with antioxidants called flavonoids, which can help reduce inflammation and improve heart health. So there’s that. And if you use high-quality vanilla extract, you’re getting a small amount of vanillin, which has been shown to have antioxidant properties too. I mean, it’s a stretch, but we’ll take what we can get, right?
These cookies are not gluten-free, dairy-free, or vegan in their standard form, but as I mentioned in the variations section, you can adapt them. They do contain eggs and dairy, so keep that in mind if you’re baking for someone with allergies. The red gel food coloring is typically vegan and gluten-free, but check the label to be sure.
My personal philosophy? Food is about joy, connection, and celebration. These cookies are a treat, meant to be enjoyed in moderation. One or two with a cup of coffee? Perfect. A whole batch in one sitting? Well, I’ve been there, and I’m not here to judge. Just maybe save some for sharing.
Conclusion
These perfect red velvet crinkle cookies are more than just a recipe—they’re a little piece of joy you can create in your own kitchen. Whether you’re making them for a Valentine’s Day party, a classroom celebration, or just because it’s Tuesday and you deserve something beautiful, they deliver every single time. That crackly top, that soft center, that gorgeous red color—it’s all there, waiting for you.
I still think about The Little Red Hen sometimes, and I miss that squeaky floor and the way the owner would always slip an extra cookie into my bag. But now, when February rolls around, I don’t feel that pang of loss anymore. I fire up my oven, pull out my ingredients, and recreate that magic myself. And honestly? It tastes even better knowing I made it with my own two hands.
I’d love to hear how these turn out for you! Drop a comment below and let me know if you tried any variations, or tag me in your photos on social media. Did you add white chocolate chips? Make them gluten-free? Eat three before they even cooled? (No judgment here.) Your stories and adaptations make this community so special, and I can’t wait to see what you create. Happy baking, friends—and happy Valentine’s Day!
Frequently Asked Questions
Can I make these cookies without a mixer?
Absolutely! You can mix everything by hand with a sturdy whisk and some elbow grease. Just make sure the butter is properly melted and cooled, and whisk the wet ingredients until they’re smooth before adding the dry ingredients. It might take a little longer, but the cookies will turn out just as delicious.
Why did my cookies not crackle?
This usually happens for one of three reasons: the dough was too warm when it went into the oven, you didn’t roll the dough balls in enough powdered sugar, or your oven temperature was too low. Make sure your dough is at room temperature (not warm from your hands), roll generously in powdered sugar, and bake at the correct temperature. A properly preheated oven is key.
Can I use natural food coloring instead of gel?
You can, but the color won’t be as vibrant. Liquid food coloring will give you a pinkish-red at best, and you’ll need a lot of it, which can affect the texture of the dough. If you’re set on using natural coloring, look for a natural red gel option or try beet powder, though the color will be more of a deep burgundy.
How do I know when the cookies are done baking?
The edges should be set and look slightly firm, while the centers will still appear soft and puffy. The tops will have visible cracks where the dough has spread. If you gently touch the center, it should spring back slightly. Remember, they’ll continue to set as they cool on the baking sheet, so it’s better to underbake slightly than overbake.
Can I double this recipe?
Yes, this recipe doubles beautifully! Just make sure you have enough baking sheets to work in batches, and don’t overcrowd the oven. If you’re doubling, mix the dough in a really large bowl—trust me, it gets voluminous. You can also freeze half the dough balls for later, which is perfect for spontaneous cookie cravings.
Pin This Recipe!

Perfect Red Velvet Crinkle Cookies – Easy Valentine’s Day Dessert

These perfect red velvet crinkle cookies are a Valentine’s Day tradition, with a crackly exterior and soft, fudgy center. Made with simple ingredients and no chilling required, they come together in under 45 minutes for a stunning, crowd-pleasing dessert.
- Prep Time: 15 minutes
- Cook Time: 12 minutes
- Total Time: 27 minutes
- Yield: 24 cookies 1x
- Category: Dessert
- Cuisine: American
Ingredients
- 2 ¼ cups all-purpose flour (spooned and leveled)
- ¼ cup unsweetened cocoa powder
- 1 teaspoon baking powder
- ½ teaspoon salt (fine sea salt or table salt)
- ½ cup unsalted butter, melted and cooled slightly
- ¼ cup vegetable oil
- 1 cup granulated sugar
- 2 large eggs, room temperature
- 2 teaspoons vanilla extract (pure vanilla)
- 1 tablespoon red gel food coloring
- 1 teaspoon white vinegar
- ½ cup granulated sugar (for rolling)
- ½ cup powdered sugar (for rolling)
Instructions
- Preheat your oven to 350°F (175°C). Line two baking sheets with parchment paper.
- In a medium bowl, whisk together the flour, cocoa powder, baking powder, and salt until no lumps remain.
- In a large bowl, combine the melted butter, vegetable oil, and granulated sugar. Beat with an electric mixer on medium speed until well combined, about 1 minute, until smooth and glossy.
- Add the eggs one at a time, beating well after each addition. Then add the vanilla extract and beat until combined. The mixture should be pale and creamy.
- Add the red gel food coloring and white vinegar. Beat on low speed until the color is evenly distributed and vibrant red.
- Gradually add the dry ingredients to the wet mixture, mixing on low speed just until combined. Do not overmix; stop as soon as no streaks of flour remain.
- Use a rubber spatula to scrape down the sides and bottom of the bowl. Give the dough a few gentle folds to ensure everything is incorporated. The dough will be soft and slightly sticky.
- Place the granulated sugar in one small bowl and the powdered sugar in another for rolling.
- Using a cookie scoop or spoon, portion out about 1.5 tablespoons of dough. Roll into a ball between your palms. Roll the ball first in the granulated sugar, coating completely, then in the powdered sugar, coating generously. Place on prepared baking sheets, spacing about 2 inches apart.
- Bake for 10-12 minutes. The edges should be set and tops cracked and slightly puffed; centers will still look soft. For softer cookies, bake 10 minutes; for crisper edges, bake 12 minutes.
- Let cookies cool on the baking sheet for 5 minutes (crucial for structure), then transfer to a wire rack to cool completely. The powdered sugar will continue to set and create a beautiful crackled look.
Notes
For the most dramatic crackle effect, double coat the powdered sugar: roll once, let sit for a minute, then roll again. If cookies spread too much, butter may have been too warm or baking powder old. Let baking sheets cool completely between batches. Cookies taste even better the next day as flavors meld.
Nutrition
- Serving Size: 1 cookie
- Calories: 145
- Sugar: 12
- Sodium: 85
- Fat: 7
- Saturated Fat: 3
- Carbohydrates: 20
- Fiber: 0.5
- Protein: 2
Keywords: red velvet crinkle cookies, Valentine's Day dessert, easy cookie recipe, no chill cookies, red velvet cookies