Introduction
There used to be a tiny diner off Route 9, the kind with cracked vinyl booths and a jukebox that only played songs from the 80s, that made the most incredible garlic butter chicken and rice. When they closed suddenly three summers ago—a “for lease” sign appeared overnight—I actually felt a little pang of loss. That sounds dramatic, I know, but my kids would order it every single time we went. And I mean every time. After maybe a dozen tries in my own kitchen—some too greasy, some too bland, one that somehow turned into a sticky mess—I finally cracked the code.
The thing is, this isn’t just any chicken and rice. It’s the kind where the rice soaks up all that garlicky, buttery goodness while the chicken stays tender enough for little fingers to pull apart. I remember the first successful batch I made; my youngest actually asked for seconds before I could even sit down. Honestly, that never happens. Maybe you’ve been there, chasing a restaurant memory that feels just out of reach. Well, let me tell you—this one-pan version brings it all back, minus the cracked vinyl and the drive.
Why You’ll Love This Recipe
I’ve tested this recipe more times than I care to count, and I can tell you with confidence: it’s a game-changer for busy weeknights. Here’s why it works so well for families:
- Quick & Easy: From start to finish, this comes together in about 40 minutes. No separate pots, no complicated steps—just one pan and a whole lot of flavor.
- Simple Ingredients: You probably have most of this stuff in your pantry right now. Butter, garlic, rice, chicken thighs—no fancy grocery store runs required.
- Perfect for Picky Eaters: The garlic butter flavor is mild and comforting, not overwhelming. My kids call it “fancy chicken,” and they’ve never once complained about the rice.
- Crowd-Pleaser: I’ve served this at family dinners, playdates, and even a casual potluck. It always gets the same reaction—empty plates and requests for the recipe.
- Unbelievably Delicious: The rice turns out fluffy and flavorful, the chicken stays juicy, and that golden crust on the bottom? Absolute magic.
What makes this recipe different from the rest is the technique. Instead of cooking the rice separately, you let it simmer right in the pan with the chicken drippings and garlic butter. That means every single grain gets infused with flavor. It’s not just another chicken and rice recipe—it’s the one that makes you close your eyes after the first bite. And for a busy parent trying to get dinner on the table without a meltdown? That’s worth everything.
What Ingredients You Will Need
This recipe uses simple, everyday ingredients to create something that tastes like you spent hours in the kitchen. Trust me, you won’t need anything exotic here.
For the Chicken
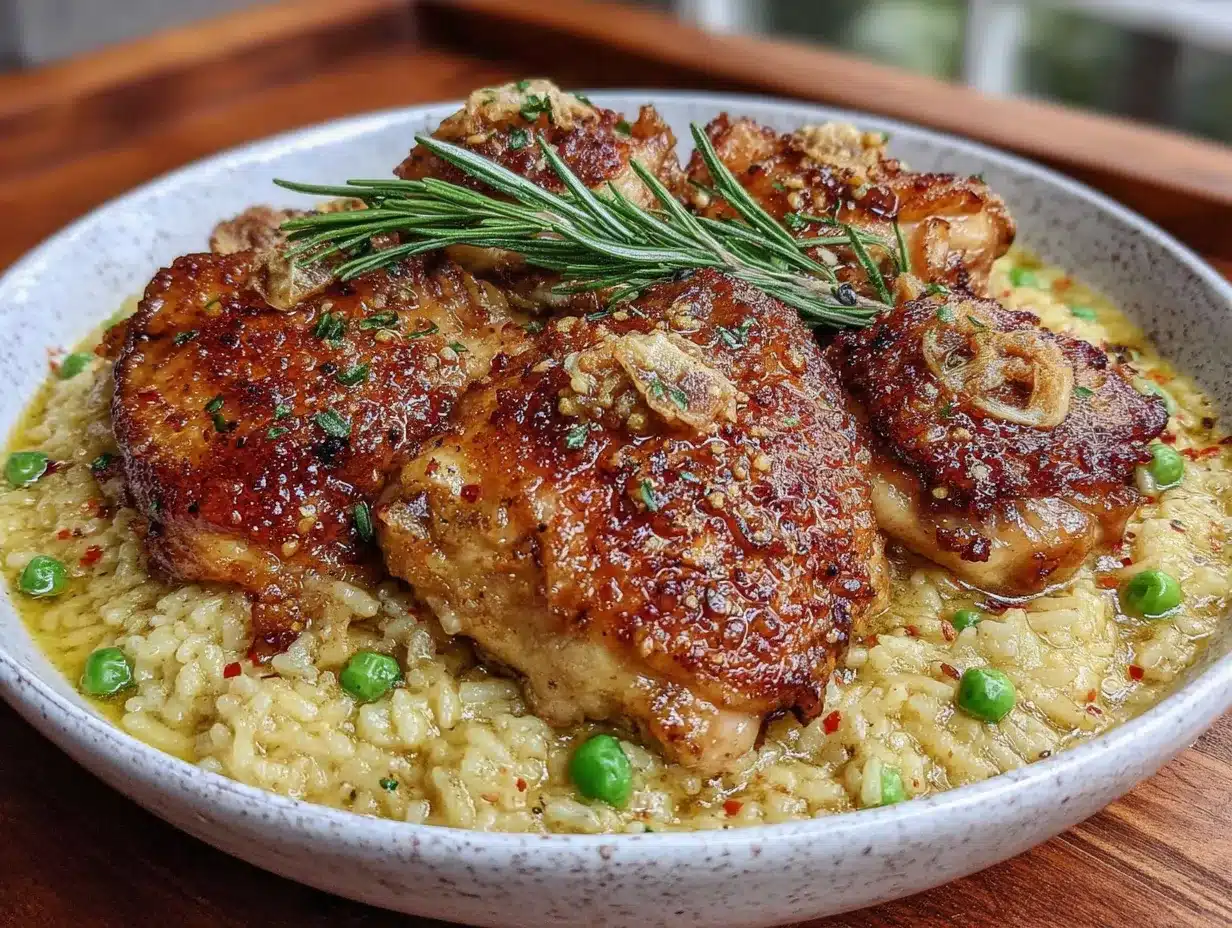
- 4 boneless, skinless chicken thighs (about 1.5 lbs or 680g) — I prefer thighs for tenderness, but breasts work too (see notes below)
- 1 teaspoon salt — kosher salt is best here
- ½ teaspoon black pepper — freshly ground if you have it
- ½ teaspoon garlic powder — adds a little extra depth
- 2 tablespoons olive oil — for searing the chicken
For the Garlic Butter Rice
- 4 tablespoons unsalted butter (56g) — I recommend Kerrygold or any good-quality butter for the best flavor
- 6 cloves garlic, minced — fresh is non-negotiable here; jarred stuff won’t give you the same result
- 1 ½ cups long-grain white rice (300g) — basmati or jasmine also work beautifully
- 2 ½ cups low-sodium chicken broth (600ml) — you can use water in a pinch, but broth adds so much more flavor
- ½ teaspoon dried thyme — optional, but it adds a lovely earthiness
- ¼ teaspoon paprika — for a little color and mild warmth
- Salt to taste — start with ½ teaspoon and adjust
For the Garnish (Optional but Recommended)
- 2 tablespoons fresh parsley, chopped — adds a pop of color and freshness
- Lemon wedges — a squeeze of lemon brightens everything up
A quick note on substitutions: If you’re using chicken breasts, reduce the cooking time by about 5 minutes and check for doneness earlier. For a dairy-free version, swap the butter with a good-quality vegan butter or coconut oil—just know the flavor will shift slightly. And if you’re gluten-free, this recipe is naturally gluten-free as long as your broth is certified gluten-free. I’ve also made this with brown rice, but you’ll need to increase the broth to 3 cups (720ml) and cook for about 45 minutes instead of 20.
Equipment Needed
The beauty of this recipe is that you really only need one pan. Here’s what I use:
- A large, heavy-bottomed skillet or Dutch oven (12-inch or 30cm) — I love my Lodge cast iron skillet for this, but any oven-safe pan with a tight-fitting lid works. A stainless steel pan is also great.
- A sharp knife — for mincing garlic and chopping parsley. A dull knife makes garlic prep a nightmare.
- A cutting board — wooden or plastic, whatever you have
- Measuring cups and spoons — for accuracy, especially with the rice-to-liquid ratio
- A wooden spoon or spatula — for stirring the rice and scraping up those flavorful browned bits
- Tongs — for flipping the chicken without losing that golden crust
If you don’t have a cast iron skillet, don’t worry. A deep non-stick pan works just fine—just be careful not to scratch it when you’re stirring the rice. I actually used a non-stick pan for years before I switched to cast iron, and the results were still fantastic. The key is making sure your pan is large enough to hold everything without crowding.
Preparation Method
Alright, let’s get cooking. This is where the magic happens.
- Prep the chicken: Pat the chicken thighs dry with paper towels. This is important—wet chicken won’t sear properly. Season both sides with salt, pepper, and garlic powder. Let them sit at room temperature for about 10 minutes while you get everything else ready.
- Sear the chicken: Heat the olive oil in your skillet over medium-high heat. When the oil shimmers (that’s your cue), place the chicken thighs skin-side down if they have skin, or just place them evenly in the pan. Cook for 4-5 minutes without moving them—you want a deep golden crust. Flip and cook for another 3-4 minutes. The chicken won’t be fully cooked yet, and that’s fine. Transfer the chicken to a plate and set aside. Don’t wipe out the pan—those browned bits are flavor gold.
- Make the garlic butter: Reduce the heat to medium. Add the butter to the pan and let it melt, scraping up any browned bits from the bottom with your wooden spoon. This is called deglazing, and it’s where all that flavor gets released into the butter. Add the minced garlic and cook for about 30 seconds, stirring constantly. You want it fragrant, not burnt—burnt garlic turns bitter, and nobody wants that.
- Toast the rice: Add the rice to the pan and stir it around in the garlic butter for about 2 minutes. You’ll notice the rice turns slightly translucent at the edges. This step is crucial—it coats each grain in fat and prevents the rice from turning mushy later. I learned this the hard way after making a few batches of sad, sticky rice.
- Add the liquid: Pour in the chicken broth, thyme, paprika, and salt. Stir everything together, scraping up any last bits from the bottom. Bring it to a gentle boil—you’ll see bubbles around the edges of the pan.
- Return the chicken: Nestle the seared chicken thighs back into the rice, pushing them down slightly so they’re partially submerged. Any juices that collected on the plate should go into the pan too—that’s more flavor.
- Simmer and cover: Reduce the heat to low, cover the pan with a tight-fitting lid, and let it simmer for 20 minutes. Do not lift the lid during this time. I know it’s tempting, but every time you lift that lid, steam escapes, and steam is what cooks the rice perfectly. Set a timer and walk away.
- Rest and fluff: After 20 minutes, turn off the heat but keep the lid on. Let it rest for another 5-10 minutes. This allows the rice to absorb any remaining liquid and steam to fluffy perfection. When you’re ready, remove the lid, fluff the rice gently with a fork, and garnish with fresh parsley and lemon wedges if you’re using them.
- Check the chicken: Make sure the chicken reaches an internal temperature of 165°F (74°C). If it’s not quite there, just pop the lid back on for another 5 minutes. It usually is, though.
A quick sensory check: the rice should be tender but not mushy, and the chicken should pull apart easily with a fork. The smell? Pure garlic butter heaven.
Cooking Tips & Techniques
I’ve made this recipe enough times to know exactly where things can go wrong. Let me save you some trouble.
Don’t skip the toasting step. I know it seems like an extra minute of work, but toasting the rice in the garlic butter before adding liquid is what gives this dish its structure. The first time I made this, I was in a hurry and just dumped everything in at once. The rice turned out clumpy and uneven. Learn from my mistake.
Watch your heat. When you add the garlic, keep it moving. Garlic burns in seconds, and burnt garlic has a harsh, bitter taste that ruins the whole dish. If you’re worried, you can even add the garlic with the broth instead of cooking it in the butter first. It won’t be quite as fragrant, but it’s a safer bet for beginners.
Use low-sodium broth. Regular chicken broth can be incredibly salty, especially once it reduces. Low-sodium gives you control over the seasoning. You can always add more salt at the end, but you can’t take it out.
Let the pan do the work. That golden crust on the bottom of the pan after searing the chicken? That’s called fond, and it’s pure flavor. Don’t scrub it off or skip the deglazing step. That fond is what makes the rice taste like it simmered in chicken goodness—because it did.
Multitasking tip: While the rice is simmering, use that time to chop your parsley, set the table, or pour yourself a glass of water. The 20 minutes of hands-off cooking is a gift—don’t waste it hovering over the stove.
Variations & Adaptations
This recipe is wonderfully flexible. Here are a few ways I’ve adapted it over the years:
- Vegetable Boost: Add a cup of frozen peas and carrots during the last 5 minutes of cooking. They’ll steam right along with the rice and add color and nutrients. My kids actually eat more veggies this way than when I serve them on the side.
- Cheesy Version: Stir in ½ cup of shredded cheddar or parmesan cheese after the rice is done cooking. The residual heat melts it into a creamy, dreamy mess. I did this once when I was out of parsley, and now it’s a regular request.
- Spicy Kick: Add ¼ teaspoon of red pepper flakes along with the garlic if your family likes heat. My husband loves this version, though the kids prefer the original.
- Herb Swap: If you don’t have thyme, try dried oregano or rosemary. Both work beautifully with garlic and butter. I’ve even used a tablespoon of fresh dill at the end, and it was surprisingly good.
- One-Pan Veggie Addition: Sauté a diced onion and bell pepper before adding the garlic. It adds sweetness and texture without much extra effort.
I once tried a version with coconut milk instead of half the broth—it was creamy and slightly sweet, and the kids actually liked it. Just be aware it changes the flavor profile significantly. Sometimes that’s exactly what you want.
Serving & Storage Suggestions
This dish is best served warm, straight from the pan. I like to spoon the rice onto plates first, then top with a chicken thigh and a sprinkle of fresh parsley. A squeeze of lemon over everything brightens the flavors and cuts through the richness of the butter.
For sides, I keep it simple. A quick steamed green vegetable like broccoli or green beans works perfectly. Sometimes I’ll throw together a simple cucumber salad with a little vinegar and salt—the acidity balances the buttery rice nicely. If you’re feeding a crowd, a side of crusty bread is never a bad idea, especially for sopping up any leftover garlic butter from the pan.
For storage, let the dish cool completely before transferring to an airtight container. It keeps in the refrigerator for up to 4 days. The flavors actually meld together even more overnight, so leftovers are often better the next day.
To reheat, I recommend adding a splash of chicken broth or water to the rice before microwaving—about a tablespoon per serving. Cover it with a damp paper towel and microwave in 30-second intervals, stirring in between. This prevents the rice from drying out. You can also reheat it in a skillet over medium-low heat with a lid, adding a little broth as needed. The chicken stays tender either way.
This recipe freezes surprisingly well too. Portion it into freezer-safe containers and freeze for up to 3 months. Thaw overnight in the fridge and reheat as directed.
Nutritional Information & Benefits
Here’s an approximate nutritional breakdown per serving (based on 4 servings):
| Nutrient | Amount |
|---|---|
| Calories | 485 |
| Protein | 32g |
| Carbohydrates | 45g |
| Fat | 18g |
| Saturated Fat | 8g |
| Fiber | 1g |
| Sodium | 680mg |
From a health perspective, this dish offers a good balance of protein from the chicken and energy from the rice. Garlic is known for its immune-boosting properties, and using chicken broth adds minerals like calcium and magnesium. If you’re watching your sodium, use low-sodium broth and go easy on the added salt. This recipe is naturally gluten-free and can be made dairy-free with a simple butter swap. It’s not low-carb by any means, but for a family meal that satisfies everyone without a lot of fuss, it hits the sweet spot.
Conclusion
This one-pan garlic butter chicken and rice has become a staple in our house for a reason. It’s the recipe I turn to on hectic weeknights when I need something reliable, delicious, and guaranteed to get smiles instead of complaints. The fact that it all comes together in a single pan means less cleanup, which honestly feels like a win on its own.
I love that this recipe is forgiving enough for beginners but satisfying enough for experienced cooks. You can tweak it, adapt it, and make it your own without worrying about ruining it. And that first bite—the one where the garlic butter hits your tongue and the tender chicken practically melts—reminds me every time why I love cooking for my family.
If you try this recipe, I’d love to hear how it went. Did your kids ask for seconds? Did you add your own twist? Drop a comment below and let me know. And if you share a photo on Pinterest, tag me—I love seeing your creations. Happy cooking, friends!
Frequently Asked Questions
Can I use chicken breasts instead of thighs?
Absolutely. Just reduce the searing time slightly and check for doneness earlier. Chicken breasts can dry out faster, so keep an eye on them. I recommend using bone-in, skin-on breasts for the most flavor, but boneless works too.
Why is my rice still crunchy after 20 minutes?
A few possibilities: your heat was too low, your lid wasn’t tight enough, or you lifted the lid during cooking. Next time, make sure the liquid is at a gentle boil before covering, and resist the urge to peek. If it’s still crunchy, add 2-3 tablespoons of broth, cover, and cook for another 5 minutes.
Can I make this in a slow cooker or Instant Pot?
I haven’t tested it in a slow cooker, but for Instant Pot, use the sauté function for searing and toasting, then add the broth and cook on high pressure for 5 minutes with a natural release. The rice-to-liquid ratio may need adjusting—start with 1:1.5 rice to broth.
How do I make this dairy-free?
Swap the butter with a good-quality vegan butter or coconut oil. The flavor will change slightly, but it’s still delicious. I’ve used Miyoko’s vegan butter with great results.
Can I double this recipe?
Yes, but you’ll need a larger pan—at least a 14-inch skillet or a Dutch oven. Keep the searing steps the same, but increase the simmering time by about 5 minutes. Make sure the rice has enough space to cook evenly.
Pin This Recipe!
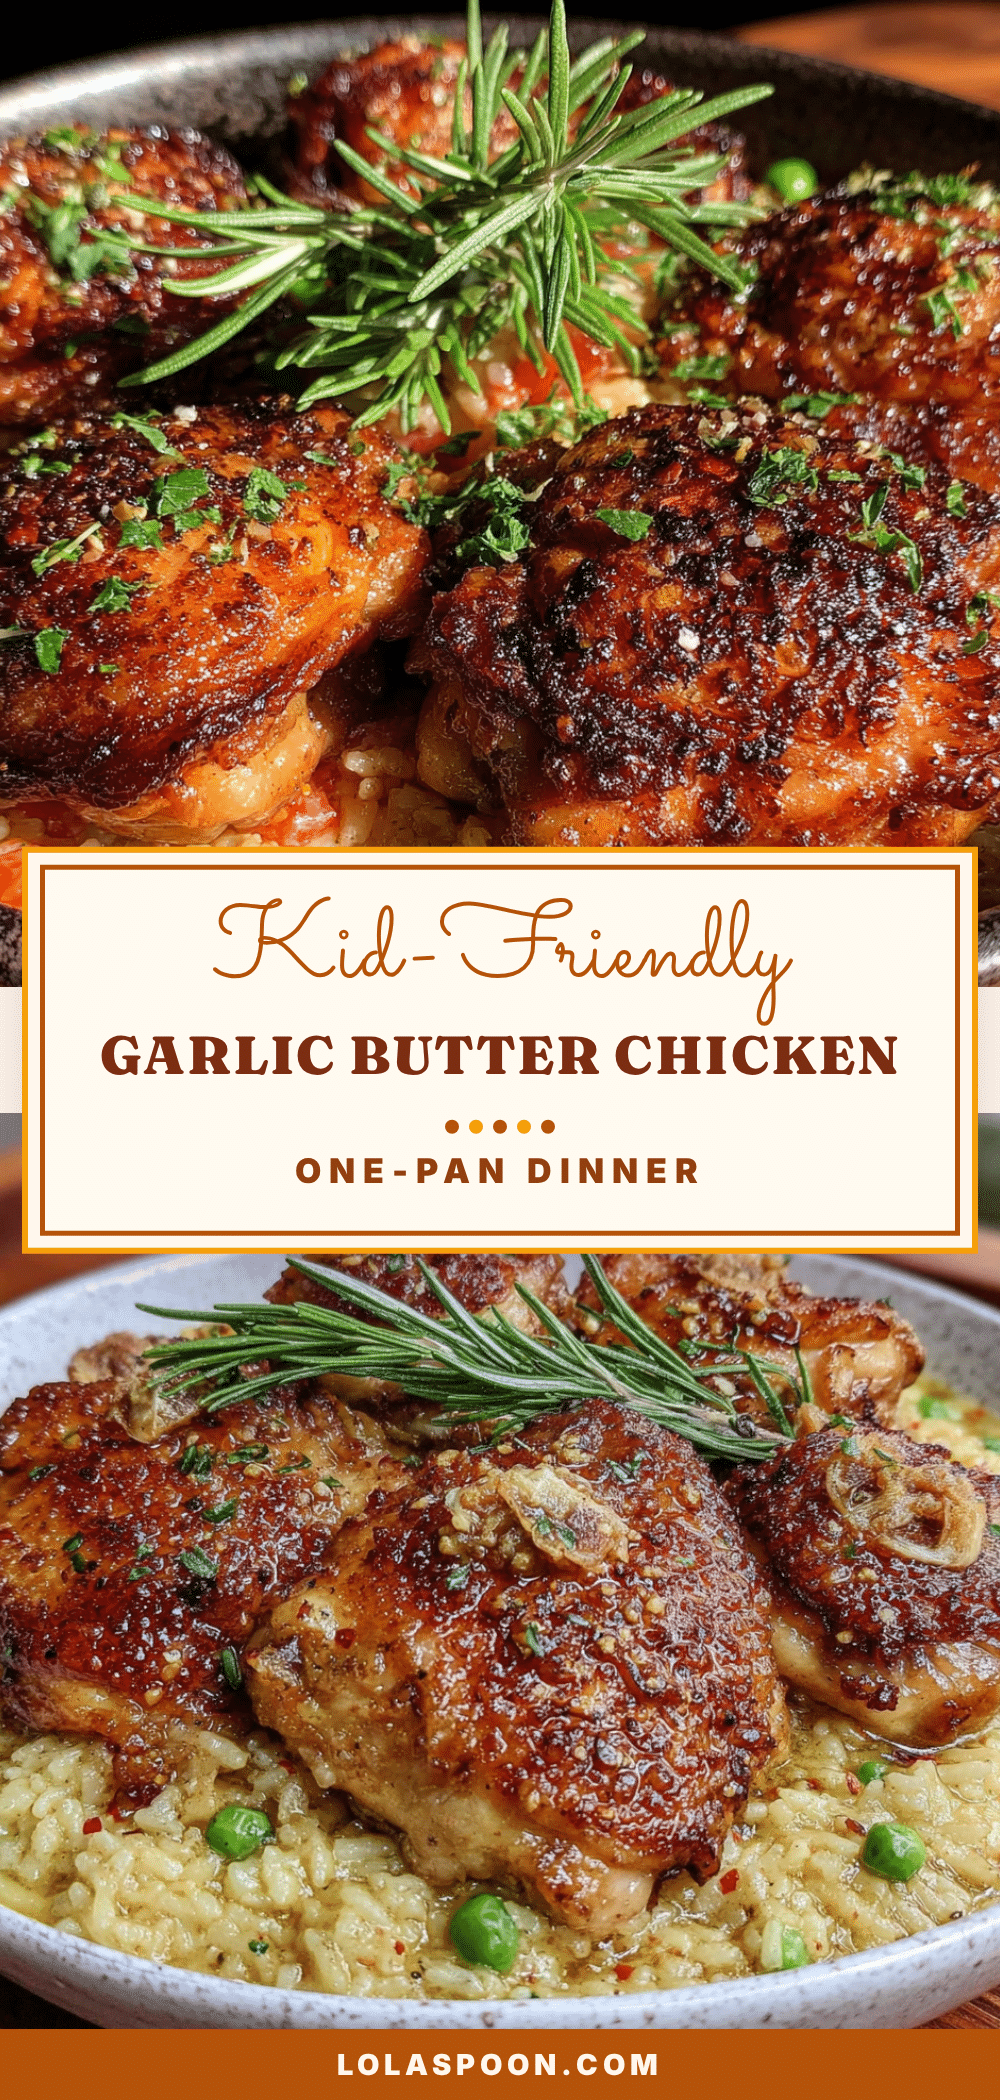
Best One-Pan Garlic Butter Chicken and Rice for Kids
A one-pan garlic butter chicken and rice recipe that brings back the comfort of a beloved diner dish. Tender chicken and fluffy rice are infused with garlic butter flavor, making it a family-friendly weeknight dinner.
- Prep Time: 10 minutes
- Cook Time: 30 minutes
- Total Time: 40 minutes
- Yield: 4 servings 1x
- Category: Main Course
- Cuisine: American
Ingredients
- 4 boneless, skinless chicken thighs (about 1.5 lbs or 680g)
- 1 teaspoon salt
- ½ teaspoon black pepper
- ½ teaspoon garlic powder
- 2 tablespoons olive oil
- 4 tablespoons unsalted butter (56g)
- 6 cloves garlic, minced
- 1 ½ cups long-grain white rice (300g)
- 2 ½ cups low-sodium chicken broth (600ml)
- ½ teaspoon dried thyme
- ¼ teaspoon paprika
- Salt to taste
- 2 tablespoons fresh parsley, chopped
- Lemon wedges
Instructions
- Pat the chicken thighs dry with paper towels. Season both sides with salt, pepper, and garlic powder. Let them sit at room temperature for about 10 minutes.
- Heat the olive oil in a large skillet over medium-high heat. When the oil shimmers, place the chicken thighs in the pan. Cook for 4-5 minutes without moving them, then flip and cook for another 3-4 minutes. Transfer the chicken to a plate and set aside. Do not wipe out the pan.
- Reduce the heat to medium. Add the butter to the pan and let it melt, scraping up any browned bits from the bottom. Add the minced garlic and cook for about 30 seconds, stirring constantly.
- Add the rice to the pan and stir it around in the garlic butter for about 2 minutes until the rice turns slightly translucent at the edges.
- Pour in the chicken broth, thyme, paprika, and salt. Stir everything together, scraping up any last bits from the bottom. Bring it to a gentle boil.
- Nestle the seared chicken thighs back into the rice, pushing them down slightly so they’re partially submerged. Add any juices that collected on the plate.
- Reduce the heat to low, cover the pan with a tight-fitting lid, and let it simmer for 20 minutes. Do not lift the lid during this time.
- After 20 minutes, turn off the heat but keep the lid on. Let it rest for another 5-10 minutes.
- Remove the lid, fluff the rice gently with a fork, and garnish with fresh parsley and lemon wedges if using. Ensure the chicken reaches an internal temperature of 165°F (74°C).
Notes
For chicken breasts, reduce cooking time by about 5 minutes. For dairy-free, swap butter with vegan butter or coconut oil. For brown rice, increase broth to 3 cups (720ml) and cook for about 45 minutes. Use low-sodium broth to control saltiness. Do not lift the lid during simmering.
Nutrition
- Serving Size: 1 serving (1 chicken
- Calories: 485
- Sodium: 680
- Fat: 18
- Saturated Fat: 8
- Carbohydrates: 45
- Fiber: 1
- Protein: 32
Keywords: one-pan chicken and rice, garlic butter chicken, kid-friendly dinner, easy weeknight meal, family dinner