My brother-in-law, Mark, swore he hated chicken thighs. For years. “Too fatty,” he’d say, pushing them around his plate at family dinners. “Dark meat’s just not my thing.” I’d nod and let it go, because honestly, arguing with a guy who once declared ketchup too spicy just wasn’t worth my energy. But last New Year’s Eve, I made this sticky honey garlic chicken for a small gathering, and I caught him. There he was, standing by the stove, fork in hand, pulling a piece straight from the pan when he thought no one was looking. The glaze was running down his chin, and he had this look on his face—like he’d been caught doing something he absolutely didn’t want to stop doing.
That’s the thing about this recipe. It doesn’t argue with you. It just sits there, all glossy and golden, and lets you prove yourself wrong. I’d been tinkering with honey garlic combinations for months, trying to find that perfect balance where the sweetness doesn’t clobber you and the garlic doesn’t get bitter. This version hit it. The chicken comes out tender enough to pull apart with a fork, and the sauce reduces into this thick, sticky glaze that coats every single bite. I mean, let me tell you, the first time I made it for myself, I ate three pieces standing over the counter. No plate. No shame.
Maybe you’ve been there—skeptical about a dish that everyone seems to rave about, only to find yourself sneaking seconds when you thought nobody was watching. That’s exactly the energy this chicken brings. It’s unassuming. It’s just a one-pan dinner. But it has this way of making people quiet at the table, and honestly, that’s the highest compliment a cook can get. This recipe stayed with me not because it’s fancy or complicated, but because it changed someone’s mind without even trying. And isn’t that the kind of magic we all want in our kitchen?
Why You’ll Love This Recipe
Let me be real with you—I’ve tested this recipe about seven times to get it exactly right. The first batch was too sweet. The second, the garlic burned. The third, I forgot the soy sauce entirely. But by the fourth try, something clicked, and by the seventh, I knew I had something special. This isn’t just another honey garlic chicken recipe you’ll find floating around the internet. Here’s why this version stands out, especially when you’re cooking for a crowd.
- One Pan, Zero Fuss: Everything happens in a single skillet. No transferring, no extra dishes, no complicated steps. You sear the chicken, build the sauce, and let it simmer until sticky perfection. Your future self will thank you.
- Simple Pantry Ingredients: You probably have honey, soy sauce, garlic, and chicken thighs in your kitchen right now. No trips to specialty stores, no hunting down obscure ingredients. Just honest, accessible food.
- Perfect for Hosting: This is the dish you make when friends come over and you want to look like you tried without actually trying. It scales beautifully—double the recipe, use a bigger pan, and you’re feeding eight people without breaking a sweat.
- Crowd-Pleaser Guaranteed: I’ve served this at potlucks, dinner parties, and casual weeknight hangs. Every single time, someone asks for the recipe. Even the chicken thigh skeptics get converted.
- Unbelievably Delicious: The sauce reduces into this thick, glossy glaze that coats each piece of chicken like armor. The honey caramelizes just enough to give you those sticky, almost-burnt edges that everyone fights over. It’s comfort food that feels a little bit fancy.
What makes this recipe different from all the others? It’s the technique. Most recipes tell you to just dump everything in the pan and hope for the best. But here, you sear the chicken first to develop that deep, golden crust. Then you build the sauce in the same pan, scraping up all those browned bits (that’s where the flavor lives). And here’s the secret—you add a tiny splash of rice vinegar at the end. Just a teaspoon. It cuts through the sweetness and makes everything taste brighter. Chef-tested, family-approved, and honestly, a little bit life-changing.
This is the kind of recipe that makes you close your eyes after the first bite. It’s sticky-sweet, savory, and just a little bit garlicky. Perfect for impressing guests without the stress, or turning a simple Tuesday dinner into something memorable. Trust me on this one.
What Ingredients You Will Need
This recipe uses simple, honest ingredients to deliver bold, sticky-sweet flavor without any fuss. Most of these are pantry staples, which means you’re probably already halfway there. Let me walk you through each one and why it matters.
- Bone-in, Skin-on Chicken Thighs (2 lbs / about 900g): This is non-negotiable for the best results. The bone keeps the meat juicy, and the skin crisps up beautifully in the pan. If you use boneless, skinless thighs, you’ll lose that crispy texture and the cooking time will be shorter. I prefer thighs from a local butcher or a trusted brand like Bell & Evans for consistent quality. Look for thighs that are roughly the same size so they cook evenly.
- Honey (1/3 cup / 110g): The star of the show. Use a good-quality, runny honey—not the crystallized stuff that’s been sitting in your cabinet for two years. Local honey is great if you have it, but any pure honey works. Avoid honey blends or flavored syrups; they won’t reduce properly and can leave a weird aftertaste.
- Soy Sauce (1/4 cup / 60ml): This provides the savory backbone that balances the sweetness. I use low-sodium soy sauce so I can control the salt level. If you’re gluten-free, swap in tamari or coconut aminos (though coconut aminos will make the sauce slightly sweeter, so you might want to reduce the honey by a tablespoon).
- Garlic (6 cloves, minced): Fresh garlic only, please. The pre-minced stuff in a jar has a different flavor profile and can taste harsh. You want that sweet, mellow garlic flavor that comes from fresh cloves. I mince mine by hand with a sharp knife, but a garlic press works in a pinch.
- Rice Vinegar (1 tablespoon / 15ml): This is my secret weapon. Just a splash at the end brightens the entire dish and cuts through the richness. Don’t skip it. If you don’t have rice vinegar, you can use apple cider vinegar or even a squeeze of fresh lemon juice.
- Olive Oil (2 tablespoons / 30ml): For searing the chicken. You want an oil with a relatively high smoke point. Avocado oil works too, but olive oil adds a nice subtle flavor.
- Salt and Black Pepper (to taste): Simple seasonings that let the honey garlic shine. I use kosher salt and freshly ground black pepper.
- Optional Garnishes: Sliced green onions, toasted sesame seeds, and a pinch of red pepper flakes. These aren’t essential, but they add color, texture, and a tiny bit of heat that plays beautifully with the sweet glaze.
Ingredient Notes and Substitutions:
- If you’re feeding a crowd, double everything and use a large, oven-safe skillet or a roasting pan. The cooking time will increase slightly, but the technique stays the same.
- For a less sweet version, reduce the honey to 1/4 cup and add an extra tablespoon of soy sauce. The glaze will be slightly less sticky but still delicious.
- In summer, I sometimes add a handful of fresh pineapple chunks during the last 10 minutes of cooking. The acidity from the pineapple complements the honey beautifully.
Equipment Needed
You don’t need a fancy kitchen to make this recipe work. Here’s what you’ll need and a few honest thoughts about each piece.
- Large, Heavy-Bottomed Skillet (12-inch / 30cm): This is your main tool. Cast iron is ideal because it holds heat evenly and gives you that beautiful sear. I use a Lodge 12-inch skillet that I’ve had for years. A stainless steel skillet works too, but avoid non-stick if you can—you won’t get the same browning. If all you have is non-stick, just know the chicken won’t develop that deep golden crust.
- Tongs: For flipping the chicken without piercing the skin. A good pair of spring-loaded tongs makes life so much easier. I’ve got a pair from OXO that I swear by.
- Measuring Cups and Spoons: For accuracy. Eyeballing the honey can lead to a cloyingly sweet sauce. Trust me, I learned that the hard way.
- Small Bowl: For mixing the sauce ingredients together before adding them to the pan. This isn’t strictly necessary, but it helps you pour everything in at once.
- Sharp Knife and Cutting Board: For mincing the garlic. A dull knife will just bruise the garlic and release bitter compounds.
- Meat Thermometer (optional but recommended): Chicken thighs are done when they reach 175°F (80°C) internally. The dark meat can handle a bit more heat than chicken breasts, so don’t worry about drying them out. A thermometer takes the guesswork out of it.
Budget-Friendly Alternatives: If you don’t have a cast iron skillet, any oven-safe skillet will do. You can even use a regular frying pan and transfer the chicken to a baking dish for the final simmer. The key is having a pan that can go from stovetop to oven (if you’re finishing it that way) or just a pan wide enough to hold the chicken in a single layer.
Preparation Method
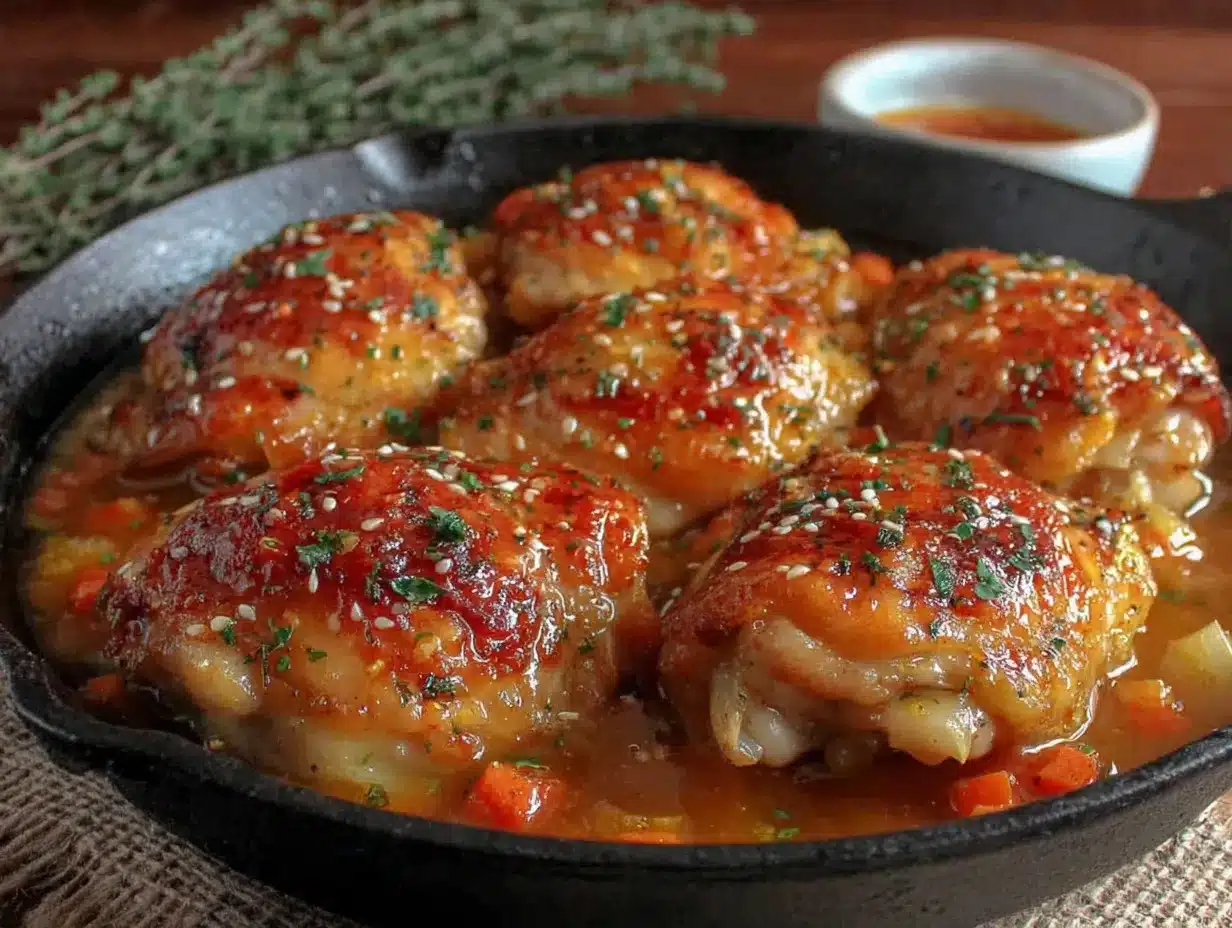
Alright, let’s get cooking. This recipe moves quickly once you start, so I recommend reading through the entire method before you begin. Trust me, having everything prepped makes the process smooth and stress-free.
- Prep the Chicken (5 minutes): Pat the chicken thighs dry with paper towels. This is crucial—wet skin won’t sear properly. Season generously on both sides with salt and black pepper. Don’t be shy with the salt; it’s the only seasoning the chicken gets before the sauce. Let the chicken sit at room temperature for about 15 minutes while you prep the other ingredients. This helps it cook more evenly.
- Make the Sauce (5 minutes): In a small bowl, whisk together the honey, soy sauce, minced garlic, and rice vinegar. Set it aside. Give it a taste—it should be sweet, salty, and tangy all at once. If it feels too sweet, add another splash of soy sauce. If it feels too salty, a tiny bit more honey balances it out. This is your chance to adjust before it hits the pan.
- Sear the Chicken (10-12 minutes): Heat the olive oil in your large skillet over medium-high heat until it shimmers. Carefully place the chicken thighs skin-side down in the pan. Do not crowd the pan—work in batches if necessary. Let them cook undisturbed for 5-6 minutes. You’ll know they’re ready when the skin is deep golden brown and releases easily from the pan. If it sticks, it needs more time. Flip and cook the other side for 3-4 minutes. The chicken won’t be fully cooked through yet, and that’s fine. Transfer the seared thighs to a plate. Don’t wipe out the pan—those browned bits are pure flavor.
- Build the Glaze (2 minutes): Reduce the heat to medium-low. Pour the honey garlic sauce into the hot pan. It will sizzle and bubble immediately. Use a wooden spoon or spatula to scrape up all those browned bits from the bottom of the pan. This is called deglazing, and it’s where the magic happens. Let the sauce bubble gently for about a minute until it thickens slightly.
- Simmer the Chicken (20-25 minutes): Return the chicken thighs to the pan, skin-side up, nestling them into the sauce. Spoon some of the sauce over the tops. Bring the sauce to a gentle simmer, then reduce the heat to low. Cover the pan with a lid or foil and let it cook for 15 minutes. After 15 minutes, remove the lid and let it simmer uncovered for another 5-10 minutes. The sauce will reduce and thicken into a sticky, glossy glaze. Baste the chicken occasionally with the sauce as it cooks. Your kitchen will smell incredible at this point.
- Check for Doneness (2 minutes): The chicken is done when it reaches 175°F (80°C) internally, or when the juices run clear when pierced with a knife. The meat should be tender and pulling away from the bone slightly. If the sauce is still too thin, let it simmer a few more minutes uncovered. If it’s getting too thick too fast, add a splash of water to loosen it up.
- Rest and Serve (5 minutes): Remove the pan from the heat. Let the chicken rest in the sauce for 5 minutes. This allows the juices to redistribute and the glaze to set. Spoon the thickened sauce over the chicken one last time before serving. Garnish with sliced green onions, toasted sesame seeds, and a pinch of red pepper flakes if you like a little heat.
Troubleshooting Note: If your sauce isn’t thickening, don’t panic. It might be because you’re using a honey that’s particularly runny. Just let it simmer a bit longer uncovered. If it’s getting too dark before it’s thick, your heat is too high. Turn it down and be patient. The sauce will thicken as it cools, so don’t wait until it’s syrupy in the pan.
Cooking Tips & Techniques
I’ve made this recipe enough times to learn a few things the hard way. Let me save you some trouble.
Don’t Skip the Searing: I know it’s tempting to just dump everything in the pan and let it cook, but that golden-brown crust is what makes this dish special. It adds texture and depth of flavor that you just can’t get from simmering alone. The Maillard reaction—that browning process—creates complex, savory notes that balance the sweetness of the honey. Take the extra 10 minutes. Your taste buds will thank you.
Watch the Garlic: Garlic burns quickly, especially when it’s combined with honey and sugar. That’s why you add the sauce after searing the chicken, not before. And keep the heat at medium-low once the garlic is in the pan. Burnt garlic tastes bitter and acrid, and it’ll ruin the whole dish. I learned this the hard way when I got distracted by a phone call and came back to a pan that smelled like regret.
Use a Meat Thermometer: Chicken thighs are forgiving, but they still need to be cooked properly. I aim for 175°F (80°C) because the dark meat stays juicy even at that temperature. If you pull them at 165°F (the safe minimum for poultry), the meat will be cooked but not as tender. The extra 10 degrees breaks down the connective tissue and makes the thighs melt-in-your-mouth tender.
Multitasking Strategy: Here’s how I time it when I’m cooking for guests. I prep the chicken and sauce in the morning and keep them in the fridge. About 45 minutes before I want to eat, I start searing. While the chicken simmers (that’s about 25 minutes of mostly hands-off time), I steam some rice, roast some broccoli, and set the table. By the time the chicken is done, everything else is ready. It’s a one-pan wonder that lets you be a host instead of a slave to the stove.
Consistency Tip: If you’re making a double batch for a crowd, use two pans or work in batches for the searing step. Overcrowding the pan will steam the chicken instead of searing it, and you’ll lose that crispy skin. It’s better to take a little extra time upfront than to end up with soggy chicken.
Variations & Adaptations
This recipe is a fantastic base for experimentation. Here are a few ways I’ve adapted it depending on who’s coming over and what’s in my fridge.
Spicy Honey Garlic Chicken: Add 1-2 teaspoons of sriracha or gochujang to the sauce along with the honey. The heat cuts through the sweetness beautifully. I made this version for a game night gathering, and it disappeared faster than the original. If you want even more heat, sprinkle red pepper flakes over the finished dish.
Garlic Lovers Version: Roast a whole head of garlic (cut the top off, drizzle with olive oil, wrap in foil, and bake at 400°F for 40 minutes). Squeeze the softened cloves into the sauce instead of raw minced garlic. The result is sweeter, mellower, and absolutely divine. It’s a little extra work, but for a special dinner party, it’s worth it.
Citrus Twist: Add the zest and juice of one orange to the sauce. The citrus brightens everything up and pairs beautifully with the honey. I tried this on a whim when I had an orange sitting on my counter, and it’s become my go-to summer version. Serve it with a simple green salad and some crusty bread.
Baked Version: If you don’t want to stand over the stove, sear the chicken in an oven-safe skillet, then pour the sauce over it and bake at 375°F (190°C) for 25-30 minutes, basting halfway through. The sauce will caramelize in the oven, and you’ll get even more of those sticky, glossy edges. This is perfect for feeding a crowd because you can just pop the whole pan in the oven and forget about it.
Dietary Adaptations: For a gluten-free version, use tamari or coconut aminos instead of soy sauce. For a lower-sugar option, reduce the honey to 1/4 cup and add a tablespoon of apple cider vinegar for tang. The texture won’t be quite as sticky, but the flavor will still be fantastic. I’ve also made this with boneless, skinless chicken breasts for a leaner option—just reduce the cooking time to about 15 minutes total and watch them closely so they don’t dry out.
Serving & Storage Suggestions
This sticky honey garlic chicken is versatile enough for a casual weeknight dinner or a dinner party centerpiece. Here’s how I like to serve it and how to handle leftovers.
Serving Temperature and Presentation: Serve the chicken hot, straight from the pan. I like to arrange the thighs on a large platter and spoon the remaining glaze over the top. Garnish with sliced green onions, toasted sesame seeds, and a sprinkle of red pepper flakes for color. The chicken should be glistening and sticky—that’s the sign of a perfect glaze. For a dinner party, I’ll sometimes serve it family-style with the pan right on the table. It feels rustic and inviting.
What to Serve Alongside: This dish pairs beautifully with steamed jasmine rice or coconut rice to soak up all that extra sauce. For a low-carb option, try cauliflower rice or a simple green salad with a tangy vinaigrette. Roasted broccoli, green beans, or asparagus are excellent vegetable sides. I also love serving it with a side of quick-pickled cucumbers—the acidity cuts through the richness of the glaze. If you’re hosting a larger gathering, add a platter of roasted vegetables and a crusty baguette to round out the meal.
Storage Instructions: Leftovers keep well in an airtight container in the refrigerator for up to 4 days. The sauce will thicken as it cools, almost like a jelly. Don’t worry—it will loosen up when you reheat it. I actually think the flavors get even better after a day or two in the fridge. The garlic mellows out, and the honey glaze soaks deeper into the meat.
Reheating Tips: The best way to reheat is in a skillet over medium-low heat with a splash of water or chicken broth. Cover the pan and let it warm through for 5-7 minutes, flipping once. The microwave works in a pinch, but it can make the skin soggy. If you’re using the microwave, cover the plate with a damp paper towel to retain moisture. For the crispiest skin, reheat in a 350°F (175°C) oven for about 10 minutes.
Freezer Instructions: This recipe freezes beautifully. Let the chicken cool completely, then transfer it to a freezer-safe container or zip-top bag. Pour any remaining sauce over the top. Freeze for up to 3 months. To thaw, move it to the refrigerator overnight. Reheat gently in a skillet as described above. The texture might be slightly softer after freezing, but the flavor will still be fantastic.
Nutritional Information & Benefits
Here’s the honest truth about this dish—it’s indulgent, but it’s made with real food. Let’s break it down.
| Nutrient | Per Serving (2 thighs) |
|---|---|
| Calories | |
| Protein | 35-40g |
| Fat | 25-30g |
| Saturated Fat | 7-9g |
| Carbohydrates | 20-25g |
| Sugar | 18-22g |
| Sodium | 600-700mg |
Note: These values are estimates and will vary based on specific ingredients and portion sizes.
Health Benefits of Key Ingredients: Chicken thighs are a great source of protein, iron, and B vitamins. The dark meat is actually higher in zinc and selenium than chicken breasts, which supports immune function and thyroid health. Honey contains antioxidants and has natural antibacterial properties. Garlic is well-known for its cardiovascular benefits and immune-boosting compounds. While this dish isn’t exactly diet food, it’s made with wholesome ingredients that nourish your body.
Dietary Considerations: This recipe is naturally dairy-free and can be made gluten-free with a simple swap. It’s not low-carb or low-sugar due to the honey, but you can reduce the honey to lower the sugar content. If you’re watching your sodium, use low-sodium soy sauce and go easy on the added salt during searing.
My Personal Perspective: I believe in balance. This isn’t a recipe I make every week, but when I do, I enjoy every single bite without guilt. It’s real food made with love, and that counts for something. Pair it with a big vegetable side and a sensible portion, and you’ve got a meal that feels indulgent but is still grounded in good ingredients.
Conclusion
This sticky honey garlic chicken thighs recipe has earned a permanent spot in my rotation, and I think it will in yours too. It’s the kind of dish that delivers on every level—easy enough for a Tuesday, impressive enough for a dinner party, and delicious enough to convert even the most stubborn chicken thigh skeptics. I mean, if it worked on my brother-in-law Mark, it can work on anyone.
What I love most about this recipe is how adaptable it is. You can make it spicy, citrusy, or extra garlicky depending on your mood. You can serve it over rice, alongside roasted vegetables, or just straight from the pan when nobody’s looking (no judgment here). It’s forgiving, it’s flexible, and it always delivers.
So here’s my challenge to you: Make this recipe for your next gathering. Watch the faces around your table as that first bite hits. Listen for the quiet “mmms” and the inevitable question—”Can I get this recipe?” And when someone tells you they don’t like chicken thighs, just smile. You know what’s coming.
I’d love to hear how yours turns out. Drop a comment below and let me know if you tried any variations, or tag me in your photos if you share them online. Happy cooking, friends!
Frequently Asked Questions
Can I use chicken breasts instead of thighs?
Yes, but the results will be different. Chicken breasts cook faster and can dry out more easily. If you’re swapping, use boneless, skinless breasts and reduce the cooking time to about 15 minutes total. Check the internal temperature—165°F (74°C) is your target. The sauce will still be delicious, but you’ll miss that crispy skin and juicy texture that thighs provide.
How do I prevent the sauce from burning?
Keep your heat at medium-low once the sauce is in the pan. Honey and sugar can burn quickly if the heat is too high. If you notice the sauce getting too dark too fast, add a splash of water and turn the heat down. Also, make sure you’re using a heavy-bottomed pan that distributes heat evenly.
Can I make this recipe in advance?
Absolutely. You can prep the sauce and season the chicken up to 24 hours in advance. Store them separately in the refrigerator. When you’re ready to cook, just follow the method as written. The dish also reheats beautifully, so you can make it a day ahead and reheat gently before serving.
What if my honey is crystallized?
Crystallized honey is fine to use—it just needs to be liquefied first. Place the jar in a bowl of warm water for 10-15 minutes, or microwave it in short bursts (10 seconds at a time) until it’s runny again. Avoid boiling it, as that can destroy some of the beneficial compounds.
How do I get the skin extra crispy?
Pat the chicken thighs very dry with paper towels before seasoning. Let them sit uncovered in the refrigerator for an hour before cooking—this dries out the skin even more. When searing, press the thighs down gently with a spatula to ensure even contact with the pan. And resist the urge to move them around; let them cook undisturbed for a full 5-6 minutes on the first side.
Pin This Recipe!
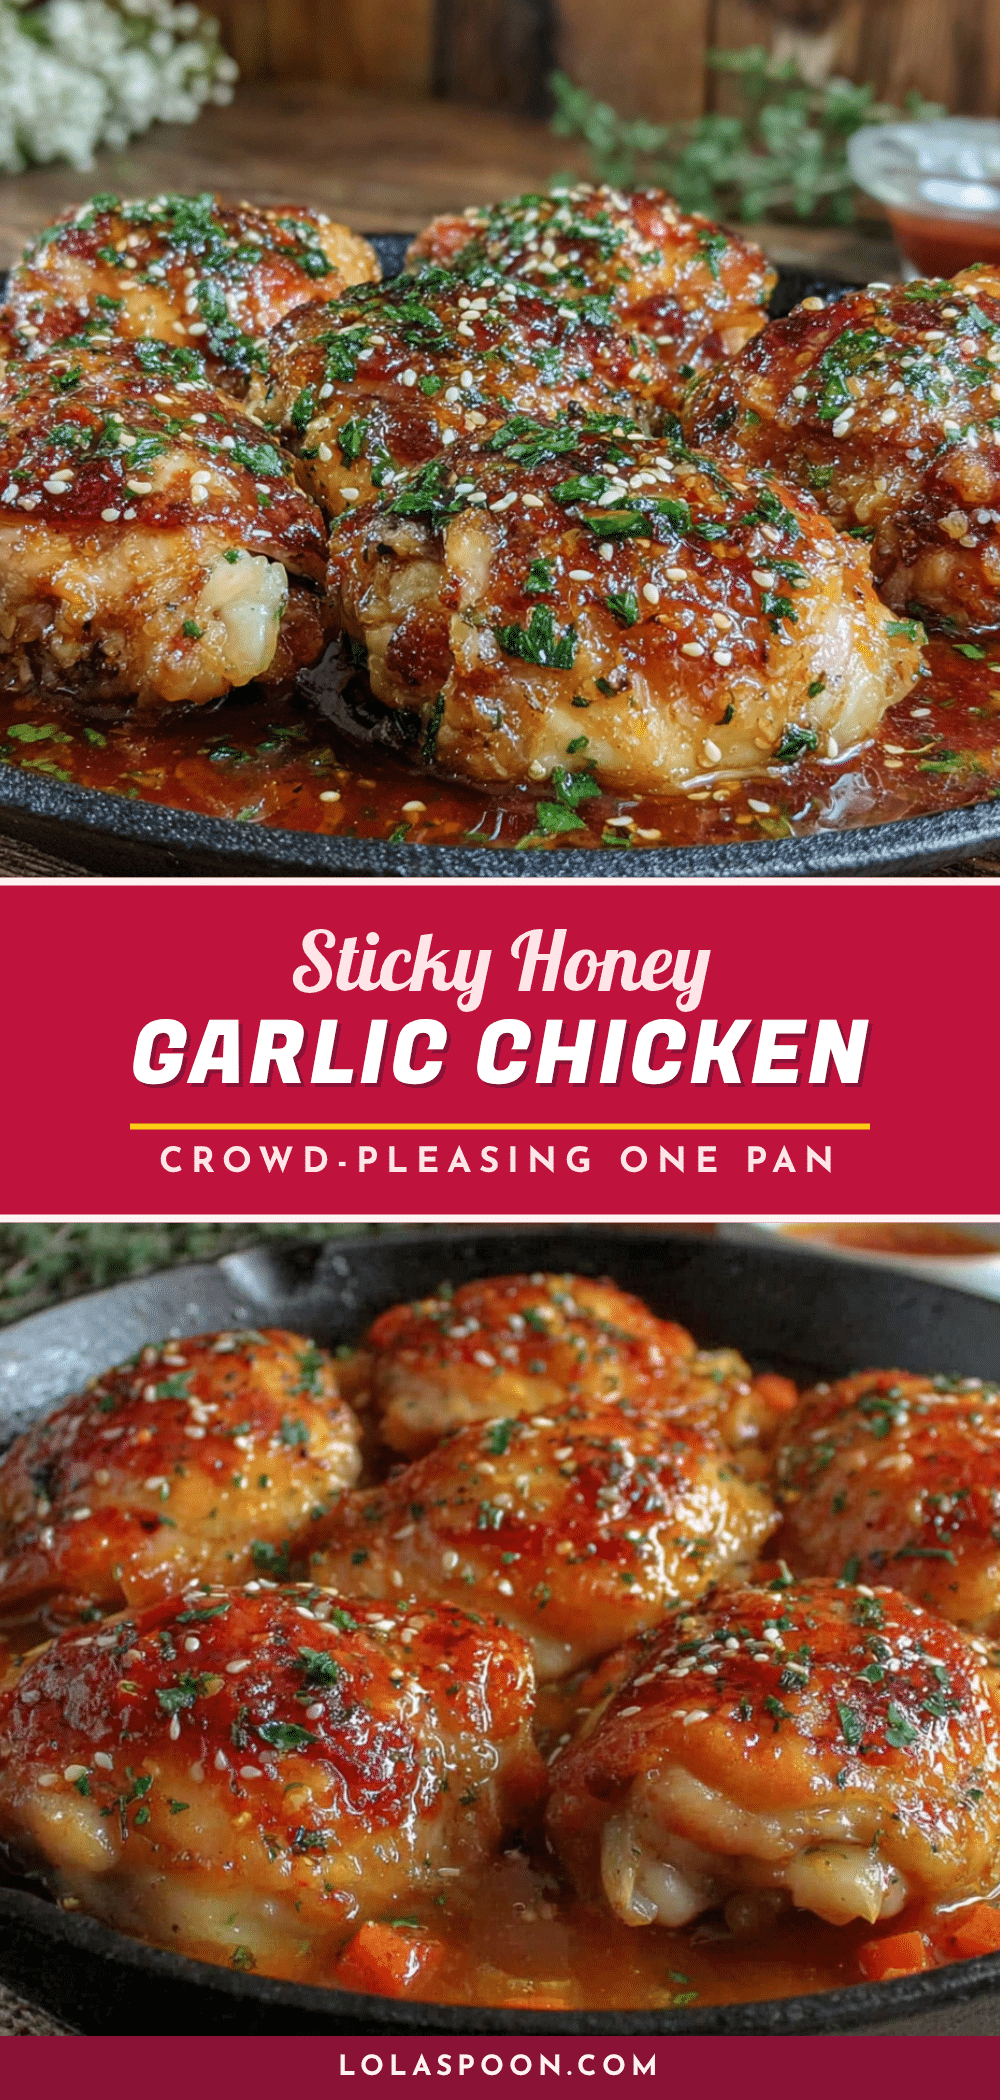
Sticky Honey Garlic Chicken Thighs Made Easy

Tender, juicy chicken thighs coated in a glossy, sticky-sweet honey garlic glaze. This one-pan wonder is easy enough for a weeknight and impressive enough for company, guaranteed to convert even the most stubborn chicken thigh skeptics.
- Prep Time: 15 minutes
- Cook Time: 30 minutes
- Total Time: 45 minutes
- Yield: 4 servings 1x
- Category: Main Course
- Cuisine: Asian-Inspired
Ingredients
- 2 lbs (about 900g) bone-in, skin-on chicken thighs
- 1/3 cup (110g) honey
- 1/4 cup (60ml) low-sodium soy sauce
- 6 cloves garlic, minced
- 1 tablespoon (15ml) rice vinegar
- 2 tablespoons (30ml) olive oil
- Salt and black pepper to taste
- Sliced green onions (optional garnish)
- Toasted sesame seeds (optional garnish)
- Red pepper flakes (optional garnish)
Instructions
- Prep the Chicken (5 minutes): Pat the chicken thighs dry with paper towels. Season generously on both sides with salt and black pepper. Let sit at room temperature for about 15 minutes.
- Make the Sauce (5 minutes): In a small bowl, whisk together honey, soy sauce, minced garlic, and rice vinegar. Set aside.
- Sear the Chicken (10-12 minutes): Heat olive oil in a large skillet over medium-high heat. Place chicken thighs skin-side down in the pan (work in batches if needed). Cook undisturbed for 5-6 minutes until skin is deep golden brown. Flip and cook other side for 3-4 minutes. Transfer to a plate.
- Build the Glaze (2 minutes): Reduce heat to medium-low. Pour honey garlic sauce into the hot pan. Scrape up browned bits from the bottom. Let bubble gently for about 1 minute until slightly thickened.
- Simmer the Chicken (20-25 minutes): Return chicken to the pan, skin-side up. Spoon sauce over tops. Bring to a gentle simmer, then reduce heat to low. Cover and cook for 15 minutes. Uncover and simmer 5-10 more minutes until sauce thickens and glazes the chicken. Baste occasionally.
- Check for Doneness (2 minutes): Chicken is done when internal temperature reaches 175°F (80°C) or juices run clear. If sauce is too thin, simmer uncovered a few more minutes.
- Rest and Serve (5 minutes): Remove from heat. Let chicken rest in sauce for 5 minutes. Spoon thickened sauce over chicken before serving. Garnish with green onions, sesame seeds, and red pepper flakes if desired.
Notes
For extra crispy skin, pat chicken very dry and let sit uncovered in the refrigerator for an hour before cooking. If sauce isn’t thickening, simmer uncovered longer. For a gluten-free version, use tamari or coconut aminos instead of soy sauce. Leftovers keep in the refrigerator for up to 4 days and freeze for up to 3 months.
Nutrition
- Serving Size: 2 chicken thighs
- Calories: 475
- Sugar: 20
- Sodium: 650
- Fat: 28
- Saturated Fat: 8
- Carbohydrates: 23
- Protein: 38
Keywords: honey garlic chicken, sticky chicken thighs, one-pan chicken, easy chicken dinner, chicken thigh recipe, honey garlic glaze