I was killing time in a dusty little antiques shop last October—the kind of place that smells like old paper and cedar—when the owner, a woman named Margot who looked like she hadn’t smiled since the Carter administration, started talking about her Halloween party menu. I wasn’t expecting party planning advice from someone who clearly hated people touching her porcelain dolls, but there I was, trapped between a Victorian lamp and a stack of chipped plates, listening to her describe exactly how to make a veggie spider web tray. She told me the secret was all in the dip placement and the way you slice the bell peppers. I nodded along, mostly trying to figure out how to escape without buying anything, but honestly, that conversation stuck with me. Maybe you’ve been there—you find a recipe idea in the strangest place, and it just won’t let go.
So I went home and tried it. I made a mess of my kitchen, sliced my thumb on a mandoline (classic move), and ended up with a veggie tray that looked more like a haunted house collapse than a spider web. But the second time? It clicked. The kids at my neighbor’s Halloween block party devoured it, and I had to make another one the next day. This Wholesome Halloween Veggie Spider Web Tray with Ranch Dip is now my go-to for every spooky gathering. It’s the kind of recipe that makes you feel like you’ve got your life together, even when you’re hiding a sink full of dirty dishes. The best part? It actually tastes good, and nobody misses the candy.
Why You’ll Love This Recipe
Let me tell you why this tray has earned a permanent spot in my Halloween rotation. I’ve tested it at three different parties, with kids and adults, and it never fails to impress. Here’s what makes it stand out:
- Quick & Easy: You can put this together in about 20 minutes flat. No cooking, no baking, just chopping and arranging. Perfect for those last-minute Halloween gatherings where you forgot you were supposed to bring something.
- Simple Ingredients: Everything on this tray is stuff you can grab at any grocery store. No fancy health food runs or specialty items. I mean, you probably already have ranch seasoning in your pantry, right?
- Perfect for Halloween Parties: This works for classroom celebrations, office potlucks, or neighborhood gatherings. It’s festive without being fussy, and it fits right in next to all the candy and cupcakes.
- Crowd-Pleaser: Here’s the thing—kids actually eat vegetables when they’re arranged in a spider web. I’ve watched picky eaters go back for thirds. And adults? They love having something crunchy to snack on that isn’t coated in sugar.
- Unbelievably Delicious: The ranch dip is the real star here. I use a blend of Greek yogurt and sour cream that gives it this tangy, creamy texture that’s way better than store-bought. The vegetables stay crisp and fresh, and the whole thing just works.
What makes this different from every other veggie tray out there is the presentation. The spider web design isn’t just cute—it actually makes the vegetables more accessible. Kids can grab individual pieces, and the dip is right there in the center. Plus, using Greek yogurt instead of all sour cream means you’re getting some protein and probiotics without sacrificing flavor. It’s comfort food reimagined—healthier, faster, but with the same soul-soothing satisfaction. Perfect for impressing guests without stress, or turning a simple snack into something memorable.
What Ingredients You Will Need
This recipe uses fresh, colorful vegetables and a simple homemade ranch dip to deliver bold flavor and satisfying crunch without any fuss. Most of these ingredients are pantry staples or easy to find at any grocery store.
For the Veggie Spider Web Tray
- 1 large round serving platter or pizza pan (at least 12 inches wide)
- 1 cup cherry tomatoes, halved (adds pop of color and sweetness)
- 1 large cucumber, sliced into thin rounds (use English cucumber for fewer seeds)
- 1 red bell pepper, sliced into thin strips (for the web rings)
- 1 yellow bell pepper, sliced into thin strips (contrast makes the web pop)
- 1 orange bell pepper, sliced into thin strips (keeps the Halloween theme going)
- 2 cups broccoli florets, blanched for 1 minute if desired (I like them raw for crunch)
- 1 cup cauliflower florets (adds white color for web contrast)
- 1 cup baby carrots (or regular carrots cut into sticks)
- 1/2 cup black olives, sliced (for spider bodies—trust me on this)
- 1/4 cup fresh chives or green onion tops (for spider legs)
- Optional: 1 small sugar pumpkin or gourd for decoration (not for eating, just for looks)
For the Homemade Ranch Dip
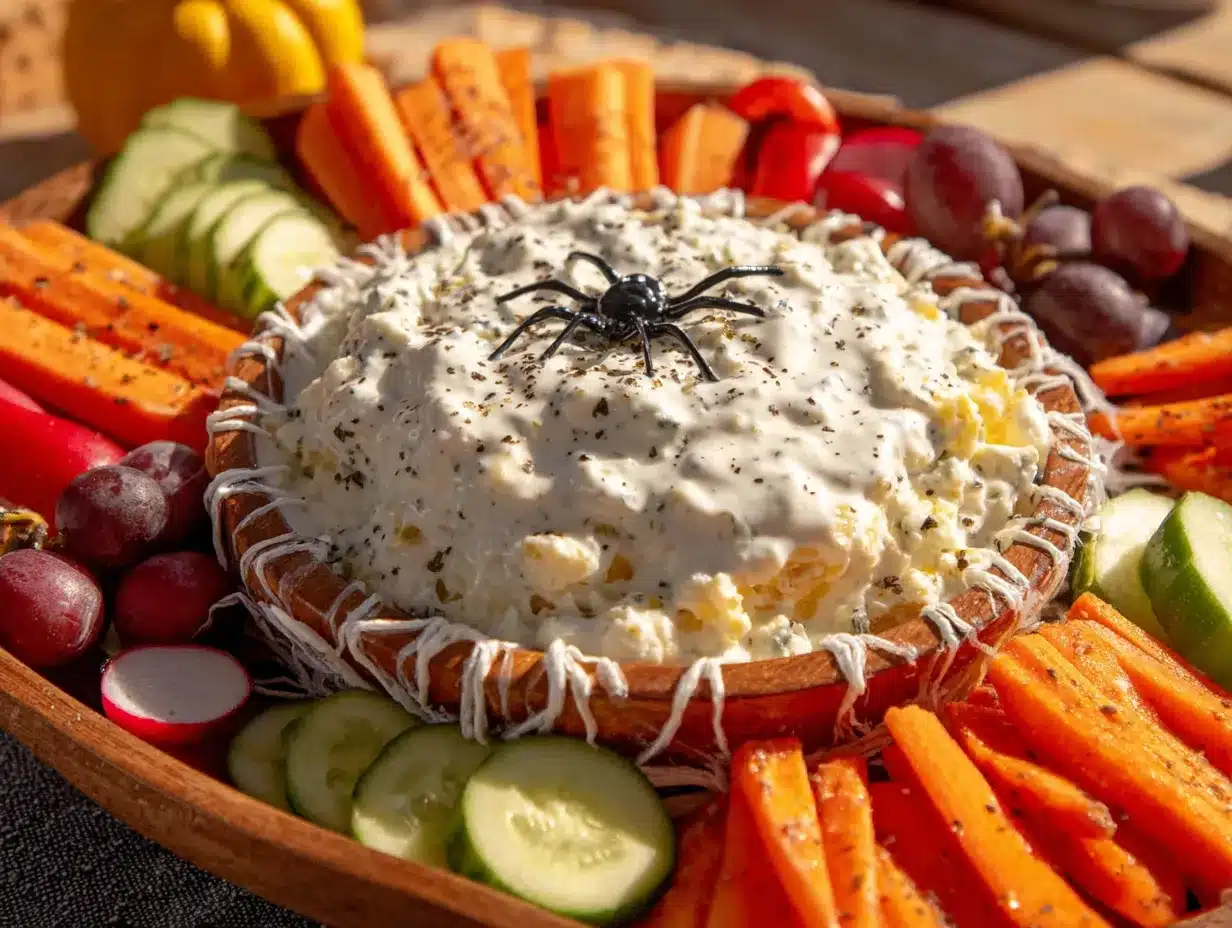
- 1/2 cup plain Greek yogurt (I recommend Fage or Chobani for thickness)
- 1/2 cup sour cream (full-fat works best, but low-fat is fine)
- 1 packet ranch seasoning mix (Hidden Valley is my go-to, or use 2 tablespoons homemade blend)
- 1 tablespoon fresh lemon juice (adds brightness and helps the dip last longer)
- 1/2 teaspoon garlic powder (optional, but I never skip it)
- 1/4 teaspoon black pepper (fresh ground if you have it)
- 2 tablespoons fresh dill, chopped (or 1 teaspoon dried dill)
- 1 tablespoon fresh parsley, chopped (optional, for color)
Ingredient Tips: For the best texture, look for firm vegetables without any soft spots. I prefer organic bell peppers because they tend to be sweeter and more colorful. If you’re dairy-free, swap the Greek yogurt and sour cream with dairy-free alternatives—just make sure they’re plain and unsweetened. The ranch seasoning mix usually contains buttermilk powder, so check labels if you’re avoiding dairy entirely. You can also make your own ranch seasoning with dried herbs and spices, which I’ll share in the variations section.
Substitution Guidance: Use gluten-free ranch seasoning if needed. For a lower-carb option, skip the carrots and add more cucumber and bell peppers. If you don’t have fresh dill, dried dill works fine—just use half the amount. The lemon juice is important though, so don’t skip it. It keeps the dip from tasting flat.
Equipment Needed
You don’t need much for this recipe, which is part of why I love it. Here’s what you’ll need:
- Large round serving platter or pizza pan: The round shape is key for the spider web design. I use a 14-inch wooden board that I picked up at a thrift store for three bucks. If you don’t have round, a large rectangular platter works—just adjust the web shape.
- Sharp chef’s knife: A good knife makes all the difference when slicing bell peppers and cucumbers. I learned that lesson the hard way after mangling too many vegetables with a dull blade.
- Cutting board: Get a big one. You’ll be chopping a lot of veggies, and having space makes it easier.
- Small mixing bowl: For the ranch dip. Any bowl works, but I like using a glass one so I can see when everything’s combined.
- Measuring cups and spoons: For the dip ingredients. Eyeballing works for some things, but the ranch needs proper ratios.
- Mandoline slicer (optional): If you want perfectly even cucumber and bell pepper slices, a mandoline is your friend. Just watch your fingers—I still have a scar from being too confident with mine.
- Serving bowl for dip: A small round bowl that fits in the center of your platter. I use a white ramekin that cost two dollars at a kitchen supply store.
Budget-Friendly Options: Skip the mandoline and use your knife—it takes a little longer but works fine. A dinner plate can substitute for a round platter if you’re in a pinch. The dip bowl can be any small bowl or even a cleaned-out yogurt container if you’re really desperate. I’ve done it, no shame.
Preparation Method
Let me walk you through this step by step. I’ve made this tray about a dozen times now, so I’ve worked out all the kinks. Take your time with the arrangement—it’s the fun part.
- Make the ranch dip first: In your small mixing bowl, combine the Greek yogurt, sour cream, ranch seasoning mix, lemon juice, garlic powder, black pepper, fresh dill, and parsley. Whisk until smooth and well combined. Taste it and adjust the seasoning—I usually add a pinch more dill because I love the flavor. Cover and refrigerate while you prep the vegetables. This gives the flavors time to meld, which makes a huge difference.
- Wash and dry all vegetables thoroughly: This is important because wet vegetables make the dip watery and slide around on the platter. I pat everything dry with paper towels, even the broccoli. It takes an extra minute but saves you from a soggy mess later.
- Slice the cucumber: Cut it into thin rounds, about 1/4 inch thick. If you’re using a mandoline, set it to that thickness. If using a knife, try to keep them even. You’ll need about 20-25 slices for the web. Set them aside on a plate.
- Slice the bell peppers: Cut the tops off each pepper and remove the seeds and white membranes. Slice each pepper into thin strips, about 1/4 inch wide. You want them long enough to create the web rings. I usually get 8-10 strips from each pepper. Keep the colors separate for now.
- Halve the cherry tomatoes: Cut each tomato in half lengthwise. If they’re really small, you can leave them whole. Set them aside in a bowl.
- Cut the broccoli and cauliflower: Break or cut them into small florets, about bite-sized. If you want to blanch the broccoli, bring a pot of water to a boil, drop the florets in for 1 minute, then transfer to an ice bath. I usually skip this step because I like the crunch, but blanching makes them brighter green and slightly softer.
- Prepare the spider decorations: Take the black olives and slice them in half lengthwise. You’ll use these to create the spider bodies. For the legs, cut the chives or green onion tops into 1-inch pieces. You’ll need 8 pieces per spider—4 on each side.
- Assemble the spider web: Place your round platter on the counter. Put the small dip bowl in the center. This is the anchor for your web design. Start by placing a ring of cucumber slices around the dip bowl, about 2 inches out. Then create a second ring of cucumber slices about 2 inches further out. Continue until you reach the edge of the platter. You should have 3-4 rings total, depending on your platter size.
- Create the web spokes: Take your bell pepper strips and lay them from the dip bowl outward to the edge of the platter, like spokes on a wheel. Space them evenly—I use about 8 spokes total. Alternate colors as you go for visual interest. The strips should cross over the cucumber rings, creating the web pattern.
- Fill in the sections: Between the spokes, fill the spaces with your remaining vegetables. I like to group them by color—broccoli in one section, cauliflower in another, cherry tomatoes in another, carrots in another. This makes the tray look intentional and beautiful. Don’t overcrowd the sections; leave a little space so people can grab the vegetables easily.
- Add the spiders: Place 3-4 olive halves around the web, positioning them so they look like spiders crawling on the web. Use the chive pieces to create legs—4 on each side of the olive. Press them gently into the vegetables so they stay put. This is the part that kids absolutely love.
- Fill the dip bowl: Take the ranch dip out of the refrigerator and give it a stir. Spoon it into the center bowl. You can garnish with a small sprinkle of fresh dill or a few chive pieces on top. Serve immediately or refrigerate until ready.
Sensory Cues: When the dip is ready, it should be thick enough to coat the back of a spoon but still creamy. The vegetables should look bright and crisp, not wilted. The finished tray should look like a spider web—the bell pepper strips creating the lines, the cucumber rings forming the circles, and the vegetables filling in the gaps like colorful patches.
Personal Tip: I learned the hard way that you should arrange the vegetables before adding the dip bowl. I once tried to build the web around the dip and ended up knocking it over. Dip everywhere. So put the bowl in first, then build the web around it. Trust me on this one.
Cooking Tips & Techniques
After making this tray more times than I care to admit, I’ve picked up a few tricks that make the process smoother and the results better. Here’s what I wish someone had told me:
The Dip Consistency Trick: If your ranch dip is too thick, add a tablespoon of milk or water and stir. If it’s too thin, add more Greek yogurt. The perfect consistency is like thick pancake batter—it should hold its shape in the bowl but still be dippable. I once made it too thin and it ran all over the tray. Not a good look.
Vegetable Prep Order: Always prep the dip first. While it’s chilling in the fridge, you can take your time with the vegetables. This also means the dip flavors have time to develop. I’ve made the mistake of prepping everything else first, then rushing the dip. The flavors never come together as well.
The Knife Angle: When slicing bell peppers for the web spokes, cut them at a slight angle rather than straight across. This gives you longer strips and they lay flatter on the tray. I figured this out after struggling with short, curly strips that wouldn’t stay in place.
Common Mistake to Avoid: Don’t put the dip bowl in the center and then try to arrange vegetables around it. You’ll end up knocking it over or getting dip on the vegetables. Place the bowl first, then build the web outward. Also, don’t use too many wet vegetables—pat everything dry or the tray gets watery and the design falls apart.
Timing Strategy: You can prep all the vegetables up to 24 hours in advance. Store them in separate bags or containers in the refrigerator. Assemble the tray no more than 2 hours before serving. The vegetables stay crisp, and the dip doesn’t get watery. I usually do the chopping the night before a party, then assemble in the morning. It makes Halloween day so much less stressful.
My Biggest Failure: The first time I made this, I used too many vegetables and the web design was completely hidden. It looked like a pile of vegetables with a random bowl of dip in the middle. Learn from my mistake—less is more. You want to see the web pattern clearly. Leave space between the vegetables so the design shows through.
Variations & Adaptations
One of the best things about this recipe is how flexible it is. I’ve tried several variations, and they all turned out great. Here are some of my favorites:
Dairy-Free Version
Swap the Greek yogurt with a plain dairy-free yogurt (I like Kite Hill or Silk) and use dairy-free sour cream. Most ranch seasoning mixes contain buttermilk powder, so either make your own blend or look for a dairy-free ranch mix. The texture will be slightly thinner, but the flavor is still fantastic. I made this version for a friend who’s lactose intolerant, and she said it was the best ranch she’d had in years.
Seasonal Vegetable Swap
In the summer, I use fresh cherry tomatoes from the garden, yellow squash slices, and zucchini rounds. In the fall, I add roasted pumpkin seeds and sliced radishes for extra crunch. Winter calls for blanched green beans and roasted beet slices. The spider web design works with any colorful vegetables you have on hand. Just make sure they’re firm enough to hold their shape.
Spicy Ranch Version
Add 1/2 teaspoon of cayenne pepper or a minced jalapeño to the ranch dip for a spicy kick. I tried this for a Halloween party with my spice-loving friends, and it was a huge hit. You can also add a dash of hot sauce—I use Cholula because it adds flavor without overwhelming heat. Just be careful not to add too much; you can always add more heat but you can’t take it away.
Protein-Packed Version
Add hard-boiled egg slices, grilled chicken strips, or cheese cubes to the vegetable sections. This turns the snack tray into a more substantial meal. I’ve done this for Halloween movie nights where we wanted something more filling. The eggs look especially good with the spider web theme—they’re white and round, like little ghost eggs.
Kid-Friendly Adaptations
For picky eaters, stick to familiar vegetables like carrots, cucumbers, and bell peppers. Let them help arrange the spiders on the web—they love that part. I’ve found that kids are more likely to eat vegetables when they’ve helped make the tray. My niece insisted on arranging the olives herself, and she ate three servings of broccoli that night. Coincidence? I don’t think so.
Serving & Storage Suggestions
This tray is best served cold or at room temperature. I recommend taking it out of the refrigerator about 15 minutes before serving so the dip softens slightly and the flavors come through. The vegetables should still be crisp and cold, but the dip shouldn’t be ice-cold.
Presentation Tips: Place the tray in the center of your Halloween spread. It makes a great centerpiece because it’s so colorful and festive. I like to surround it with small bowls of other snacks—popcorn, pretzels, maybe some candy corn for the traditionalists. The contrast between the healthy veggie tray and the indulgent treats makes both more appealing.
Complementary Dishes: This tray pairs beautifully with other Halloween snacks. I often serve it alongside a warm spinach and artichoke dip with tortilla chips, or a bowl of chili for a heartier option. For drinks, apple cider or a crisp white wine works well. The ranch dip is versatile enough to go with almost anything.
Storage Instructions: If you have leftovers (which is rare in my house), separate the vegetables from the dip. Store them in separate airtight containers in the refrigerator. The vegetables will keep for 2-3 days, though they’ll lose some crispness. The dip keeps for up to 5 days. Do not freeze the dip—the texture will be weird when it thaws.
Reheating Tips: This is a cold dish, so there’s no reheating needed. But if you’ve stored the vegetables and they’ve gone a little soft, you can revive them by soaking them in ice water for 10 minutes. Pat them dry and they’ll be almost as crisp as fresh. I do this all the time with leftover cucumber slices.
Flavor Development: The dip actually gets better after a day in the refrigerator. The herbs and seasonings meld together, and the flavor becomes more complex. I sometimes make the dip two days ahead of time just for this reason. The vegetables, however, are best fresh. So prep the dip early, but assemble the tray close to serving time.
Nutritional Information & Benefits
This veggie tray is packed with nutrients while still feeling like a treat. Here’s what you’re getting with each serving (based on 8 servings, assuming about 1 cup of vegetables and 2 tablespoons of dip per serving):
| Nutrient | Amount Per Serving |
|---|---|
| Calories | 145 |
| Total Fat | 8g |
| Saturated Fat | 3g |
| Cholesterol | 15mg |
| Sodium | 320mg |
| Total Carbohydrates | 14g |
| Dietary Fiber | 4g |
| Sugars | 6g |
| Protein | 6g |
| Vitamin A | 120% DV |
| Vitamin C | 150% DV |
| Calcium | 8% DV |
| Iron | 6% DV |
Health Benefits: Bell peppers are loaded with vitamin C—one serving gives you more than your daily needs. Broccoli and cauliflower are cruciferous vegetables that support liver health and provide fiber. The Greek yogurt in the dip adds protein and probiotics for gut health. Even the ranch dip has benefits when you make it with yogurt instead of all sour cream. This is one Halloween treat you can feel good about eating.
Dietary Considerations: This recipe is naturally gluten-free if you use gluten-free ranch seasoning. It’s also vegetarian and can be made dairy-free with simple substitutions. It’s low in added sugars and high in fiber, making it a great option for anyone watching their blood sugar. The only potential allergen is dairy, so be mindful of that for guests with allergies.
Personal Wellness Perspective: I love that this recipe lets me enjoy Halloween parties without feeling like I’ve derailed my healthy eating. I can snack on this all night and still have room for a piece of candy or two. It’s about balance, you know? Having a veggie tray like this means I’m nourishing my body while still participating in the fun. That’s the kind of eating I can get behind.
Conclusion
This Wholesome Halloween Veggie Spider Web Tray with Ranch Dip has become a non-negotiable part of my October celebrations. It’s the recipe that proves healthy eating doesn’t have to be boring, and Halloween doesn’t have to be all sugar and artificial colors. The spider web design is genuinely fun to create, the homemade ranch dip is leagues better than anything from a bottle, and the whole thing comes together in under 30 minutes. Plus, it’s one of those dishes that makes people smile—kids love the spiders, adults appreciate the fresh vegetables, and everyone goes back for more dip.
I want you to make this your own. Use your favorite vegetables, adjust the dip to your taste, and don’t stress about making it perfect. The first time I made this, my web looked more like a tangled fishing net, and it was still delicious. The beauty of this recipe is that it’s forgiving. So go ahead, give it a try for your next Halloween gathering. And when you do, come back and tell me how it went. I’d love to hear about your spider web creations, your favorite vegetable combinations, and whether the kids in your life loved it as much as mine do. Leave a comment below or tag me in your photos—I’m always looking for new inspiration!
Frequently Asked Questions
Can I make this veggie spider web tray ahead of time?
Yes, but with some planning. You can chop all the vegetables and make the dip up to 24 hours in advance. Store them separately in airtight containers in the refrigerator. Assemble the tray no more than 2 hours before serving to keep the vegetables crisp and the design looking fresh. I usually prep everything the night before and assemble it in the morning for an afternoon party.
What if I don’t have a round platter?
No problem! You can use a large rectangular platter or even a clean baking sheet. The web design will be oval instead of round, but it still looks great. You can also use a large dinner plate if you’re serving a smaller group. The key is having a flat surface where you can arrange the vegetables in a web pattern.
How do I keep the vegetables from sliding around?
Make sure all your vegetables are thoroughly dried after washing. Moisture makes them slippery. You can also place a thin layer of lettuce leaves on the platter first—the vegetables grip onto the leaves and stay in place. I’ve used romaine lettuce leaves for this, and it works perfectly. Plus, it adds more green to the presentation.
Can I use store-bought ranch dip instead of homemade?
Absolutely, but I recommend adding some fresh herbs to it. Store-bought ranch can be a little flat, so stirring in some fresh dill, parsley, or chives makes a big difference. You can also add a squeeze of lemon juice to brighten it up. If you’re short on time, go for it—nobody will judge you. I’ve done it myself when I was in a rush.
What other vegetables work well in this tray?
So many options! Sugar snap peas, jicama sticks, radish slices, celery sticks, and bell peppers in any color all work great. For a Halloween theme, try adding orange cauliflower or purple carrots if you can find them. The more colors, the better the spider web looks. Just make sure whatever you choose is firm enough to hold its shape and not too watery.
Pin This Recipe!
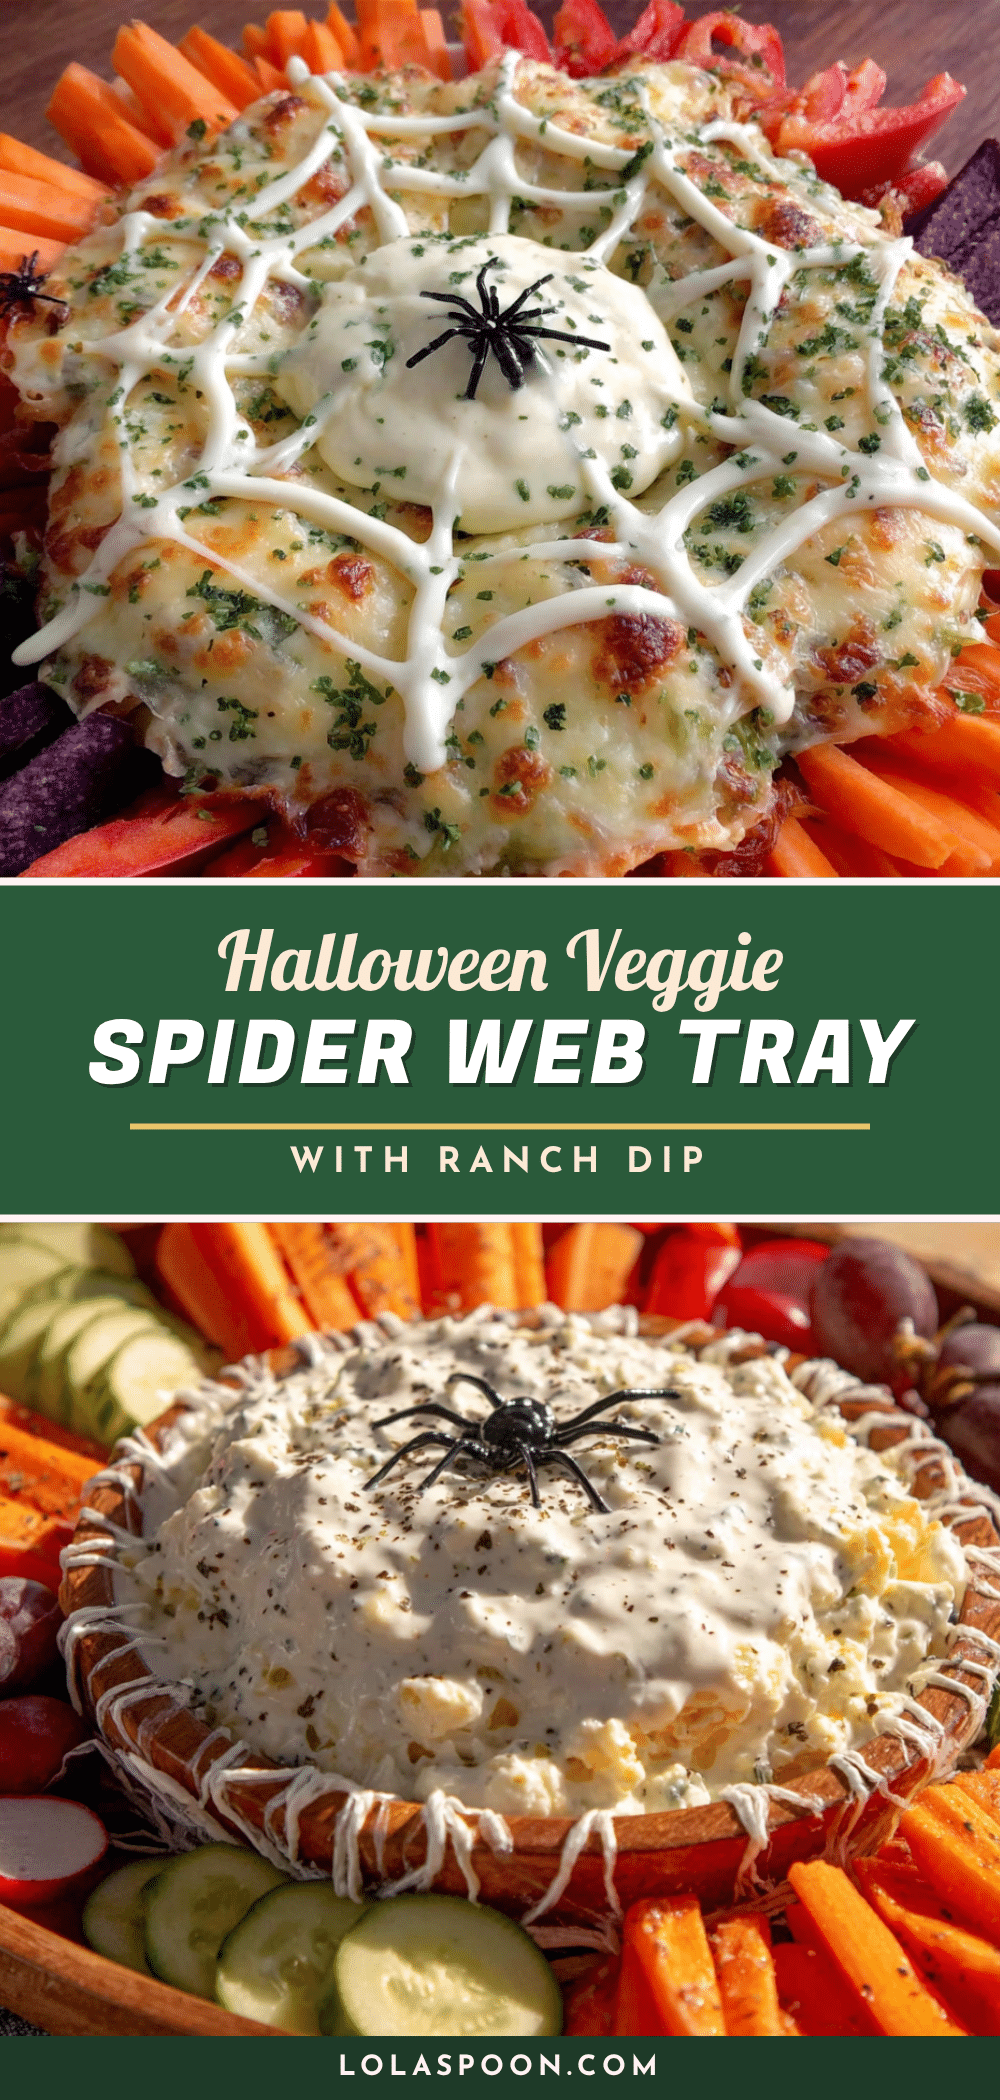
Wholesome Halloween Veggie Spider Web Tray with Ranch
A festive and healthy Halloween appetizer featuring a colorful vegetable spider web design with a creamy homemade ranch dip. Perfect for parties, this no-cook recipe is quick, easy, and a crowd-pleaser for kids and adults alike.
- Prep Time: 20 minutes
- Cook Time: 0 minutes
- Total Time: 20 minutes
- Yield: 8 servings 1x
- Category: Appetizer
- Cuisine: American
Ingredients
- 1 large round serving platter or pizza pan (at least 12 inches wide)
- 1 cup cherry tomatoes, halved
- 1 large cucumber, sliced into thin rounds
- 1 red bell pepper, sliced into thin strips
- 1 yellow bell pepper, sliced into thin strips
- 1 orange bell pepper, sliced into thin strips
- 2 cups broccoli florets
- 1 cup cauliflower florets
- 1 cup baby carrots
- 1/2 cup black olives, sliced
- 1/4 cup fresh chives or green onion tops
- 1 small sugar pumpkin or gourd for decoration (optional)
- 1/2 cup plain Greek yogurt
- 1/2 cup sour cream
- 1 packet ranch seasoning mix (or 2 tablespoons homemade blend)
- 1 tablespoon fresh lemon juice
- 1/2 teaspoon garlic powder (optional)
- 1/4 teaspoon black pepper
- 2 tablespoons fresh dill, chopped (or 1 teaspoon dried dill)
- 1 tablespoon fresh parsley, chopped (optional)
Instructions
- Make the ranch dip first: In a small mixing bowl, combine Greek yogurt, sour cream, ranch seasoning mix, lemon juice, garlic powder, black pepper, fresh dill, and parsley. Whisk until smooth. Cover and refrigerate while prepping vegetables.
- Wash and dry all vegetables thoroughly. Pat dry with paper towels.
- Slice cucumber into thin rounds, about 1/4 inch thick. Set aside.
- Slice bell peppers into thin strips, about 1/4 inch wide. Keep colors separate.
- Halve cherry tomatoes lengthwise. Set aside.
- Cut broccoli and cauliflower into small florets.
- Slice black olives in half lengthwise for spider bodies. Cut chives into 1-inch pieces for spider legs.
- Place the round platter on the counter. Put the small dip bowl in the center.
- Arrange cucumber slices in concentric rings around the dip bowl, spacing them about 2 inches apart. Create 3-4 rings total.
- Lay bell pepper strips from the dip bowl outward to the edge of the platter like spokes on a wheel, spacing evenly (about 8 spokes). Alternate colors.
- Fill the sections between spokes with remaining vegetables, grouping by color. Leave space for the web pattern to show.
- Place 3-4 olive halves around the web to look like spiders. Add chive pieces for legs (4 on each side).
- Fill the dip bowl with the ranch dip. Garnish with fresh dill or chives if desired. Serve immediately or refrigerate until ready.
Notes
For best results, prep the dip first and let it chill while chopping vegetables. Assemble the tray no more than 2 hours before serving. Pat vegetables dry to prevent sliding. Use a round platter for the best web design. The dip can be made up to 2 days ahead.
Nutrition
- Serving Size: 1 cup vegetables wit
- Calories: 145
- Sugar: 6
- Sodium: 320
- Fat: 8
- Saturated Fat: 3
- Carbohydrates: 14
- Fiber: 4
- Protein: 6
Keywords: Halloween, veggie tray, spider web, ranch dip, healthy appetizer, party snack, vegetable platter