I was standing in line at the hardware store—of all places—holding a new faucet I wasn’t entirely sure how to install, when the woman behind me started talking about cookies. Not the kind you buy, not the kind that take hours, but these little clouds of meringue she called “forgotten cookies.” She was probably in her seventies, had flour dusted on her sweater (which I only noticed later), and she told me the whole story while we waited for the register guy to find a price check. “You put them in the oven,” she said, “turn it off, and then you just… forget about them. Go to bed. They’re ready in the morning.” I almost laughed. It sounded like a prank. But she was dead serious, and something about the way she said it—like this was just normal kitchen wisdom everyone should know—made me grab a box of chocolate chips on my way home. Honestly, I’m still not sure I installed that faucet right, but those cookies? They’ve been a staple in my kitchen ever since.
Let me tell you, the first time I tried them, I was skeptical. I mean, you’re telling me I just whip some egg whites, fold in sugar and chocolate, plop them on a tray, and walk away? No baking? No watching? It felt wrong. But I did it anyway, and when I opened the oven the next morning, there they were—perfect little meringues, crisp on the outside, chewy in the middle, with melted chocolate chips hiding inside. It felt like magic. And maybe you’ve been there, standing in front of your oven at 10 p.m. wondering if you really have the energy to bake something from scratch. These cookies were made for that exact moment. They’re the recipe you keep in your back pocket for when you want something sweet but don’t want to work for it.
Why You’ll Love This Recipe
These forgotten cookies aren’t just easy—they’re practically foolproof. I’ve tested them more times than I can count, tweaking temperatures and timing, and every single batch has turned out. That’s the kind of reliability you want on a busy weeknight when you’re already tired and just need something to go right.
- Quick & Easy: Prep takes about 10 minutes. That’s it. The oven does the rest while you sleep or relax.
- Simple Ingredients: You only need three things: egg whites, sugar, and chocolate chips. No butter, no flour, no fancy extracts.
- Perfect for Late-Night Cravings: When you want cookies but don’t want to wait, this is your answer. Mix, scoop, forget.
- Crowd-Pleaser: Kids love them, adults love them, and everyone is amazed when you explain how they’re made.
- Unbelievably Delicious: The texture is like a cross between a meringue and a marshmallow, with pockets of melted chocolate in every bite.
What makes these different from regular meringue cookies? It’s the “forgotten” method. By letting them sit in a cooling oven overnight, they dry out slowly without cracking or browning. You get a perfectly crisp shell and a soft, almost gooey center. It’s not just another cookie recipe—it’s a technique that works every single time.
These are the kind of cookies that make you close your eyes after the first bite. They’re light, airy, and just sweet enough. And honestly? They make you feel like a kitchen genius with almost zero effort.
What Ingredients You Will Need
This recipe uses three simple ingredients to create something truly special. No complicated shopping lists, no hard-to-find items—just pantry staples that come together beautifully.
- 3 large egg whites, room temperature (separate them carefully—no yolk allowed, or your meringue won’t whip up properly)
- ¾ cup (150g) granulated sugar (regular white sugar works best; avoid superfine unless you have it on hand)
- 1 cup (175g) semi-sweet chocolate chips (I prefer Ghirardelli or Toll House for reliable melting; mini chips distribute more evenly)
Optional add-ins (not required, but fun):
- ½ teaspoon vanilla extract (adds warmth and depth)
- ¼ teaspoon cream of tartar (helps stabilize the egg whites if you’re nervous about whipping)
- Pinch of salt (balances sweetness)
A few notes on ingredient selection: Room-temperature egg whites whip up higher and more stable than cold ones. If you forget to take them out of the fridge, place the eggs in a bowl of warm water for 5 minutes. For the sugar, granulated is your best bet—it dissolves easily into the egg whites and creates that signature crisp shell. I’ve tried using coconut sugar, and while it works, the cookies come out darker and slightly less crisp.
If you’re dairy-free, make sure your chocolate chips are labeled dairy-free. Many dark chocolate brands are naturally dairy-free, but it’s worth checking the label. For a lower-sugar option, you can use sugar-free chocolate chips, though the texture will be slightly different.
Equipment Needed
You don’t need much for these cookies, which is part of their charm. Here’s what you’ll need:
- Electric mixer (stand mixer or hand mixer—either works; I’ve used both and prefer my KitchenAid stand mixer for stability, but a hand mixer is totally fine)
- Large mixing bowl (glass or metal—avoid plastic, as it can hold onto grease that prevents egg whites from whipping)
- Baking sheet (rimmed or rimless; line it with parchment paper for easiest cleanup)
- Parchment paper (non-stick foil also works, but parchment is best)
- Rubber spatula (for folding in the chocolate chips)
- Cookie scoop or two spoons (for portioning the meringue)
- Cooling rack (optional, but nice for cooling)
If you don’t have an electric mixer, you can whip the egg whites by hand with a whisk—but be prepared for a serious arm workout. It’s doable, but it’ll take 10-15 minutes of steady whisking. I’ve done it once, and honestly, the electric mixer is worth the counter space.
For the baking sheet, any standard half-sheet pan works. I use a Nordic Ware aluminum sheet because it heats evenly, but a dark non-stick pan works too—just keep an eye on the cookies if your oven runs hot. And if you don’t have parchment paper, a silicone baking mat is a great reusable alternative.
Preparation Method
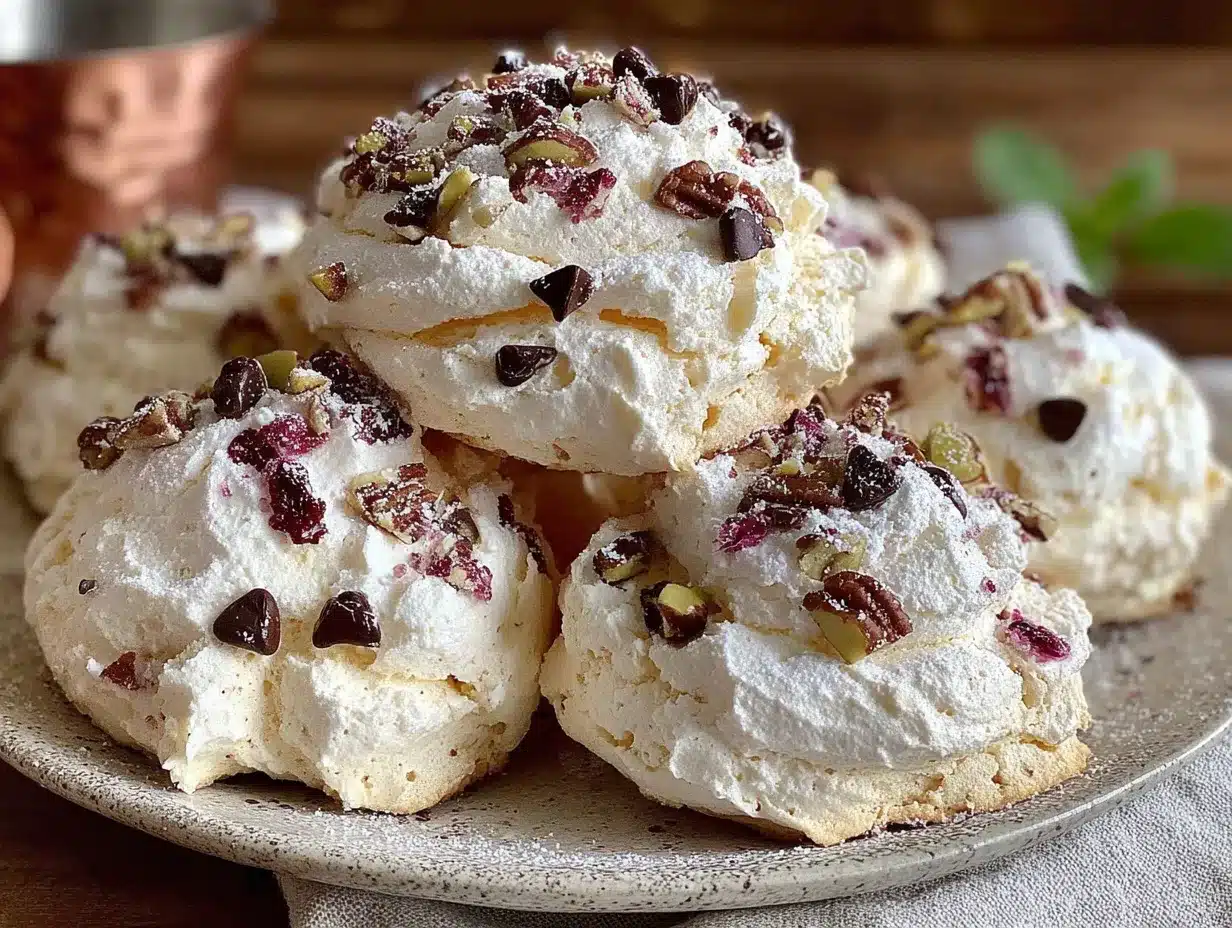
Here’s how to make these forgotten cookies step by step. It’s easier than you think.
- Preheat your oven to 350°F (175°C). Wait—I know that sounds hot for meringues. Trust me on this. The heat is just to get things started; you’ll turn the oven off in a minute.
- Line a baking sheet with parchment paper. Set it aside for now. You don’t need to grease it—the parchment does all the work.
- Separate your eggs. Crack each egg carefully, letting the white fall into a small bowl and the yolk into another container. If any yolk gets into the whites, start over—fat from the yolk will ruin your meringue. I learned this the hard way after ruining three batches in a row.
- Pour the egg whites into your clean, dry mixing bowl. Make sure the bowl is completely grease-free. A drop of lemon juice on a paper towel works great for wiping it down if you’re unsure.
- Beat the egg whites on medium speed until they become frothy and start to hold soft peaks. This takes about 2-3 minutes with a stand mixer. The whites should look like a cloud and flop over slightly when you lift the beater.
- Gradually add the sugar, about 1 tablespoon at a time, with the mixer running on medium-high. Keep beating until the mixture is thick, glossy, and holds stiff peaks. This means when you lift the beater, the meringue stands straight up without drooping. Rub a little between your fingers—if it feels gritty, keep beating. It should feel smooth. Total whipping time is about 5-7 minutes.
- Fold in the chocolate chips using a rubber spatula. Gently scrape from the bottom and fold over the top. Don’t stir—you want to keep as much air in the meringue as possible. Stop when the chips are evenly distributed, even if some streaks of white remain.
- Drop spoonfuls of the meringue onto the prepared baking sheet. Use a cookie scoop or two spoons to make dollops about 2 tablespoons each. Space them about 1 inch apart—they don’t spread much. I usually get about 18-20 cookies from one batch.
- Place the baking sheet in the oven. Immediately turn the oven OFF. Close the door. Walk away. Seriously—don’t open the oven again until morning.
- Let the cookies sit in the closed oven for at least 6 hours or overnight. I usually make them right before bed and wake up to fresh cookies. They’re ready when they feel dry on the outside and lift easily off the parchment.
Troubleshooting tip: If your meringue won’t whip up, it might be because of grease or yolk in the bowl. Start fresh with a clean bowl and fresh eggs. If the cookies come out sticky or chewy, they might need more time in the oven—leave them for another hour or two.
Cooking Tips & Techniques
Here’s what I’ve learned from making these cookies more times than I can count. Some of these tips came from failures, so learn from my mistakes.
Room temperature eggs are non-negotiable. Cold egg whites don’t whip as high or as stable. I’ve tried rushing this step, and the meringue always ends up flat. Take the eggs out 30 minutes before you start, or place them in warm water for 5 minutes.
Don’t overmix the sugar. Once the meringue reaches stiff peaks, stop. Overbeaten meringue looks grainy and dry, and it will deflate when you fold in the chocolate. I once got distracted by a phone call and overbeat my meringue—the cookies came out flat and sad.
Humidity is your enemy. Meringues are sensitive to moisture. If it’s a rainy or humid day, your cookies might come out sticky or chewy instead of crisp. On humid days, I leave them in the oven for an extra hour or two to compensate.
Multitasking tip: While your egg whites are whipping, measure out your chocolate chips and line your baking sheet. That way, everything is ready to go the second the meringue is done. Every minute counts when you’re tired.
Consistency is key. Make sure your dollops are roughly the same size so they dry evenly. A cookie scoop is worth the investment—it makes portioning fast and consistent.
Variations & Adaptations
These cookies are incredibly versatile. Here are some ways to change them up:
- Chocolate Mint: Add ½ teaspoon peppermint extract along with the vanilla. Use mini chocolate chips or chopped Andes mints for a cool, refreshing twist. I tried this last Christmas and it was a hit.
- Nutty Delight: Fold in ½ cup chopped pecans or walnuts along with the chocolate chips. Toast the nuts first for extra flavor—just 5 minutes in a 350°F oven does the trick.
- Vegan Version: Use aquafaba (the liquid from a can of chickpeas) instead of egg whites. 3 tablespoons of aquafaba replaces 1 egg white. Whip it the same way—it works surprisingly well, though the texture is slightly less crisp.
- Coconut Dream: Fold in ½ cup shredded unsweetened coconut along with the chocolate chips. The coconut adds chewiness and a tropical flavor. This is my go-to variation in summer.
- Spiced Chocolate: Add ½ teaspoon cinnamon, ¼ teaspoon cayenne pepper, and a pinch of nutmeg to the sugar before whipping. It gives the cookies a warm, Mexican-hot-chocolate vibe.
I’ve also tried making these with white chocolate chips and dried cranberries—they turned out great for holiday cookie exchanges. The key is to keep the add-ins small and dry. Wet ingredients like fresh fruit will ruin the meringue.
Serving & Storage Suggestions
These cookies are best served at room temperature. They’re perfect straight from the oven (well, after they’ve cooled overnight), but they also work great as a make-ahead dessert for parties or potlucks.
Serving ideas:
- Serve alongside a cup of coffee or tea—the sweetness pairs beautifully with a bitter drink.
- Crumble them over vanilla ice cream for an easy sundae topping.
- Package them in a cute tin as a homemade gift. They travel well and stay fresh for days.
Storage:
- Room temperature: Store in an airtight container for up to 1 week. Layer them between sheets of parchment paper to prevent sticking.
- Freezer: These cookies freeze beautifully. Place them in a single layer on a baking sheet, freeze for 1 hour, then transfer to a freezer bag. They’ll keep for up to 3 months. Thaw at room temperature for 10 minutes before serving.
Reheating: You don’t really need to reheat these, but if you want a warm, gooey center, pop them in a 300°F oven for 3-4 minutes. Just watch them closely—they can burn quickly.
One thing I love about these cookies is that the flavors actually develop over time. Day-old cookies are slightly chewier and the chocolate flavor deepens. They’re still delicious on day three or four, though they’ll lose some of their initial crispness.
Nutritional Information & Benefits
These cookies are surprisingly light compared to traditional cookies. Here’s an approximate breakdown per cookie (based on 20 cookies):
- Calories: 65
- Fat: 2.5g
- Carbohydrates: 11g
- Protein: 1g
- Sugar: 9g
These are estimates and will vary based on the exact ingredients you use and the size of your cookies.
Health benefits:
- Egg whites are a great source of lean protein and contain no fat or cholesterol.
- Dark chocolate (if you use dark chocolate chips) is rich in antioxidants and can support heart health in moderation.
- These cookies are naturally gluten-free and nut-free (depending on your add-ins), making them safe for many dietary restrictions.
Dietary considerations:
- Gluten-free: Yes, these cookies contain no flour or gluten-containing ingredients.
- Low-carb: Not really—sugar is the main ingredient. But they’re lower in carbs than most cookies.
- Dairy-free: Use dairy-free chocolate chips.
- Vegan: Use aquafaba instead of egg whites.
I’m not a nutritionist, but I love that these cookies let me enjoy something sweet without feeling heavy or guilty afterward. They’re light, airy, and satisfying in a way that a dense chocolate chip cookie just isn’t.
FAQs
Can I use a sugar substitute?
You can, but the texture will change. Regular sugar dissolves completely into the egg whites, creating that crisp shell. Sugar substitutes like erythritol or stevia don’t dissolve the same way, so your cookies might come out grainy or soft. I’ve tried it with monk fruit sweetener, and while it worked, the texture was more like a marshmallow than a meringue.
Why are they called “forgotten cookies”?
Because you literally forget them in the oven! The technique involves turning off the heat and leaving the cookies inside overnight. You “forget” about them until morning. It’s a brilliant, low-effort way to make meringues without babysitting them.
Can I make these in a humid climate?
Yes, but you might need to adjust. Humidity makes it harder for meringues to dry out. On humid days, leave the cookies in the turned-off oven for an extra 2-3 hours, or even a full 12 hours. You can also add ¼ teaspoon cream of tartar to the egg whites to help stabilize them.
How do I know when they’re done?
They’re done when they feel dry on the outside and lift easily off the parchment paper. The inside should be slightly chewy, not sticky. If they’re still sticky, leave them in the turned-off oven for another hour or two. Don’t rush the process—the slow drying is what gives them that perfect texture.
Can I double the recipe?
Absolutely! Just make sure your mixer bowl is big enough to handle the volume. I’ve doubled this recipe many times for holiday parties. If you’re using a hand mixer, you might need to work in batches. And you’ll need two baking sheets—just place them in the oven at the same time before turning it off.
Conclusion
These forgotten cookies are proof that you don’t need fancy techniques or complicated ingredients to make something truly special. They’re the recipe I turn to when I want dessert without the fuss, when I’m too tired to stand over a stove, or when I just need a little kitchen magic to end my day.
I hope you give them a try—and I hope you forget them in the oven, just like I did that first time. There’s something so satisfying about waking up to a batch of cookies you made the night before, ready and waiting for you. It’s like a gift from your past self to your future self.
If you make these, let me know how they turn out! Leave a comment below or tag me in your photos—I love seeing your creations. And if you have a variation I haven’t tried, share it. I’m always looking for new ways to make these little clouds of joy even better.
Happy baking—or rather, happy forgetting!
Pin This Recipe!

Quick No-Bake Forgotten Cookies: Easy 3-Ingredient Meringues

These forgotten cookies are light, airy meringues with melted chocolate chips inside. Made with just three ingredients and a unique ‘forgotten’ method, they’re perfect for late-night cravings or effortless entertaining.
- Prep Time: 10 minutes
- Cook Time: 0 minutes (oven is turned off)
- Total Time: 6 hours 10 minutes (includes overnight resting)
- Yield: 18-20 cookies 1x
- Category: Dessert
- Cuisine: American
Ingredients
- 3 large egg whites, room temperature
- ¾ cup (150g) granulated sugar
- 1 cup (175g) semi-sweet chocolate chips
- ½ teaspoon vanilla extract (optional)
- ¼ teaspoon cream of tartar (optional)
- Pinch of salt (optional)
Instructions
- Preheat your oven to 350°F (175°C).
- Line a baking sheet with parchment paper.
- Separate your eggs, ensuring no yolk gets into the whites.
- Pour the egg whites into a clean, dry mixing bowl.
- Beat the egg whites on medium speed until frothy and soft peaks form, about 2-3 minutes.
- Gradually add the sugar, 1 tablespoon at a time, beating on medium-high until thick, glossy, and stiff peaks form, about 5-7 minutes.
- Fold in the chocolate chips (and optional vanilla, cream of tartar, or salt) using a rubber spatula.
- Drop spoonfuls of meringue onto the prepared baking sheet, using about 2 tablespoons per cookie, spaced 1 inch apart.
- Place the baking sheet in the oven and immediately turn the oven OFF. Close the door and do not open it.
- Let the cookies sit in the closed oven for at least 6 hours or overnight, until dry on the outside and easily lifted off the parchment.
Notes
Room temperature eggs are essential for proper whipping. Humidity can affect texture; on humid days, leave cookies in the turned-off oven for an extra 2-3 hours. For vegan version, use aquafaba (3 tablespoons per egg white). Store in an airtight container at room temperature for up to 1 week, or freeze for up to 3 months.
Nutrition
- Serving Size: 1 cookie
- Calories: 65
- Sugar: 9
- Sodium: 15
- Fat: 2.5
- Saturated Fat: 1.5
- Carbohydrates: 11
- Fiber: 0.5
- Protein: 1
Keywords: forgotten cookies, meringue cookies, no-bake cookies, 3-ingredient cookies, easy dessert, gluten-free cookies, late-night cookies


