Our neighborhood block party was in six hours and I’d completely forgotten. Everyone else would be bringing elaborate dishes—slow-cooked ribs, homemade pies, some kind of layered dip that looked like art. I had three overripe bananas on the counter, a bag of walnuts I’d bought on sale, and a toddler who was “helping” by pulling everything out of my cupboards. Honestly, panic doesn’t even begin to cover it.
I remember standing there, staring at those sad, spotty bananas, thinking there was no way I could compete. I mean, I’m not a baker. I’m the person who burns toast. But the party was non-negotiable, so I grabbed a bowl, mashed those bananas with a fork—bits of peel might have fallen in, let’s be real—and threw together a one-bowl banana nut bread. No mixer, no fancy steps, just me, a bowl, and a prayer that my toddler wouldn’t dump the flour on the floor (she did, but I scooped most of it back in).
So I walked into that party with my humble loaf, still warm in a tinfoil-covered pan, feeling like I’d brought a PB&J to a steak dinner. But here’s the thing—it disappeared in fifteen minutes. People kept coming back for slices, asking for the recipe. I was honestly confused. It was just banana bread. But my neighbor, who’d made those famous ribs, asked me for the recipe twice. Twice! That’s when I realized this wasn’t just banana bread—it was the banana bread. Maybe you’ve been there, showing up to something feeling totally outmatched, only to find out your simple thing was exactly what everyone needed. That’s this recipe.
Why You’ll Love This Recipe
Let me tell you why this one-bowl banana nut bread has become my secret weapon for family meals, school events, and those days when I need to feel like a hero without actually trying very hard.
- Quick & Easy: From start to oven in under 10 minutes. No mixer, no sifting, no complicated techniques. Just one bowl, a spatula, and you’re done.
- Simple Ingredients: Everything is probably in your kitchen right now. Overripe bananas? Check. Flour, sugar, eggs, butter? Check. Walnuts optional but highly recommended.
- Perfect for Families: This bread is soft, moist, and not too sweet—which means kids devour it and adults don’t feel guilty having seconds.
- Crowd-Pleaser: I’ve brought this to potlucks, bake sales, and playdates. It always gets the same reaction: “Wait, this is homemade?” Yes, and it took me one bowl and zero stress.
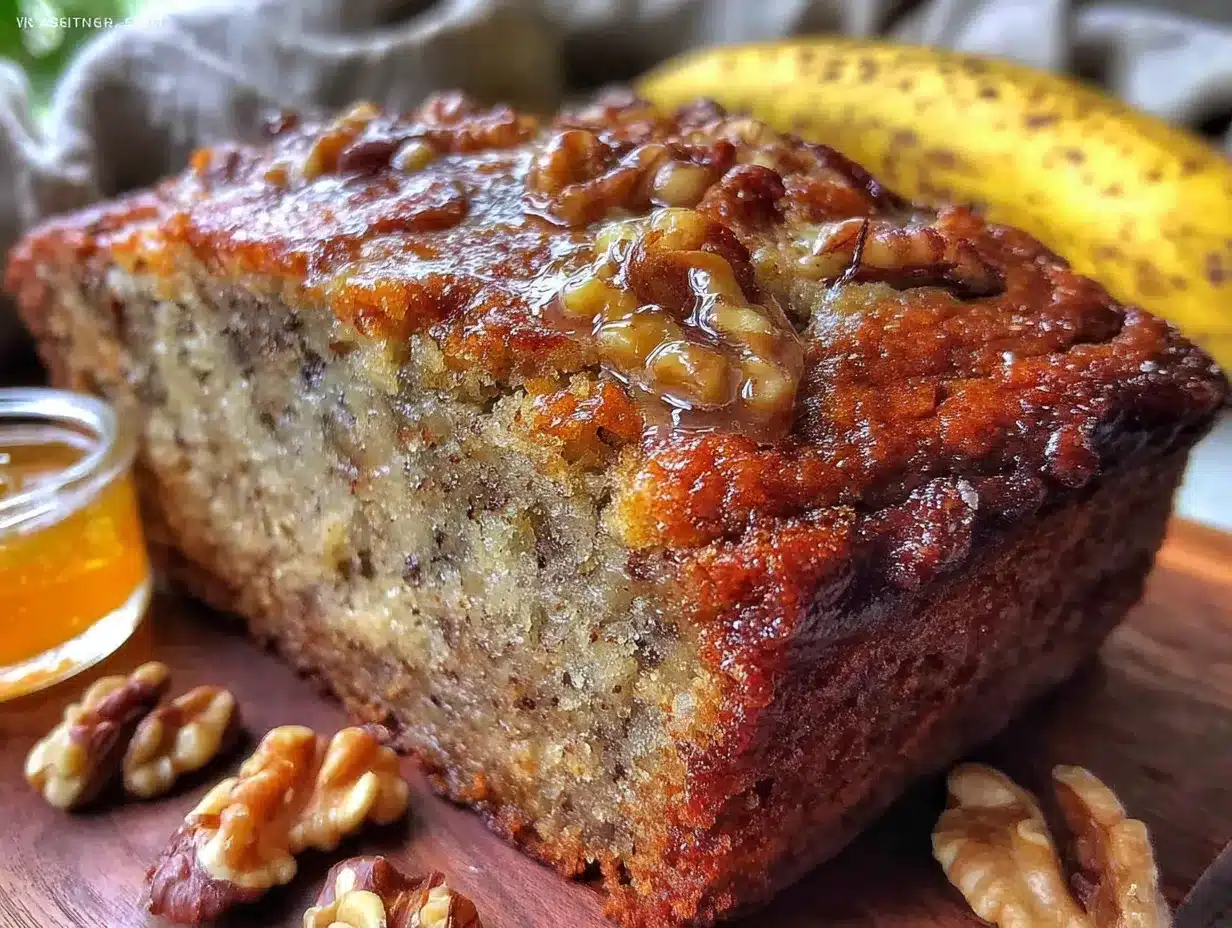
- Unbelievably Delicious: The texture is what gets me every time. It’s dense but tender, with that perfect crust on the outside and a soft, almost creamy crumb inside. The walnuts add this little crunch that makes every bite interesting.
What makes this different from every other banana bread recipe out there? It’s the ratio. I’ve tested this about a dozen times—yes, a dozen—to get the perfect balance of moisture and structure. Too much banana and it’s gummy. Too little and it’s dry. This version uses three medium bananas, which is the sweet spot for a loaf that stays moist for days without falling apart. Plus, the one-bowl method means less cleanup, which honestly might be the best part for busy parents.
What Ingredients You Will Need
This recipe uses simple, wholesome ingredients that come together to create something truly special. No fancy grocery trips needed—just pantry staples and those sad bananas sitting on your counter.
- 3 medium ripe bananas, mashed (the spottier, the better—those brown spots mean maximum sweetness and moisture)
- 1/3 cup unsalted butter, melted (salted butter works too, just reduce the added salt by half)
- 3/4 cup granulated sugar (you can use brown sugar for a deeper flavor, or mix half and half)
- 1 large egg, room temperature (cold eggs can make the butter seize up, so let it sit out for 15 minutes)
- 1 teaspoon vanilla extract (pure vanilla is best, but imitation works in a pinch)
- 1 teaspoon baking soda (make sure it’s not expired—this is what gives the bread its rise)
- Pinch of salt (just a pinch, it balances the sweetness)
- 1 1/2 cups all-purpose flour (spoon and level it—don’t scoop straight from the bag or you’ll get too much)
- 1/2 cup chopped walnuts (optional but highly recommended—toast them first for extra flavor)
I personally prefer using Land O’Lakes unsalted butter because it gives me control over the salt level, but any brand works. For the bananas, look for ones that are almost entirely brown—they should feel soft when you squeeze them gently. If your bananas aren’t ripe enough, you can speed things up by baking them at 300°F for 15 minutes until the skins turn black. It sounds weird, but it works!
For substitutions, you can swap the walnuts with pecans, chocolate chips, or even dried cranberries. If you need a dairy-free version, use melted coconut oil instead of butter. And for a gluten-free option, a good 1:1 gluten-free flour blend works beautifully—just don’t overmix the batter.
Equipment Needed
One of the best things about this recipe is how little equipment you need. Here’s what I use every time:
- One large mixing bowl (any bowl works, but I prefer a wide, shallow one for easy mixing)
- A fork or potato masher for mashing the bananas
- A spatula or wooden spoon for mixing the batter
- A 9×5-inch loaf pan (glass or metal both work—just adjust baking time slightly for glass)
- Measuring cups and spoons (dry and wet sets if you have them)
- Parchment paper (optional but makes cleanup a breeze)
- A cooling rack (or just a clean dish towel on the counter)
If you don’t have a loaf pan, you can use an 8×8 square pan and bake for about 25-30 minutes instead. I’ve also made these as muffins in a pinch—just fill lined muffin tins about 2/3 full and bake for 15-18 minutes. The muffins are actually my toddler’s favorite because they’re the perfect size for little hands.
Preparation Method
Alright, let’s get to the good part. This is so simple you’ll memorize it after one try.
- Preheat your oven to 350°F (175°C). Grease your loaf pan with butter or cooking spray, or line it with parchment paper for easy removal. I always leave a little overhang on the sides so I can lift the bread out cleanly.
- Mash the bananas in your mixing bowl. Use a fork or potato masher until they’re mostly smooth with a few small lumps. Don’t over-mash—a little texture is nice. You should have about 1 cup of mashed banana.
- Add the melted butter and sugar. Stir until combined. The mixture will look a little grainy at this point, but that’s totally normal.
- Crack in the egg and add the vanilla. Mix until everything is smooth and well incorporated. The batter should look glossy and smell amazing already.
- Sprinkle the baking soda and salt over the batter. Stir them in gently, then add the flour. Mix until just combined—a few streaks of flour are okay. Overmixing will make the bread tough, so stop as soon as you don’t see dry flour anymore.
- Fold in the walnuts. If you’re using them, gently fold them in with a spatula. Reserve a handful to sprinkle on top for a pretty presentation.
- Pour the batter into your prepared loaf pan. Spread it evenly with your spatula, then sprinkle the reserved walnuts on top. Give the pan a gentle tap on the counter to release any air bubbles.
- Bake for 55-65 minutes. The bread is done when a toothpick inserted into the center comes out clean or with just a few moist crumbs. If the top is browning too quickly (after about 40 minutes), tent it loosely with aluminum foil.
- Cool in the pan for 10 minutes. Then transfer to a wire rack to cool completely. I know it’s tempting to slice into it immediately, but let it cool for at least 30 minutes—it continues to cook and set as it cools.
One thing I learned the hard way: don’t open the oven door during the first 30 minutes of baking. The bread needs that initial heat to rise properly. I used to peek every 10 minutes and ended up with a flat, dense loaf every time. Patience, my friend.
Cooking Tips & Techniques
After making this banana nut bread more times than I can count, I’ve picked up a few tricks that make a real difference.
The banana ripeness rule: I cannot stress this enough—use bananas that are practically black. The ones you think are too ripe? Those are perfect. Green bananas have too much starch and not enough sugar, which means your bread will be bland and dense. If you only have yellow bananas, leave them in a paper bag overnight with an apple to speed up ripening.
The muffin method for mixing: Here’s a pro tip I learned from a pastry chef friend—mix the wet ingredients together first, then add the dry ingredients. It’s called the muffin method, and it prevents overmixing because you’re not stirring everything together for ages. Just fold until the flour disappears, and you’re golden.
My biggest failure: The first time I made this, I used a hand mixer because I thought it would be faster. Big mistake. The batter became tough and the bread came out like a brick. Hand mixing is actually gentler and gives you better texture. Plus, it’s one less thing to wash.
Timing tip: Make this when you have a free hour and a half. The active time is only 10 minutes, but the baking and cooling require patience. I usually make it during nap time or after dinner when I’m just hanging out anyway.
Consistency check: The batter should be thick but scoopable—like a slightly runny muffin batter. If it’s too thick, add a tablespoon of milk. Too thin? Add an extra tablespoon of flour. But honestly, if you measured correctly, it should be perfect.
Variations & Adaptations
This one-bowl banana nut bread is incredibly forgiving, so feel free to make it your own. Here are some of my favorite variations:
Chocolate Chip Banana Bread: Swap the walnuts for 1/2 cup of semi-sweet chocolate chips. My kids go absolutely nuts for this version—it feels like dessert but has all the same wholesome ingredients. I sometimes sprinkle a few extra chips on top before baking for a bakery-style look.
Vegan Banana Bread: Replace the egg with a flax egg (1 tablespoon ground flaxseed mixed with 3 tablespoons water, let sit for 5 minutes) and use melted coconut oil instead of butter. It comes out slightly denser but still delicious. My vegan friend actually prefers this version!
Spiced Banana Bread: Add 1 teaspoon of cinnamon, 1/2 teaspoon of nutmeg, and 1/4 teaspoon of ground ginger to the flour mixture. It gives the bread a warm, cozy flavor that’s perfect for fall mornings. I made this for Thanksgiving one year and it was gone before the turkey even came out.
Gluten-Free Version: Use a 1:1 gluten-free flour blend (I like Bob’s Red Mill). Add an extra tablespoon of milk because gluten-free flours absorb more liquid. The texture will be slightly more crumbly, but still incredibly moist and satisfying.
Mini Loaves or Muffins: Divide the batter among 3 mini loaf pans or 12 muffin tins. Bake mini loaves for 25-30 minutes and muffins for 15-18 minutes. These make great gifts or lunchbox treats—just wrap them in parchment paper and tie with twine.
Serving & Storage Suggestions
This banana nut bread is delicious in so many ways. Here’s how I like to serve and store it.
Serving temperature: Warm is my absolute favorite—just microwave a slice for 10-15 seconds. The butter melts into the bread and the walnuts get slightly toasty. But honestly, it’s just as good at room temperature, especially the next day when the flavors have had time to meld.
Presentation ideas: For a simple breakfast, serve slices with a pat of butter and a drizzle of honey. For dessert, warm a slice and top it with a scoop of vanilla ice cream and caramel sauce. For brunch, arrange slices on a platter with fresh berries and a dusting of powdered sugar.
What to serve with it: A cup of coffee or tea is the obvious choice, but it’s also amazing with a cold glass of milk (my kids’ favorite) or even a glass of red wine for an adult treat. If you’re serving it as part of a breakfast spread, pair it with scrambled eggs and fresh fruit for a balanced meal.
Storage instructions: Wrap the cooled loaf tightly in plastic wrap or aluminum foil and store at room temperature for up to 4 days. Do not refrigerate—it will dry out the bread. For longer storage, slice the bread, wrap individual slices in plastic wrap, and freeze in a zip-top bag for up to 3 months. Just thaw at room temperature or microwave for 20 seconds.
Flavor development: Here’s a little secret—this bread actually tastes better on day two. The flavors meld together and the texture becomes even more moist and tender. So if you can resist eating it all on day one, you’re in for a real treat on day two.
Reheating methods: For one slice, microwave for 10-15 seconds. For a whole loaf, wrap in foil and warm in a 300°F oven for 10-15 minutes. The oven method gives you that fresh-baked crust again.
Nutritional Information & Benefits
While this is definitely a treat, it has some redeeming qualities that make me feel good about serving it to my family.
| Per Slice (1/12 of loaf) | Amount |
|---|---|
| Calories | 210 |
| Total Fat | 9g |
| Saturated Fat | 4g |
| Cholesterol | 30mg |
| Sodium | 160mg |
| Total Carbohydrates | 30g |
| Dietary Fiber | 2g |
| Sugars | 16g |
| Protein | 4g |
Bananas are packed with potassium, which is great for heart health and muscle function. Walnuts provide omega-3 fatty acids, which support brain health—perfect for growing kids. And since this recipe uses less sugar than many banana breads, it’s a relatively balanced option for a homemade snack. It’s not health food, but it’s real food made with real ingredients, and that counts for something.
Conclusion
This one-bowl banana nut bread has saved me more times than I can count. From last-minute potlucks to rainy afternoon snacks, it’s the recipe I turn to when I need something reliable, delicious, and honestly, a little bit impressive without any effort. It’s the kind of bread that makes you look like you have your life together, even when you’re just trying to use up those bananas before they go bad.
I love that this recipe lets me be creative—sometimes I add chocolate chips, sometimes I swap the walnuts for pecans, sometimes I just leave it plain and simple. It always works. And it always makes my kitchen smell like home.
So go ahead, grab those spotty bananas and give it a try. I promise you’ll be amazed at what one bowl and a little bit of love can do. And when you make it, come back and tell me how it turned out! Did you add anything fun? Did your kids help you mix it? I’d love to hear your stories in the comments below. Happy baking!
Frequently Asked Questions
Can I use frozen bananas for this recipe?
Absolutely! Frozen bananas work great. Just thaw them completely and drain off any excess liquid before mashing. The texture might be slightly softer, but the flavor is just as good.
Why is my banana bread dry?
Dry banana bread usually means you either overmixed the batter or baked it too long. Make sure to mix only until the flour disappears, and start checking for doneness at the 55-minute mark. Also, using bananas that are too green can result in a drier loaf.
Can I make this without walnuts?
Of course! The walnuts are completely optional. You can leave them out entirely, or substitute with chocolate chips, pecans, dried cranberries, or even shredded coconut. The bread will still be delicious.
How do I know when the banana bread is done?
Insert a toothpick or a thin knife into the center of the loaf. If it comes out clean or with just a few moist crumbs, it’s done. If there’s wet batter on the toothpick, bake for another 5 minutes and check again.
Can I double this recipe?
Yes! This recipe doubles beautifully. Just use a larger bowl and bake in two separate loaf pans. You can also freeze one loaf for later—it’s like having a homemade treat waiting for you in the freezer.
Pin This Recipe!
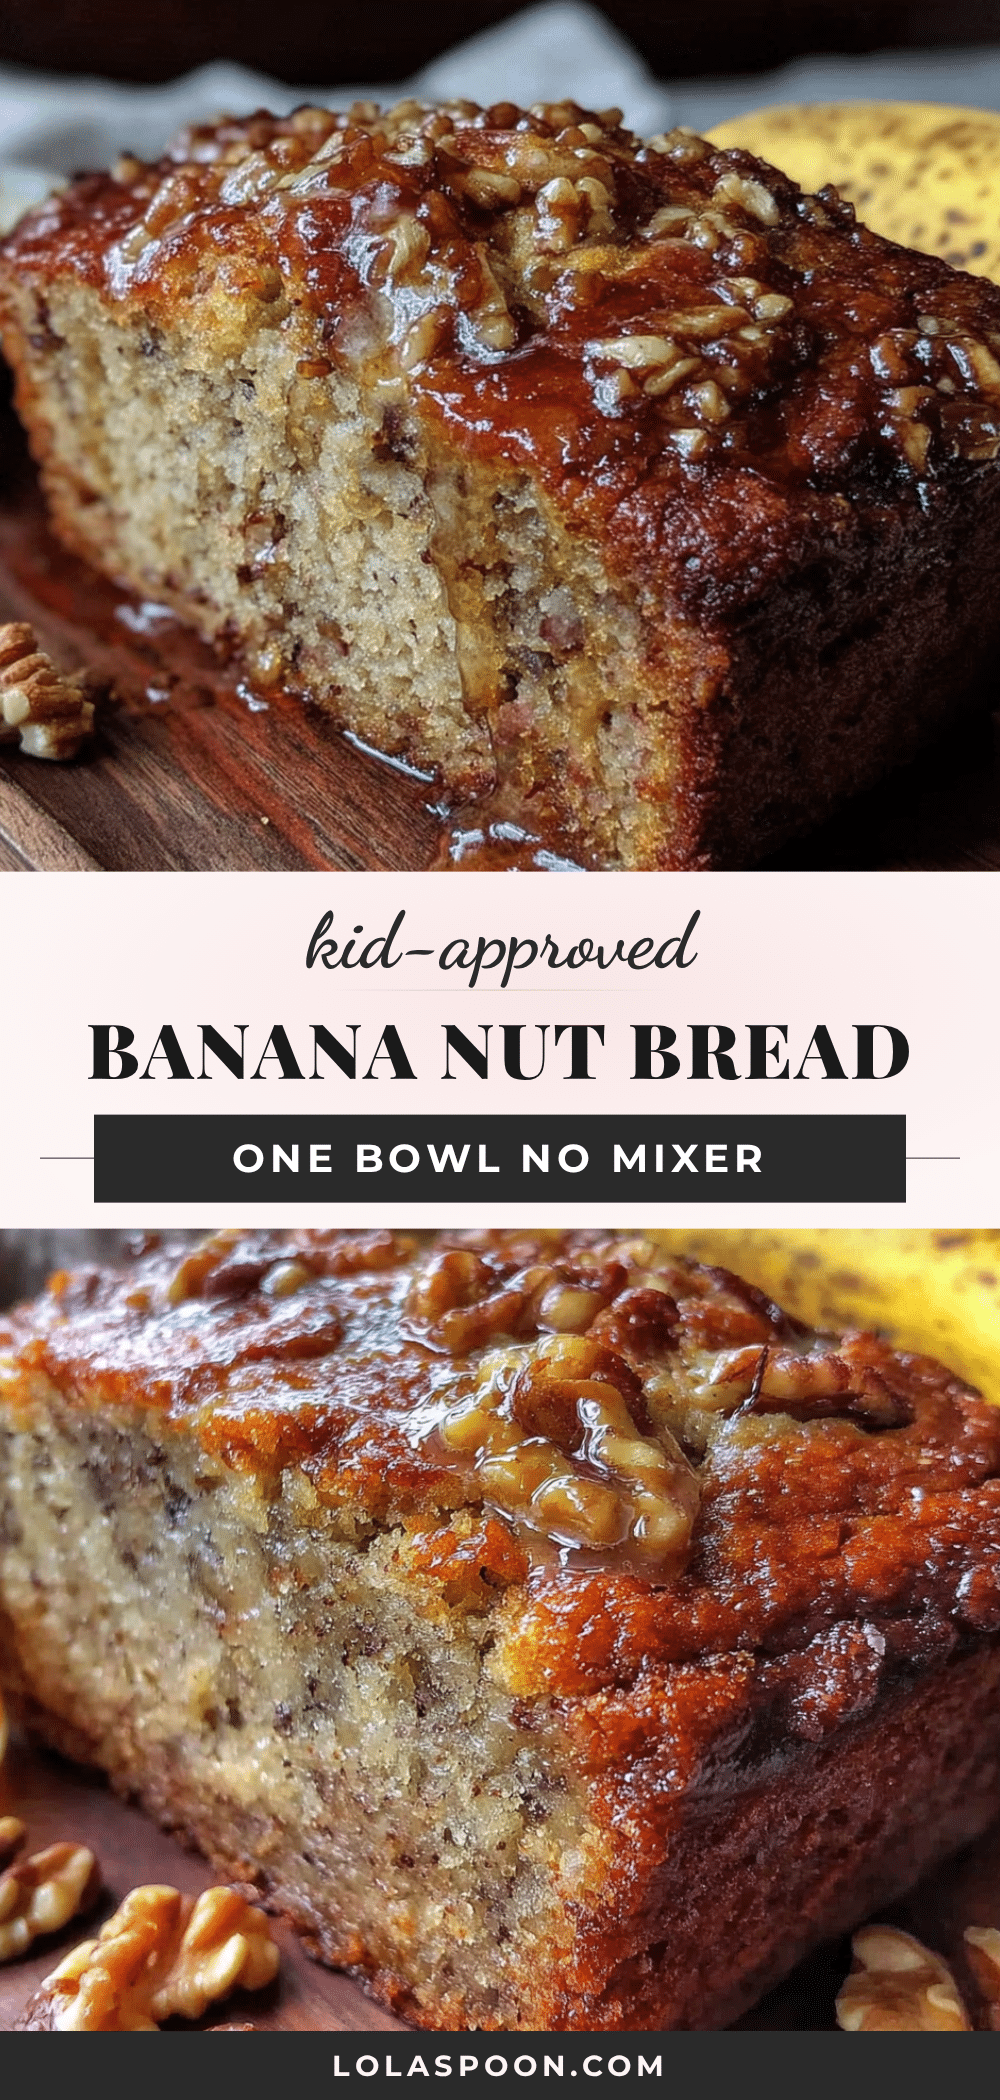
One-Bowl Banana Nut Bread: Easy, Kid-Approved Recipe
This one-bowl banana nut bread is quick, easy, and perfect for using up overripe bananas. With simple ingredients and minimal cleanup, it’s a crowd-pleaser that stays moist for days.
- Prep Time: 10 minutes
- Cook Time: 55-65 minutes
- Total Time: 1 hour 15 minutes
- Yield: 12 servings 1x
- Category: Dessert
- Cuisine: American
Ingredients
- 3 medium ripe bananas, mashed
- 1/3 cup unsalted butter, melted
- 3/4 cup granulated sugar
- 1 large egg, room temperature
- 1 teaspoon vanilla extract
- 1 teaspoon baking soda
- Pinch of salt
- 1 1/2 cups all-purpose flour
- 1/2 cup chopped walnuts (optional)
Instructions
- Preheat your oven to 350°F (175°C). Grease your loaf pan with butter or cooking spray, or line it with parchment paper for easy removal.
- Mash the bananas in your mixing bowl with a fork or potato masher until mostly smooth with a few small lumps.
- Add the melted butter and sugar. Stir until combined.
- Crack in the egg and add the vanilla. Mix until smooth and well incorporated.
- Sprinkle the baking soda and salt over the batter. Stir gently, then add the flour. Mix until just combined—a few streaks of flour are okay.
- Fold in the walnuts if using. Reserve a handful to sprinkle on top.
- Pour the batter into the prepared loaf pan. Spread evenly, sprinkle reserved walnuts on top, and tap the pan gently on the counter.
- Bake for 55-65 minutes, until a toothpick inserted into the center comes out clean or with a few moist crumbs. Tent with foil after 40 minutes if browning too quickly.
- Cool in the pan for 10 minutes, then transfer to a wire rack to cool completely before slicing.
Notes
Use very ripe (almost black) bananas for best sweetness and moisture. Do not overmix the batter to avoid a tough loaf. The bread tastes even better on day two. For a dairy-free version, use melted coconut oil instead of butter. For gluten-free, use a 1:1 gluten-free flour blend and add an extra tablespoon of milk.
Nutrition
- Serving Size: 1 slice (1/12 of loa
- Calories: 210
- Sugar: 16
- Sodium: 160
- Fat: 9
- Saturated Fat: 4
- Carbohydrates: 30
- Fiber: 2
- Protein: 4
Keywords: banana bread, banana nut bread, one-bowl banana bread, easy banana bread, kid-friendly banana bread


