My neighbor, a woman named Gloria whose garden was the envy of our entire block, watched me struggle with a soggy, store-bought pie crust one November afternoon. I was trying to get a head start on Thanksgiving prep, and the dough kept tearing and sticking to my fingers. She didn’t say anything at first, just leaned on the fence separating our yards. Then she walked over, wiped her hands on her apron, and said, “You’re fighting the butter. You have to let it stay cold.”
That was the moment I stopped being afraid of pie crust. Gloria didn’t hand me a recipe card or lecture me. She just showed me how to work the flour and butter together with her fingertips, explaining that the little pea-sized pieces of butter were the secret to those flaky layers. I remember my kitchen smelled like flour and cold air, and I had butter smeared up to my elbows. Honestly, I was a mess. But that pie, the one we baked together that afternoon, had a crust so tender and flaky it practically sang. The filling was just a simple classic pumpkin pie, but the crust? It was a revelation.
This recipe is the direct result of that afternoon over the fence. It’s the classic pumpkin pie you know and love—spiced, creamy, and deeply comforting—but it’s wrapped in a flaky, all-butter crust that makes all the difference. Maybe you’ve been there, staring at a sad, pre-made crust in the grocery aisle, wondering if it’s worth the effort to make your own. Let me tell you, it absolutely is. This is the pie that gets asked for every single year, the one that disappears before the whipped cream even makes it to the table. It’s the taste of a perfect autumn afternoon, and it’s simpler to pull off than you think.
Why You’ll Love This Recipe
This isn’t just another pumpkin pie recipe. After years of testing, I’ve landed on a version that delivers on every single promise. It’s the kind of pie that makes you close your eyes after the first bite. The kind that earns you the title of “best pie maker” in your family.
Here’s what makes it a keeper:
- Perfectly Spiced Filling: It’s not just pumpkin puree and sugar. I use a blend of cinnamon, ginger, nutmeg, and a pinch of cloves for that warm, complex flavor that tastes like fall in a slice.
- Flaky, All-Butter Crust: This is the star. The crust is tender, shatteringly flaky, and has a rich, buttery flavor that no shortening-based crust can match. It’s the foundation that makes the pie unforgettable.
- Simple, Trusted Ingredients: You won’t find any weird thickeners or hard-to-find spices here. Everything is a pantry staple, which means you’re never more than an hour away from a homemade pie.
- Make-Ahead Friendly: The crust can be made and chilled days in advance. The filling can be prepped a day ahead. This pie is designed to reduce your holiday stress, not add to it.
- The Ultimate Crowd-Pleaser: I’ve brought this to Thanksgiving dinners, Friendsgiving potlucks, and casual Sunday suppers. It gets rave reviews every single time. Kids love the creamy filling, and adults fight over the last slice of crust.
This recipe is different because it respects the process without being fussy. It’s comfort food at its finest—a little bit of effort for a whole lot of reward. It’s the pie that makes you feel like a pro, even if it’s your first time making one from scratch.
What Ingredients You Will Need
This recipe relies on simple, high-quality ingredients to create a pie that tastes anything but basic. Each component has a specific job, from building that flaky crust to creating the silky, spiced filling. Here’s everything you’ll need, broken down by component.
For the Flaky All-Butter Crust
- 2 ½ cups (315g) all-purpose flour: I prefer unbleached flour for its slightly higher protein content, which gives the crust structure without making it tough. King Arthur Flour is my go-to brand.
- 1 teaspoon (5g) salt: Fine sea salt works best here. It dissolves evenly into the flour and seasons the crust from the inside out.
- 1 tablespoon (12g) granulated sugar: Just a touch of sugar adds a subtle sweetness and helps the crust brown beautifully in the oven.
- 1 cup (226g) cold unsalted butter, cut into ½-inch cubes: This is non-negotiable. The butter must be ice-cold. I pop my cubed butter in the freezer for 10 minutes before I start. The little pieces of solid butter create steam as they melt in the oven, which is what creates those irresistible flaky layers.
- ½ cup (120ml) ice water, plus more if needed: You’ll use about 6 to 8 tablespoons. The key is to add it slowly and only until the dough just comes together. Too much water makes the crust tough.
For the Classic Pumpkin Filling
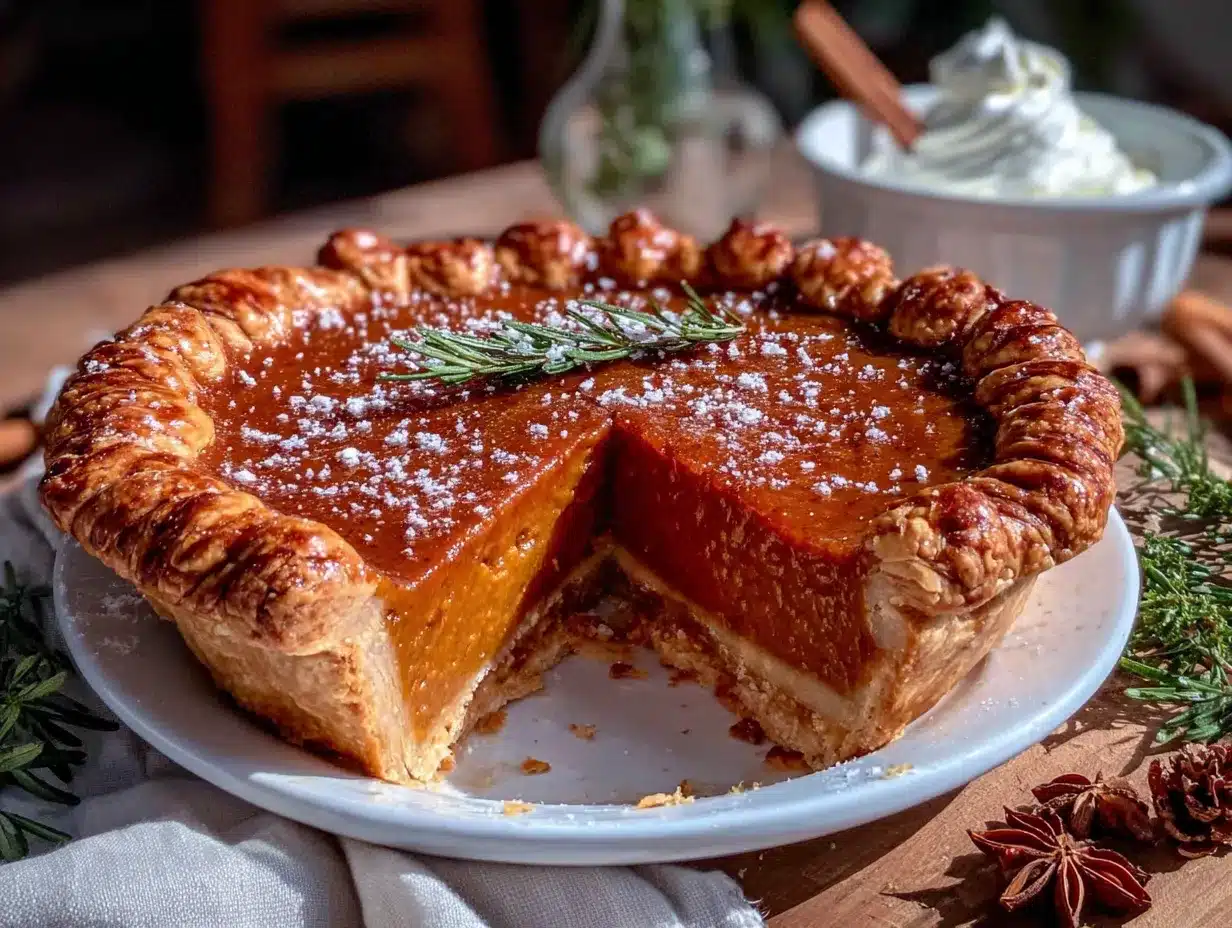
- 1 (15-ounce) can (425g) pumpkin puree: Not pumpkin pie filling. Make sure you grab 100% pure pumpkin puree. Libby’s is my tried-and-true favorite for its consistent texture and deep flavor.
- 1 ½ cups (355ml) heavy cream: This gives the filling its luscious, silky texture. For a slightly lighter option, you can substitute with half-and-half, but the pie won’t be quite as rich.
- ¾ cup (150g) packed light brown sugar: Brown sugar adds a deeper, more caramel-like sweetness than granulated sugar. It also contributes to the pie’s beautiful color.
- 2 large eggs, plus 1 large egg yolk: The eggs provide structure. The extra yolk adds richness and helps create a creamier texture.
- 1 teaspoon (5ml) vanilla extract: Pure vanilla extract rounds out the spices and adds warmth.
- 2 teaspoons (4g) ground cinnamon: The backbone of the pumpkin pie spice blend. Use a fresh jar for the best flavor.
- 1 teaspoon (2g) ground ginger: Adds a gentle warmth and a little bite that cuts through the richness.
- ½ teaspoon (1g) ground nutmeg: Freshly grated nutmeg is a game-changer if you have it. It has a much more aromatic, floral flavor than the pre-ground stuff.
- ¼ teaspoon (0.5g) ground cloves: A little goes a long way. Cloves add that deep, almost peppery warmth that makes the spice blend so complex.
- ½ teaspoon (3g) salt: Salt is crucial in sweet baking. It balances the sugar and intensifies the flavors of the spices and pumpkin.
Equipment Needed
You don’t need a professional bakery setup to make this pie, but having the right tools makes the process much smoother. Here’s what I use and recommend.
- 9-inch standard pie dish: A glass or ceramic pie dish is ideal. Glass allows you to see how the bottom crust is browning, which is a huge help for a first-timer. I use a classic Pyrex dish.
- Food processor or pastry cutter: A food processor makes cutting the butter into the flour incredibly fast and easy. If you don’t have one, a simple pastry cutter or even two forks will work—it just takes a bit more elbow grease.
- Rolling pin: A standard rolling pin is fine. If you don’t have one, a clean wine bottle works in a pinch!
- Large mixing bowls: You’ll need one for the crust and one for the filling.
- Whisk: For combining the filling ingredients smoothly.
- Plastic wrap: Essential for chilling the dough.
- Parchment paper and pie weights (or dried beans): These are for blind-baking the crust. Parchment paper keeps the weights from sticking, and the weights prevent the crust from puffing up as it bakes.
- Cooling rack: A wire rack allows air to circulate around the pie, preventing the bottom crust from getting soggy as it cools.
Preparation Method
Let’s get baking. This process is broken down into simple, manageable steps. Take your time, especially with the crust. It’s worth it.
Make the All-Butter Crust (Can be done 2-3 days in advance)
- Combine dry ingredients: In a food processor, pulse together the flour, salt, and sugar until combined. If doing this by hand, whisk them together in a large bowl.
- Cut in the butter: Scatter the cold butter cubes over the flour mixture. Pulse in the food processor in 1-second bursts, about 10-12 times, until the butter is broken down into pea-sized pieces with some larger flakes remaining. If working by hand, use a pastry cutter to cut the butter into the flour until you reach the same texture. This is crucial—you want visible pieces of butter.
- Add the ice water: Sprinkle 6 tablespoons of the ice water over the flour-butter mixture. Pulse a few more times, or stir with a fork, until the dough looks shaggy and just starts to hold together when you squeeze a bit in your hand. If it’s too dry, add the remaining water, one tablespoon at a time, pulsing after each.
- Form and chill: Turn the dough out onto a lightly floured surface. Gather it into a ball, then flatten it into a 1-inch thick disc. Wrap tightly in plastic wrap and refrigerate for at least 1 hour, or up to 3 days. This rest is essential—it relaxes the gluten and re-chills the butter.
Blind-Bake the Crust
- Preheat and roll: Preheat your oven to 375°F (190°C). On a lightly floured surface, roll the chilled dough disc into a 12-inch circle, about ⅛-inch thick. Rotate the dough a quarter turn after every few rolls to prevent sticking.
- Transfer to pie dish: Gently roll the dough around your rolling pin, then unroll it over your 9-inch pie dish. Gently press the dough into the bottom and up the sides of the dish. Trim the overhang to about ½-inch, then tuck it under and crimp the edges as desired.
- Chill again: Place the crust in the freezer for 15 minutes. This is a pro tip—it firms up the butter again and prevents shrinkage during baking.
- Line and fill: Line the chilled crust with a piece of parchment paper, making sure it covers the edges. Fill it completely with pie weights or dried beans.
- Bake: Bake for 15 minutes. Carefully remove the parchment and weights, then return the crust to the oven for another 8-10 minutes, or until the bottom looks dry and is just starting to turn a light golden color. Set aside to cool slightly while you make the filling.
Make the Pumpkin Filling
- Whisk together: In a large bowl, whisk the pumpkin puree, heavy cream, brown sugar, eggs, egg yolk, and vanilla extract until smooth and fully combined.
- Add the spices: Whisk in the cinnamon, ginger, nutmeg, cloves, and salt until evenly distributed. Give it a taste—you should be able to smell the warm spices. The filling will be thin, but don’t worry, it will set up beautifully as it bakes.
Bake the Pie
- Fill the crust: Pour the pumpkin filling into the warm, blind-baked crust. It will fill it right to the brim.
- Bake: Bake at 375°F (190°C) for 45-55 minutes. The edges of the filling should be set, but the center will still jiggle slightly when you gently shake the pie. A knife inserted near the center should come out mostly clean, with a little bit of moist crumbs.
- Cool completely: Place the pie on a wire rack and let it cool to room temperature. This takes about 2-3 hours. The filling will continue to set as it cools. Do not put it in the fridge while it’s still warm, or it can crack.
Cooking Tips & Techniques
I’ve made this pie more times than I can count, and I’ve learned a few things the hard way. Here are my best tips to ensure your pie is perfect every single time.
- Keep everything cold for the crust: This is the single most important tip. Cold butter is what creates those flaky layers. If your kitchen is warm, chill your flour and bowl as well. If the dough gets sticky at any point, pop it back in the fridge for 15 minutes.
- Don’t overwork the dough: Over-mixing develops gluten, which leads to a tough, chewy crust. Mix just until it comes together. A few dry bits are perfectly fine.
- Blind-baking is non-negotiable: If you skip this step, you’ll end up with a soggy bottom crust. The blind-baking ensures the crust is fully cooked and crisp before the wet filling is added. It’s an extra step, but it’s the secret to a professional-quality pie.
- Use a pie shield for the edges: The crimped edges of the crust brown much faster than the rest of the pie. If they start to look too dark, cover them loosely with a strip of aluminum foil or a silicone pie shield for the last 15-20 minutes of baking.
- Patience is key for cooling: I know it’s tempting to slice into a warm pie, but it will be a runny mess. The filling needs time to fully set. Let it cool completely on the counter for at least 2 hours, then you can transfer it to the fridge to chill for an even cleaner slice.
Variations & Adaptations
This classic recipe is a fantastic base for experimentation. Here are a few of my favorite ways to change it up.
- Spice it up: For a bolder, more complex flavor, add ¼ teaspoon of ground cardamom or allspice to your spice blend. A pinch of black pepper also adds a surprising and delicious warmth.
- Make it dairy-free: You can substitute the butter in the crust with a high-quality vegan butter (like Miyoko’s). For the filling, use full-fat canned coconut milk instead of heavy cream. The texture will be slightly different, but still deliciously creamy.
- Add a twist: Before pouring the filling into the crust, sprinkle the bottom with ½ cup of toasted, chopped pecans or a layer of chocolate chips. The nuts add a wonderful crunch, and the chocolate creates a lovely sweet surprise.
- Try a different crust: If you’re short on time, you can use a high-quality store-bought refrigerated pie crust. Just be sure to blind-bake it according to the package directions. I’ve also made this with a gingersnap cookie crust for a fun, spicy twist.
Serving & Storage Suggestions
This pie is wonderful on its own, but a few thoughtful accompaniments can make it truly spectacular.
- Serving temperature: This pie is best served at room temperature or slightly chilled. A cold slice from the fridge is also delicious, especially on a warm day.
- Presentation: A generous dollop of freshly whipped cream is the classic choice. For a fancier presentation, try a drizzle of salted caramel sauce or a sprinkle of candied ginger and a dusting of cinnamon.
- What to serve with it: It pairs beautifully with a cup of hot coffee, a spiced chai latte, or a glass of dessert wine like a late-harvest Riesling.
- Storage: Leftover pie can be stored in the refrigerator, loosely covered with plastic wrap or in an airtight container, for up to 5 days.
- Freezing: You can freeze the fully baked and cooled pie for up to 3 months. Wrap it tightly in a layer of plastic wrap, then a layer of aluminum foil. To serve, thaw it overnight in the refrigerator and bring it to room temperature before slicing.
Nutritional Information & Benefits
While this is a dessert, it does have some nutritional bright spots. Here’s a general overview per slice (based on 8 servings).
- Estimated calories: Approximately 450-500 calories per slice.
- Key nutrients: Pumpkin is an excellent source of Vitamin A, which is great for eye health and immune function. It also provides fiber and antioxidants.
- Dietary considerations: This recipe is vegetarian. It can be made dairy-free and gluten-free with the substitutions mentioned above.
- Potential allergens: Contains wheat (gluten), dairy, and eggs.
I believe in enjoying treats in moderation. This pie is a special occasion dessert, and the joy it brings to a table full of loved ones is a form of nourishment in itself. Don’t stress over the numbers—just enjoy a slice (or two!).
Conclusion
This classic pumpkin pie with its flaky all-butter crust is more than just a recipe—it’s a tradition waiting to happen. It’s the pie that will earn you a permanent spot on the Thanksgiving dessert roster. It’s the one your family will start requesting in October. And honestly, making it from scratch is one of the most satisfying things you can do in the kitchen. The process is meditative, and the result is pure, edible joy.
Don’t be afraid to make it your own. Add a little extra ginger, try a different crust, or pile it high with whipped cream. The best recipes are the ones that become yours. So grab your ingredients, preheat your oven, and get ready to make the best pumpkin pie of your life. I promise you, it’s worth every single step.
If you make this recipe, I’d love to hear about it! Leave a comment below and tell me how it turned out. Did you add a special twist? Did your family fight over the last slice? Share your story—it makes my day. Happy baking!
Frequently Asked Questions
Can I use a store-bought crust for this recipe?
Absolutely. If you’re short on time, a high-quality refrigerated pie crust will work perfectly. Just be sure to blind-bake it according to the package directions before adding the filling to prevent a soggy bottom.
Why is my pumpkin pie cracking?
Cracks usually happen when the pie is over-baked or cools too quickly. The center should still have a slight jiggle when you take it out of the oven. Also, let it cool gradually on a wire rack at room temperature—don’t put it in the fridge while it’s still warm.
Can I make this pie gluten-free?
Yes! You can substitute the all-purpose flour in the crust with a good 1-to-1 gluten-free baking flour blend. For the filling, just make sure your pumpkin puree and all other ingredients are certified gluten-free. The rest of the recipe remains the same.
How do I know when the pie is fully baked?
The edges of the filling should be set and puffed slightly, while the center will still jiggle a little when you gently shake the pie. A thin knife inserted about 1-inch from the center should come out mostly clean, with just a few moist crumbs attached.
Can I make the filling ahead of time?
Yes, you can prepare the filling up to 2 days in advance. Store it in an airtight container in the refrigerator. When you’re ready to bake, give it a good whisk and pour it into your blind-baked crust. You may need to add 5-10 minutes to the baking time since the filling will be cold.
Pin This Recipe!
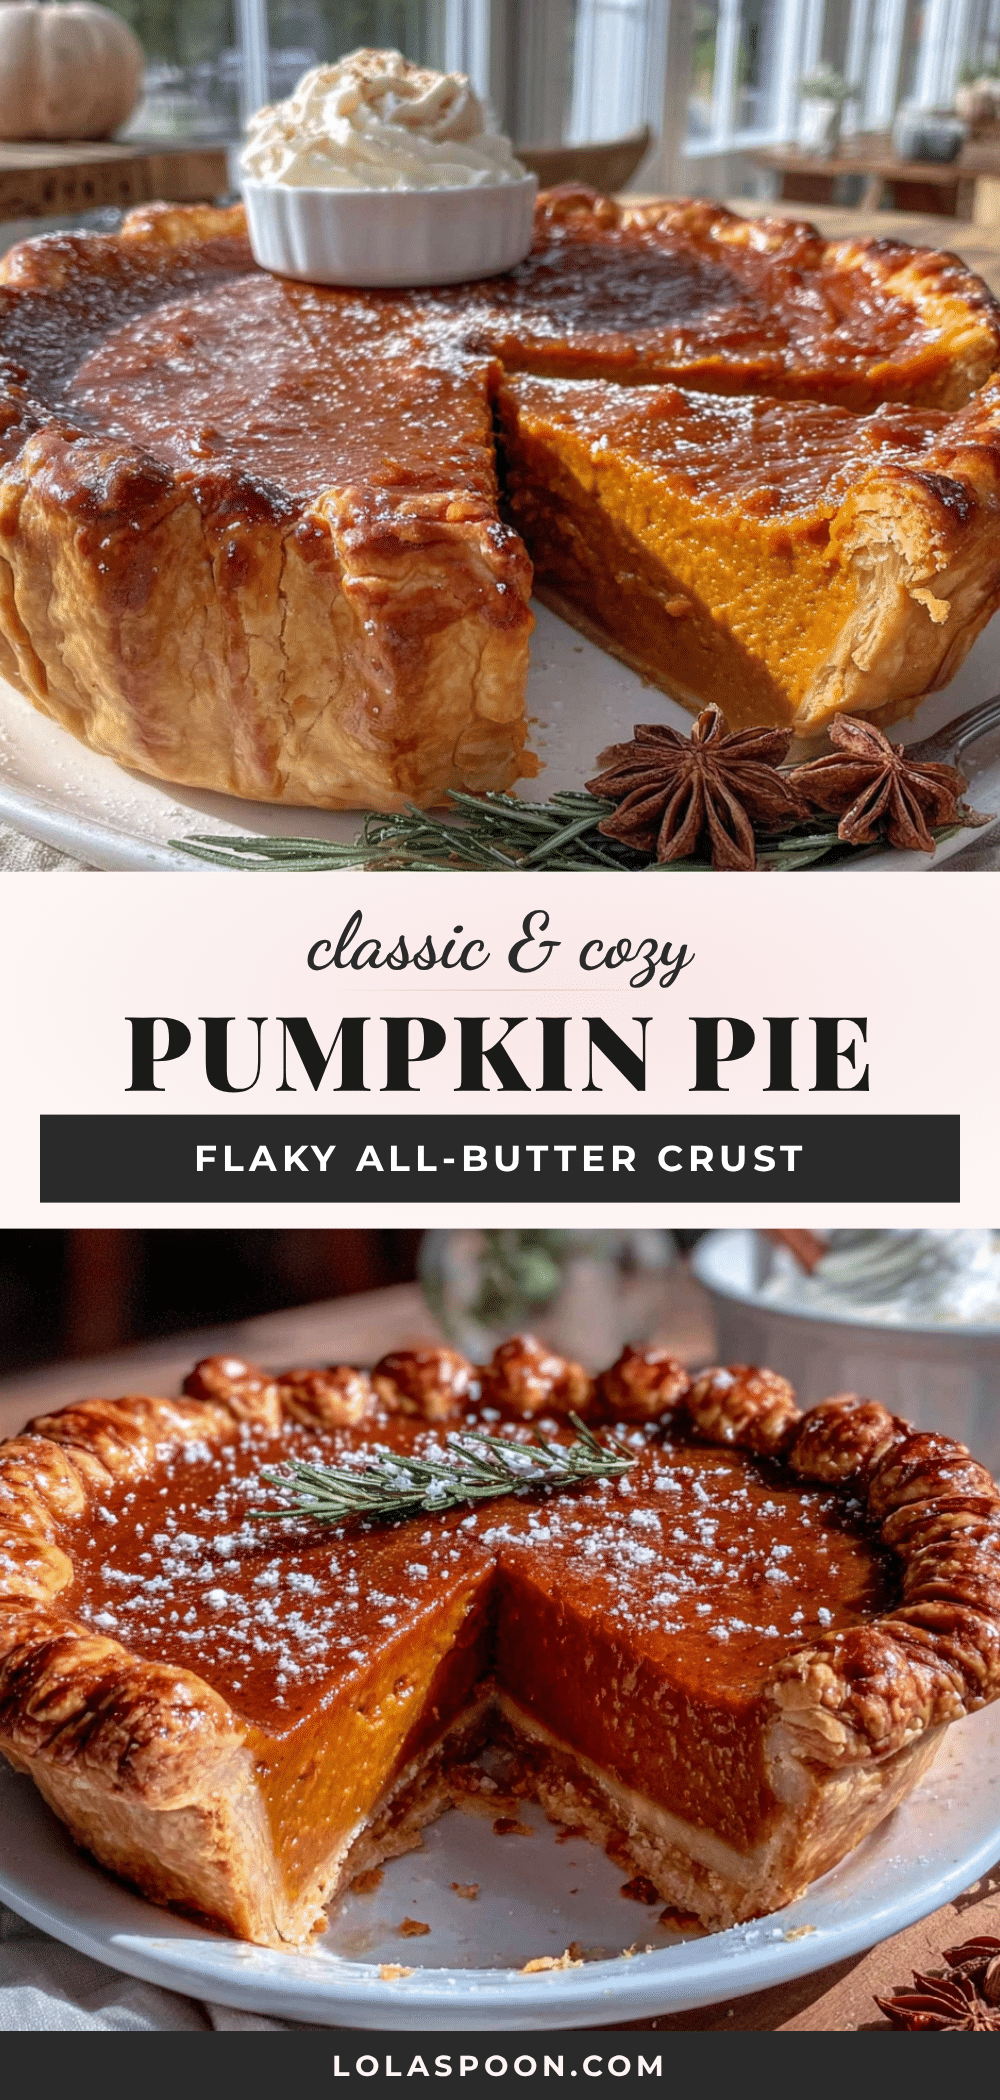
Best Classic Pumpkin Pie with Flaky Butter Crust
This classic pumpkin pie features a perfectly spiced, creamy filling wrapped in a flaky, all-butter crust. It’s the ultimate crowd-pleaser for Thanksgiving and fall gatherings, with a tender, shatteringly flaky crust that makes all the difference.
- Prep Time: 30 minutes
- Cook Time: 1 hour 10 minutes
- Total Time: 4 hours 40 minutes
- Yield: 8 servings 1x
- Category: Dessert
- Cuisine: American
Ingredients
- 2 ½ cups (315g) all-purpose flour
- 1 teaspoon (5g) fine sea salt
- 1 tablespoon (12g) granulated sugar
- 1 cup (226g) cold unsalted butter, cut into ½-inch cubes
- ½ cup (120ml) ice water, plus more if needed
- 1 (15-ounce) can (425g) pumpkin puree
- 1 ½ cups (355ml) heavy cream
- ¾ cup (150g) packed light brown sugar
- 2 large eggs, plus 1 large egg yolk
- 1 teaspoon (5ml) vanilla extract
- 2 teaspoons (4g) ground cinnamon
- 1 teaspoon (2g) ground ginger
- ½ teaspoon (1g) ground nutmeg
- ¼ teaspoon (0.5g) ground cloves
- ½ teaspoon (3g) salt
Instructions
- Make the all-butter crust: In a food processor, pulse together flour, salt, and sugar. Add cold butter cubes and pulse until pea-sized pieces remain. Sprinkle 6 tablespoons ice water over mixture and pulse until dough is shaggy and holds together when squeezed. Add more water if needed. Turn dough onto floured surface, form into a 1-inch thick disc, wrap in plastic, and refrigerate for at least 1 hour or up to 3 days.
- Blind-bake the crust: Preheat oven to 375°F (190°C). Roll chilled dough into a 12-inch circle, transfer to a 9-inch pie dish, trim and crimp edges. Freeze for 15 minutes. Line with parchment paper and fill with pie weights. Bake for 15 minutes, remove parchment and weights, then bake for another 8-10 minutes until bottom is dry and lightly golden. Set aside to cool slightly.
- Make the pumpkin filling: In a large bowl, whisk together pumpkin puree, heavy cream, brown sugar, eggs, egg yolk, and vanilla extract until smooth. Whisk in cinnamon, ginger, nutmeg, cloves, and salt until evenly distributed.
- Bake the pie: Pour filling into warm blind-baked crust. Bake at 375°F (190°C) for 45-55 minutes, until edges are set but center jiggles slightly. Cool completely on a wire rack for 2-3 hours before serving.
Notes
Keep all ingredients cold for the crust. Blind-baking is essential to prevent a soggy bottom. Use a pie shield or foil to protect edges from over-browning. Let pie cool completely before slicing to allow filling to set. Can be made ahead and stored in refrigerator for up to 5 days or frozen for up to 3 months.
Nutrition
- Serving Size: 1 slice
- Calories: 475
- Sugar: 28
- Sodium: 380
- Fat: 28
- Saturated Fat: 17
- Carbohydrates: 52
- Fiber: 3
- Protein: 6
Keywords: pumpkin pie, classic pumpkin pie, flaky butter crust, Thanksgiving dessert, fall dessert, homemade pie, all-butter crust


