My neighbor, a retired pastry chef named Leo, watched me struggling with a batch of regular snickerdoodles one Tuesday afternoon. I was trying to get that perfect crackle-top, and my dough was spreading into sad, flat puddles. He didn’t say anything at first. Then he just reached into my pantry, grabbed the can of pumpkin puree I had leftover from another project, and said, “Add this. And brown the butter first.” He didn’t explain why, he just handed me a wooden spoon and started talking about his grandmother’s kitchen in Bologna. Honestly, I was skeptical. Pumpkin in a snickerdoodle? It sounded like a gimmick. But I was desperate, and Leo had that quiet confidence of someone who has forgotten more about baking than I’ll ever know. So I browned the butter, stirred in the pumpkin, and watched the dough transform into something soft, fragrant, and deeply autumnal.
The first batch came out of the oven, and I swear, the kitchen smelled like a hug. The brown butter gave this nutty, toasty depth, while the pumpkin kept the cookies impossibly soft and pillowy. They weren’t just snickerdoodles anymore. They were an event. I brought a plate to Leo’s door the next day, and he just nodded, a small smile on his face. “Now you know,” he said. And honestly, I did. That exchange—the shared failure, the simple fix, the unspoken trust—is what made this recipe stick with me. It wasn’t just about the cookies; it was about the conversation that came with them. Now, every time I make these for a gathering, I think of Leo. Maybe you’ve been there—when a stranger or a neighbor casually drops a piece of wisdom that changes how you cook forever. These Perfect Brown Butter Pumpkin Snickerdoodles are that piece of wisdom, baked into every bite.
Why You’ll Love This Recipe
Let’s be honest, finding a fall cookie that actually impresses a crowd without making you sweat in the kitchen is rare. These brown butter pumpkin snickerdoodles are that unicorn. I’ve tested this recipe at least a dozen times—for potlucks, for Thanksgiving pre-games, and for a very intense cookie swap where someone brought a store-bought tray (the horror). These cookies won every single time. They have that “wow” factor that makes people ask for the recipe before they’ve even finished chewing.
- Quick & Easy: From start to finish, you’re looking at about 30 minutes. The dough comes together in one bowl, and there’s no chilling required. Yes, you read that right—no chilling! Perfect for those last-minute “I need to bring something to a party” moments.
- Simple Ingredients: You probably have everything in your pantry already. Butter, sugar, pumpkin puree, flour, and a few spices. No fancy extracts or hard-to-find mix-ins. It’s all about technique here, not a shopping list.
- Perfect for Fall Gatherings: These cookies are made for a dinner party, a Friendsgiving, or a festive get-together. They look stunning on a platter, and the aroma alone will draw people into the kitchen. They’re the kind of cookie that steals the table.
- Crowd-Pleaser: I’ve served them to kids who hate pumpkin and adults who claim they “don’t do sweet.” Every single person went back for seconds. The texture is soft, almost cake-like, but with that signature snickerdoodle tang from the cream of tartar.
- Unbelievably Delicious: The brown butter is the secret weapon here. It adds a nutty, caramelized flavor that pairs perfectly with the warm pumpkin spices. It’s not just a cookie; it’s an experience.
What makes this recipe different from the rest? It’s the combination of brown butter and pumpkin puree that creates a texture that’s both tender and chewy. Most pumpkin cookies turn out dry or cakey, but the brown butter adds fat and moisture, while the pumpkin keeps everything soft. Plus, the cream of tartar gives that classic snickerdoodle tang that cuts through the sweetness. It’s comfort food reimagined—faster, easier, but with the same soul-soothing satisfaction. Perfect for impressing guests without stress, or turning a simple evening into something memorable.
What Ingredients You Will Need
This recipe uses simple, wholesome ingredients to deliver bold flavor and satisfying texture without the fuss. Most of these are pantry staples, but a few key players make all the difference. Here’s what you’ll need:
- Unsalted butter (1 cup / 2 sticks): You’ll be browning this, so skip the salted butter. It gives you control over the salt level. I prefer using a high-fat European-style butter like Plugrà for a richer nutty flavor.
- Granulated sugar (1 cup / 200g): This provides the sweetness and helps with that crackly top. Don’t substitute with brown sugar here—it changes the texture.
- Light brown sugar (½ cup / 100g): Packed firmly. This adds moisture and a hint of molasses that complements the pumpkin.
- Pumpkin puree (¾ cup / 180g): Not pumpkin pie filling! Make sure it’s 100% pure pumpkin. I like Libby’s for its consistent thickness. If your puree is watery, blot it with a paper towel before using.
- Large egg (1): Room temperature is best for even mixing. If you’re in a rush, place the egg in a bowl of warm water for 5 minutes.
- Vanilla extract (2 teaspoons): Pure vanilla, not imitation. It brightens the pumpkin and brown butter flavors.
- All-purpose flour (2 ½ cups / 312g): Spooned and leveled. Too much flour makes the cookies dense, so use a kitchen scale if you have one.
- Cream of tartar (2 teaspoons): This is non-negotiable for that classic snickerdoodle tang. It also helps stabilize the cookies and gives them a soft, chewy texture.
- Baking soda (1 teaspoon): Helps the cookies spread just enough.
- Pumpkin pie spice (1 ½ teaspoons): You can make your own with cinnamon, nutmeg, ginger, and cloves. But store-bought works great too.
- Cinnamon (1 teaspoon, plus more for rolling): Adds warmth and depth.
- Salt (½ teaspoon): Balances the sweetness and enhances the brown butter flavor. I use fine sea salt.
Equipment Needed
You don’t need a fancy kitchen to pull these off. Here’s what you’ll need:
- Large skillet or saucepan: For browning the butter. A light-colored pan helps you see the color change. I use a stainless steel pan—it’s easier to monitor the browning without the dark coating hiding things.
- Mixing bowls: One large bowl for the wet ingredients and one for the dry. Glass or stainless steel works best.
- Whisk and wooden spoon: A whisk for the dry ingredients and a wooden spoon for the dough. A rubber spatula is also handy for scraping the brown butter.
- Baking sheets: Two standard half-sheet pans. Line them with parchment paper or a silicone baking mat for easy cleanup.
- Cookie scoop: A 1.5-tablespoon scoop makes uniform cookies. If you don’t have one, use two spoons to portion the dough.
- Cooling rack: Essential for letting the cookies cool evenly without getting soggy bottoms.
If you don’t have a skillet, a regular saucepan works fine. Just keep an eye on the butter—it can burn quickly in a darker pan. I once used a non-stick pan and couldn’t see the browning properly, and my butter went from golden to burnt in seconds. Lesson learned!
Preparation Method
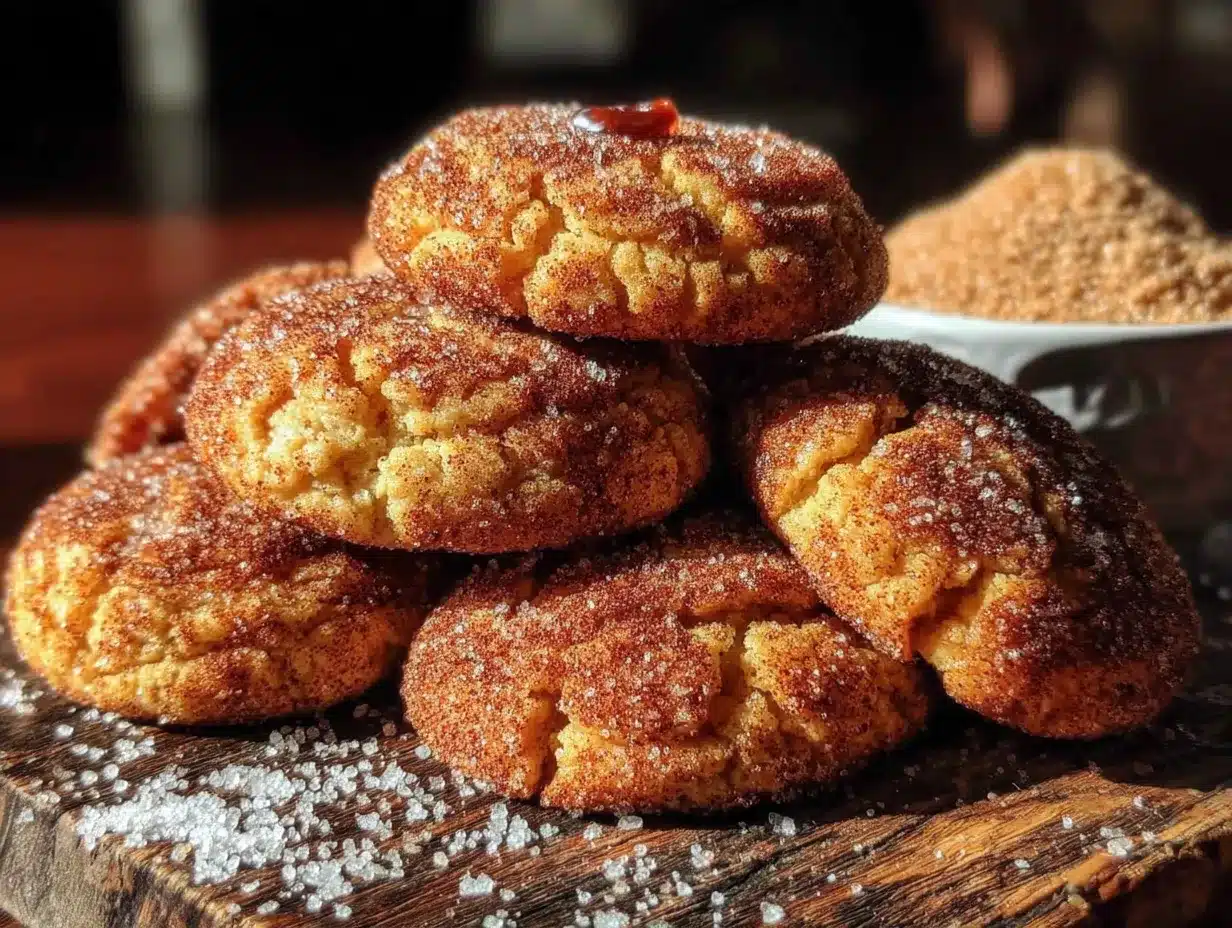
Alright, let’s get baking. This method is straightforward, but a few details make all the difference. Follow along closely, and you’ll have a batch of perfect brown butter pumpkin snickerdoodles in no time.
- Brown the butter: Place the 1 cup of unsalted butter in a large skillet over medium heat. Let it melt completely, then stir constantly with a wooden spoon. The butter will foam, then the foam will subside, and you’ll see little brown specks forming at the bottom. This takes about 5-7 minutes. The moment it smells nutty and turns a deep amber color, remove it from the heat immediately. Pour it into a large mixing bowl, including all the brown bits (that’s the flavor!). Let it cool for 10 minutes. Don’t skip the cooling—if you add the sugar to hot butter, it’ll melt and change the texture.
- Mix the wet ingredients: To the cooled brown butter, add 1 cup granulated sugar and ½ cup packed light brown sugar. Whisk vigorously for about 1 minute until the mixture looks like wet sand. Add the ¾ cup pumpkin puree, 1 large egg, and 2 teaspoons vanilla extract. Whisk until smooth and fully combined. The mixture will look a little thick and glossy—that’s perfect.
- Combine the dry ingredients: In a separate bowl, whisk together 2 ½ cups all-purpose flour, 2 teaspoons cream of tartar, 1 teaspoon baking soda, 1 ½ teaspoons pumpkin pie spice, 1 teaspoon cinnamon, and ½ teaspoon salt. Whisk until evenly distributed. This ensures the leavening agents are spread throughout the dough.
- Make the dough: Gradually add the dry ingredients to the wet ingredients, stirring with a wooden spoon until just combined. Do not overmix! Overmixing develops gluten and makes the cookies tough. Stop when you no longer see streaks of flour. The dough will be soft, slightly sticky, and very fragrant.
- Prepare the cinnamon sugar coating: In a small bowl, mix together ¼ cup granulated sugar and 2 teaspoons cinnamon. This is your rolling mixture.
- Shape the cookies: Preheat your oven to 350°F (175°C). Line two baking sheets with parchment paper. Using a 1.5-tablespoon cookie scoop, portion out the dough. Roll each portion into a smooth ball between your palms. Then roll each ball in the cinnamon sugar mixture until fully coated. Place them on the prepared baking sheets, spacing them about 2 inches apart. No need to flatten them—they’ll spread naturally.
- Bake: Bake for 10-12 minutes, rotating the pans halfway through. The cookies should look puffed and slightly cracked on top, with golden edges. The centers will look soft and slightly underdone—that’s good! They’ll continue to set as they cool. Overbaking makes them dry.
- Cool: Let the cookies rest on the baking sheet for 5 minutes. This allows them to firm up without breaking. Then transfer them to a wire rack to cool completely. If you try to move them too early, they’ll fall apart. Trust me, I’ve learned this the hard way.
A quick tip: If your dough feels too sticky to roll, pop it in the fridge for 10 minutes. But honestly, a slightly sticky dough gives you the softest cookies. Just lightly oil your palms before rolling.
Cooking Tips & Techniques
I’ve made this recipe more times than I can count, and I’ve definitely had my share of failures. Here’s what I’ve learned so you don’t have to repeat my mistakes.
Don’t skip browning the butter. I know it’s an extra step, but it’s the heart of this recipe. The nutty, toasty flavor is what makes these cookies unforgettable. If you burn the butter, start over. Burnt butter tastes bitter and ruins the whole batch. Watch for that amber color and nutty aroma—that’s your cue.
Measure your flour correctly. The biggest mistake home bakers make is scooping flour directly from the bag. This packs the flour and gives you way too much. Instead, spoon the flour into your measuring cup and level it off with a knife. Or better yet, use a kitchen scale. 312 grams is the sweet spot.
Rotate your pans. Ovens have hot spots. Halfway through baking, swap the top and bottom racks and rotate the pans front to back. This ensures even browning and prevents one batch from being darker than the other.
Let them cool on the pan. I know it’s tempting to move them immediately, but those 5 minutes on the hot baking sheet are crucial. The cookies are fragile right out of the oven, and moving them too early leads to crumbled edges. Patience pays off.
If you’re baking for a crowd, double the recipe. These cookies disappear fast. I once brought a single batch to a potluck, and they were gone in 10 minutes. Now I always make a double batch. They freeze beautifully, too—just freeze the unbaked dough balls on a sheet pan, then transfer them to a freezer bag. Bake from frozen, adding 2 minutes to the bake time.
Variations & Adaptations
One of the best things about this recipe is how flexible it is. I’ve tried several variations, and they all turned out delicious.
- Gluten-Free: Substitute the all-purpose flour with a 1:1 gluten-free baking flour blend. I’ve used King Arthur Measure for Measure, and the texture was almost identical. Just make sure the blend contains xanthan gum for structure.
- Dairy-Free: Replace the butter with a high-quality vegan butter stick (not margarine). I like Miyoko’s for browning. The flavor won’t be as nutty, but it’s still delicious.
- Spice It Up: Add ¼ teaspoon of cardamom or cloves to the dough for an extra layer of warmth. I tried cardamom once, and it gave the cookies a slightly floral, exotic note that was amazing.
- Add a Filling: Press a small piece of dark chocolate or a caramel candy into the center of each dough ball before rolling in cinnamon sugar. It creates a gooey surprise in the middle. My friend Sarah did this for a cookie exchange, and people lost their minds.
- Make Them Chewier: Swap ¼ cup of the granulated sugar for an additional ¼ cup of brown sugar. Brown sugar has more moisture, which creates a chewier texture. Just be aware that the cookies might spread a bit more.
Serving & Storage Suggestions
These cookies are best served slightly warm, when the brown butter flavor is at its peak and the texture is soft and tender. I like to arrange them on a wooden platter or a cake stand for a rustic, inviting look. They pair beautifully with a hot cup of coffee, a spiced chai latte, or even a glass of cold milk.
If you’re hosting a dinner party, serve these alongside a scoop of vanilla bean ice cream or a dollop of whipped cream. The warm spices and nutty brown butter complement the cold creaminess perfectly. For a fall-themed dessert table, arrange them with cinnamon sugar pumpkin bundt cake and apple cider donuts for a stunning spread.
Storage: Store the cookies in an airtight container at room temperature for up to 5 days. Place a slice of bread in the container to keep them soft—the bread absorbs excess moisture and the cookies stay tender. I’ve done this for years, and it works like magic.
Freezing: You can freeze baked cookies for up to 3 months. Layer them between sheets of parchment paper in a freezer-safe container. Thaw at room temperature for 30 minutes before serving. Or, freeze the unbaked dough balls as mentioned earlier. It’s a lifesaver for last-minute gatherings.
Reheating: Pop a cookie in the microwave for 10 seconds to bring back that fresh-from-the-oven warmth. Or warm them in a 300°F oven for 5 minutes. The flavors actually deepen after a day or two, so don’t be surprised if they taste even better the next day.
Nutritional Information & Benefits
Here’s the estimated nutritional breakdown per cookie (based on 24 cookies):
- Calories: ~165
- Fat: 8g
- Carbohydrates: 22g
- Protein: 2g
- Fiber: 1g
- Sugar: 13g
While these are definitely a treat, there are a few nutritional bright spots. Pumpkin puree is rich in vitamin A and fiber, which supports eye health and digestion. The brown butter, while indulgent, provides a small amount of vitamin A and healthy fats. The cream of tartar adds potassium, which is great for muscle function. Of course, these cookies are meant to be enjoyed in moderation—they’re a celebration food, not an everyday snack.
For those with dietary restrictions, this recipe can be easily adapted. It’s naturally nut-free (unless you add mix-ins), and the gluten-free and dairy-free variations work beautifully. Always check your ingredient labels for potential allergens, especially in the pumpkin pie spice blend.
Conclusion
This recipe is more than just a cookie—it’s a conversation starter, a crowd-pleaser, and a little piece of fall magic. The brown butter adds a depth of flavor that feels fancy, while the pumpkin keeps everything soft and comforting. I love this recipe because it reminds me of that afternoon with Leo, and how a simple act of sharing knowledge can change the way you cook forever.
I encourage you to make these your own. Play with the spices, add some chocolate, or double the batch for your next gathering. They’re forgiving, adaptable, and absolutely delicious. When you make them, tag me or leave a comment below—I’d love to hear how they turned out. Did you add a twist? Did your guests go crazy for them? Share your stories, and let’s keep this conversation going.
Happy baking, friends. Your fall table just got a whole lot sweeter.
Frequently Asked Questions
Can I use pumpkin pie filling instead of pumpkin puree?
No, please don’t. Pumpkin pie filling is pre-sweetened and spiced, which will throw off the sugar and spice balance in this recipe. Stick with 100% pure pumpkin puree for the best results.
Why did my cookies turn out flat?
Flat cookies usually mean the butter was too warm when you mixed the dough, or the dough wasn’t chilled enough. Make sure your brown butter has cooled for at least 10 minutes before adding the sugars. If your kitchen is warm, pop the dough in the fridge for 15 minutes before baking.
Can I make the dough ahead of time?
Absolutely! You can refrigerate the dough for up to 3 days. Just let it sit at room temperature for 10 minutes before scooping and rolling, as it will be quite firm. You can also freeze the dough balls for up to 3 months.
What if I don’t have cream of tartar?
Cream of tartar is essential for the classic snickerdoodle tang and texture. If you don’t have it, you can substitute with 2 teaspoons of lemon juice or white vinegar, but the flavor will be slightly different. Your best bet is to buy cream of tartar—it’s cheap and lasts forever.
How do I know when the butter is properly browned?
Look for a deep amber color and a nutty, toasty aroma. The butter will foam, then the foam will subside, and you’ll see brown specks forming at the bottom of the pan. Remove it from the heat immediately at that point. If it smells burnt, you’ve gone too far and should start over.
Pin This Recipe!
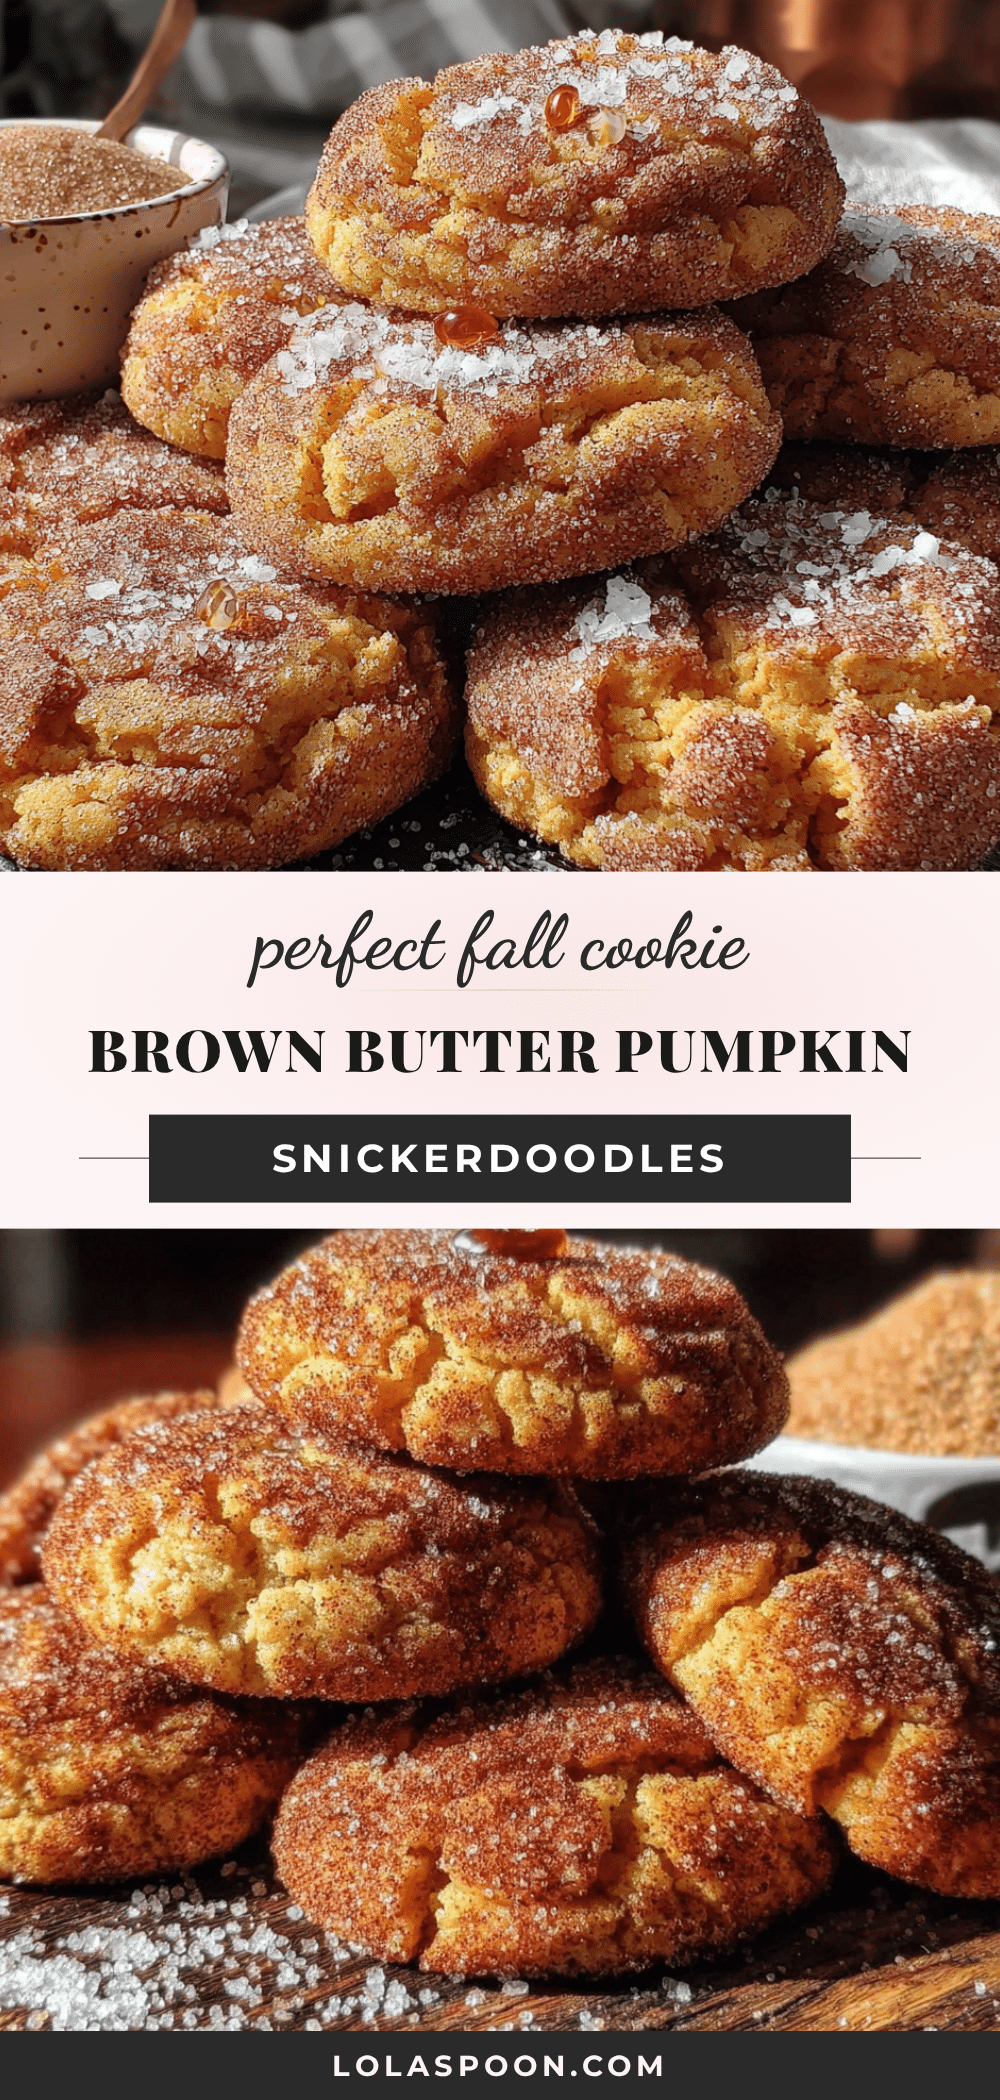
Best Easy Brown Butter Pumpkin Snickerdoodles Recipe
These brown butter pumpkin snickerdoodles are soft, pillowy, and deeply autumnal. The nutty brown butter and pumpkin puree create a tender, chewy texture with a classic snickerdoodle tang, perfect for fall gatherings.
- Prep Time: 15 minutes
- Cook Time: 12 minutes
- Total Time: 27 minutes
- Yield: 24 cookies 1x
- Category: Dessert
- Cuisine: American
Ingredients
- 1 cup (2 sticks) unsalted butter
- 1 cup (200g) granulated sugar
- ½ cup (100g) light brown sugar, packed
- ¾ cup (180g) pumpkin puree (not pumpkin pie filling)
- 1 large egg, room temperature
- 2 teaspoons vanilla extract
- 2 ½ cups (312g) all-purpose flour, spooned and leveled
- 2 teaspoons cream of tartar
- 1 teaspoon baking soda
- 1 ½ teaspoons pumpkin pie spice
- 1 teaspoon cinnamon
- ½ teaspoon fine sea salt
- For rolling: ¼ cup granulated sugar and 2 teaspoons cinnamon
Instructions
- Brown the butter: Place 1 cup unsalted butter in a large skillet over medium heat. Melt completely, then stir constantly with a wooden spoon. The butter will foam, then the foam will subside, and brown specks will form at the bottom (about 5-7 minutes). When it smells nutty and turns deep amber, remove from heat immediately. Pour into a large mixing bowl, including all brown bits. Let cool for 10 minutes.
- Mix the wet ingredients: To the cooled brown butter, add 1 cup granulated sugar and ½ cup packed light brown sugar. Whisk vigorously for about 1 minute until the mixture looks like wet sand. Add ¾ cup pumpkin puree, 1 large egg, and 2 teaspoons vanilla extract. Whisk until smooth and fully combined.
- Combine the dry ingredients: In a separate bowl, whisk together 2 ½ cups all-purpose flour, 2 teaspoons cream of tartar, 1 teaspoon baking soda, 1 ½ teaspoons pumpkin pie spice, 1 teaspoon cinnamon, and ½ teaspoon salt until evenly distributed.
- Make the dough: Gradually add the dry ingredients to the wet ingredients, stirring with a wooden spoon until just combined. Do not overmix. The dough will be soft, slightly sticky, and fragrant.
- Prepare the cinnamon sugar coating: In a small bowl, mix together ¼ cup granulated sugar and 2 teaspoons cinnamon.
- Shape the cookies: Preheat oven to 350°F (175°C). Line two baking sheets with parchment paper. Using a 1.5-tablespoon cookie scoop, portion out the dough. Roll each portion into a smooth ball, then roll in the cinnamon sugar mixture until fully coated. Place on prepared baking sheets, spacing about 2 inches apart. Do not flatten.
- Bake: Bake for 10-12 minutes, rotating pans halfway through. Cookies should look puffed and slightly cracked on top with golden edges. Centers will look soft and slightly underdone.
- Cool: Let cookies rest on the baking sheet for 5 minutes, then transfer to a wire rack to cool completely.
Notes
Do not skip browning the butter; it’s the key to the nutty flavor. Measure flour correctly by spooning and leveling. Let cookies cool on the pan for 5 minutes before moving. For a chewier texture, swap ¼ cup granulated sugar for additional brown sugar. Dough can be refrigerated for up to 3 days or frozen for up to 3 months.
Nutrition
- Serving Size: 1 cookie
- Calories: 165
- Sugar: 13
- Sodium: 95
- Fat: 8
- Saturated Fat: 5
- Carbohydrates: 22
- Fiber: 1
- Protein: 2
Keywords: brown butter, pumpkin, snickerdoodles, fall cookies, easy cookie recipe, pumpkin cookies, brown butter cookies


