This was supposed to be a batch of delicate French macarons. I had the almond flour measured out, the egg whites aging on the counter for three days, and my piping bags ready to go. Then my three-year-old decided to “help” by dumping the entire bag of powdered sugar into the bowl before I’d added the almonds. I stood there, staring at a mountain of sweet, white powder, and felt that familiar wave of kitchen panic. My husband walked in, took one look at my face, and quietly backed out of the room. Smart man.
I was already running late for a work call, the kitchen was a mess, and those perfect little sandwich cookies were not happening. But I couldn’t waste those egg whites. I mean, have you seen the price of eggs lately? So I grabbed the wrong extract—peppermint instead of vanilla—and just started whisking. The mixture whipped up into stiff, glossy peaks way faster than I expected. I scooped it onto a baking sheet in a hurry, threw it in the oven, and ran to my meeting. When I came back an hour later, I found the most ridiculous, adorable little ghost-shaped meringues staring back at me. They were pale, puffy, and utterly charming in their imperfection.
Honestly, I almost threw them out. They weren’t the plan. But my kids found them first, and the squeals of delight that came from the kitchen were something else. We melted some chocolate chips for eyes, and just like that, a kitchen disaster turned into our new favorite Halloween tradition. Maybe you’ve been there—staring at a failed recipe, wondering what to do with the mess. Let me tell you, these ghost meringue cookies are the happy accident you didn’t know you needed.
Why You’ll Love This Recipe
These ghost meringue cookies are the weeknight hero you’ve been looking for. They’re quick, they’re easy, and they use ingredients you probably already have in your pantry. No fancy equipment, no complicated techniques—just pure, spooky fun that comes together in under 30 minutes of actual work.
- Quick & Easy: From start to finish, you’re looking at about 15 minutes of prep time. The oven does the rest of the work while you tackle homework, fold laundry, or just collapse on the couch for a minute.
- Simple Ingredients: You need exactly four ingredients—egg whites, sugar, cream of tartar, and chocolate chips. That’s it. No trips to the specialty baking store required.
- Perfect for Halloween: These little guys are the star of any Halloween party, classroom treat, or spooky movie night. They’re cute without being complicated.
- Crowd-Pleaser: Kids go absolutely wild for them. Adults too, honestly. There’s something about a tiny ghost face that makes everyone smile.
- Unbelievably Delicious: That light, airy texture with a little crunch on the outside and those melty chocolate eyes—it’s like a cloud that tastes like candy.
What makes this recipe different from the dozens of other meringue recipes out there? It’s the speed. Most meringue recipes want you to slowly add sugar, beat for ages, and babysit the oven. This one is designed for real people with real schedules. We’re using a slightly higher oven temperature for a shorter time, which gives you that perfect marshmallow interior and crisp exterior without the all-day commitment. It’s my best version because it actually fits into a Tuesday night.
This recipe isn’t just good—it’s the kind that makes you close your eyes after the first bite. That sweet, airy crunch followed by the rich chocolate hit. It’s comfort food reimagined for the Halloween season. Perfect for impressing your kid’s class without spending hours in the kitchen, or turning a regular weeknight into something a little bit magical.
What Ingredients You Will Need
This recipe uses simple, wholesome ingredients to deliver big personality and satisfying texture without the fuss. Most of these are pantry staples you probably already have on hand.
For the Meringue Ghosts
- 3 large egg whites, room temperature (cold egg whites won’t whip up properly—trust me on this one)
- ¾ cup (150g) granulated sugar (regular white sugar works best; avoid superfine or powdered here)
- ¼ teaspoon cream of tartar (this stabilizes the meringue and helps it hold its shape—don’t skip it)
- ¼ teaspoon peppermint extract (or vanilla extract if you prefer a milder flavor—I’ve used both and they’re both great)
- Pinch of salt (just a tiny one—it balances the sweetness)
For the Eyes
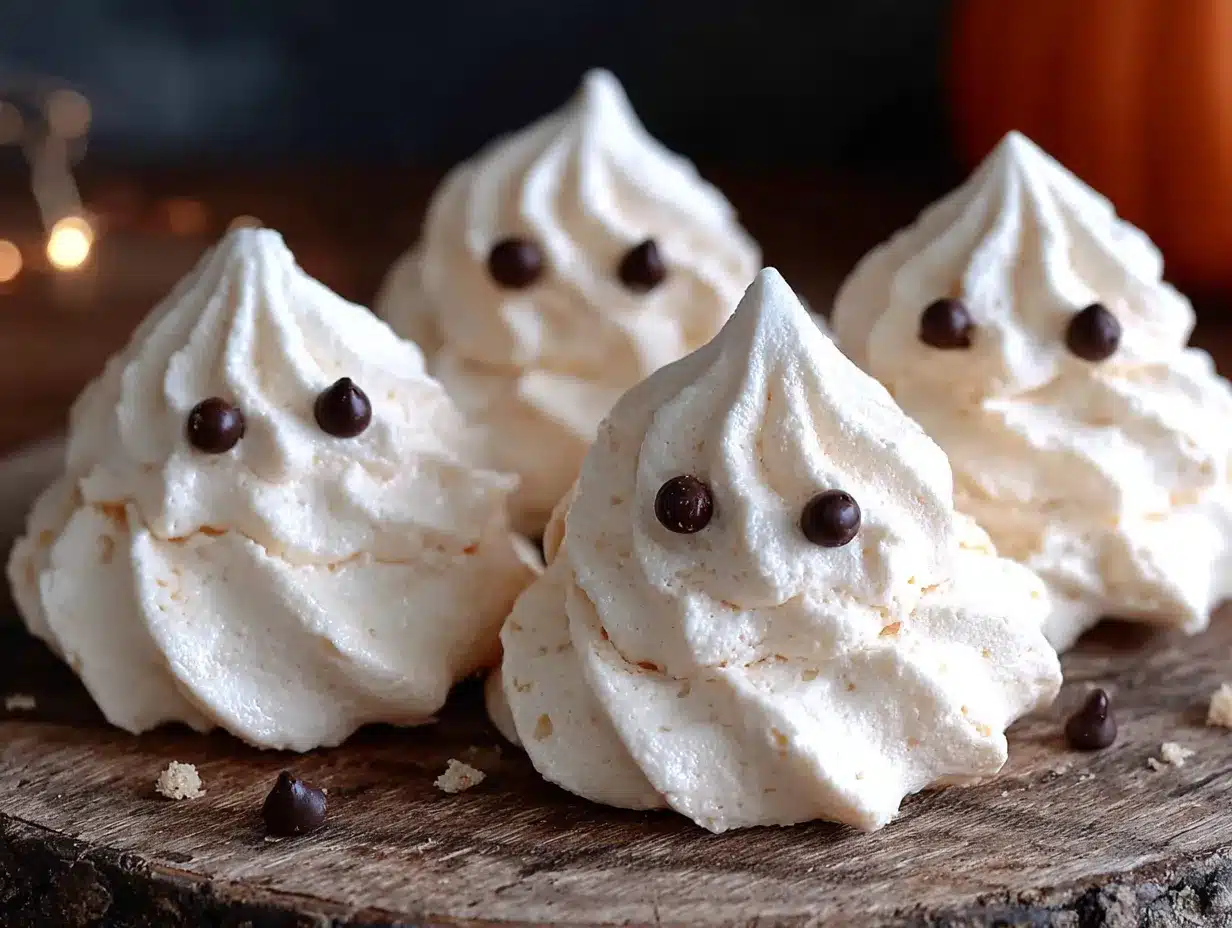
- ¼ cup mini chocolate chips (I like Ghirardelli or Enjoy Life for allergy-friendly options)
- Optional: 1 teaspoon coconut oil (to help the chocolate melt smoother if you’re piping the eyes)
Ingredient Selection Tips
For the best results, use fresh egg whites at room temperature. If you’re in a hurry, place your eggs in a bowl of warm water for about 5 minutes. Make sure your bowl and whisk are completely clean and free of any grease—even a tiny bit of oil can prevent your egg whites from whipping up properly. I learned this the hard way after three failed batches. For the chocolate chips, look for mini ones—they’re the perfect size for ghost eyes and stick better to the meringue.
Substitution Guidance
Need this to be dairy-free? Most chocolate chips are naturally dairy-free, but double-check the label. For a vegan version, you can use aquafaba (the liquid from a can of chickpeas) instead of egg whites—use about 3 tablespoons per egg white. The texture will be slightly different, but they still work. If you don’t have cream of tartar, you can substitute with ½ teaspoon of lemon juice or white vinegar. Just don’t tell anyone—your secret is safe with me.
Equipment Needed
You don’t need a professional bakery setup for these little guys. Here’s what you’ll need:
- Electric hand mixer or stand mixer—you can whisk by hand if you’re feeling ambitious, but your arm will hate you. I’ve done it once. Never again.
- Large mixing bowl—preferably glass or metal. Avoid plastic bowls as they can retain grease.
- Baking sheet—a standard half-sheet pan works perfectly.
- Parchment paper or silicone baking mat—this is non-negotiable. Meringue will stick to everything else.
- Piping bag or zip-top bag—for shaping the ghosts. A zip-top bag with the corner snipped off works beautifully in a pinch.
- Small microwave-safe bowl—for melting the chocolate for the eyes.
- Toothpick or small offset spatula—for placing the eyes.
If you don’t have a piping bag, don’t stress. I’ve used a sandwich bag more times than I can count. Just fill it, snip a tiny corner, and you’re in business. For the baking sheet, any rimmed sheet pan will do. Just make sure you have that parchment paper—I once tried wax paper in a desperate moment, and let’s just say it wasn’t pretty.
Preparation Method
- Preheat and prep. Preheat your oven to 225°F (110°C). Line a baking sheet with parchment paper or a silicone mat. This low temperature is key—we’re drying the meringues, not baking them. Set the oven rack to the middle position.
- Whip the egg whites. In your completely clean, dry mixing bowl, combine the room-temperature egg whites and cream of tartar. Beat on medium speed until frothy—about 1 minute. You’re looking for small, even bubbles covering the surface. This is where patience starts paying off.
- Add the sugar gradually. With the mixer running on medium-high, add the sugar one tablespoon at a time. I know it feels tedious, but dumping it all in at once will deflate your meringue. Take about 2-3 minutes for this step. The mixture should look thick and glossy by the time you’re done.
- Whip to stiff peaks. Increase the speed to high and beat for 3-4 more minutes. You’re looking for stiff, glossy peaks that hold their shape when you lift the whisk. The mixture should be thick enough that it doesn’t slide around in the bowl. Add the peppermint extract and salt during the last 30 seconds of mixing. A good test? Turn the bowl upside down—if nothing moves, you’re there.
- Pipe the ghosts. Transfer the meringue to your piping bag fitted with a large round tip (or just snip the corner of a zip-top bag). Pipe 1½-inch tall blobs onto the prepared baking sheet, spacing them about 2 inches apart. To make them look ghost-shaped, pipe a tall blob, then pull up quickly to create a little peak on top. Don’t worry if they look uneven—that’s the charm. Aim for about 20-24 ghosts.
- Add the eyes. This is the fun part. While the meringues are still wet, gently press two mini chocolate chips into each ghost for eyes. Place them close together near the top of each ghost. Don’t press too hard or you’ll deflate the meringue. If the chips won’t stick, dab a tiny bit of meringue on the back of each chip first.
- Bake low and slow. Place the baking sheet in the preheated oven and bake for 60-75 minutes. The meringues are done when they’re dry to the touch and easily lift off the parchment paper. They should be pale and matte, not brown. If they start to brown, your oven is too hot—open the door for a minute to let out some heat.
- Cool completely. Turn off the oven and leave the meringues inside with the door slightly ajar for at least 30 minutes. This prevents cracking from sudden temperature changes. Then transfer them to a wire rack to cool completely. They’ll continue to firm up as they cool.
Pro tip: If your kitchen is humid (like mine in summer), the meringues might take a bit longer to dry out. Just add 10-15 minutes to the baking time. They’re forgiving little ghosts.
Cooking Tips & Techniques
I’ve made these ghost meringue cookies about a dozen times now, and I’ve learned a few things the hard way. Let me save you some trouble.
The bowl must be spotless. I cannot stress this enough. Any trace of grease or egg yolk will ruin your meringue. I wipe my bowl and whisk attachments with a bit of lemon juice or vinegar before starting, just to be safe. It sounds extra, but it works.
Don’t overbeat. This is the mistake I made most often when I started. You want stiff peaks, but if you beat too long, the meringue becomes grainy and starts to separate. The texture should be smooth and glossy. If it looks clumpy or watery, you’ve gone too far. Start over—it’s cheaper than crying over wasted sugar.
Humidity is your enemy. Meringue and humidity don’t mix. If you live in a humid climate (hello, Florida), make these on a dry day if possible. You can also add an extra ¼ teaspoon of cream of tartar to help stabilize the mixture. And definitely don’t make them on a rainy day—I learned that one the hard way when my ghosts turned into sad, sticky puddles.
Multitasking strategy: While the egg whites are whipping, line your baking sheet and get your piping bag ready. While they’re baking, melt your chocolate for the eyes (if you’re piping them) and clean up your kitchen. This recipe is fast enough that you can have everything done before the kids even notice you’re making Halloween treats.
Consistency tip: For perfectly shaped ghosts every time, pipe a practice ghost or two onto a separate piece of parchment. You can scrape it back into the bag and try again. No one has to know about your practice rounds.
Variations & Adaptations
These ghost meringue cookies are surprisingly versatile. Here are some ways to make them your own:
Flavor Variations
- Chocolate Ghosts: Swap 2 tablespoons of sugar for cocoa powder. Sift it in with the sugar to avoid lumps. The ghosts will be a pale brown, but they’ll taste like chocolate clouds.
- Vanilla Bean: Use the seeds from half a vanilla bean instead of extract. The little black specks look beautiful against the white meringue.
- Almond: Replace the peppermint with almond extract for a subtle, nutty flavor that pairs beautifully with the chocolate eyes.
Dietary Adaptations
- Vegan: Use aquafaba (chickpea liquid) instead of egg whites. Use 3 tablespoons per egg white. It whips up just like egg whites, though it takes a bit longer. Add an extra ¼ teaspoon of cream of tartar for stability.
- Gluten-Free: These are naturally gluten-free! Just double-check your chocolate chips. Most are, but some brands add wheat starch.
- Lower Sugar: You can reduce the sugar to ½ cup (100g), but the meringues won’t be as stable and might not hold their shape as well. They’ll still taste good, just a bit less sweet.
Customization Ideas
My kids love making these with different colored eyes. Use mini M&Ms instead of chocolate chips for a pop of color. You can also add a tiny bit of gel food coloring to the meringue for pastel ghosts—just fold it in gently at the end. I tried a lavender batch last year that was absolutely gorgeous. Just avoid liquid food coloring, which can deflate the meringue.
Serving & Storage Suggestions
These ghost meringue cookies are best served at room temperature. They’re perfect for Halloween parties, classroom treats, or just a fun after-school snack. Arrange them on a platter with some fake spiderwebs and plastic spiders for a spooky presentation that kids love.
They pair beautifully with hot chocolate, coffee, or a glass of cold milk. For a grown-up twist, serve them alongside a peppermint mocha or a dark hot chocolate. The light, airy texture of the meringue is a perfect contrast to a rich, warm drink.
Storage: Store your ghost meringue cookies in an airtight container at room temperature for up to 2 weeks. Do not refrigerate—the moisture will make them sticky and sad. If you live in a humid climate, add a silica gel packet to the container to keep them crisp. I keep mine in a glass jar on the counter, and they’re usually gone within a few days anyway.
Freezing: You can freeze these for up to 3 months. Place them in a single layer in a freezer-safe container with parchment paper between layers. Thaw at room temperature for about 15 minutes before serving. The texture will be slightly softer, but they’re still delicious.
Flavor development: These actually get better after a day or two. The flavors meld and the texture becomes perfectly crisp. Just keep them sealed tight. I’ve found they’re at their absolute best on day two—if they last that long.
Nutritional Information & Benefits
Per serving (2 ghost cookies): approximately 85 calories, 1g fat, 18g carbohydrates, 2g protein. These are a lighter treat option compared to traditional Halloween cookies, which is a nice bonus when you’re staring down a month of candy and sweets.
The main ingredient here is egg whites, which are a great source of high-quality protein. They’re also naturally low in fat and cholesterol-free. The sugar content is moderate for a cookie, and you can easily reduce it if you prefer a less sweet treat.
Dietary considerations: These are naturally gluten-free and can be made dairy-free with the right chocolate chips. They’re also nut-free if you use peppermint extract instead of almond. The only common allergen is eggs, so they’re safe for most school and party settings.
From a wellness perspective, I love that these feel like a treat without being overly indulgent. They satisfy that sweet craving without the heavy feeling you get from butter-laden cookies. Plus, they’re fun to make with kids, which is a whole different kind of nourishment.
Conclusion
These ghost meringue cookies started as a complete accident, and honestly, that’s what makes them so special. They remind me that some of the best things in the kitchen—and in life—come from unexpected places. That failed batch of macarons led to a recipe that my kids request every October, and that I genuinely look forward to making.
I hope you give these little ghosts a try. Don’t stress about making them perfect—the uneven ones are the most charming. Let your kids help press in the eyes. Experiment with different extracts and colors. Make them your own. And if something goes wrong? Just call it a happy accident and try again. That’s what I do.
I’d love to hear how yours turn out! Drop a comment below and let me know if your ghosts ended up looking spooky or silly. Share a photo on social media and tag me—I’m always looking for new ghost inspiration. Until next time, happy baking, and may your kitchen be full of happy accidents!
Frequently Asked Questions
Can I make these ghost meringue cookies ahead of time?
Absolutely! These are perfect for making a day or two ahead. Just store them in an airtight container at room temperature. They actually get better after a day—the texture becomes perfectly crisp.
Why did my meringue turn out flat and sticky?
This usually happens when there’s a bit of grease or egg yolk in the bowl, or if the humidity is too high. Make sure your bowl and whisk are spotless, and try to make these on a dry day. Adding a bit more cream of tartar can help too.
Can I use liquid egg whites from a carton?
You can, but they won’t whip up as well as fresh egg whites. Carton egg whites are pasteurized, which changes the protein structure. If you’re in a pinch, they’ll work, but fresh is always better for the fluffiest ghosts.
How do I know when the meringues are done baking?
They should be dry to the touch and lift easily off the parchment paper. They’ll be pale and matte, not shiny. If they start to brown, your oven is too hot. They should feel light and hollow when you pick them up.
Can I double this recipe?
Yes! This recipe doubles beautifully. Just make sure you have a big enough bowl—the meringue expands quite a bit as it whips. You might need to bake in batches or use two baking sheets on separate racks, rotating them halfway through.
Pin This Recipe!
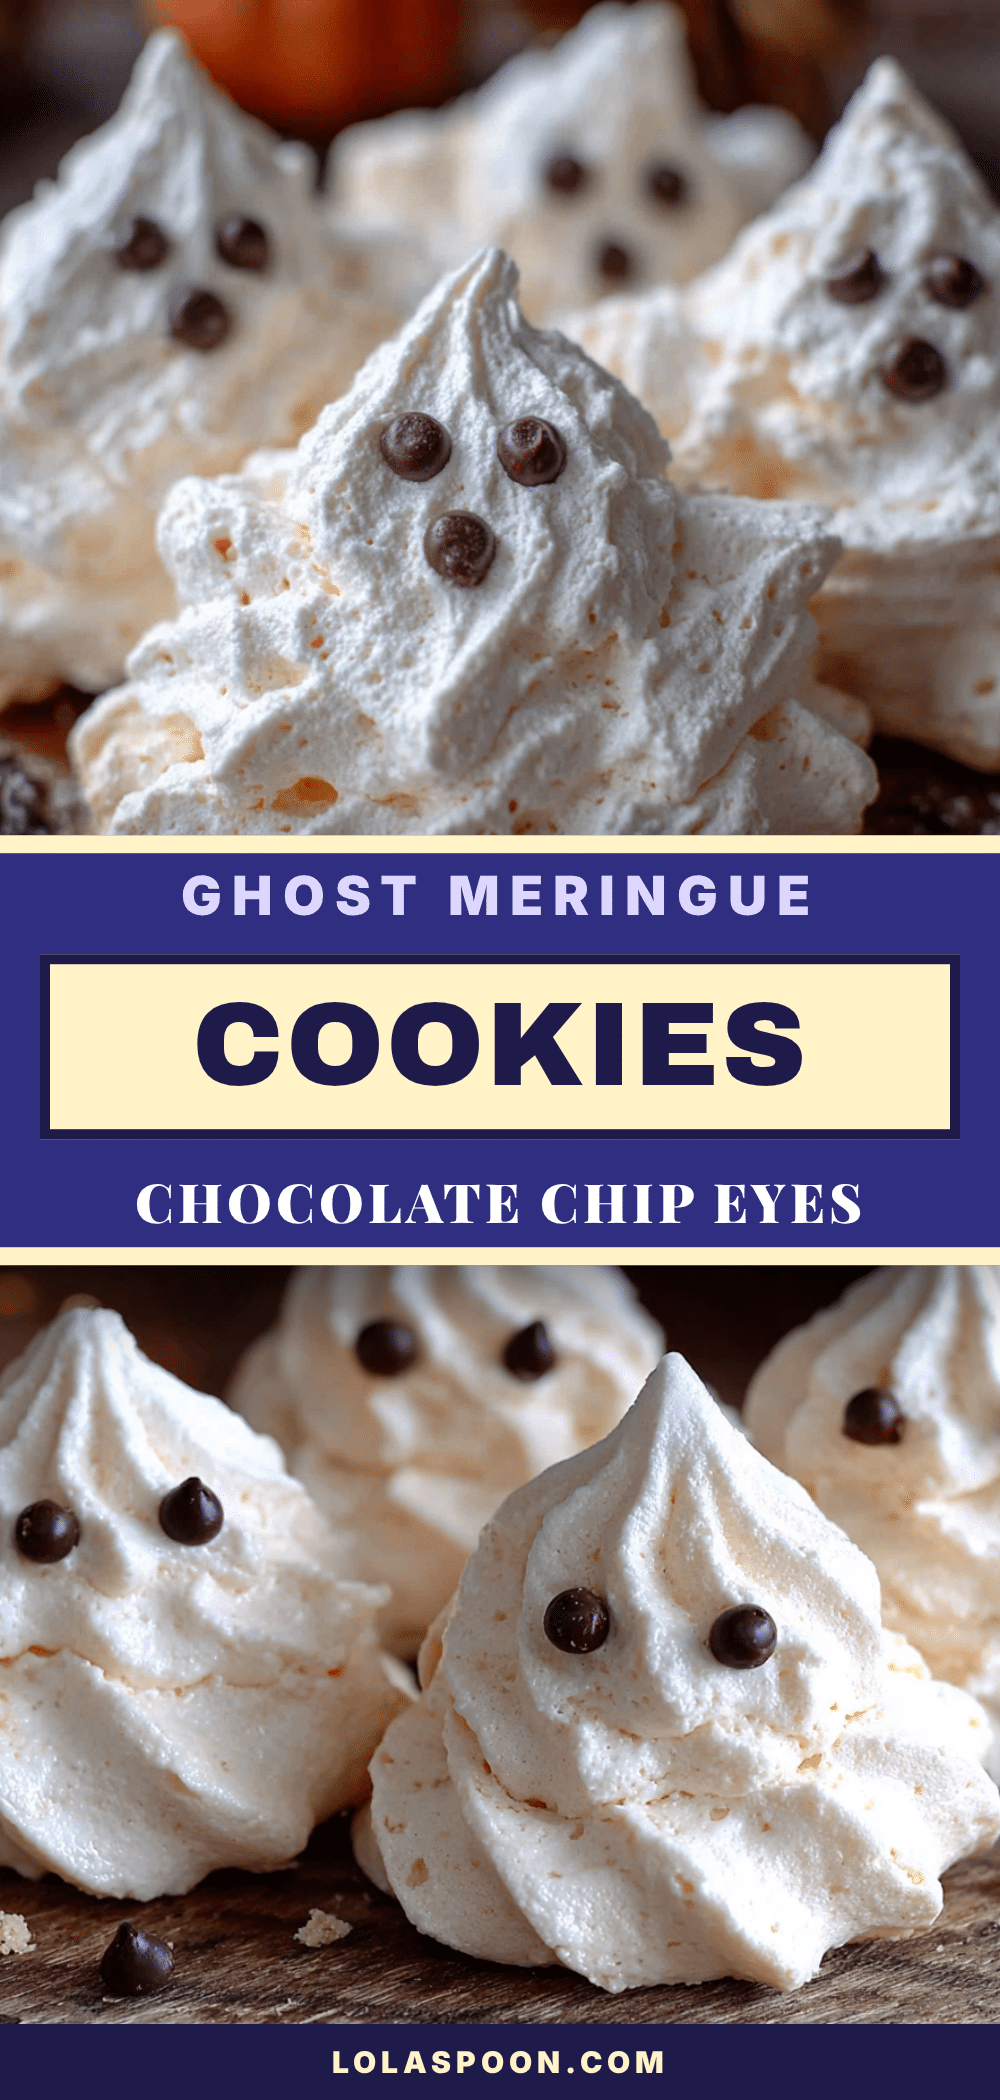
Best Easy Ghost Meringue Cookies with Chocolate Eyes
These ghost meringue cookies are a quick and easy Halloween treat made with just four simple ingredients. They’re light, airy, and adorable, perfect for parties or a fun weeknight activity.
- Prep Time: 15 minutes
- Cook Time: 60-75 minutes
- Total Time: 1 hour 30 minutes
- Yield: 20-24 cookies 1x
- Category: Dessert
- Cuisine: American
Ingredients
- 3 large egg whites, room temperature
- ¾ cup (150g) granulated sugar
- ¼ teaspoon cream of tartar
- ¼ teaspoon peppermint extract (or vanilla extract)
- Pinch of salt
- ¼ cup mini chocolate chips
- Optional: 1 teaspoon coconut oil
Instructions
- Preheat oven to 225°F (110°C). Line a baking sheet with parchment paper or a silicone mat.
- In a clean, dry mixing bowl, combine room-temperature egg whites and cream of tartar. Beat on medium speed until frothy, about 1 minute.
- With mixer running on medium-high, add sugar one tablespoon at a time over 2-3 minutes until mixture is thick and glossy.
- Increase speed to high and beat for 3-4 minutes until stiff, glossy peaks form. Add peppermint extract and salt during the last 30 seconds.
- Transfer meringue to a piping bag fitted with a large round tip (or a zip-top bag with corner snipped). Pipe 1½-inch tall ghost-shaped blobs onto prepared baking sheet, spacing 2 inches apart.
- While meringues are still wet, gently press two mini chocolate chips into each ghost for eyes, placing them close together near the top.
- Bake for 60-75 minutes until dry to the touch and easily lifting off parchment. They should be pale and matte.
- Turn off oven and leave meringues inside with door slightly ajar for 30 minutes. Then transfer to a wire rack to cool completely.
Notes
Ensure bowl and whisk are completely grease-free. Humidity can affect meringue; add extra cream of tartar if needed. For vegan version, use aquafaba (3 tablespoons per egg white). Store in airtight container at room temperature for up to 2 weeks.
Nutrition
- Serving Size: 2 cookies
- Calories: 85
- Sugar: 17
- Sodium: 25
- Fat: 1
- Saturated Fat: 0.5
- Carbohydrates: 18
- Protein: 2
Keywords: ghost meringue cookies, Halloween cookies, easy meringue, ghost cookies, meringue cookies


