My brother-in-law Mark asked why I couldn’t just boil the potatoes whole and mash them with the skins on. I started to explain why that wouldn’t work—something about texture, about how the skins would make it gritty, about how proper mashed potatoes require peeling and careful technique. Then I stopped. Honestly, I had no good reason except that’s how I’d always done it. So I shrugged and said, “Let’s try it your way.”
That decision changed my entire approach to mashed potatoes. The skins added this rustic, hearty texture that everyone at our Sunday dinner couldn’t stop raving about. The potato flavor was more pronounced, and honestly, it saved me about twenty minutes of peeling. I mean, who actually enjoys peeling potatoes? Not me. The best part was watching Mark’s face light up when everyone asked for seconds. He’d been nervous about hosting his first big family dinner, and this little suggestion turned into the star of the meal.
That’s the thing about cooking for a crowd—sometimes the best ideas come from the least expected places. Maybe you’ve been there, stuck in your ways, convinced that your method is the only method. Let me tell you, being wrong never tasted so good. This loaded mashed potato bar with bacon and chives became our go-to for every gathering after that. It’s forgiving, it’s flexible, and it practically begs for toppings. You can prep everything ahead, set it out buffet-style, and let your guests build their perfect bowl.
This recipe stayed with me because it taught me something bigger than cooking. It reminded me that hosting isn’t about perfection—it’s about sharing good food and letting people make it their own. And when you see someone load up their plate with crispy bacon, sharp cheddar, and a dollop of sour cream, you know you’ve done something right.
Why You’ll Love This Recipe
Let me be straight with you—this isn’t just another mashed potato recipe. This is the one that’ll have your friends texting you for the details the next morning. Here’s why this loaded mashed potato bar with bacon and chives stands out from the crowd:
- Stress-Free Hosting: Everything can be prepped hours before your guests arrive. Boil the potatoes, crisp the bacon, shred the cheese, and set it all out. When dinner time hits, you’re just reheating and arranging.
- Crowd-Pleaser Guaranteed: I’ve served this at potlucks, Thanksgiving dinners, and casual game nights. It disappears every single time. Kids love building their own bowls, and adults appreciate the customizable options.
- Simple Ingredients: No fancy grocery trips or obscure spices. Potatoes, butter, milk, bacon, cheese, sour cream, and chives. That’s it. You probably have most of these in your kitchen right now.
- Make-Ahead Magic: The mashed potato base actually gets better after sitting overnight. The flavors meld together, and the texture stays creamy. This is a lifesaver when you’re hosting a big gathering.
- Budget-Friendly: Potatoes are one of the cheapest ingredients you can buy. Feeding a crowd with this loaded mashed potato bar costs a fraction of what you’d spend on other party dishes.
What makes this recipe different from every other mashed potato bar out there? It’s the technique. Leaving the skins on adds texture and flavor that peeled potatoes just can’t match. Plus, the ratio of butter to potatoes is dialed in perfectly—rich without being greasy, creamy without being heavy. I tested this recipe six times before I got it exactly right. My family was happy to be taste testers, let me tell you.
This isn’t just comfort food—it’s comfort food that makes you look like a rockstar host. You’ll get that satisfying feeling when someone takes their first bite and their eyes go wide. That’s the moment this recipe was made for.
What Ingredients You Will Need
This loaded mashed potato bar with bacon and chives uses simple, everyday ingredients to create something truly special. Here’s what you’ll need to gather:
For the Mashed Potato Base
- 5 pounds Yukon Gold potatoes (washed, cut into 2-inch chunks) — These have the perfect balance of starch and waxiness for creamy mashed potatoes. Russets work too, but Yukon Golds give you that buttery flavor naturally.
- 1 cup whole milk (warm) — Warm milk incorporates better than cold milk, preventing that gluey texture nobody wants. You can use 2% or even oat milk in a pinch.
- 1/2 cup unsalted butter (softened, cut into cubes) — I recommend Kerrygold or Plugrà for the richest flavor. Salted butter works if you reduce the added salt later.
- 1 teaspoon salt (plus more for the boiling water) — Diamond Crystal kosher salt is my go-to for even seasoning.
- 1/2 teaspoon black pepper (freshly ground) — Pre-ground pepper works, but fresh makes a noticeable difference here.
- 1/2 cup sour cream (room temperature) — This adds tanginess and extra creaminess. Greek yogurt works beautifully as a substitute.
For the Toppings Bar
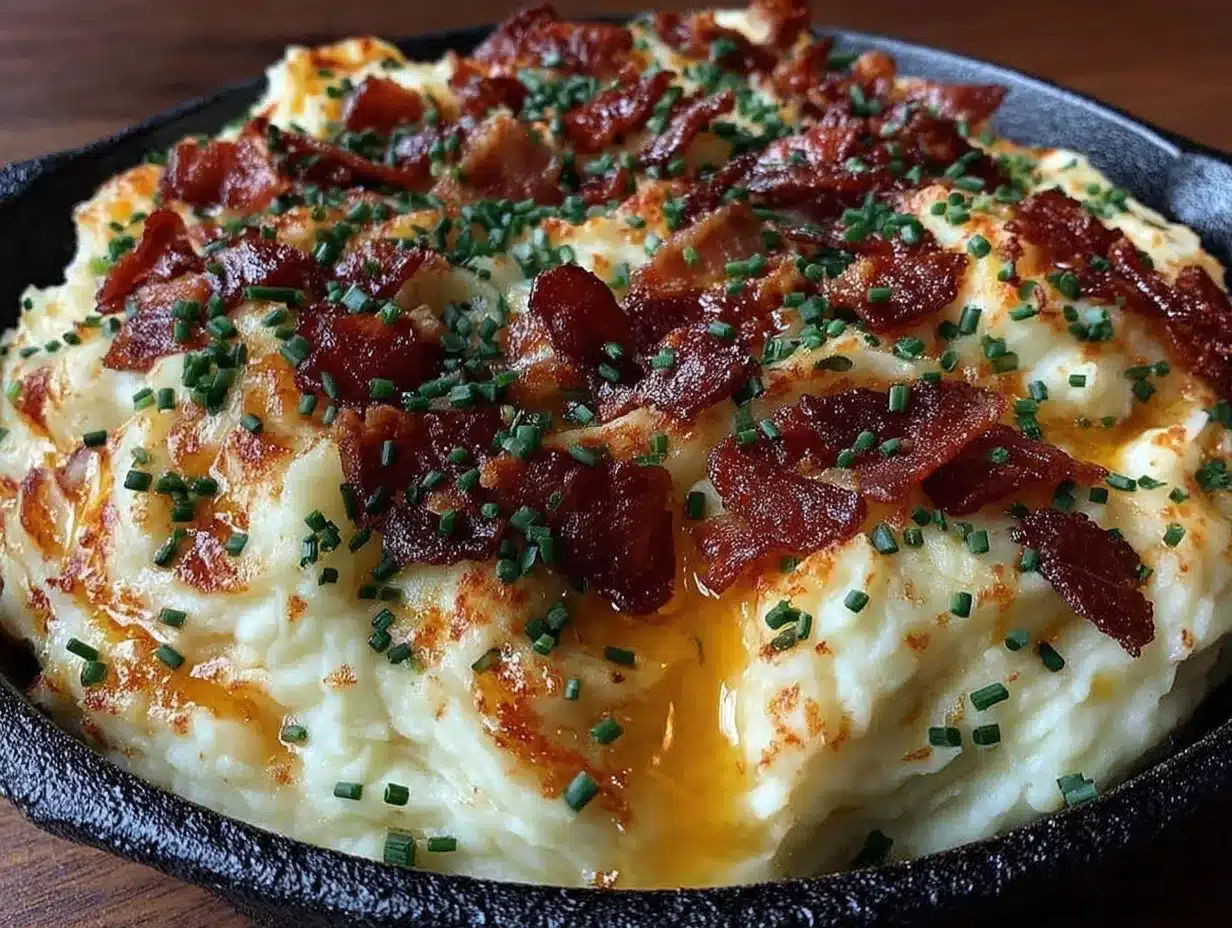
- 1 pound bacon (cooked until crispy, crumbled) — Thick-cut bacon gives you more substantial bits. I prefer Wright Brand or Nueske’s for consistent quality.
- 2 cups sharp cheddar cheese (shredded) — Shred your own from a block—pre-shredded cheese has anti-caking agents that prevent smooth melting. White cheddar adds a nice visual contrast.
- 1 cup sour cream (for topping) — Daisy brand has the thickest consistency without added stabilizers.
- 1/2 cup fresh chives (finely chopped) — Don’t substitute dried chives here. Fresh makes a huge difference in both flavor and appearance.
- 4 green onions (sliced thin) — These add a milder onion flavor and beautiful green color.
- 1/2 cup butter (softened, for topping) — Set this out in a small dish so guests can add extra if they want.
Optional Toppings
- 1/2 cup crispy fried onions — French’s works great for that extra crunch factor.
- 1/4 cup pickled jalapeños (diced) — For guests who want heat.
- 1/2 cup roasted garlic cloves — Mash these into the potatoes for incredible depth of flavor.
- Fresh parsley (chopped) — Adds color and freshness.
Ingredient Selection Tips: Look for potatoes that feel firm with no soft spots or green tinge. For the bacon, I’ve found that oven-baking gives you the most consistent crispiness without the mess of stovetop frying. And please, please use real butter—margarine just doesn’t deliver the same richness.
Equipment Needed
You don’t need fancy equipment for this loaded mashed potato bar with bacon and chives, but having the right tools makes the process smoother:
- Large stockpot (8-quart or larger) — You need enough room for all those potatoes to boil without crowding. I use my trusty 12-quart pot when making a double batch for parties.
- Potato masher or ricer — A ricer gives you the smoothest texture, but honestly, a good old-fashioned masher works beautifully. I prefer the OXO Good Grips masher—it’s sturdy and comfortable to hold.
- Colander — For draining the potatoes. Make sure it’s large enough to hold all those chunks.
- Large mixing bowl — For mashing and mixing everything together.
- Baking sheet — For cooking the bacon in the oven. Line it with parchment paper for easy cleanup.
- Cheese grater — Please grate your own cheese. The pre-shredded stuff just doesn’t melt the same way.
- Small serving bowls and spoons — For setting up your toppings bar. I use little ramekins for the smaller items.
- Large serving bowl or chafing dish — For keeping the mashed potatoes warm during serving. A slow cooker on warm setting works great too.
Budget-Friendly Alternatives: If you don’t have a potato ricer, a fork works in a pinch—it just takes more elbow grease. No baking sheet? Cook the bacon in a large skillet and drain on paper towels. And if you’re short on serving dishes, small bowls from your regular dinner set work perfectly for the toppings.
Preparation Method
Let me walk you through making this loaded mashed potato bar with bacon and chives step by step. I’ve tested this process multiple times, so trust me on the details.
- Prep your potatoes — Scrub the Yukon Gold potatoes thoroughly under cold water. Cut them into 2-inch chunks, leaving the skins on. Don’t worry about making them perfect—rough chunks are fine. Place them in your large stockpot and cover with cold water by about 2 inches. Add a generous tablespoon of salt to the water.
- Boil the potatoes — Bring the water to a boil over high heat. Once boiling, reduce the heat to medium-high and cook for 15-20 minutes. You’ll know they’re done when you can easily pierce a chunk with a fork and it slides off without resistance. Don’t overcook them—mushy potatoes make watery mashed potatoes.
- Drain and steam — Drain the potatoes in your colander. Here’s a trick I learned the hard way: let them sit in the colander for 2-3 minutes to steam dry. Excess moisture is the enemy of creamy mashed potatoes. You want them dry before you start mashing.
- While potatoes boil, cook the bacon — Preheat your oven to 400°F. Line a baking sheet with parchment paper. Lay the bacon strips in a single layer—don’t overlap them. Bake for 15-20 minutes, flipping halfway through. The bacon should be deep golden brown and crispy. Transfer to a paper towel-lined plate to cool, then crumble into small pieces.
- Warm the milk and butter — In a small saucepan over low heat, warm the milk and butter together until the butter melts and the mixture is warm to the touch. Don’t boil it—you just want it warm. Cold milk will make your potatoes gluey.
- Mash the potatoes — Return the drained potatoes to the stockpot or transfer them to a large mixing bowl. Add the warm milk-butter mixture. Mash with your potato masher until mostly smooth but still slightly chunky. I like to leave a few small lumps for texture—it feels more rustic and homemade.
- Add the final ingredients — Fold in the sour cream, salt, and pepper using a rubber spatula. Taste and adjust seasoning. Remember, the bacon and cheese will add saltiness, so don’t go overboard here. The potatoes should be creamy, rich, and well-seasoned.
- Set up your toppings bar — Transfer the mashed potatoes to your serving bowl or chafing dish. Arrange all your toppings in separate bowls: crumbled bacon, shredded cheddar, extra sour cream, fresh chives, sliced green onions, and any optional toppings you’re including. Provide small spoons for each topping.
- Serve immediately — Let guests build their own bowls. I recommend starting with a generous scoop of potatoes, then adding cheese (it melts beautifully into the warm potatoes), followed by bacon, sour cream, and fresh herbs. Watch their faces light up when they take that first bite.
Timing Note: From start to finish, this loaded mashed potato bar with bacon and chives takes about 45 minutes to prepare. If you’re making it ahead, stop after step 7, cover the potatoes, and refrigerate. Reheat gently on the stovetop or in a slow cooker, adding a splash of warm milk to restore creaminess.
Cooking Tips & Techniques
After making this loaded mashed potato bar with bacon and chives more times than I can count, I’ve collected some hard-won wisdom. Let me share what I’ve learned:
Don’t overwork the potatoes. This is the number one mistake I see. Over-mashing activates the starch too much, turning your creamy potatoes into something that resembles wallpaper paste. Mash just until the ingredients are combined. A few lumps are perfectly fine—actually, they’re desirable.
Salt your water generously. The water should taste like the sea. This is your only chance to season the potatoes from the inside out. I add about a tablespoon of salt per gallon of water. Trust me on this—underseasoned potatoes are the saddest thing in the culinary world.
Keep everything warm. Cold ingredients will cool down your hot potatoes, and nobody wants lukewarm mashed potatoes. Warm your milk and butter before adding them. Let your sour cream sit out for 30 minutes before using. This attention to temperature makes a noticeable difference.
Toast your garlic if using. If you’re adding roasted garlic to the potatoes, roast it while the potatoes boil. Cut the top off a garlic head, drizzle with olive oil, wrap in foil, and roast at 400°F for 35-40 minutes. Squeeze the soft cloves into the potatoes before mashing. The sweetness of roasted garlic is incredible here.
One mistake I still make: I once tried to make this recipe with red potatoes because that’s what I had on hand. Disaster. Red potatoes are too waxy and don’t mash well—they turn gummy. Stick with Yukon Golds or Russets. Learn from my error.
Multi-tasking strategy: Start the bacon in the oven first since it takes the longest. While it cooks, prep your potatoes and get them boiling. While the potatoes boil, shred your cheese and chop your chives. By the time the potatoes are done, everything else is ready to go.
Variations & Adaptations
This loaded mashed potato bar with bacon and chives is incredibly adaptable. Here are some variations I’ve tried and loved:
Dietary Adaptations
- Vegetarian Version: Skip the bacon and add roasted mushrooms or caramelized onions for that savory depth. Smoked paprika on top adds a bacon-like smokiness that’s surprisingly convincing.
- Dairy-Free Version: Use unsweetened oat milk and vegan butter for the potatoes. Top with dairy-free cheese shreds and coconut-based sour cream. I’ve tested this with Miyoko’s brand and it works beautifully.
- Gluten-Free: This recipe is naturally gluten-free, but double-check your bacon brand—some use soy sauce or other additives that contain gluten. Most major brands are safe.
Flavor Twists
- Loaded Baked Potato Style: Add broccoli florets (steamed and chopped) and extra cheddar. It tastes just like a loaded baked potato soup in solid form.
- Southwest Version: Top with corn kernels, black beans, diced avocado, and a drizzle of chipotle crema. The smoky heat pairs surprisingly well with the creamy potatoes.
- Italian-Inspired: Add sun-dried tomatoes, fresh basil, mozzarella pearls, and a drizzle of balsamic glaze. This one got rave reviews at my last dinner party.
Different Cooking Methods
- Instant Pot Method: Add the potato chunks to your Instant Pot with 1 cup of water. Cook on high pressure for 8 minutes, then quick release. Proceed with mashing as directed. This saves about 10 minutes.
- Slow Cooker Method: Boil the potatoes first, mash them, then transfer to a slow cooker set to warm. This is perfect for parties where you want to keep the potatoes hot for hours. Add a splash of warm milk every hour to maintain creaminess.
My Personal Favorite Variation: I once added caramelized onions and truffle oil to the potato base for a fancy dinner party. The earthy truffle flavor with the sweet onions was absolutely divine. It felt like restaurant-quality food without the restaurant price tag.
Serving & Storage Suggestions
Serving Temperature: Serve the mashed potatoes hot, with all toppings at room temperature. The contrast between warm potatoes and cool sour cream is part of the magic. If you’re using a chafing dish, the potatoes will stay perfectly warm for up to 2 hours.
Presentation Tips: For a beautiful spread, arrange your toppings in rainbow order—green chives next to white sour cream, next to orange cheddar, next to brown bacon. Use small clear glass bowls so guests can see what’s available. Label each topping with a small tent card if you’re feeling fancy.
What to Serve Alongside: This loaded mashed potato bar with bacon and chives is hearty enough to be a main dish, but it pairs beautifully with:
- Grilled steak or roasted chicken
- A crisp green salad with vinaigrette (the acidity cuts through the richness)
- Roasted vegetables like asparagus or Brussels sprouts
- Warm dinner rolls or crusty bread
Storage Instructions: Store leftover mashed potatoes in an airtight container in the refrigerator for up to 4 days. Store toppings separately—bacon in a sealed bag, cheese in its original packaging, and chives wrapped in a damp paper towel in a plastic bag.
Reheating Methods: The best way to reheat is in a saucepan over medium-low heat, stirring frequently. Add a splash of warm milk to restore creaminess. You can also reheat in the microwave in 30-second bursts, stirring between each. The texture won’t be quite as good as fresh, but it’s still delicious.
Freezer Instructions: Mashed potatoes freeze surprisingly well. Portion them into freezer-safe bags, squeeze out the air, and freeze flat for up to 3 months. Thaw in the refrigerator overnight, then reheat as directed. The bacon and chives should be added fresh after thawing.
Flavor Development: Here’s something interesting—the potato base actually tastes better the next day. The flavors meld together overnight, and the texture becomes even creamier. I sometimes make the potatoes a day ahead on purpose for this reason.
Nutritional Information & Benefits
Here’s the nutritional breakdown for one serving of this loaded mashed potato bar with bacon and chives (based on 8 servings, with approximately 1/2 cup of toppings):
| Nutrient | Amount Per Serving |
|---|---|
| Calories | 385 |
| Total Fat | 22g |
| Saturated Fat | 12g |
| Cholesterol | 55mg |
| Sodium | 680mg |
| Total Carbohydrates | 38g |
| Dietary Fiber | 4g |
| Protein | 12g |
| Vitamin C | 25% DV |
| Potassium | 15% DV |
| Calcium | 20% DV |
Health Benefits: Potatoes get a bad reputation, but they’re actually quite nutritious. Yukon Gold potatoes are rich in vitamin C, potassium, and fiber (especially with the skins on). The bacon and cheese add protein and calcium, while chives provide vitamin K and antioxidants. This isn’t health food, but it’s not as indulgent as you might think.
Dietary Considerations: This recipe is naturally gluten-free and nut-free. For lower sodium, use unsalted butter and reduce the added salt. For a lighter version, substitute half the sour cream with plain Greek yogurt and use turkey bacon instead of regular bacon.
My Wellness Perspective: I believe in balance. This loaded mashed potato bar with bacon and chives is a celebration dish—it’s meant for gatherings and special occasions. Enjoy it fully, savor every bite, and don’t stress about the numbers. Food is about connection and joy, not just nutrients.
Frequently Asked Questions
Can I make this loaded mashed potato bar ahead of time?
Absolutely! The potato base can be made up to 2 days in advance. Store it covered in the refrigerator, then reheat gently on the stovetop or in a slow cooker. Add a splash of warm milk when reheating to restore the creamy texture. Prep your toppings the day before and store them separately.
What are the best potatoes for mashed potatoes?
Yukon Gold potatoes are my top choice for this recipe. They have the perfect balance of starch and moisture, plus a naturally buttery flavor. Russet potatoes work well too—they’re starchier and give you a fluffier texture. Avoid waxy potatoes like red or fingerling varieties, as they become gummy when mashed.
How do I keep mashed potatoes warm for a party?
A slow cooker set to warm is your best friend here. Transfer the mashed potatoes to the slow cooker after mashing, cover, and they’ll stay perfectly warm for 2-3 hours. Stir occasionally and add a splash of warm milk if they start to dry out. A chafing dish with a water bath works great too.
Can I freeze leftover mashed potatoes?
Yes! Mashed potatoes freeze beautifully. Portion them into freezer-safe bags, squeeze out excess air, and freeze flat. They’ll keep for up to 3 months. Thaw overnight in the refrigerator, then reheat in a saucepan with a splash of warm milk. Add fresh toppings after reheating for the best texture.
What other toppings can I add to a mashed potato bar?
The possibilities are endless! Some of my favorites include: caramelized onions, roasted garlic, crispy fried onions, diced avocado, pickled jalapeños, crumbled blue cheese, chopped fresh parsley, truffle oil drizzle, and even pulled pork for a loaded potato bowl. Let your guests get creative!
Conclusion
This loaded mashed potato bar with bacon and chives has become my secret weapon for hosting. It’s forgiving enough for a beginner cook, impressive enough for a holiday table, and customizable enough to please even the pickiest eaters. Every time I set out that toppings bar, I watch people’s faces light up as they build their perfect bowl.
What I love most about this recipe is how it brings people together. There’s something about creating your own loaded potato bowl that sparks conversation and laughter. People share their topping combinations, trade tips, and go back for seconds. It’s not just dinner—it’s an experience.
I encourage you to make this recipe your own. Swap in your favorite cheese, experiment with different toppings, adjust the seasoning to your taste. The beauty of a loaded mashed potato bar is that there’s no wrong way to do it. Start with the base recipe, then let your creativity run wild.
When you make this, I’d love to hear about it. Drop a comment below and tell me your favorite topping combination. Share a photo of your spread on social media. And most importantly, enjoy every creamy, bacony, cheesy bite. You’ve got this!
Pin This Recipe!
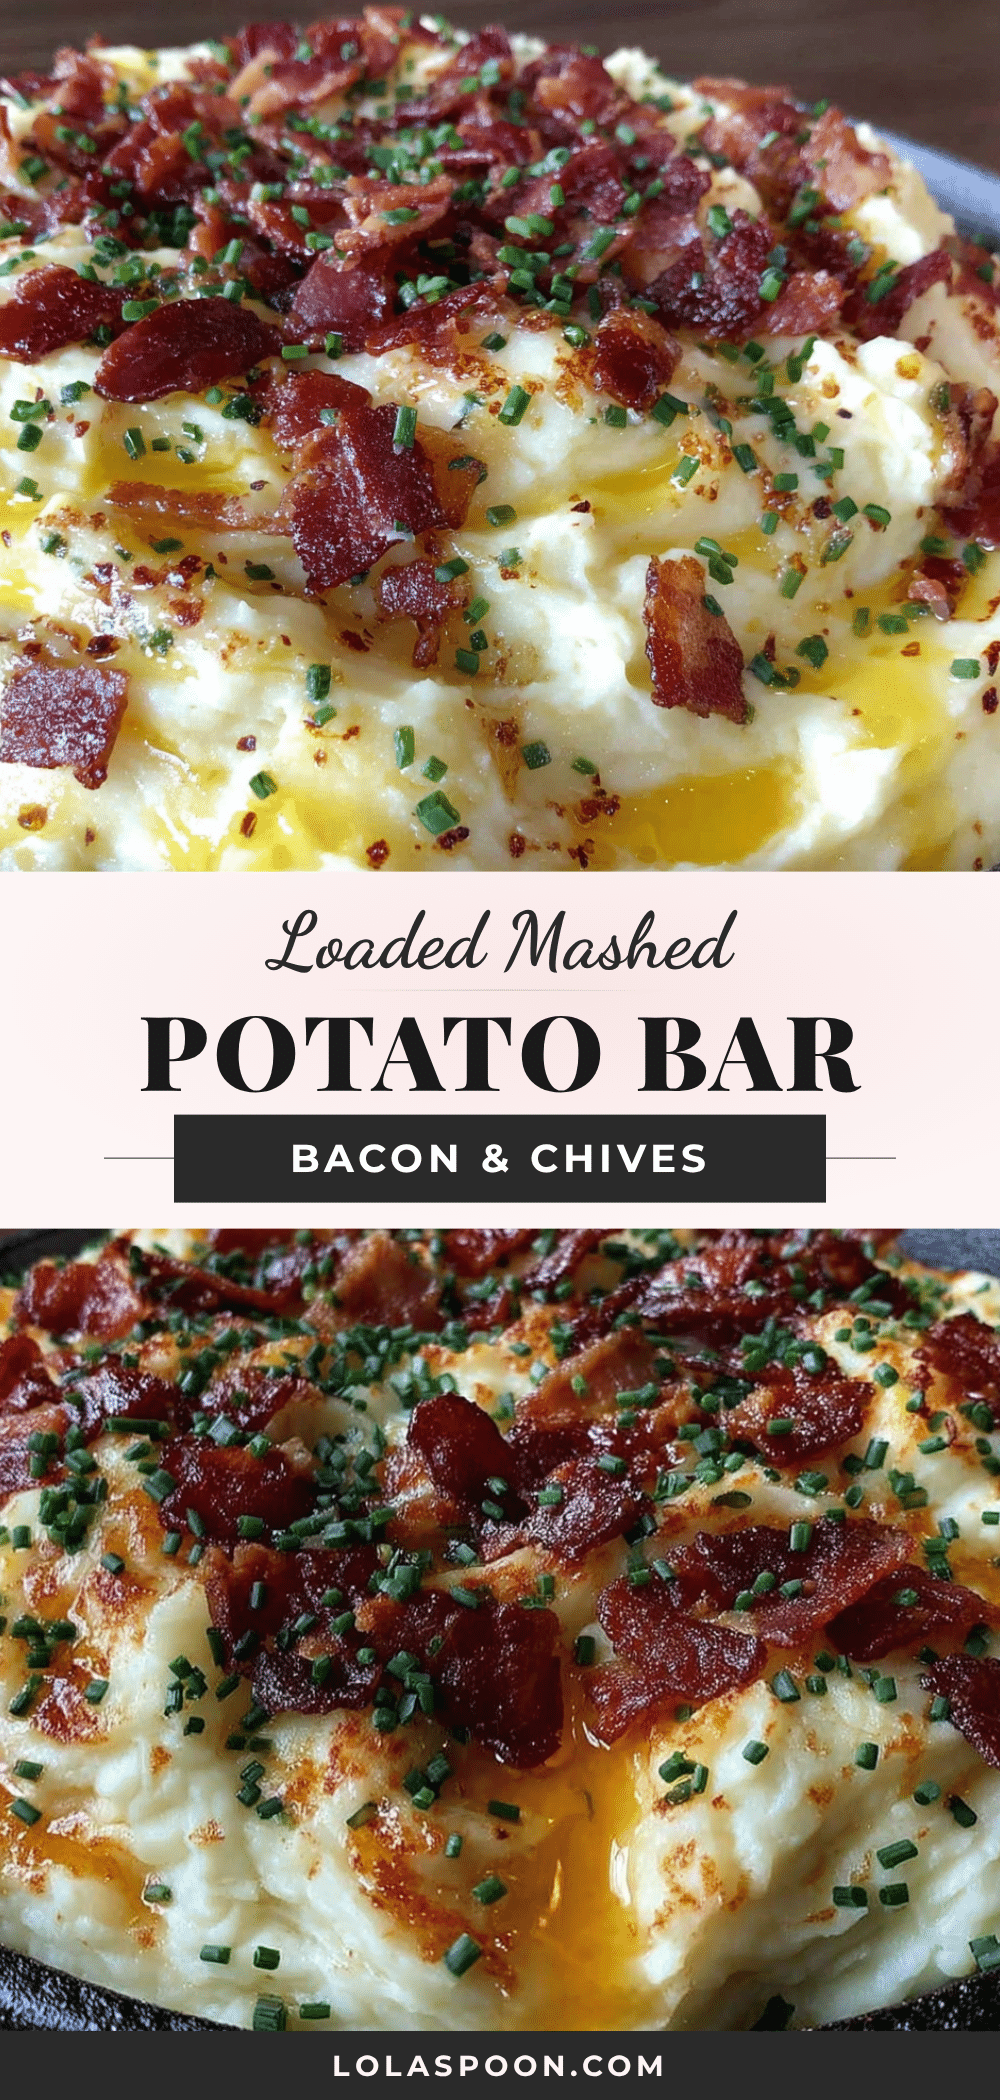
Best Loaded Mashed Potato Bar with Bacon & Chives

This loaded mashed potato bar with bacon and chives is a crowd-pleasing, customizable dish perfect for gatherings. With rustic skins-on potatoes, crispy bacon, sharp cheddar, and fresh chives, it’s stress-free to make ahead and always a hit.
- Prep Time: 15 minutes
- Cook Time: 30 minutes
- Total Time: 45 minutes
- Yield: 8 servings 1x
- Category: Main Course
- Cuisine: American
Ingredients
- 5 pounds Yukon Gold potatoes, washed, cut into 2-inch chunks
- 1 cup whole milk, warm
- 1/2 cup unsalted butter, softened, cut into cubes
- 1 teaspoon salt, plus more for boiling water
- 1/2 teaspoon black pepper, freshly ground
- 1/2 cup sour cream, room temperature
- 1 pound bacon, cooked until crispy, crumbled
- 2 cups sharp cheddar cheese, shredded
- 1 cup sour cream, for topping
- 1/2 cup fresh chives, finely chopped
- 4 green onions, sliced thin
- 1/2 cup butter, softened, for topping
- 1/2 cup crispy fried onions (optional)
- 1/4 cup pickled jalapeños, diced (optional)
- 1/2 cup roasted garlic cloves (optional)
- Fresh parsley, chopped (optional)
Instructions
- Scrub the Yukon Gold potatoes thoroughly under cold water. Cut them into 2-inch chunks, leaving the skins on. Place them in a large stockpot and cover with cold water by about 2 inches. Add a generous tablespoon of salt to the water.
- Bring the water to a boil over high heat. Once boiling, reduce the heat to medium-high and cook for 15-20 minutes until the potatoes are fork-tender. Drain in a colander and let them steam dry for 2-3 minutes.
- While the potatoes boil, preheat the oven to 400°F. Line a baking sheet with parchment paper. Lay the bacon strips in a single layer and bake for 15-20 minutes, flipping halfway through, until crispy. Transfer to a paper towel-lined plate to cool, then crumble into small pieces.
- In a small saucepan over low heat, warm the milk and butter together until the butter melts and the mixture is warm to the touch. Do not boil.
- Return the drained potatoes to the stockpot or transfer to a large mixing bowl. Add the warm milk-butter mixture. Mash with a potato masher until mostly smooth but still slightly chunky.
- Fold in the sour cream, salt, and pepper using a rubber spatula. Taste and adjust seasoning.
- Transfer the mashed potatoes to a serving bowl or chafing dish. Arrange all toppings in separate bowls: crumbled bacon, shredded cheddar, extra sour cream, fresh chives, sliced green onions, and any optional toppings.
- Serve immediately, letting guests build their own bowls. Start with a scoop of potatoes, then add cheese, bacon, sour cream, and fresh herbs.
Notes
For make-ahead, prepare the potato base up to 2 days in advance and reheat gently with a splash of warm milk. The potato base tastes even better the next day. For best results, use Yukon Gold potatoes and shred your own cheese.
Nutrition
- Serving Size: 1 serving (about 1 c
- Calories: 385
- Sugar: 3
- Sodium: 680
- Fat: 22
- Saturated Fat: 12
- Carbohydrates: 38
- Fiber: 4
- Protein: 12
Keywords: loaded mashed potato bar, bacon and chives mashed potatoes, mashed potato bar, loaded mashed potatoes, potato bar recipe


