The Halloween party was in four hours and I’d completely forgotten. Not just forgotten the costume — I’d forgotten I was supposed to bring food. Everyone else would be showing up with those elaborate themed platters you see on Pinterest, the ones that look like they took three days and a culinary degree. I had a bag of bell peppers, some chicken I’d thawed that morning, and a bottle of buffalo sauce that was dangerously close to its expiration date. Honestly, I stood in my kitchen staring at the counter like it had personally betrayed me.
Then it hit me — and I mean literally hit me, because I dropped a pepper on my foot. What if I carved the peppers like tiny jack-o’-lanterns and stuffed them with spicy buffalo chicken? It was one of those ideas that feels either brilliant or terrible, with no in-between. I started cutting, scraping, and mixing with the frantic energy of someone who has zero backup plan. The kitchen looked like a buffalo wing exploded by the time I was done. My dog kept licking my ankle, probably hoping I’d drop something.
I showed up late, carrying a tray of these weird little pepper faces, fully expecting to be the person who brought the “well, I tried” dish. But then people started grabbing them. And then they started going back for seconds. By the end of the night, someone had actually asked me for the recipe — which is funny, because I’d basically made it up on the spot out of sheer panic. That’s the thing about cooking under pressure. Sometimes you stumble into something that just works. And now I make these every Halloween, on purpose, with plenty of time to spare. Well, most years anyway.
Maybe you’ve been there — staring down a deadline with nothing but odds and ends in your fridge. These Spooky Stuffed Buffalo Chicken Peppers are the kind of recipe that turns a kitchen crisis into a party win. They’re fun, they’re spicy, and they look exactly like Halloween on a plate.
Why You’ll Love This Recipe
Let me tell you why this recipe has become my go-to for every Halloween gathering. I’ve tested it about a dozen times since that frantic first attempt, and I’ve got it dialed in perfectly now. Here’s what makes it special:
- Quick & Easy: From start to table in about 45 minutes. That’s faster than most people spend on their costume.
- Simple Ingredients: Chicken, cream cheese, buffalo sauce, cheese, and peppers. That’s it. No weird specialty items.
- Perfect for Halloween: The carved pepper faces make them instantly festive. No fake spider webs required.
- Crowd-Pleaser: I’ve watched picky eaters, spice wimps, and even vegetarians (who ate just the pepper part) go back for more.
- Unbelievably Delicious: The creamy, spicy filling inside a roasted sweet pepper is pure comfort food magic.
What makes this different from every other stuffed pepper recipe out there? It’s the combination of the buffalo chicken filling — which stays incredibly creamy thanks to the cream cheese — and the fact that the pepper itself becomes both the vessel and the vegetable. Most stuffed peppers get soggy. These don’t. The carving actually helps them hold their shape better during baking.
This recipe isn’t just good — it’s the kind that makes people close their eyes after the first bite. It’s comfort food reimagined for a spooky occasion. Healthier than a plate of wings, faster than a slow-cooker dip, but with the same soul-soothing satisfaction. Perfect for impressing guests without stress, or turning a simple weeknight dinner into something memorable. Honestly, I’ve made these in October and in March. They work any time you want a little heat and a lot of flavor.
What Ingredients You Will Need
This recipe uses simple, wholesome ingredients to deliver bold flavor and satisfying texture without the fuss. Most of these are pantry staples or easy to find at any grocery store. Here’s what you’ll need:
For the Peppers
- 6 medium bell peppers — orange and red work best for the Halloween look, but any color works. Look for ones that sit flat on their own.
- 1 tablespoon olive oil — for brushing the peppers before baking (adds a nice sheen and helps them roast evenly)
For the Buffalo Chicken Filling
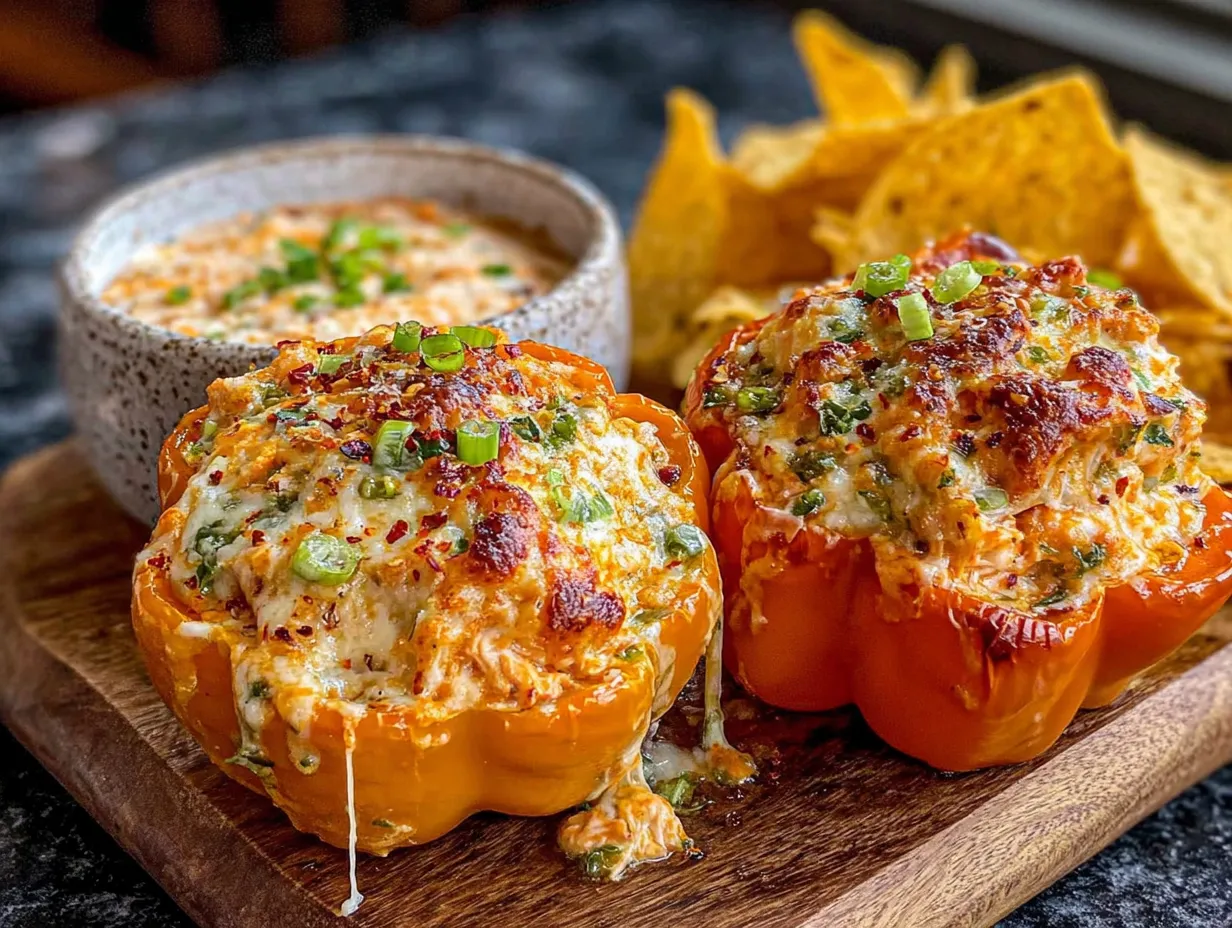
- 2 cups cooked chicken, shredded — rotisserie chicken is my secret weapon here. I grab one from the store and shred it while I’m carving the peppers. If you’re cooking from scratch, poach 2 boneless skinless chicken breasts until tender, then shred.
- 4 ounces cream cheese, softened — full-fat gives the creamiest result, but reduced-fat works fine too. Let it sit out for 20 minutes before mixing.
- 1/2 cup buffalo sauce — I prefer Frank’s RedHot for that classic wing flavor. Use more or less depending on your heat tolerance.
- 1/2 cup shredded cheddar cheese — sharp cheddar adds the best flavor, but Monterey Jack or pepper jack work beautifully too.
- 1/4 cup crumbled blue cheese — optional but highly recommended. It’s the classic wing pairing and adds a tangy kick.
- 2 green onions, sliced — for freshness and a little color contrast
- 1/2 teaspoon garlic powder — don’t skip this. It rounds out the flavor.
- 1/4 teaspoon salt — adjust based on how salty your buffalo sauce is
- 1/4 teaspoon black pepper — freshly ground if you have it
For Garnish (Optional but Fun)
- Extra green onions — for sprinkling on top after baking
- Ranch or blue cheese dressing — for dipping. This is non-negotiable in my house.
- Celery sticks — because it’s not buffalo anything without celery
A quick note on ingredient selection: I’ve tried this with pre-shredded cheese from a bag, and honestly, it doesn’t melt as smoothly. If you have five minutes, shred your own cheddar. It makes a real difference in the creaminess of the filling. Also, for the buffalo sauce, check the label — some brands add a ton of extra salt or sugar. Frank’s is pretty clean ingredient-wise, which is why I stick with it.
If you’re feeding folks who don’t love spice, use a mild buffalo sauce or mix it with a little melted butter to tone down the heat. You can also swap the chicken for shredded jackfruit or canned chickpeas for a vegetarian version — I’ve done both, and they’re surprisingly good.
Equipment Needed
You don’t need a fancy kitchen to pull these off. Here’s what I use every time:
- Baking dish — a 9×13 works perfectly. You want something that holds the peppers snugly so they don’t tip over.
- Small sharp knife — for carving the pepper faces. A paring knife is ideal. Please be careful — I’ve nicked myself more times than I’d like to admit.
- Small spoon or melon baller — for scooping out the pepper seeds and membranes. A melon baller is oddly satisfying for this task.
- Mixing bowl — medium size, for combining the filling ingredients
- Cutting board — preferably one with a groove to catch pepper juice
- Pastry brush — for brushing oil on the peppers. If you don’t have one, just use your fingers. I’ve done it plenty of times.
- Aluminum foil — for covering the dish during the first part of baking
If you don’t have a melon baller, a regular teaspoon works fine. And if you’re short on baking dishes, a cast iron skillet works beautifully — it retains heat well and gives the peppers a nice roasted bottom. My favorite budget-friendly option is a simple glass baking dish from any grocery store. They cost about ten bucks and last forever.
Preparation Method
Alright, let’s make these spooky little things. I’ve broken this down so even a Halloween procrastinator can follow along.
- Preheat your oven to 375°F (190°C). Get this going first so it’s ready when you are.
- Prepare the peppers. Wash and dry your bell peppers. Using your small sharp knife, cut the top off each pepper — about 1/2 inch from the stem. Set the tops aside. Reach inside and remove all the seeds and white membranes. Rinse the inside if needed and pat dry. Now for the fun part: carve little jack-o’-lantern faces into one side of each pepper. Triangle eyes, a jagged mouth, maybe a little nose if you’re feeling fancy. Cut all the way through the pepper wall. Don’t worry if they’re not perfect — imperfect faces look more Halloween-y anyway.
- Blanch the peppers (optional but helpful). If you want slightly softer peppers, bring a large pot of water to a boil and drop the peppers in for 2 minutes. Remove with tongs and let them drain upside down on a paper towel. I skip this step half the time and they still turn out great, so don’t stress about it.
- Make the filling. In your mixing bowl, combine the shredded chicken, softened cream cheese, buffalo sauce, shredded cheddar, crumbled blue cheese (if using), sliced green onions, garlic powder, salt, and pepper. Mix everything together until it’s well combined. The cream cheese should be fully incorporated — no white streaks. Taste it. Adjust the salt or buffalo sauce to your liking. This is your moment to make it perfect.
- Stuff the peppers. Spoon the filling into each pepper, packing it gently but firmly. Don’t overstuff — you want the filling to stay inside, not explode out during baking. Mound it slightly at the top. Place the pepper tops back on at a jaunty angle, like little hats. This makes them look even more like tiny Halloween creatures.
- Arrange and brush. Place the stuffed peppers upright in your baking dish. If they wobble, trim a tiny slice off the bottom to make them sit flat. Brush the outside of each pepper with olive oil. This helps them roast and get that beautiful slightly blistered look.
- Bake covered. Cover the dish with aluminum foil and bake for 20 minutes. This steams the peppers enough to soften them without turning them into mush.
- Bake uncovered. Remove the foil and bake for another 10-15 minutes, until the peppers are tender and the filling is hot and bubbly. The cheese on top should be melted and starting to brown in spots.
- Rest and serve. Let the peppers sit for 5 minutes before serving. This is important — the filling sets up a little and won’t burn your mouth. Trust me on this one. I’ve learned the hard way.
Your kitchen will smell incredible at this point. The buffalo sauce mingling with roasted pepper is one of those aromas that makes people wander in asking, “What’s for dinner?”
Cooking Tips & Techniques
After making these more times than I can count, I’ve collected a few tricks that make the process smoother and the results better. Here’s what I wish someone had told me the first time:
Don’t overbake the peppers. They should be tender but still have a little structure. If they collapse, they lose their spooky face shape. Start checking at the 25-minute mark. A fork should slide in easily but the pepper shouldn’t be falling apart.
Make the faces big enough. I made the mistake of carving tiny little eyes my first time, and they basically closed up during baking. Cut your triangles and mouths at least 1/2 inch wide. The pepper will shrink slightly as it roasts, so bigger openings stay visible.
Room temperature cream cheese is non-negotiable. I’ve tried mixing cold cream cheese into the filling and ended up with lumpy pockets of cream cheese that didn’t distribute. Let it sit out for 20-30 minutes. If you forgot, microwave it for 10 seconds — but watch it carefully. Nobody wants scrambled eggs in their buffalo chicken.
Use rotisserie chicken for speed. This is my biggest time-saving tip. Shredding a rotisserie chicken takes about 5 minutes and gives you perfectly cooked, flavorful meat. Plus, you can use the leftover chicken for lunches the next day. It’s a win-win.
Line your baking dish with foil. The filling sometimes bubbles over, and buffalo sauce is a pain to scrub off a glass dish. A quick foil lining means minimal cleanup. Future you will be grateful.
One time I forgot to set a timer and the peppers baked for almost 35 minutes uncovered. The faces were barely visible and the filling got a little dry. It was still edible, but it taught me to always set two timers — one for the covered phase and one for the uncovered phase. Learn from my mistakes, friends.
Variations & Adaptations
This recipe is surprisingly flexible. Here are some ways I’ve adapted it over the years:
Vegetarian Version: Swap the chicken for two cans of drained and rinsed chickpeas or one can of jackfruit (shredded). The texture is different but still satisfying. I made this for a friend who doesn’t eat meat, and she asked for the recipe. Add a little extra buffalo sauce to compensate for the milder flavor of the plant-based options.
Milder Version: Use only 1/4 cup buffalo sauce and add 2 tablespoons of melted butter to tone down the heat. You can also use a mild wing sauce or even a barbecue sauce mixed with a little hot sauce. Great for kids or spice-sensitive guests.
Extra Spicy Version: Add 1/2 teaspoon cayenne pepper to the filling and use a spicy buffalo sauce. Top with sliced jalapeños before baking. This one is for the heat seekers in your life. My brother-in-law swears by this version.
Dairy-Free Version: Use dairy-free cream cheese and vegan cheddar shreds. The texture won’t be quite as creamy, but it’s still delicious. I’ve tested this with Kite Hill cream cheese and it worked surprisingly well.
Different Protein: Shredded pork, ground turkey, or even canned tuna (drained) work in place of chicken. I made a buffalo turkey version for a post-Thanksgiving party and it was a hit. Just make sure whatever protein you use is fully cooked before mixing.
Air Fryer Method: Cook at 350°F (175°C) for 12-15 minutes. No need to cover. Check at the 10-minute mark. The peppers get a nice blistered exterior this way. I’ve done this when I didn’t want to heat up the whole oven.
My personal favorite variation? I add a little cooked crumbled bacon to the filling. It’s extra work, but the smoky flavor with the buffalo sauce is absolutely killer. Just saying.
Serving & Storage Suggestions
These peppers are best served warm, right after that 5-minute rest. The filling is creamy, the pepper is tender, and the faces are at their most visible. I like to arrange them on a platter with a small bowl of ranch or blue cheese dressing in the center for dipping. Celery sticks around the edge complete the buffalo wing experience.
For a Halloween party, I’ll set them out on a black platter with some fake spider webs draped around. It’s silly but people love it. They also pair great with a crisp green salad or some roasted potato wedges if you’re serving them as a main dish.
Refrigerator Storage: Leftover peppers keep in an airtight container in the fridge for up to 4 days. The flavors actually meld together overnight and get even better. I’ve eaten them cold straight from the fridge the next day and loved them.
Freezer Storage: You can freeze the unbaked stuffed peppers for up to 3 months. Assemble them completely, place on a baking sheet to freeze solid, then transfer to a freezer bag. To bake, add about 15 minutes to the covered baking time. Don’t thaw first — bake from frozen.
Reheating: The best way to reheat is in the oven at 350°F (175°C) for 10-15 minutes. The microwave works in a pinch but the pepper gets a little sad and soft. If microwaving, do 30-second intervals and let it rest between each one.
One thing I’ve noticed — the peppers get a little softer each day in the fridge. They’re still tasty, but the faces might not be as crisp. That’s why I recommend eating them within two days for the best texture. Not that they usually last that long in my house.
Nutritional Information & Benefits
Here’s a rough estimate per stuffed pepper (using full-fat ingredients and one pepper per serving):
- Calories: Approximately 320-350
- Protein: 24g
- Fat: 20g
- Carbohydrates: 12g
- Fiber: 3g
- Sugar: 6g
These numbers will vary based on your exact ingredients and portion sizes. Use reduced-fat cheese and cream cheese to cut the fat and calories by about 30%.
From a health perspective, bell peppers are packed with vitamin C — actually more than oranges gram for gram. They also contain vitamin A, which is great for eye health, and capsaicin from the buffalo sauce may help boost metabolism. The chicken provides lean protein that keeps you full and satisfied. It’s not health food, but it’s not junk food either. It’s a balanced, real-food meal that happens to look like a Halloween decoration.
If you’re watching sodium, use low-sodium buffalo sauce and skip the added salt. The blue cheese and cheddar already bring plenty of saltiness. This recipe is naturally gluten-free as written, which makes it a great option for guests with celiac disease or gluten sensitivity.
Conclusion
These Spooky Stuffed Buffalo Chicken Peppers are proof that you don’t need hours of prep or a themed tablecloth to make Halloween special. They came out of a moment of panic in my kitchen, and now they’re a tradition I actually look forward to. The combination of spicy, creamy filling inside a sweet roasted pepper is just — I mean, it’s hard to describe without sounding dramatic, but it really is that good.
I hope you give these a try, whether you’re hosting a party, feeding your family on Halloween night, or just want a fun dinner that feels like a celebration. Don’t be afraid to make the faces your own — I’ve done everything from classic jack-o’-lantern grins to angry eyebrows to a pepper that looked suspiciously like my neighbor’s cat. The imperfections are what make them charming.
If you make these, I’d love to hear how they turned out. Drop a comment below with your pepper face creations, any variations you tried, or just to say hi. And if you’re looking for more easy weeknight dinners with a twist, check out my crispy garlic chicken or these sheet pan fajitas for another quick meal that delivers big flavor without the stress. Happy Halloween, and happy cooking!
Frequently Asked Questions
Can I make these ahead of time for a party?
Absolutely. You can assemble the stuffed peppers up to 24 hours in advance and keep them covered in the fridge. Just add 5-10 minutes to the covered baking time since you’re starting from cold. I’ve done this for multiple parties and it works perfectly.
What if I can’t find orange or red bell peppers?
Any color works, honestly. Green peppers are a little more bitter and firmer, but they still taste great. Yellow peppers are sweeter and milder. The faces show up best on lighter-colored peppers, but even a green pepper with a carved face looks undeniably Halloween-y.
How do I keep the peppers from tipping over in the baking dish?
If a pepper won’t sit flat, slice a tiny piece off the bottom — just enough to create a flat surface. Don’t cut too much or you’ll create a hole. You can also nestle them close together in the dish so they support each other. That’s my lazy trick.
Can I use pre-cooked frozen chicken?
Yes, but thaw it completely and squeeze out any excess moisture before shredding. Wet chicken makes the filling watery. I’ve used frozen grilled chicken strips in a pinch and they worked fine after I patted them dry.
My kids don’t like spicy food. Will these be too hot?
They might be. I’d recommend using only 1/4 cup of mild buffalo sauce and mixing it with 2 tablespoons of melted butter. You can also use a sweet barbecue sauce with just a dash of hot sauce for a kid-friendly version. The pepper itself isn’t spicy at all, so the heat is completely in your control.
Pin This Recipe!

Best Spooky Stuffed Buffalo Chicken Peppers Recipe

These Spooky Stuffed Buffalo Chicken Peppers are the perfect Halloween party appetizer or main dish. Carved like tiny jack-o’-lanterns and filled with a creamy, spicy buffalo chicken mixture, they’re quick, easy, and guaranteed to be a crowd-pleaser.
- Prep Time: 15 minutes
- Cook Time: 30 minutes
- Total Time: 45 minutes
- Yield: 6 servings 1x
- Category: Appetizer
- Cuisine: American
Ingredients
- 6 medium bell peppers (orange or red work best)
- 1 tablespoon olive oil
- 2 cups cooked chicken, shredded (rotisserie chicken recommended)
- 4 ounces cream cheese, softened
- 1/2 cup buffalo sauce (Frank’s RedHot recommended)
- 1/2 cup shredded cheddar cheese
- 1/4 cup crumbled blue cheese (optional)
- 2 green onions, sliced
- 1/2 teaspoon garlic powder
- 1/4 teaspoon salt
- 1/4 teaspoon black pepper
- Extra green onions for garnish (optional)
- Ranch or blue cheese dressing for dipping (optional)
- Celery sticks for serving (optional)
Instructions
- Preheat your oven to 375°F (190°C).
- Prepare the peppers: Wash and dry bell peppers. Cut the top off each pepper about 1/2 inch from the stem. Remove seeds and membranes. Carve jack-o’-lantern faces into one side of each pepper, cutting all the way through the pepper wall.
- Blanch the peppers (optional): Bring a large pot of water to a boil and drop the peppers in for 2 minutes. Remove with tongs and let drain upside down on a paper towel.
- Make the filling: In a mixing bowl, combine shredded chicken, softened cream cheese, buffalo sauce, shredded cheddar, crumbled blue cheese (if using), sliced green onions, garlic powder, salt, and pepper. Mix until well combined.
- Stuff the peppers: Spoon the filling into each pepper, packing gently but firmly. Place the pepper tops back on at a jaunty angle.
- Arrange and brush: Place stuffed peppers upright in a baking dish. Brush the outside of each pepper with olive oil.
- Bake covered: Cover the dish with aluminum foil and bake for 20 minutes.
- Bake uncovered: Remove the foil and bake for another 10-15 minutes, until peppers are tender and filling is hot and bubbly.
- Rest and serve: Let the peppers sit for 5 minutes before serving.
Notes
For best results, use room temperature cream cheese to avoid lumps. Carve faces at least 1/2 inch wide so they remain visible after baking. Line the baking dish with foil for easy cleanup. Leftovers keep in the fridge for up to 4 days or can be frozen unbaked for up to 3 months.
Nutrition
- Serving Size: 1 stuffed pepper
- Calories: 335
- Sugar: 6
- Sodium: 800
- Fat: 20
- Saturated Fat: 9
- Carbohydrates: 12
- Fiber: 3
- Protein: 24
Keywords: stuffed peppers, buffalo chicken, Halloween, appetizer, party food, spicy, bell peppers, jack-o'-lantern


