It was 10:47 PM on a rainy Tuesday in late September, and I had a very specific craving for something cheesy, comforting, and—honestly—a little bit silly. I didn’t have pizza dough in the fridge (the real stuff you’d use for a proper pie), but I had a pack of crescent rolls, some string cheese, and a jar of marinara that was staring at me from the back of the pantry. The idea that arrived was weirdly specific: what if I wrapped the cheese like a mummy and called it dinner? The rain was tapping against the window, my cat was asleep on the counter (don’t tell anyone), and I just went for it. I mean, that’s the kind of energy a late Tuesday night demands, right?
I ripped open the crescent roll tube—that satisfying *pop* sound that always makes me feel five years old again—and started cutting the dough into thin strips. It was messy. My fingers were sticky. I dropped a piece of cheese on the floor and pretended I didn’t see it. But when I wrapped those little strips around the mozzarella, leaving a tiny gap for the “eyes,” I actually laughed out loud. They looked ridiculous. Like tiny, tasty ghosts that got lost on their way to a pizza party. I baked them for twelve minutes, and the smell that filled my kitchen was pure, buttery, garlicky comfort. Maybe you’ve been there—standing in your kitchen at an ungodly hour, making something that has no business being this good, just because it feels right. These mummy pizza bites stayed with me because they weren’t just food. They were a little moment of joy on a dreary night. And honestly? That’s the best kind of recipe to keep.
Why You’ll Love This Recipe
Let me tell you, after testing this recipe about four times (the first batch was a cheesy disaster—too much dough, not enough structure), I landed on a version that is genuinely foolproof. I’ve been developing recipes for over a decade, and these little mummies check every box for a busy weeknight or a low-stress Halloween party. They are the kind of snack that makes people smile before they even take a bite.
- Quick & Easy : From start to finish, you’re looking at about 20 minutes. That’s less time than it takes to decide what to order for delivery.
- Simple Ingredients : You probably have crescent rolls, cheese, and marinara in your kitchen right now. No fancy grocery trips needed—I promise.
- Perfect for Halloween : Whether you’re hosting a spooky movie night or just want something fun for the kids, these bites fit the occasion without any stress.
- Crowd-Pleaser : I’ve served these at a party with both adults and kids, and they disappeared in under ten minutes. The adults actually fought over the last one.
- Unbelievably Delicious : The texture is what gets me—crispy, flaky dough wrapped around gooey, melted cheese. It’s next-level comfort food in a single bite.
What makes this recipe different from the rest? It’s the technique. Instead of using thick pizza dough (which can get soggy), I use crescent roll dough cut into thin strips. This creates a delicate, almost buttery crust that stays crispy on the outside while the cheese gets perfectly molten on the inside. I also add a tiny pinch of garlic powder and Italian seasoning to the dough before baking—it’s a small step, but it makes these taste like they came from a fancy pizzeria. This isn’t just another Halloween snack. It’s your best version of a cozy, cheesy, silly little treat that actually delivers on flavor.
What Ingredients You Will Need
This recipe uses simple, pantry-friendly ingredients to deliver bold flavor and that satisfying, gooey texture without any fuss. I’ve tested a few variations, and these specific ingredients give you the best balance of crispiness and cheesiness.
- 1 can (8 oz) refrigerated crescent roll dough – I recommend Pillsbury for the flakiest texture. You can also use store-brand, just make sure it’s the original style, not the flaky layers.
- 6 string cheese sticks – Use full-fat mozzarella for the best melt. I’ve tried part-skim, and it doesn’t get as oozy. Cut each stick in half crosswise to make 12 pieces.
- 1/4 cup pizza sauce or marinara – For dipping. I love Rao’s for its rich flavor, but any good jarred sauce works. You can also use leftover pasta sauce.
- 12 candy eyes or small black olive slices – For the mummy faces. Candy eyes are easier and cuter, but olive slices work if you want a savory twist. I’ve used both, and honestly, the candy eyes win for fun factor.
- 1 tablespoon melted butter – For brushing on top before baking. This gives the dough that gorgeous golden-brown color.
- 1/2 teaspoon garlic powder – Optional, but highly recommended. It adds a savory depth that makes these taste more like pizza.
- 1/2 teaspoon Italian seasoning – Also optional. A sprinkle of dried oregano, basil, and thyme makes a big difference.
- Pinch of salt – Just a little to balance the flavors.
A quick note on substitutions: if you’re gluten-free, you can use gluten-free crescent roll dough (I’ve tested the brand from Whole Foods, and it works well). For a dairy-free version, use vegan mozzarella sticks and a dairy-free butter alternative. Just be aware that the melt won’t be as stretchy, but the flavor is still great. I also sometimes add a tiny piece of pepperoni inside the cheese before wrapping for a meatier bite—my kids love that version.
Equipment Needed
You don’t need any fancy tools for this recipe, which is part of why I love it so much. Here’s what you’ll need:
- Baking sheet – A standard half-sheet pan works perfectly. Line it with parchment paper for easy cleanup.
- Parchment paper – Trust me, the cheese can leak a little, and parchment makes sure nothing sticks.
- Sharp knife or pizza cutter – For cutting the crescent roll dough into thin strips. A pizza cutter makes it faster, but a knife works fine.
- Small bowl – For mixing the melted butter with garlic powder and Italian seasoning.
- Pastry brush – For brushing the butter mixture onto the dough. If you don’t have one, you can use a spoon, but a brush gives a more even coat.
- Cooling rack – Optional, but it helps the mummies stay crispy if you let them cool on a rack instead of the hot pan.
I’ve made these with a cheap baking sheet from the dollar store, and they turned out fine. The only thing I’d splurge on is good parchment paper—the cheap stuff can stick. And if you don’t have a pastry brush, just dip a paper towel in the butter and dab it on. It’s messy, but it works.
Preparation Method
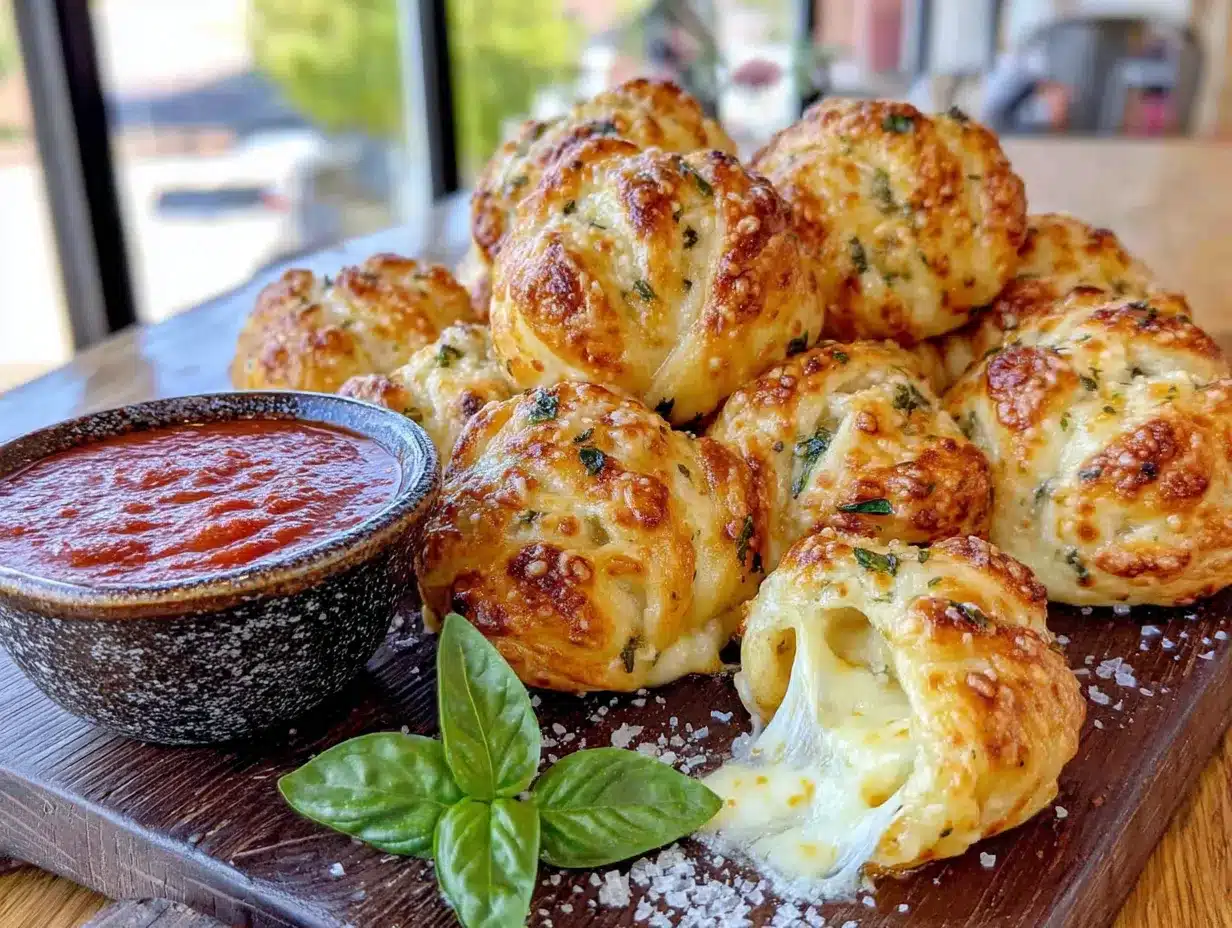
Alright, let’s get to the fun part. I’ve broken this down into clear steps so you don’t end up with a tangled mess of dough (like I did on my first try). Take your time with the wrapping—it’s the most important step.
- Preheat your oven to 375°F (190°C). Line a baking sheet with parchment paper. This ensures the mummies don’t stick and makes cleanup a breeze.
- Prepare the dough. Unroll the crescent roll dough onto a clean cutting board. Press the seams together gently to form a single sheet. Using a sharp knife or pizza cutter, cut the dough lengthwise into 12 thin strips, each about 1/2-inch wide. Don’t worry if they’re not perfectly even—it adds to the homemade charm.
- Cut the cheese. Take each string cheese stick and cut it in half crosswise. You’ll have 12 pieces total. If the cheese feels too soft, pop it in the freezer for 5 minutes—it’s easier to wrap when it’s firmer.
- Wrap the mummies. Take one strip of dough and wrap it around a piece of string cheese, starting at one end and working your way up. Leave a small gap (about 1/2 inch) near the top where the eyes will go. The dough should overlap slightly but not be too tight—the cheese needs room to expand as it melts. Repeat with all 12 pieces.
- Place on the baking sheet. Arrange the wrapped mummies on the prepared baking sheet, spacing them about 1 inch apart. They won’t spread much, but a little space helps them brown evenly.
- Brush with butter mixture. In a small bowl, mix the melted butter with the garlic powder, Italian seasoning, and a pinch of salt. Brush this mixture over each mummy bite. Be generous—this is what gives them that gorgeous golden crust.
- Bake for 10-12 minutes. Place the baking sheet in the preheated oven and bake until the dough is golden brown and the cheese is bubbly. Keep an eye on them after 10 minutes—ovens vary, and you don’t want the cheese to burst out completely.
- Add the eyes immediately. As soon as the mummies come out of the oven, press two candy eyes (or olive slices) into the exposed cheese gap. The heat will help them stick. Work quickly—the cheese sets as it cools.
- Cool for 2 minutes. Let the mummies rest on the baking sheet for 2 minutes, then transfer them to a cooling rack. This keeps the bottoms from getting soggy.
- Serve warm with marinara. Pour the pizza sauce into a small bowl for dipping. These are best eaten within 15 minutes of baking, while the cheese is still stretchy.
A little note from my own trials: if the dough tears while you’re wrapping, don’t panic. Just press it back together with your fingers. The butter wash will hide any imperfections. And if the cheese leaks out during baking (it happens to the best of us), just call them “zombie mummies” and move on. No one will complain.
Cooking Tips & Techniques
I’ve made these mummy bites about eight times now (yes, eight—my family is very supportive), and I’ve picked up a few tricks that make a real difference. Here’s what I’ve learned the hard way so you don’t have to.
First, don’t overwork the dough. Crescent roll dough is delicate, and if you handle it too much, it becomes tough. When you’re cutting the strips, use a light hand. I once pressed too hard with a dull knife, and the dough stuck to the blade and tore. A sharp pizza cutter is your best friend here.
Second, chill the cheese if your kitchen is warm. On a hot day, string cheese gets soft and bendy, which makes it harder to wrap. Pop the cheese sticks in the freezer for 5-10 minutes before cutting. It’s a small step, but it saves you from a frustrating wrapping session.
Third, leave that gap for the eyes. I know it’s tempting to wrap the dough all the way to the top, but the exposed cheese is what gives the mummies their character. Plus, it lets the cheese bubble up and get a little crispy on the edges—so good.
A common mistake I see is overbaking. The dough can go from golden to burnt very quickly, especially if your oven runs hot. Start checking at 10 minutes. You want the dough to be a deep golden brown, not dark brown. And remember, the cheese will continue to cook a little after you pull the pan out.
For multitasking, prepare the dough strips while the oven preheats. That way, everything is ready to go as soon as the oven beeps. I also like to set up a little assembly line: dough strips on the left, cheese in the middle, baking sheet on the right. It makes the wrapping process feel like a fun craft project rather than a chore.
Variations & Adaptations
One of the best things about this recipe is how easy it is to tweak. I’ve tried several variations, and they’ve all been hits in my house. Here are a few you might love:
- Spicy Sausage Mummies : Before wrapping the cheese, press a small piece of cooked Italian sausage or pepperoni onto the cheese. The spicy meat adds a nice kick and makes these more filling.
- Veggie Lover’s Version : Add a thin strip of roasted red pepper or a small basil leaf under the dough. It gives a pop of color and a fresh flavor that balances the richness.
- Gluten-Free Adaptation : Use gluten-free crescent roll dough (I’ve tested the brand from Schär, and it works well). The dough is a bit more fragile, so handle it gently. Bake for an extra 1-2 minutes.
- Air Fryer Method : Place the mummies in the air fryer basket in a single layer. Cook at 350°F (175°C) for 6-8 minutes, flipping halfway through. They get extra crispy this way—my preferred method when I’m not making a big batch.
- Sweet Version : Swap the cheese for a piece of banana or marshmallow, and use cinnamon-sugar instead of garlic butter. It’s weird, I know, but my kids begged me to try it, and honestly? It works. Just don’t tell the Halloween purists.
I personally love the spicy sausage version for game day. It turns these cute little mummies into a hearty snack that can stand up to any dip.
Serving & Storage Suggestions
These mummy pizza bites are best served warm, straight from the oven, when the cheese is at its stretchiest. I like to arrange them on a platter around a small bowl of warm marinara sauce—it makes them look like they’re gathering around a tiny campfire. For a Halloween party, you can add some “spooky” decorations like plastic spiders or fake cobwebs around the platter. It’s cheesy (pun intended), but guests love it.
If you’re serving these as a main dish (hey, no judgment), pair them with a simple side salad or some roasted vegetables. The lightness of the salad balances the richness of the cheese and dough. For drinks, a glass of red wine or a cold beer works great for adults, while kids love apple juice or sparkling water.
For storage, let any leftovers cool completely, then place them in an airtight container in the refrigerator. They’ll keep for up to 3 days. The dough will soften a bit, but they’re still delicious. To reheat, pop them in the oven at 350°F (175°C) for 5 minutes, or in the air fryer at 300°F (150°C) for 3 minutes. I don’t recommend the microwave—it makes the dough soggy.
The flavors actually develop a little overnight, especially if you used garlic powder and Italian seasoning. I’ve eaten these cold straight from the fridge the next day, and they’re still pretty great—like a weird, wonderful cold pizza experience.
Nutritional Information & Benefits
Here’s a rough estimate for one mummy bite (based on using full-fat cheese and butter). Keep in mind that these numbers can vary based on the brand of dough and cheese you use.
- Calories: ~120 per bite
- Protein: 6g
- Fat: 8g
- Carbohydrates: 7g
- Fiber: 0g
- Sugar: 2g
- Sodium: 280mg
The string cheese provides a good amount of protein and calcium, which is great for growing kids (or adults with a cheese addiction). The crescent roll dough is higher in refined carbs, but hey—it’s a treat. If you’re watching your sodium, you can use low-sodium string cheese and skip the added salt in the butter wash.
From a wellness perspective, I like to think of these as a fun, portion-controlled indulgence. You’re not eating a whole pizza—you’re having a few cute, satisfying bites. Pair them with a vegetable-heavy meal, and you’ve got a balanced plate with a little joy on the side.
Conclusion
Look, I know there are a million Halloween recipes out there. But these cozy cheesy mummy pizza bites are the ones I keep coming back to, year after year. They’re not just cute—they actually taste incredible. The flaky, buttery crust, the gooey cheese, the little burst of garlic and herbs… it’s comfort food that makes you smile. And honestly, in a world that can feel a little heavy sometimes, we all need more food that makes us smile.
I hope you give these a try, and I hope you make them your own. Maybe you’ll stuff them with pepperoni, or add a pinch of red pepper flakes for heat, or even make a sweet version for breakfast (I won’t tell). Whatever you do, I’d love to hear about it. Leave a comment below and tell me how your mummies turned out—did you use candy eyes or olives? Did the kids help you wrap them? Share a photo if you’re feeling brave. And if you loved this recipe, please share it with a friend who needs a little cozy joy in their kitchen.
Until next time, happy cooking—and happy Halloween!
Frequently Asked Questions
Can I make these mummy pizza bites ahead of time?
Yes! You can assemble the mummies up to 24 hours in advance. Place them on the baking sheet, cover tightly with plastic wrap, and refrigerate. When you’re ready to bake, brush with the butter mixture and add 1-2 minutes to the baking time. I’ve done this for parties, and it’s a huge time-saver.
Can I use homemade pizza dough instead of crescent rolls?
Absolutely. If you have leftover pizza dough, roll it out very thin (about 1/8-inch thick) and cut it into strips. The bake time might be a little longer—around 14-16 minutes—because homemade dough is denser. Just watch for the golden-brown color.
Why did my cheese leak out during baking?
This usually happens for two reasons: the dough was wrapped too loosely, or the cheese wasn’t chilled enough. Next time, try wrapping the dough a little tighter (but not too tight—you want room for expansion) and freeze the cheese for 5-10 minutes before wrapping. A little leakage is normal, though, so don’t stress.
Can I freeze these after baking?
Yes, but the texture changes a bit. Let them cool completely, then place them in a single layer in a freezer-safe bag. They’ll keep for up to 2 months. To reheat, bake from frozen at 350°F (175°C) for 8-10 minutes. They won’t be as crispy, but they’re still tasty.
What can I use instead of candy eyes?
If you don’t have candy eyes, small slices of black olive work perfectly. I’ve also used tiny dots of sriracha or ketchup for a spooky red-eye look. For a more savory version, try small pieces of sun-dried tomato. Get creative—it’s Halloween!
Pin This Recipe!

Cozy Cheesy Mummy Pizza Bites Easy Halloween Recipe

These adorable mummy pizza bites are made with crescent roll dough wrapped around string cheese, baked until golden and gooey, then topped with candy eyes. Perfect for a quick Halloween snack or party appetizer.
- Prep Time: 10 minutes
- Cook Time: 12 minutes
- Total Time: 22 minutes
- Yield: 12 servings 1x
- Category: Appetizer
- Cuisine: American
Ingredients
- 1 can (8 oz) refrigerated crescent roll dough
- 6 string cheese sticks, each cut in half crosswise (12 pieces)
- 1/4 cup pizza sauce or marinara, for dipping
- 12 candy eyes or small black olive slices
- 1 tablespoon melted butter
- 1/2 teaspoon garlic powder
- 1/2 teaspoon Italian seasoning
- Pinch of salt
Instructions
- Preheat your oven to 375°F (190°C). Line a baking sheet with parchment paper.
- Unroll the crescent roll dough onto a clean cutting board. Press the seams together gently to form a single sheet. Using a sharp knife or pizza cutter, cut the dough lengthwise into 12 thin strips, each about 1/2-inch wide.
- Take each string cheese stick and cut it in half crosswise to make 12 pieces. If the cheese feels too soft, pop it in the freezer for 5 minutes.
- Take one strip of dough and wrap it around a piece of string cheese, starting at one end and working your way up. Leave a small gap (about 1/2 inch) near the top where the eyes will go. Repeat with all 12 pieces.
- Arrange the wrapped mummies on the prepared baking sheet, spacing them about 1 inch apart.
- In a small bowl, mix the melted butter with the garlic powder, Italian seasoning, and a pinch of salt. Brush this mixture over each mummy bite.
- Bake for 10-12 minutes, until the dough is golden brown and the cheese is bubbly.
- As soon as the mummies come out of the oven, press two candy eyes (or olive slices) into the exposed cheese gap.
- Let the mummies rest on the baking sheet for 2 minutes, then transfer them to a cooling rack.
- Serve warm with marinara sauce for dipping.
Notes
If the dough tears while wrapping, press it back together with your fingers. For a gluten-free version, use gluten-free crescent roll dough. For dairy-free, use vegan mozzarella sticks and dairy-free butter. To make ahead, assemble the mummies up to 24 hours in advance, refrigerate, and add 1-2 minutes to the baking time.
Nutrition
- Serving Size: 1 mummy bite
- Calories: 120
- Sugar: 2
- Sodium: 280
- Fat: 8
- Saturated Fat: 4
- Carbohydrates: 7
- Protein: 6
Keywords: Halloween, mummy, pizza bites, crescent rolls, string cheese, easy, kid-friendly, party snack


