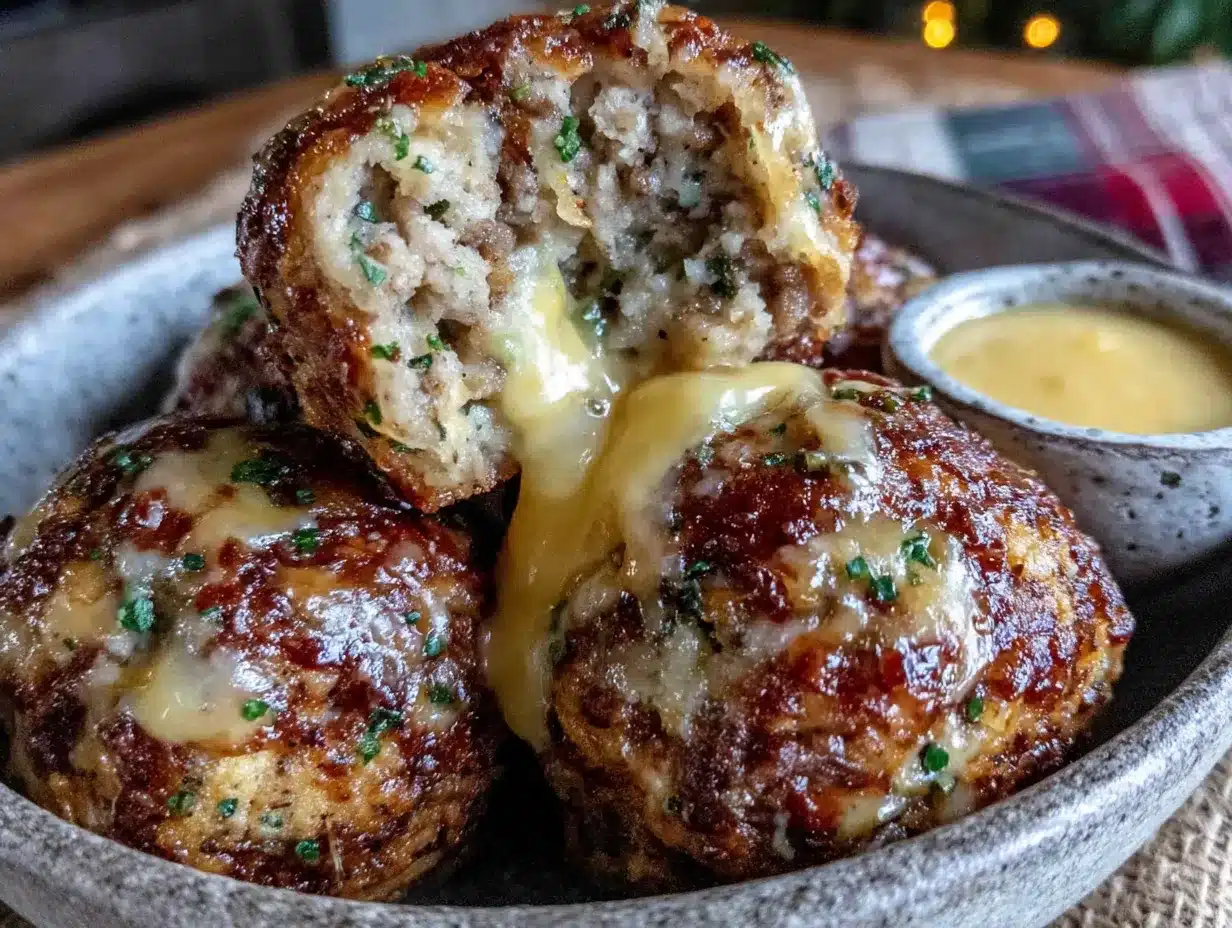
Linda wasn’t trying to impress anyone. I’d stopped by her place to pick up a casserole dish I’d left at a block party the week before, and the smell hit me before I even got through the door. It was warm, savory, a little bit buttery—the kind of smell that makes you forget why you came in the first place. She was pulling a baking sheet out of the oven, these golden little spheres glistening with melted cheese, and she just shrugged when I asked what they were.
“Oh, just some stuffing balls I threw together for the game later,” she said, like it was nothing. Like she hadn’t just created what I would later describe to my husband as “the single greatest thing I’ve put in my mouth this year.” I stood there in her kitchen, holding my empty casserole dish, watching her flip them onto a platter with complete nonchalance. She offered me one—”Here, they’re better warm”—and honestly, I almost cried. It was that good.
I asked for the recipe, obviously. She scribbled it on a sticky note, and I practically ran home to try it myself. These Cozy Cheesy Sausage Stuffing Balls have become my go-to for every holiday gathering, every potluck, every Tuesday night when I need something that feels like a hug. Maybe you’ve been there—you taste something at someone else’s house and you know, you just know, it’s going to become part of your regular rotation. That’s this recipe. It’s simple, it’s indulgent, and it’s the kind of thing people stand around the kitchen island eating straight off the pan.
Why You’ll Love This Recipe
Listen, I’ve tested this recipe more times than I care to admit. I’ve made it with different sausages, different cheeses, different binders. I’ve taken it to Thanksgiving dinners and Super Bowl parties. And every single time, the pan comes back empty. Here’s what makes these stuffing balls stand out from every other appetizer recipe you’ve bookmarked:
- Quick & Easy: From start to table in about 35 minutes. No complicated techniques, no fancy equipment. Mix, roll, bake, done.
- Simple Ingredients: Everything on the ingredient list is something you can find at any grocery store. No special trips to specialty markets.
- Perfect for Holidays & Game Days: These little guys fit right in at Thanksgiving dinner, Christmas parties, New Year’s Eve gatherings, or a Sunday afternoon football game.
- Crowd-Pleaser: Kids devour them. Adults hoard them. I’ve seen people eat six in a row without blinking.
- Unbelievably Delicious: The combo of savory sausage, herby stuffing mix, and gooey melted cheese is next-level comfort food. It’s like your favorite Thanksgiving stuffing decided to become finger food.
What makes this recipe different from the dozens of other stuffing ball recipes out there? It’s the ratio. I spent three batches getting the sausage-to-stuffing-to-cheese balance just right. Too much stuffing and they’re dry. Too much sausage and they’re greasy. This version? It’s the Goldilocks of stuffing balls. Plus, I use a little trick—adding a splash of chicken broth to keep them incredibly moist inside while the outside gets perfectly golden and crisp.
This isn’t just another appetizer. It’s the kind of recipe that makes people close their eyes after the first bite. It’s comfort food reimagined as a handheld snack, with the same soul-soothing satisfaction of a holiday meal but none of the stress. Perfect for impressing guests without breaking a sweat.
What Ingredients You Will Need
This recipe uses simple, honest ingredients that come together to create something truly special. Most of these are pantry staples or easy-to-find items, which is exactly what you want in a recipe you’ll make on repeat.
Main Ingredients
- 1 pound ground pork sausage (I prefer Jimmy Dean’s regular or mild—the sage flavor works beautifully with the stuffing mix. If you want a little heat, go for the hot version.)
- 1 box (6 ounces) Stove Top stuffing mix, chicken flavor (This is my non-negotiable brand. The seasoning blend is perfectly balanced, and the breadcrumb texture is ideal for binding. Don’t use the “homestyle” version—it’s too coarse.)
- 1 ½ cups shredded sharp cheddar cheese (Buy a block and shred it yourself. Pre-shredded cheese has anti-caking agents that prevent it from melting as smoothly. Trust me on this one.)
- ½ cup chicken broth (Adds moisture and helps the stuffing hydrate properly. Use low-sodium if you’re watching your salt intake.)
- ¼ cup finely diced yellow onion (About half a small onion. Dice it really fine so you get the flavor without big chunks of onion.)
- 2 cloves garlic, minced (Fresh garlic is best here. The jarred stuff just doesn’t hit the same.)
- 1 large egg, lightly beaten (This is the binder that holds everything together. Don’t skip it.)
- ¼ teaspoon black pepper (Freshly ground is always better.)
- ¼ teaspoon dried sage (Optional, but I love the extra herbal note. It makes them taste even more like Thanksgiving.)
Ingredient Selection Tips
When choosing your sausage, look for one that’s not too lean. You need a little fat to keep the stuffing balls moist and flavorful. If you can find it, bulk sausage (the kind that comes in a tube) works better than sausage links—you’d have to remove the casings anyway.
For the cheese, sharp cheddar gives you the most flavor bang for your buck. But I’ve also made these with a mix of cheddar and Monterey Jack, and that works beautifully too. The Monterey Jack melts a little creamier, if that’s your thing.
If you’re feeding someone who’s gluten-sensitive, you can use a gluten-free stuffing mix. Just note that the texture will be slightly different—gluten-free breadcrumbs tend to be a bit grittier. Still delicious, just not quite the same.
Equipment Needed
You don’t need much to make these stuffing balls, which is part of the beauty. Here’s what you’ll need:
- Large mixing bowl (Any big bowl will do. I use my grandmother’s old ceramic one, but a stainless steel one works just fine.)
- Baking sheet (A standard half-sheet pan is perfect. Line it with parchment paper for easy cleanup.)
- Parchment paper (Non-stick spray works too, but parchment makes cleanup a breeze and prevents sticking without adding extra grease.)
- Cookie scoop or tablespoon (A #40 cookie scoop—about 1.5 tablespoons—gives you perfectly uniform balls. If you don’t have one, just use a regular spoon and eyeball it.)
- Chef’s knife and cutting board (For dicing the onion and mincing the garlic.)
- Small skillet (For sautéing the onion and garlic. You could skip this step and add them raw, but sautéing brings out their sweetness.)
- Measuring cups and spoons (Standard set will do.)
If you don’t have a cookie scoop, don’t worry. I made these for years just rolling them by hand. Your hands are the best tool you own—just make sure they’re clean and slightly damp so the mixture doesn’t stick to them.
Preparation Method
Alright, let’s get cooking. This is straightforward, but I’ll walk you through every step so you nail it on the first try.
- Preheat your oven to 375°F (190°C). Line a baking sheet with parchment paper and set it aside. Getting the oven hot before you start mixing ensures even cooking from the moment the balls go in.
- Heat a small skillet over medium heat. Add a tiny drizzle of oil (or a pat of butter—I won’t tell), then toss in the diced onion. Cook for 3-4 minutes until it’s soft and translucent. Add the minced garlic and cook for another 30 seconds until fragrant. Remove from heat and let it cool slightly. This step takes maybe 5 minutes, but it makes a huge difference in flavor. Raw onion in stuffing balls just isn’t the same.
- In your large mixing bowl, combine the ground sausage, dry stuffing mix, shredded cheddar cheese, chicken broth, sautéed onion and garlic, beaten egg, black pepper, and dried sage (if using). Use your hands to mix everything together. I know, I know—it’s messy. But your hands do a better job than any spoon ever could. You can feel when everything is evenly distributed. Just dig in and squish it all together until it’s fully combined. The mixture should hold together when you squeeze a handful of it.
- Let the mixture rest for 5 minutes. This is important—it gives the stuffing mix time to absorb the liquid and soften. If you skip this step, your stuffing balls might be a little dry in spots. Patience, my friend.
- Using your cookie scoop or a spoon, portion the mixture into balls about 1.5 inches in diameter. Roll them gently between your palms to smooth them out. Place them on the prepared baking sheet, spacing them about 1 inch apart. They don’t spread much, so you can fit about 20-24 on a standard sheet pan.
- Bake for 20-25 minutes, until golden brown and cooked through. The internal temperature should reach 160°F (71°C) if you want to be precise. At the 15-minute mark, I like to flip them over with a spatula so they get evenly browned on both sides. If you forget, don’t sweat it—they’ll still be delicious, just a little paler on the bottom.
- Remove from the oven and let them rest on the baking sheet for 5 minutes. This allows the cheese to set slightly so they hold together better when you pick them up. Transfer to a serving platter and watch them disappear.
A note on timing: If you’re making these for a party, you can assemble the balls up to 24 hours in advance. Just arrange them on the baking sheet, cover with plastic wrap, and refrigerate. Add 2-3 minutes to the baking time if they’re going in cold.
Cooking Tips & Techniques
I’ve made these stuffing balls probably twenty times now, and I’ve learned a few things the hard way. Here are my best tips:
Don’t overmix. I know I said to mix with your hands, but stop as soon as everything is combined. Overmixing can make the sausage tough and the stuffing balls dense. You want them tender and light, not like hockey pucks.
Wet your hands. When rolling the balls, keep a small bowl of water nearby and dip your fingers in it occasionally. The mixture is sticky, and damp hands prevent it from clinging to your skin. This is one of those little tricks that makes the whole process so much more pleasant.
Use a thermometer. I burned my first batch because I relied on visual cues alone. The outside was perfectly golden, but the inside was still undercooked. A simple instant-read thermometer takes the guesswork out. Stick it in the center of a ball—160°F is your target.
Make them uniform. I cannot stress this enough. When your stuffing balls are all the same size, they cook evenly. Some will be done while others are still raw in the middle. A cookie scoop is your best friend here.
Let them rest. I know it’s hard to wait when they smell this good, but that 5-minute rest on the baking sheet is crucial. The cheese is molten hot when they come out of the oven, and if you try to move them too soon, they’ll fall apart. Trust the process.
Variations & Adaptations
One of the things I love about this recipe is how versatile it is. Here are some ways to make it your own:
- Spicy Version: Use hot Italian sausage instead of regular, and throw in a diced jalapeño (seeds removed unless you want real heat) with the onion. I made this for a Super Bowl party and it was gone in ten minutes.
- Turkey Sausage Option: Swap the pork sausage for turkey sausage to lighten things up. Add an extra tablespoon of olive oil to the mixture since turkey sausage is leaner and can dry out. They won’t be quite as juicy, but they’re still really good.
- Cheese Swap: Try pepper jack for a little kick, or gouda for a smoky flavor. I once made a batch with smoked gouda and apple chicken sausage, and it tasted like a fancy fall appetizer from a catering menu.
- Herb It Up: Add a tablespoon of fresh chopped parsley or chives to the mixture. It adds a pop of color and freshness that cuts through the richness.
- Gluten-Free Adaptation: Use a gluten-free stuffing mix (I’ve had good luck with the Aleia’s brand). The texture will be slightly crumblier, so you might need an extra tablespoon of broth to help it bind.
- Air Fryer Method: Cook at 375°F for 12-15 minutes, flipping halfway through. They get extra crispy on the outside. I actually prefer this method when I’m only making a small batch for myself.
Serving & Storage Suggestions
These stuffing balls are best served warm, right out of the oven. The cheese is melty, the edges are crispy, and everything is just perfect. But they’re still really good at room temperature, which makes them ideal for parties where people graze over a few hours.
What to serve with them: A simple dipping sauce takes these over the top. I love a honey mustard (just mix equal parts honey and Dijon mustard) or a cranberry dipping sauce for the holidays. For a savory option, try a warm ranch dip or even a little gravy on the side. If you’re serving them as part of a holiday spread, they pair beautifully with a classic green bean casserole or a creamy mashed potato casserole.
Storage: Leftover stuffing balls (if you have any) can be stored in an airtight container in the refrigerator for up to 4 days. To reheat, pop them in a 350°F oven for 8-10 minutes, or until warmed through. The microwave works in a pinch, but the texture won’t be as good—the outside gets a little soggy.
Freezing: These freeze beautifully. Arrange the baked and cooled stuffing balls on a baking sheet and freeze until solid (about 2 hours), then transfer to a freezer bag. They’ll keep for up to 3 months. To reheat from frozen, bake at 350°F for 15-18 minutes. No need to thaw first.
Flavor development: Honestly, I think these taste even better the next day. The flavors have time to meld together, and the texture softens slightly. I’ve been known to make a double batch just so I can have them for lunch the next day.
Nutritional Information & Benefits
Let’s be real—these aren’t health food. But they’re made with real, recognizable ingredients, which counts for something in my book. Here’s the estimated nutritional breakdown per serving (based on 4 stuffing balls):
- Calories: 320
- Protein: 18g
- Fat: 22g
- Carbohydrates: 14g
- Fiber: 1g
- Sugar: 2g
- Sodium: 780mg
The sausage provides a good amount of protein, and the cheese adds calcium. The onion and garlic bring some antioxidants to the party. If you’re watching your sodium, use low-sodium broth and a reduced-sodium stuffing mix—you can cut the salt by about 30% without sacrificing much flavor.
For those with dietary restrictions, this recipe contains gluten (from the stuffing mix), dairy (from the cheese), and eggs. I’ve included substitution options above for gluten-free and dairy-free versions.
My personal take? Food like this is about joy, not nutrition. I eat these at parties and holidays, and I don’t feel guilty about it. Balance is everything—enjoy the stuffing balls, eat your veggies at the next meal, and call it a win.
Conclusion
These Cozy Cheesy Sausage Stuffing Balls are the recipe that keeps on giving. They’re the thing people ask me to bring to every gathering. They’re the appetizer I make when I want to feel like a rockstar in the kitchen without actually doing much work. And every time I make them, I think of Linda standing in her kitchen, acting like she’d just thrown together something ordinary.
I hope you make these and love them as much as I do. Don’t be afraid to tweak the recipe to make it your own—swap the cheese, change the sausage, add some herbs. Cooking is about making things taste good to you.
If you try this recipe, I’d love to hear about it. Drop a comment below and tell me how they turned out, or share a photo on social media and tag me. And if you come up with a killer variation, definitely share that too—I’m always looking for new ideas.
Now go make some stuffing balls. Your kitchen is about to smell incredible.
Frequently Asked Questions
Can I make these ahead of time for a party?
Absolutely. You can assemble the balls up to 24 hours in advance and keep them covered in the refrigerator. You can also bake them fully, then reheat at 350°F for 8-10 minutes right before serving. They taste just as good.
Can I use a different flavor of stuffing mix?
Yes! I’ve used the cornbread stuffing mix with great results—it adds a slightly sweeter, more Southern-style flavor. The herb-seasoned version works too, though the flavor is more subtle. Just avoid the “homestyle” or “hearty” varieties, as the larger bread pieces don’t bind as well.
Why did my stuffing balls fall apart?
This usually happens for one of three reasons: not enough egg (the binder), too much stuffing mix (dry = crumbly), or not letting them rest after baking. Make sure you’re using a full egg and letting the mixture sit for 5 minutes before rolling so the stuffing has time to absorb the liquid.
Can I make these in a mini muffin tin instead?
You can, but I don’t recommend it. They don’t get as crispy on the outside, and they tend to stick to the pan. The baking sheet method gives you better texture and easier cleanup. If you do use a muffin tin, grease it well and expect a softer, more muffin-like result.
How do I make these less greasy?
Use a leaner sausage (like turkey sausage) and drain any excess fat after sautéing the onion and garlic. You can also place the baked stuffing balls on a paper towel-lined plate for a minute before serving to absorb any surface grease. But honestly, a little bit of fat is what makes them so delicious—don’t overcorrect.
Pin This Recipe!
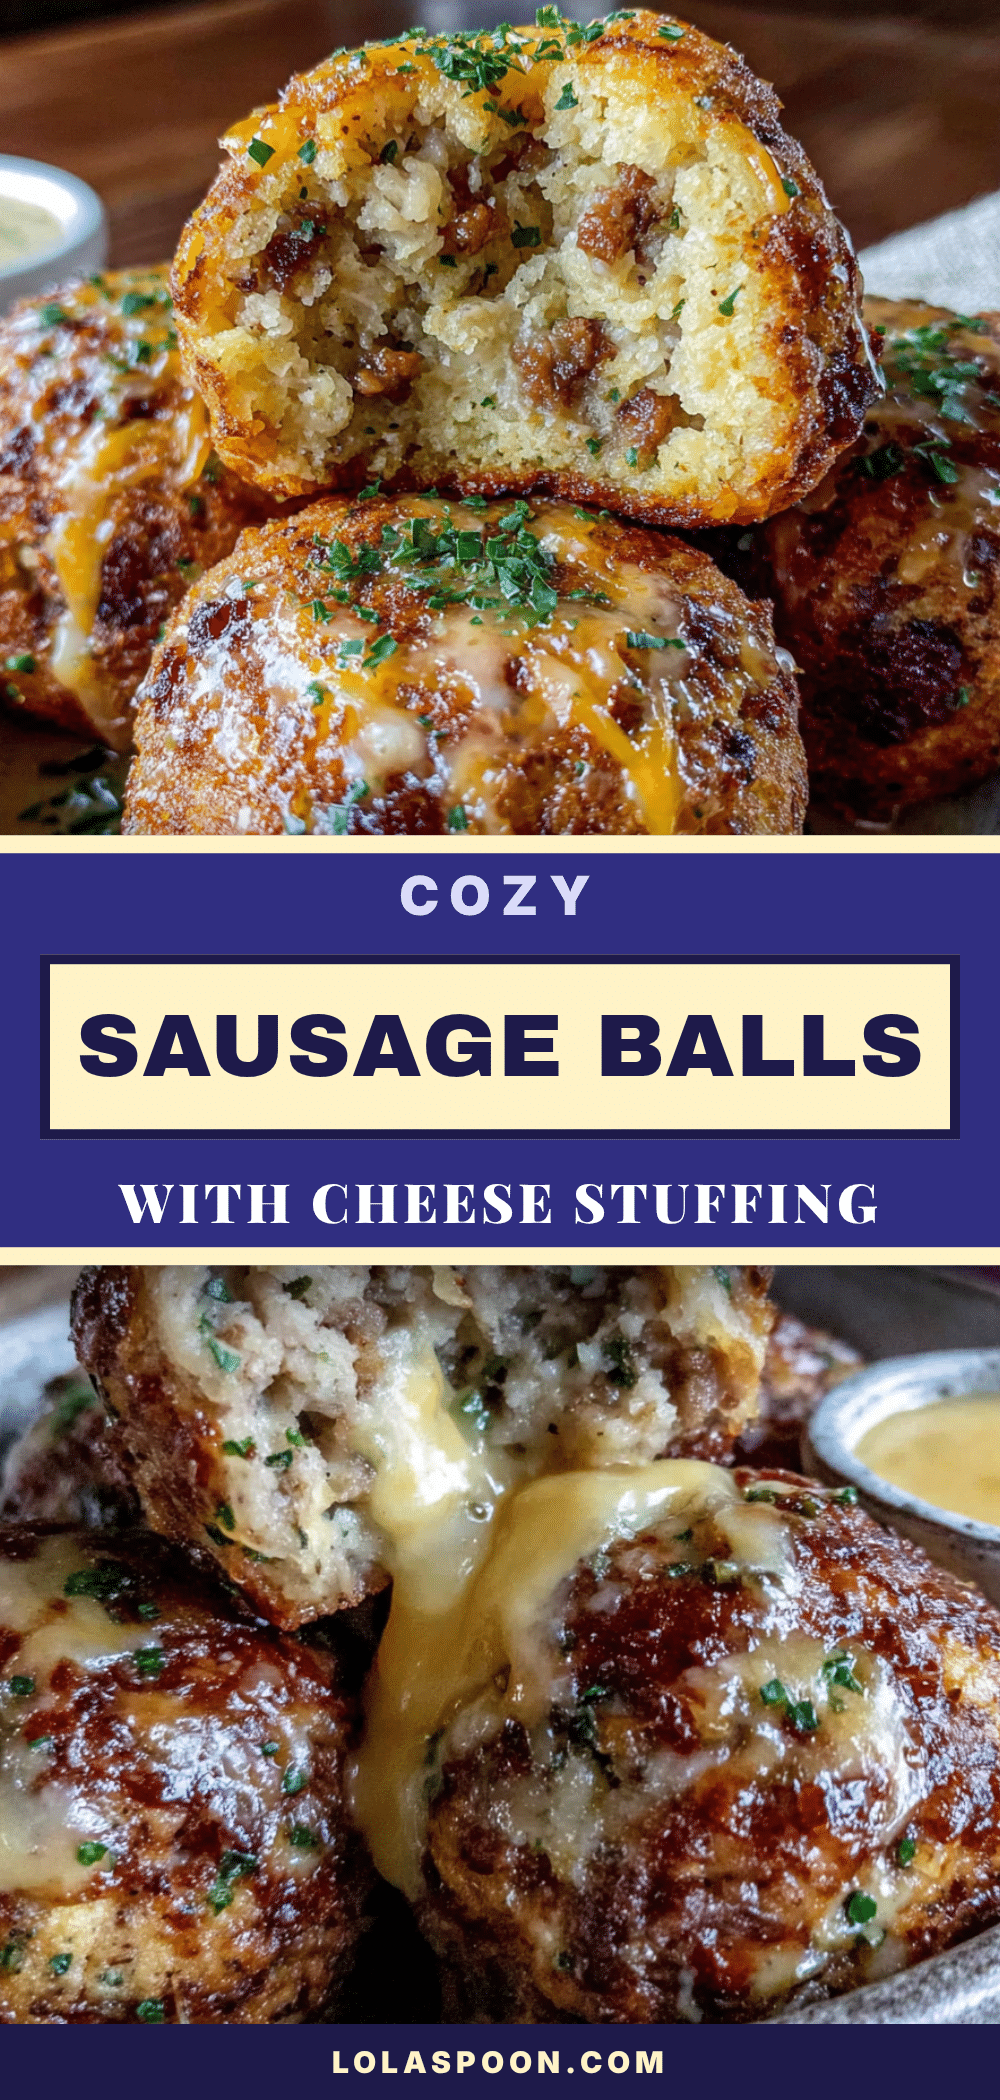
Cozy Cheesy Sausage Stuffing Balls: Easy Holiday Appetizer

These Cozy Cheesy Sausage Stuffing Balls are the ultimate crowd-pleasing appetizer, combining savory sausage, herby stuffing mix, and gooey melted cheese into golden, bite-sized spheres. Perfect for holiday gatherings, game days, or any occasion that calls for comfort food in a handheld form.
- Prep Time: 15 minutes
- Cook Time: 25 minutes
- Total Time: 40 minutes
- Yield: 4 servings 1x
- Category: Appetizer
- Cuisine: American
Ingredients
- 1 pound ground pork sausage (preferably Jimmy Dean’s regular or mild)
- 1 box (6 ounces) Stove Top stuffing mix, chicken flavor
- 1 ½ cups shredded sharp cheddar cheese (shredded from a block)
- ½ cup chicken broth (low-sodium if desired)
- ¼ cup finely diced yellow onion (about half a small onion)
- 2 cloves garlic, minced
- 1 large egg, lightly beaten
- ¼ teaspoon black pepper (freshly ground)
- ¼ teaspoon dried sage (optional)
Instructions
- Preheat your oven to 375°F (190°C). Line a baking sheet with parchment paper and set aside.
- Heat a small skillet over medium heat. Add a tiny drizzle of oil or a pat of butter, then add the diced onion. Cook for 3-4 minutes until soft and translucent. Add the minced garlic and cook for another 30 seconds until fragrant. Remove from heat and let cool slightly.
- In a large mixing bowl, combine the ground sausage, dry stuffing mix, shredded cheddar cheese, chicken broth, sautéed onion and garlic, beaten egg, black pepper, and dried sage (if using). Use your hands to mix everything together until fully combined. The mixture should hold together when squeezed.
- Let the mixture rest for 5 minutes to allow the stuffing mix to absorb the liquid and soften.
- Using a cookie scoop or spoon, portion the mixture into balls about 1.5 inches in diameter. Roll them gently between your palms to smooth them out. Place on the prepared baking sheet, spacing them about 1 inch apart.
- Bake for 20-25 minutes, until golden brown and cooked through. The internal temperature should reach 160°F (71°C). At the 15-minute mark, flip them over with a spatula for even browning.
- Remove from the oven and let them rest on the baking sheet for 5 minutes. Transfer to a serving platter and serve warm.
Notes
For best results, shred cheese from a block rather than using pre-shredded cheese. Wet your hands when rolling the balls to prevent sticking. Let the mixture rest for 5 minutes before rolling to allow the stuffing to absorb liquid. Use a thermometer to ensure internal temperature reaches 160°F. Balls can be assembled up to 24 hours in advance and refrigerated; add 2-3 minutes to baking time if baking from cold. Leftovers can be stored in an airtight container in the refrigerator for up to 4 days. Freeze baked and cooled balls for up to 3 months.
Nutrition
- Serving Size: 4 stuffing balls
- Calories: 320
- Sugar: 2
- Sodium: 780
- Fat: 22
- Carbohydrates: 14
- Fiber: 1
- Protein: 18
Keywords: stuffing balls, sausage appetizer, holiday appetizer, cheesy stuffing, game day snack, easy appetizer, Thanksgiving appetizer